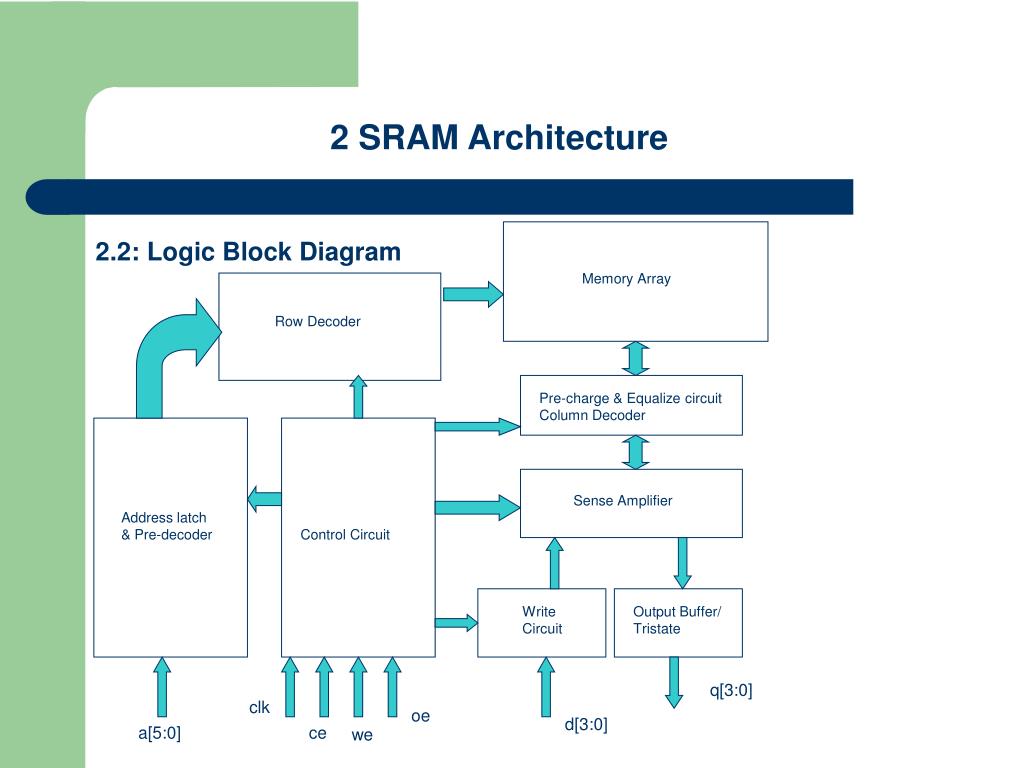
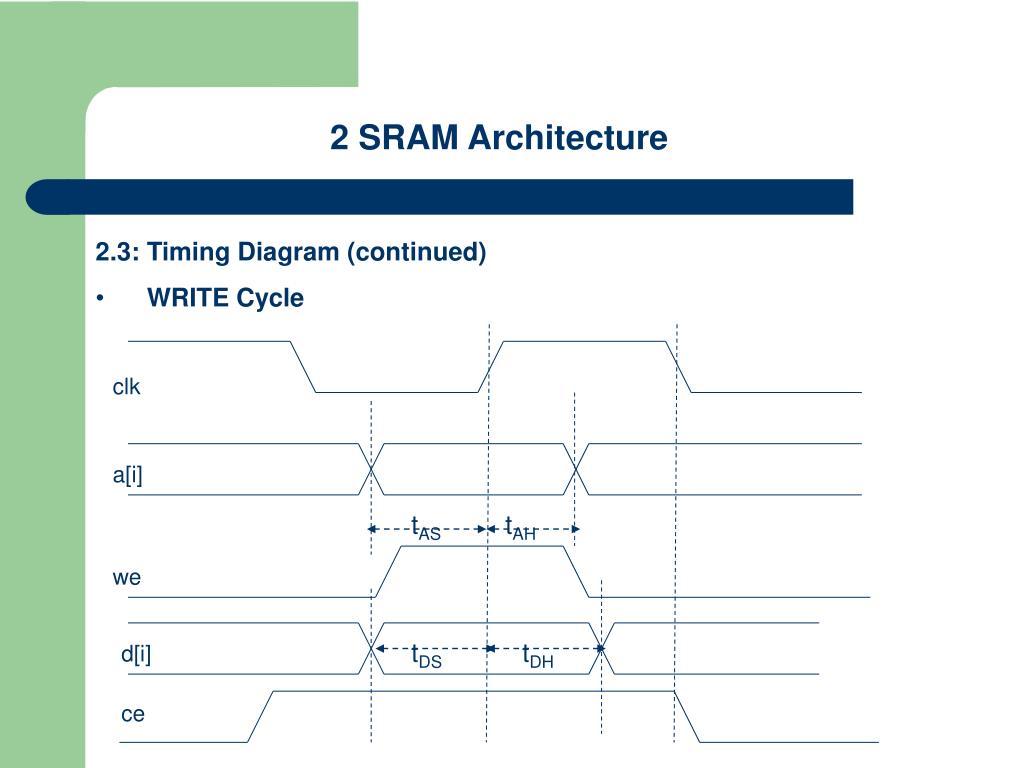
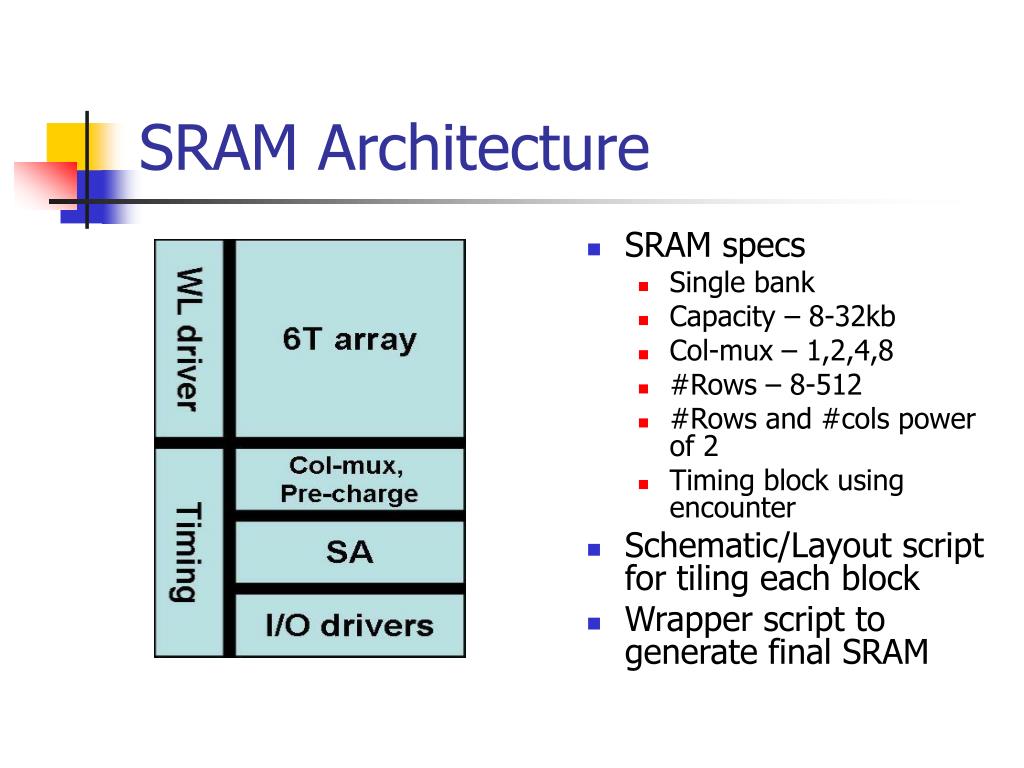
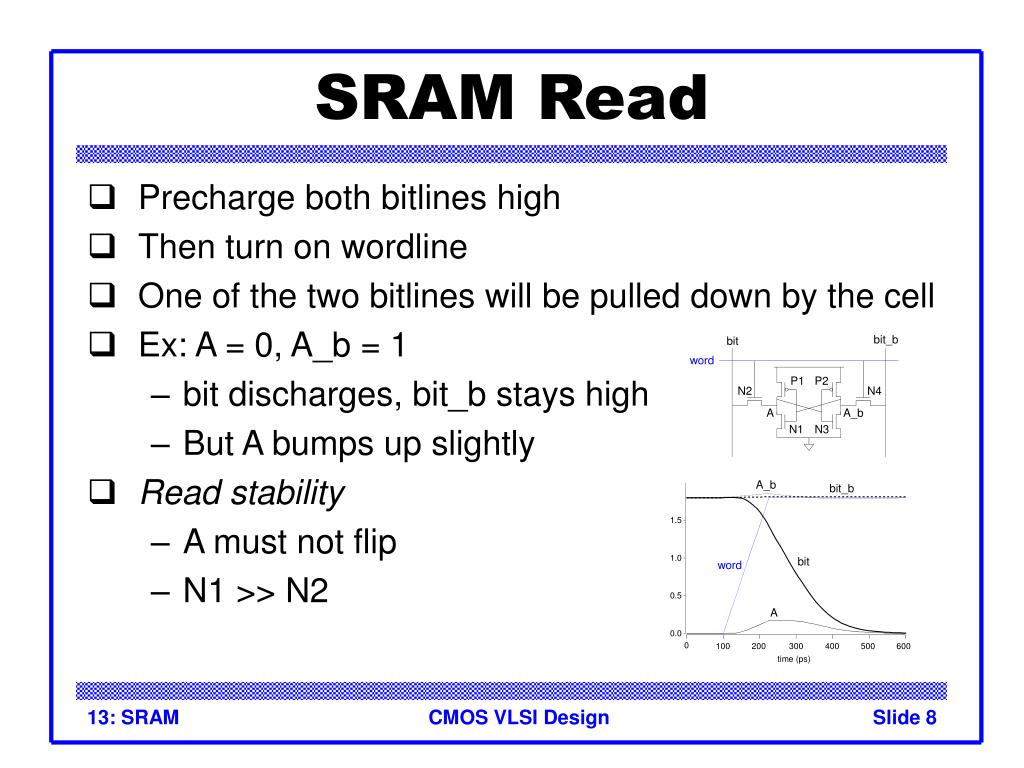
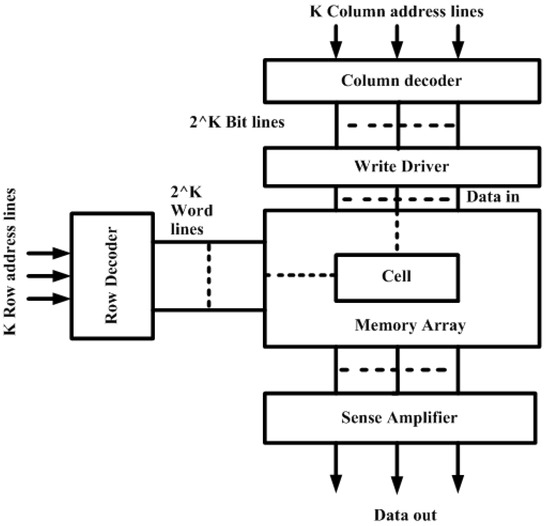
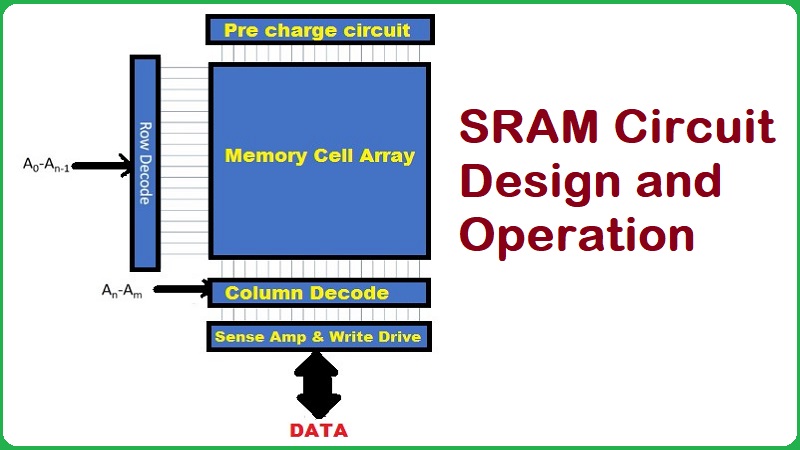
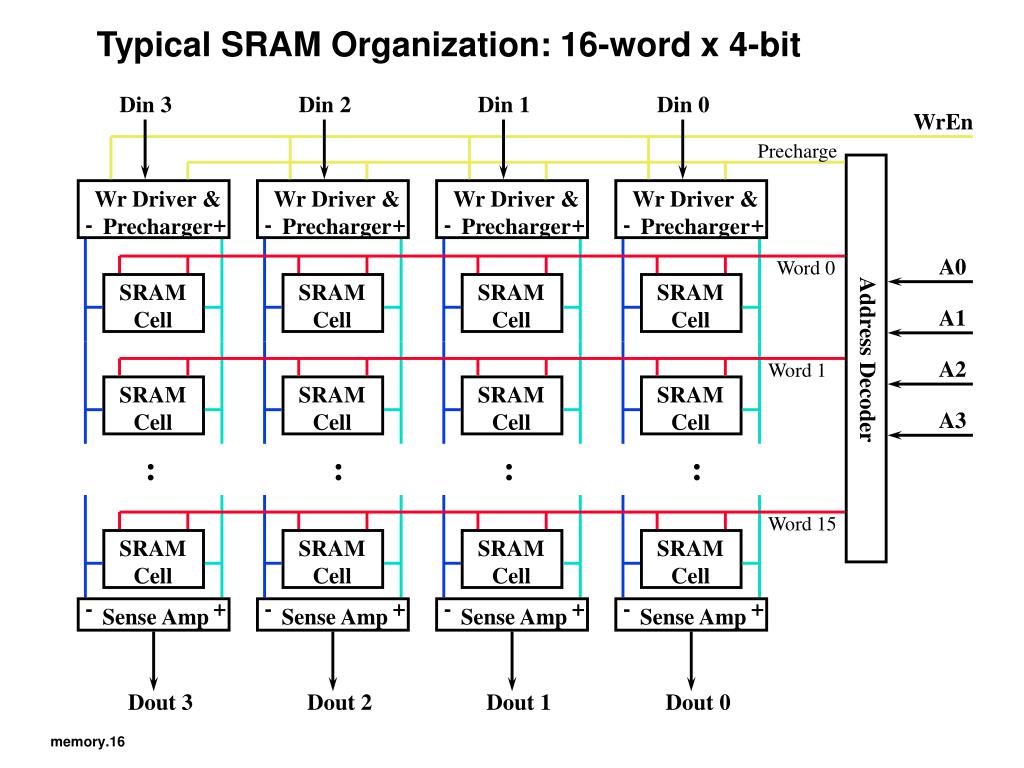
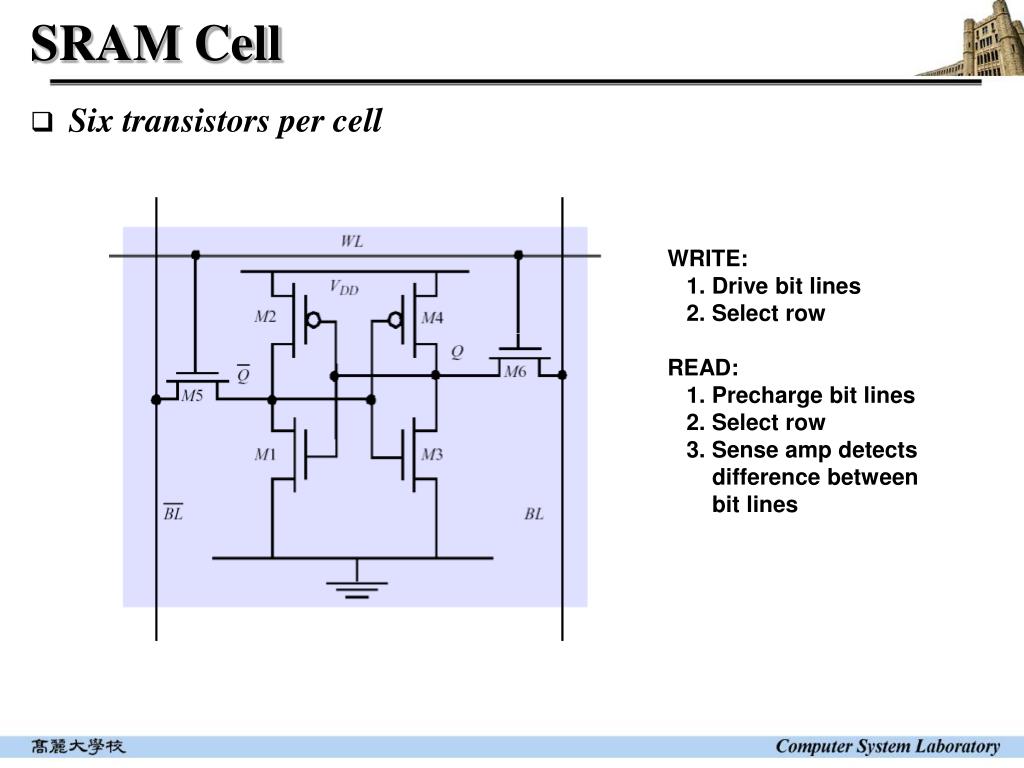
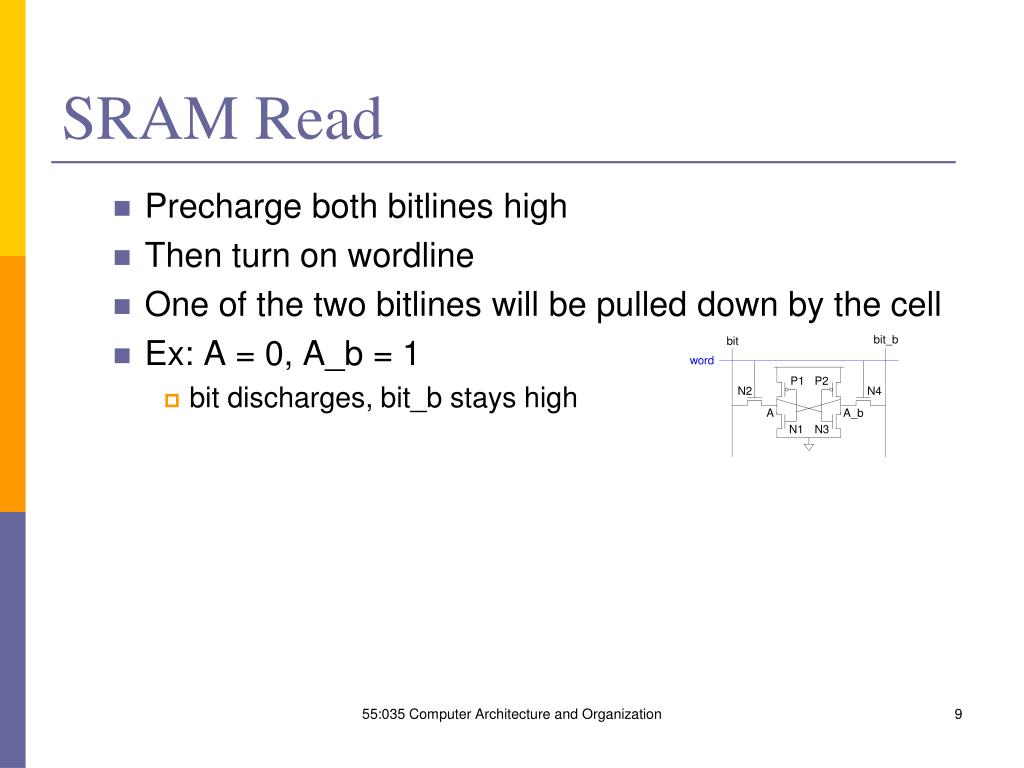
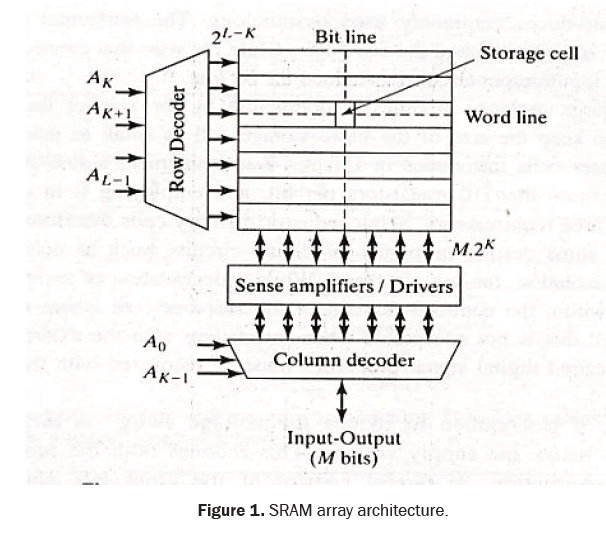
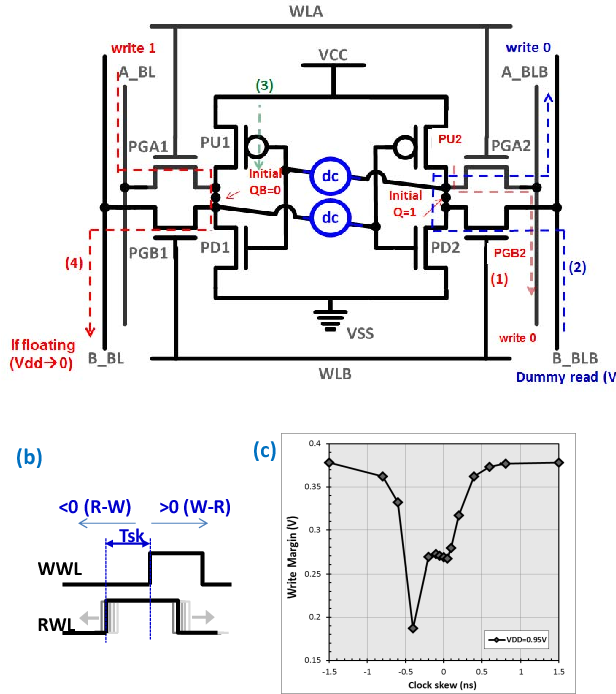
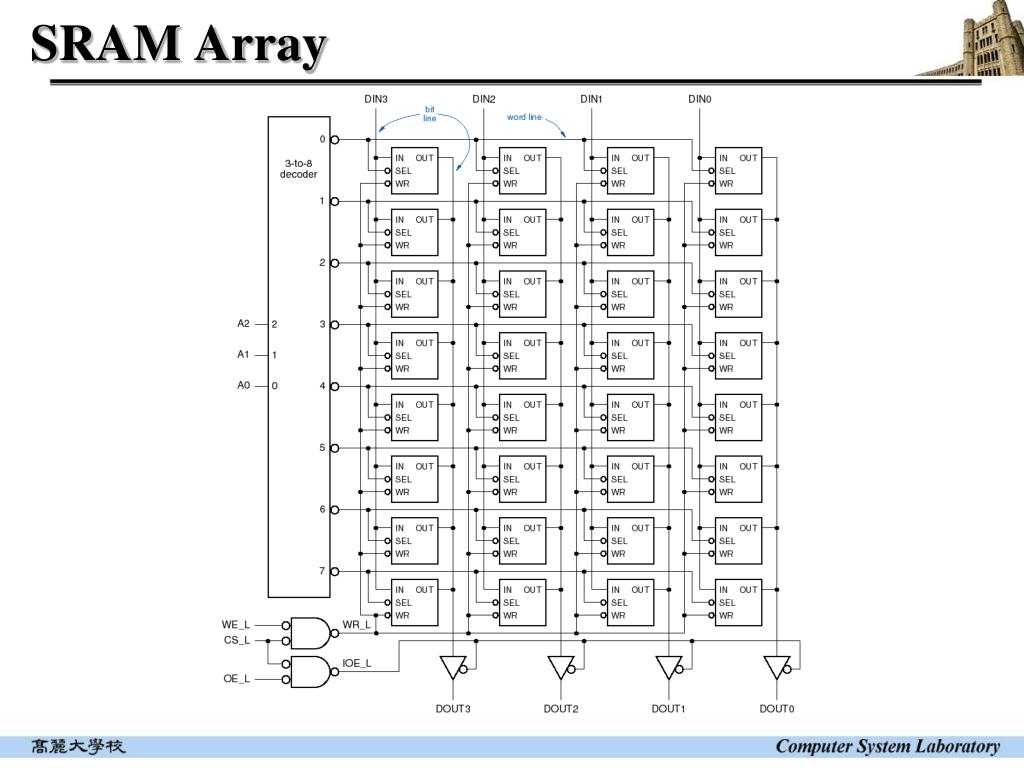
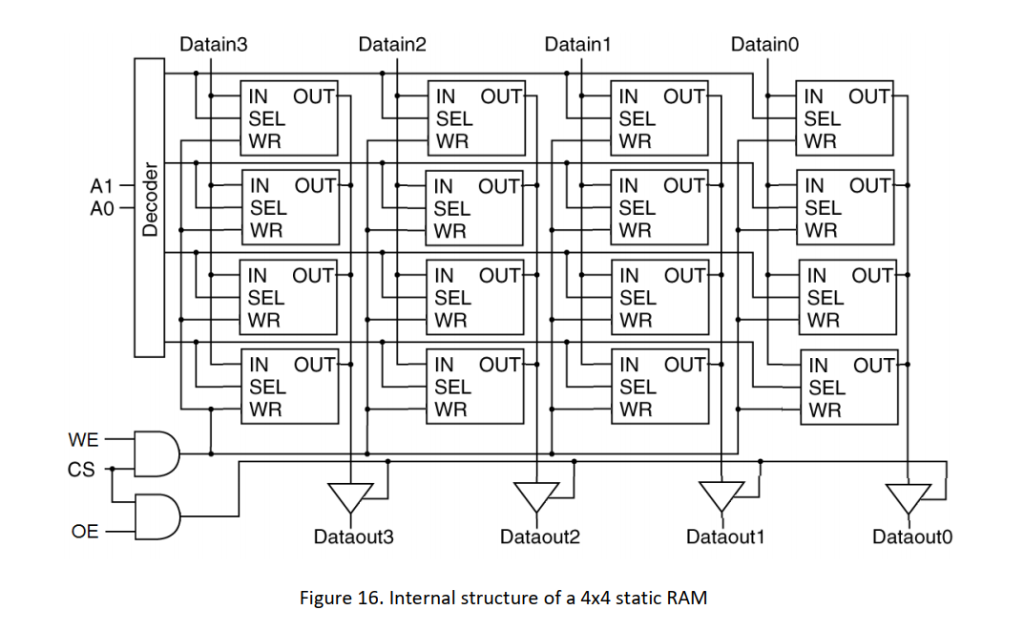
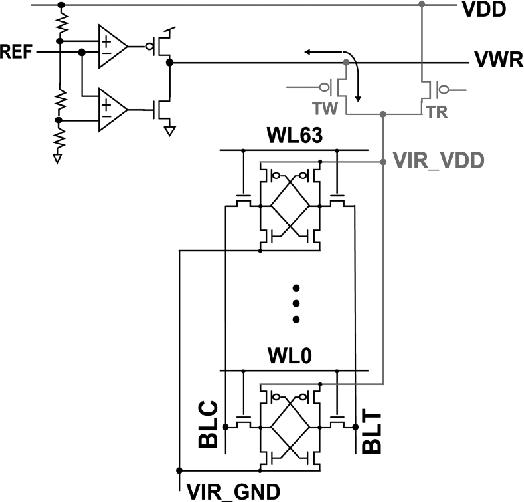
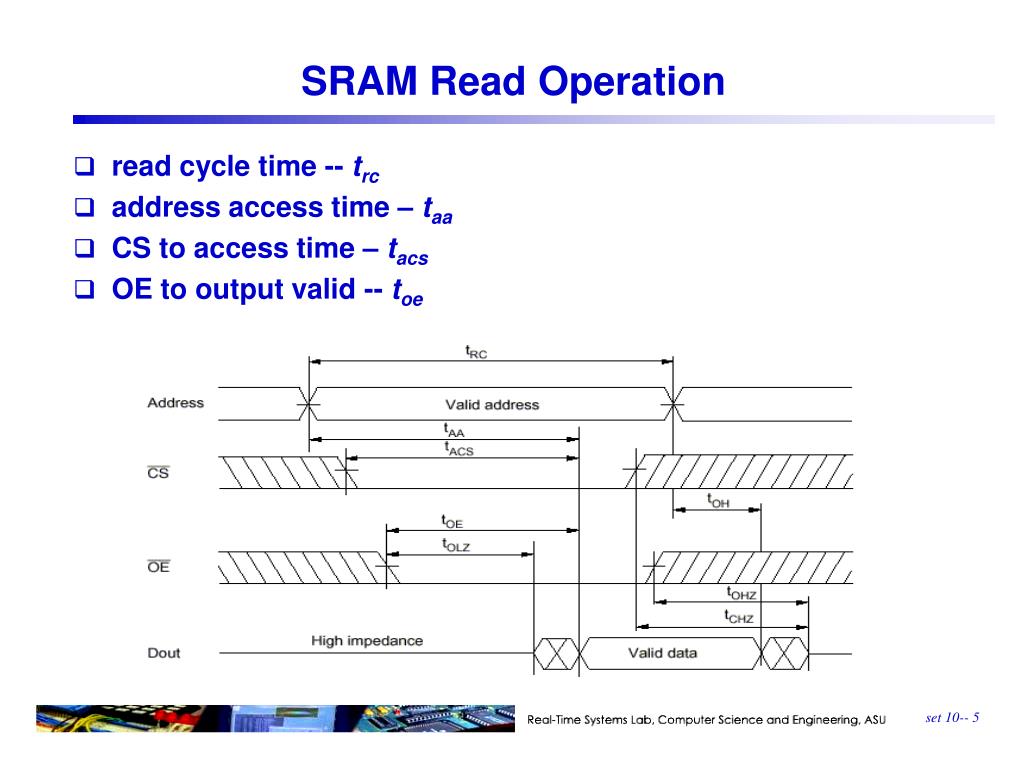
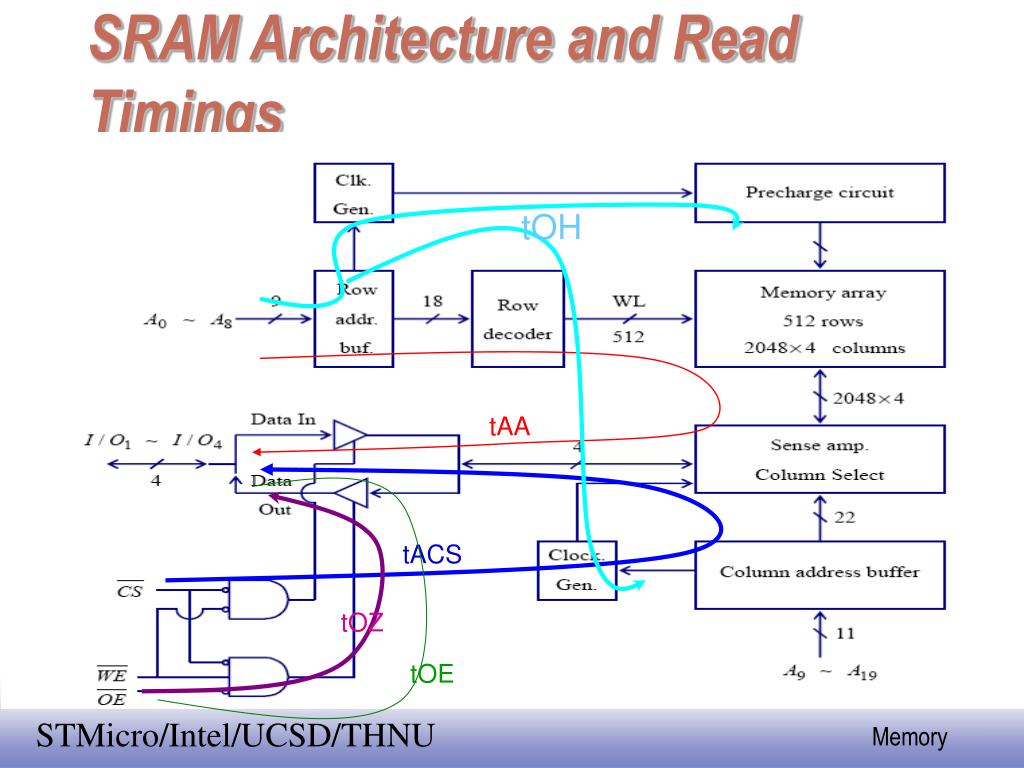
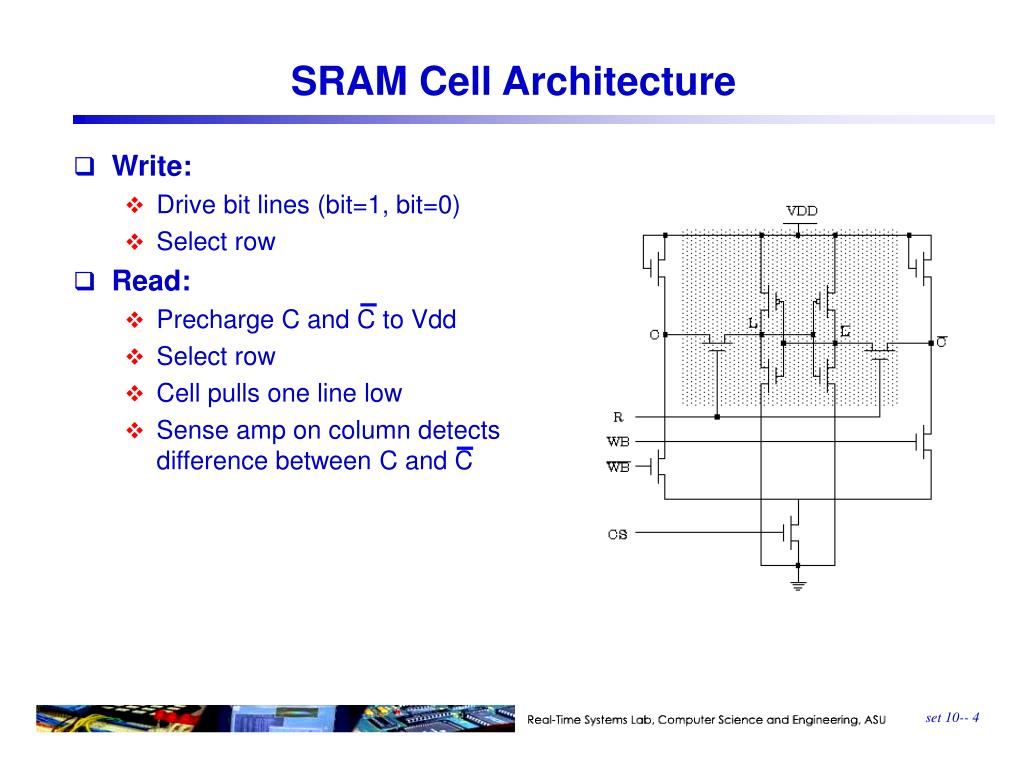
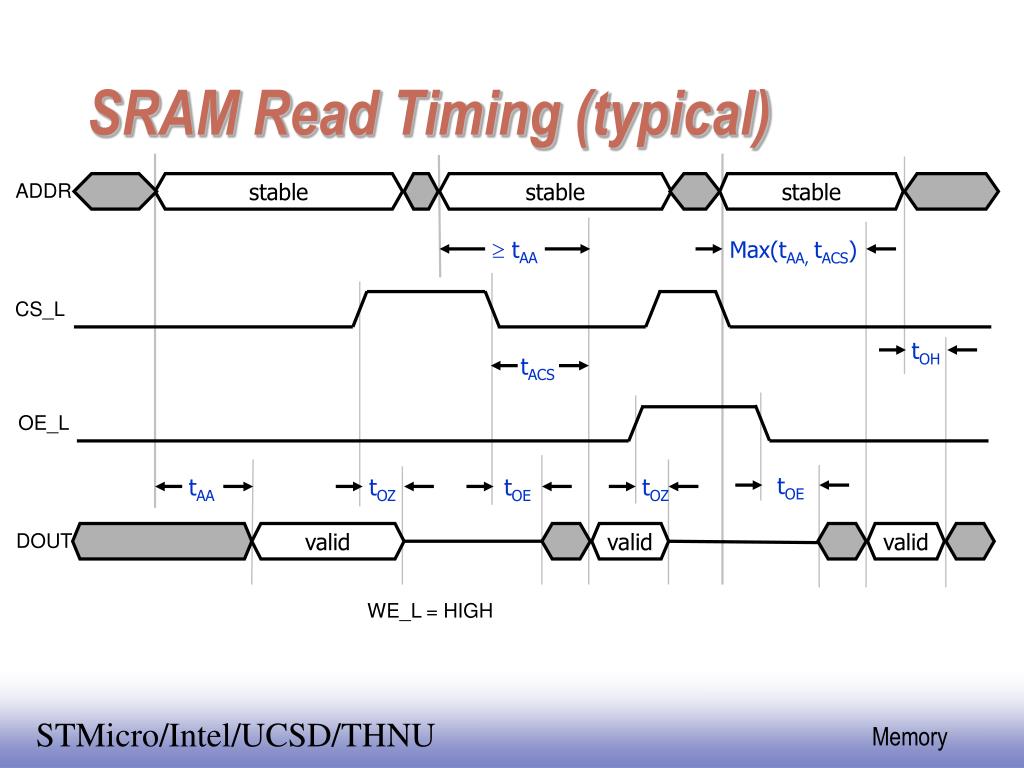
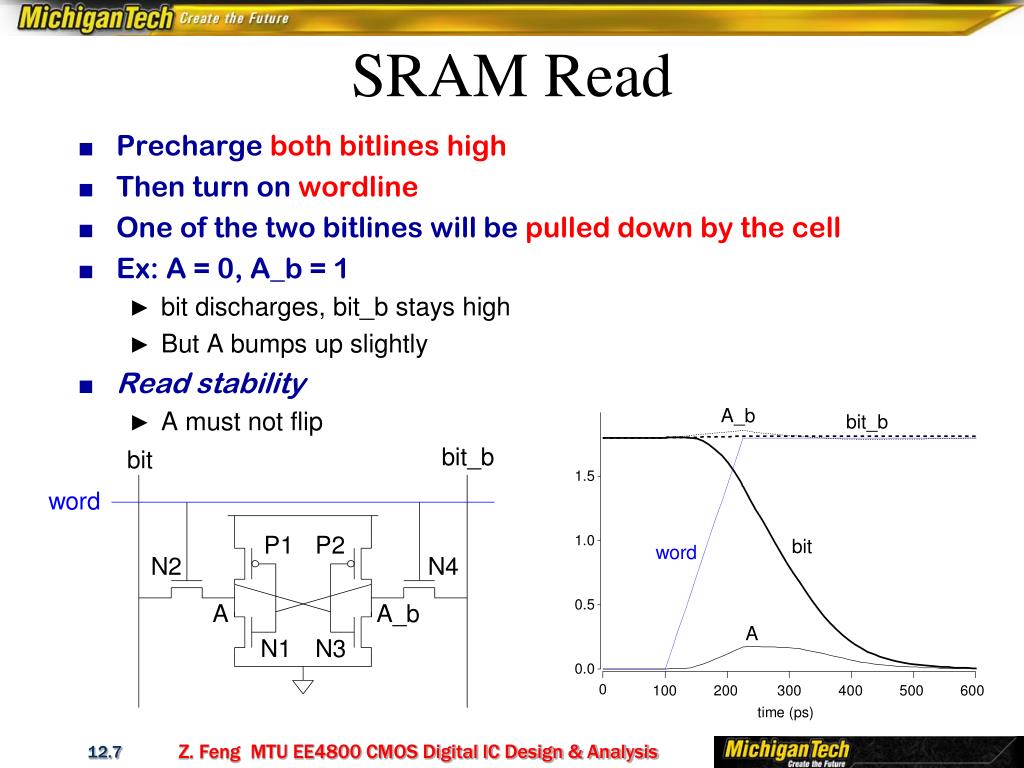
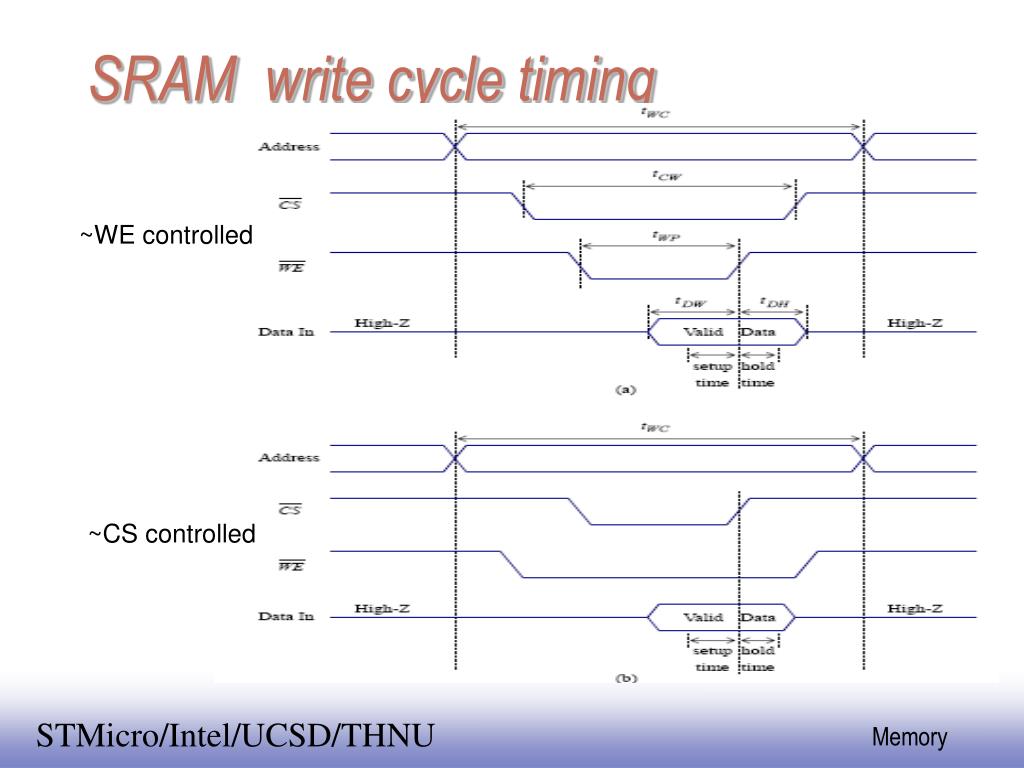
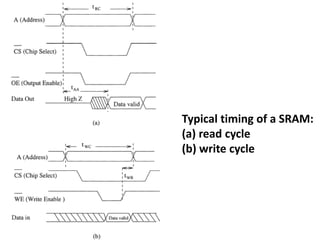
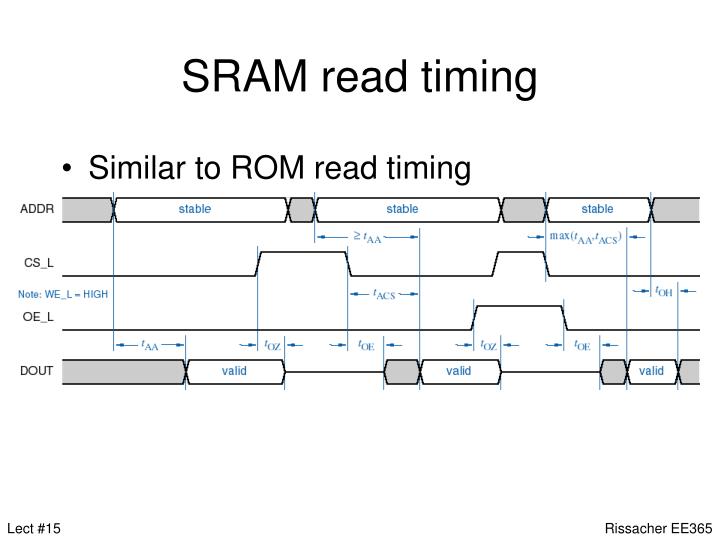
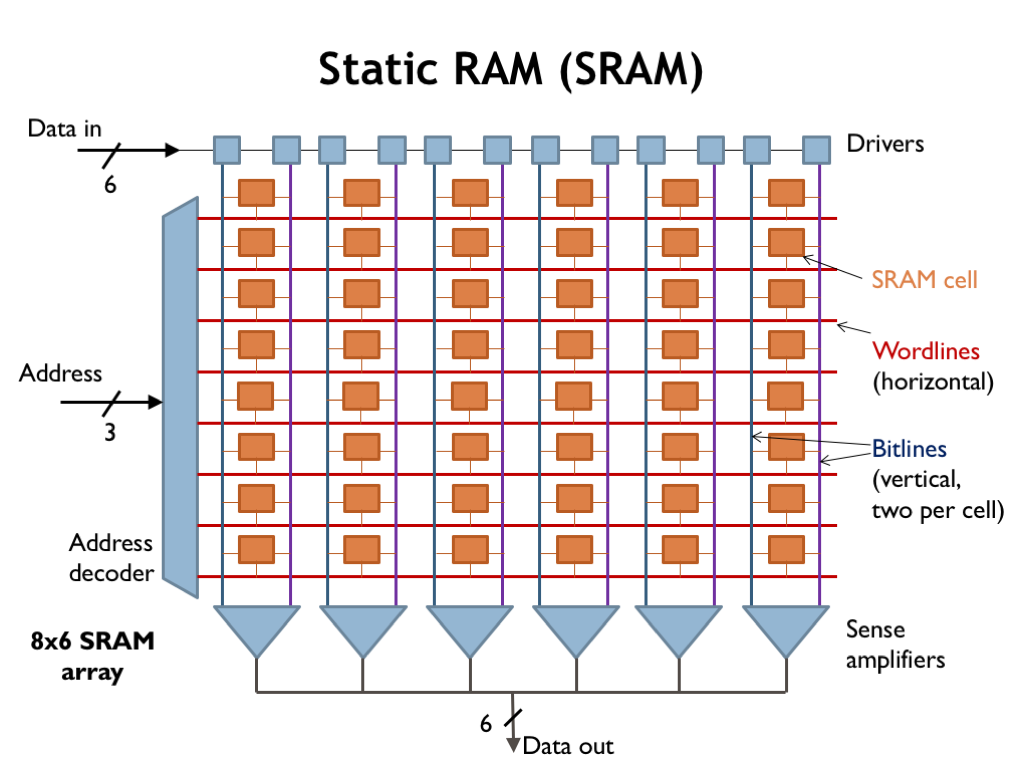
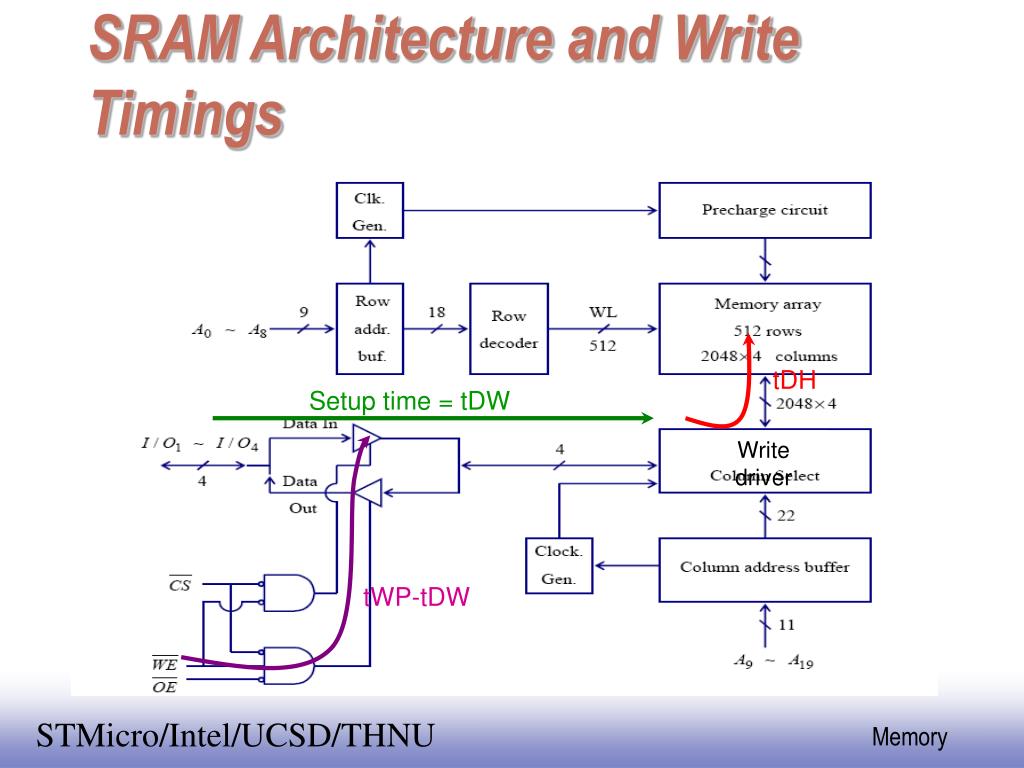
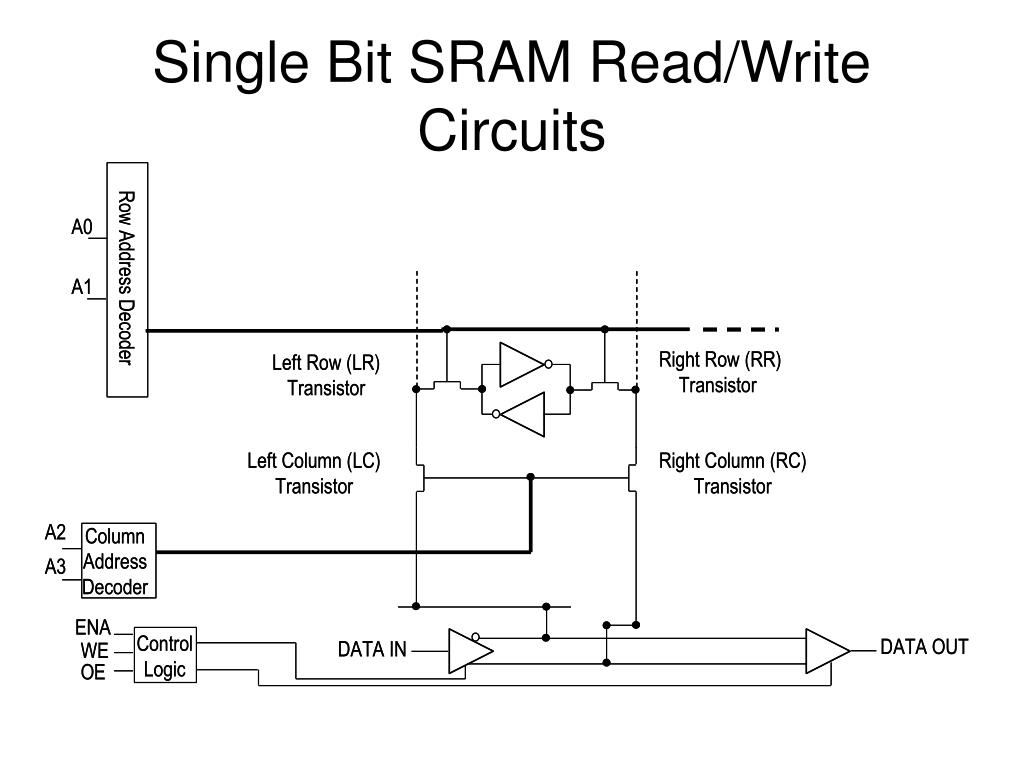
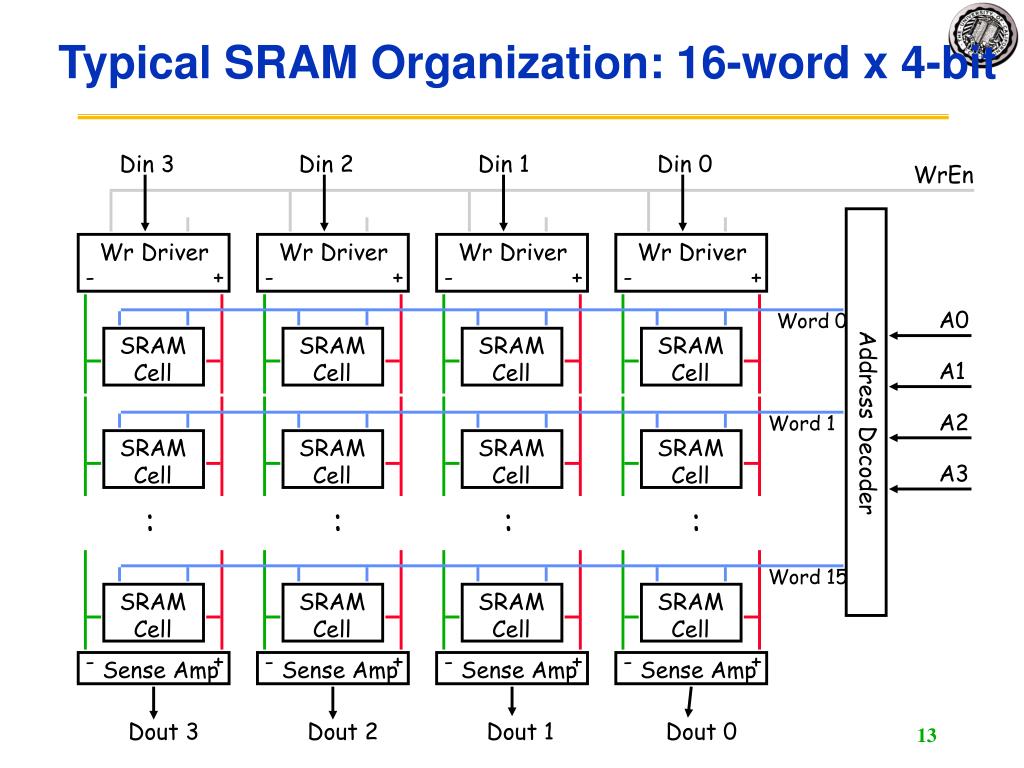
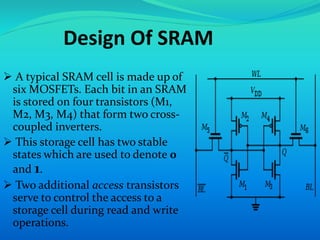
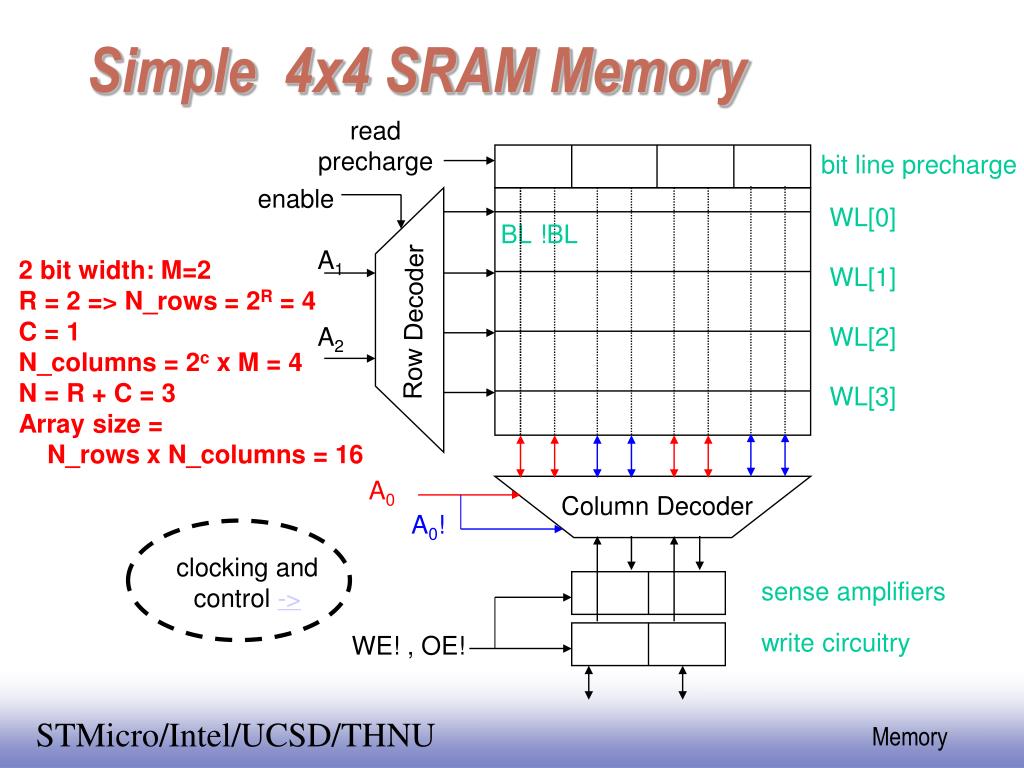
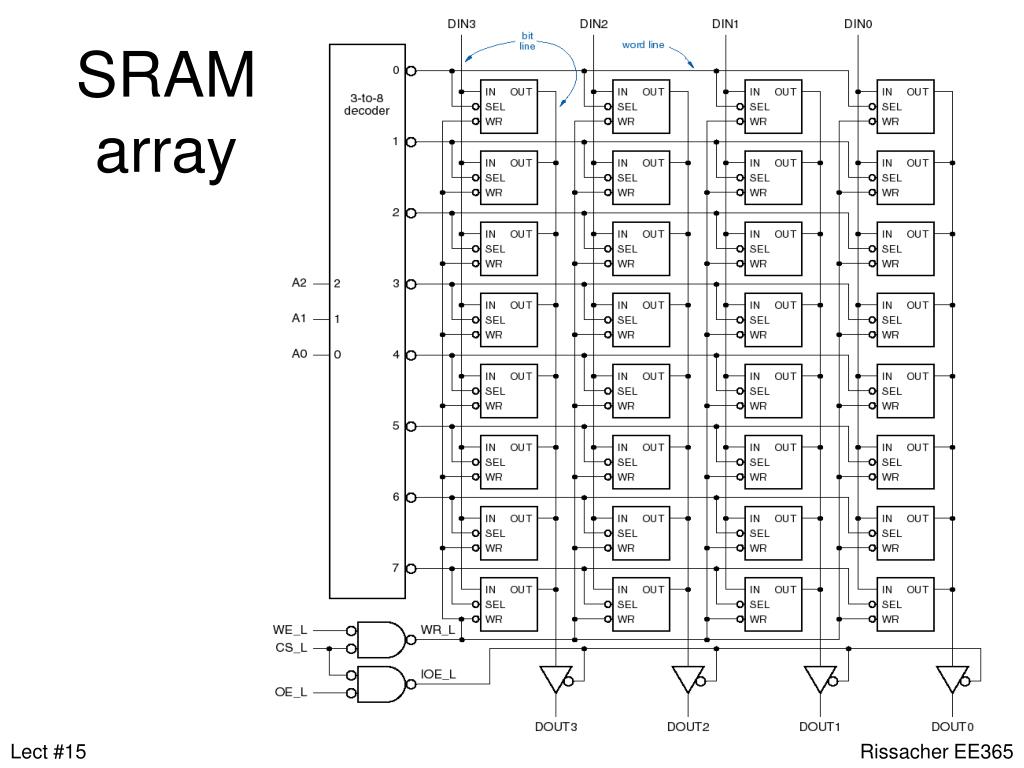
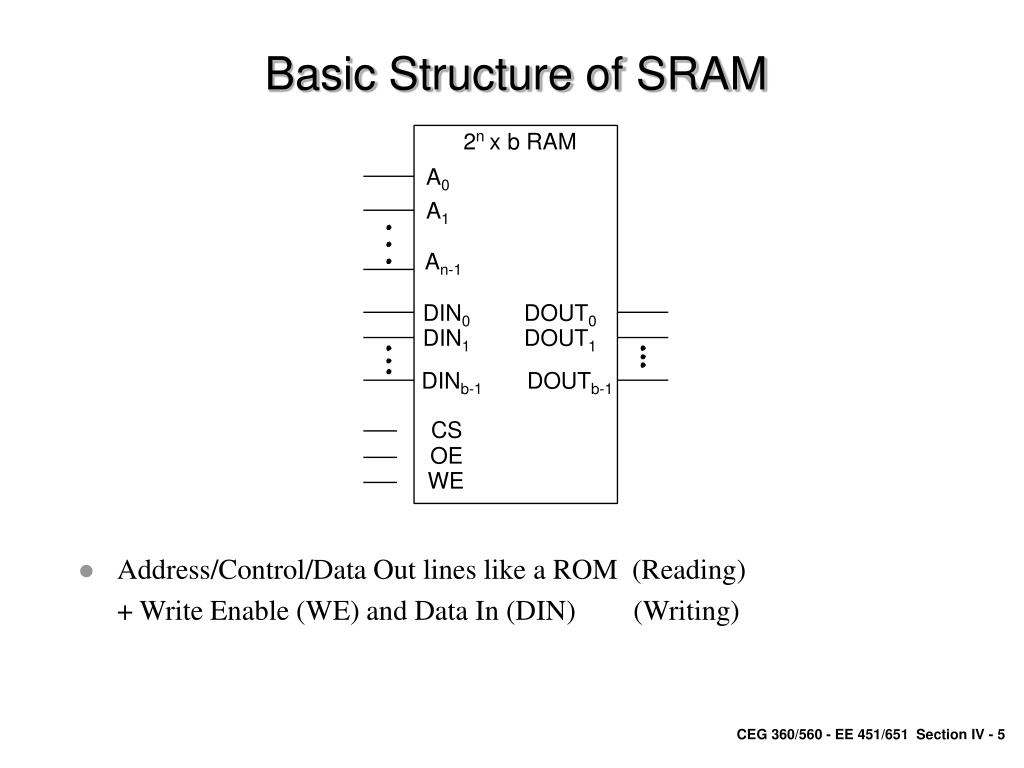
Sram Read/write Architecture


![[IC設計] sram read/write interface (讀寫介面)說明 – Techoverse](https://techoverse.blog/wp-content/uploads/2025/06/image-27.png)


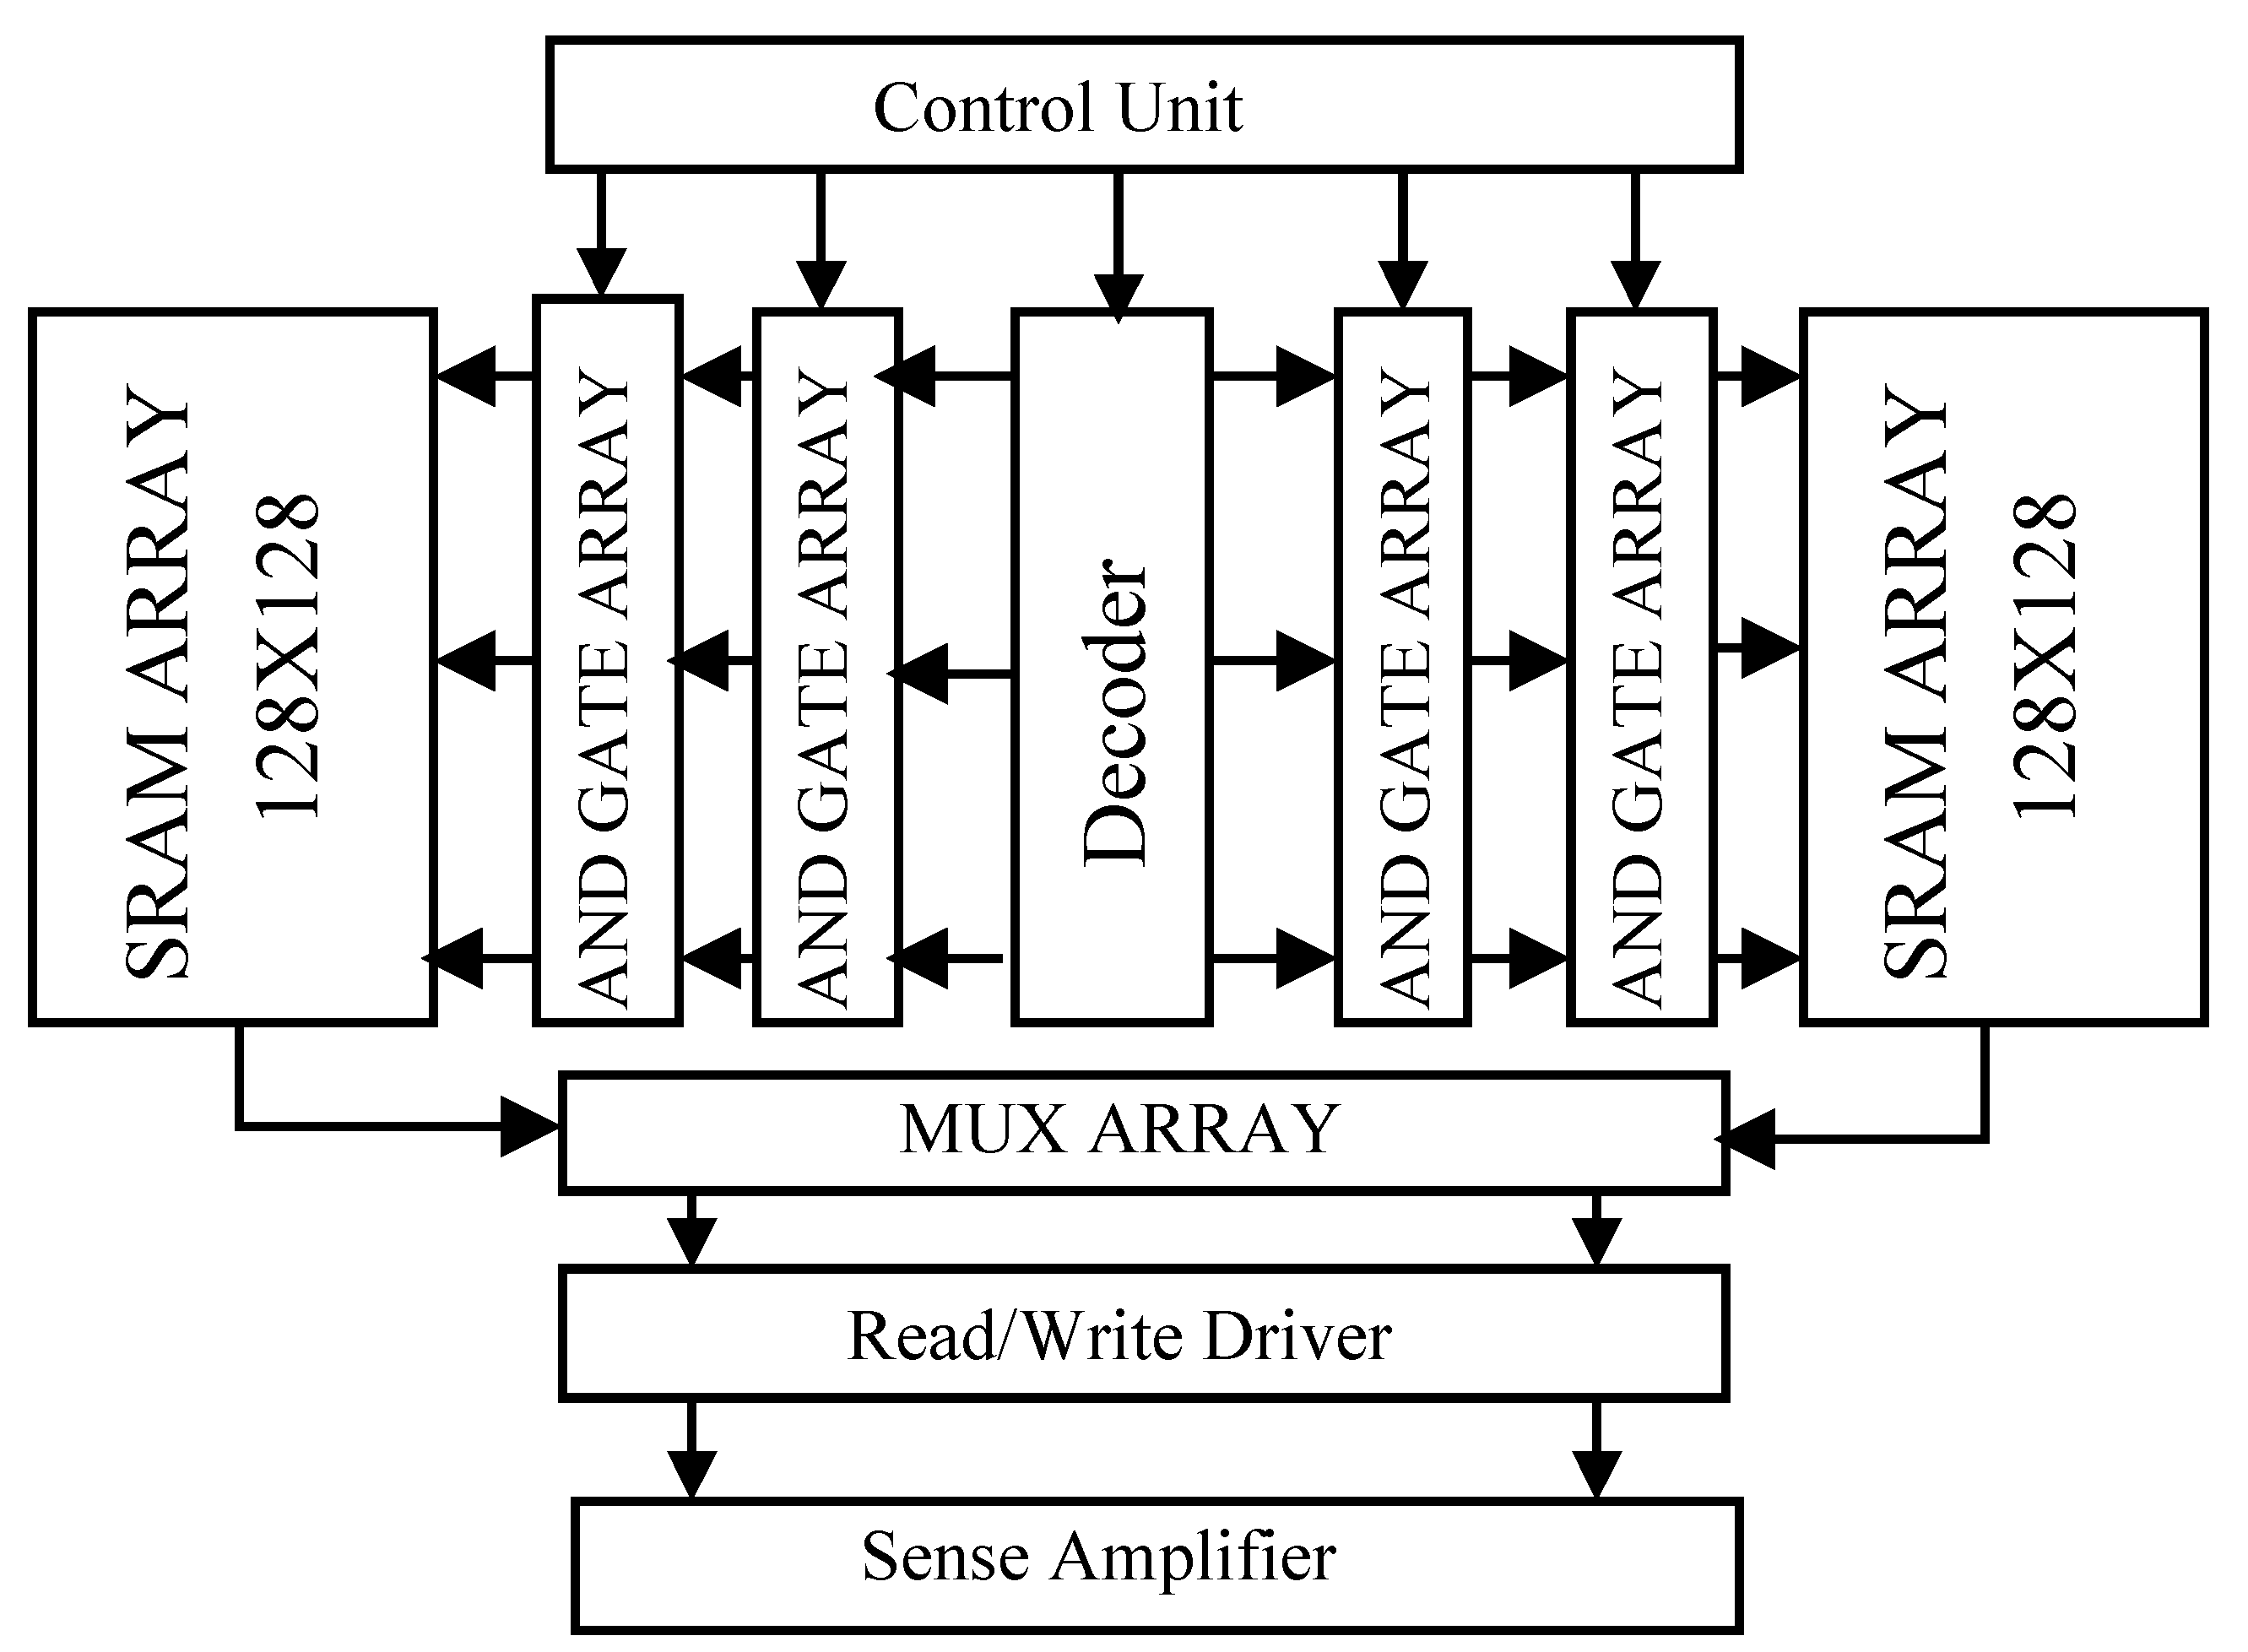
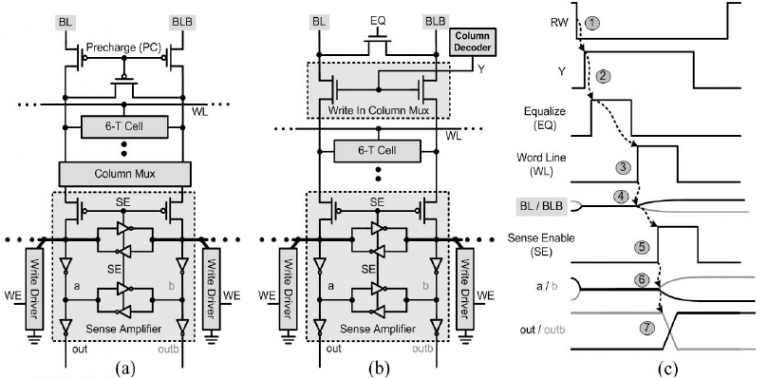
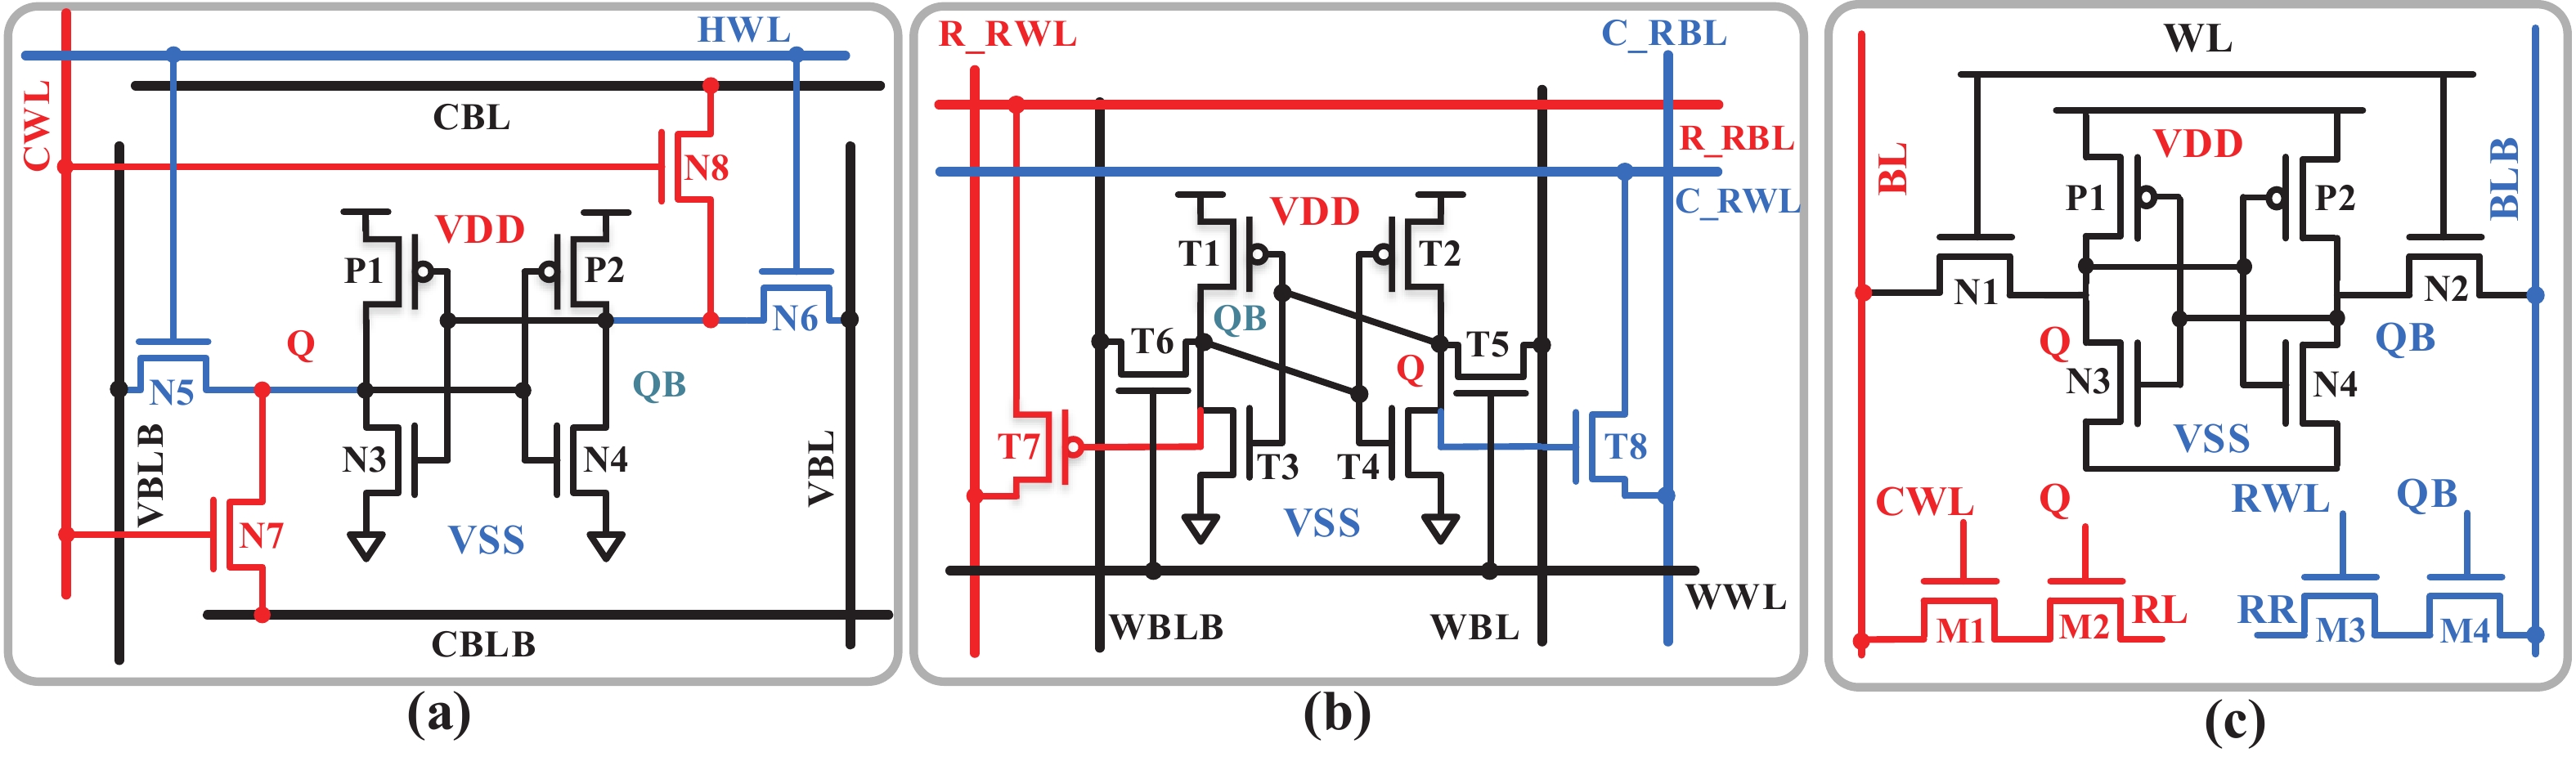
![Schematic of read and write circuits of the SRAM cell [6] and the ...](https://www.researchgate.net/publication/269577949/figure/fig4/AS:1034855328542721@1623740145218/Schematic-of-read-and-write-circuits-of-the-SRAM-cell-6-and-the-additional-logic-for.png)


Discover the thrill of Sram Read/write Architecture through hundreds of breathtaking photographs. showcasing the dynamic nature of photography, images, and pictures. perfect for thrill-seekers and outdoor enthusiasts. Discover high-resolution Sram Read/write Architecture images optimized for various applications. Suitable for various applications including web design, social media, personal projects, and digital content creation All Sram Read/write Architecture images are available in high resolution with professional-grade quality, optimized for both digital and print applications, and include comprehensive metadata for easy organization and usage. Our Sram Read/write Architecture gallery offers diverse visual resources to bring your ideas to life. Time-saving browsing features help users locate ideal Sram Read/write Architecture images quickly. Our Sram Read/write Architecture database continuously expands with fresh, relevant content from skilled photographers. Diverse style options within the Sram Read/write Architecture collection suit various aesthetic preferences. Reliable customer support ensures smooth experience throughout the Sram Read/write Architecture selection process. Each image in our Sram Read/write Architecture gallery undergoes rigorous quality assessment before inclusion. Professional licensing options accommodate both commercial and educational usage requirements. The Sram Read/write Architecture archive serves professionals, educators, and creatives across diverse industries. Whether for commercial projects or personal use, our Sram Read/write Architecture collection delivers consistent excellence.