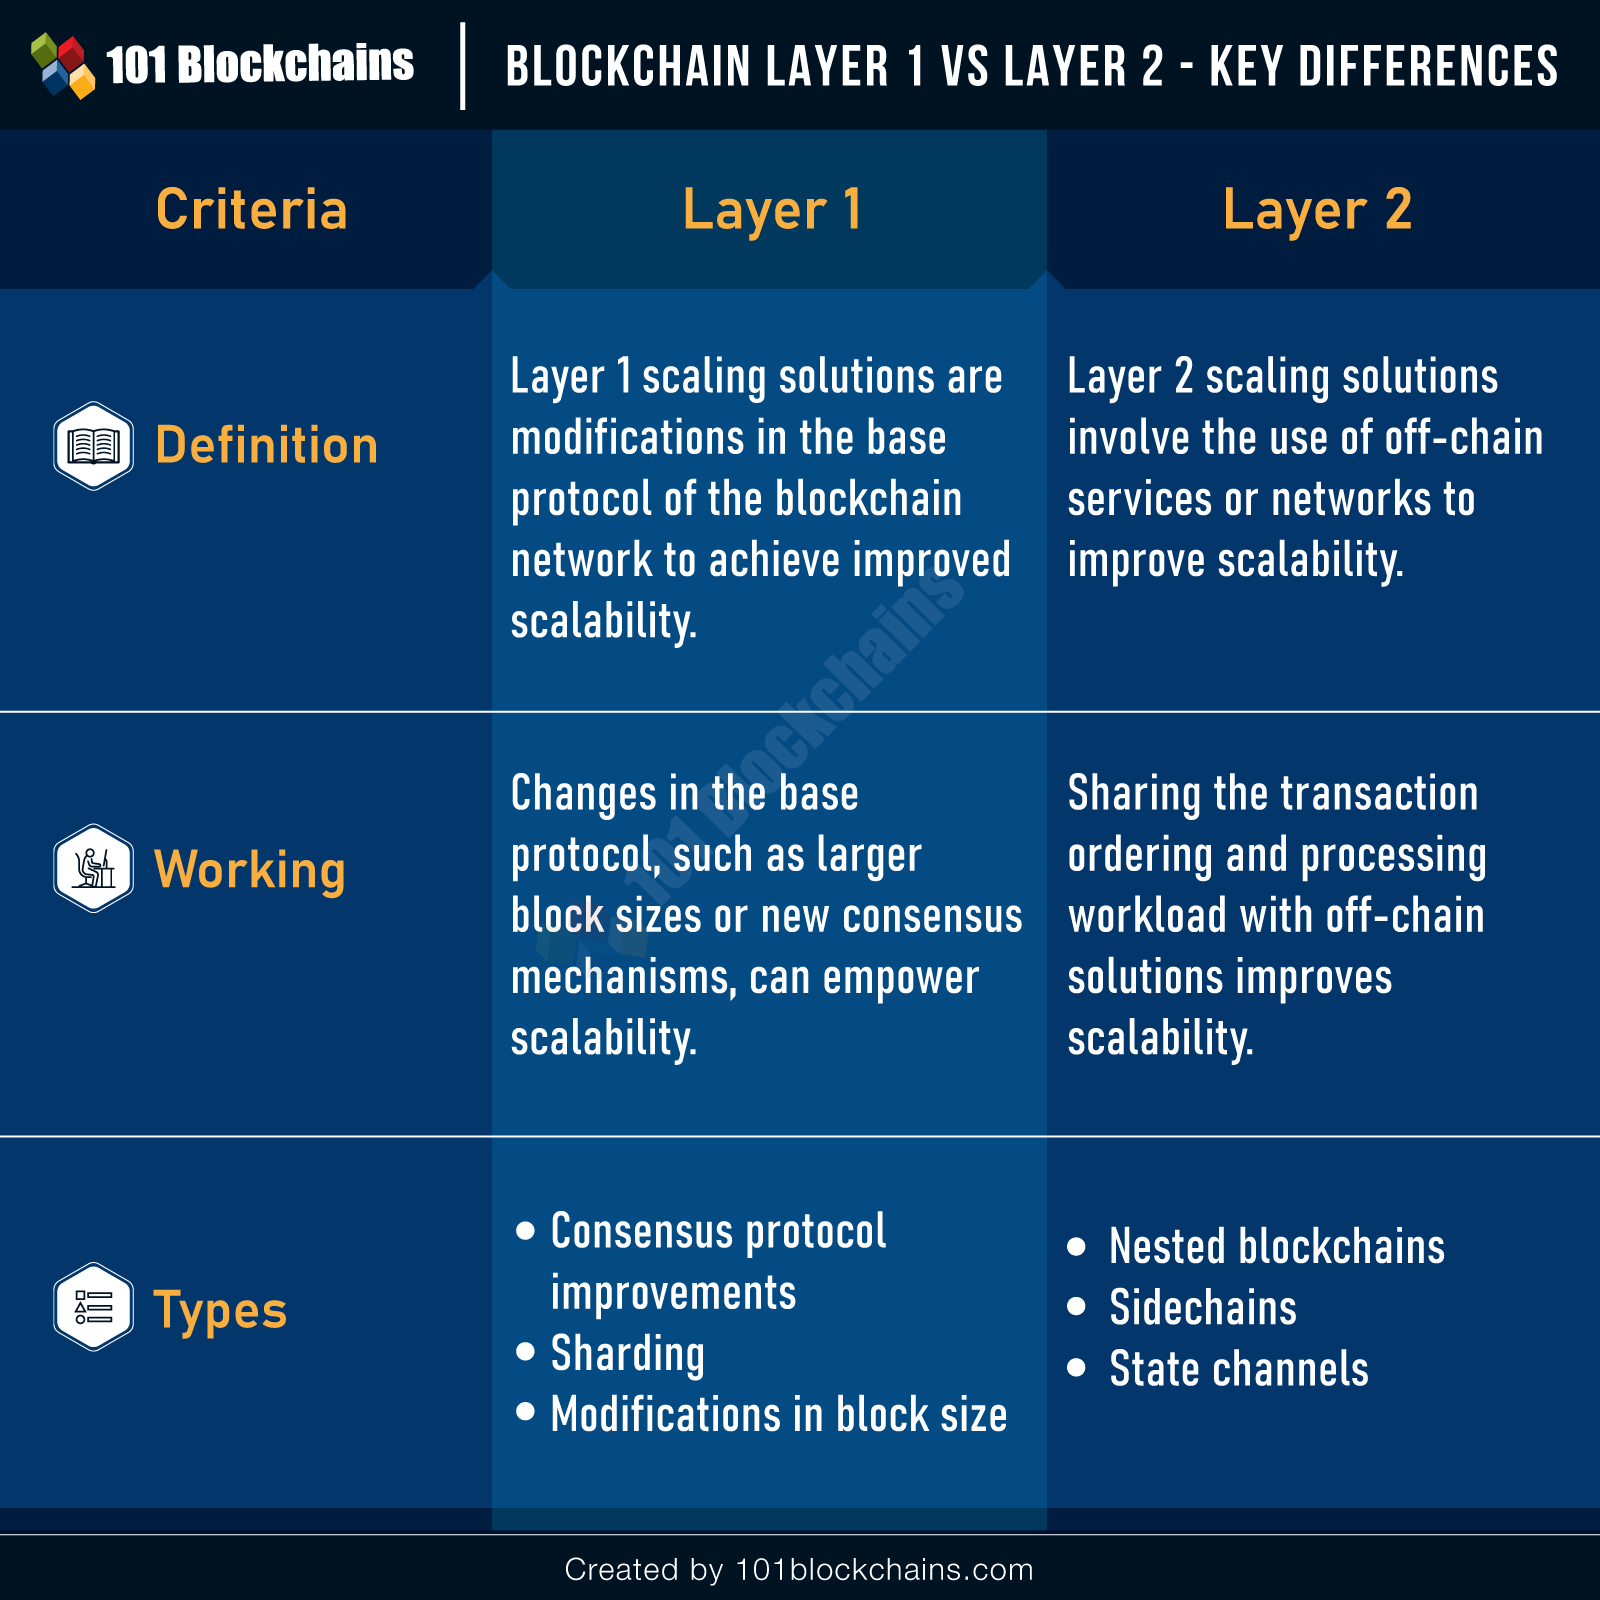
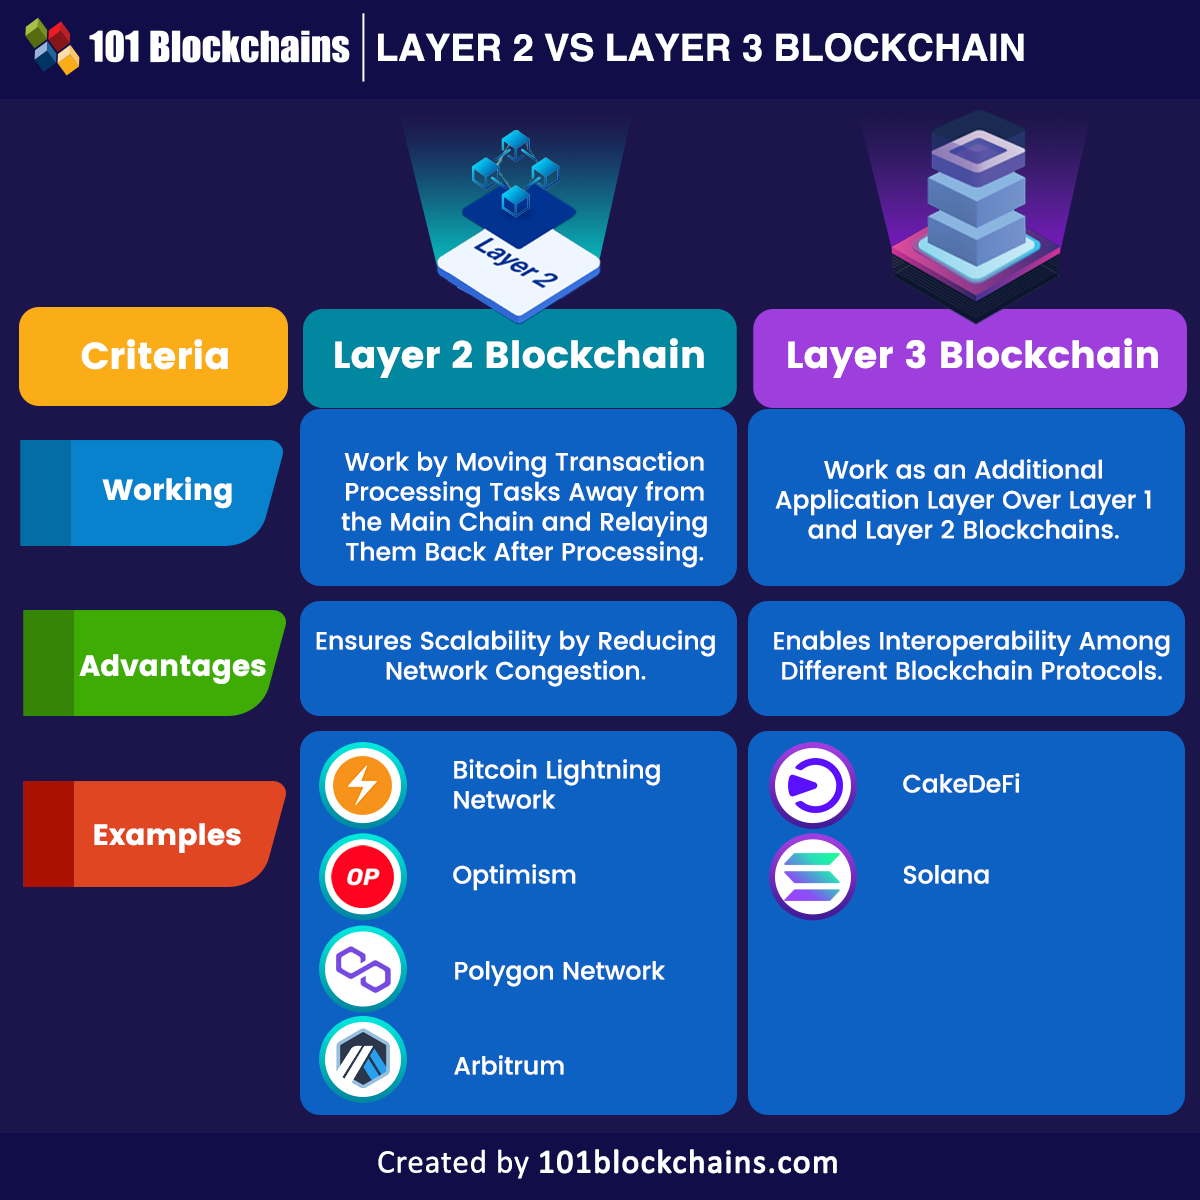
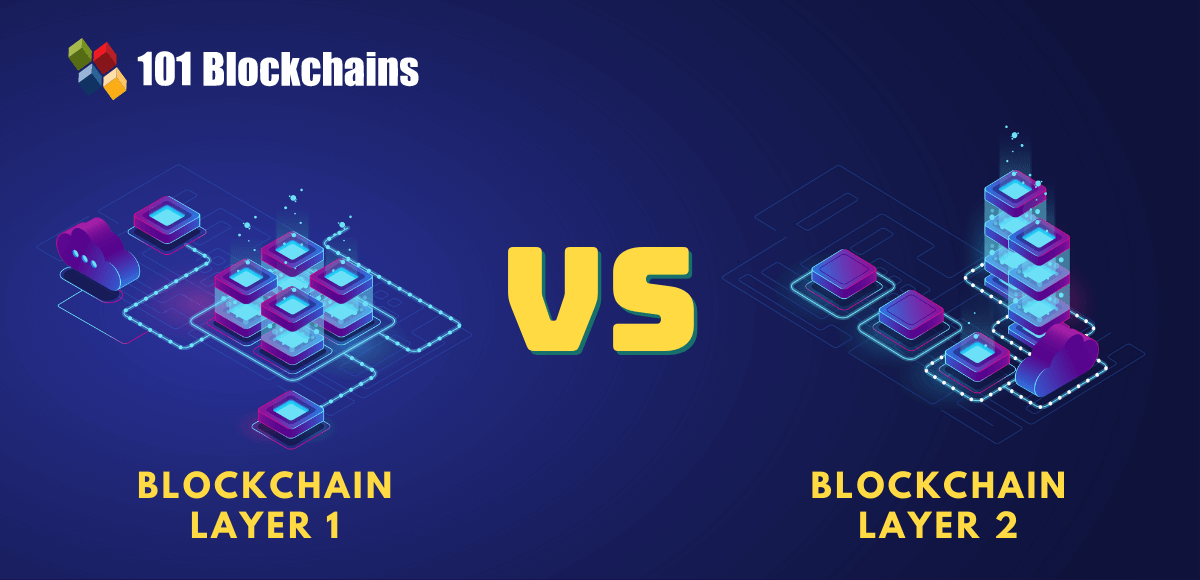
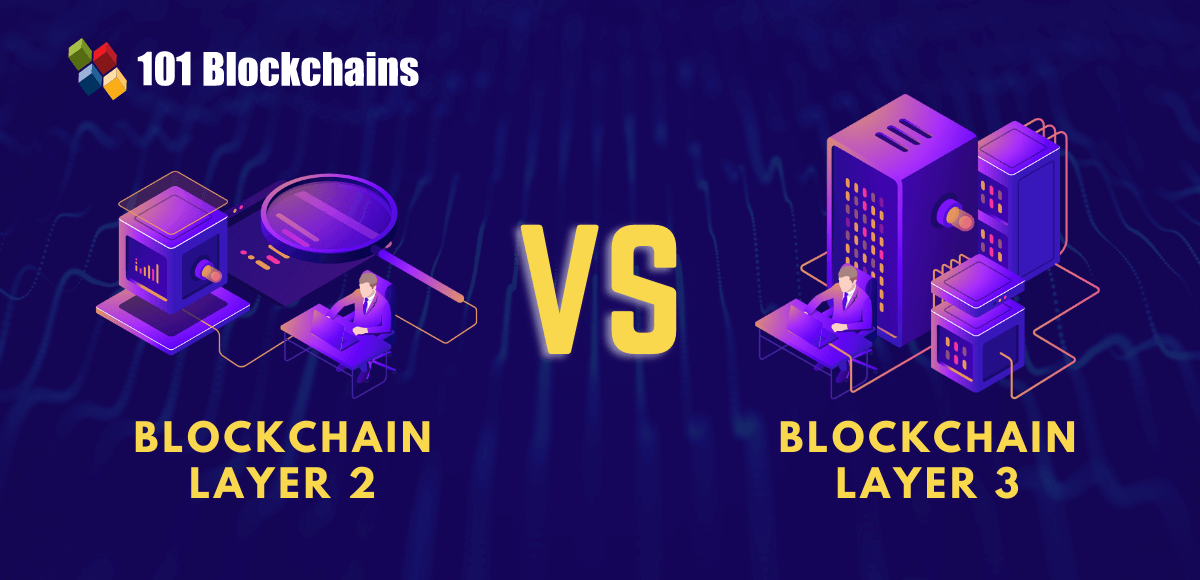
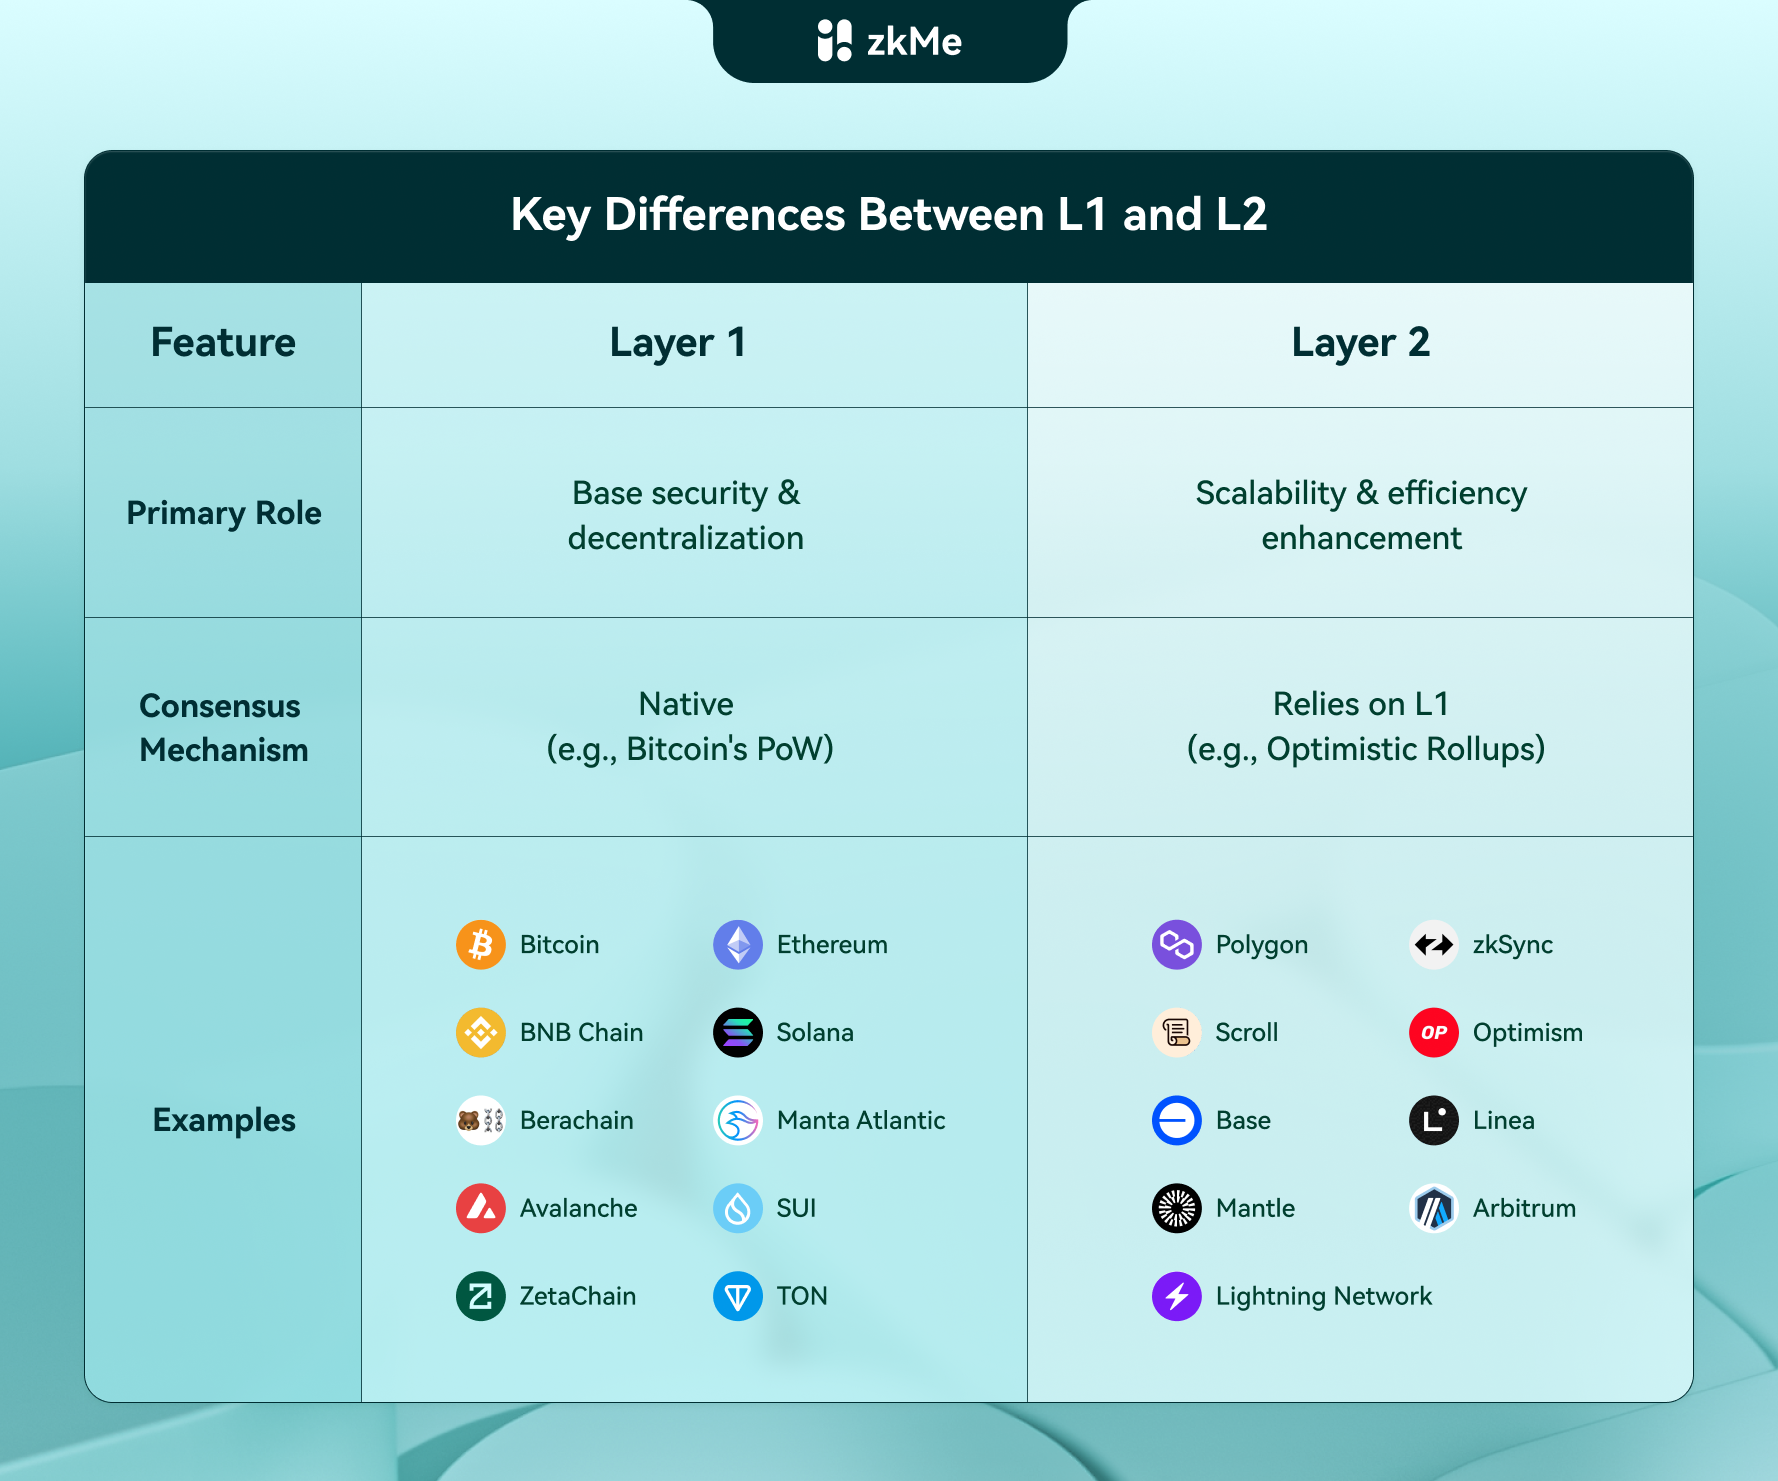
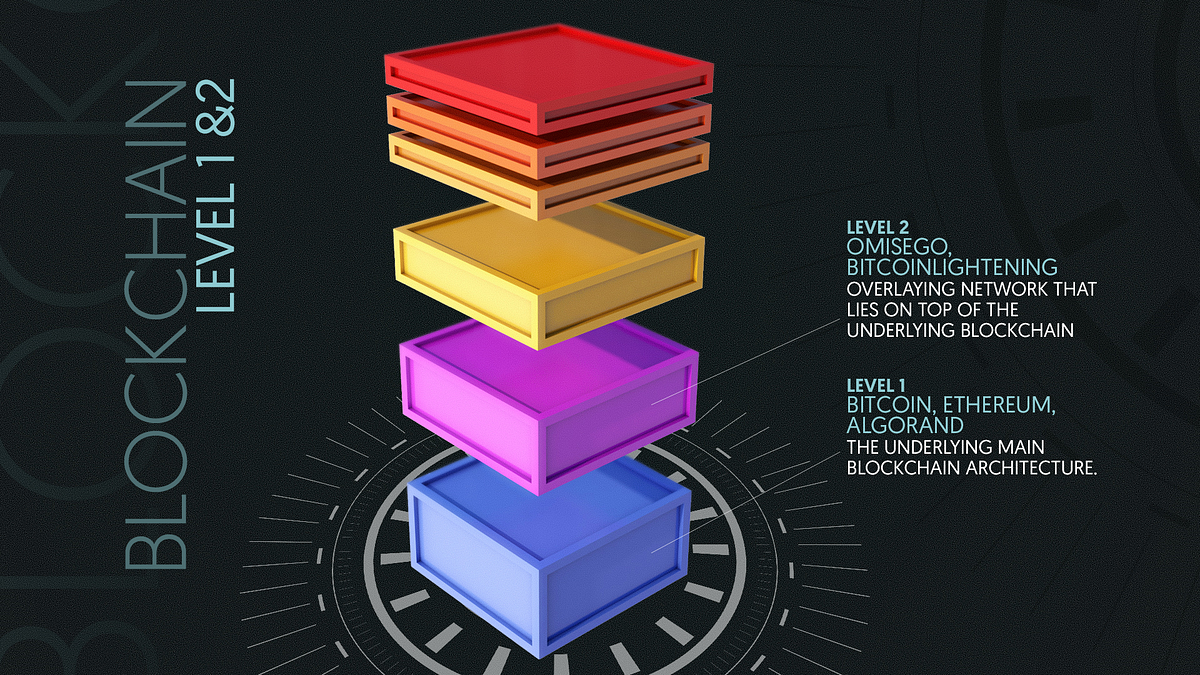
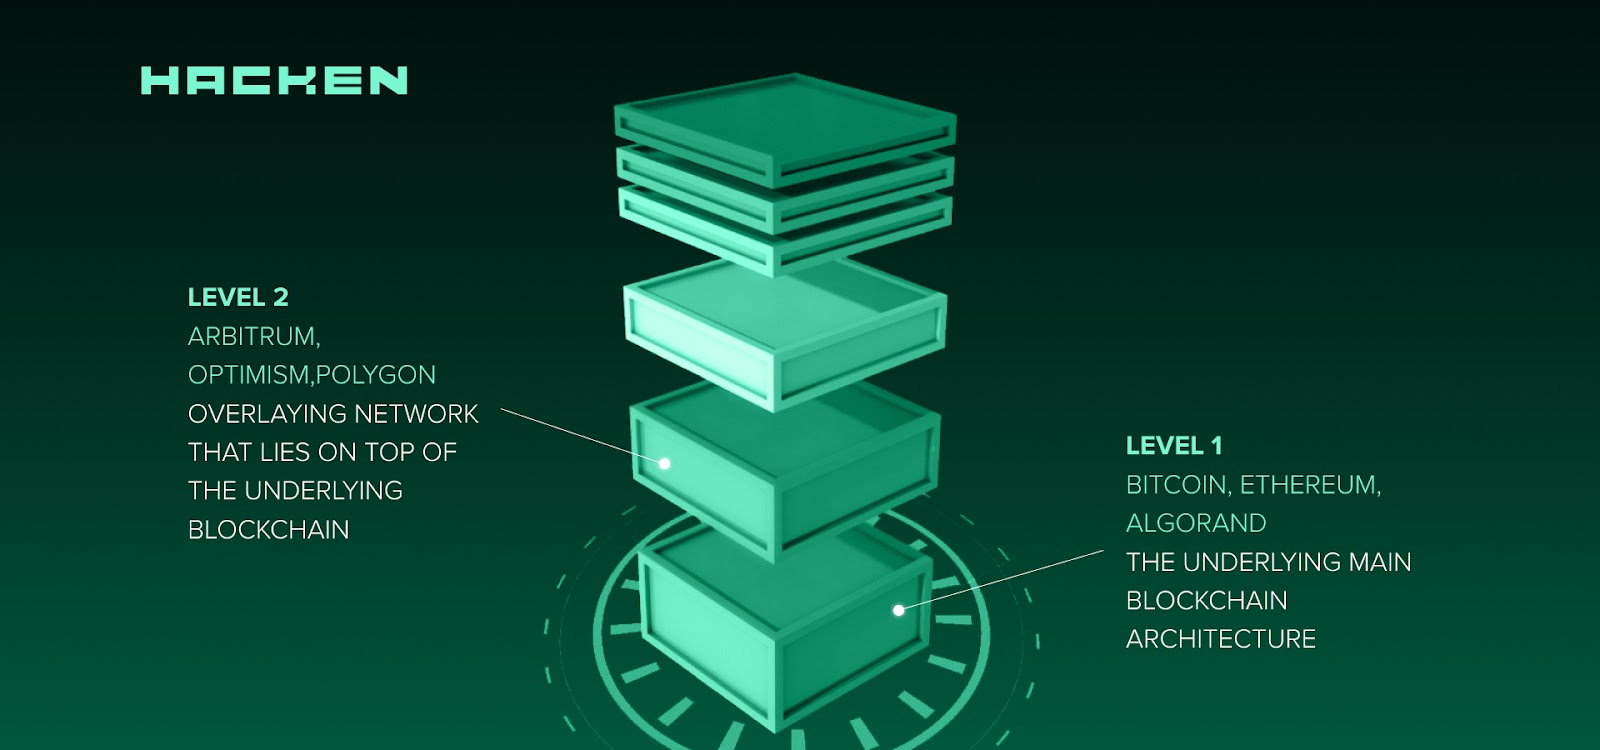
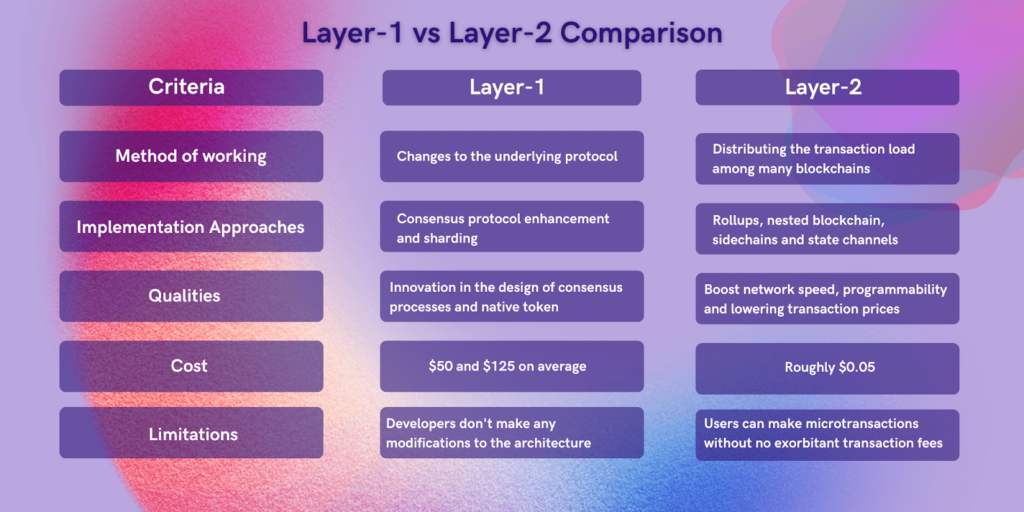
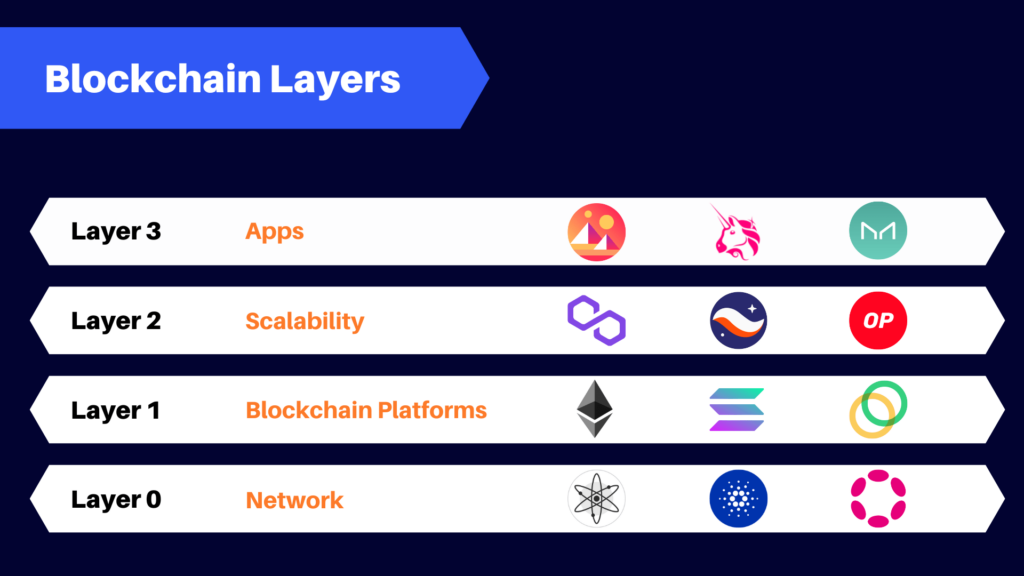
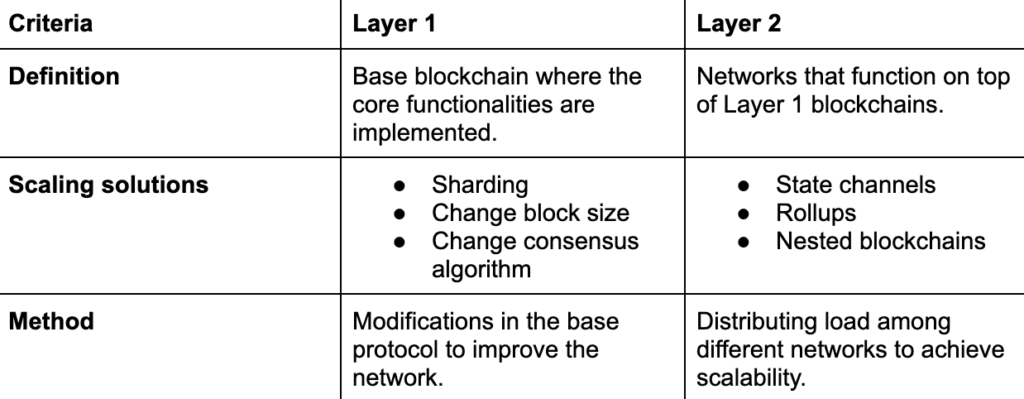
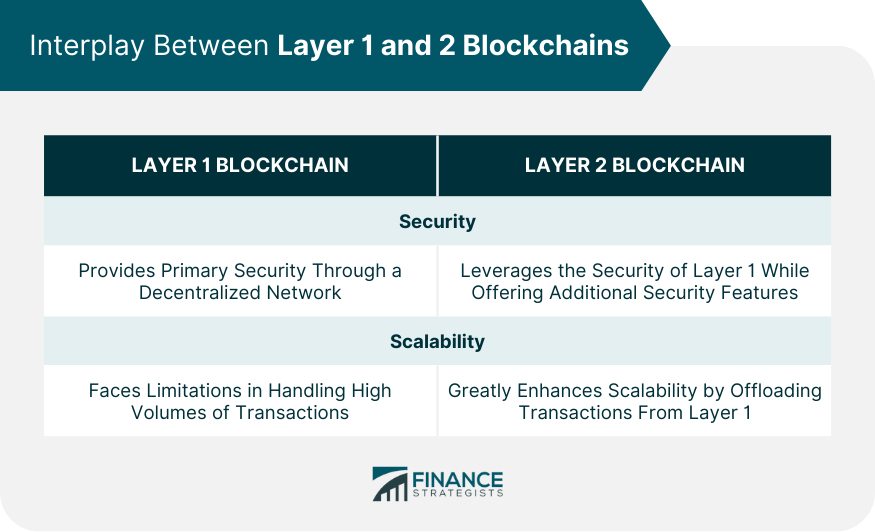
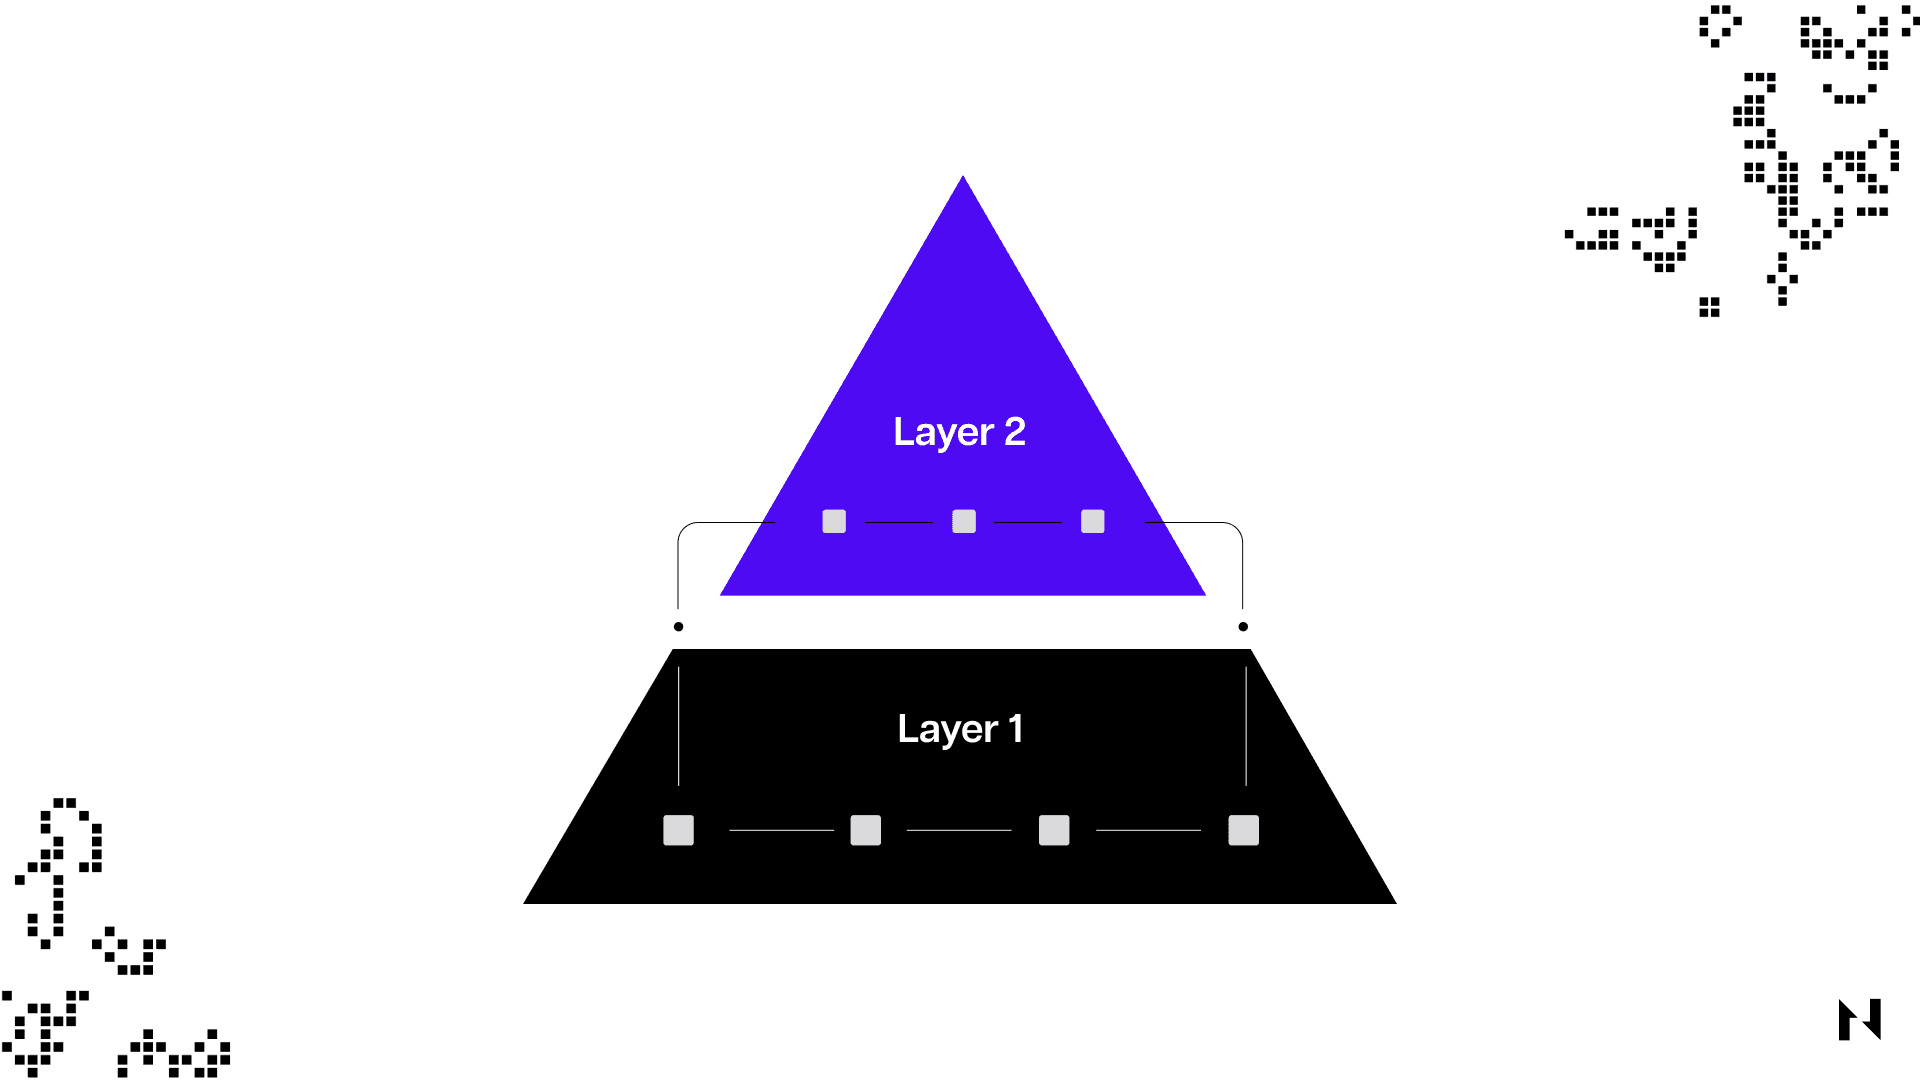
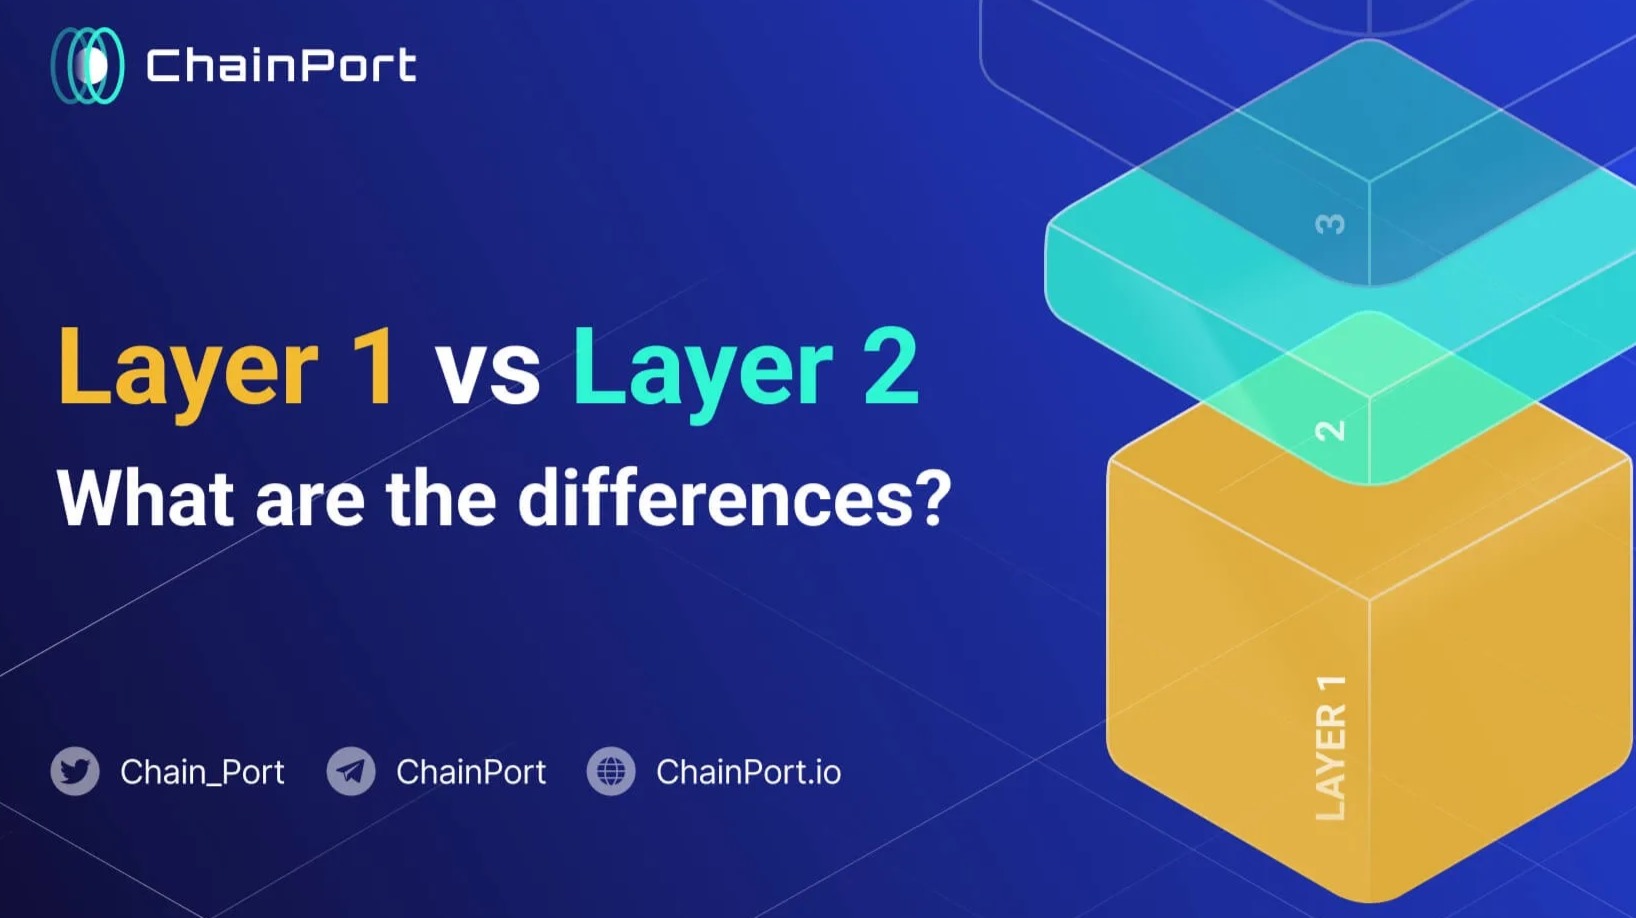
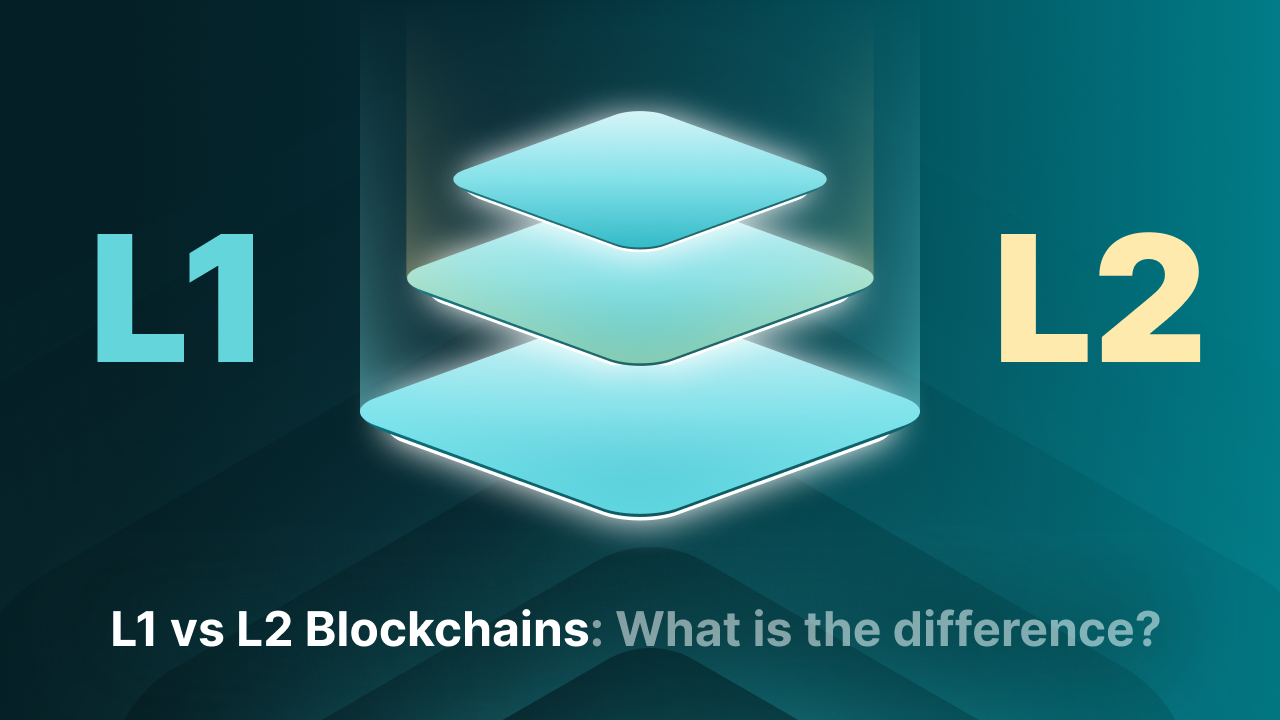
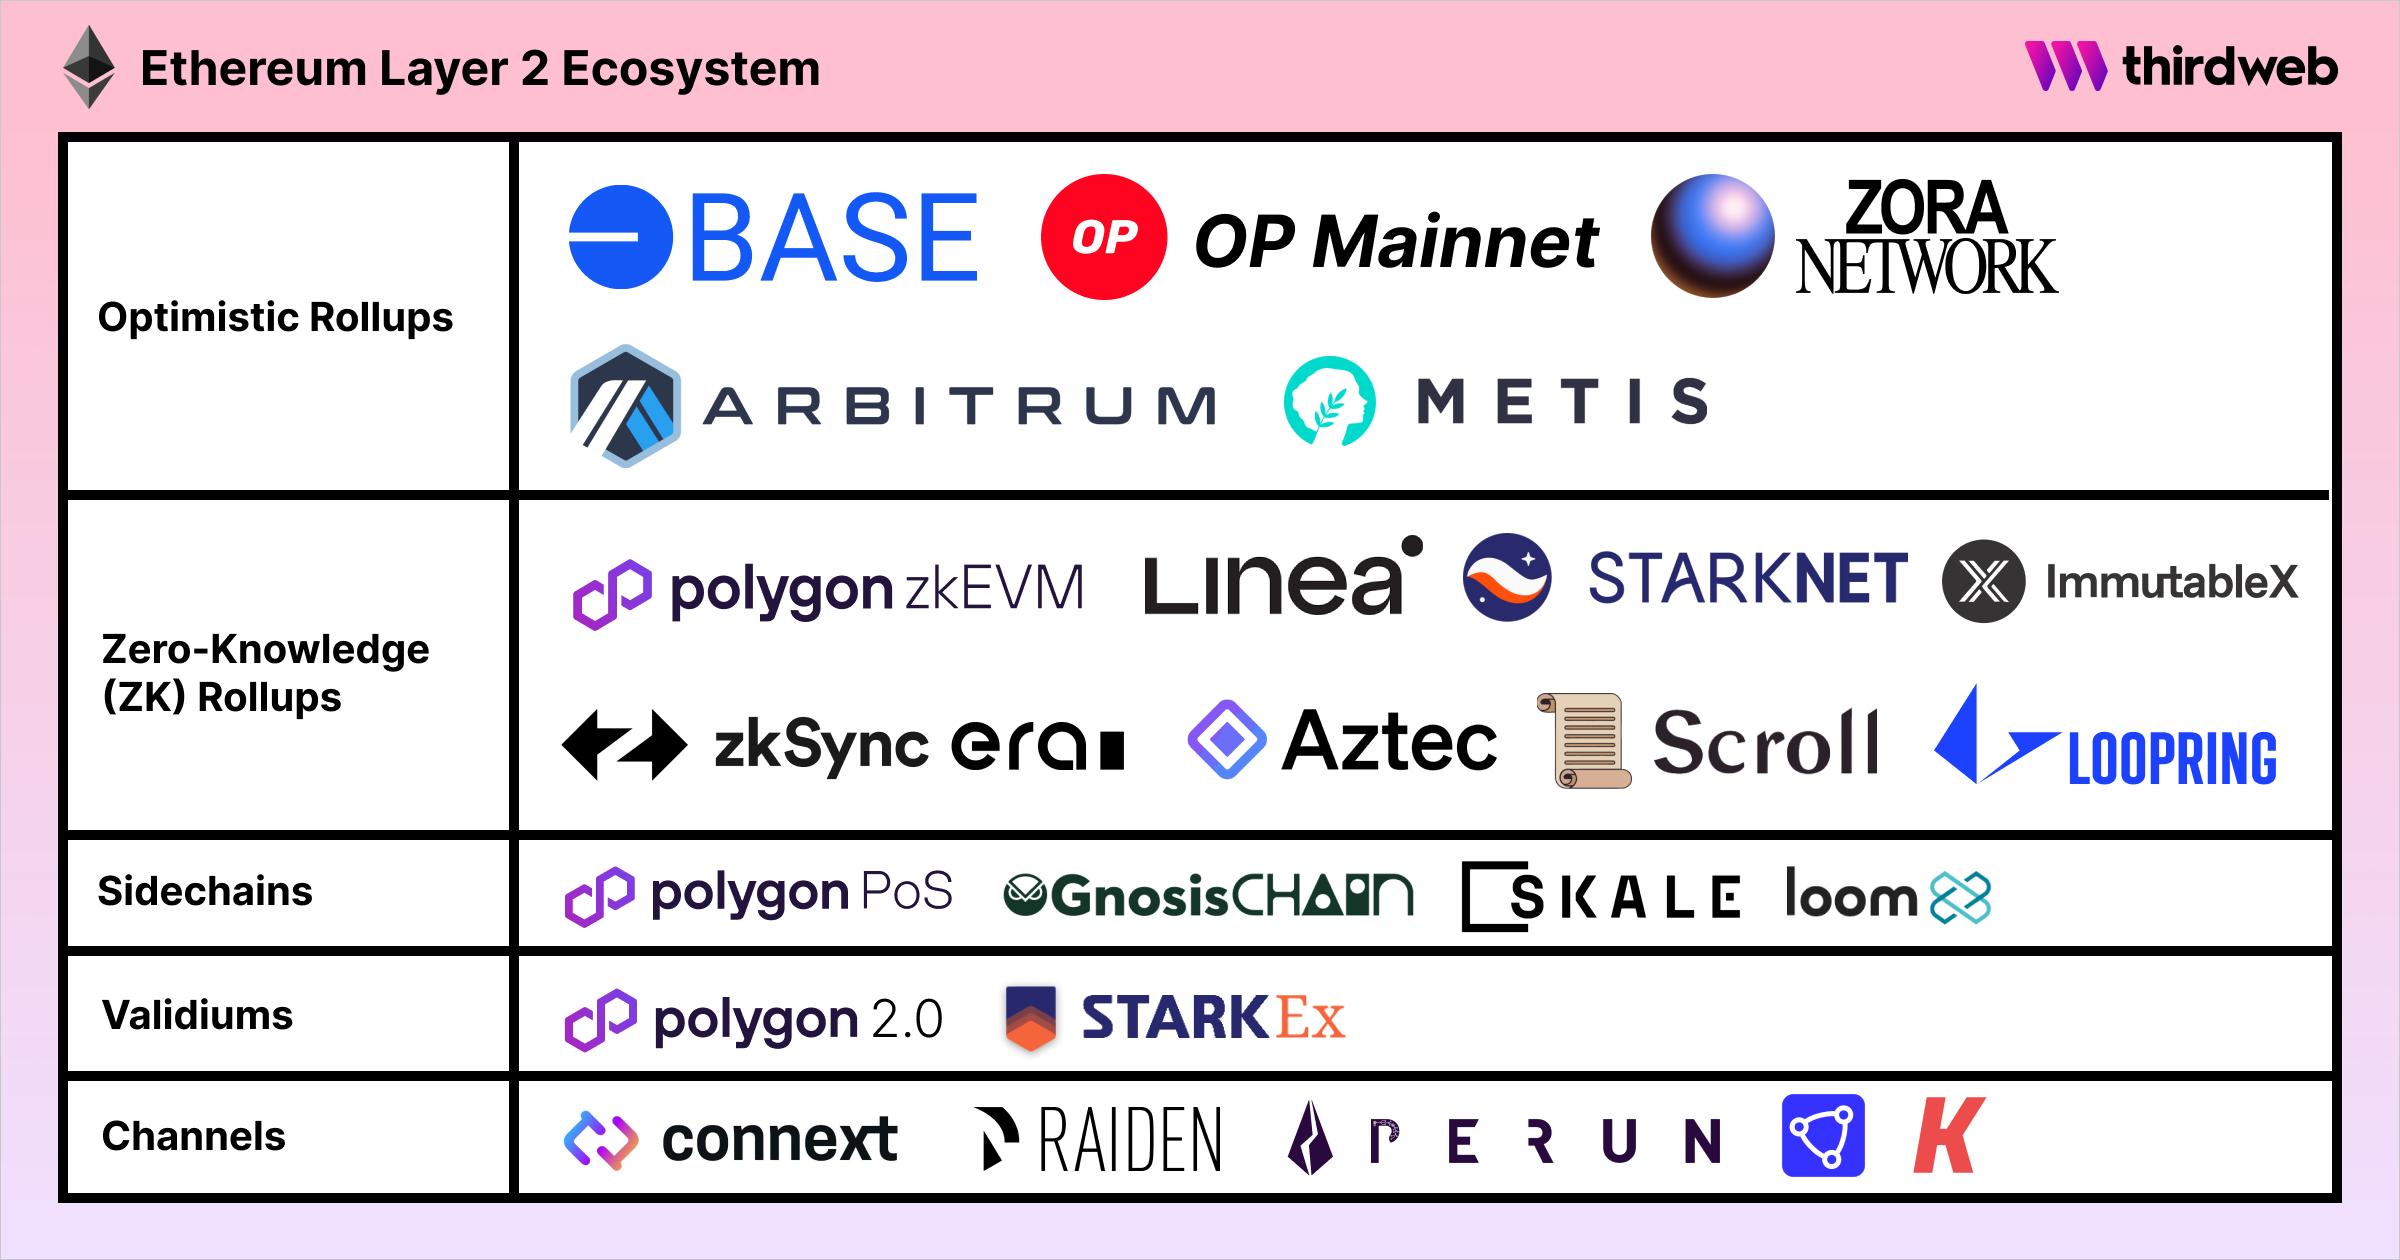
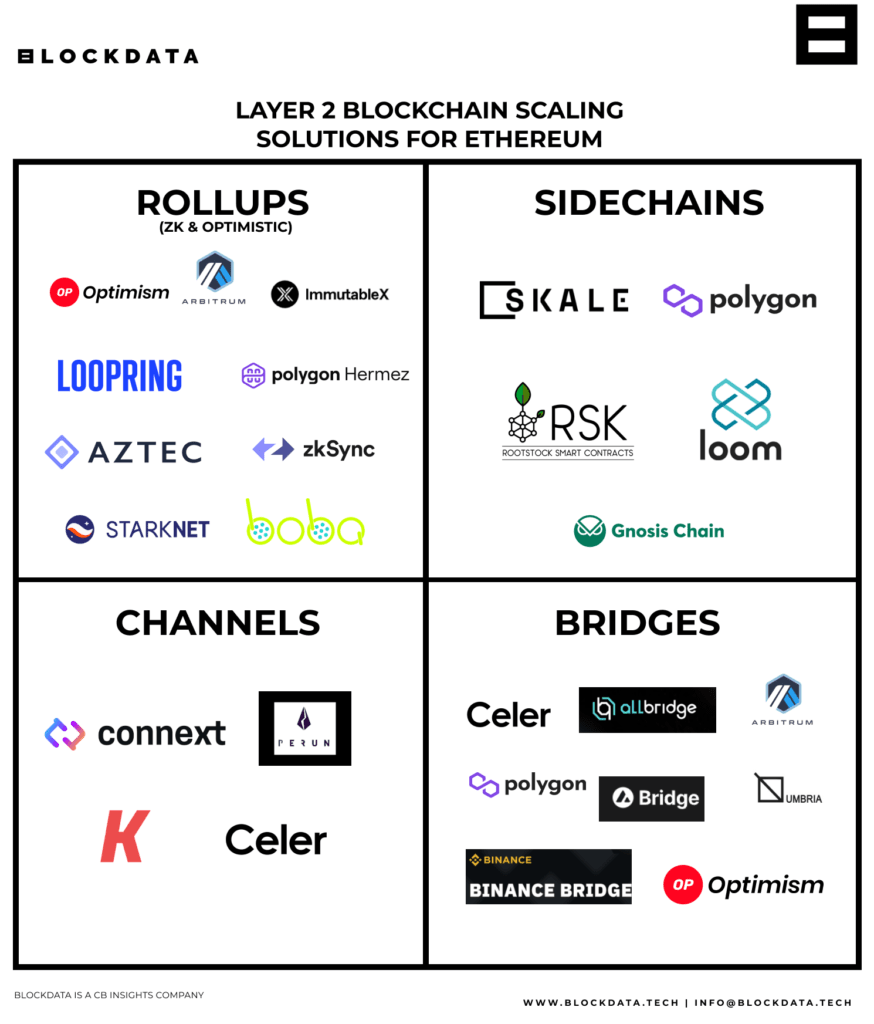
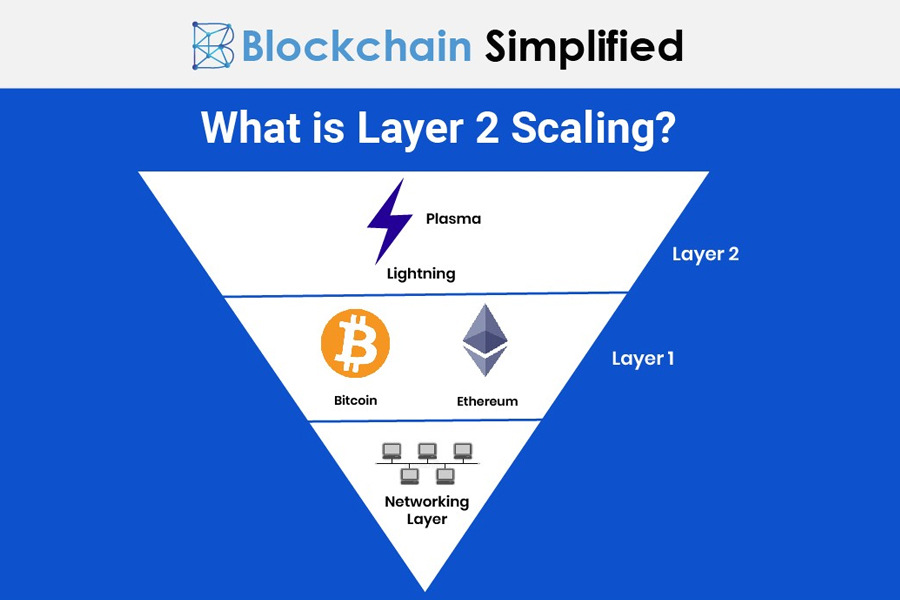
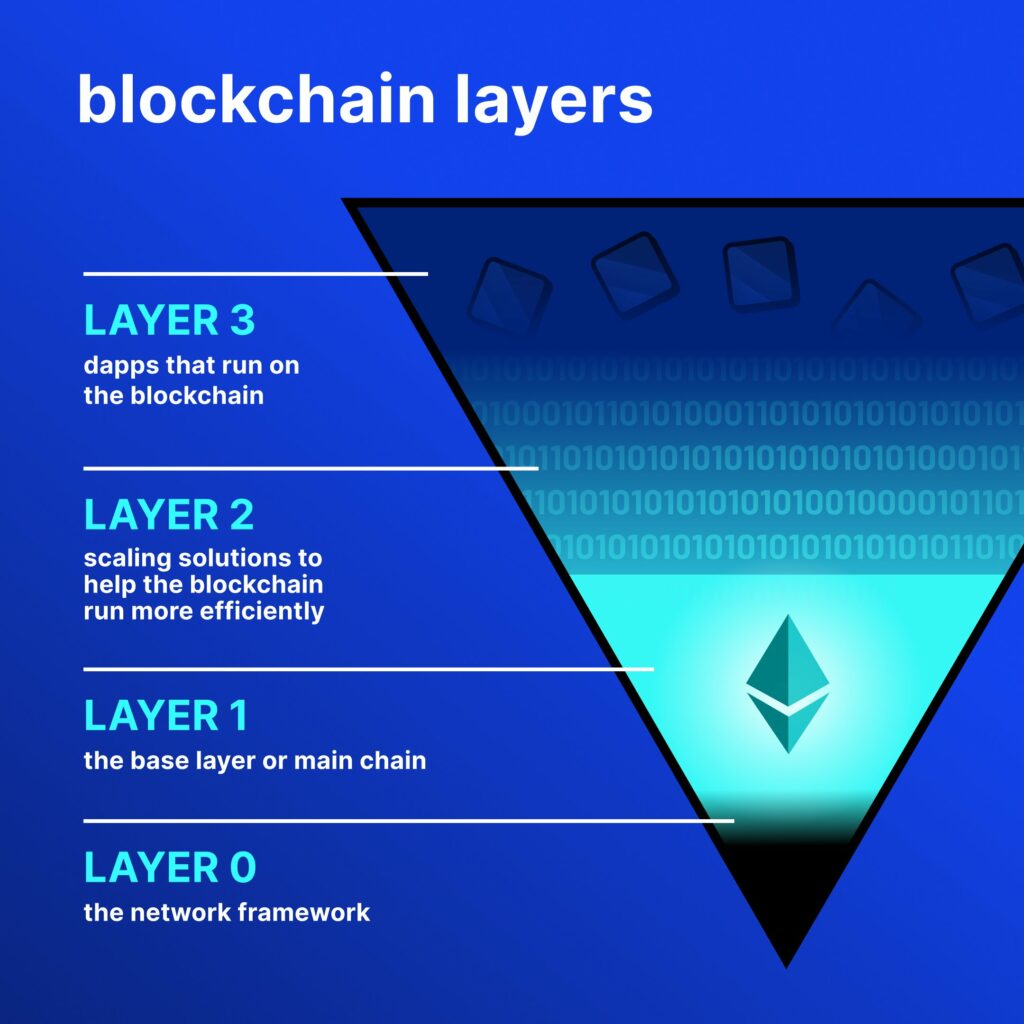
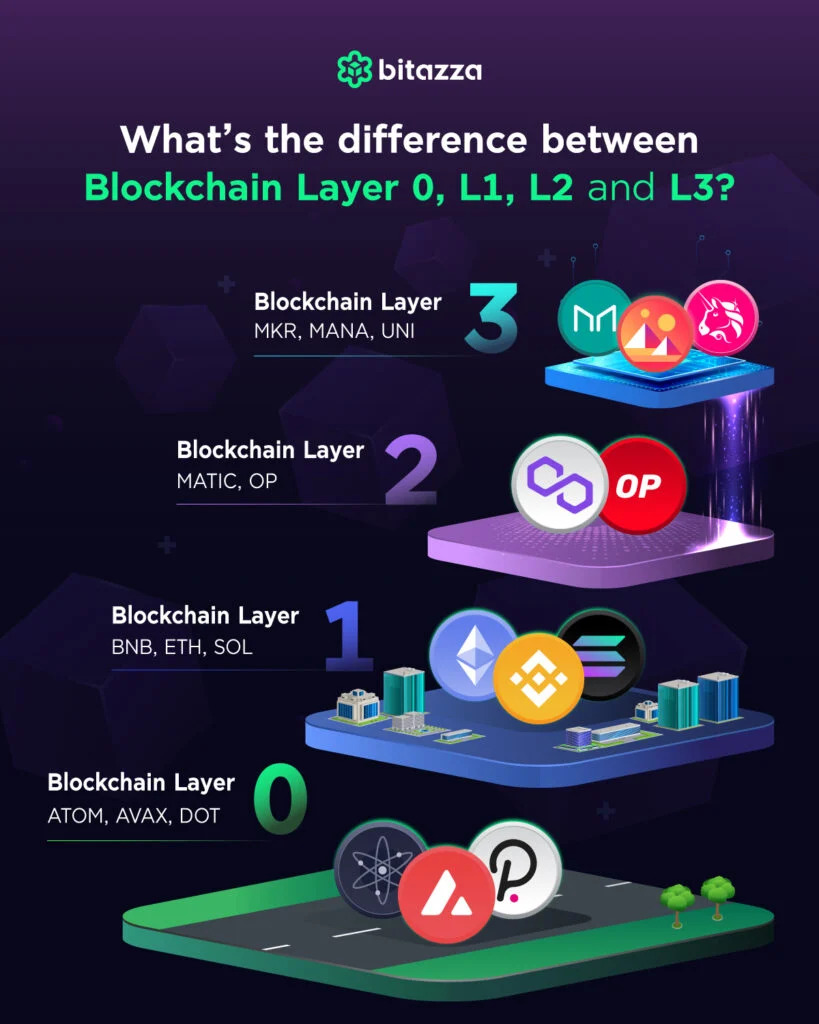
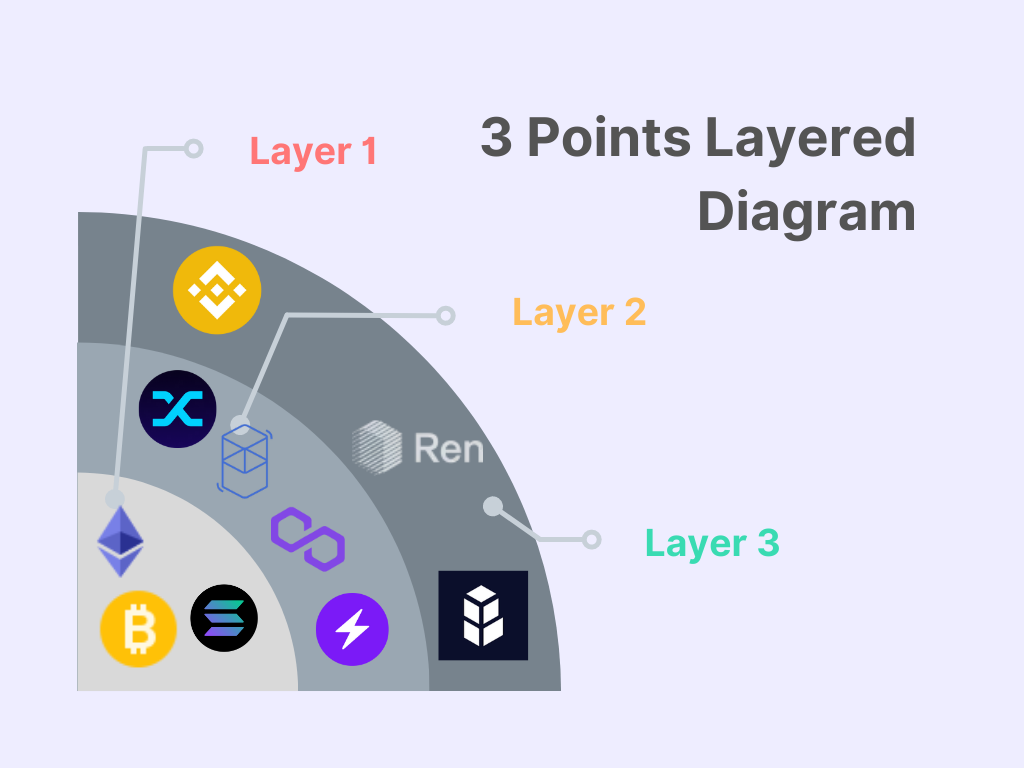
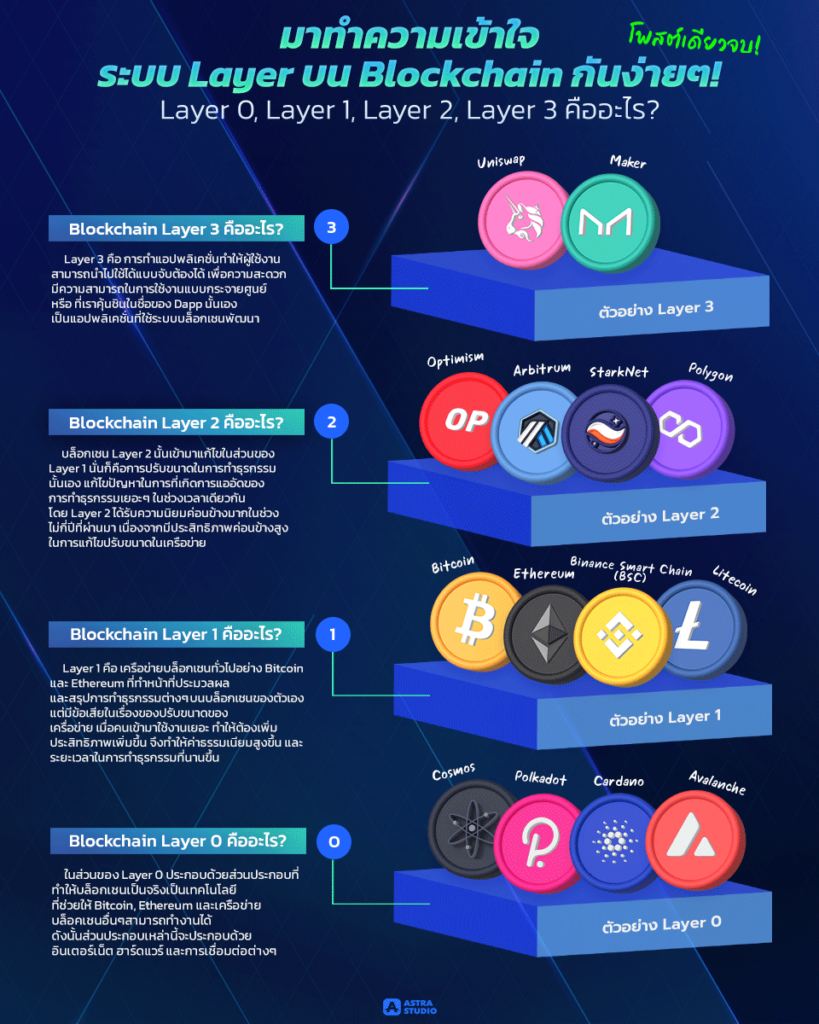
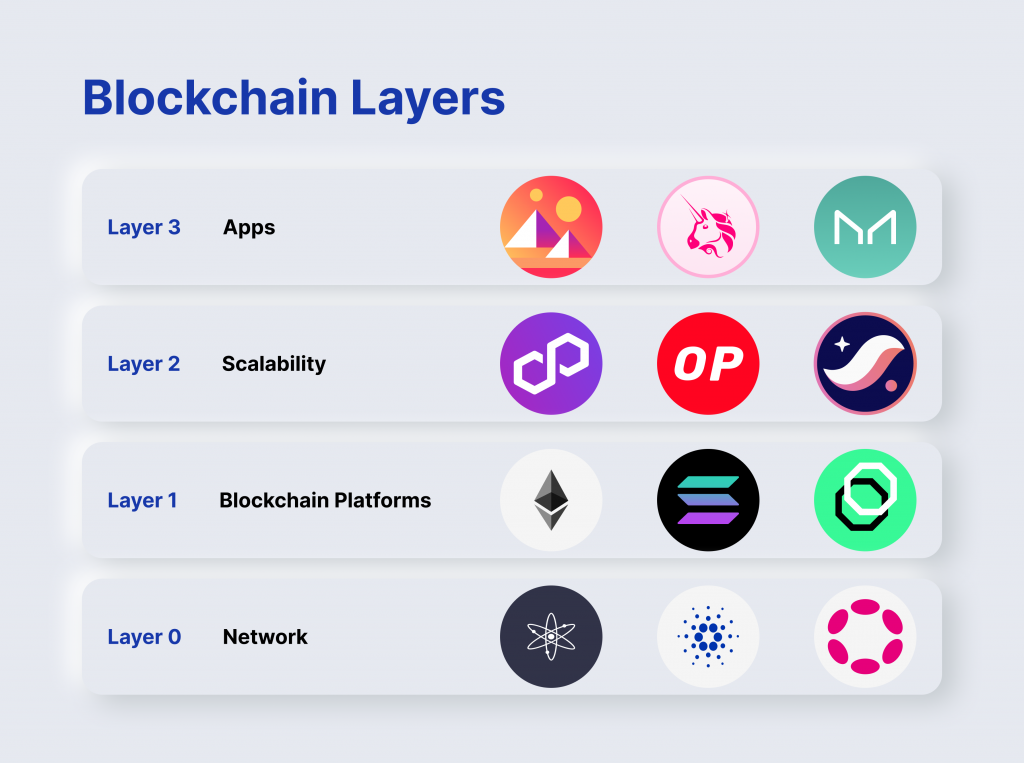
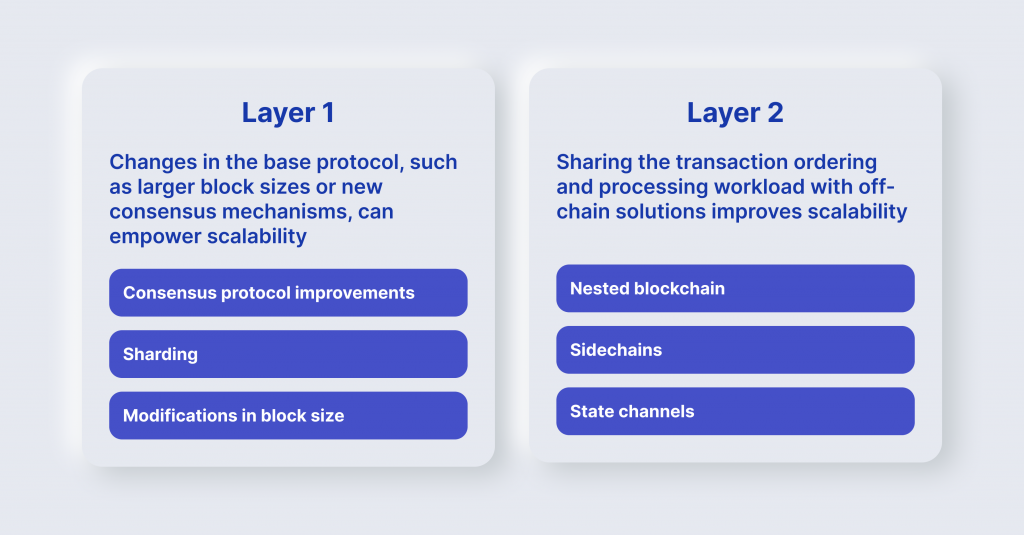
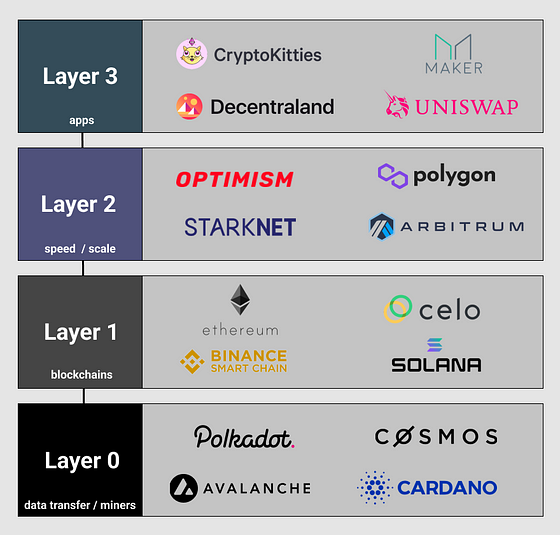
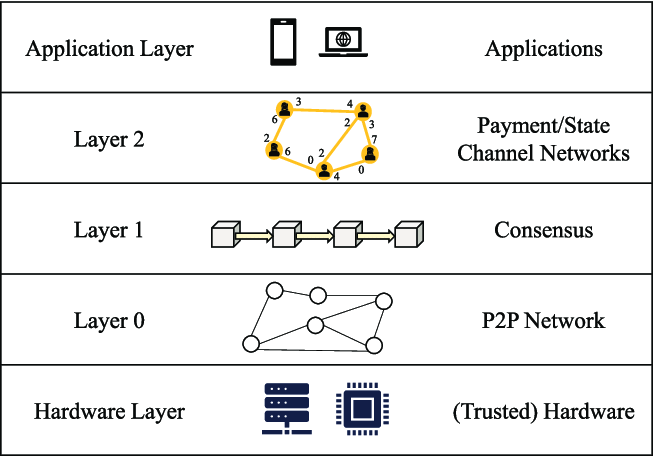
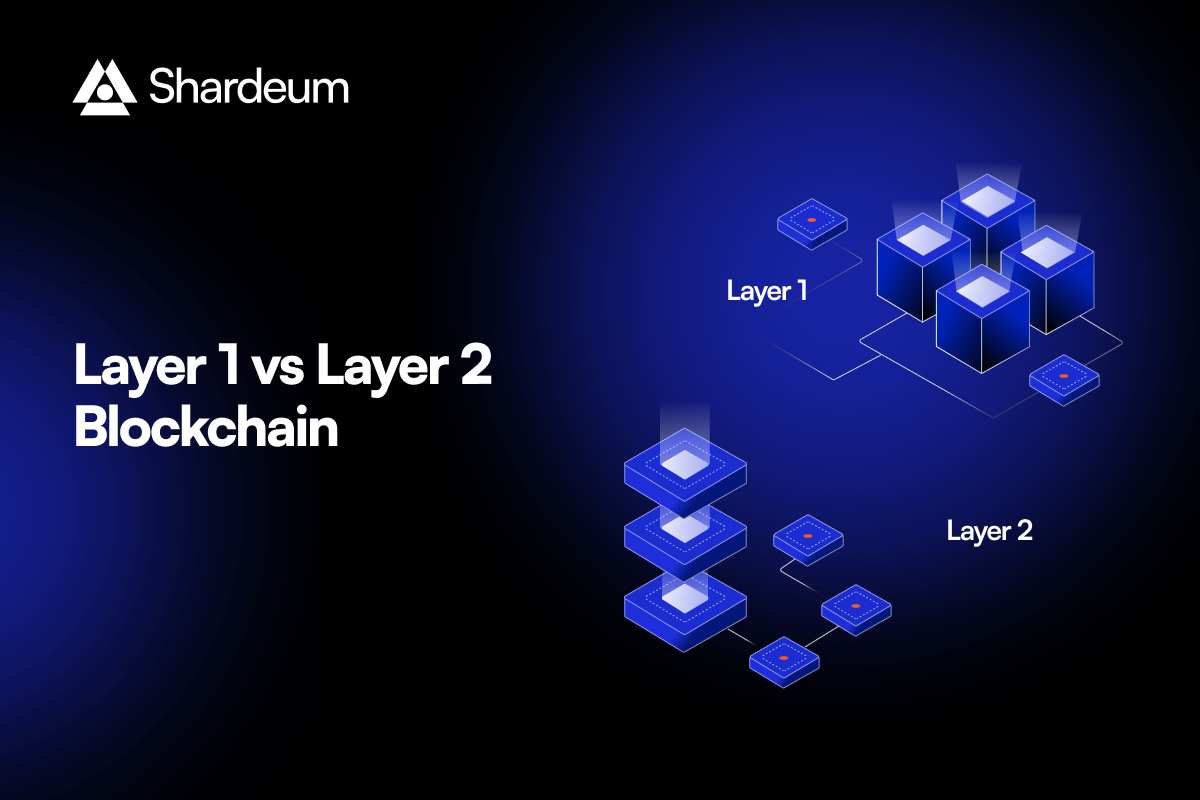
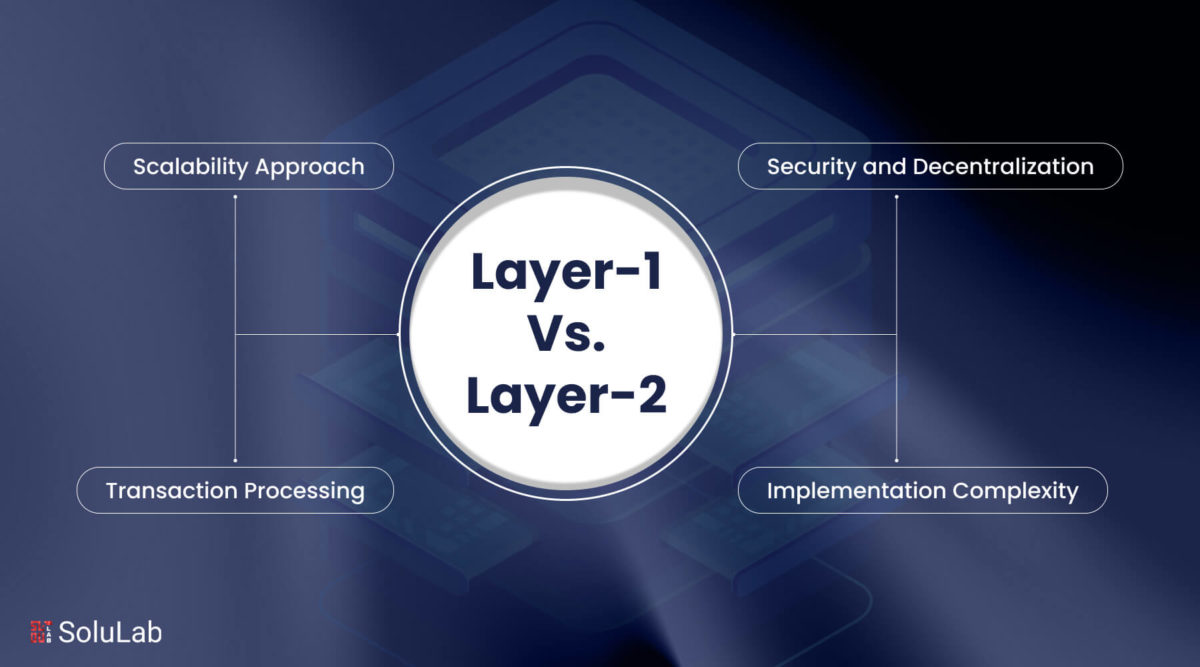
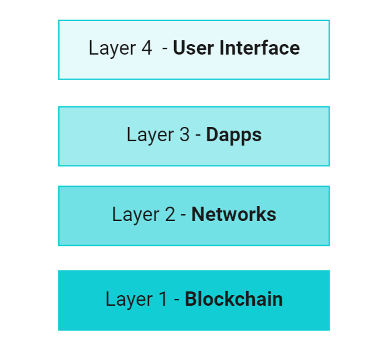
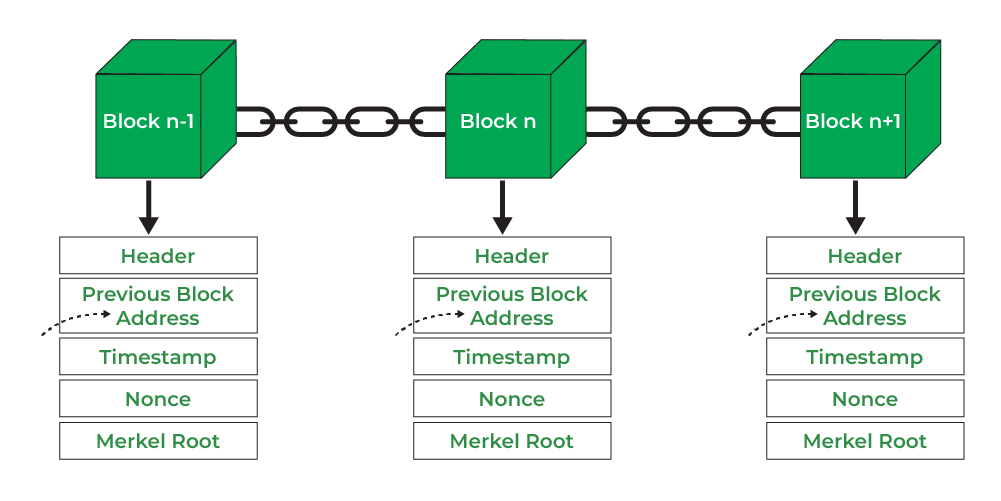
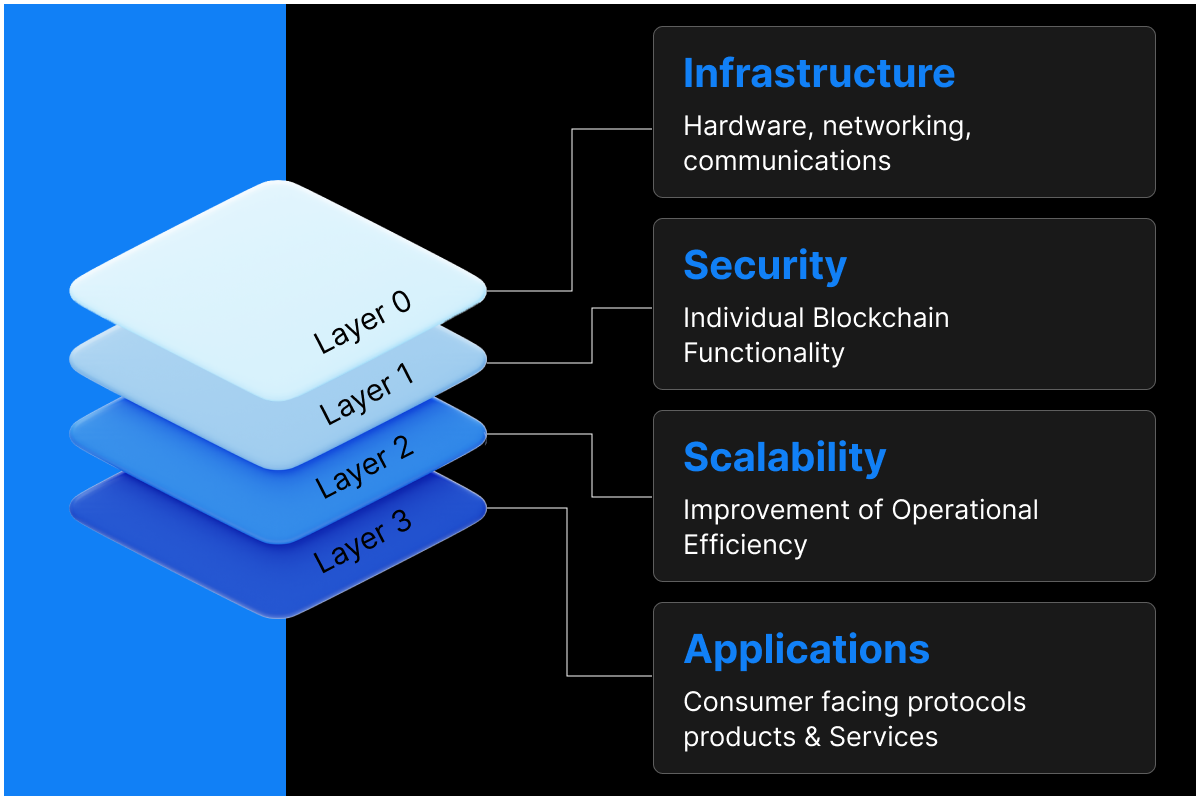
Layer 1 Vs Layer 2 Vs Layer 3 Blockchain Chart Diagram


:max_bytes(150000):strip_icc()/what-are-layer-1-and-layer-2-blockchain-scaling-solutions-7104877-final-6a3ee3188cad46d8b3d788588cab5ab0.png)


Drive innovation through substantial collections of industry-focused Layer 1 Vs Layer 2 Vs Layer 3 Blockchain Chart Diagram photographs. documenting production methods of computer, digital, and electronic. designed to support industrial communication. Discover high-resolution Layer 1 Vs Layer 2 Vs Layer 3 Blockchain Chart Diagram images optimized for various applications. Suitable for various applications including web design, social media, personal projects, and digital content creation All Layer 1 Vs Layer 2 Vs Layer 3 Blockchain Chart Diagram images are available in high resolution with professional-grade quality, optimized for both digital and print applications, and include comprehensive metadata for easy organization and usage. Explore the versatility of our Layer 1 Vs Layer 2 Vs Layer 3 Blockchain Chart Diagram collection for various creative and professional projects. Reliable customer support ensures smooth experience throughout the Layer 1 Vs Layer 2 Vs Layer 3 Blockchain Chart Diagram selection process. Advanced search capabilities make finding the perfect Layer 1 Vs Layer 2 Vs Layer 3 Blockchain Chart Diagram image effortless and efficient. Comprehensive tagging systems facilitate quick discovery of relevant Layer 1 Vs Layer 2 Vs Layer 3 Blockchain Chart Diagram content. Whether for commercial projects or personal use, our Layer 1 Vs Layer 2 Vs Layer 3 Blockchain Chart Diagram collection delivers consistent excellence. Multiple resolution options ensure optimal performance across different platforms and applications. Our Layer 1 Vs Layer 2 Vs Layer 3 Blockchain Chart Diagram database continuously expands with fresh, relevant content from skilled photographers.