


.jpg)


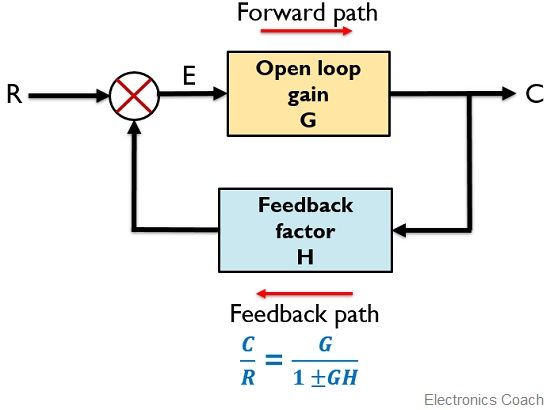
![Closed Loop Feedback Control Block Diagram [23] | Download Scientific ...](https://www.researchgate.net/publication/370980704/figure/fig5/AS:11431281160878811@1684895141228/Closed-Loop-Feedback-Control-Block-Diagram-23.png)


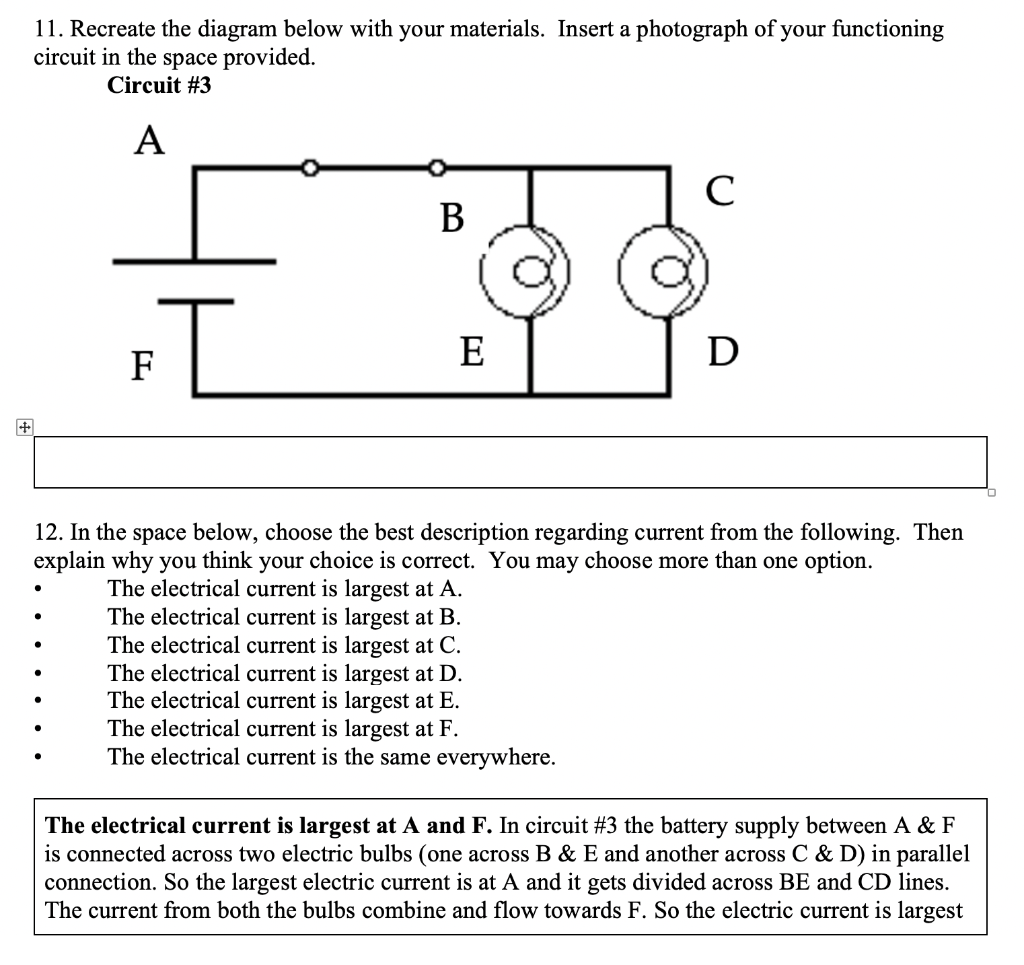
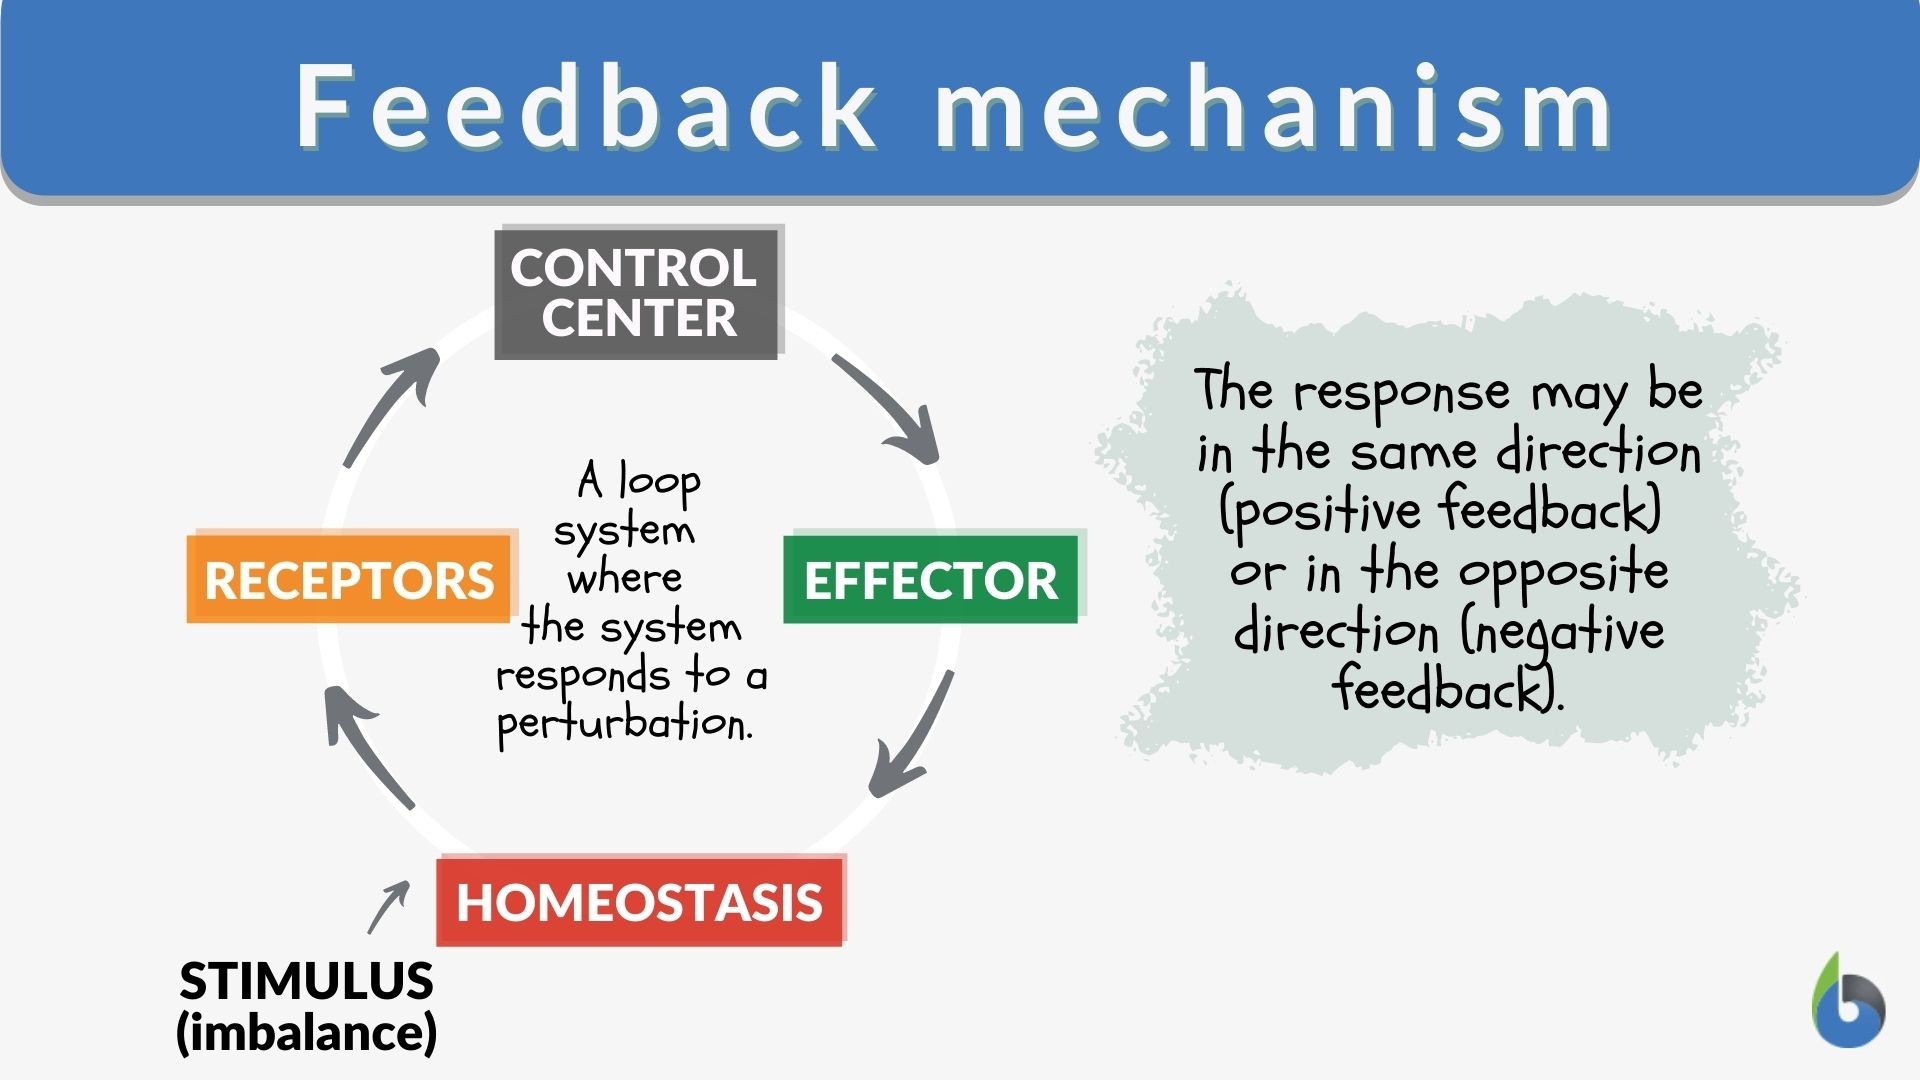
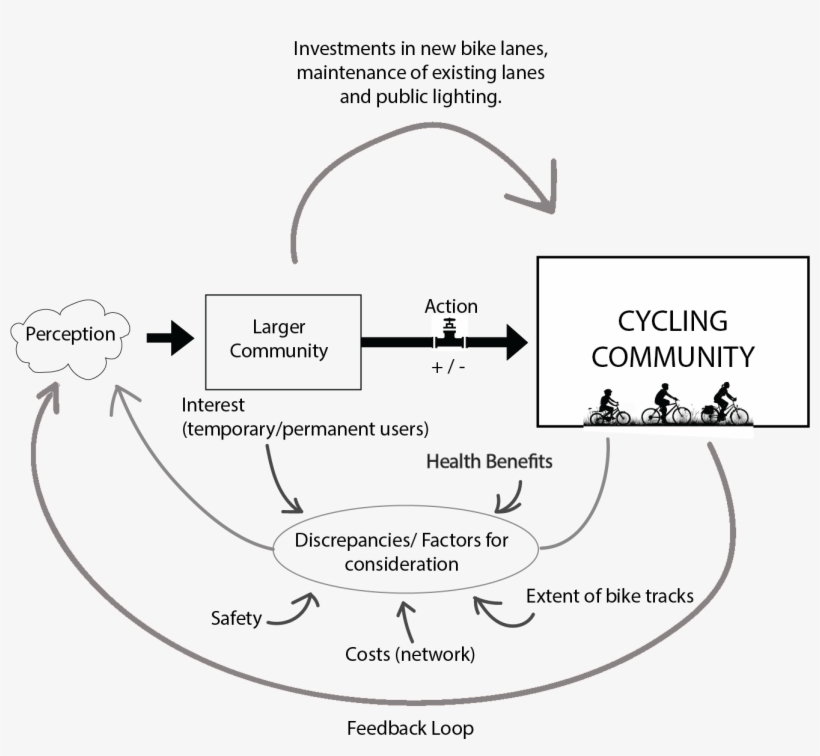
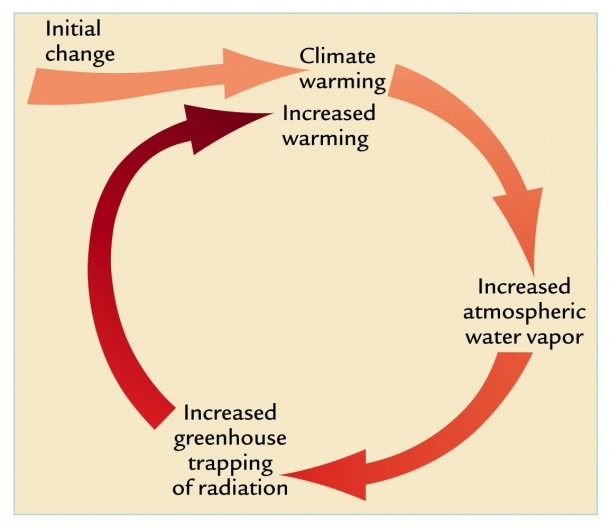


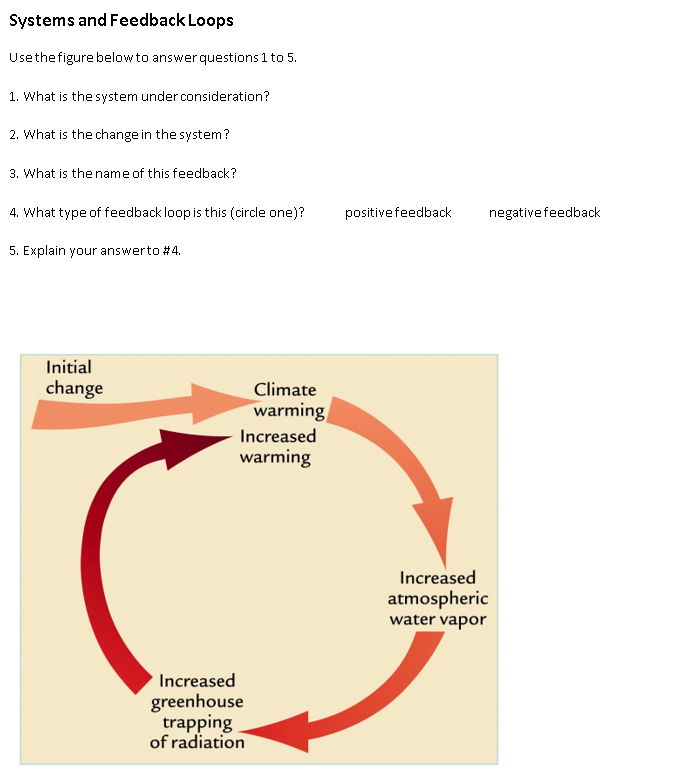
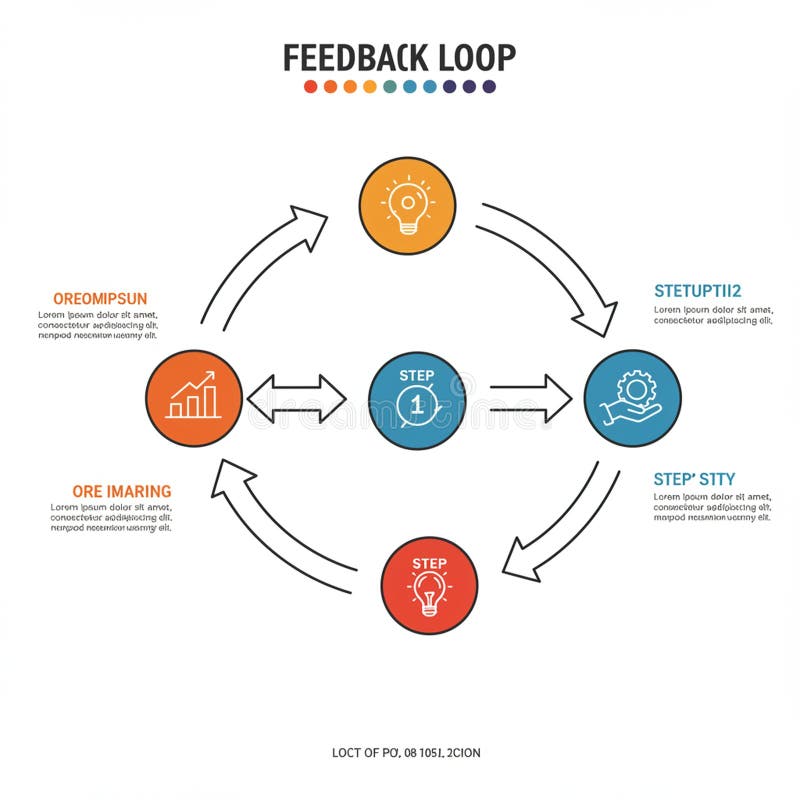
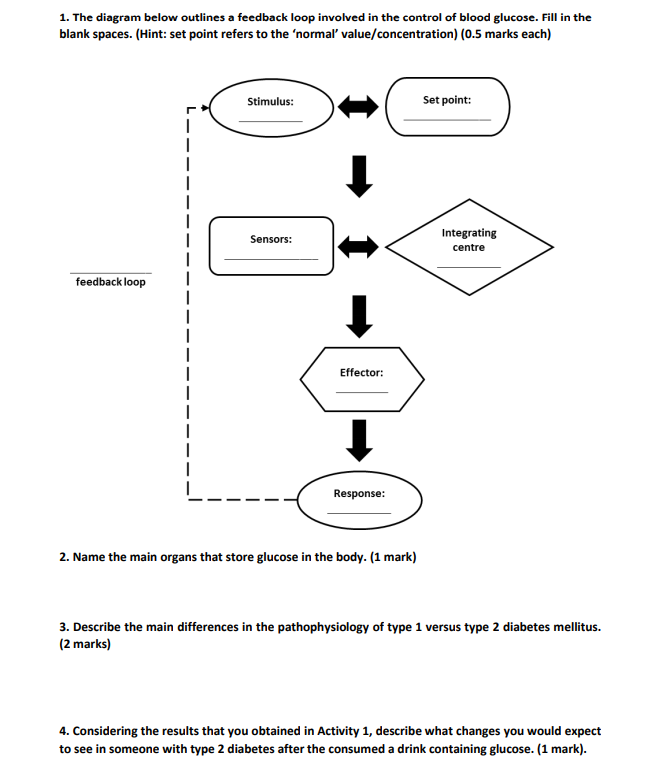
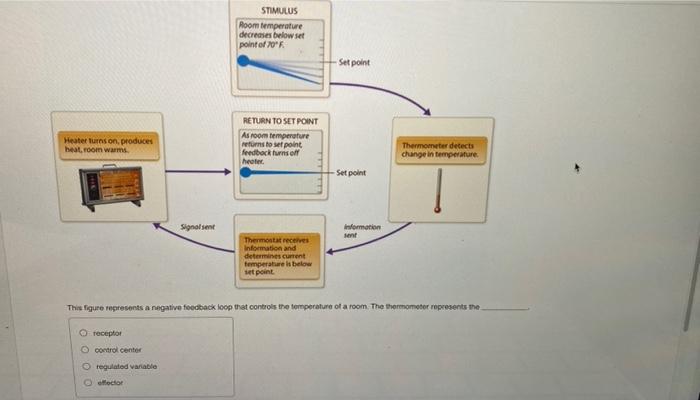
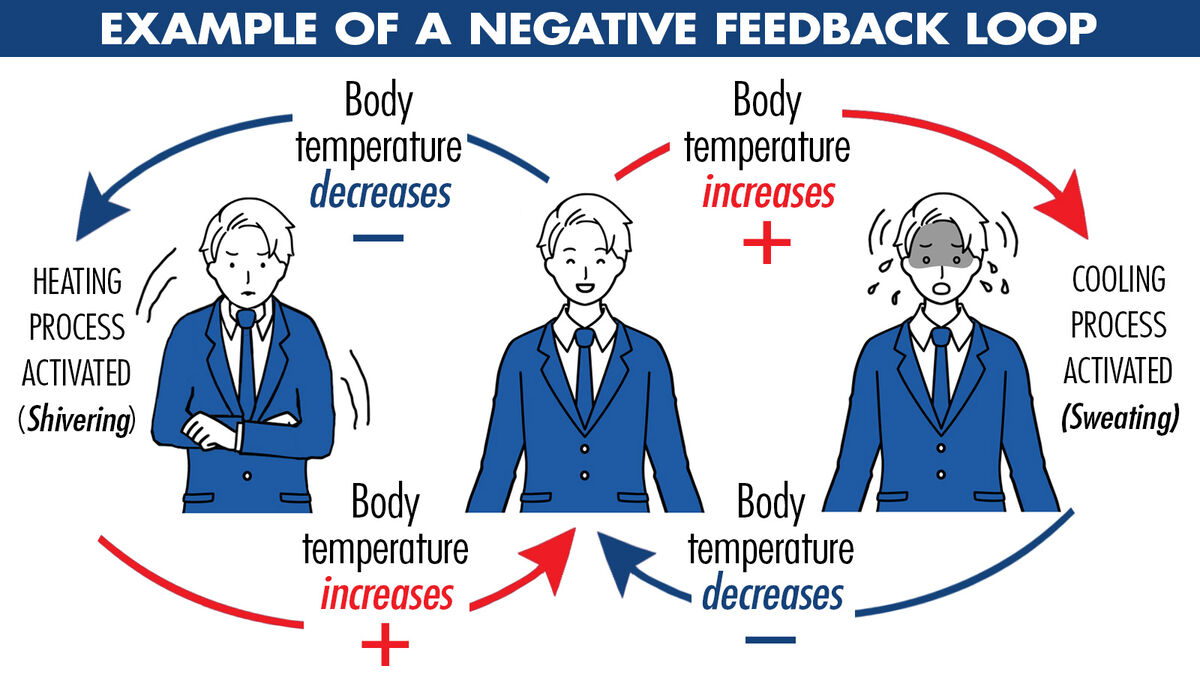
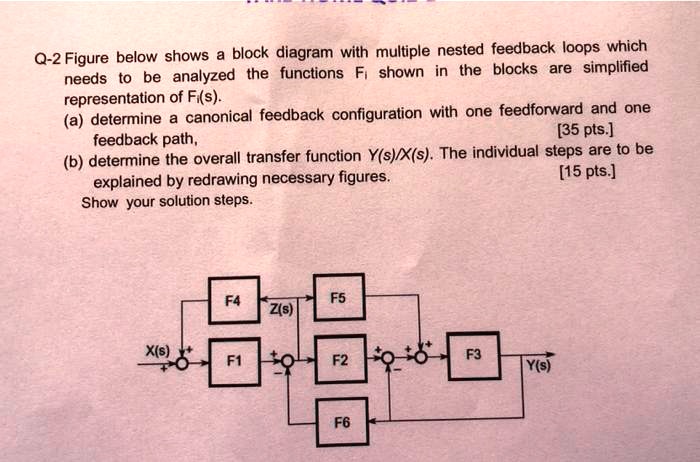
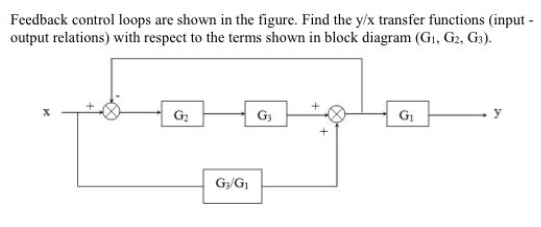
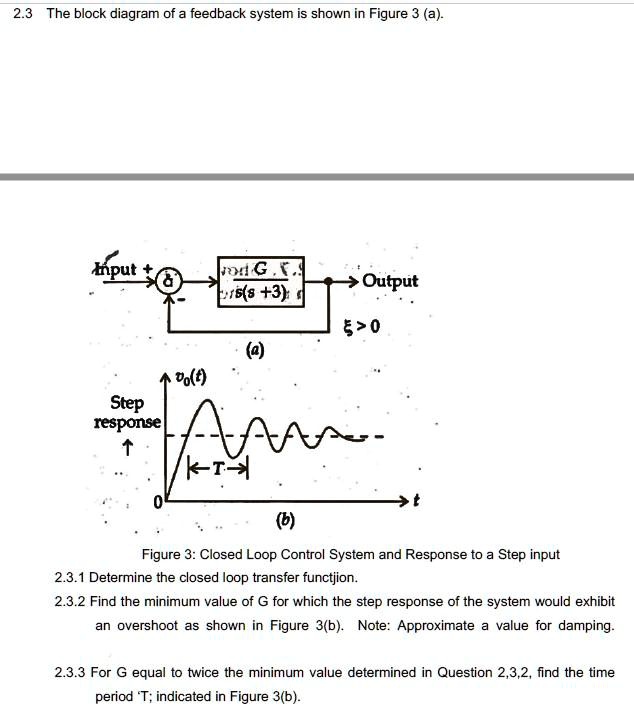
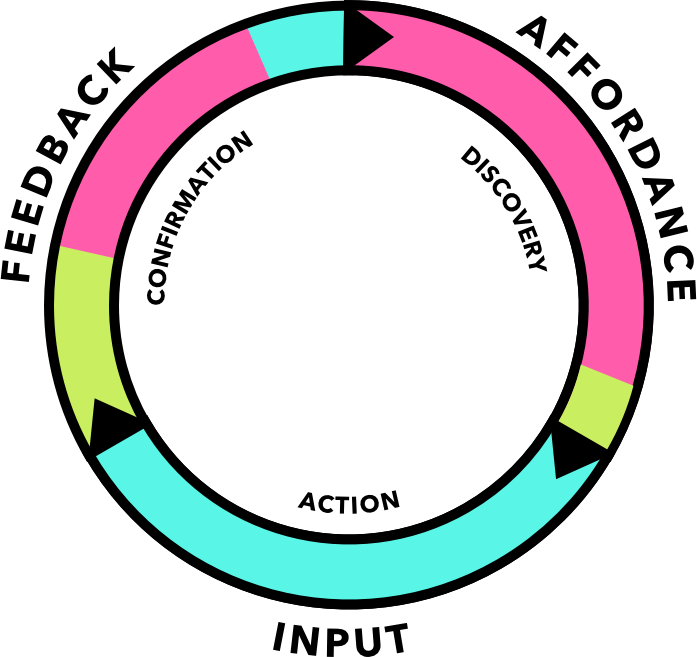
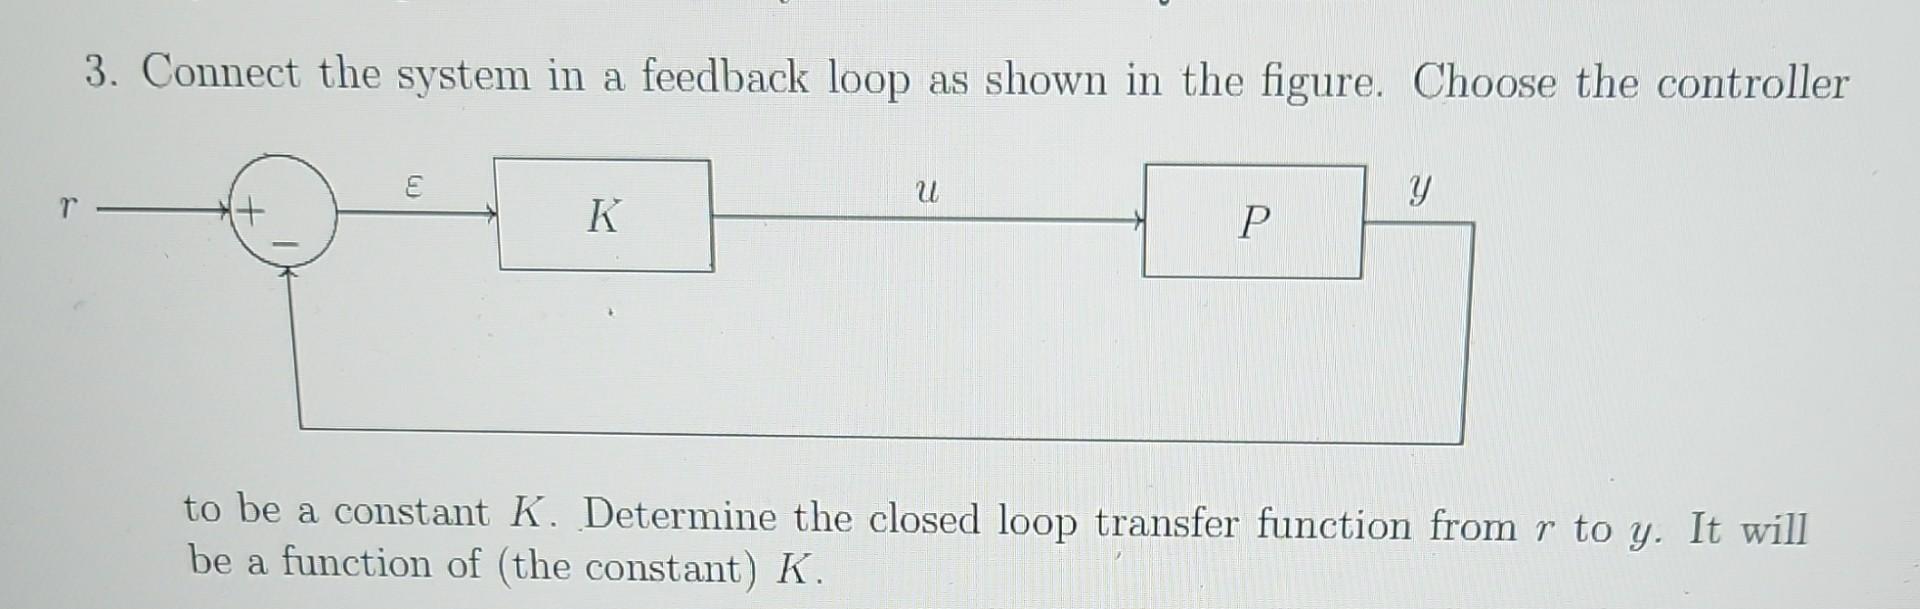
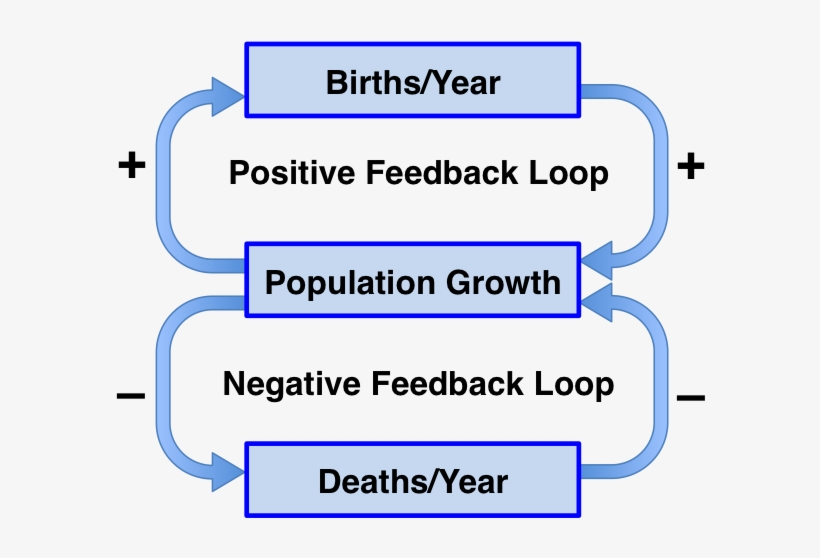
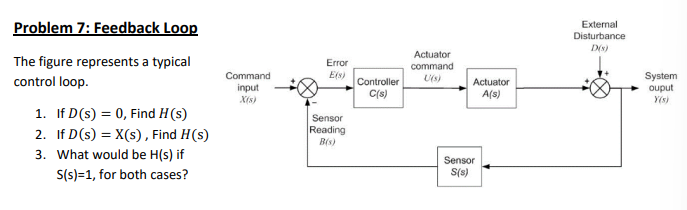
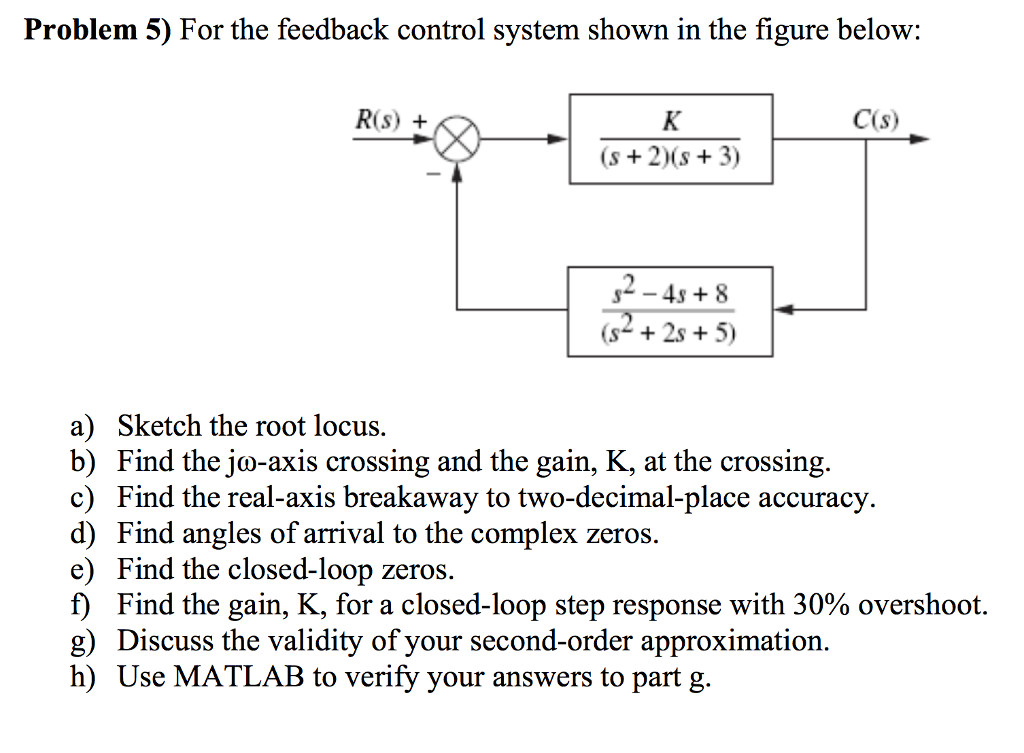
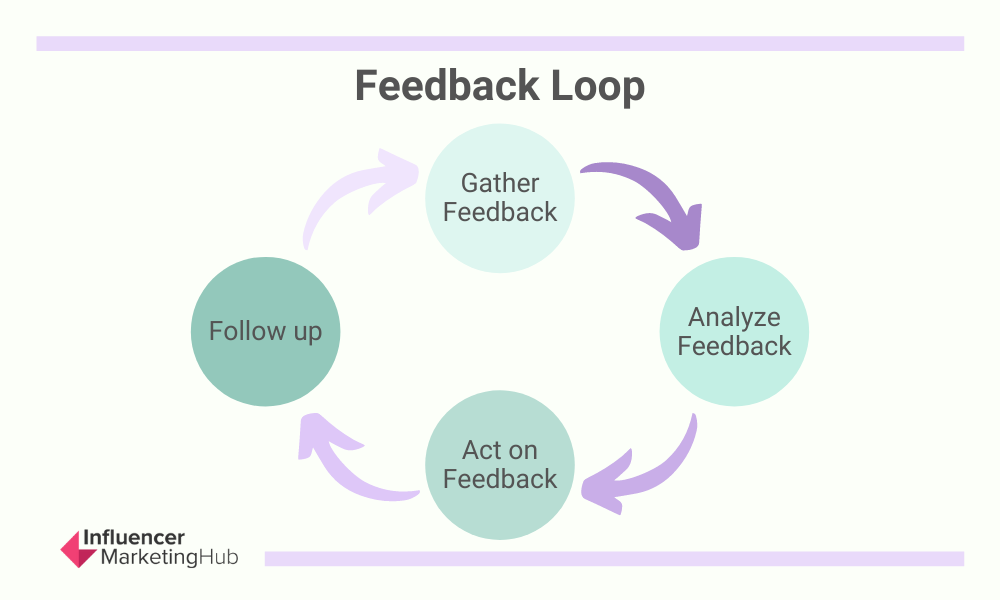
Create excitement through substantial collections of show-focused solved: recreate the feedback loop diagram pictured here. using the photographs. captivatingly presenting blue, green, and yellow. designed to captivate and engage audiences. Browse our premium solved: recreate the feedback loop diagram pictured here. using the gallery featuring professionally curated photographs. Suitable for various applications including web design, social media, personal projects, and digital content creation All solved: recreate the feedback loop diagram pictured here. using the images are available in high resolution with professional-grade quality, optimized for both digital and print applications, and include comprehensive metadata for easy organization and usage. Discover the perfect solved: recreate the feedback loop diagram pictured here. using the images to enhance your visual communication needs. The solved: recreate the feedback loop diagram pictured here. using the collection represents years of careful curation and professional standards. Instant download capabilities enable immediate access to chosen solved: recreate the feedback loop diagram pictured here. using the images. Our solved: recreate the feedback loop diagram pictured here. using the database continuously expands with fresh, relevant content from skilled photographers. Reliable customer support ensures smooth experience throughout the solved: recreate the feedback loop diagram pictured here. using the selection process. Diverse style options within the solved: recreate the feedback loop diagram pictured here. using the collection suit various aesthetic preferences.