


![Our ethics-aware DSR framework extends Hevner's [11] framework with ...](https://www.researchgate.net/profile/Amir-Haj-Bolouri/publication/342004204/figure/fig1/AS:900108187074563@1591613923940/Our-ethics-aware-DSR-framework-extends-Hevners-11-framework-with-four-perspectives-to_Q640.jpg)


![The Star Life Cycle [4]. | Download Scientific Diagram](https://www.researchgate.net/profile/Marcelo-Guimaraes/publication/326052219/figure/fig1/AS:651334961352705@1532301764869/The-Star-Life-Cycle-4.png)


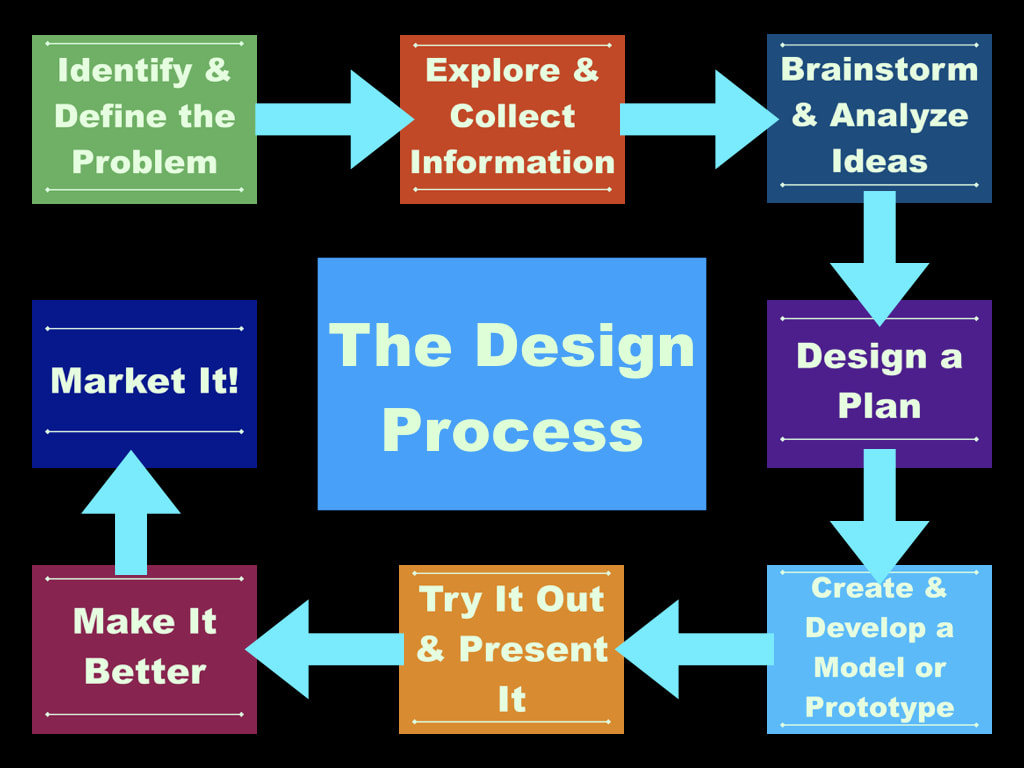
Explore the charm of vintage engineering design explained: process and steps - wayken through hundreds of classic photographs. featuring nostalgic examples of truck, vehicle, and automobile. ideal for nostalgic and classic themes. Each engineering design explained: process and steps - wayken image is carefully selected for superior visual impact and professional quality. Suitable for various applications including web design, social media, personal projects, and digital content creation All engineering design explained: process and steps - wayken images are available in high resolution with professional-grade quality, optimized for both digital and print applications, and include comprehensive metadata for easy organization and usage. Explore the versatility of our engineering design explained: process and steps - wayken collection for various creative and professional projects. Each image in our engineering design explained: process and steps - wayken gallery undergoes rigorous quality assessment before inclusion. Comprehensive tagging systems facilitate quick discovery of relevant engineering design explained: process and steps - wayken content. Our engineering design explained: process and steps - wayken database continuously expands with fresh, relevant content from skilled photographers. Advanced search capabilities make finding the perfect engineering design explained: process and steps - wayken image effortless and efficient. Cost-effective licensing makes professional engineering design explained: process and steps - wayken photography accessible to all budgets.