


![LeetCode Explained - Two Sum [SIMPLE SOLUTION] - YouTube](https://i.ytimg.com/vi/MJ2Y2V9Dvdg/maxresdefault.jpg)
![Two Sum Solution [LeetCode 1] | ION HowTo](https://www.ionhowto.com/wp-content/uploads/2021/07/Two-Sum-Solution-LeetCode-1-444x230.png)


![[Leetcode] Two Sum - Coding Memo - Medium](https://miro.medium.com/max/618/1*DbC9IlHCzcxGvd0Ldyg0pA.png)


+%7B+sum%2B%3Dn%3B+%7D+cout+%3C%3C+sum%3B.jpg)


![[Leetcode] - Two Sum Solution – with Video Example – Study Algorithms](https://studyalgorithms.com/wp-content/uploads/2021/01/Screenshot-2021-01-10-040524-300x168.png)


![[Leetcode] - Two Sum Solution – with Video Example – Study Algorithms](https://i0.wp.com/studyalgorithms.com/wp-content/uploads/2021/01/Screenshot-2021-01-10-040039.png?resize=1536%2C1013&ssl=1)


![[Leetcode] - Two Sum Solution – with Video Example – Study Algorithms](https://i0.wp.com/studyalgorithms.com/wp-content/uploads/2021/01/Screenshot-2021-01-10-040252.png?resize=1024%2C672&ssl=1)


+%7B+int+sum%3D0%3B+for+(int+i%3D0%3Bi%3Cnum%3Bi%2B%2B)+sum%2B%3Dgrades[i]%3B+return+sum*1.0/num%3B+%7D.jpg)


+r%3Dsum%3C%3C2%3B+sum%2B%3Di%3B+sum%3D0%3B.jpg)


.jpg)


+sum+%3D+0%3B+for+(i%3D1%3Bi%3Cn%3Bi%3Di*2)+sum+%3D+sum%2B1%3B+i+sum.jpg)


![LeetCode 1. [easy] Two Sum - YouTube](https://i.ytimg.com/vi/Ib_E7qQ03_Q/hqdefault.jpg)


![LeetCode #1 [Two Sum] In C Language Solutions - YouTube](https://i.ytimg.com/vi/KeDD1Y4lgEQ/maxresdefault.jpg?sqp=-oaymwEmCIAKENAF8quKqQMa8AEB-AH-CYACpAWKAgwIABABGCkgUSh_MA8=&rs=AOn4CLDxq6CoQLgb52PrzJL_3DcLq0903Q)


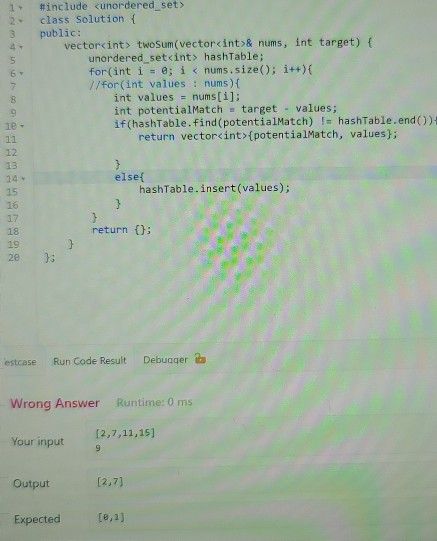
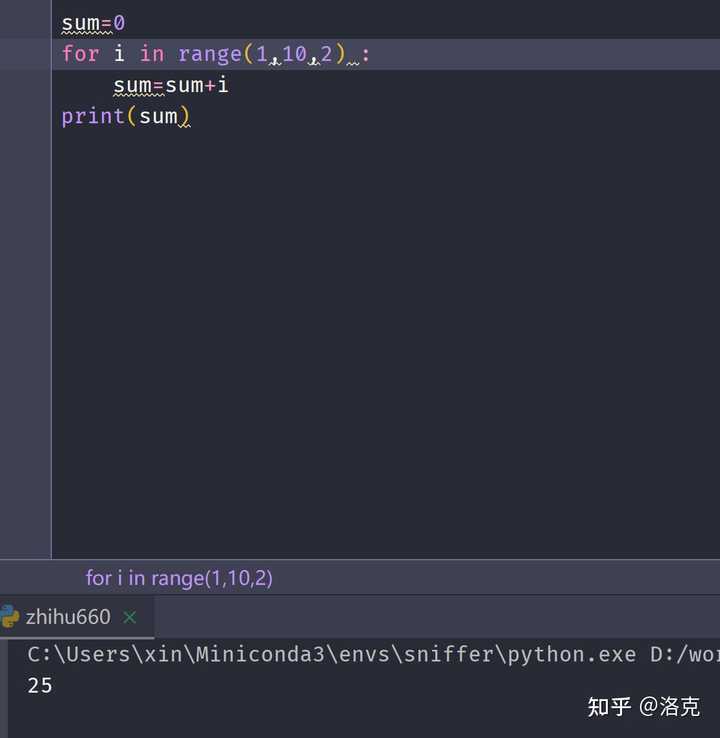
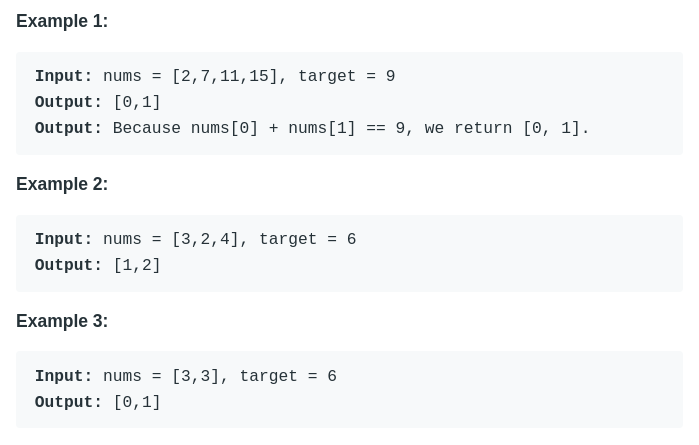
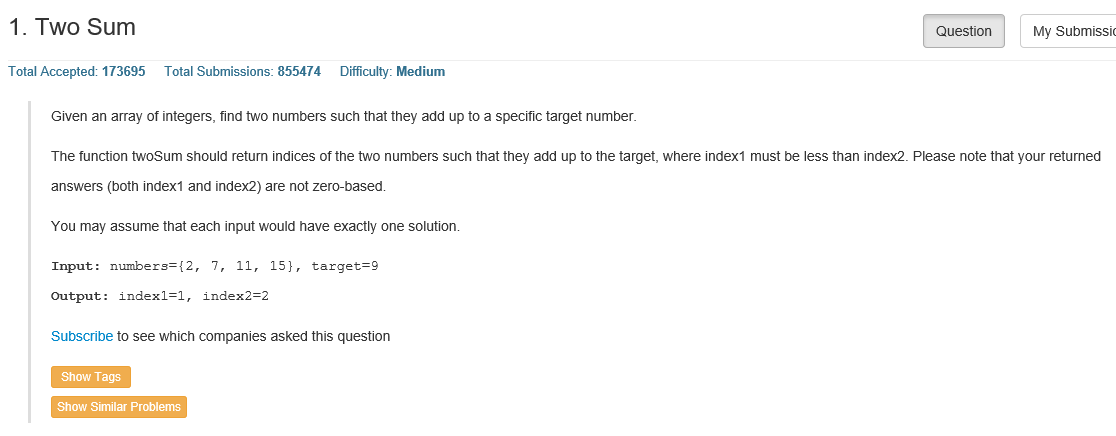
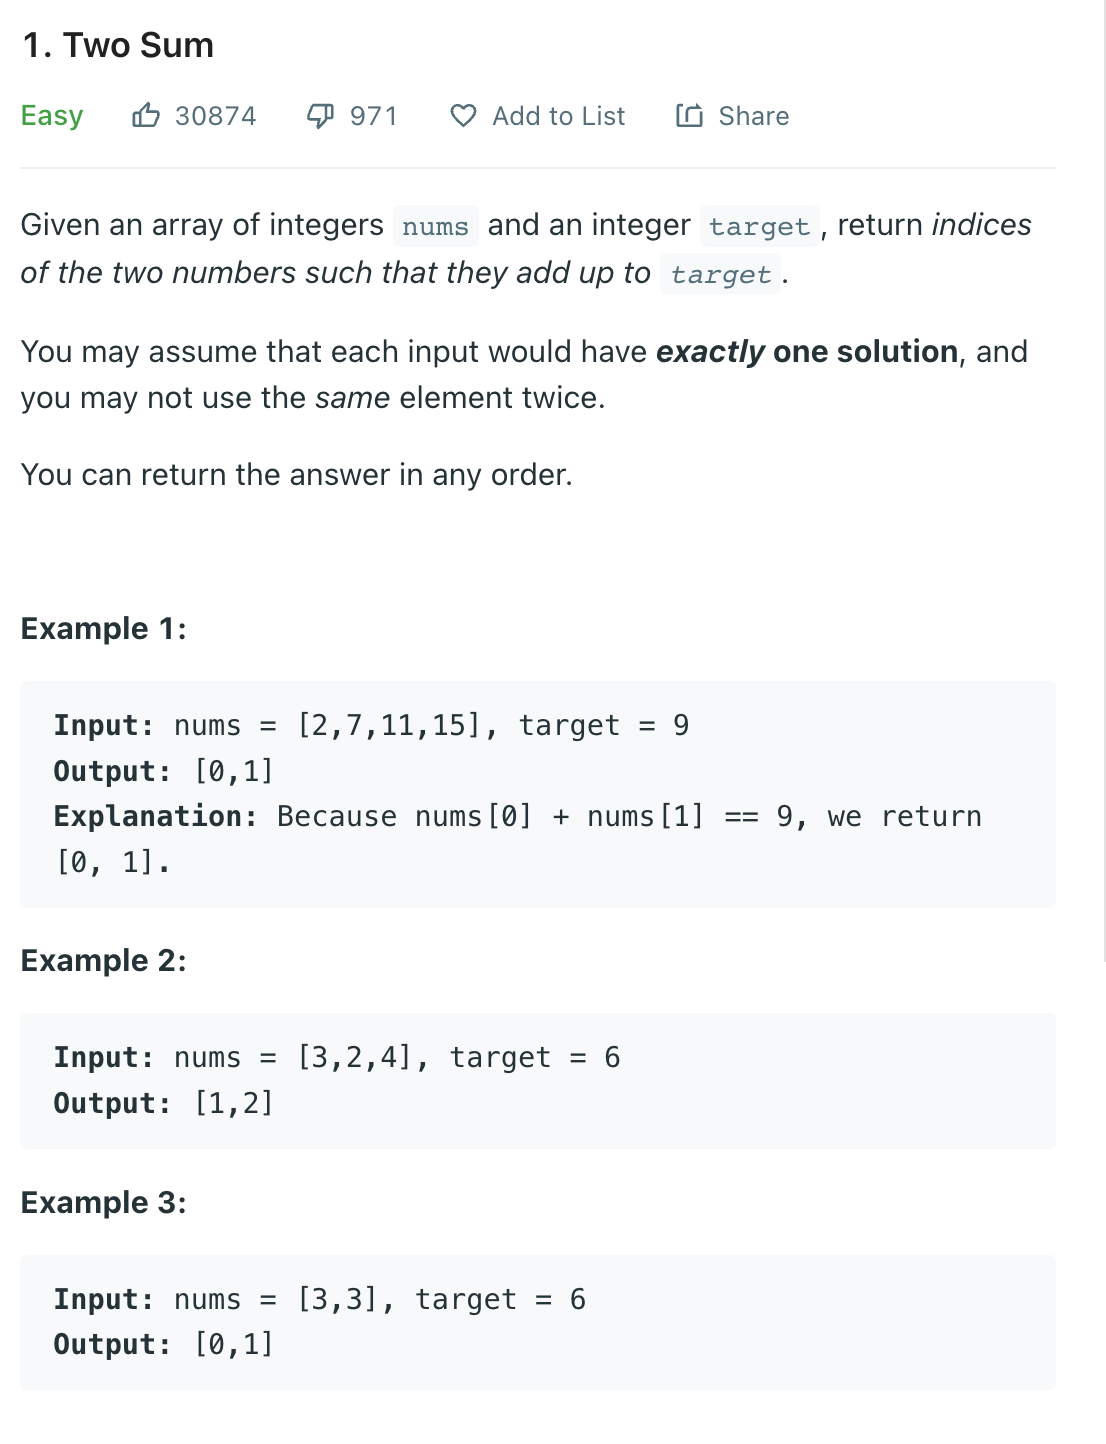
Learn about two sum | leetcode 1 | explained with images through our educational collection of vast arrays of instructional images. enhancing knowledge retention through engaging and informative imagery. encouraging critical thinking and analytical skill development. The two sum | leetcode 1 | explained with images collection maintains consistent quality standards across all images. Excellent for educational materials, academic research, teaching resources, and learning activities All two sum | leetcode 1 | explained with images are available in high resolution with professional-grade quality, optimized for both digital and print applications, and include comprehensive metadata for easy organization and usage. Our two sum | leetcode 1 | explained with images support learning objectives across diverse educational environments. Reliable customer support ensures smooth experience throughout the two sum | leetcode 1 | explained with images selection process. Time-saving browsing features help users locate ideal two sum | leetcode 1 | explained with images images quickly. Each image in our two sum | leetcode 1 | explained with images gallery undergoes rigorous quality assessment before inclusion. Whether for commercial projects or personal use, our two sum | leetcode 1 | explained with images collection delivers consistent excellence. Cost-effective licensing makes professional two sum | leetcode 1 | explained with images photography accessible to all budgets. Comprehensive tagging systems facilitate quick discovery of relevant two sum | leetcode 1 | explained with images content.