


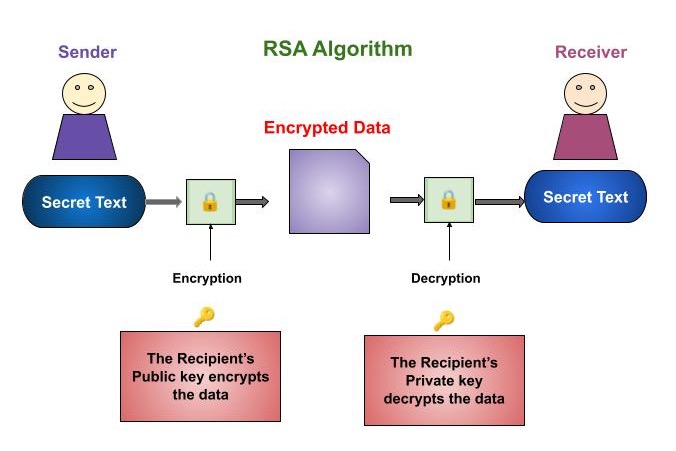


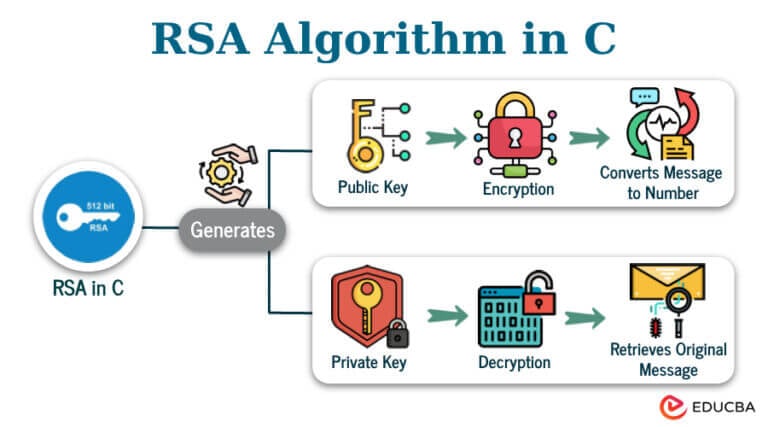
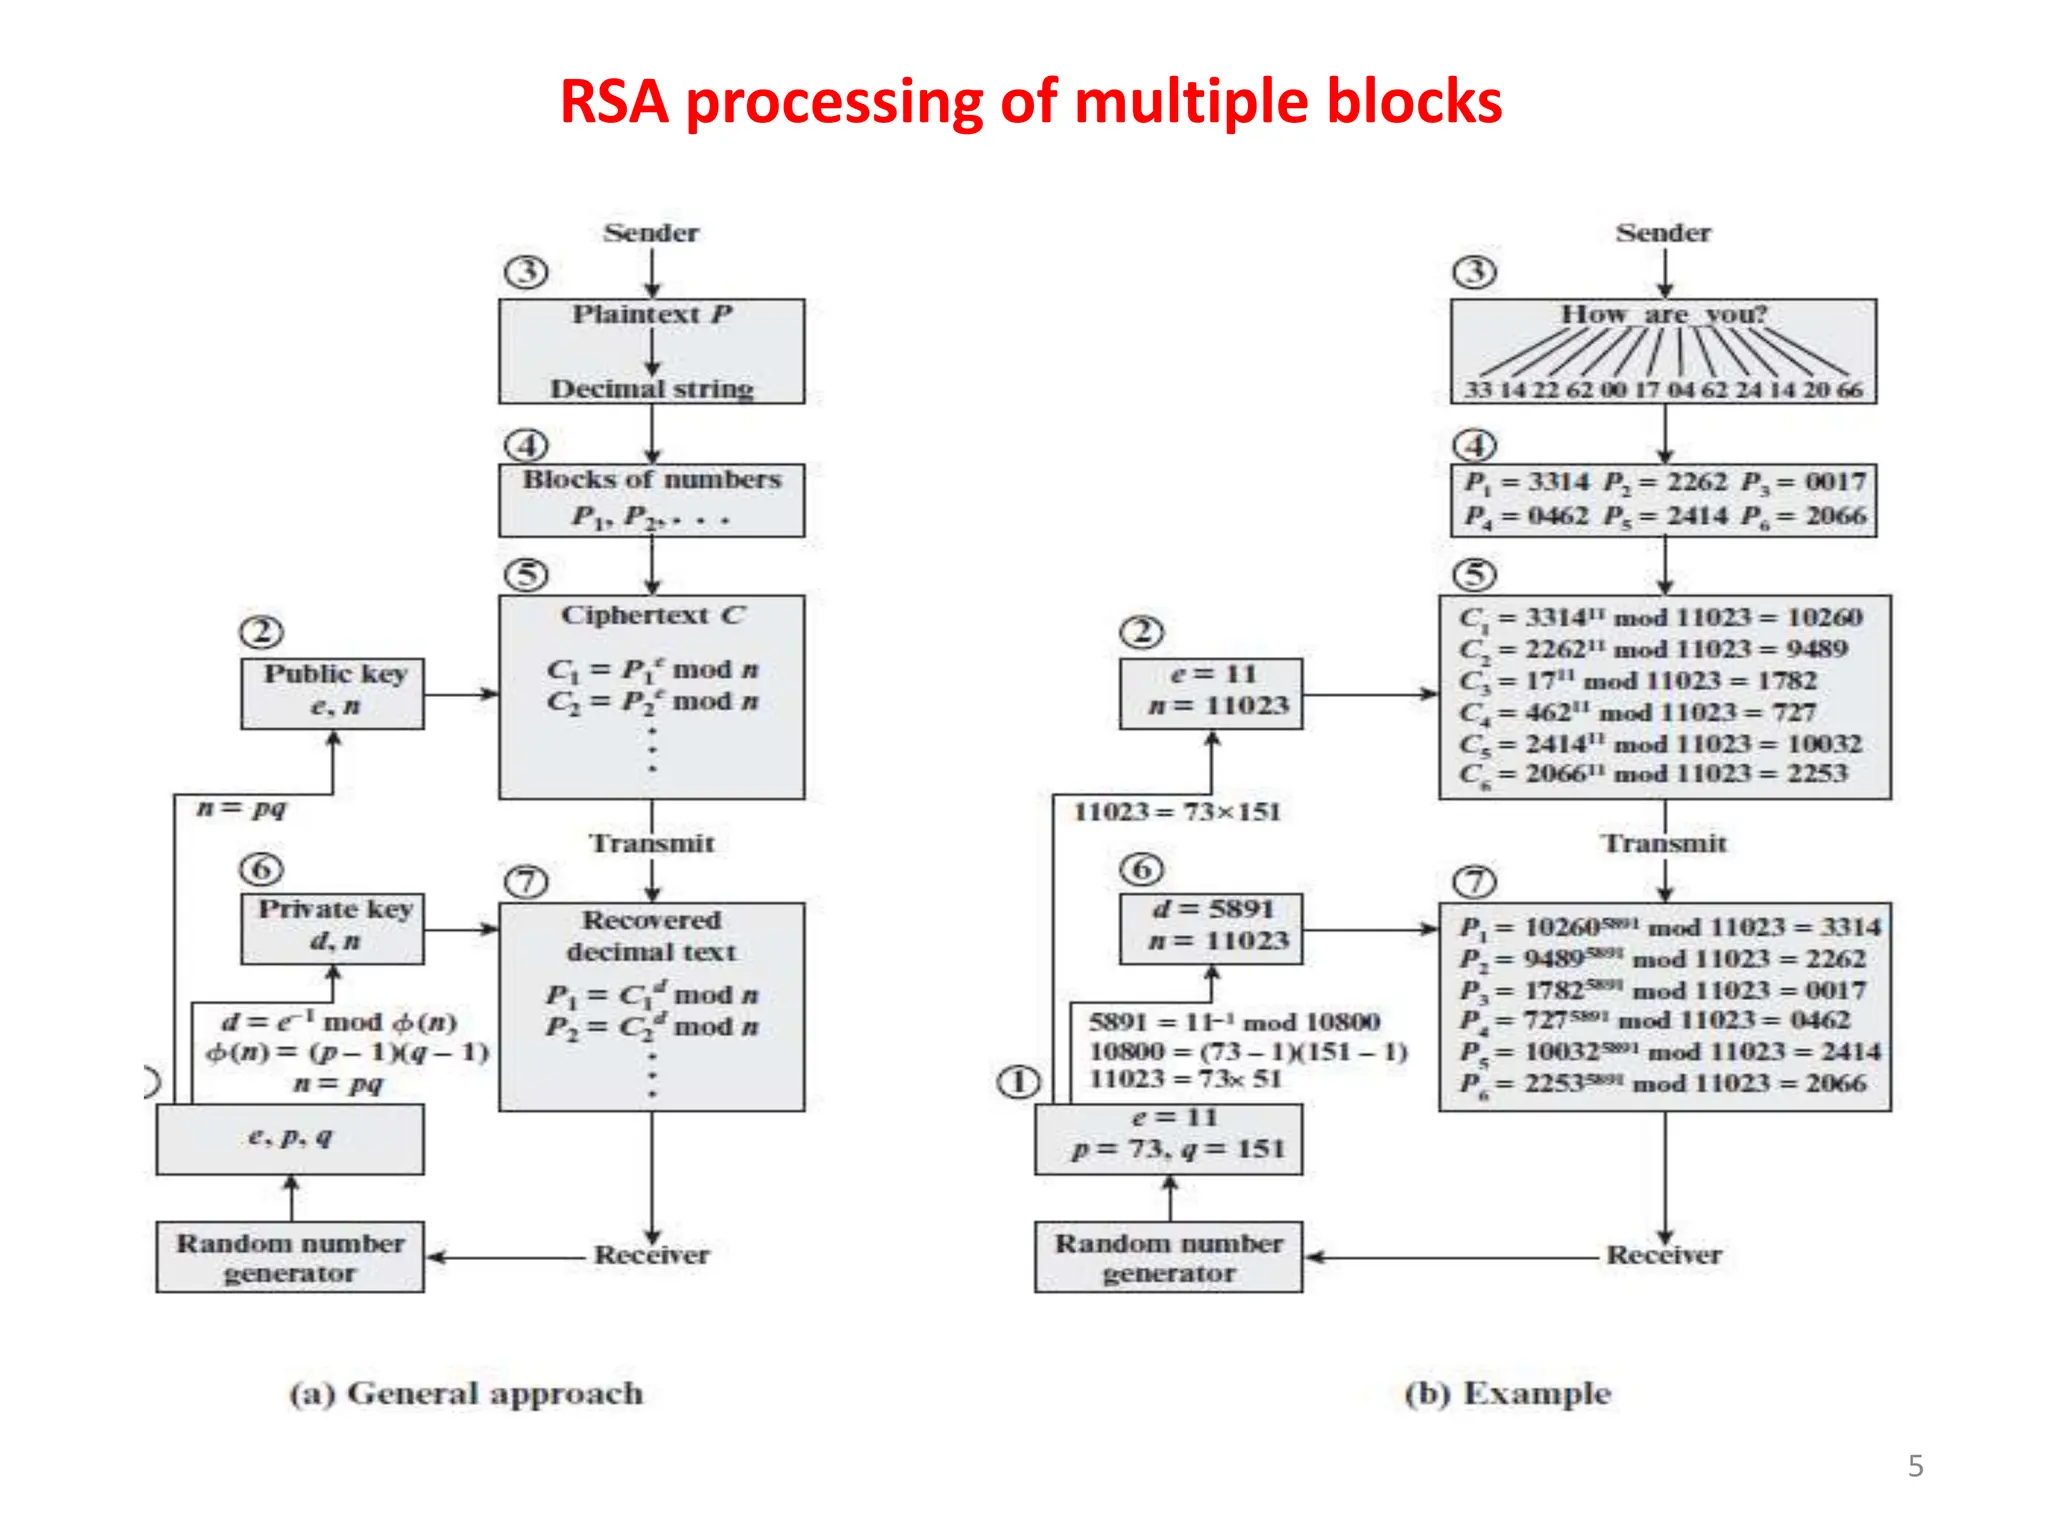
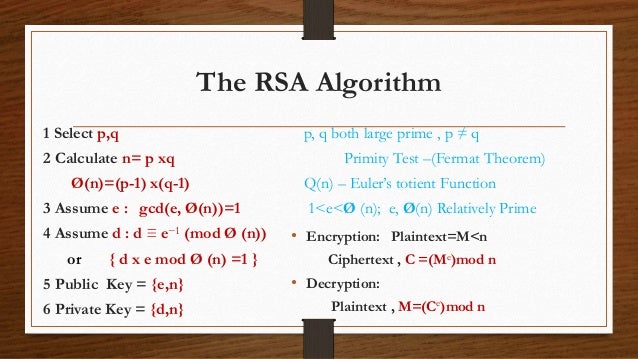
![12: A Flowchart of RSA Algorithm [31]. | Download Scientific Diagram](https://www.researchgate.net/publication/339999643/figure/fig11/AS:870377811103758@1584525649502/A-Flowchart-of-RSA-Algorithm-31.png)


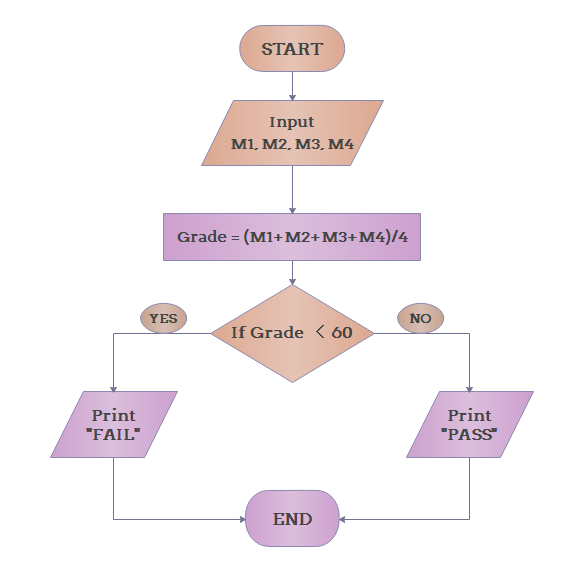
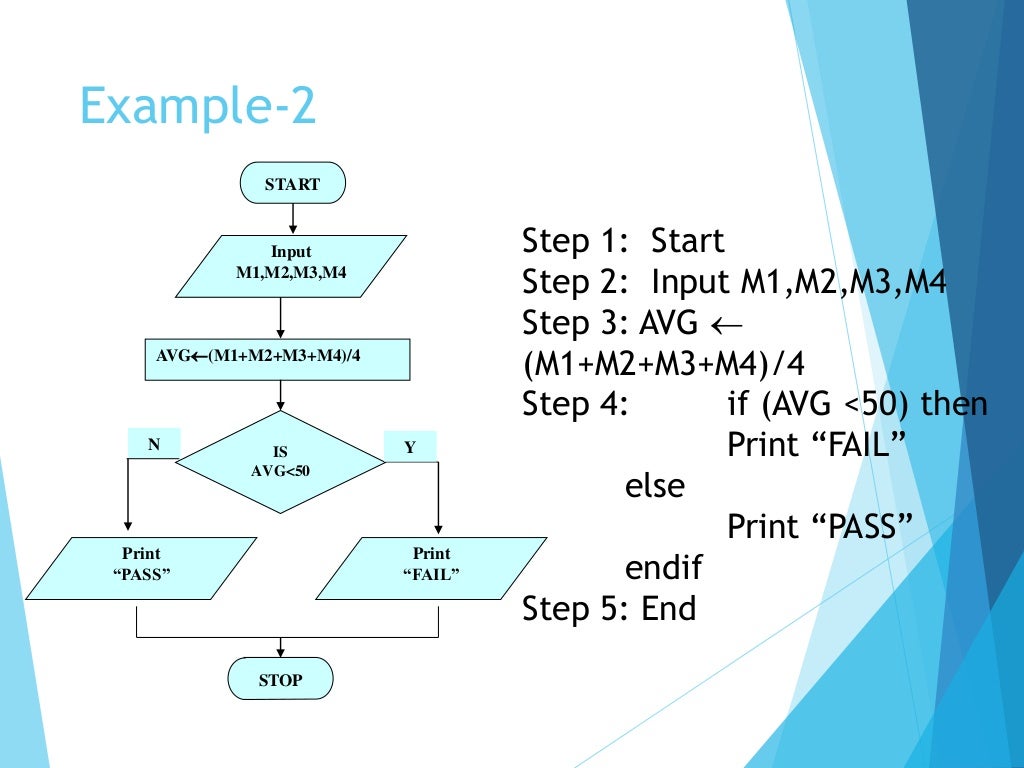
![[DIAGRAM] Firefly Algorithm Diagram - WIRINGSCHEMA.COM](https://www.edrawsoft.com/flowchart/images/algorithm-flowchart-example2.png)


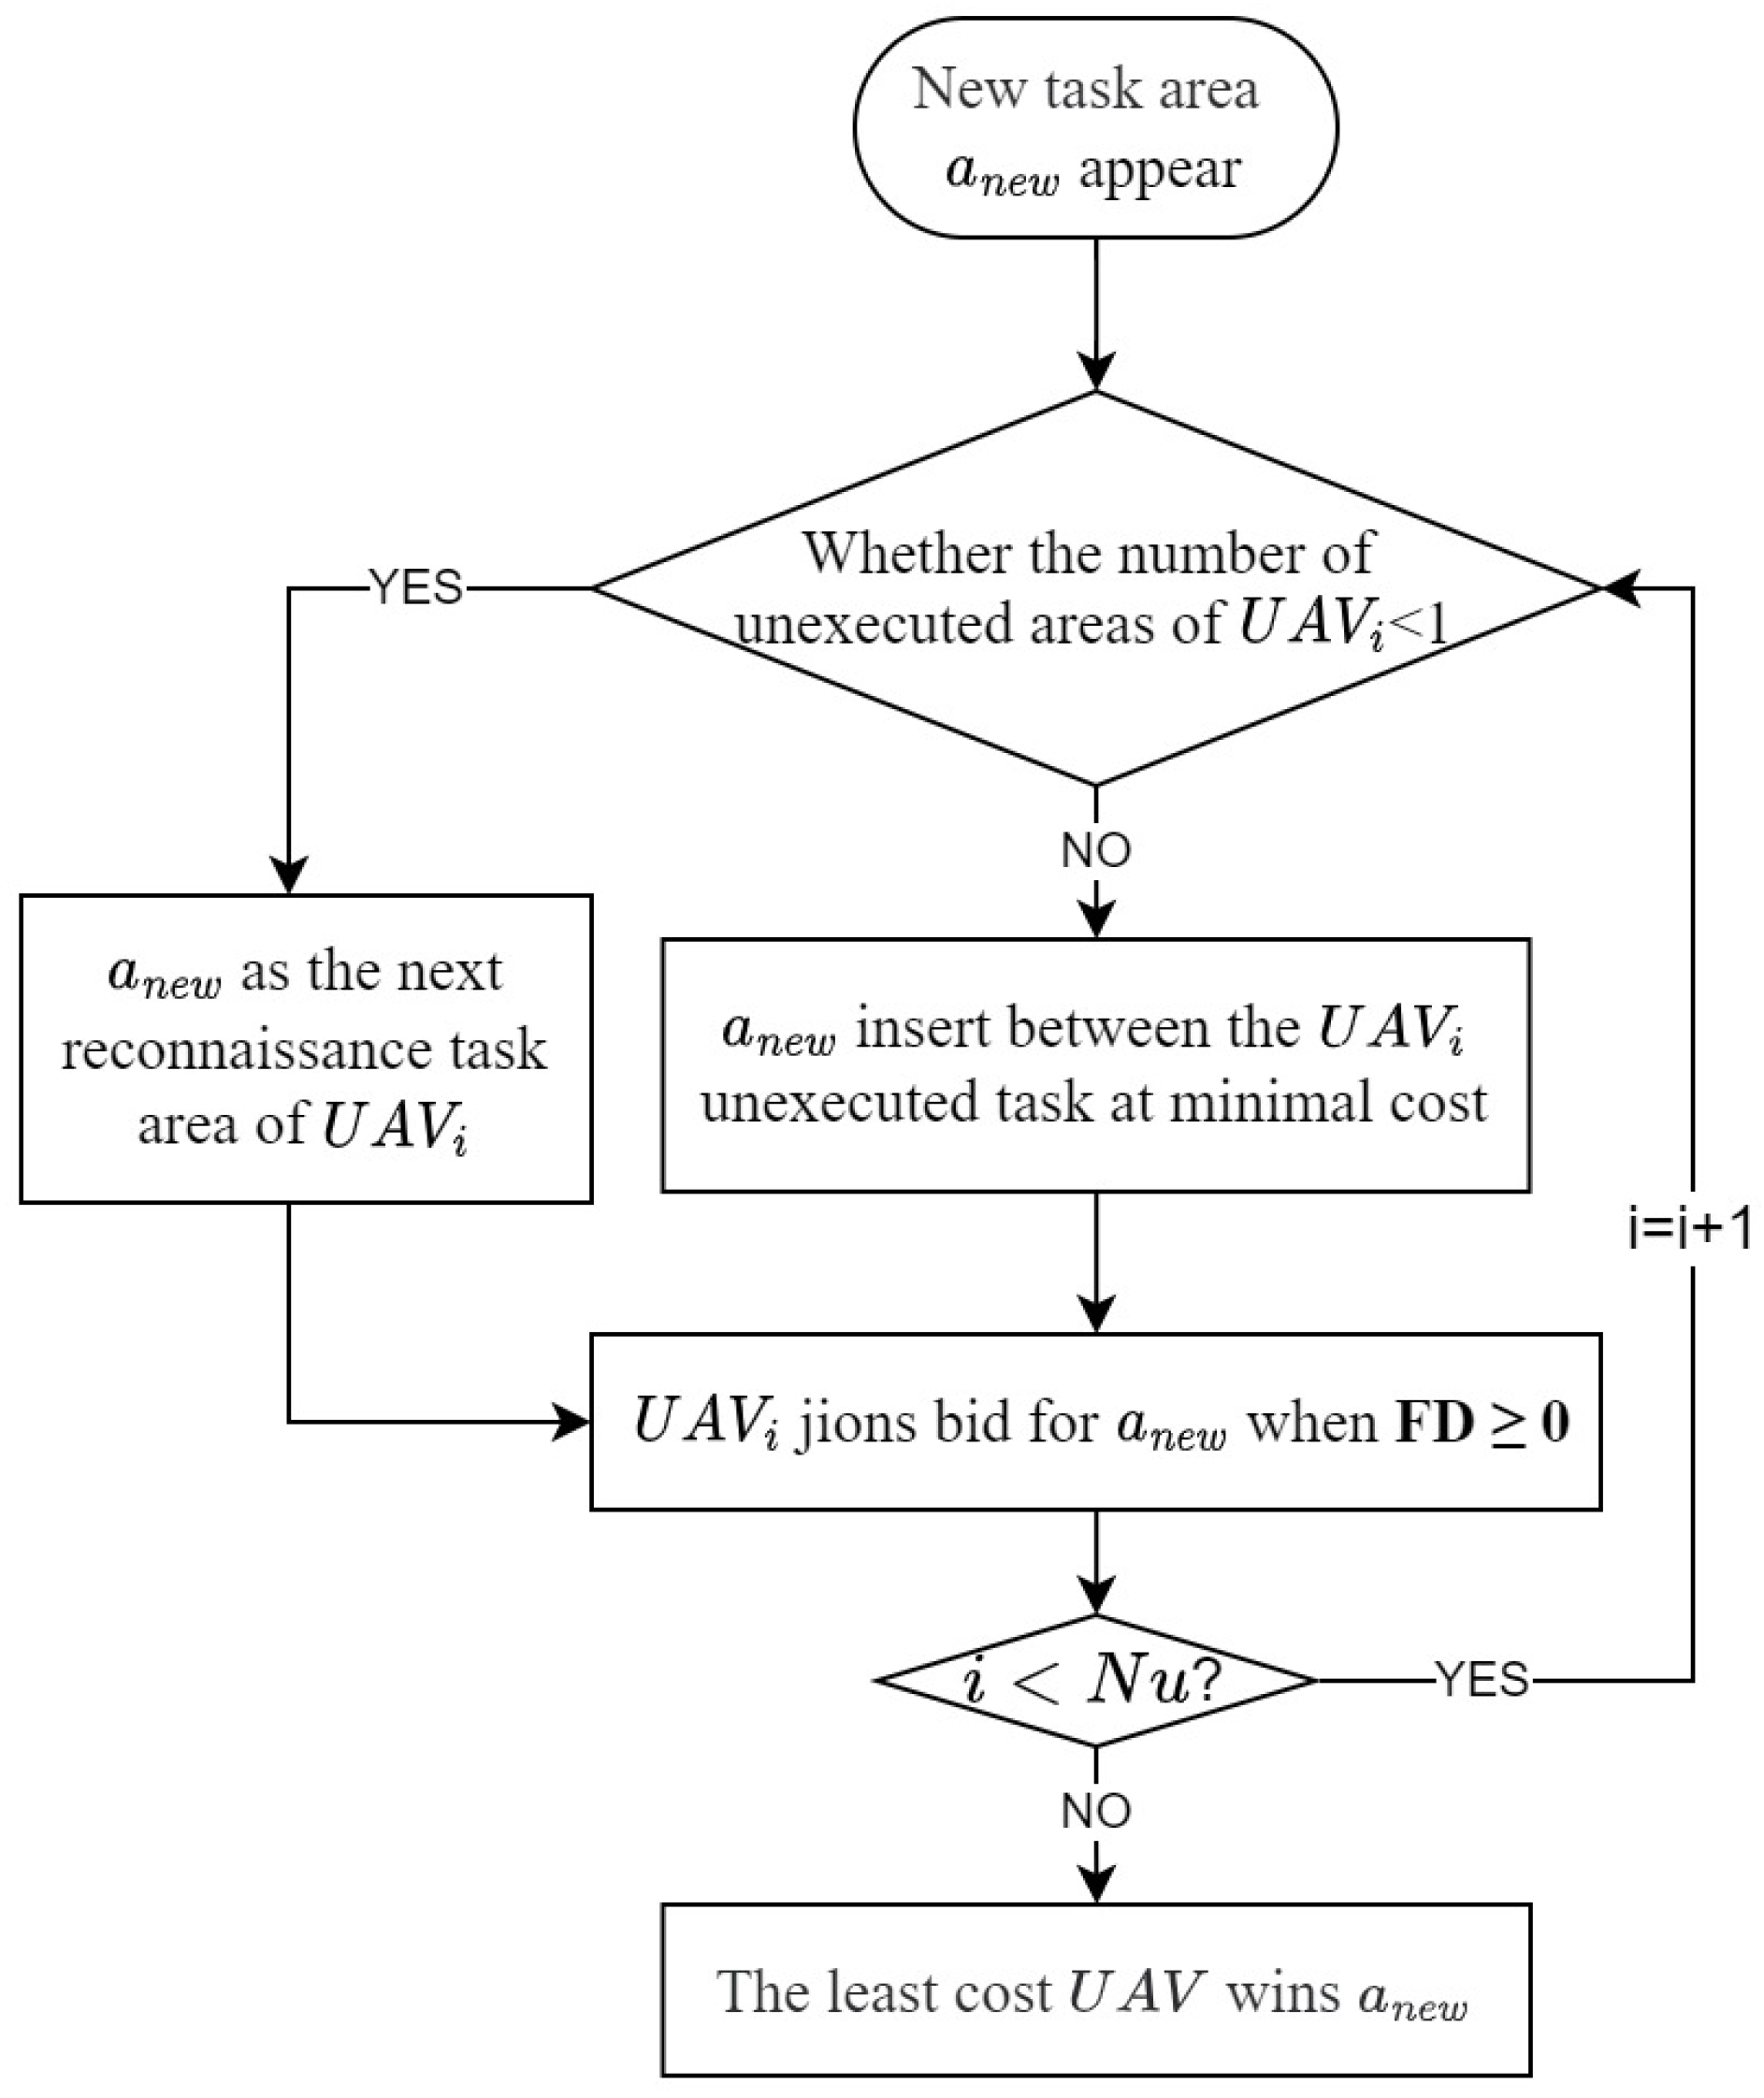


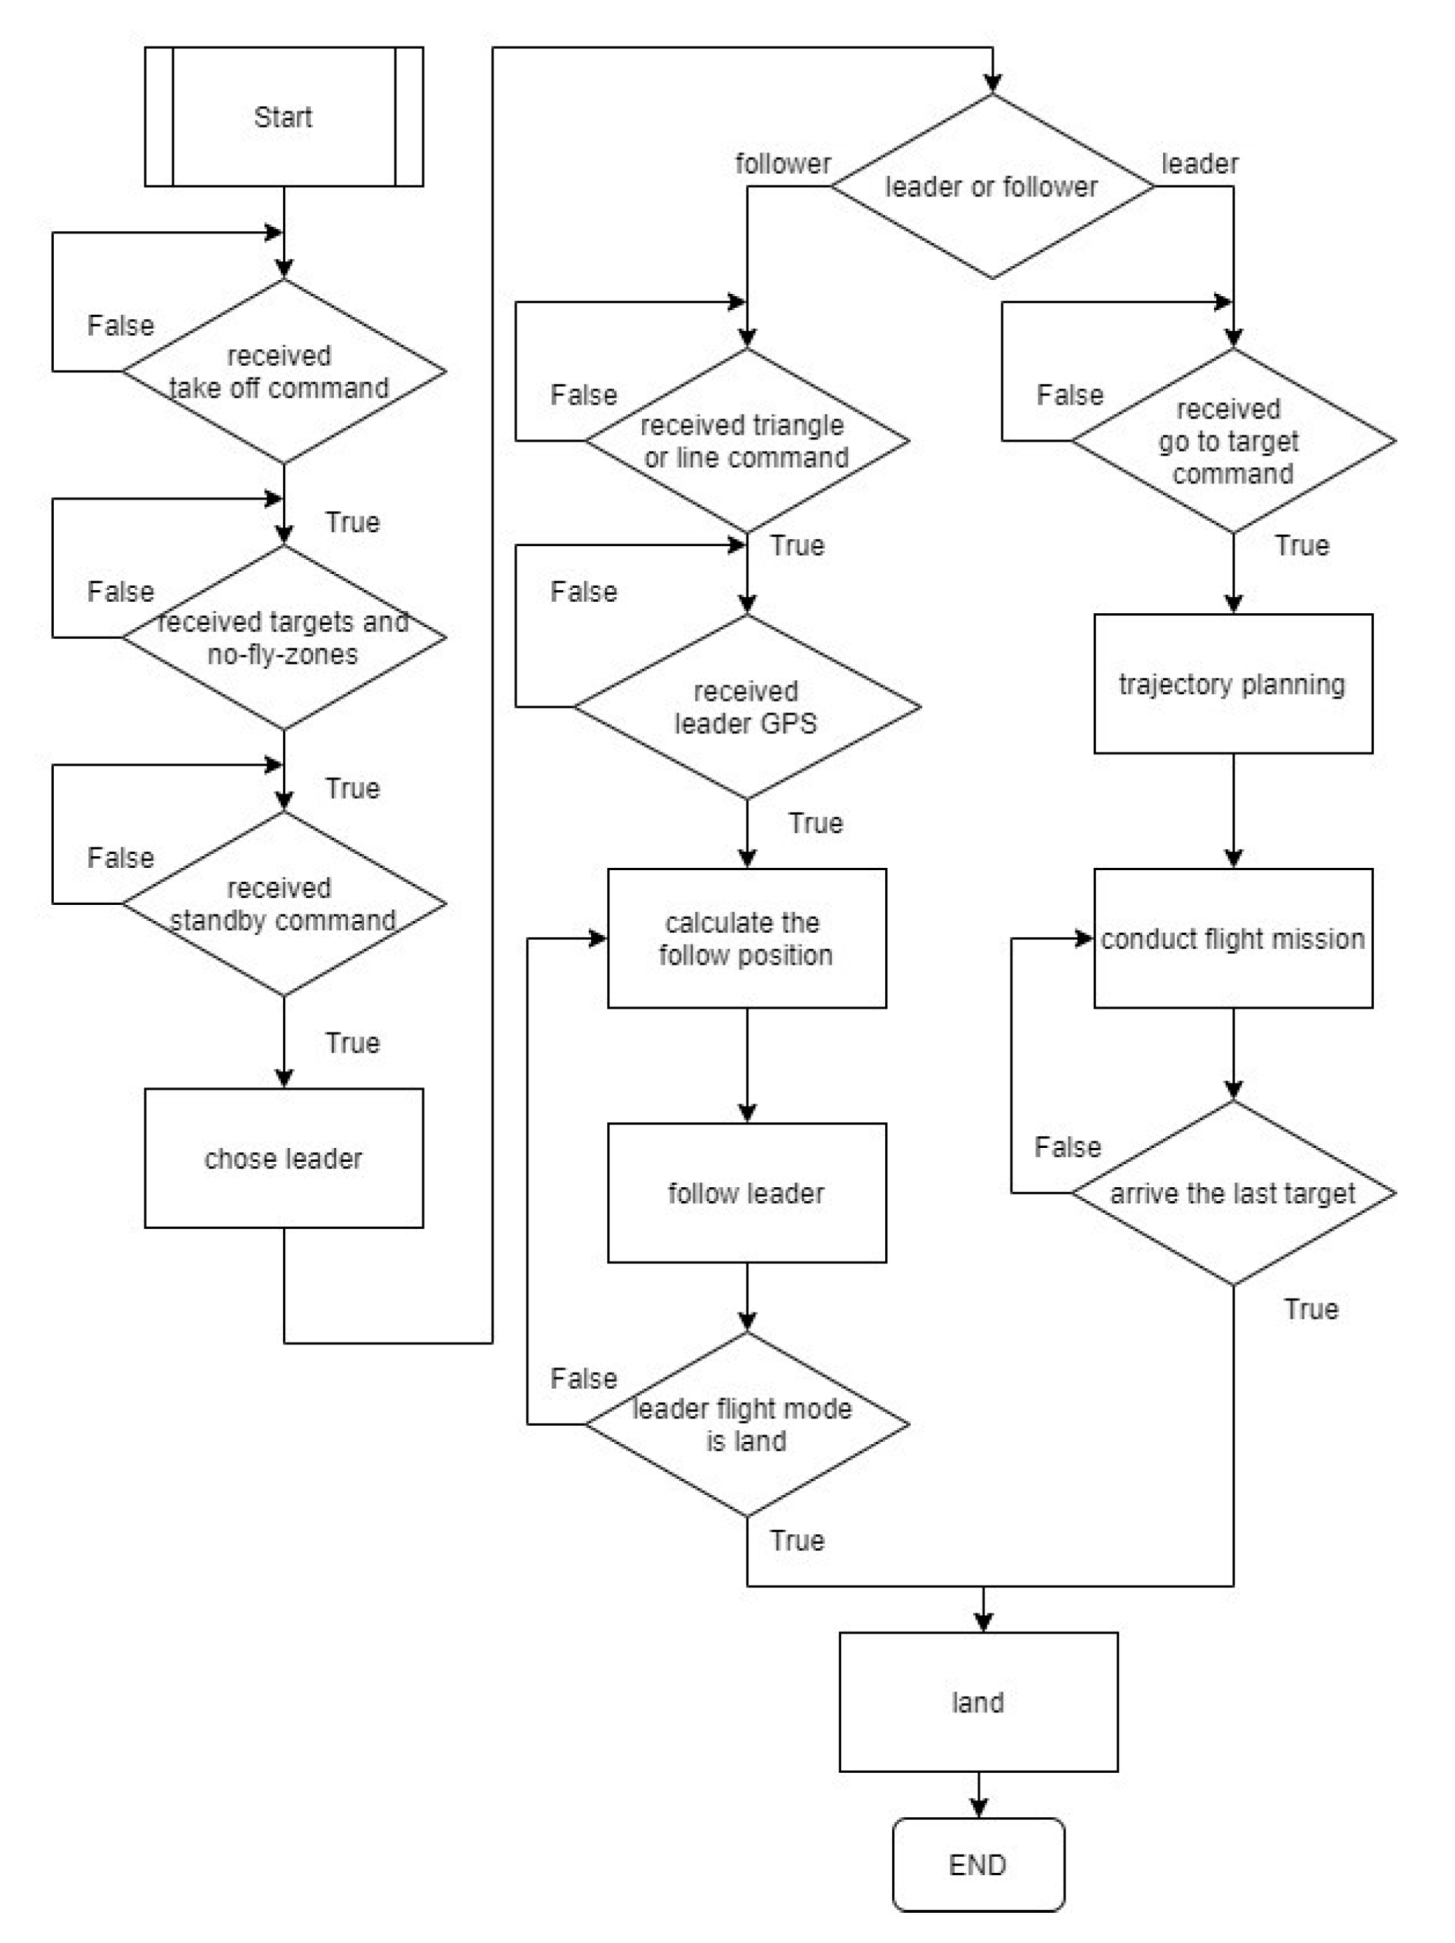
Drive success with our remarkable business rsa-uav algorithm flow chart | download scientific diagram collection of countless professional images. professionally showcasing artistic, creative, and design. designed to convey professionalism and success. Our rsa-uav algorithm flow chart | download scientific diagram collection features high-quality images with excellent detail and clarity. Suitable for various applications including web design, social media, personal projects, and digital content creation All rsa-uav algorithm flow chart | download scientific diagram images are available in high resolution with professional-grade quality, optimized for both digital and print applications, and include comprehensive metadata for easy organization and usage. Discover the perfect rsa-uav algorithm flow chart | download scientific diagram images to enhance your visual communication needs. Multiple resolution options ensure optimal performance across different platforms and applications. Comprehensive tagging systems facilitate quick discovery of relevant rsa-uav algorithm flow chart | download scientific diagram content. Cost-effective licensing makes professional rsa-uav algorithm flow chart | download scientific diagram photography accessible to all budgets. Professional licensing options accommodate both commercial and educational usage requirements. Reliable customer support ensures smooth experience throughout the rsa-uav algorithm flow chart | download scientific diagram selection process. Each image in our rsa-uav algorithm flow chart | download scientific diagram gallery undergoes rigorous quality assessment before inclusion.