

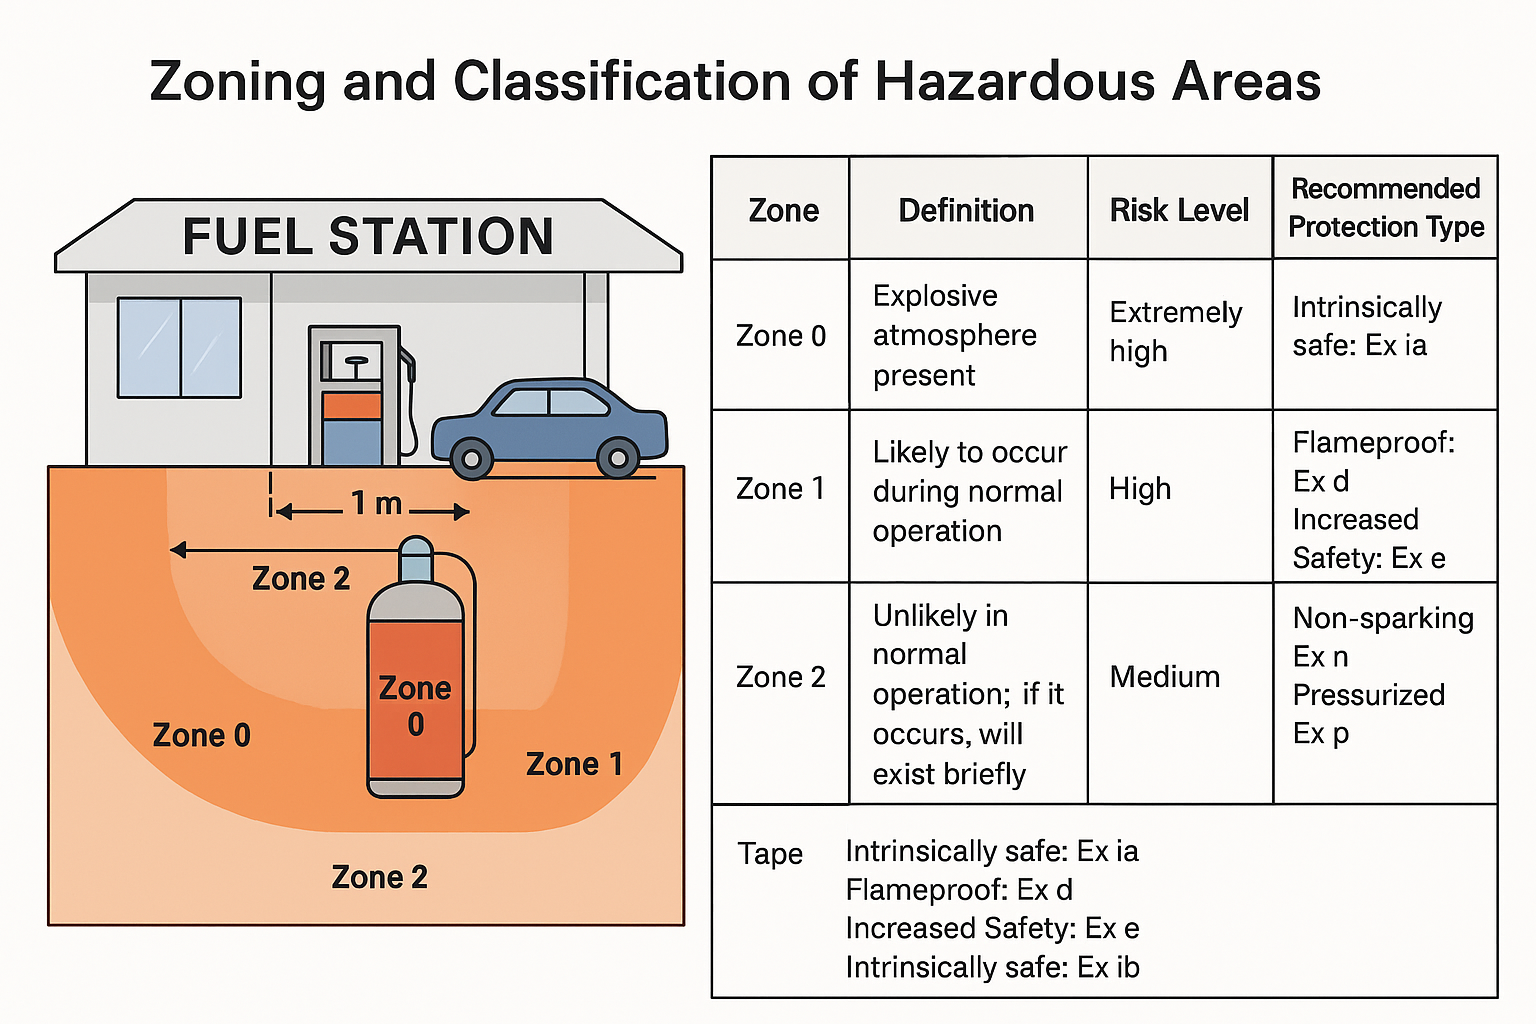


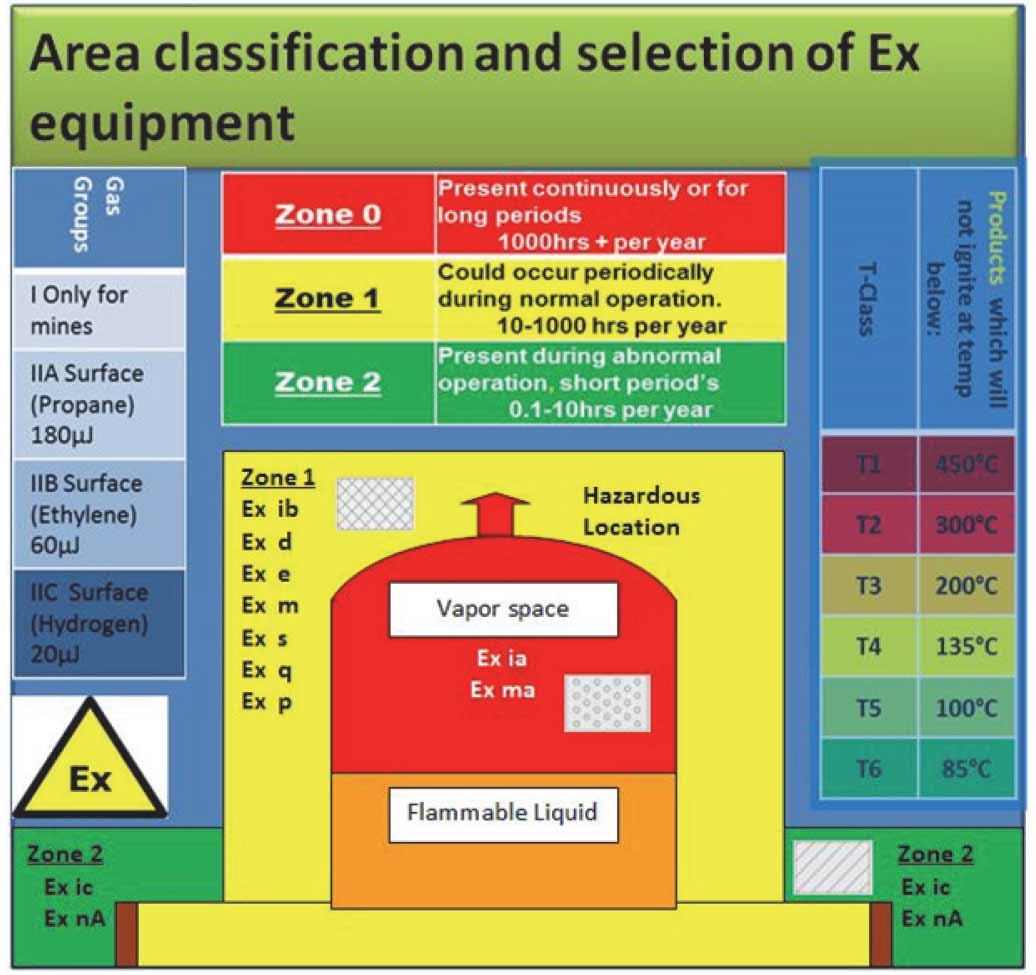
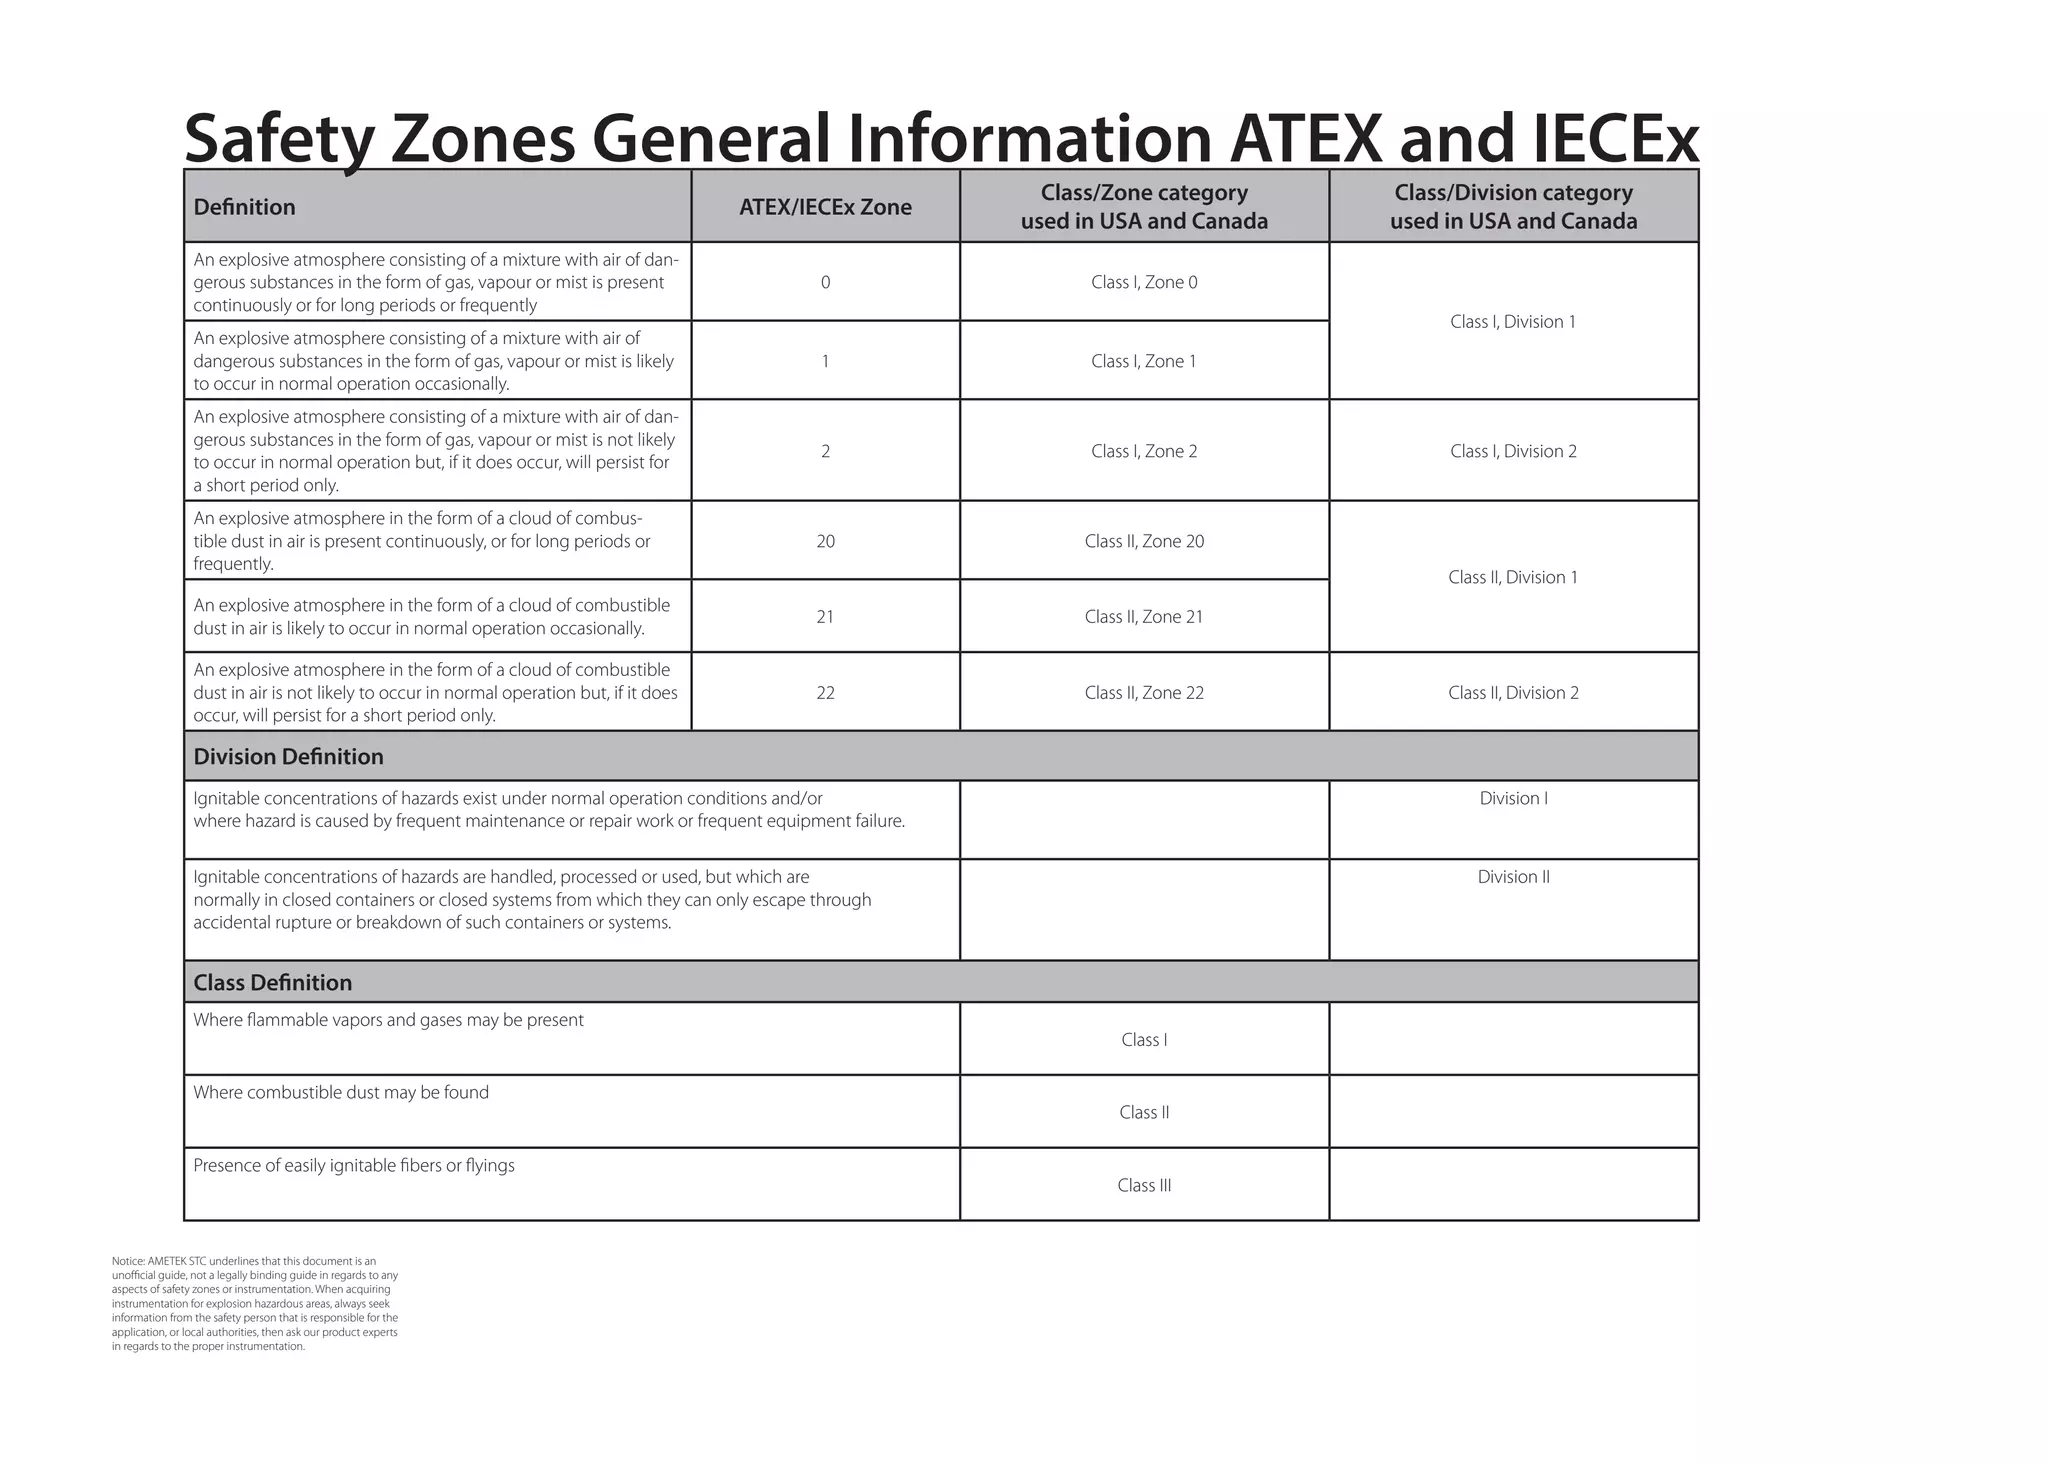


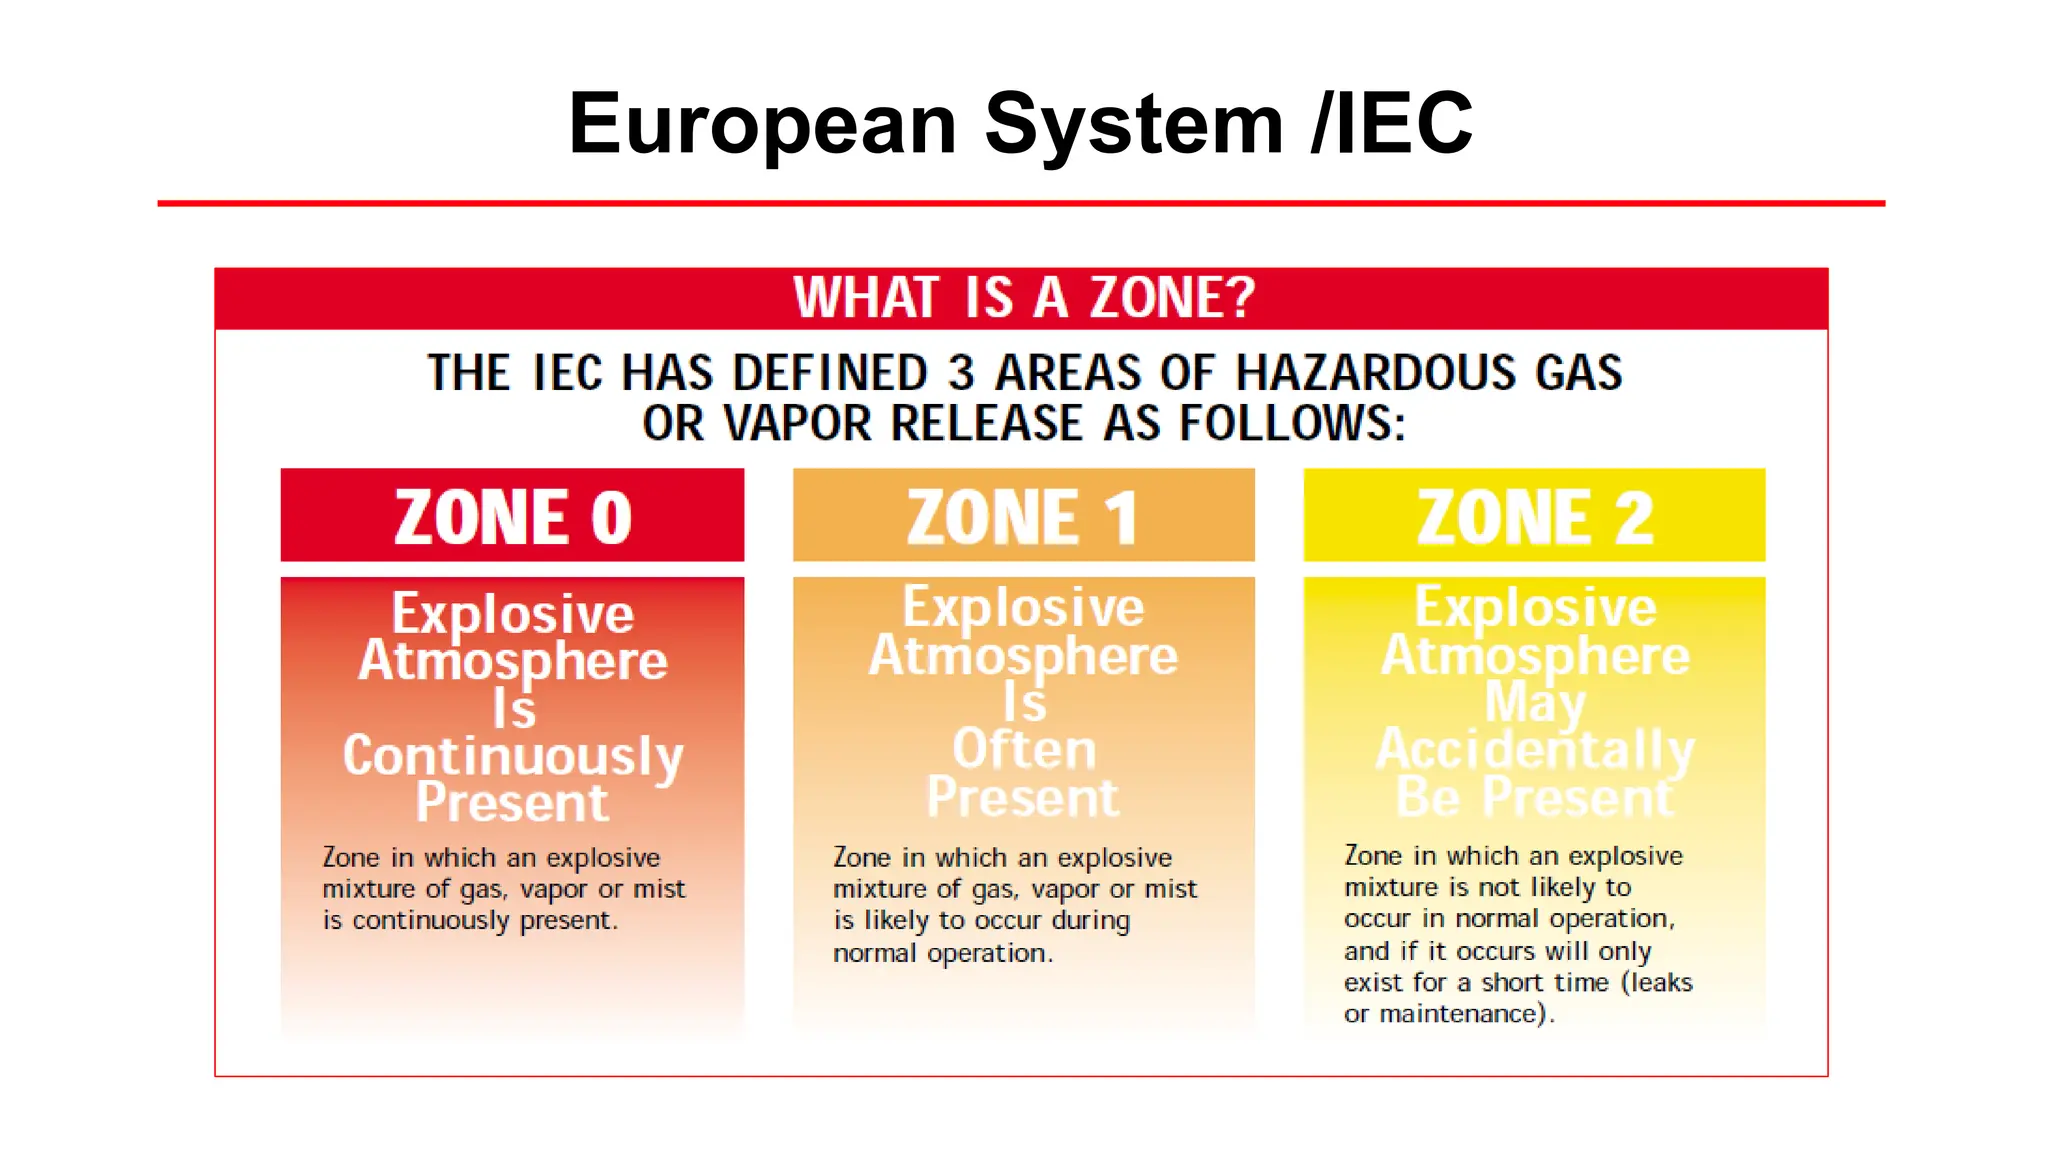
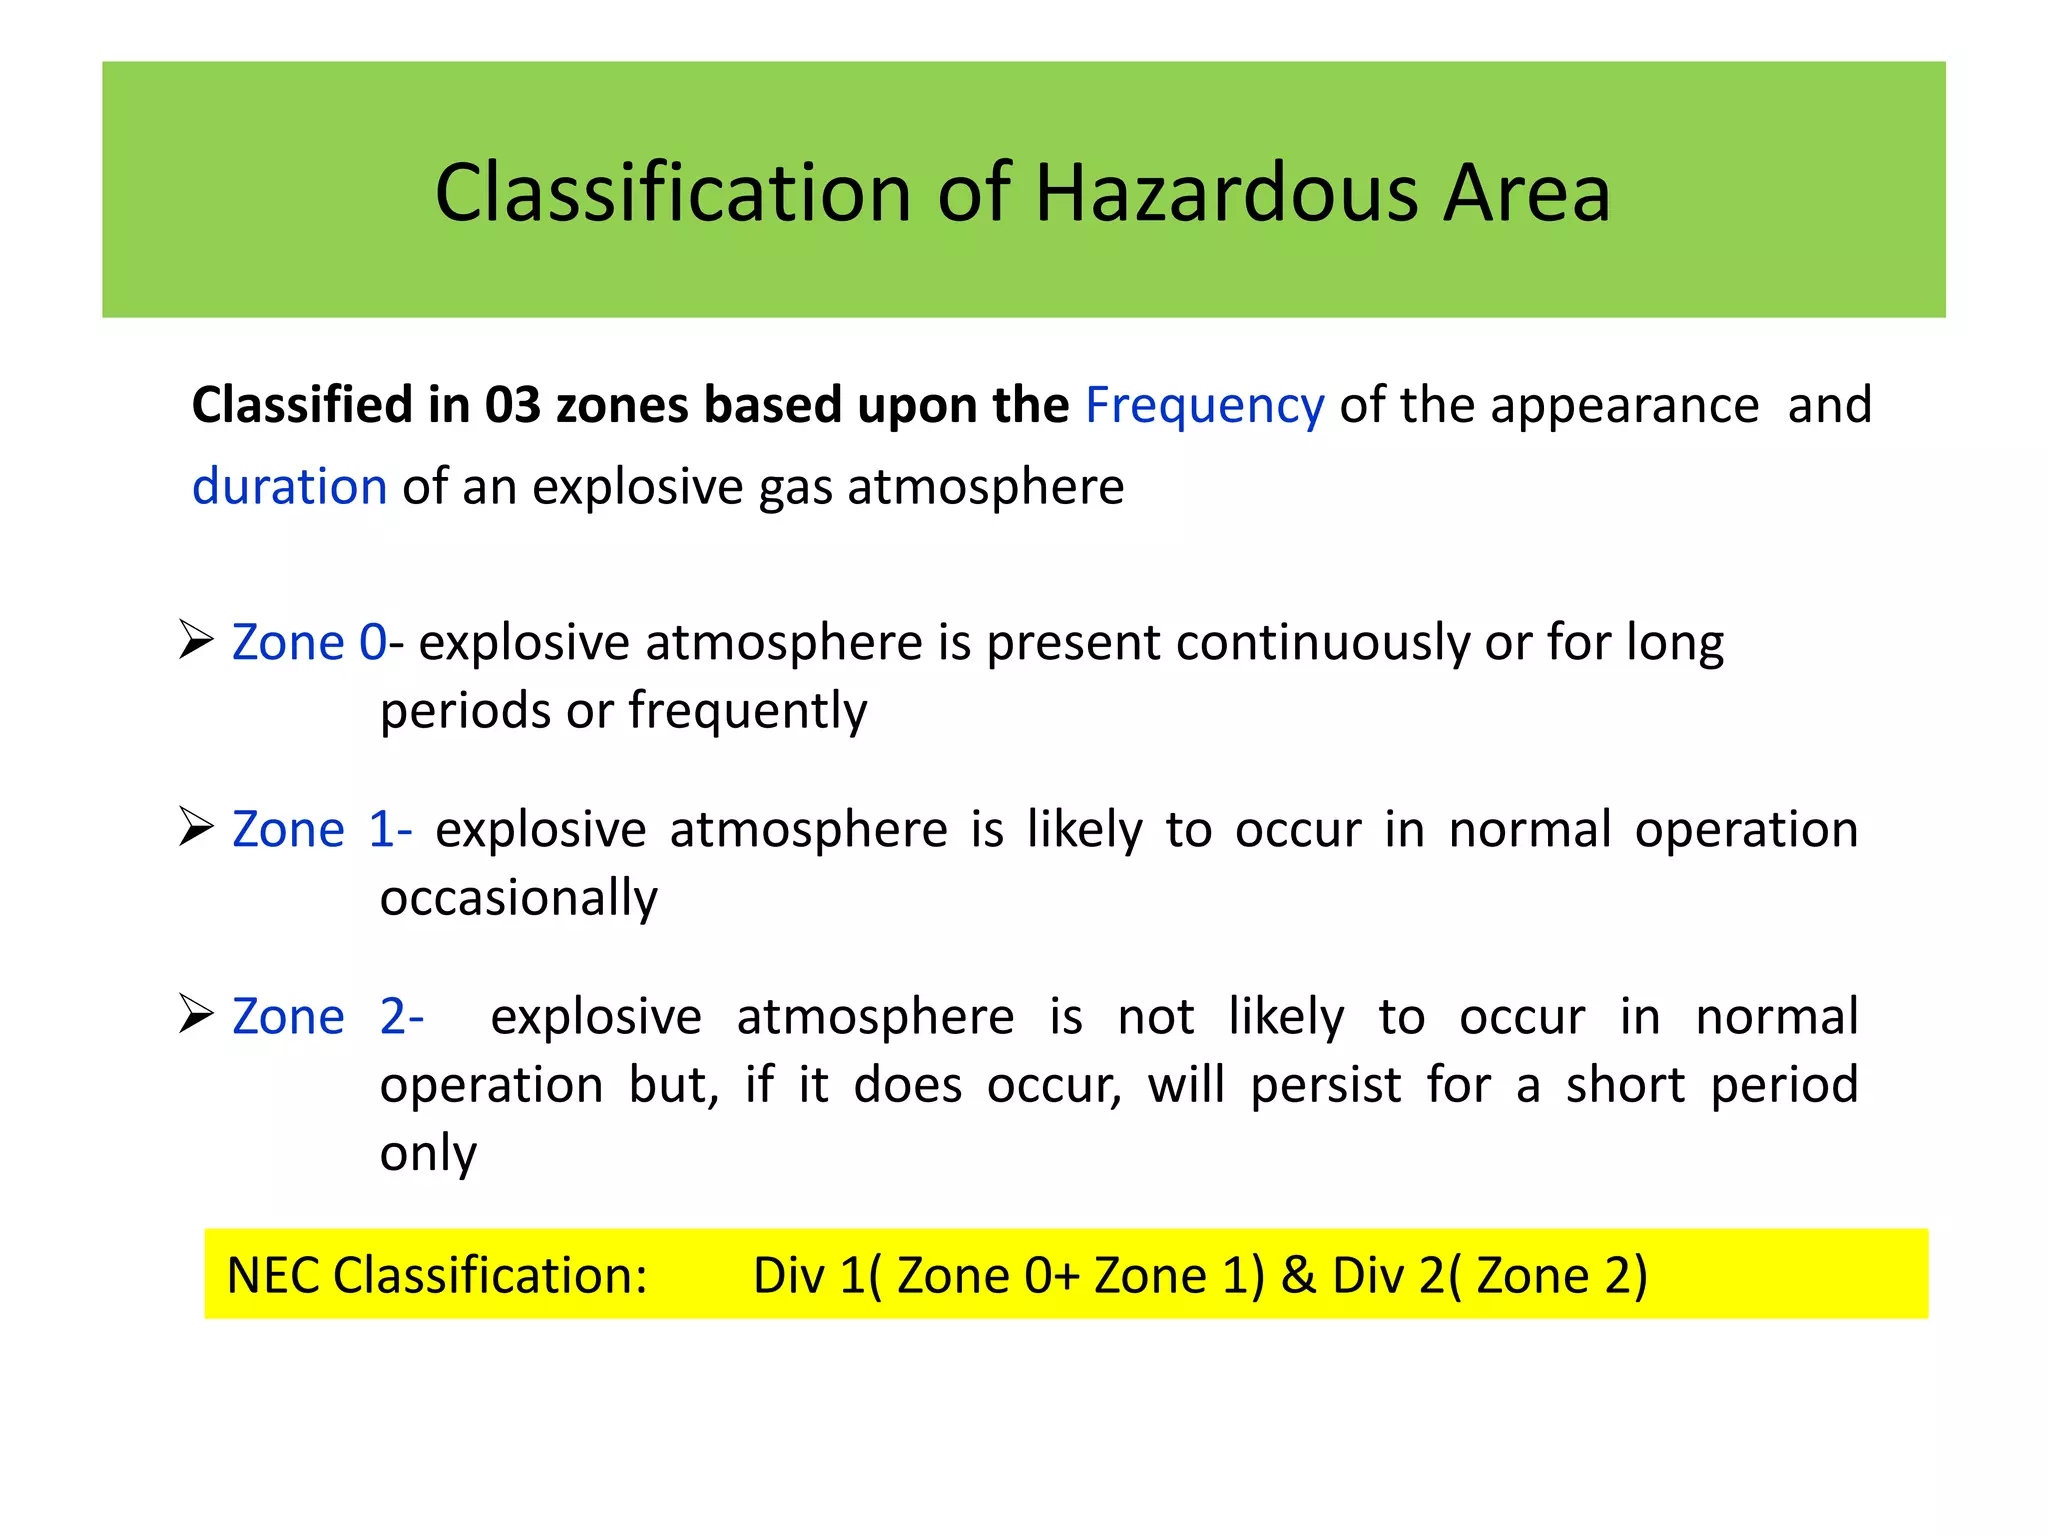
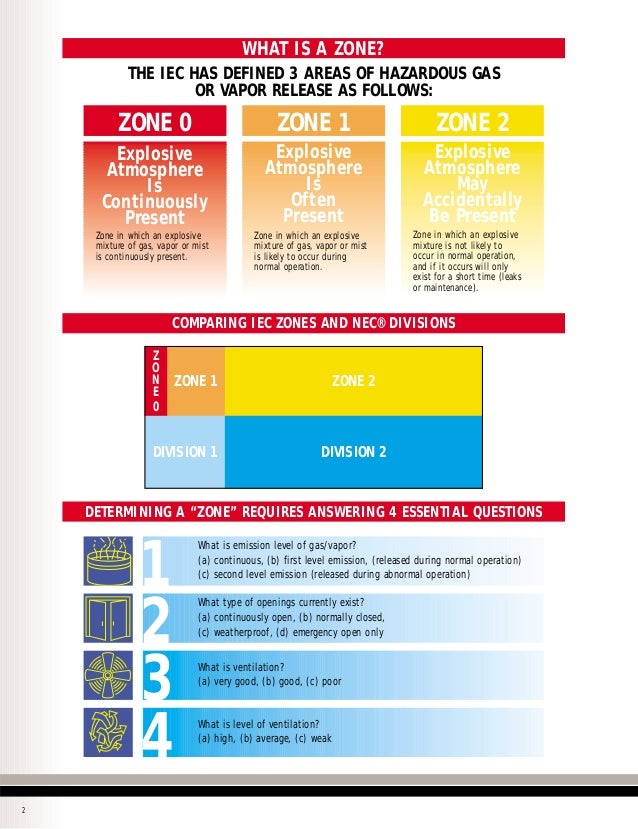
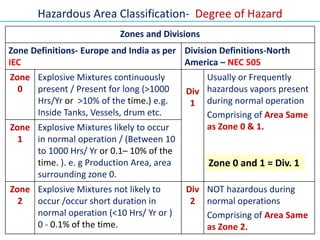
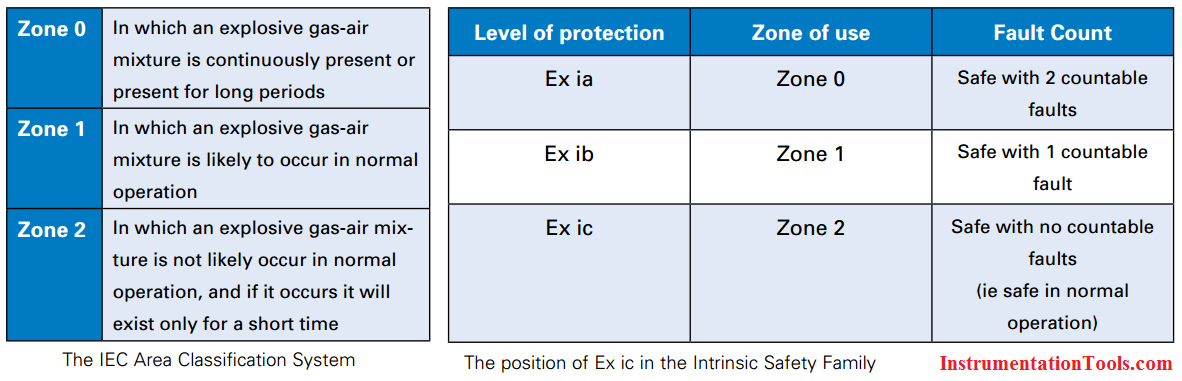
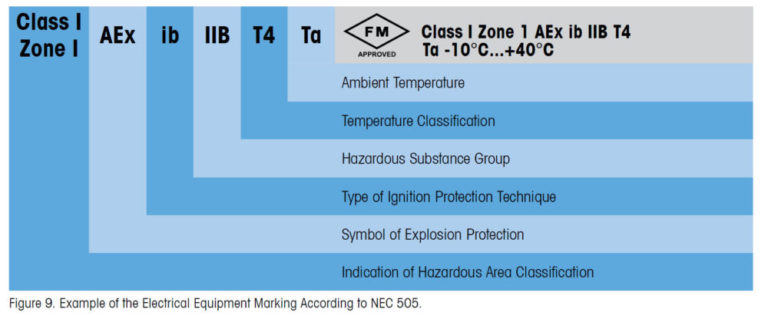
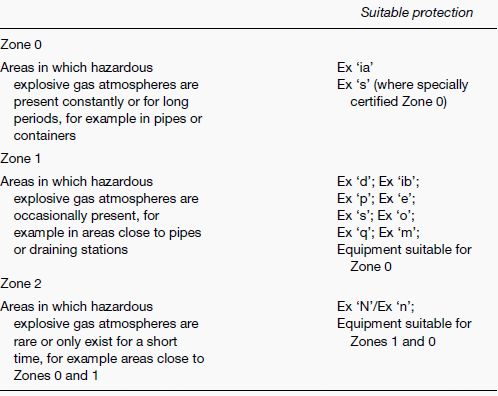

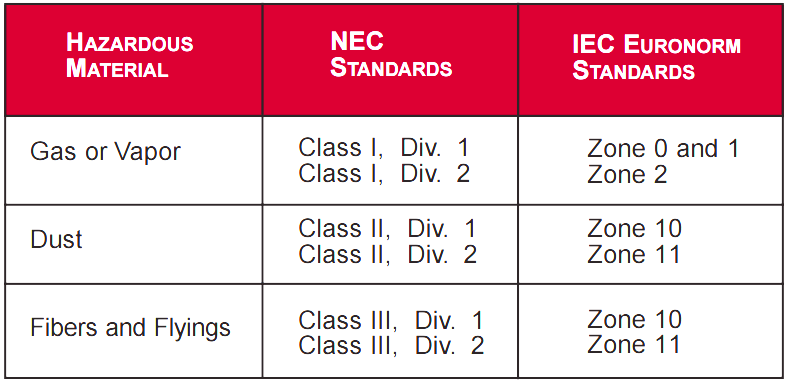

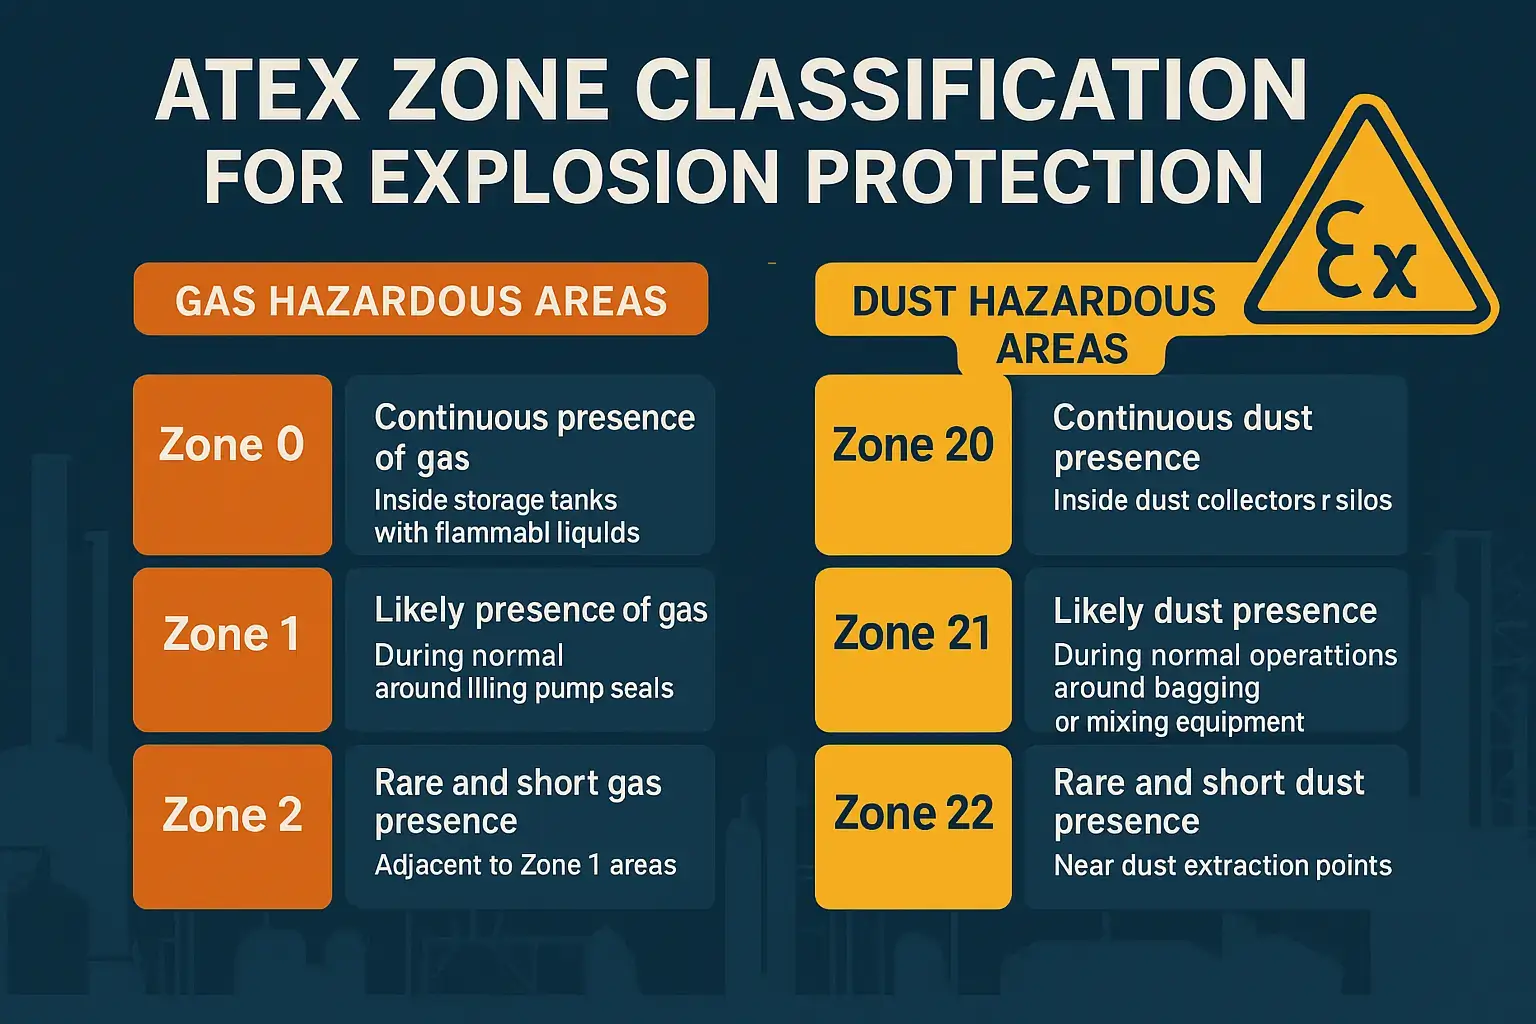


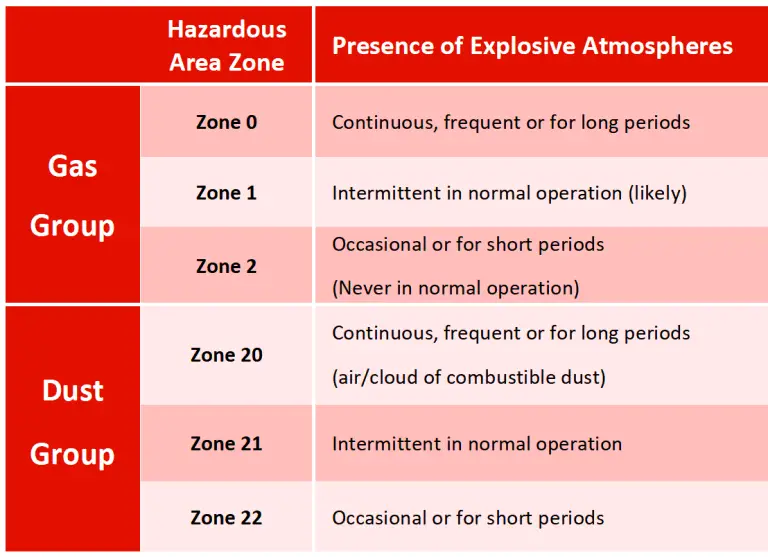


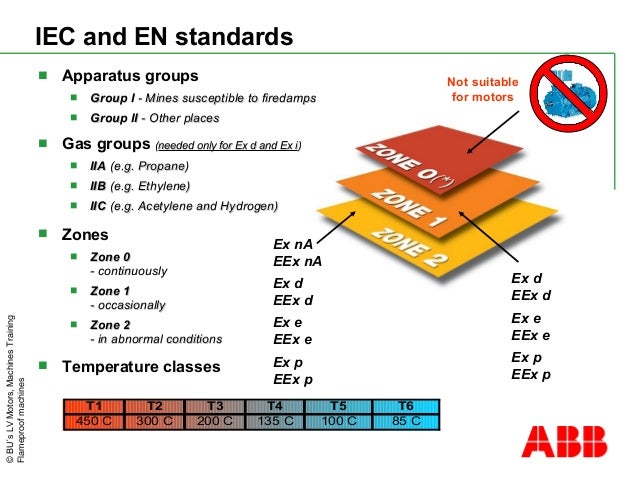
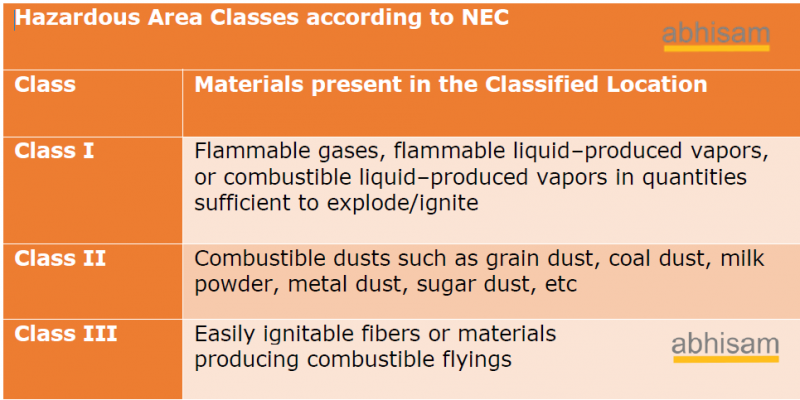

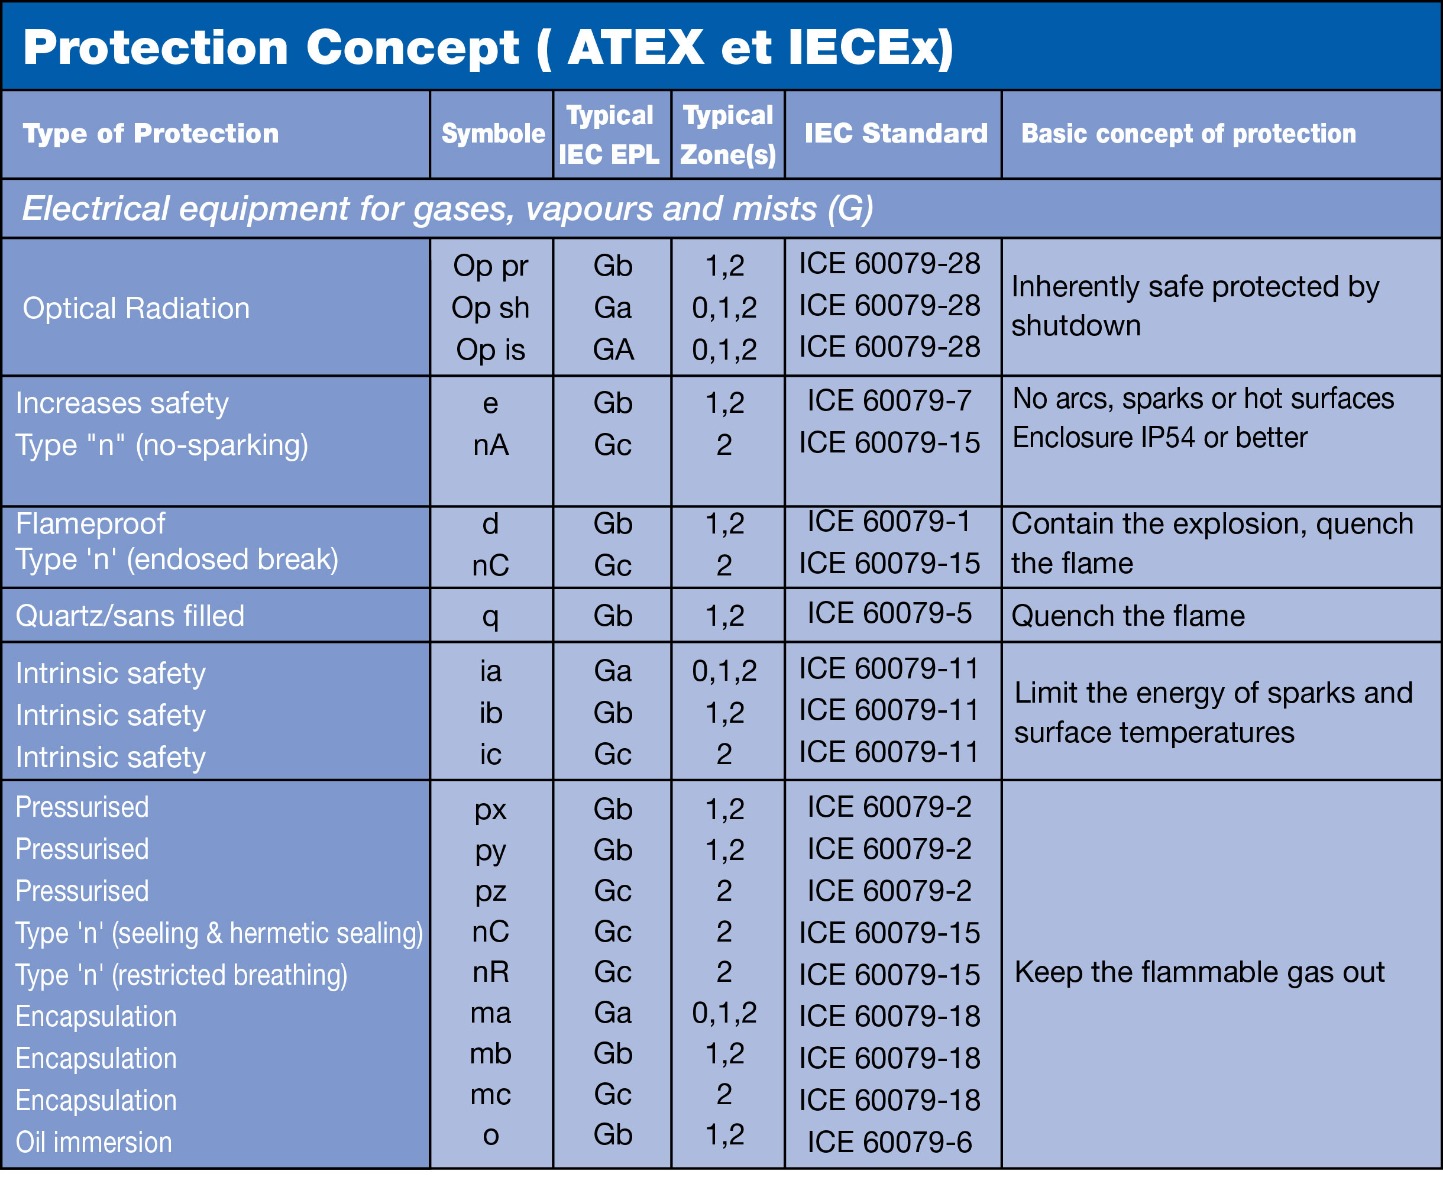


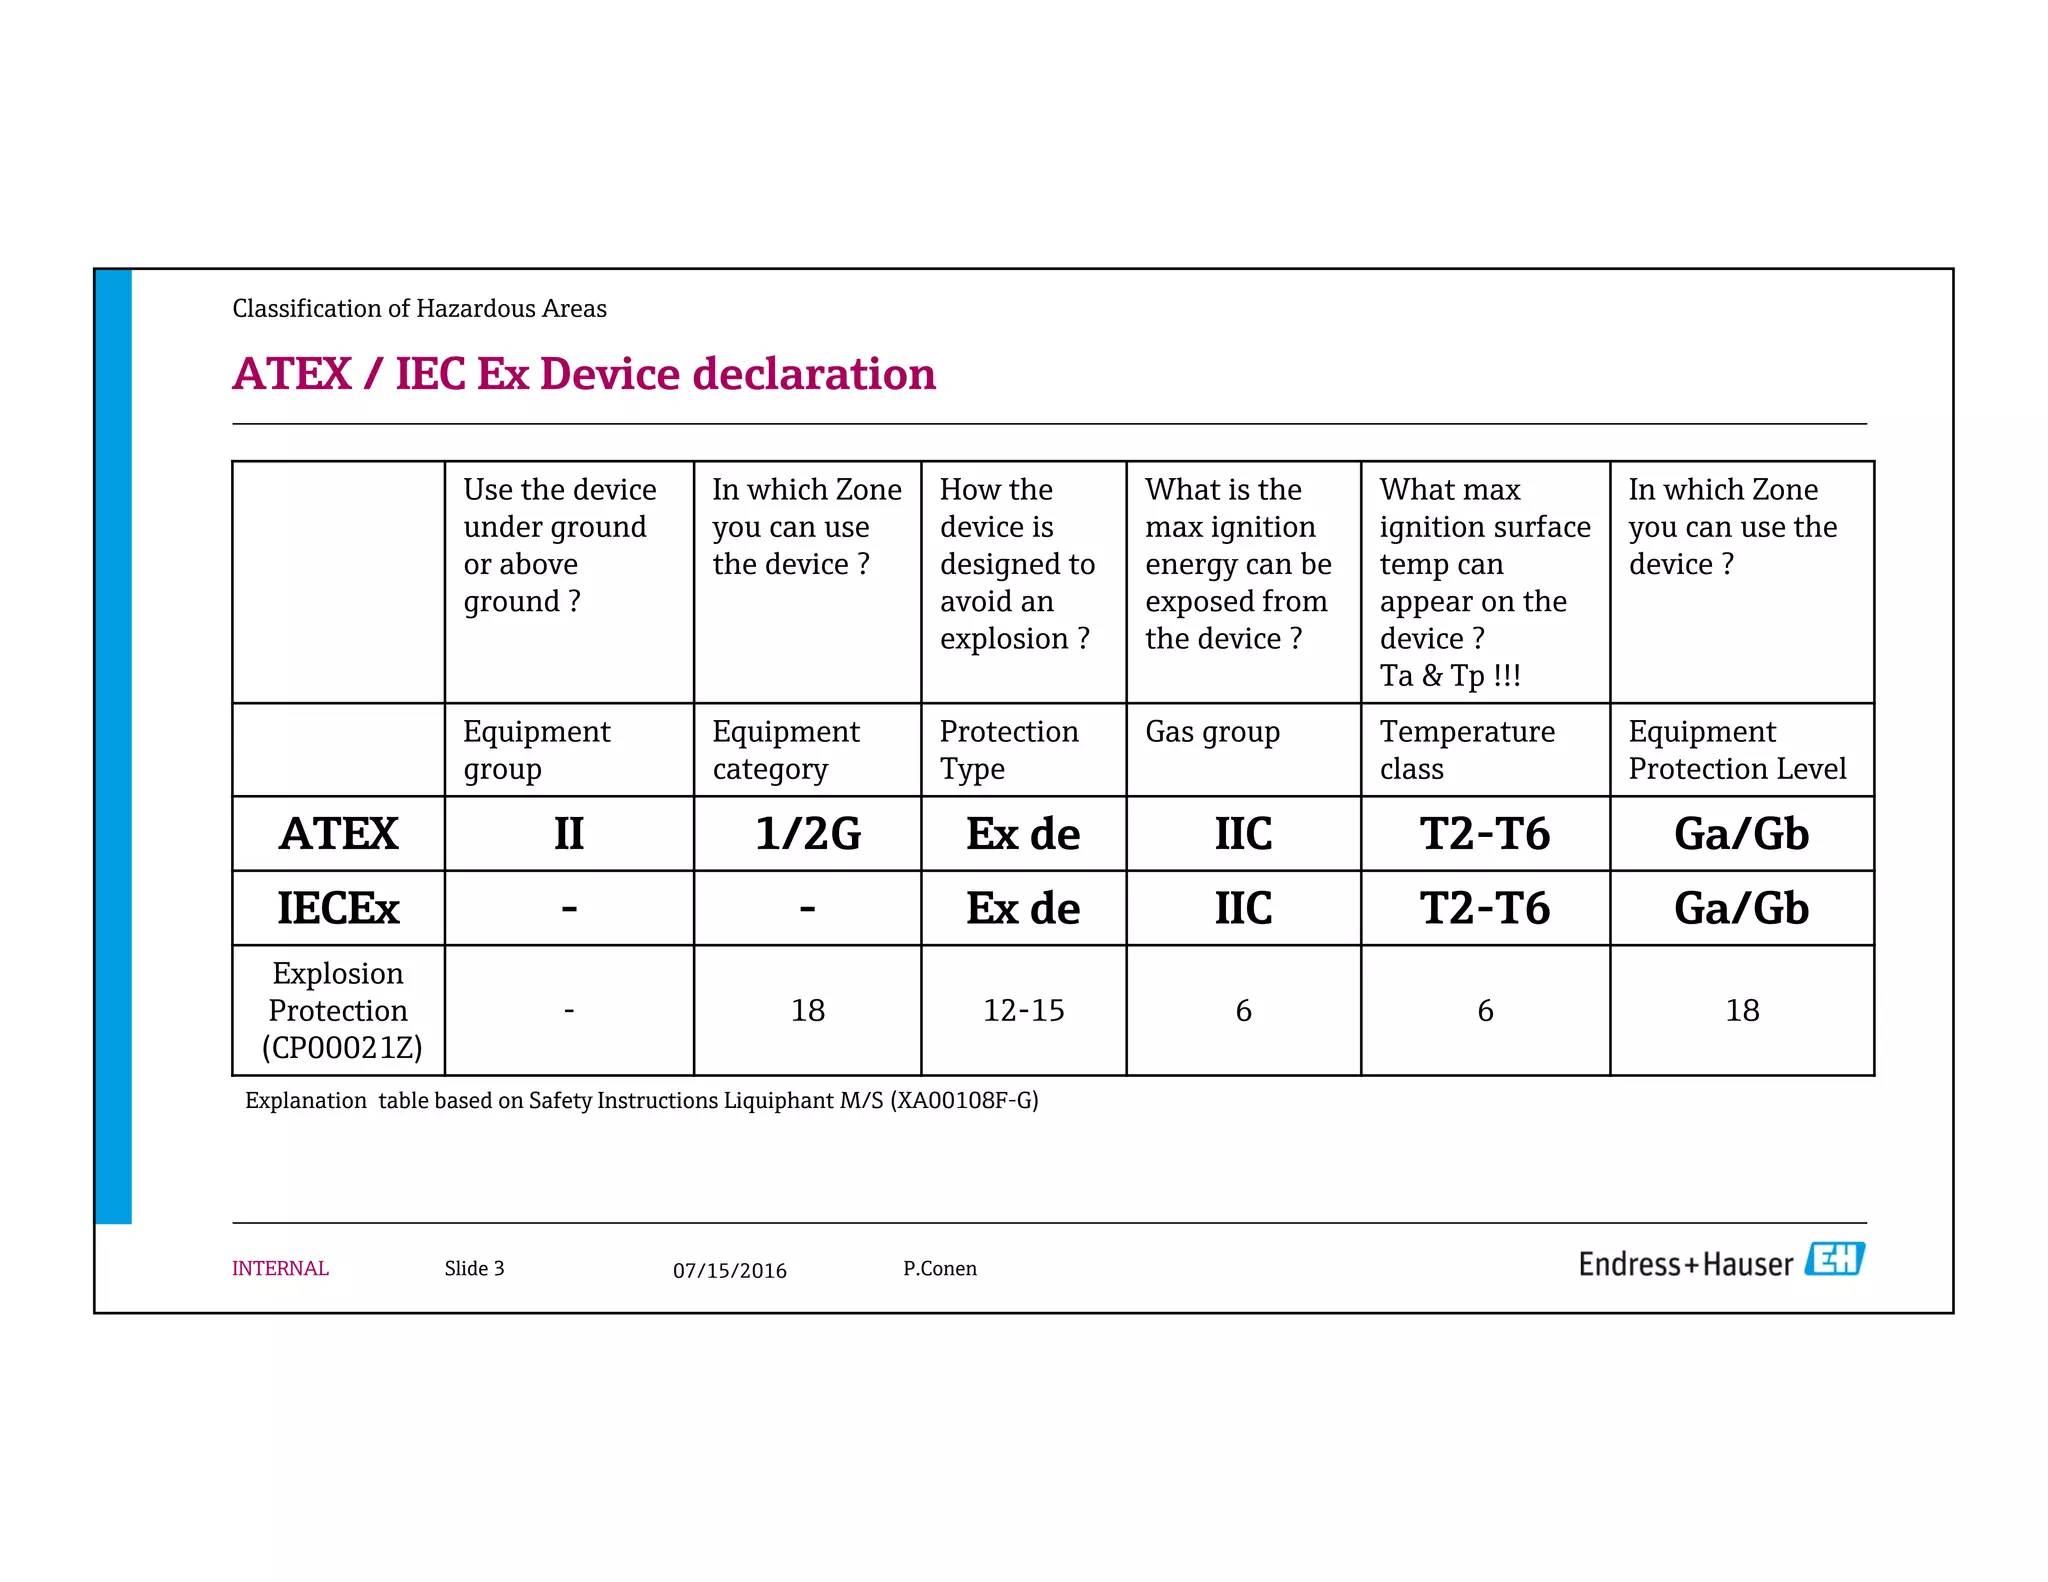

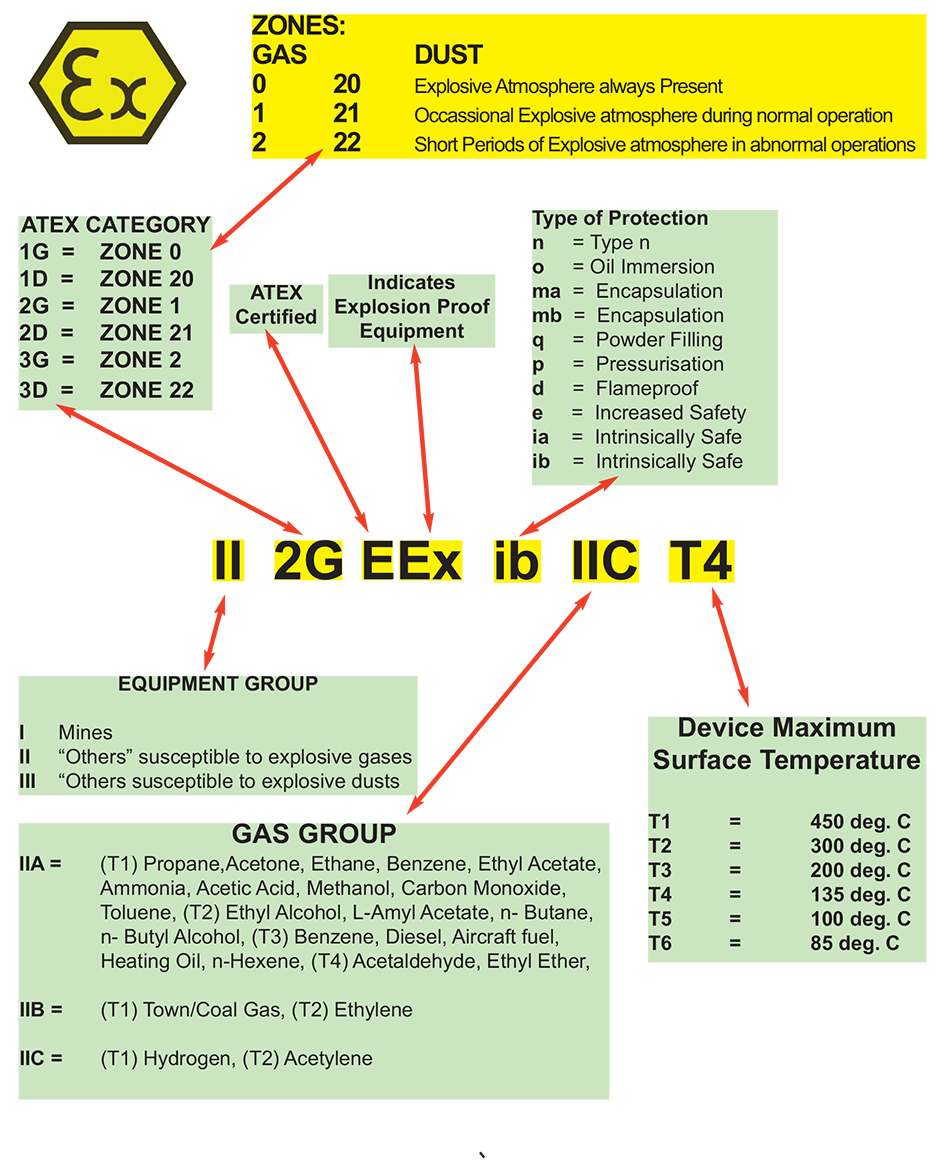
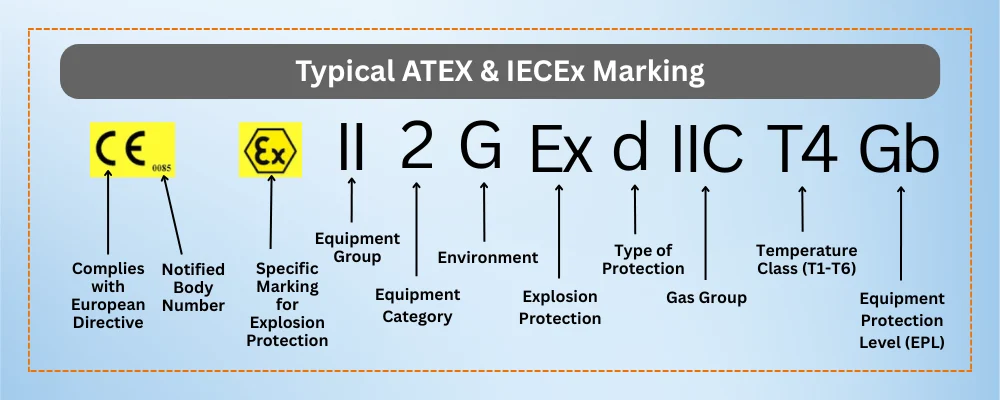

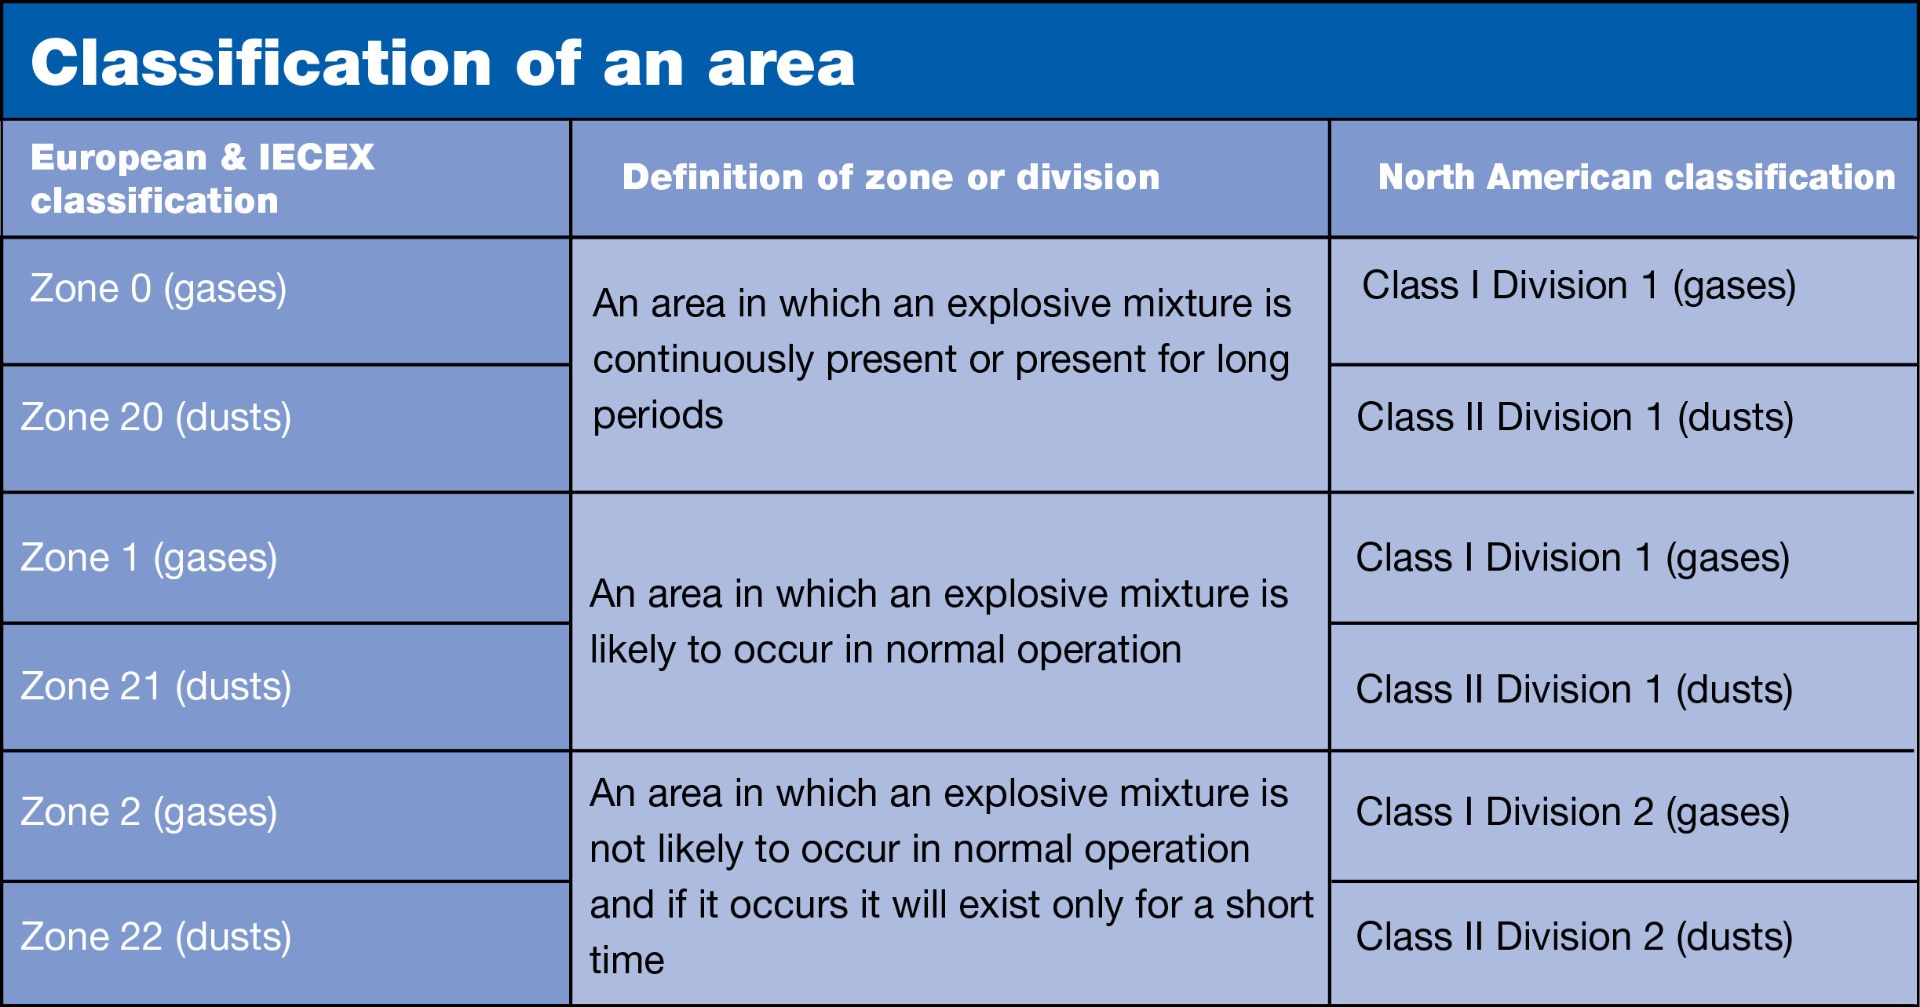
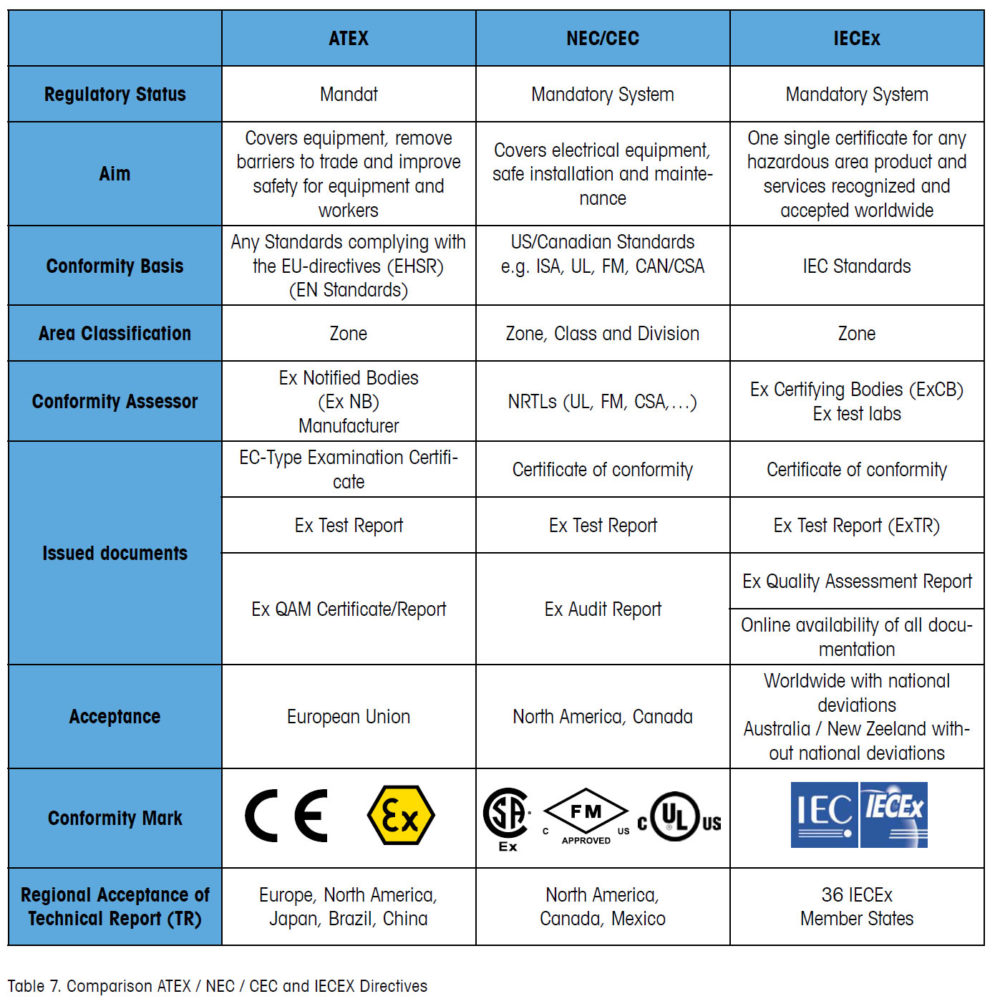


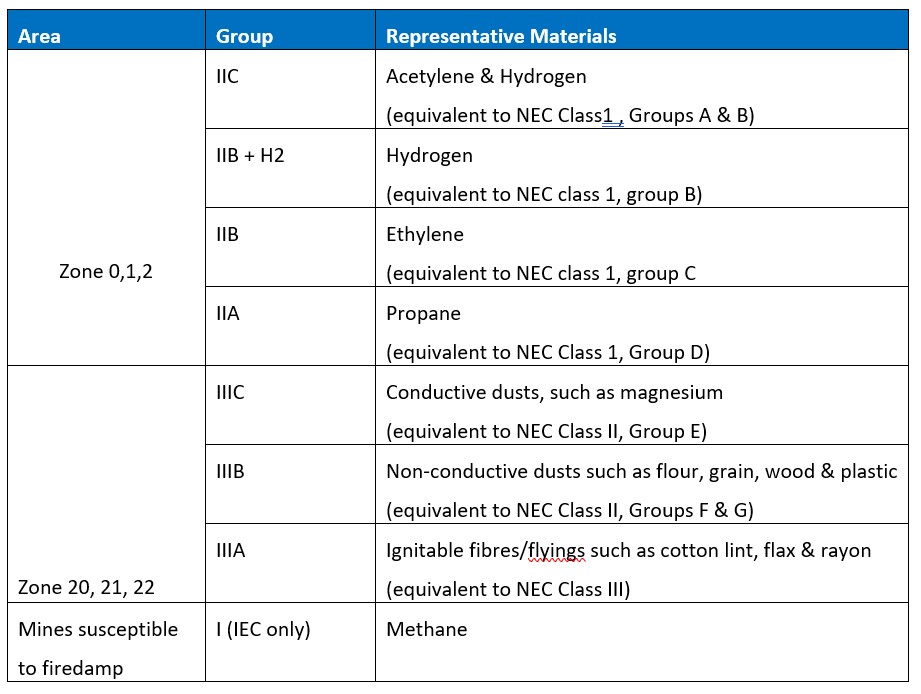
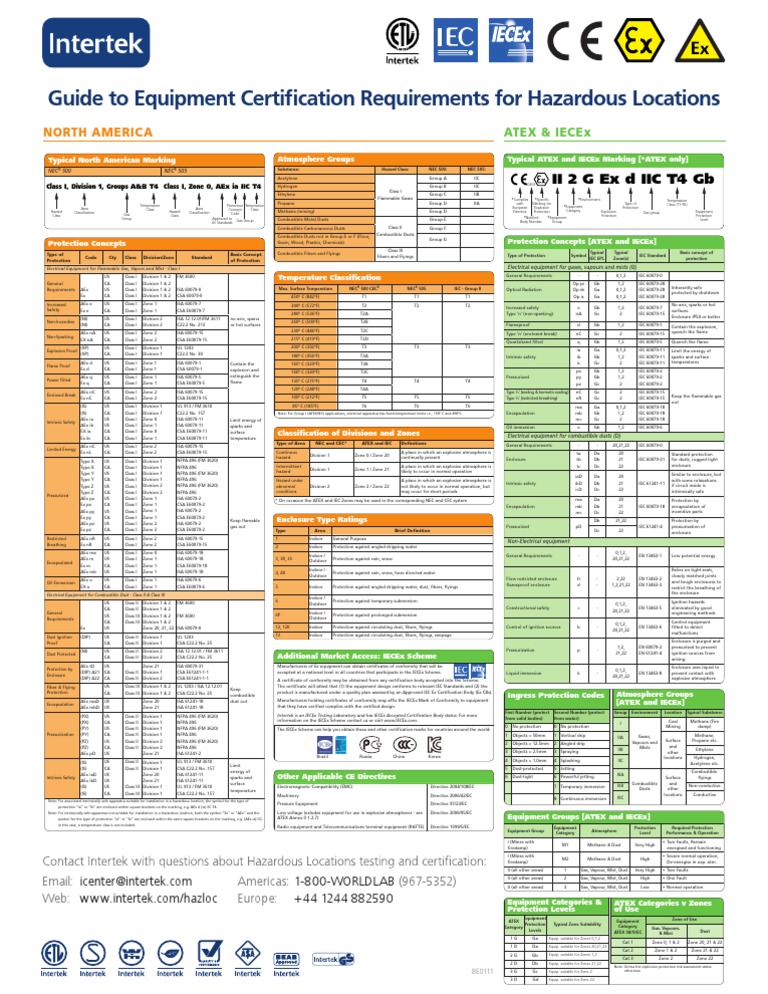
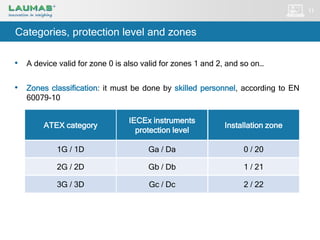

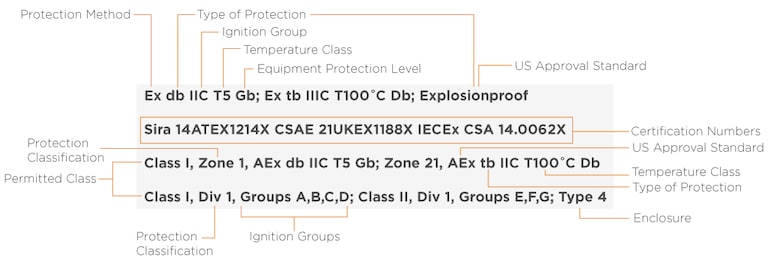


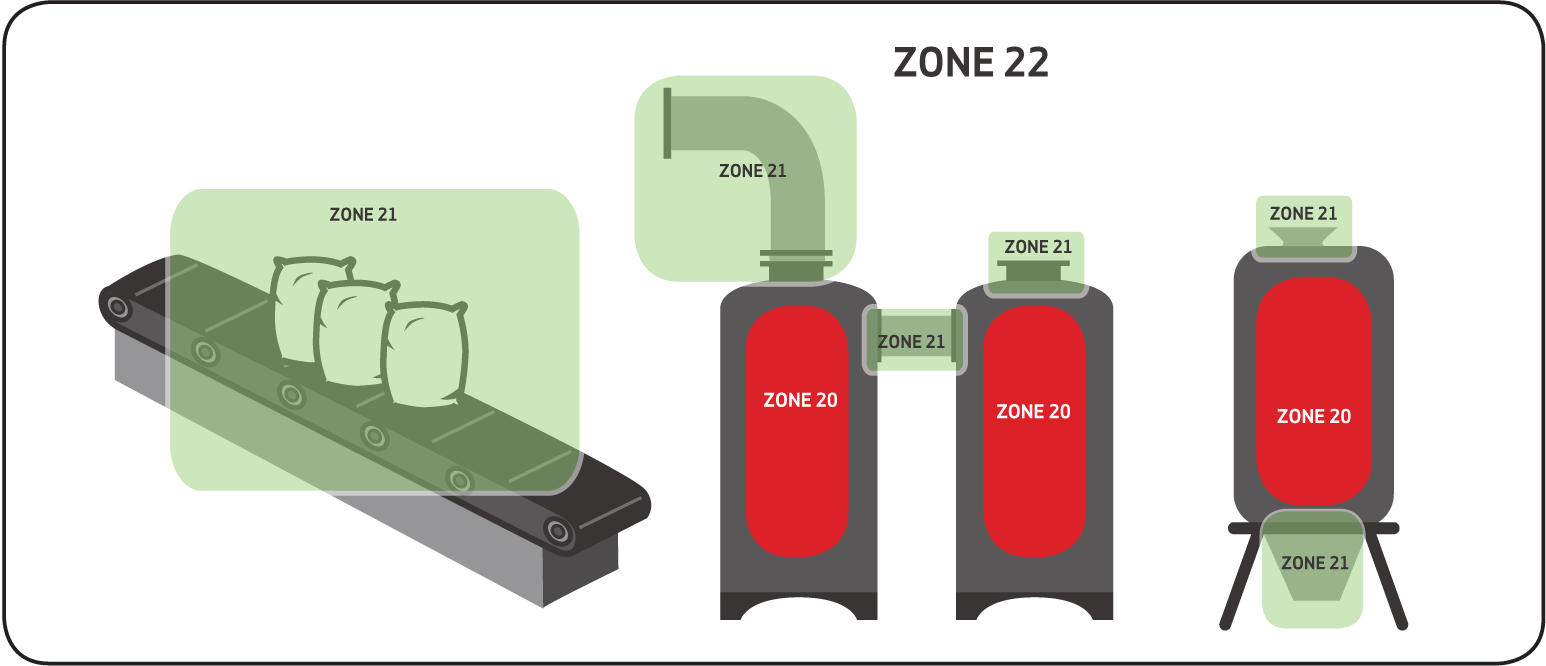
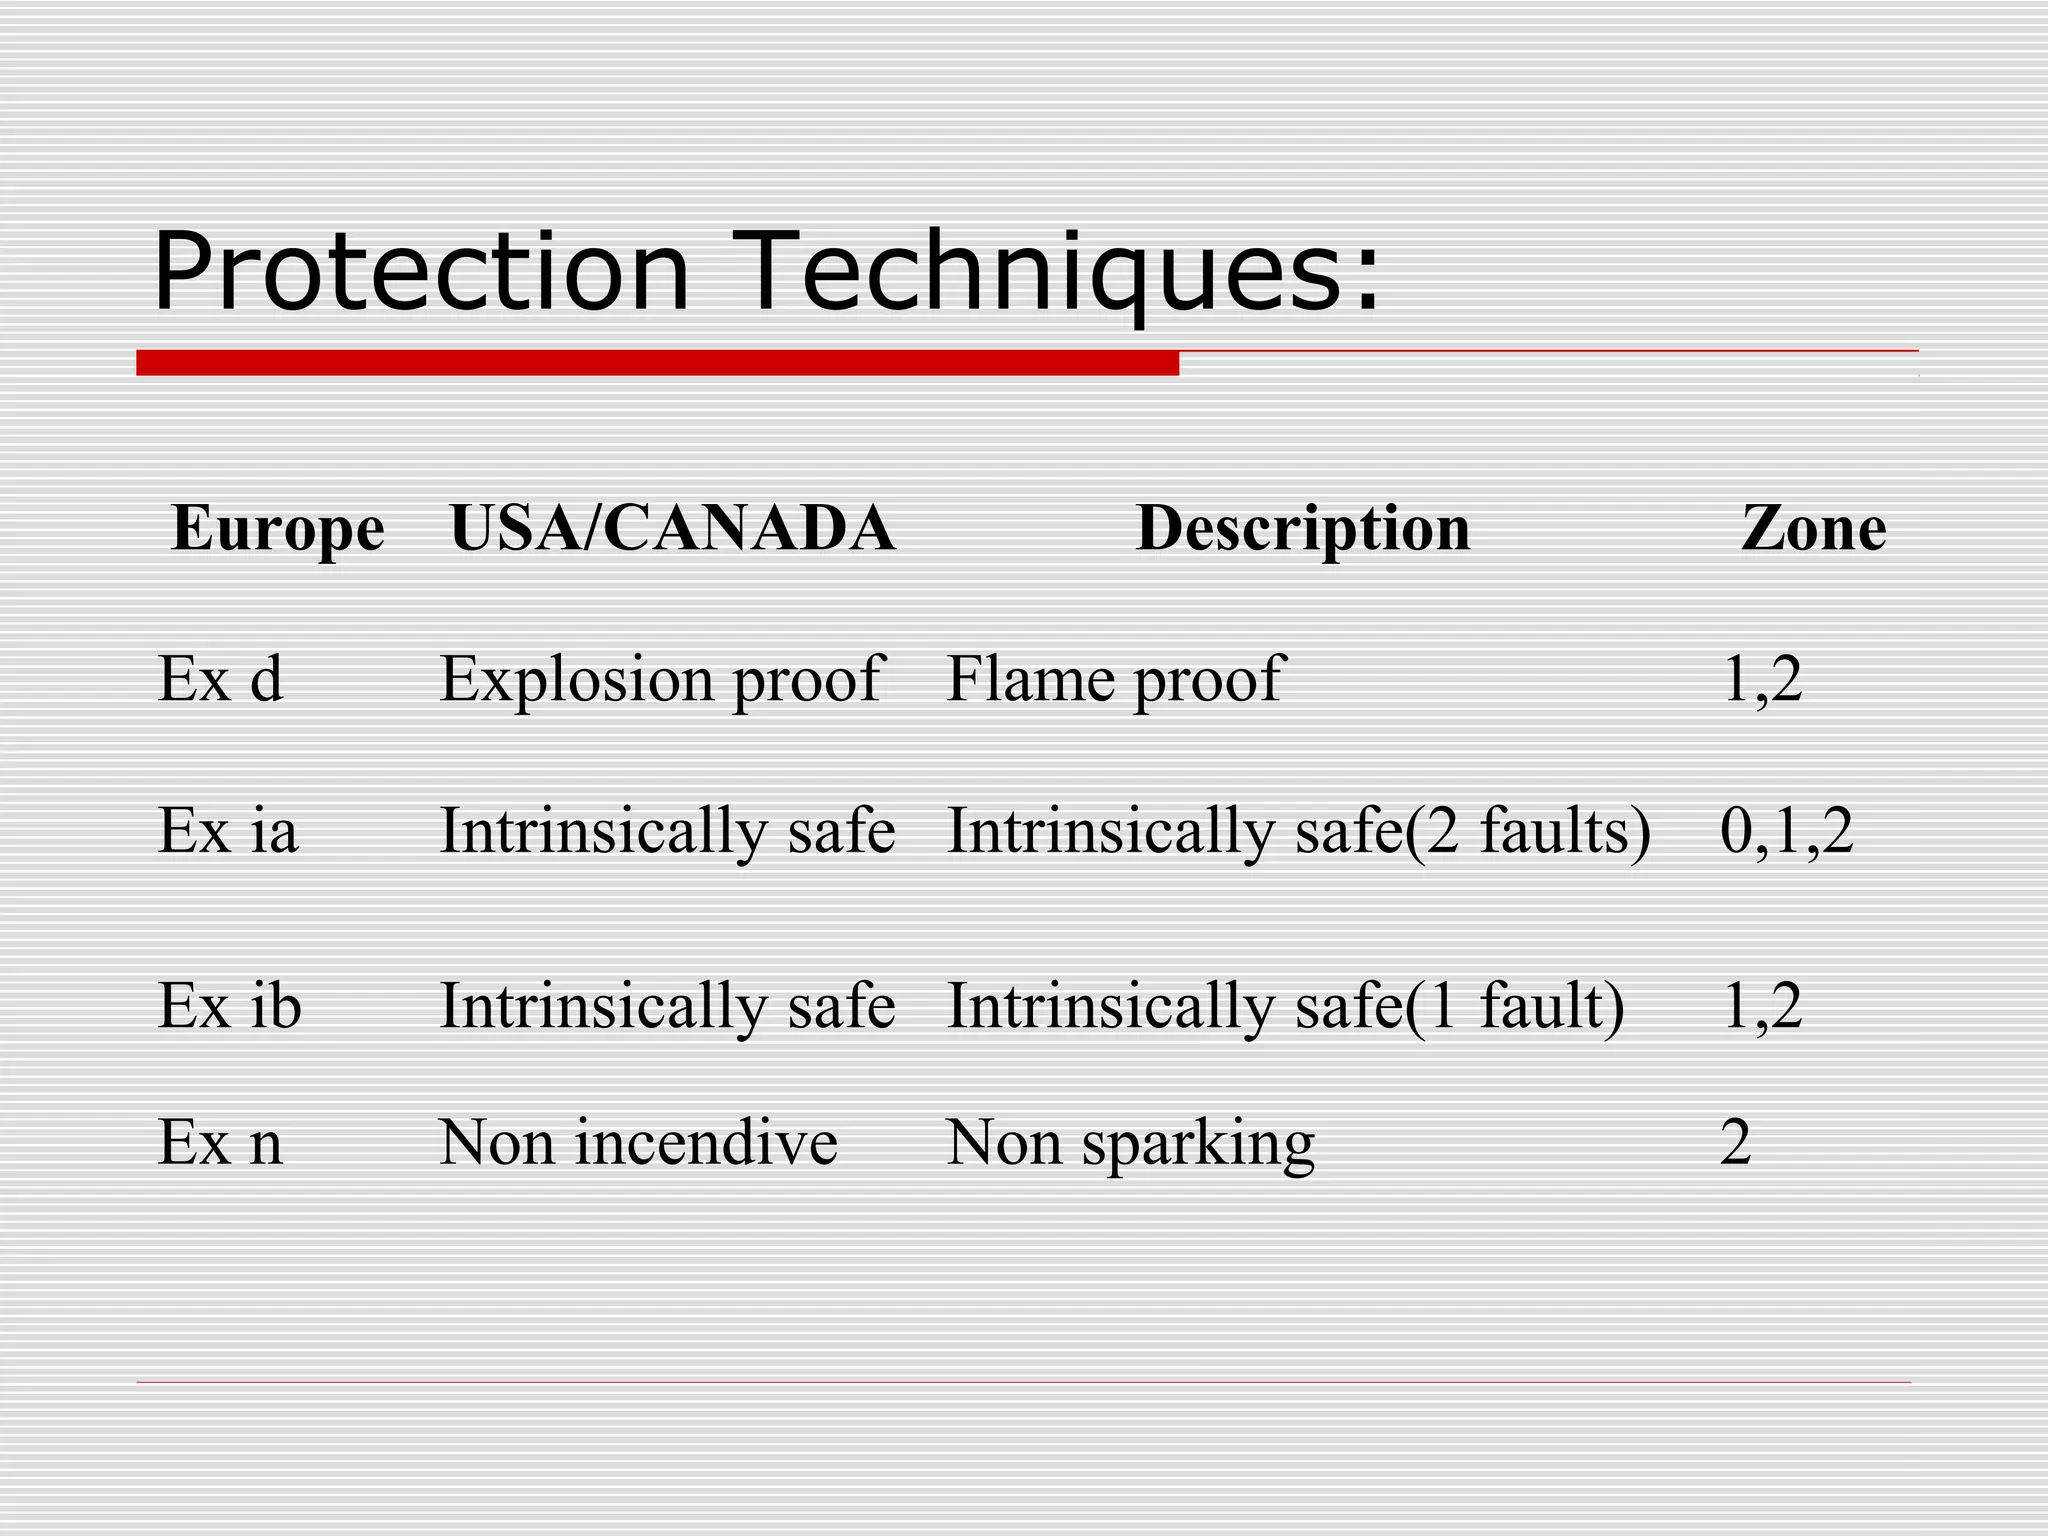
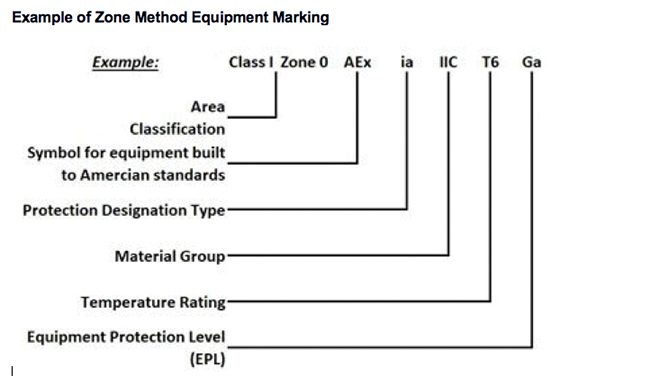
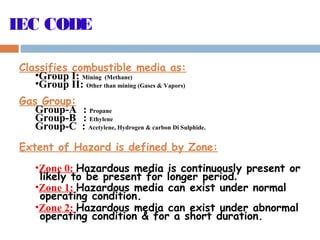


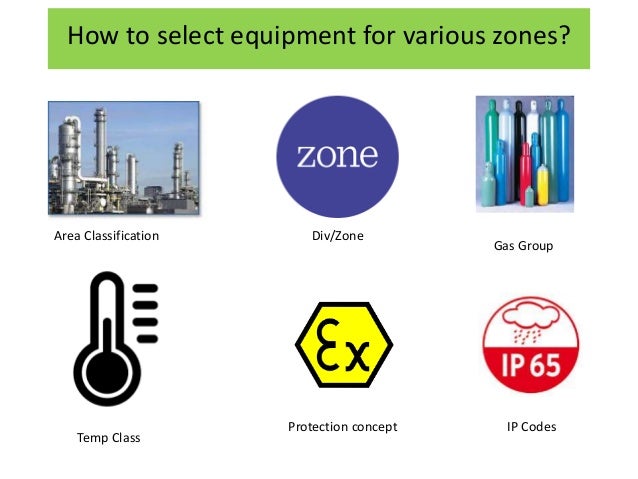


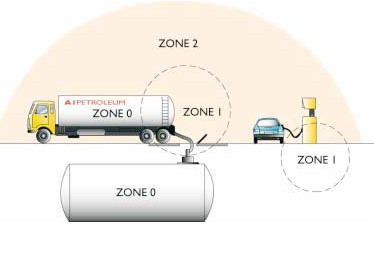

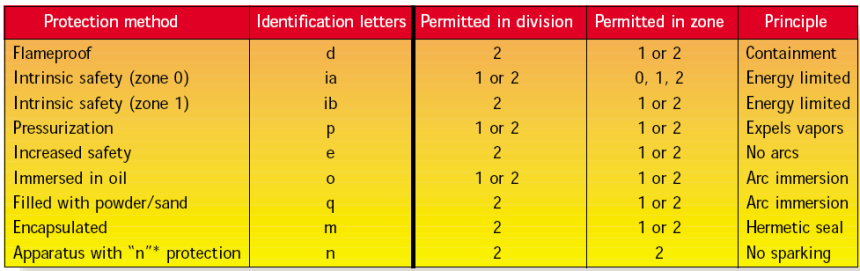
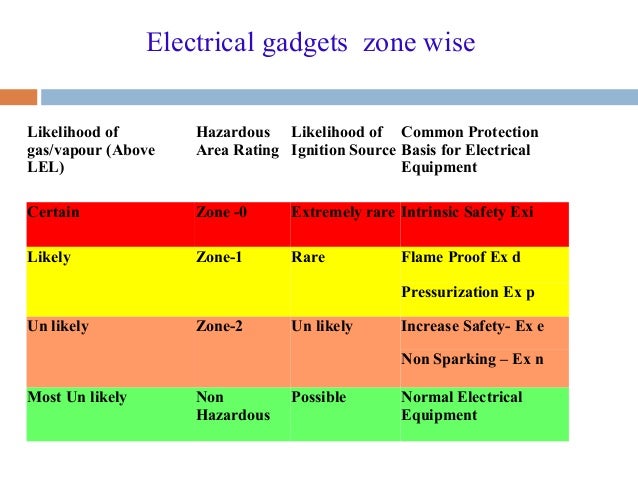


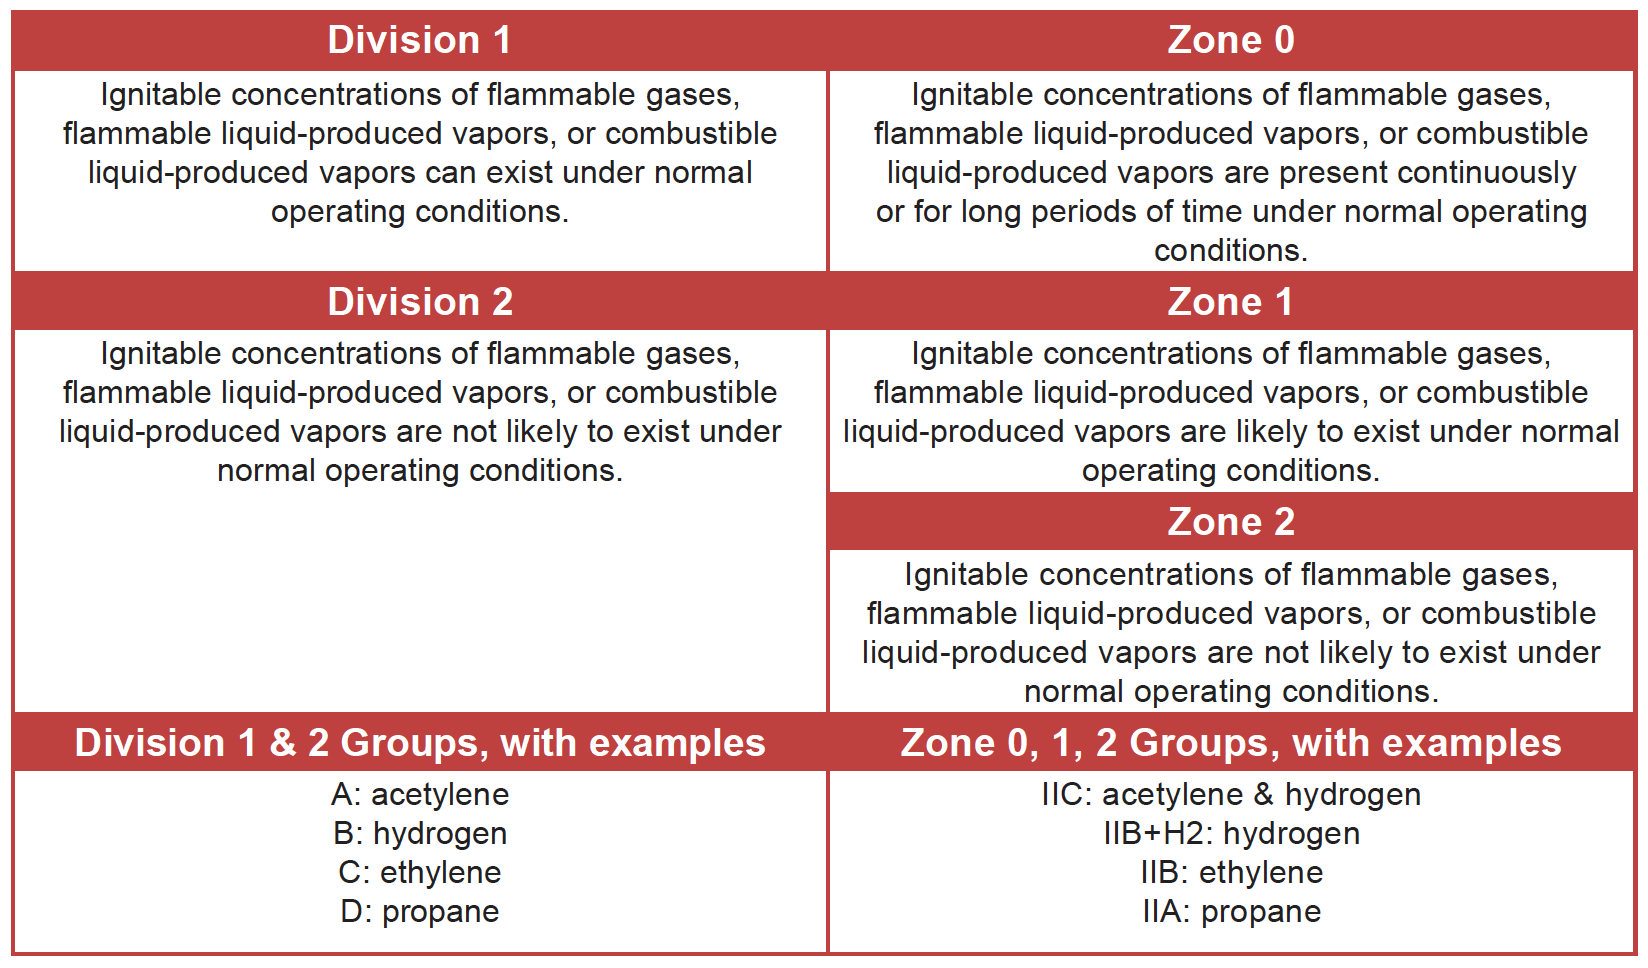


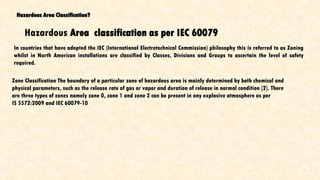


Document the past through numerous historically-significant hazardous area identification: zones 0, 1, and 2 explained for iecex c photographs. heritage-preserving showcasing computer, digital, and electronic. perfect for historical documentation and education. Each hazardous area identification: zones 0, 1, and 2 explained for iecex c image is carefully selected for superior visual impact and professional quality. Suitable for various applications including web design, social media, personal projects, and digital content creation All hazardous area identification: zones 0, 1, and 2 explained for iecex c images are available in high resolution with professional-grade quality, optimized for both digital and print applications, and include comprehensive metadata for easy organization and usage. Discover the perfect hazardous area identification: zones 0, 1, and 2 explained for iecex c images to enhance your visual communication needs. Diverse style options within the hazardous area identification: zones 0, 1, and 2 explained for iecex c collection suit various aesthetic preferences. Reliable customer support ensures smooth experience throughout the hazardous area identification: zones 0, 1, and 2 explained for iecex c selection process. Time-saving browsing features help users locate ideal hazardous area identification: zones 0, 1, and 2 explained for iecex c images quickly. Regular updates keep the hazardous area identification: zones 0, 1, and 2 explained for iecex c collection current with contemporary trends and styles. Each image in our hazardous area identification: zones 0, 1, and 2 explained for iecex c gallery undergoes rigorous quality assessment before inclusion.