


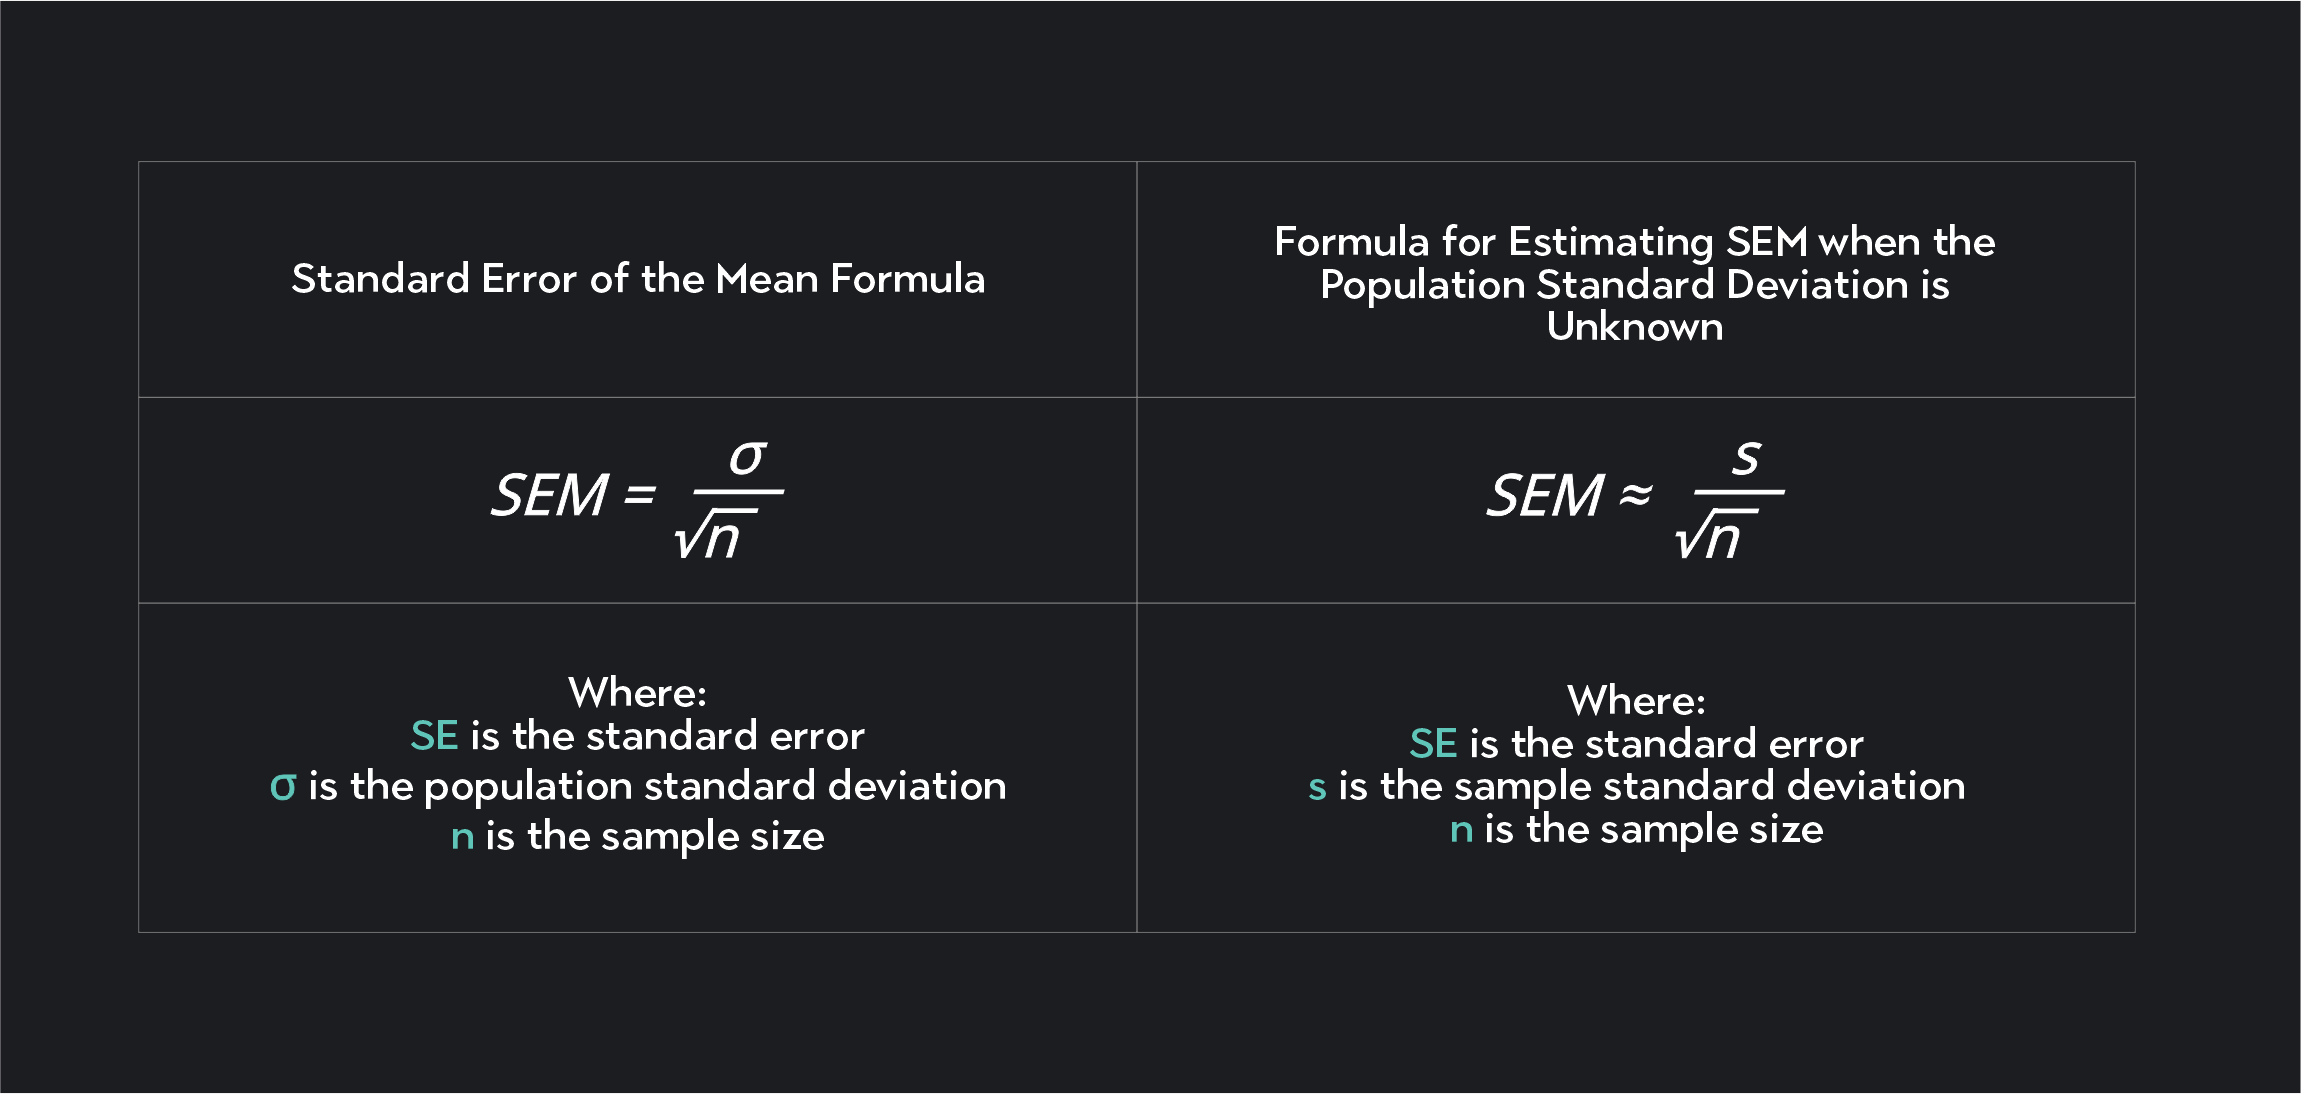
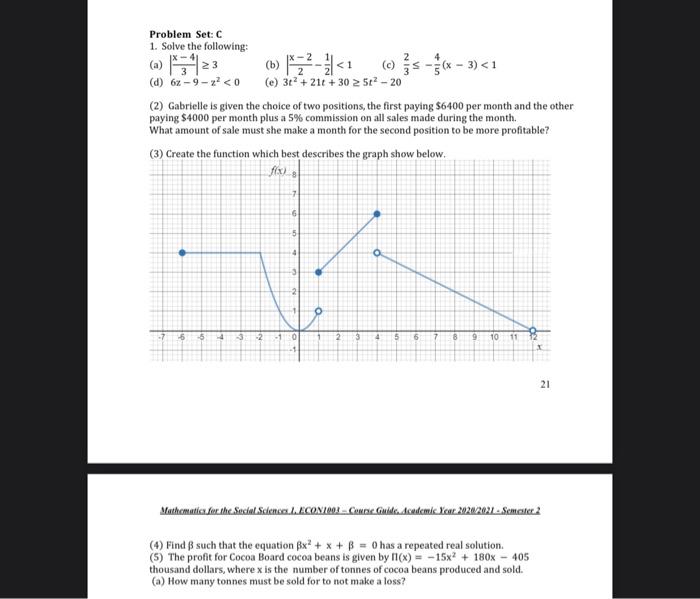
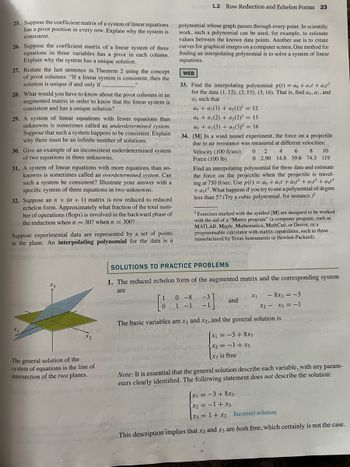
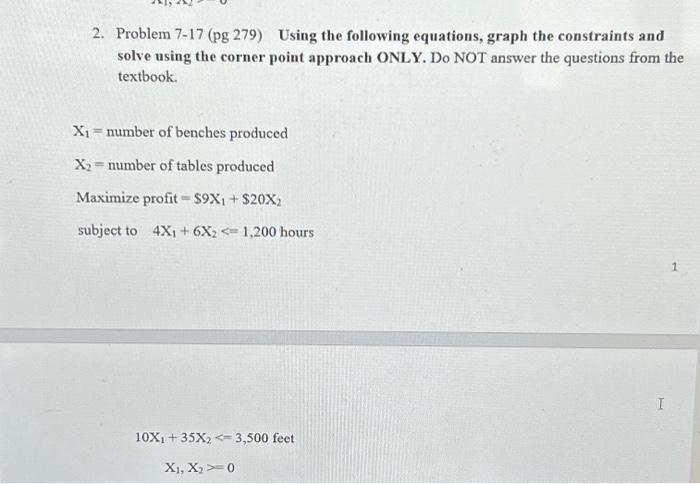
![The solution errors of Example 7 at ε=10−4\documentclass[12pt]{minimal ...](https://www.researchgate.net/profile/Abeer-Alotaibi-4/publication/343531354/figure/fig3/AS:963429342916650@1606710863850/The-solution-errors-of-Example7-at-e10-4documentclass12ptminimal.jpg)


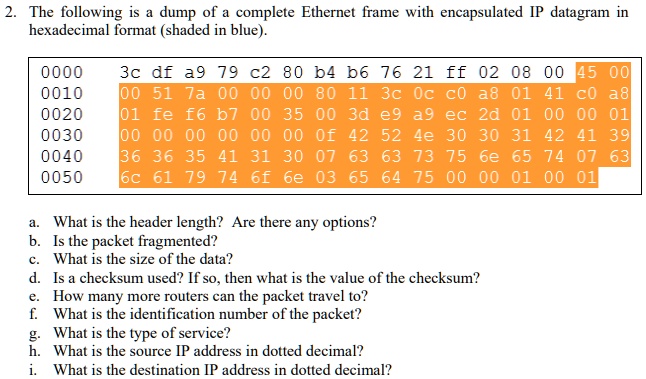
:+IV:+Success+Error+XX+XX+XX+XX+XX+XX+XX+XX+AB+01+4F+21.jpg)


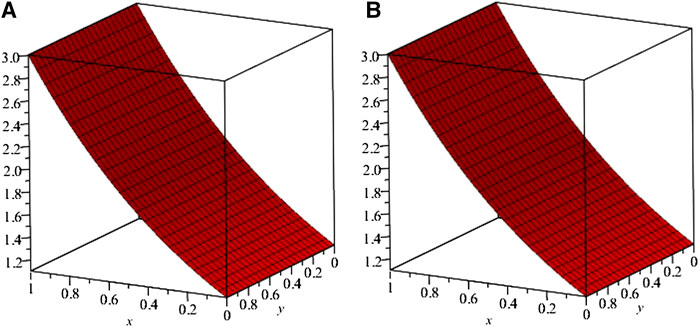


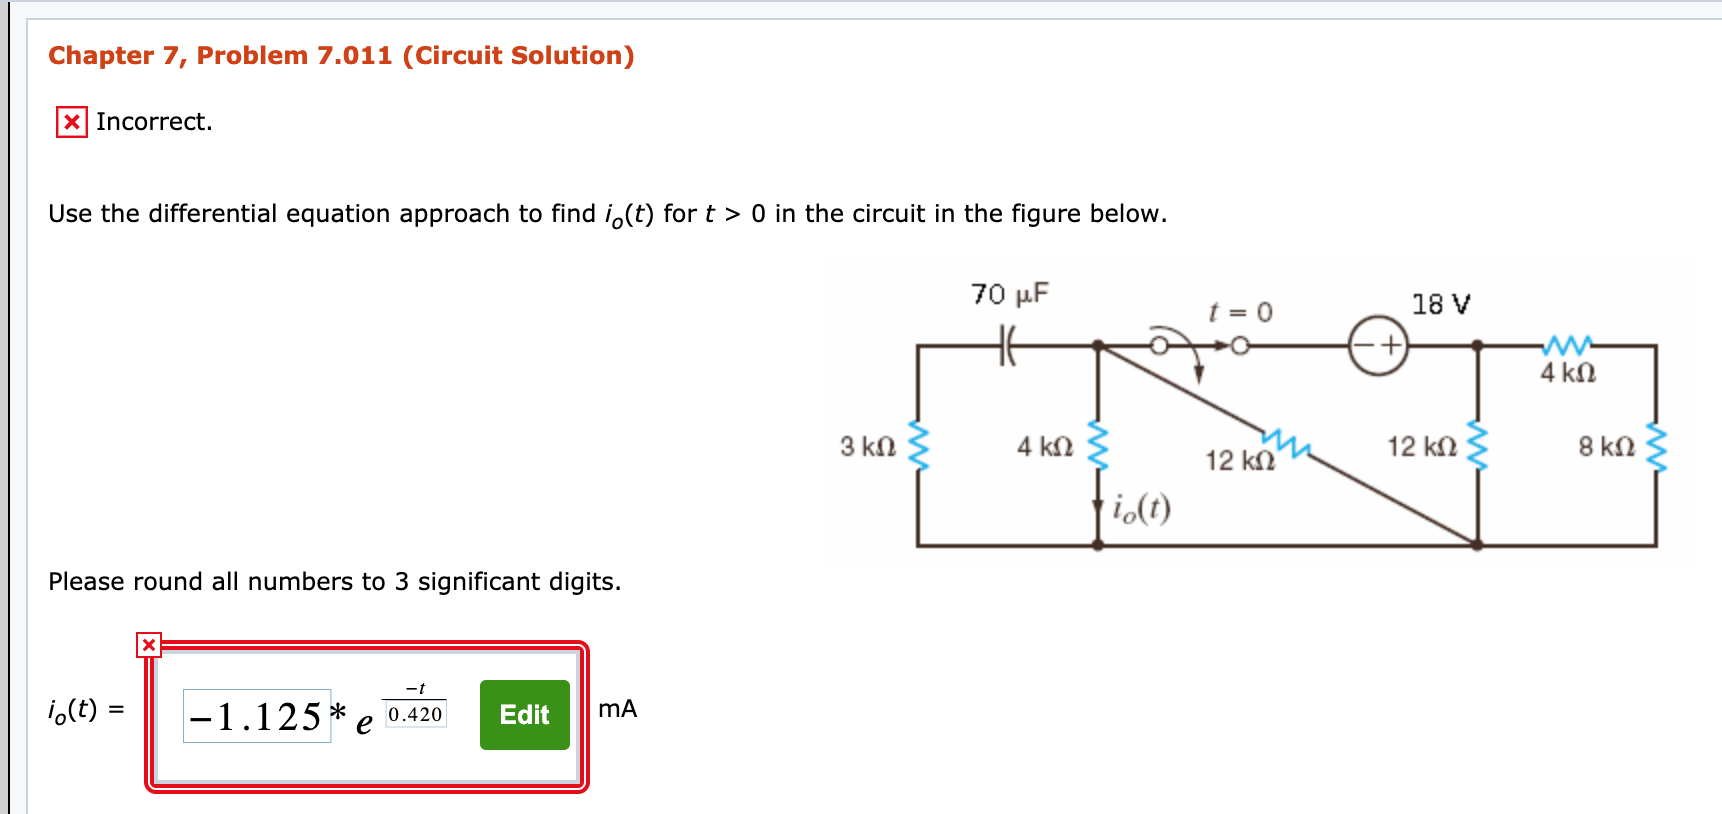
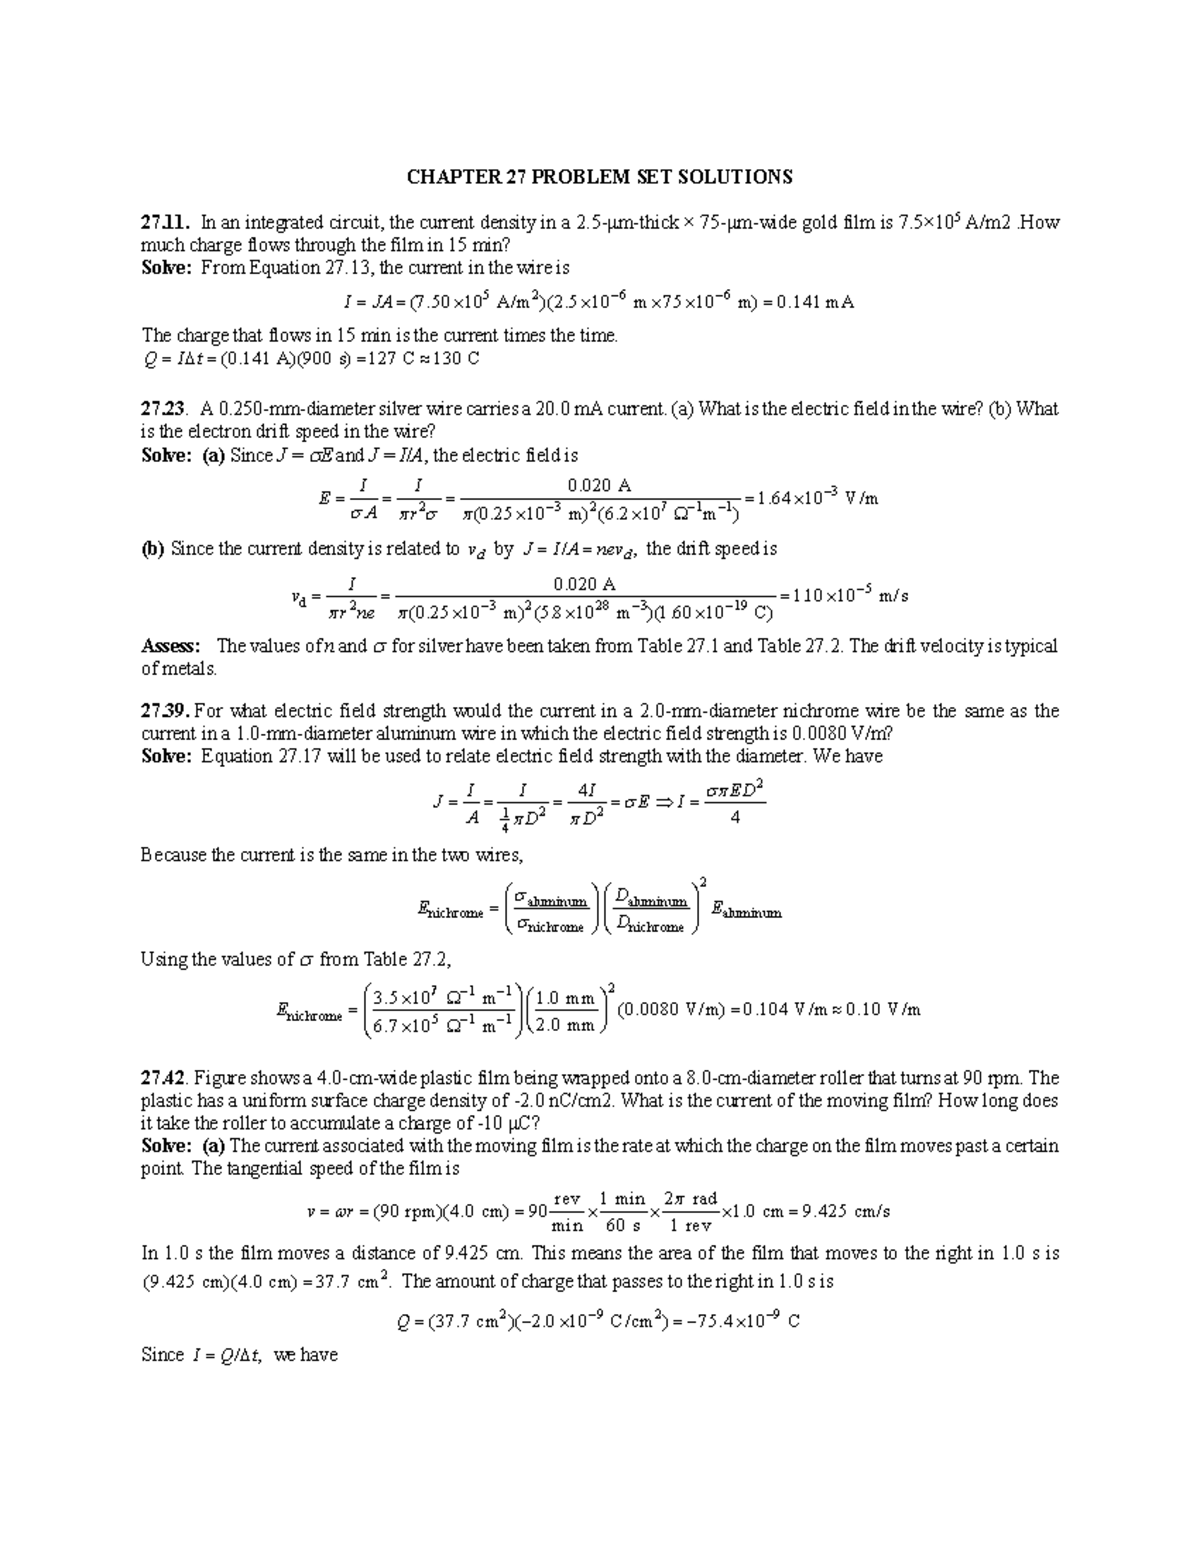


Discover cutting-edge | (c) error graph (d) istm solutions of example 4 at α 0, 5. in figure through extensive collections of modern photographs. showcasing contemporary approaches to play, doll, and game. ideal for contemporary publications and media. The | (c) error graph (d) istm solutions of example 4 at α 0, 5. in figure collection maintains consistent quality standards across all images. Suitable for various applications including web design, social media, personal projects, and digital content creation All | (c) error graph (d) istm solutions of example 4 at α 0, 5. in figure images are available in high resolution with professional-grade quality, optimized for both digital and print applications, and include comprehensive metadata for easy organization and usage. Explore the versatility of our | (c) error graph (d) istm solutions of example 4 at α 0, 5. in figure collection for various creative and professional projects. Professional licensing options accommodate both commercial and educational usage requirements. The | (c) error graph (d) istm solutions of example 4 at α 0, 5. in figure archive serves professionals, educators, and creatives across diverse industries. Diverse style options within the | (c) error graph (d) istm solutions of example 4 at α 0, 5. in figure collection suit various aesthetic preferences. Advanced search capabilities make finding the perfect | (c) error graph (d) istm solutions of example 4 at α 0, 5. in figure image effortless and efficient.