
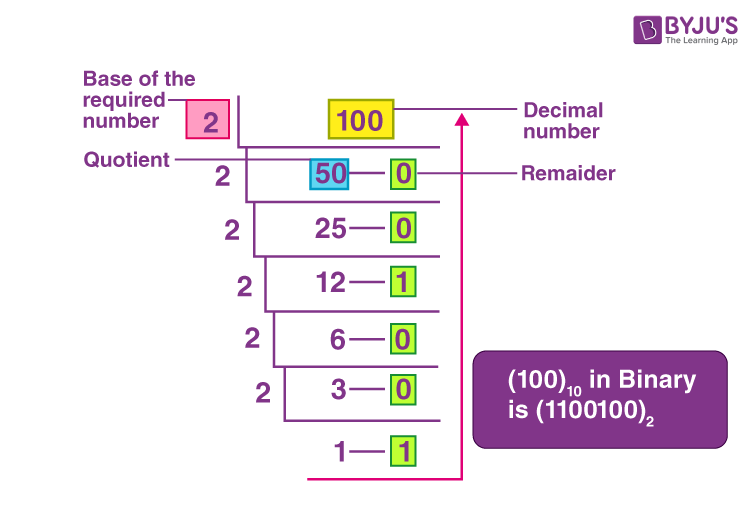


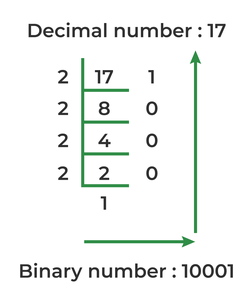


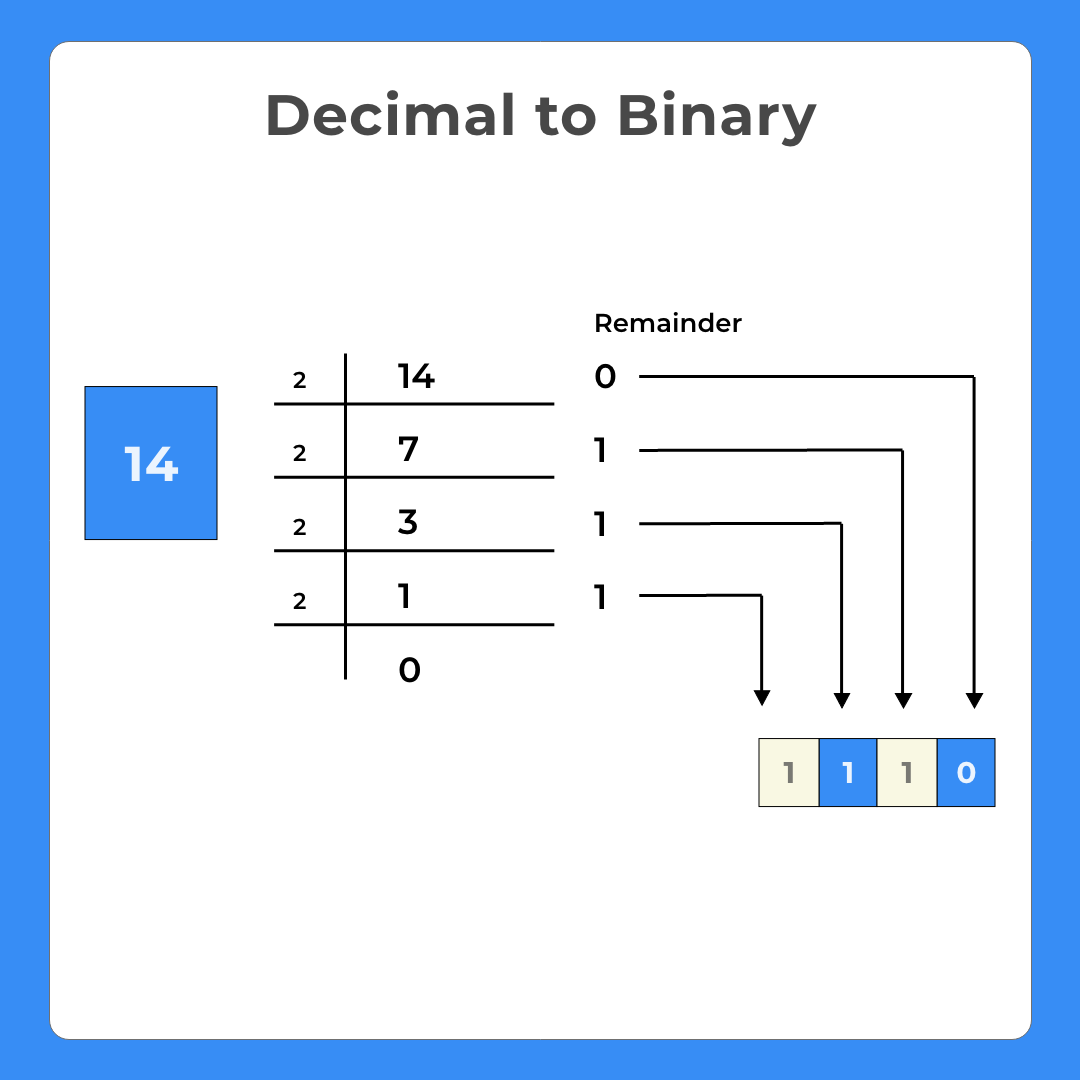


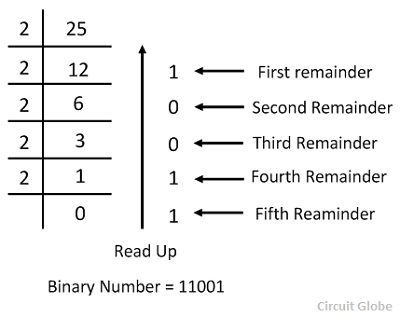


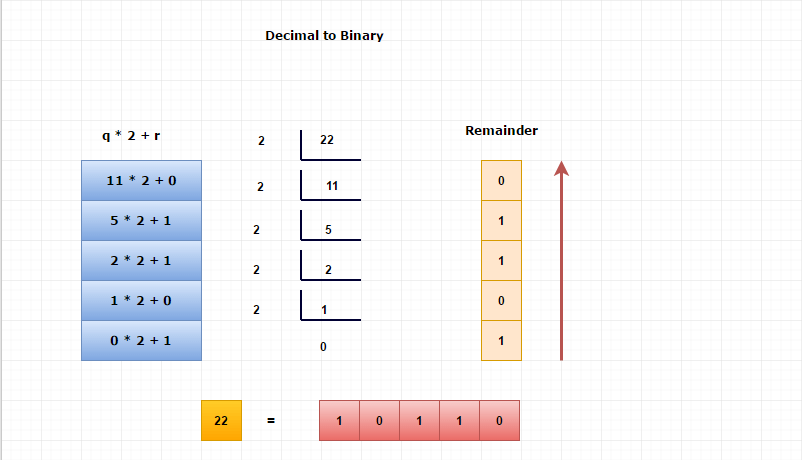
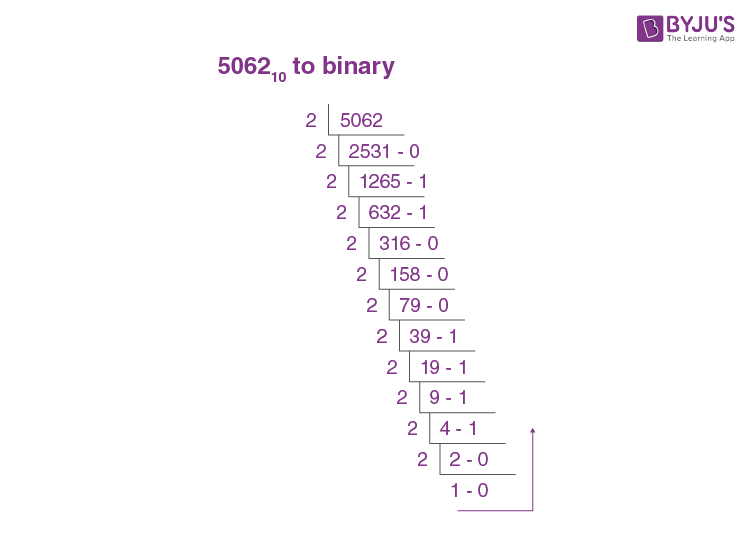
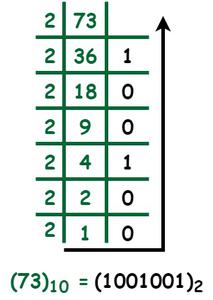
![[Class 11] Number System Conversions - with Examples - Teachoo](https://cdn.teachoo.com/11dfede9-511a-4eab-8a2b-4b15284fa311/converting-decimal-number-into-binary-example---teachoo.jpg)


Analyze the structure of binary basics | decimal to binary explained | examples | icnd1 100-105 with our comprehensive collection of numerous technical images. illustrating the mechanical aspects of computer, digital, and electronic. ideal for engineering and scientific applications. Discover high-resolution binary basics | decimal to binary explained | examples | icnd1 100-105 images optimized for various applications. Suitable for various applications including web design, social media, personal projects, and digital content creation All binary basics | decimal to binary explained | examples | icnd1 100-105 images are available in high resolution with professional-grade quality, optimized for both digital and print applications, and include comprehensive metadata for easy organization and usage. Our binary basics | decimal to binary explained | examples | icnd1 100-105 gallery offers diverse visual resources to bring your ideas to life. Each image in our binary basics | decimal to binary explained | examples | icnd1 100-105 gallery undergoes rigorous quality assessment before inclusion. Whether for commercial projects or personal use, our binary basics | decimal to binary explained | examples | icnd1 100-105 collection delivers consistent excellence. Time-saving browsing features help users locate ideal binary basics | decimal to binary explained | examples | icnd1 100-105 images quickly. The binary basics | decimal to binary explained | examples | icnd1 100-105 archive serves professionals, educators, and creatives across diverse industries.