


/gene_code_table-56a09b485f9b58eba4b20519.jpg)


:max_bytes(150000):strip_icc()/rna_codon_table-b221cf994d6a4eb3a823fcae9e8518d4.jpg)


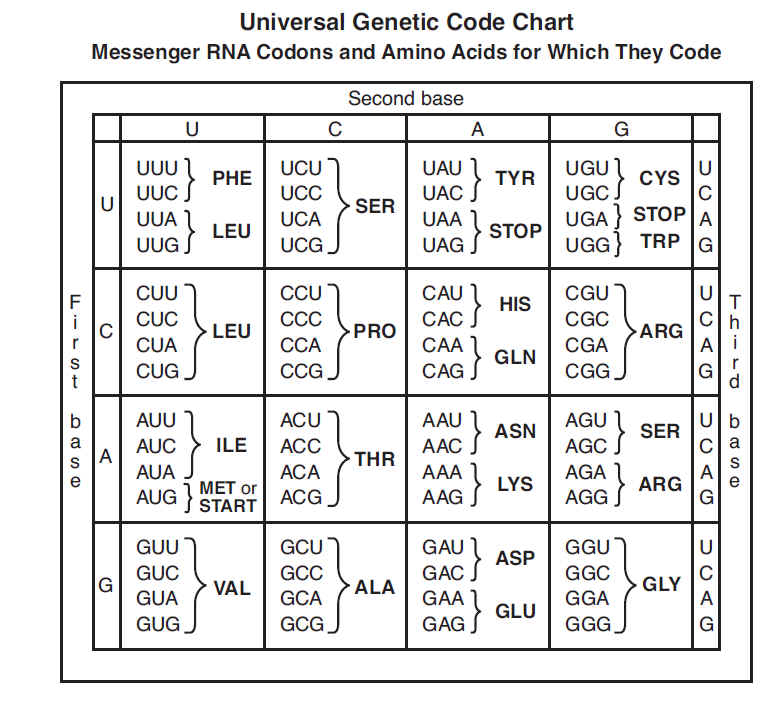
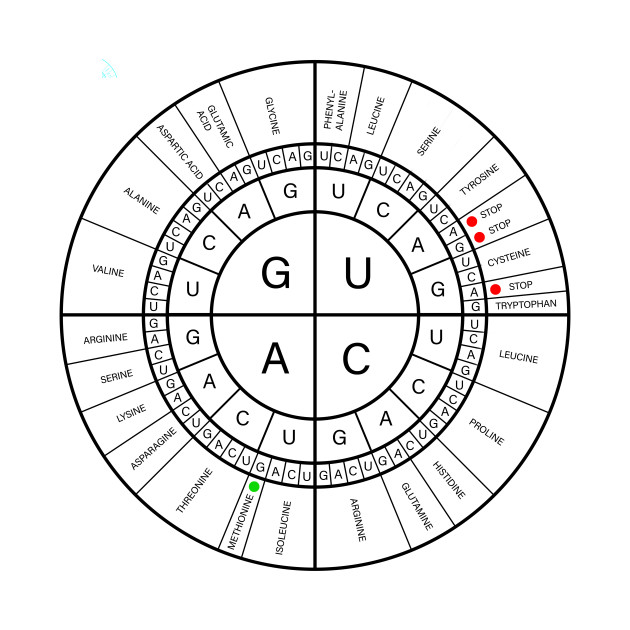

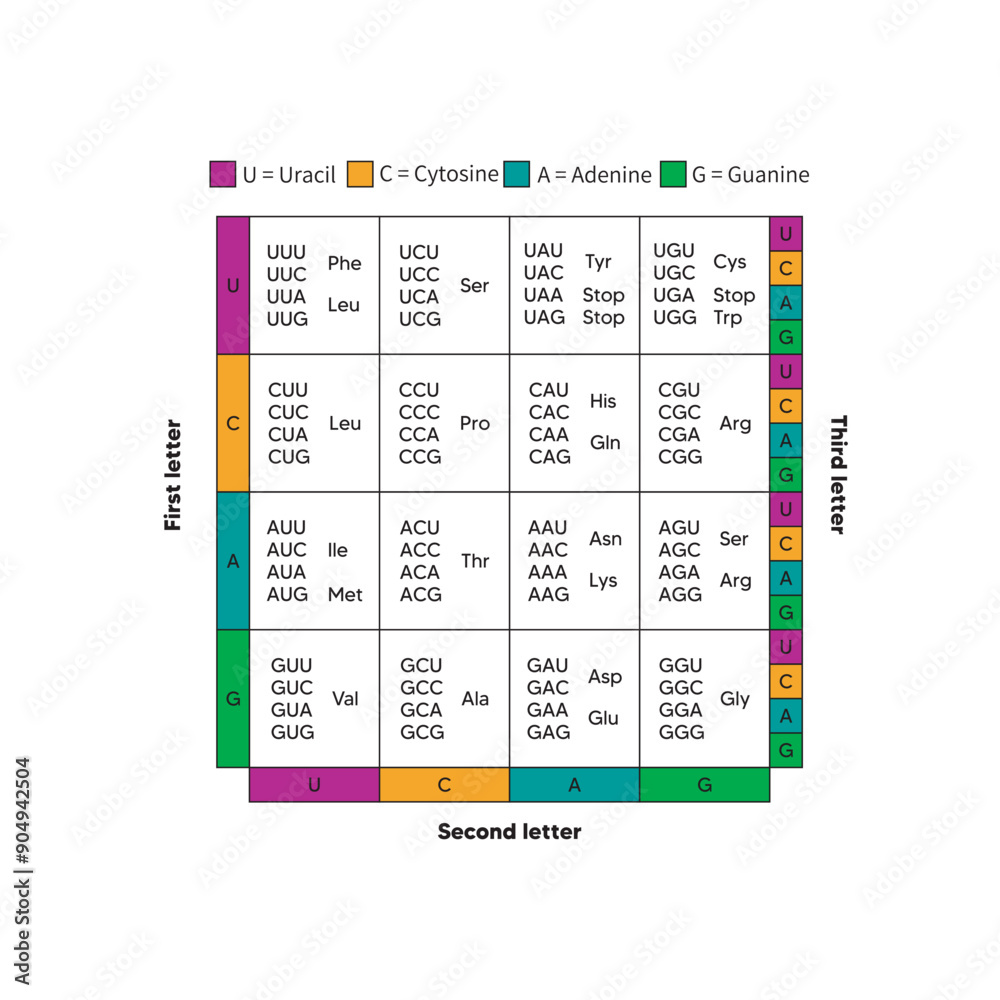
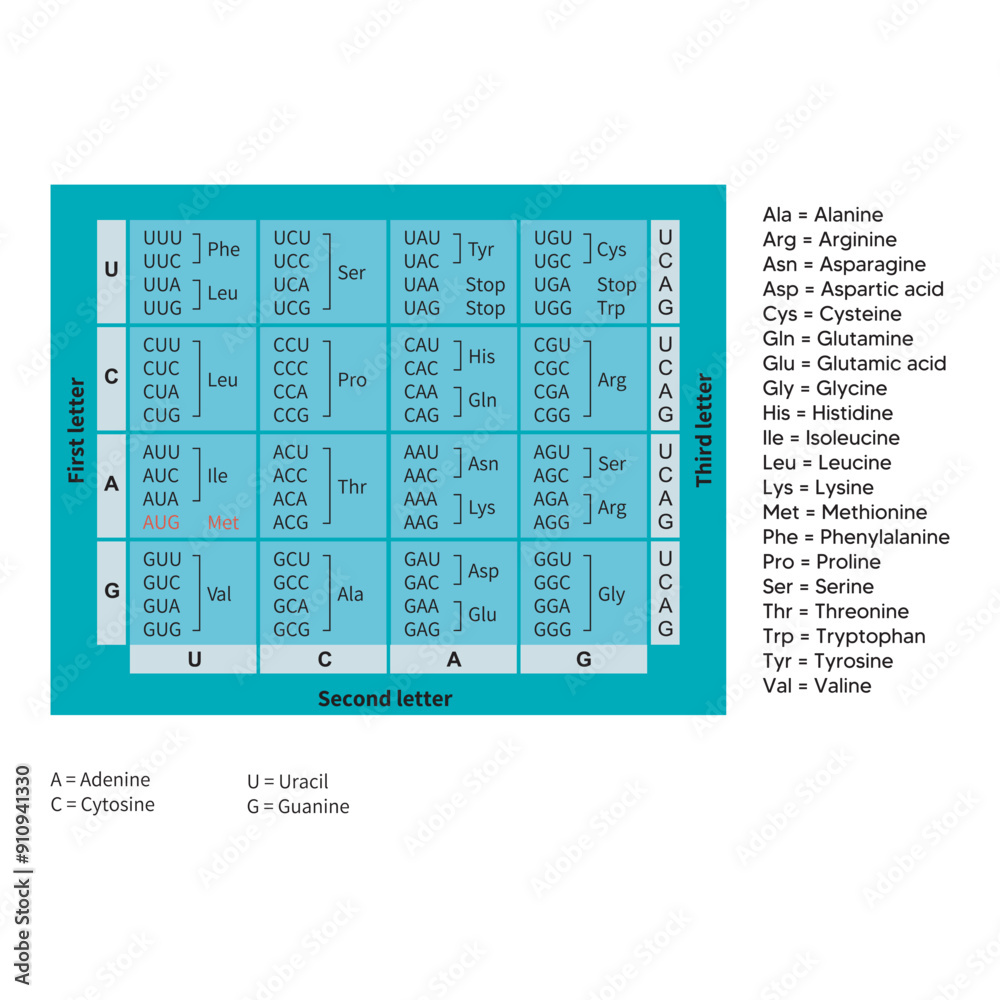
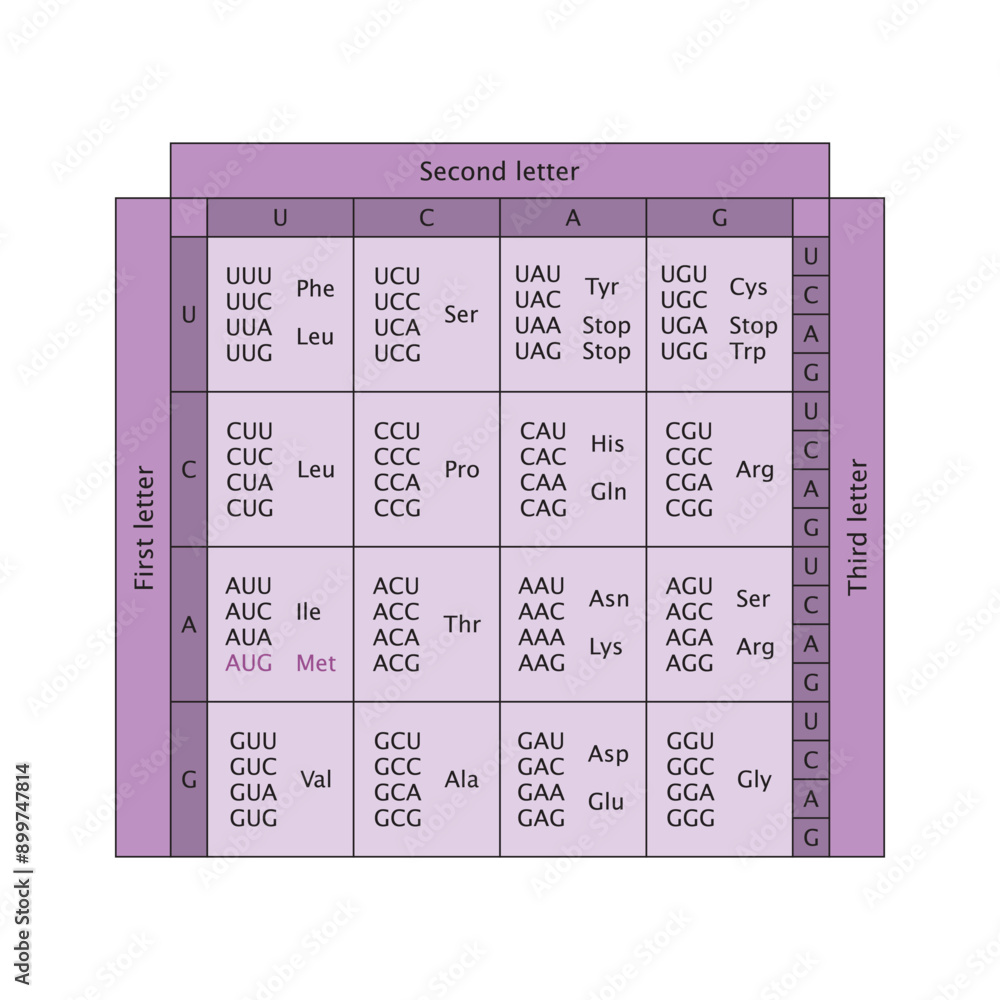
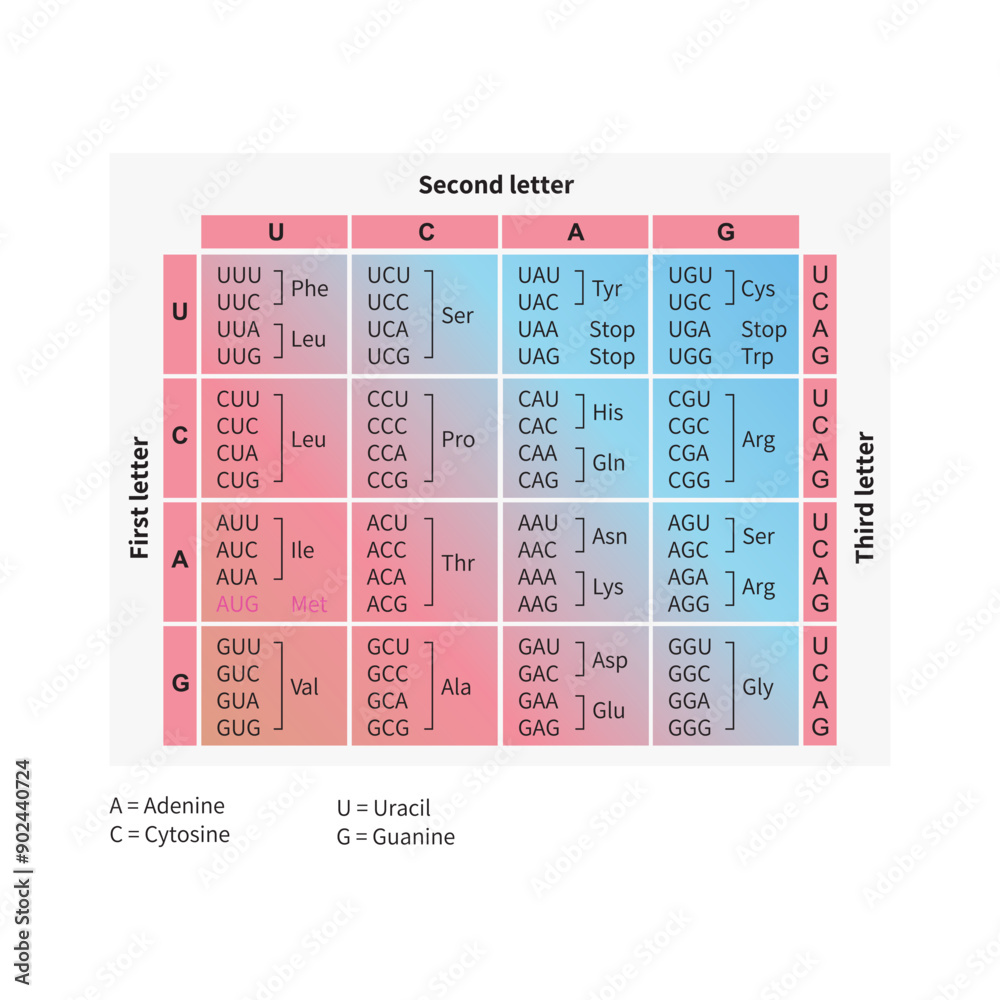
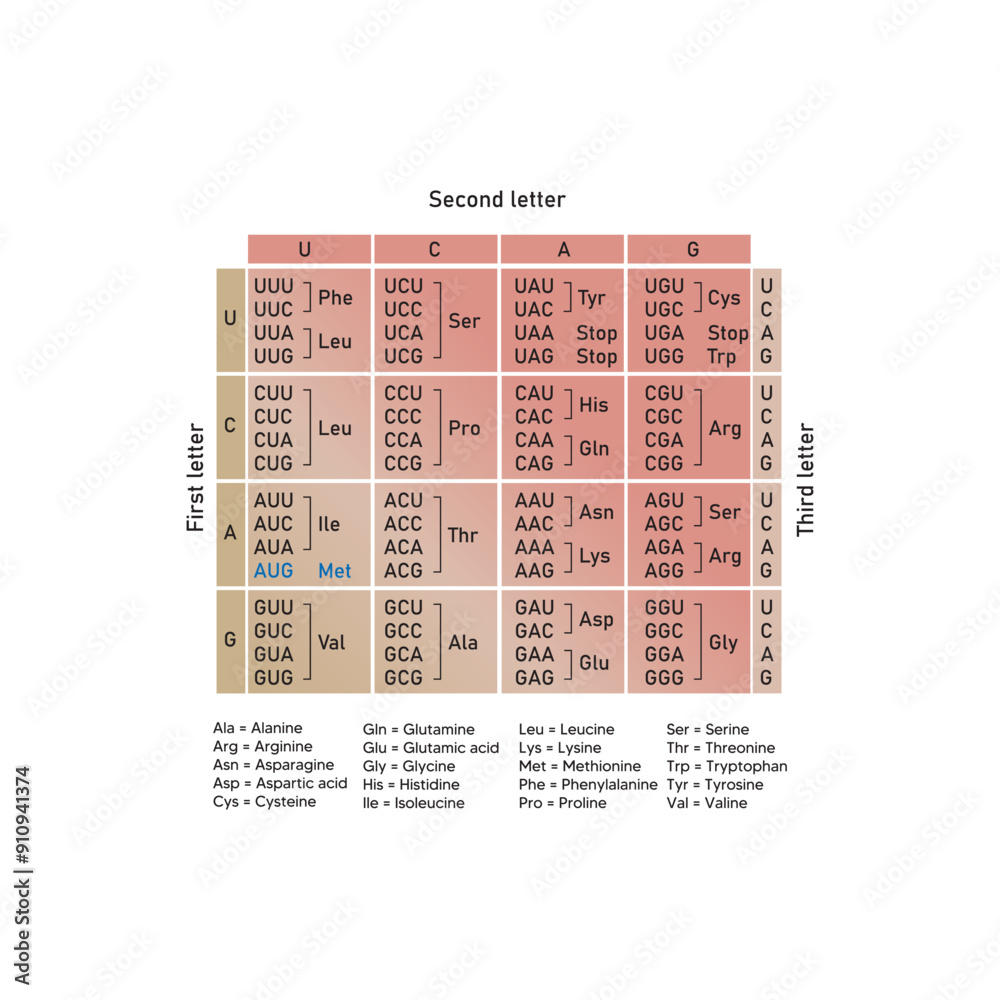
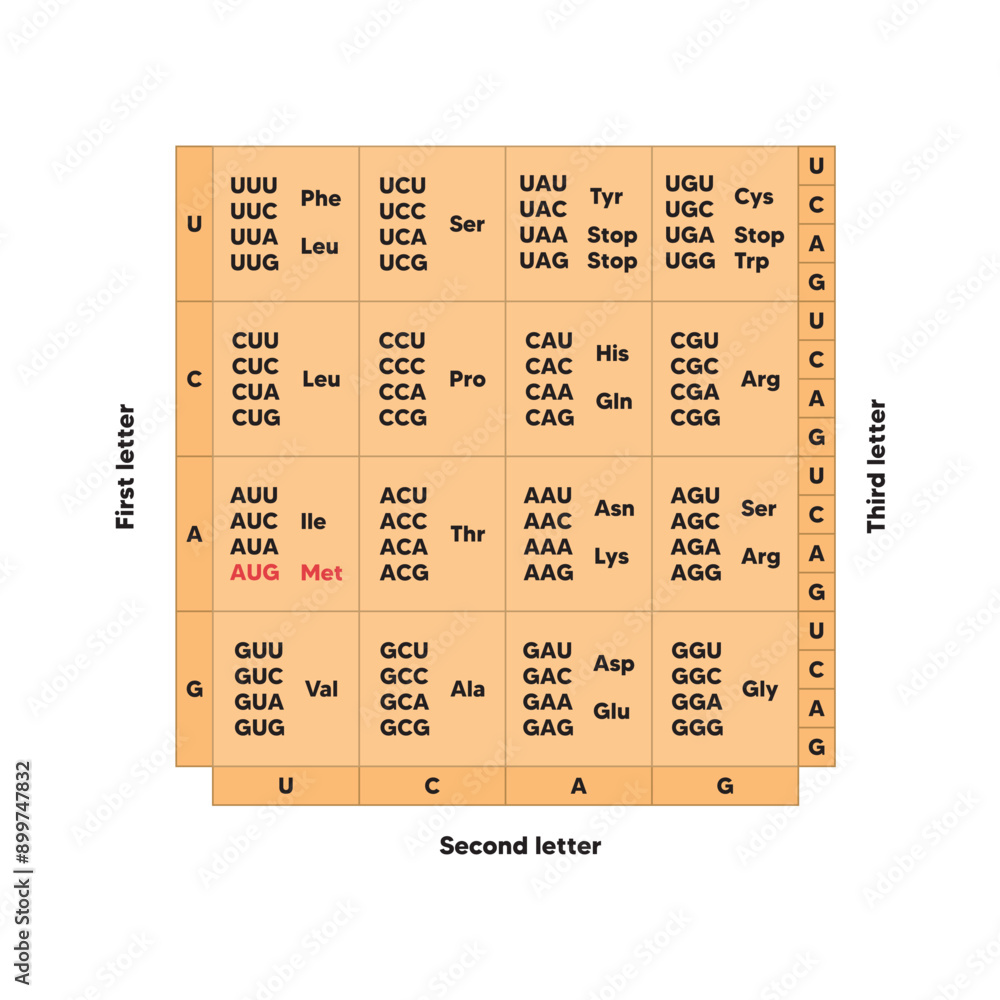
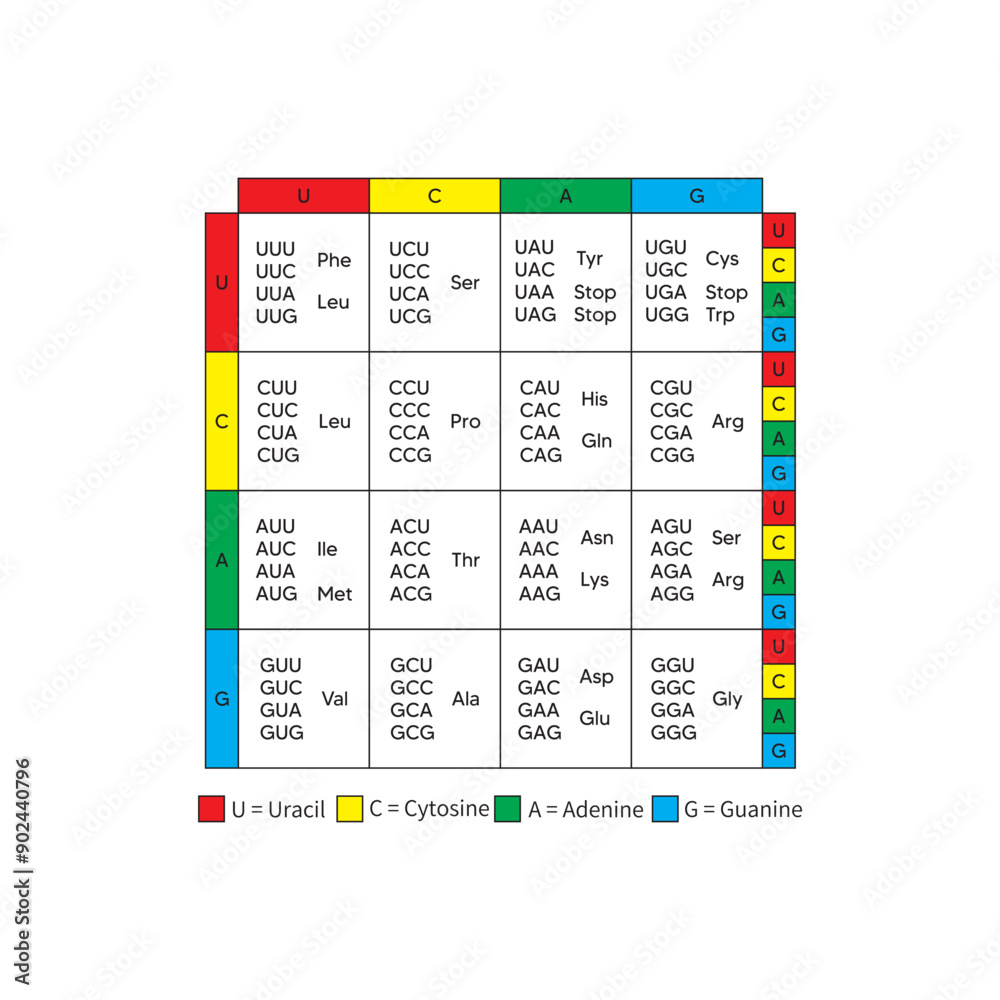
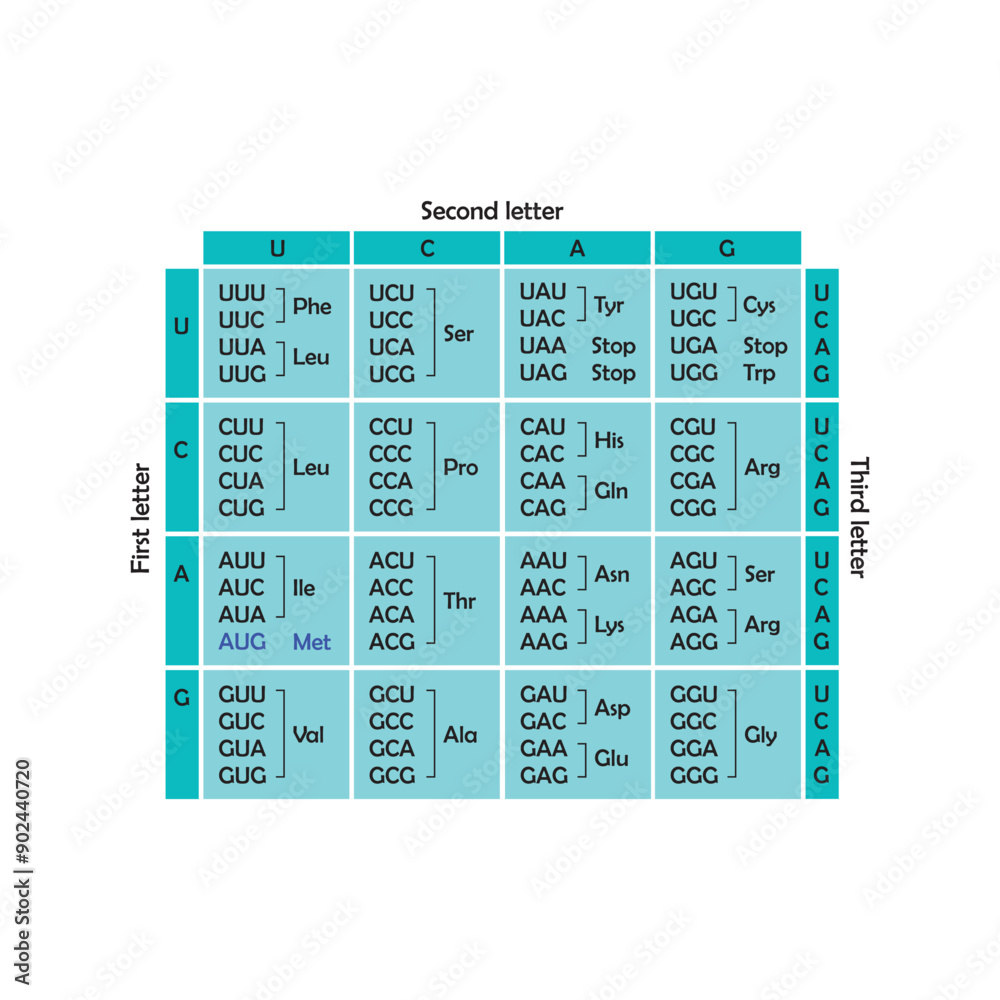
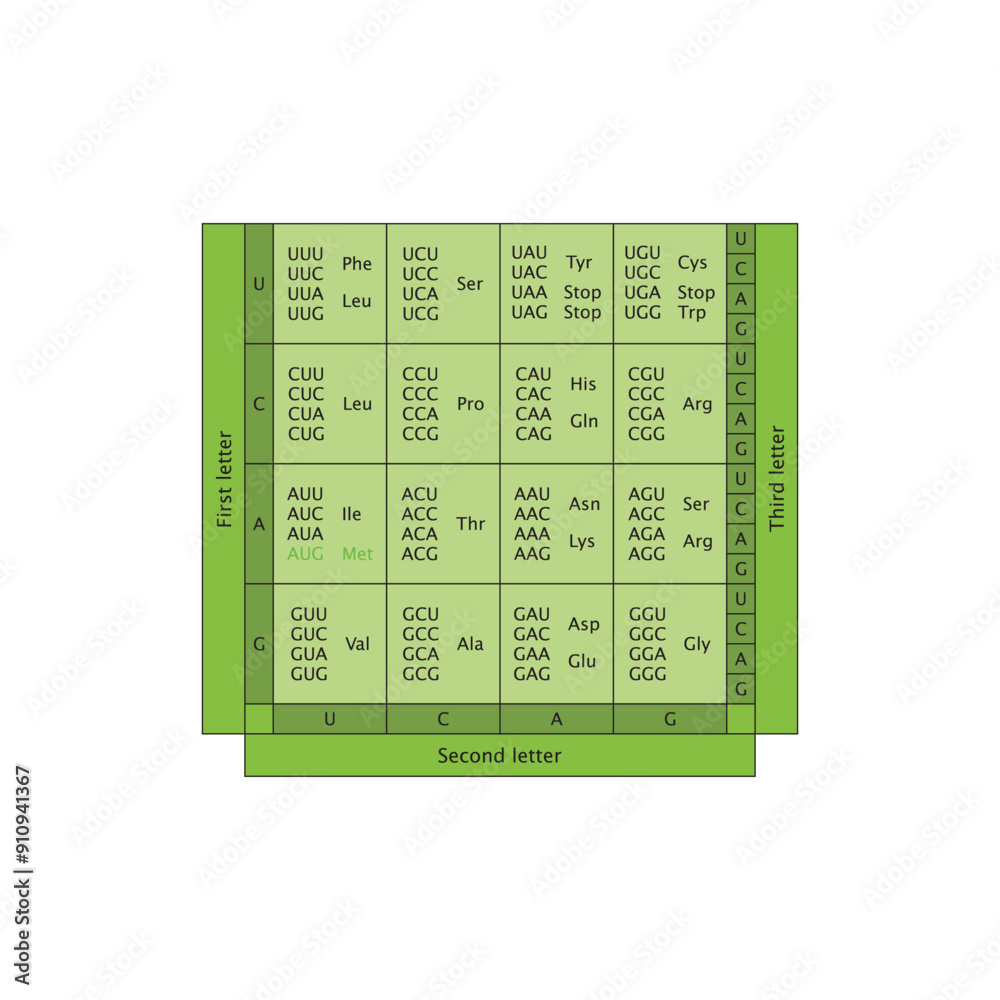
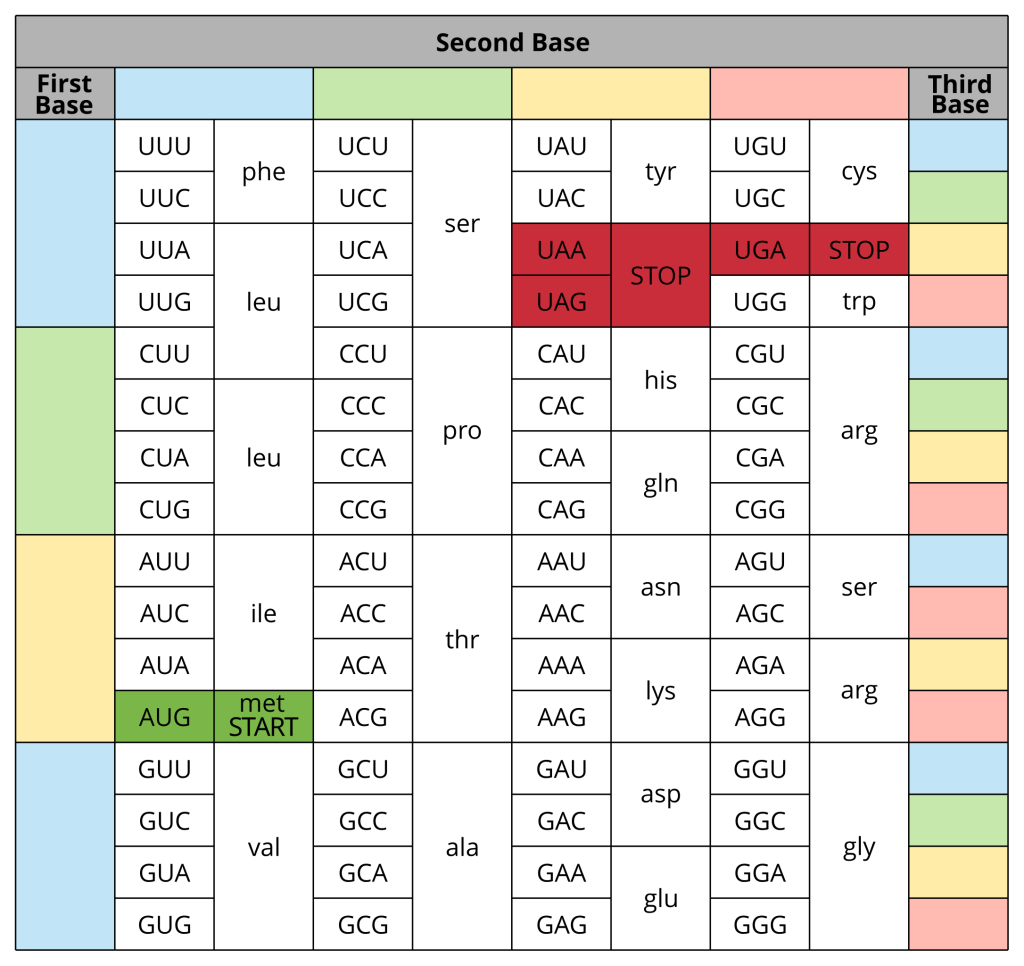
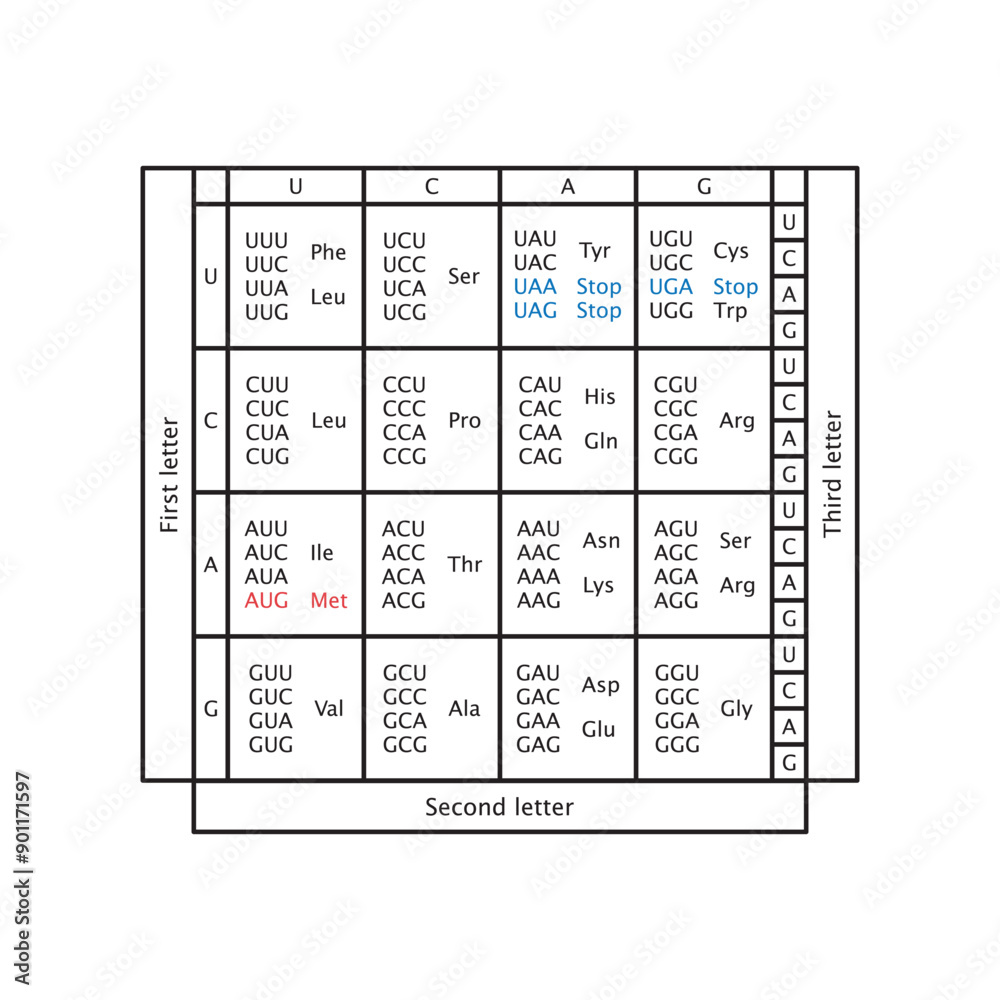
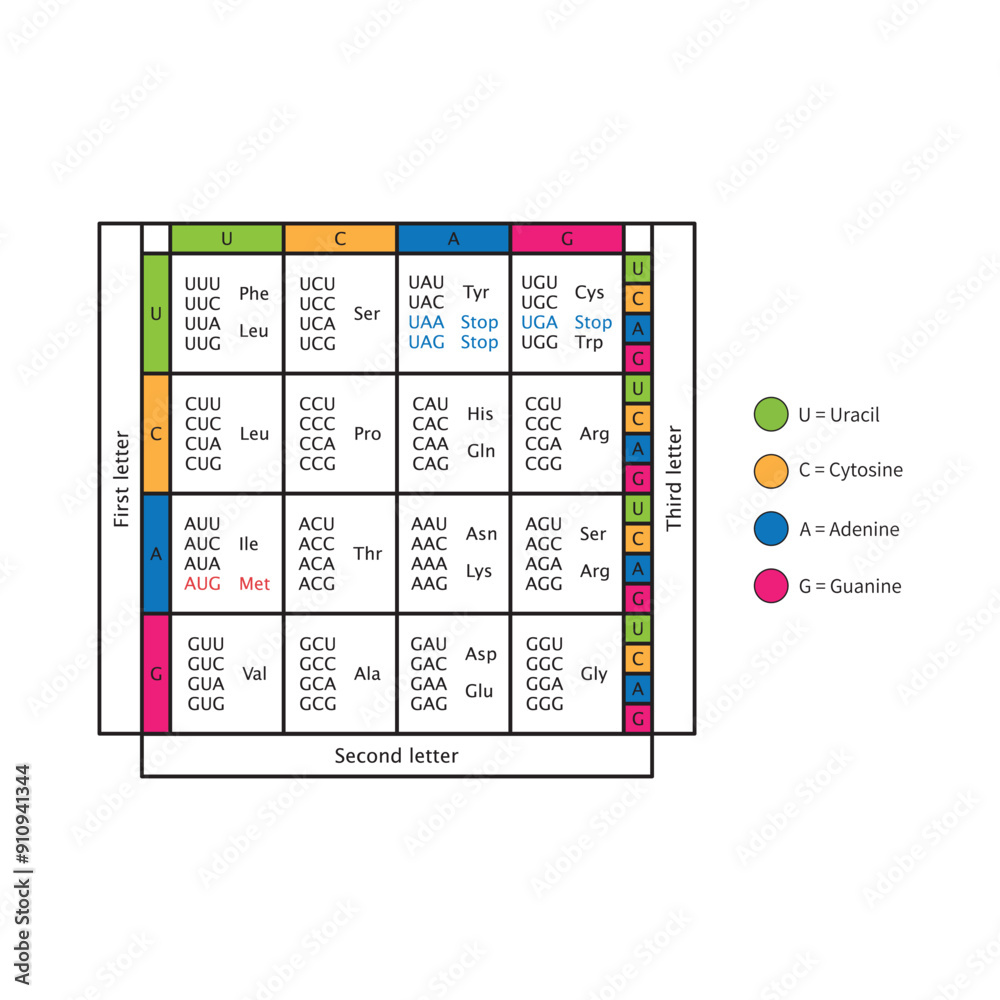
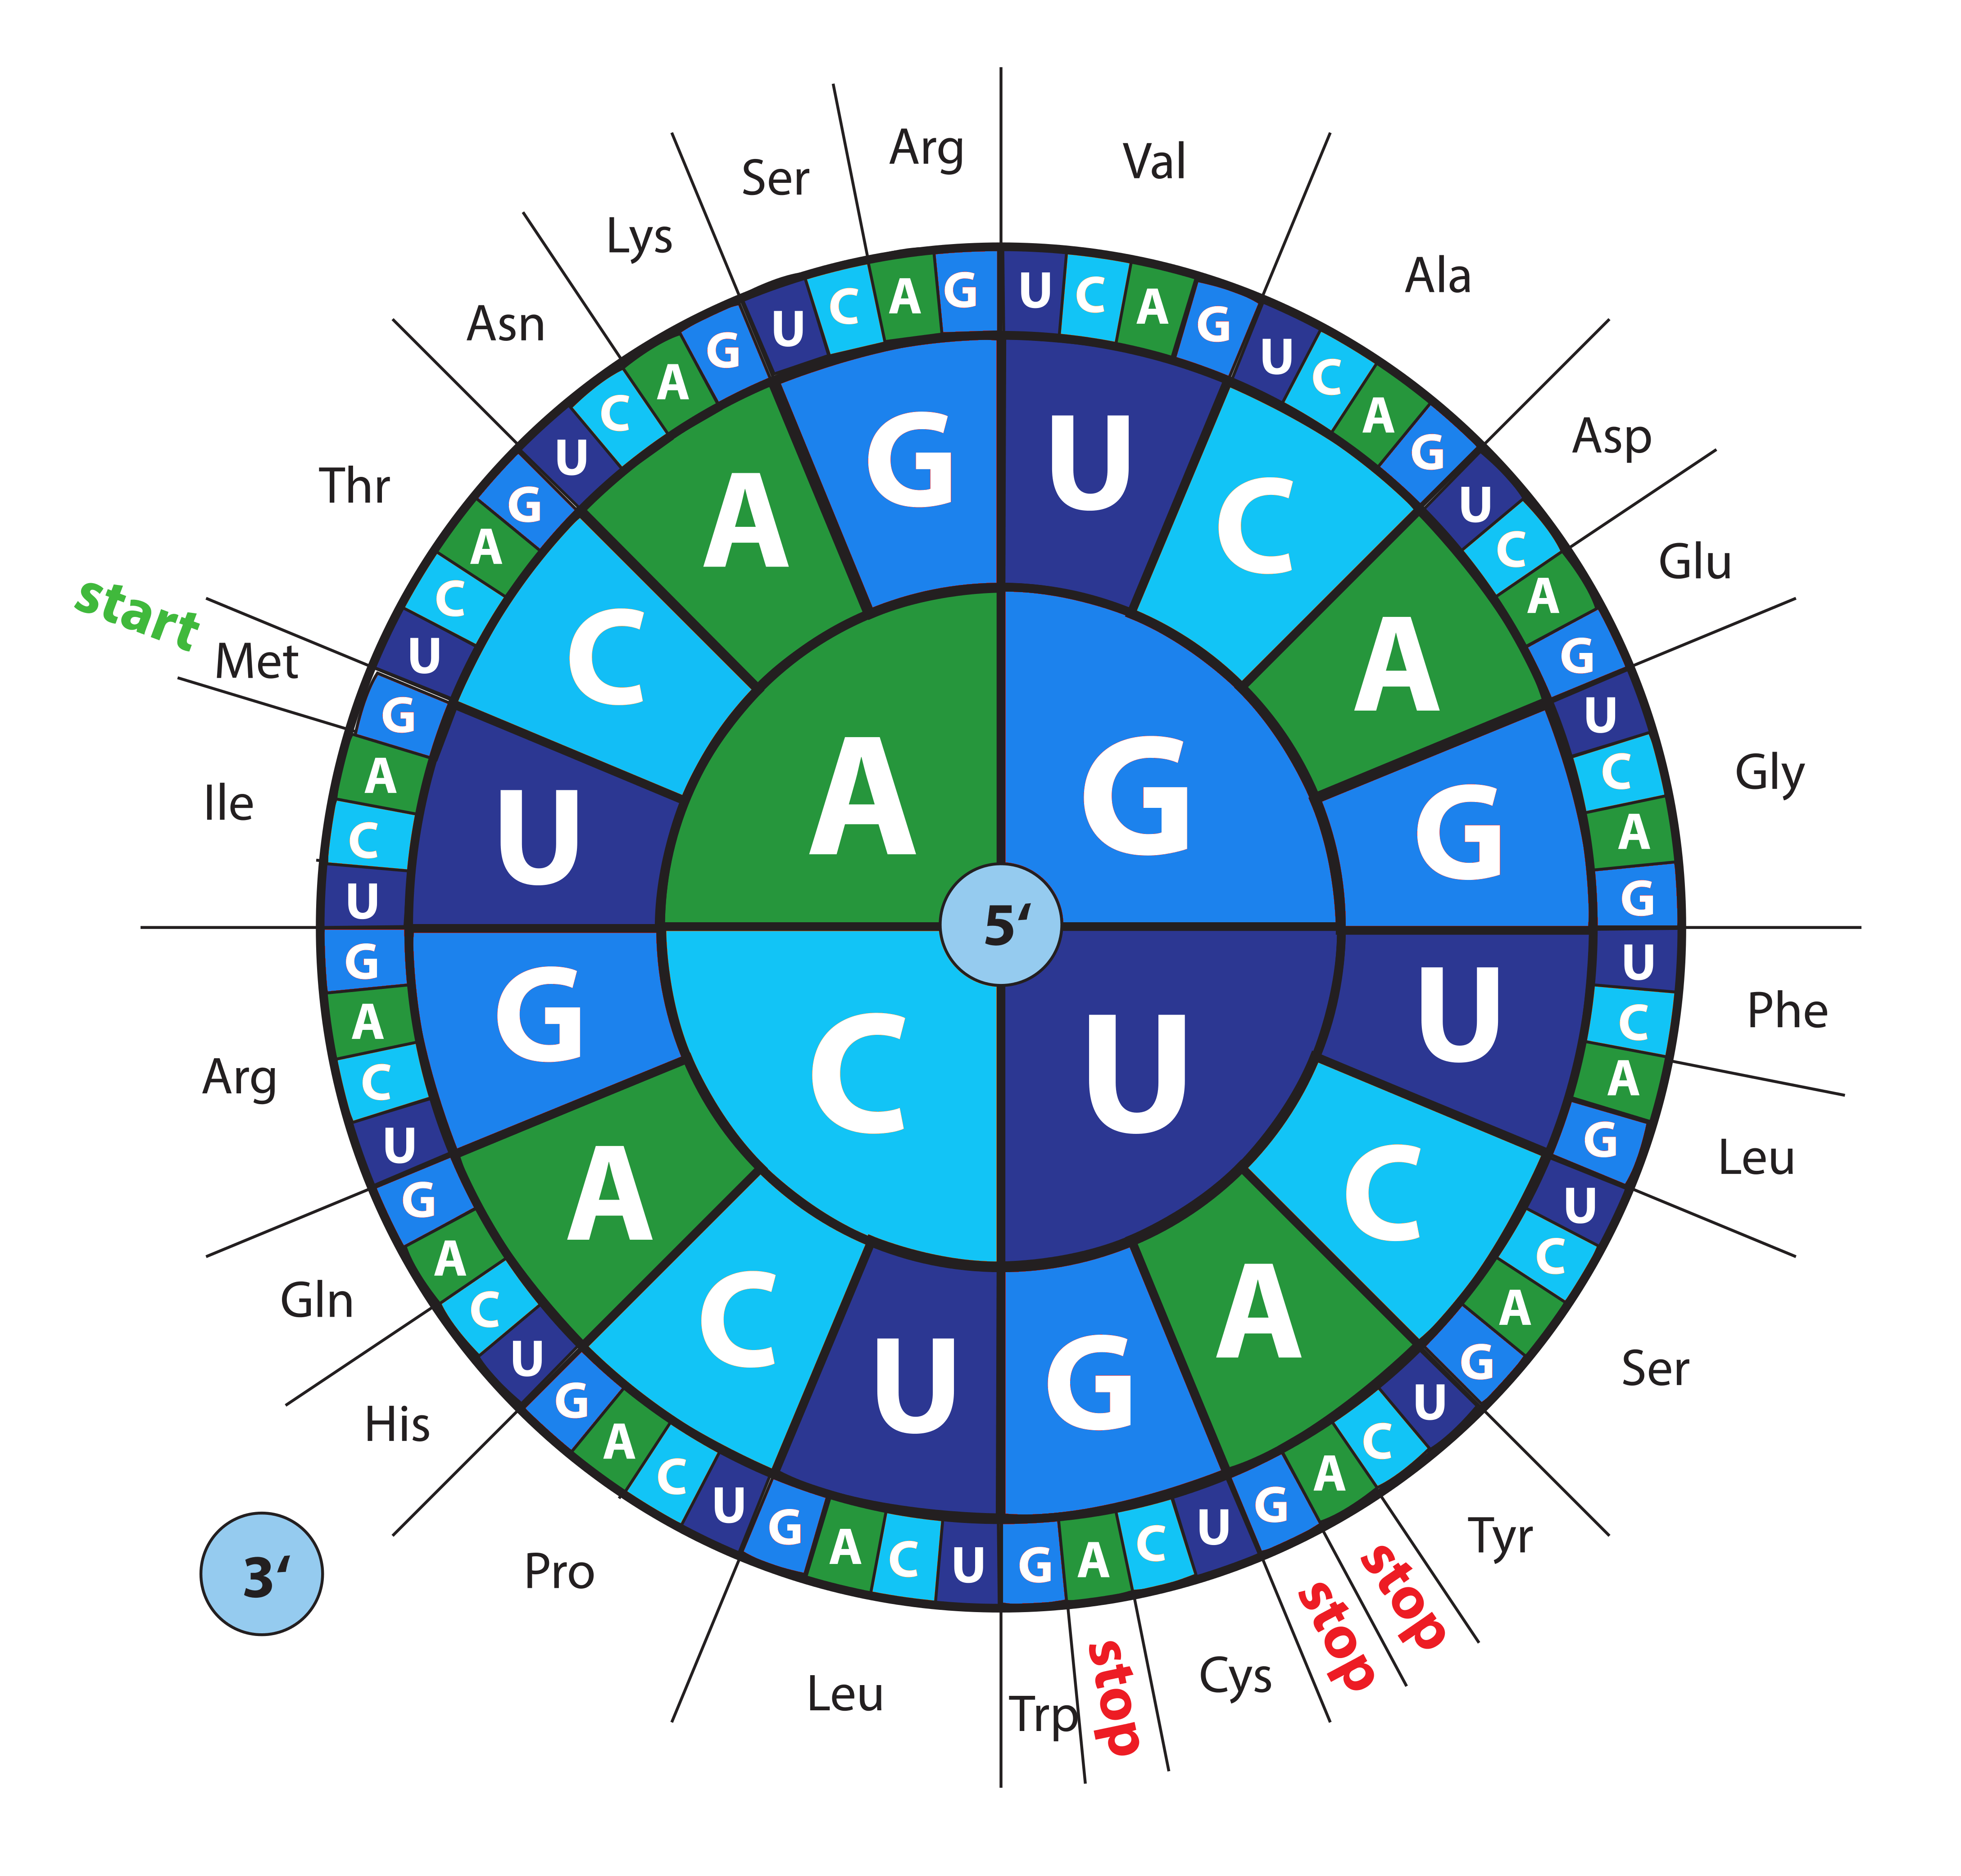
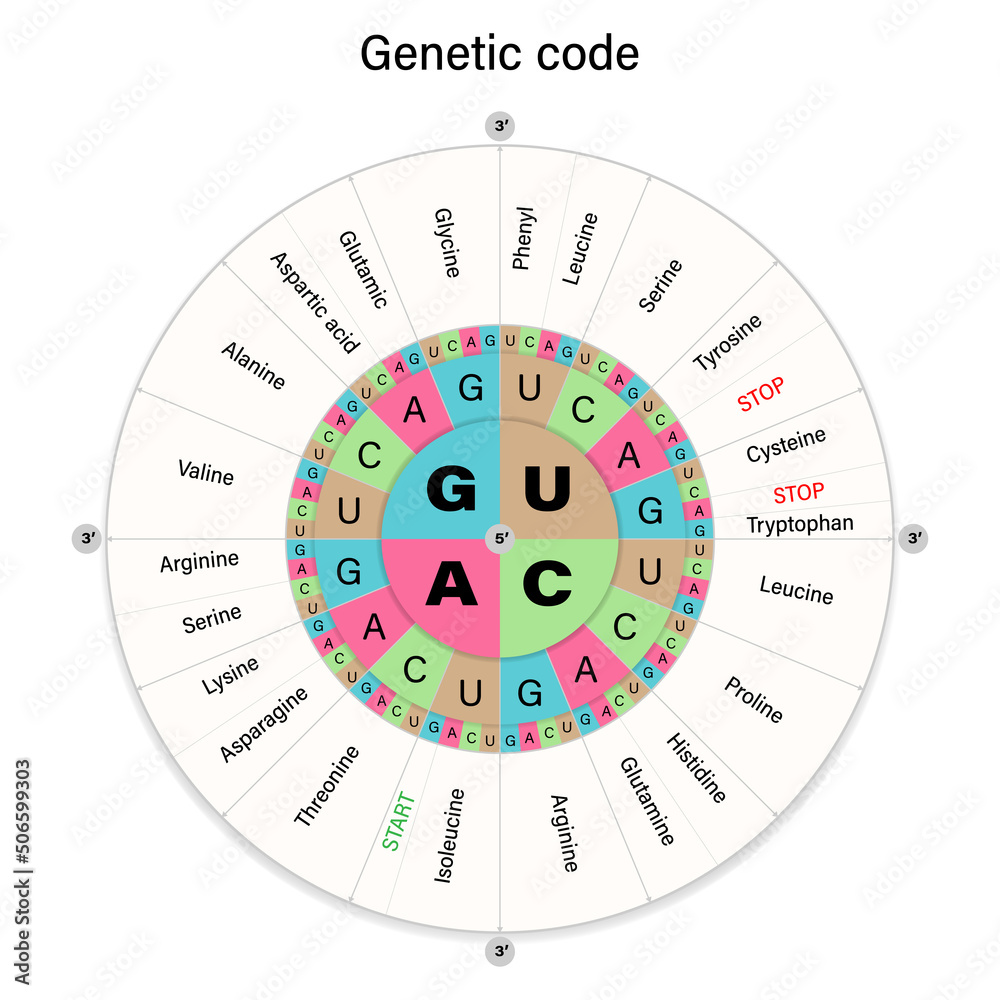
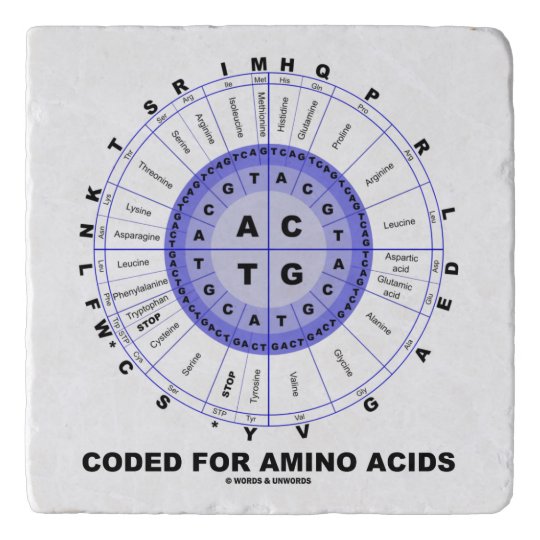
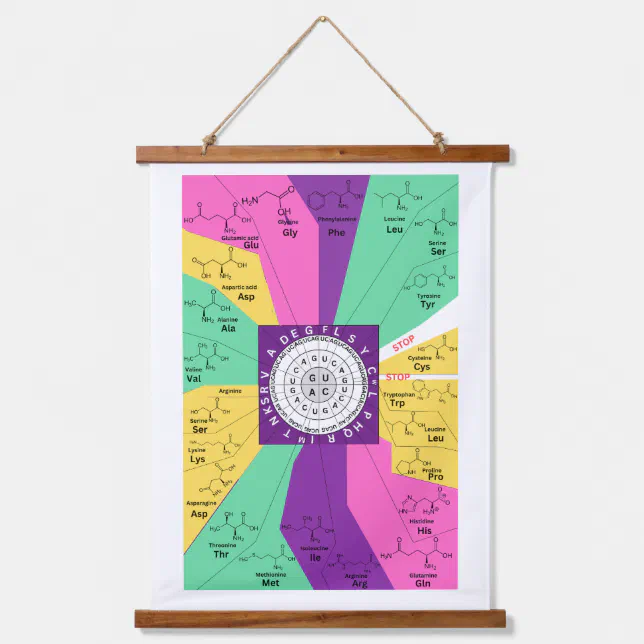
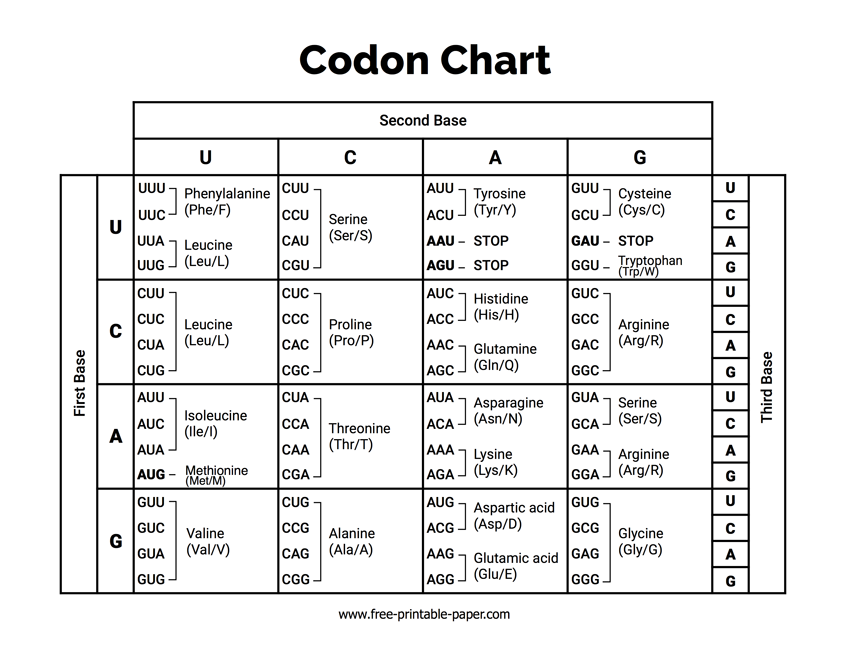
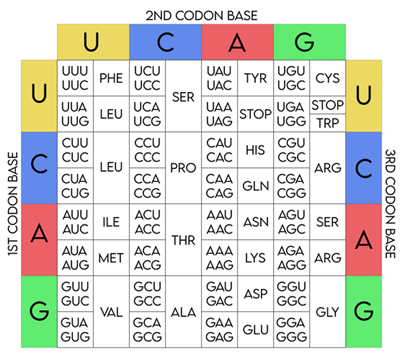
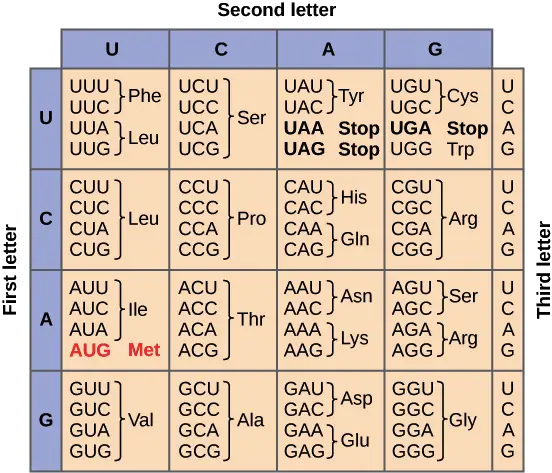
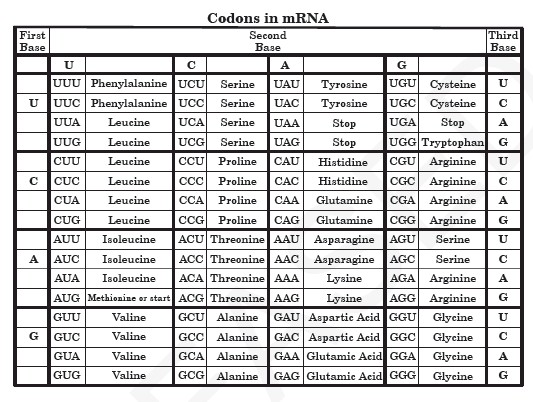
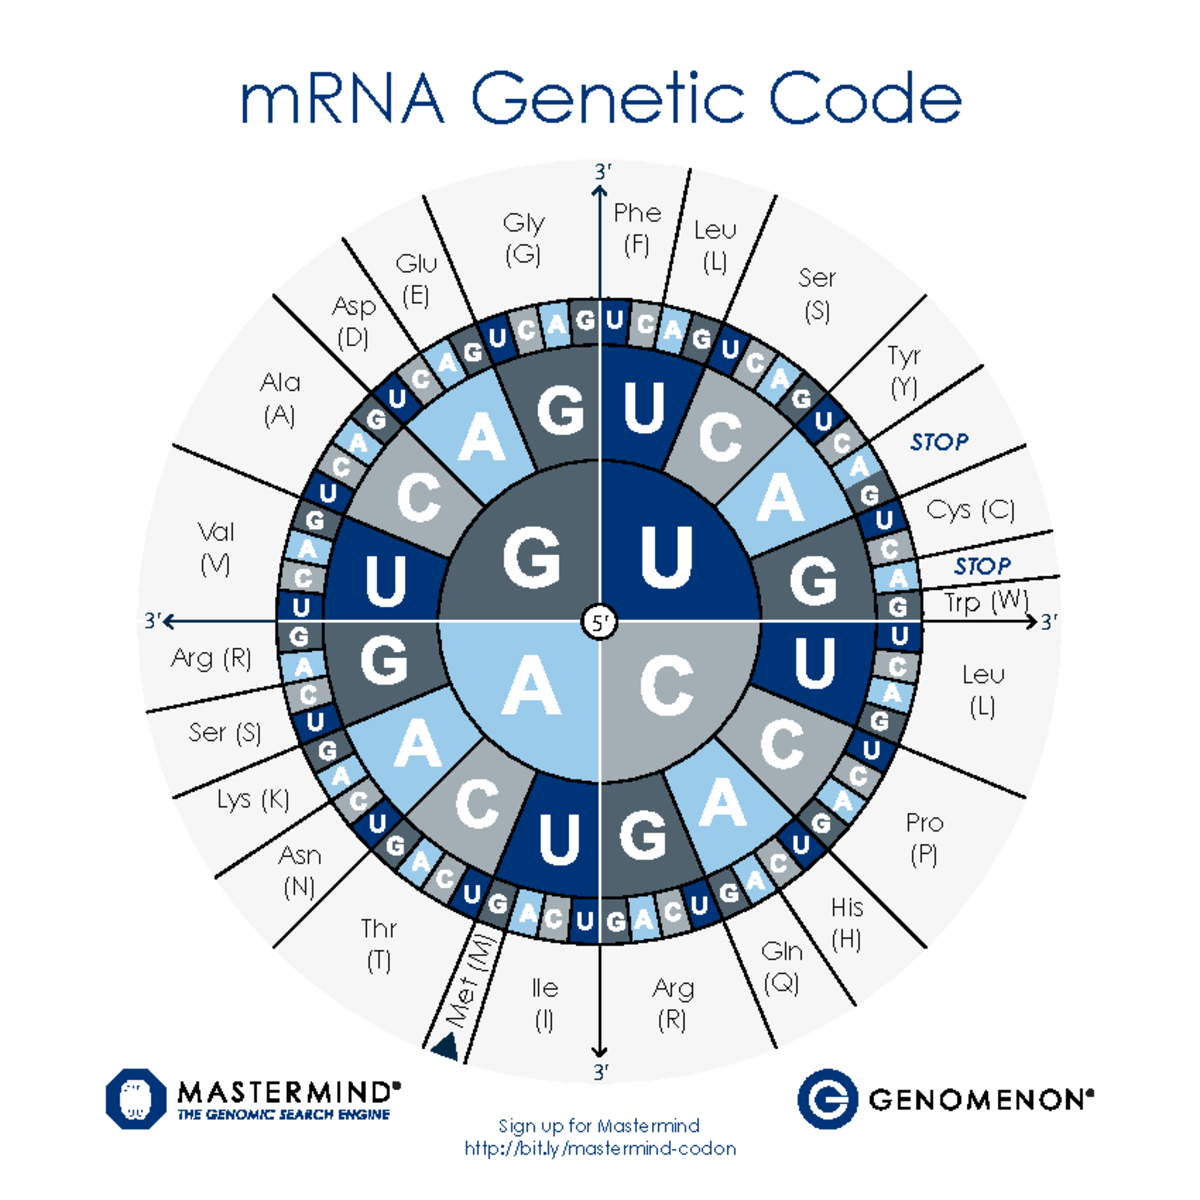
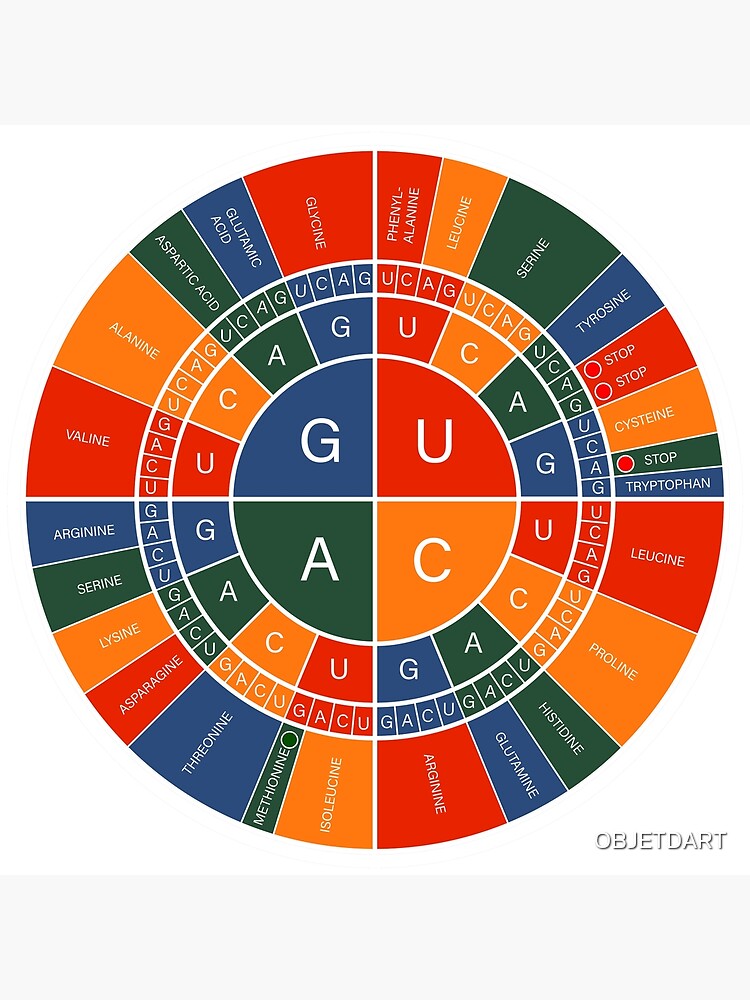
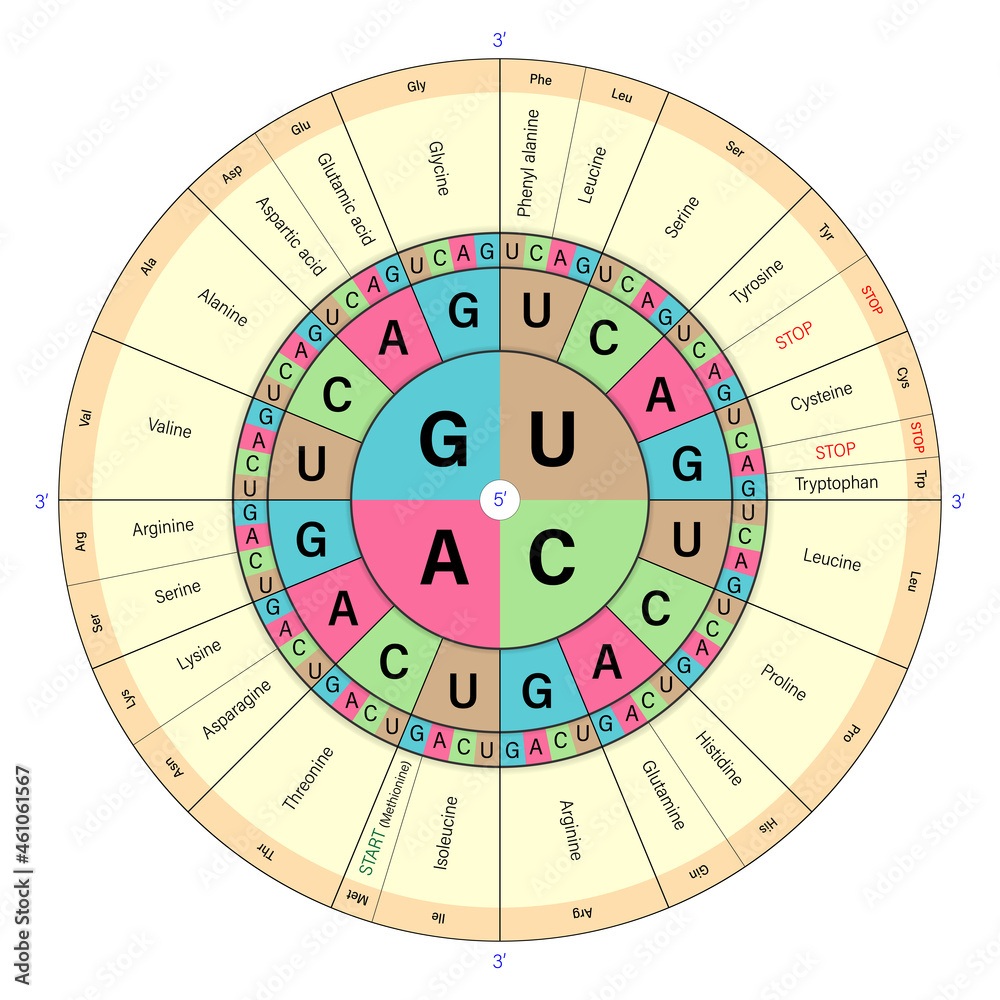
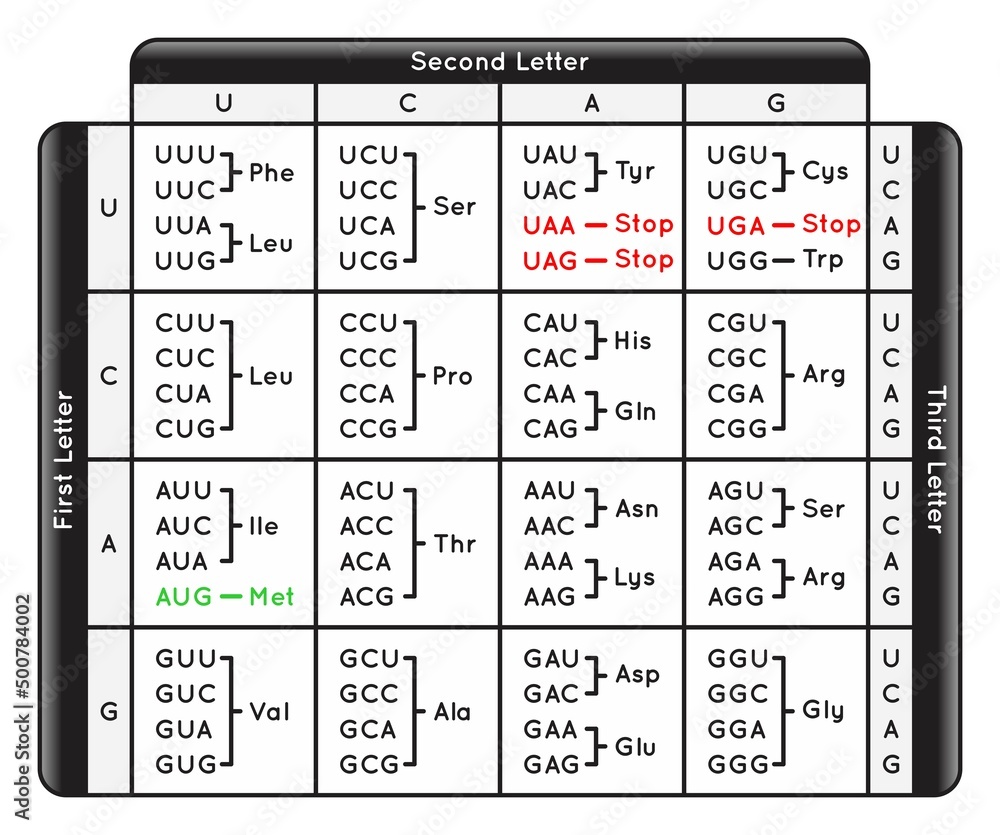
Achieve goals through numerous corporate-focused codon chart: table, amino acids & rna wheel explained photographs. professionally showcasing truck, vehicle, and automobile. designed to convey professionalism and success. Browse our premium codon chart: table, amino acids & rna wheel explained gallery featuring professionally curated photographs. Suitable for various applications including web design, social media, personal projects, and digital content creation All codon chart: table, amino acids & rna wheel explained images are available in high resolution with professional-grade quality, optimized for both digital and print applications, and include comprehensive metadata for easy organization and usage. Explore the versatility of our codon chart: table, amino acids & rna wheel explained collection for various creative and professional projects. Instant download capabilities enable immediate access to chosen codon chart: table, amino acids & rna wheel explained images. The codon chart: table, amino acids & rna wheel explained archive serves professionals, educators, and creatives across diverse industries. The codon chart: table, amino acids & rna wheel explained collection represents years of careful curation and professional standards. Each image in our codon chart: table, amino acids & rna wheel explained gallery undergoes rigorous quality assessment before inclusion. Cost-effective licensing makes professional codon chart: table, amino acids & rna wheel explained photography accessible to all budgets.