


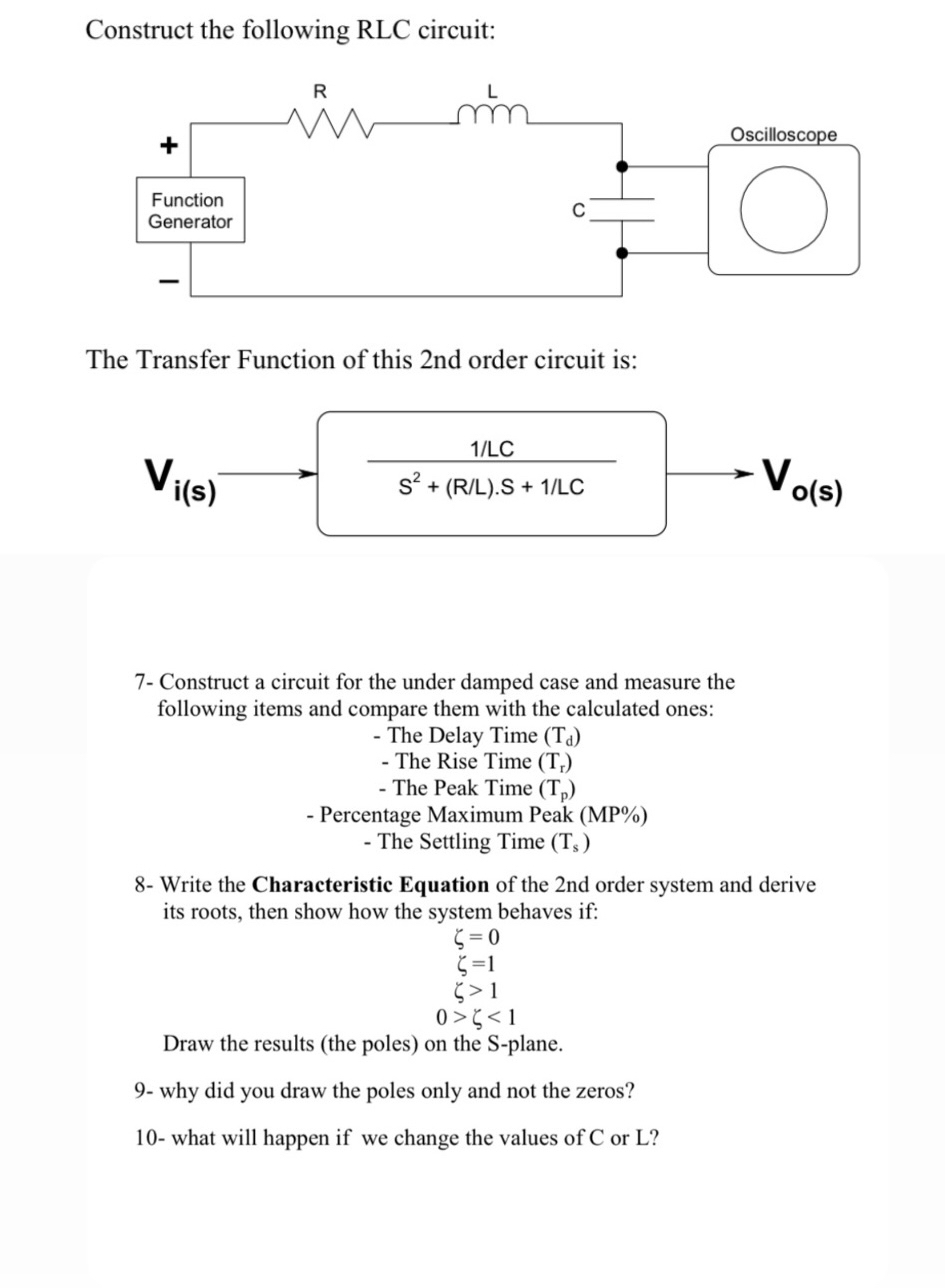
![[Solved] An RLC circuit has transfer function H(s). The circuit is ...](https://mavink.com/images/loadingwhitetransparent.gif)


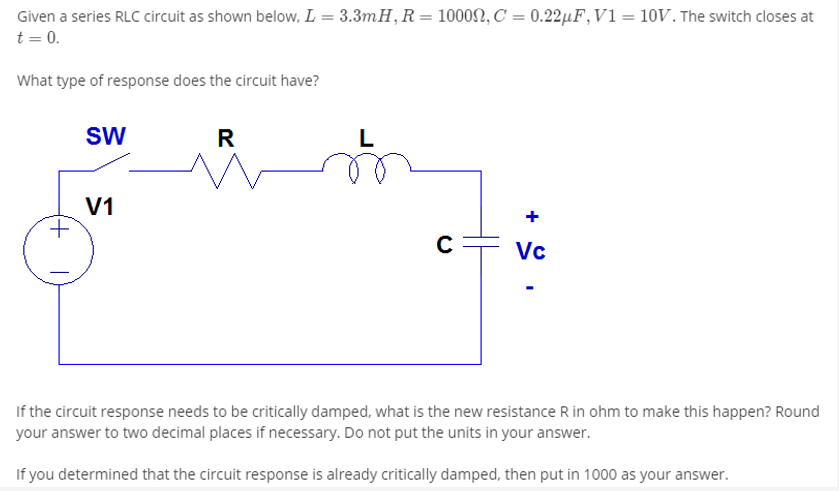


![[Solved]: Consider a series RLC circuit as shown below.](https://media.cheggcdn.com/study/d22/d22c3436-5248-4123-b2f5-e0220e9bee4c/image.jpg)


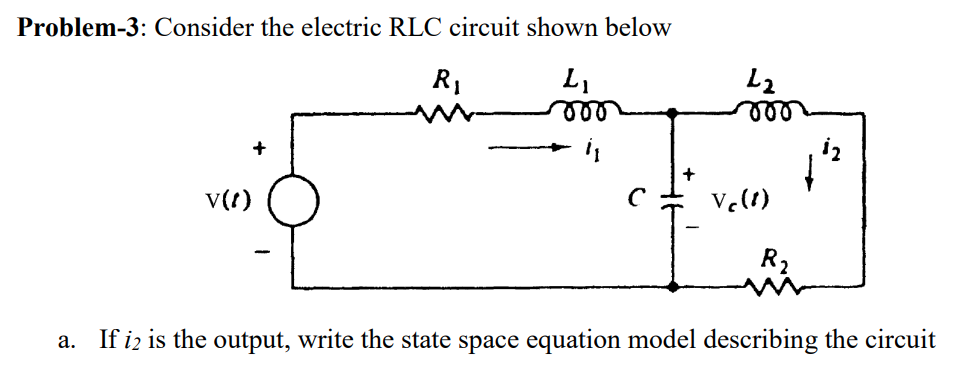
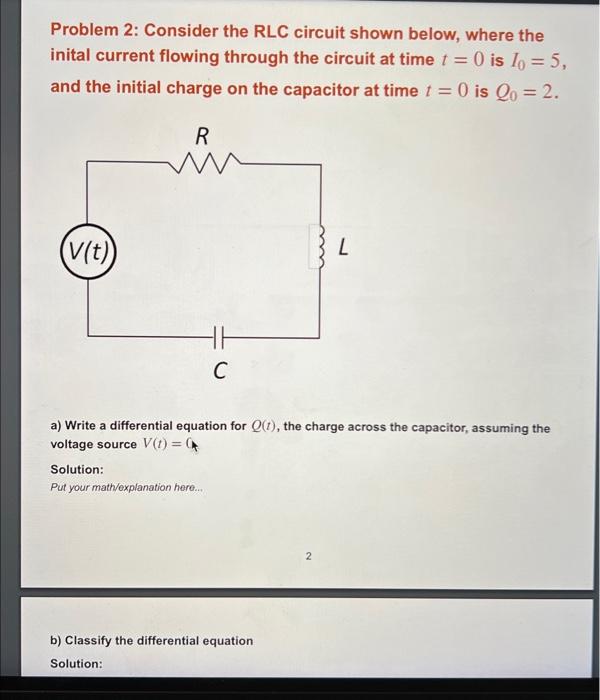
![[Solved] Consider the RLC circuit shown below, whe | SolutionInn](https://dsd5zvtm8ll6.cloudfront.net/questions/2024/01/65aeb32d409b8_1705947771146.jpg)


![[Solved]: 5. A series RLC circuit is shown below. The volta](https://media.cheggcdn.com/study/e5b/e5b2daa8-2251-4096-9a63-785d3589c721/image)


Discover traditional solved: for the rlc circuit shown below; choose the transfer function h with our collection of hundreds of classic photographs. preserving the heritage of photography, images, and pictures. perfect for heritage and cultural projects. The solved: for the rlc circuit shown below; choose the transfer function h collection maintains consistent quality standards across all images. Suitable for various applications including web design, social media, personal projects, and digital content creation All solved: for the rlc circuit shown below; choose the transfer function h images are available in high resolution with professional-grade quality, optimized for both digital and print applications, and include comprehensive metadata for easy organization and usage. Explore the versatility of our solved: for the rlc circuit shown below; choose the transfer function h collection for various creative and professional projects. Whether for commercial projects or personal use, our solved: for the rlc circuit shown below; choose the transfer function h collection delivers consistent excellence. Each image in our solved: for the rlc circuit shown below; choose the transfer function h gallery undergoes rigorous quality assessment before inclusion. Cost-effective licensing makes professional solved: for the rlc circuit shown below; choose the transfer function h photography accessible to all budgets.