


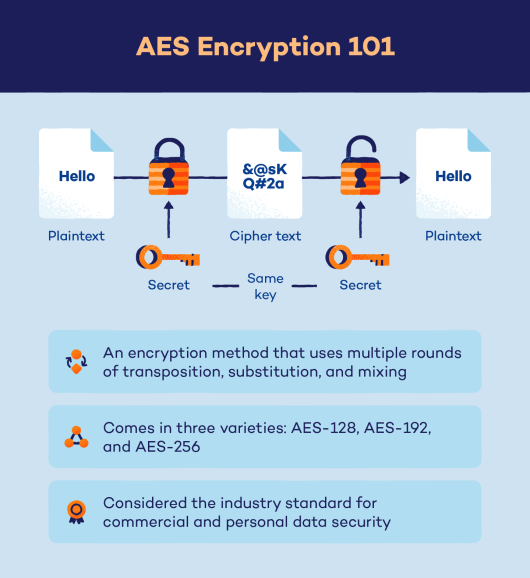
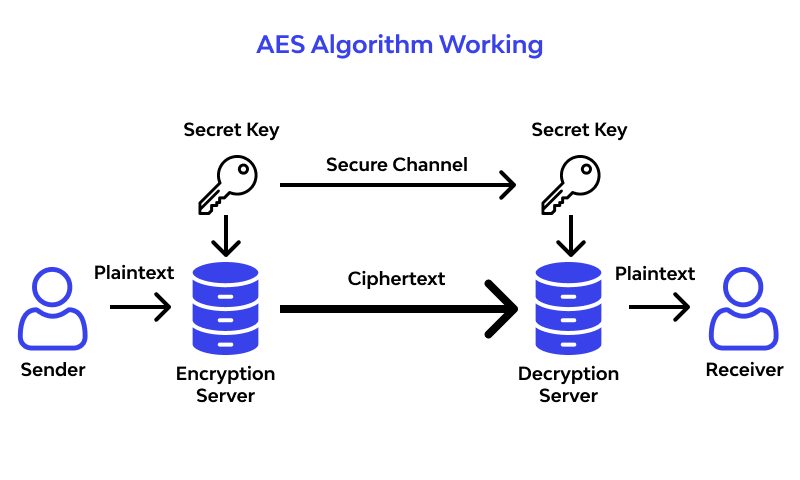
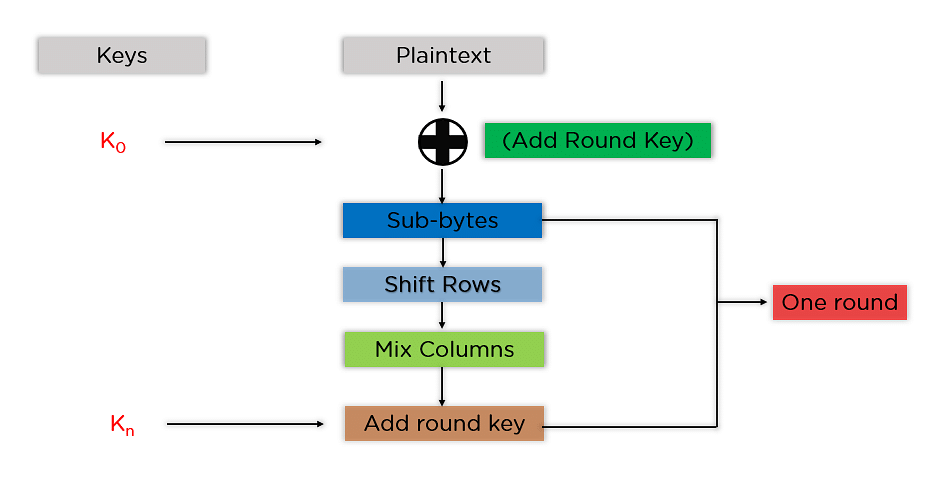
![What is AES Encryption and How it Works? [Detailed Guide]](https://cheapsslweb.com/blog/wp-content/uploads/2022/12/aes-algorithm-working-300x194.jpg)


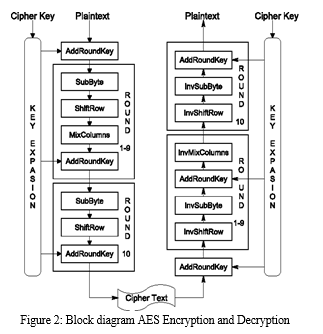


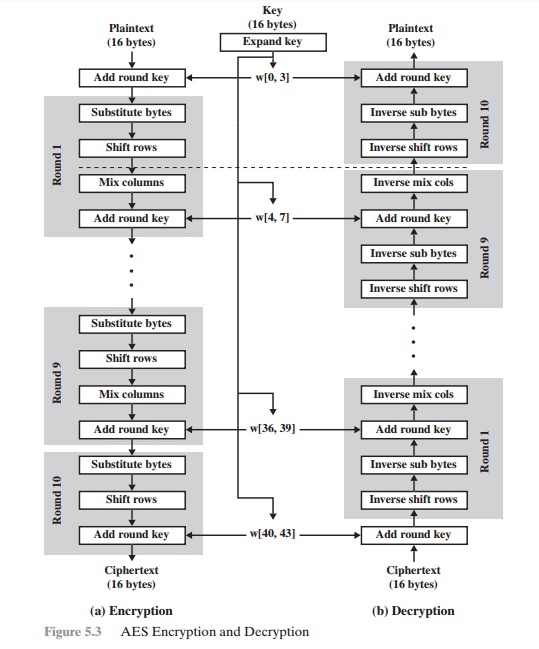


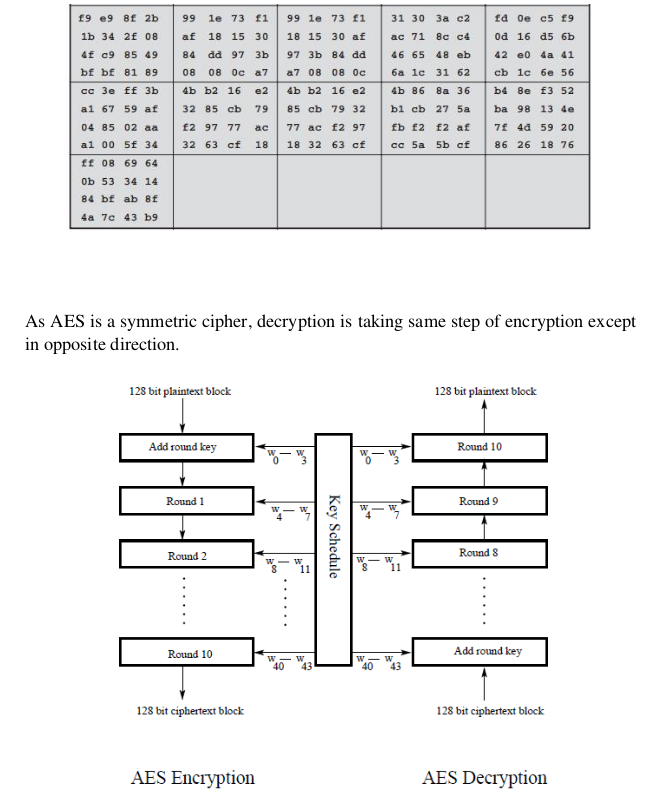


![[PDF] Block diagram of Rijndael ’ s AES : ( a ) Key Schedule , ( b ...](https://d3i71xaburhd42.cloudfront.net/917beee98c421ecd56bf0b3d798333774ee2f92a/3-Figure1-1.png)


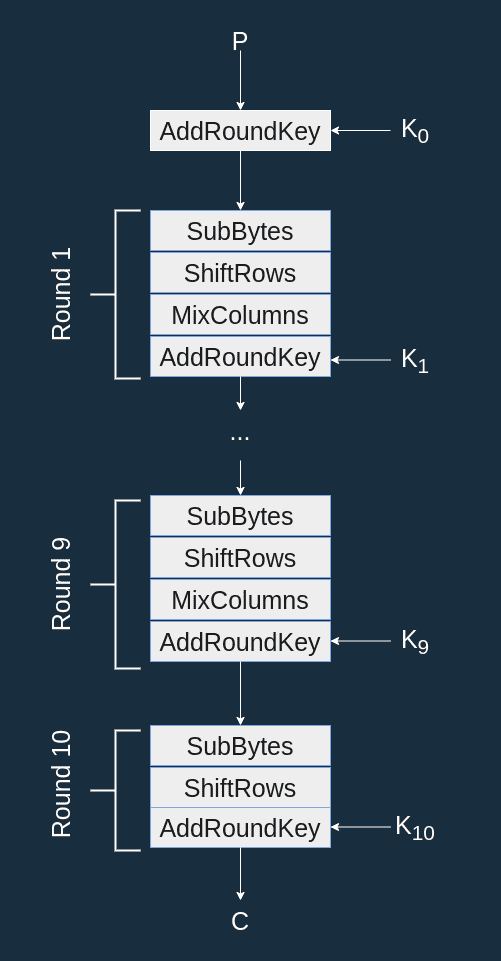


Boost your marketing with substantial collections of commercial-grade the diagram of aes algorithm: (a) encryption, (b) decryption photographs. crafted for marketing purposes showcasing photography, images, and pictures. perfect for advertising and marketing campaigns. Our the diagram of aes algorithm: (a) encryption, (b) decryption collection features high-quality images with excellent detail and clarity. Suitable for various applications including web design, social media, personal projects, and digital content creation All the diagram of aes algorithm: (a) encryption, (b) decryption images are available in high resolution with professional-grade quality, optimized for both digital and print applications, and include comprehensive metadata for easy organization and usage. Discover the perfect the diagram of aes algorithm: (a) encryption, (b) decryption images to enhance your visual communication needs. Whether for commercial projects or personal use, our the diagram of aes algorithm: (a) encryption, (b) decryption collection delivers consistent excellence. Comprehensive tagging systems facilitate quick discovery of relevant the diagram of aes algorithm: (a) encryption, (b) decryption content. Diverse style options within the the diagram of aes algorithm: (a) encryption, (b) decryption collection suit various aesthetic preferences. Cost-effective licensing makes professional the diagram of aes algorithm: (a) encryption, (b) decryption photography accessible to all budgets. Multiple resolution options ensure optimal performance across different platforms and applications.