


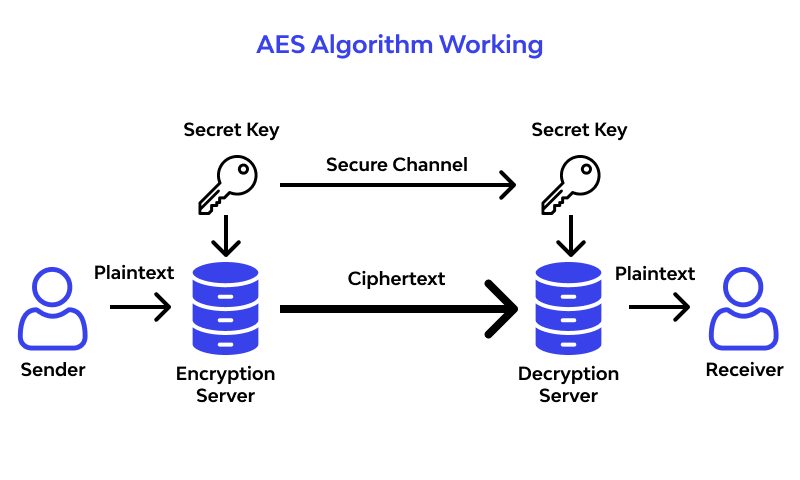
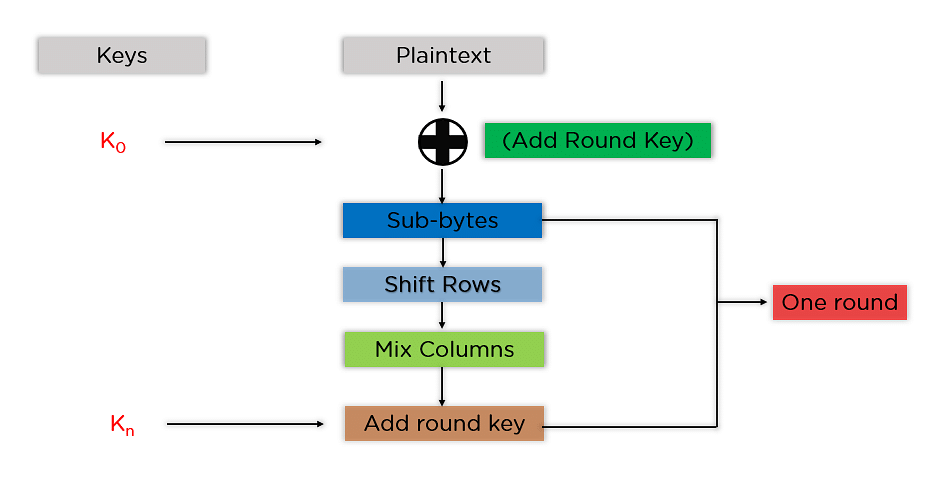
![What is AES Encryption and How it Works? [Detailed Guide]](https://cheapsslweb.com/blog/wp-content/uploads/2022/12/aes-algorithm-working-300x194.jpg)


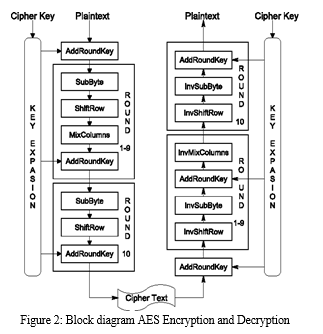


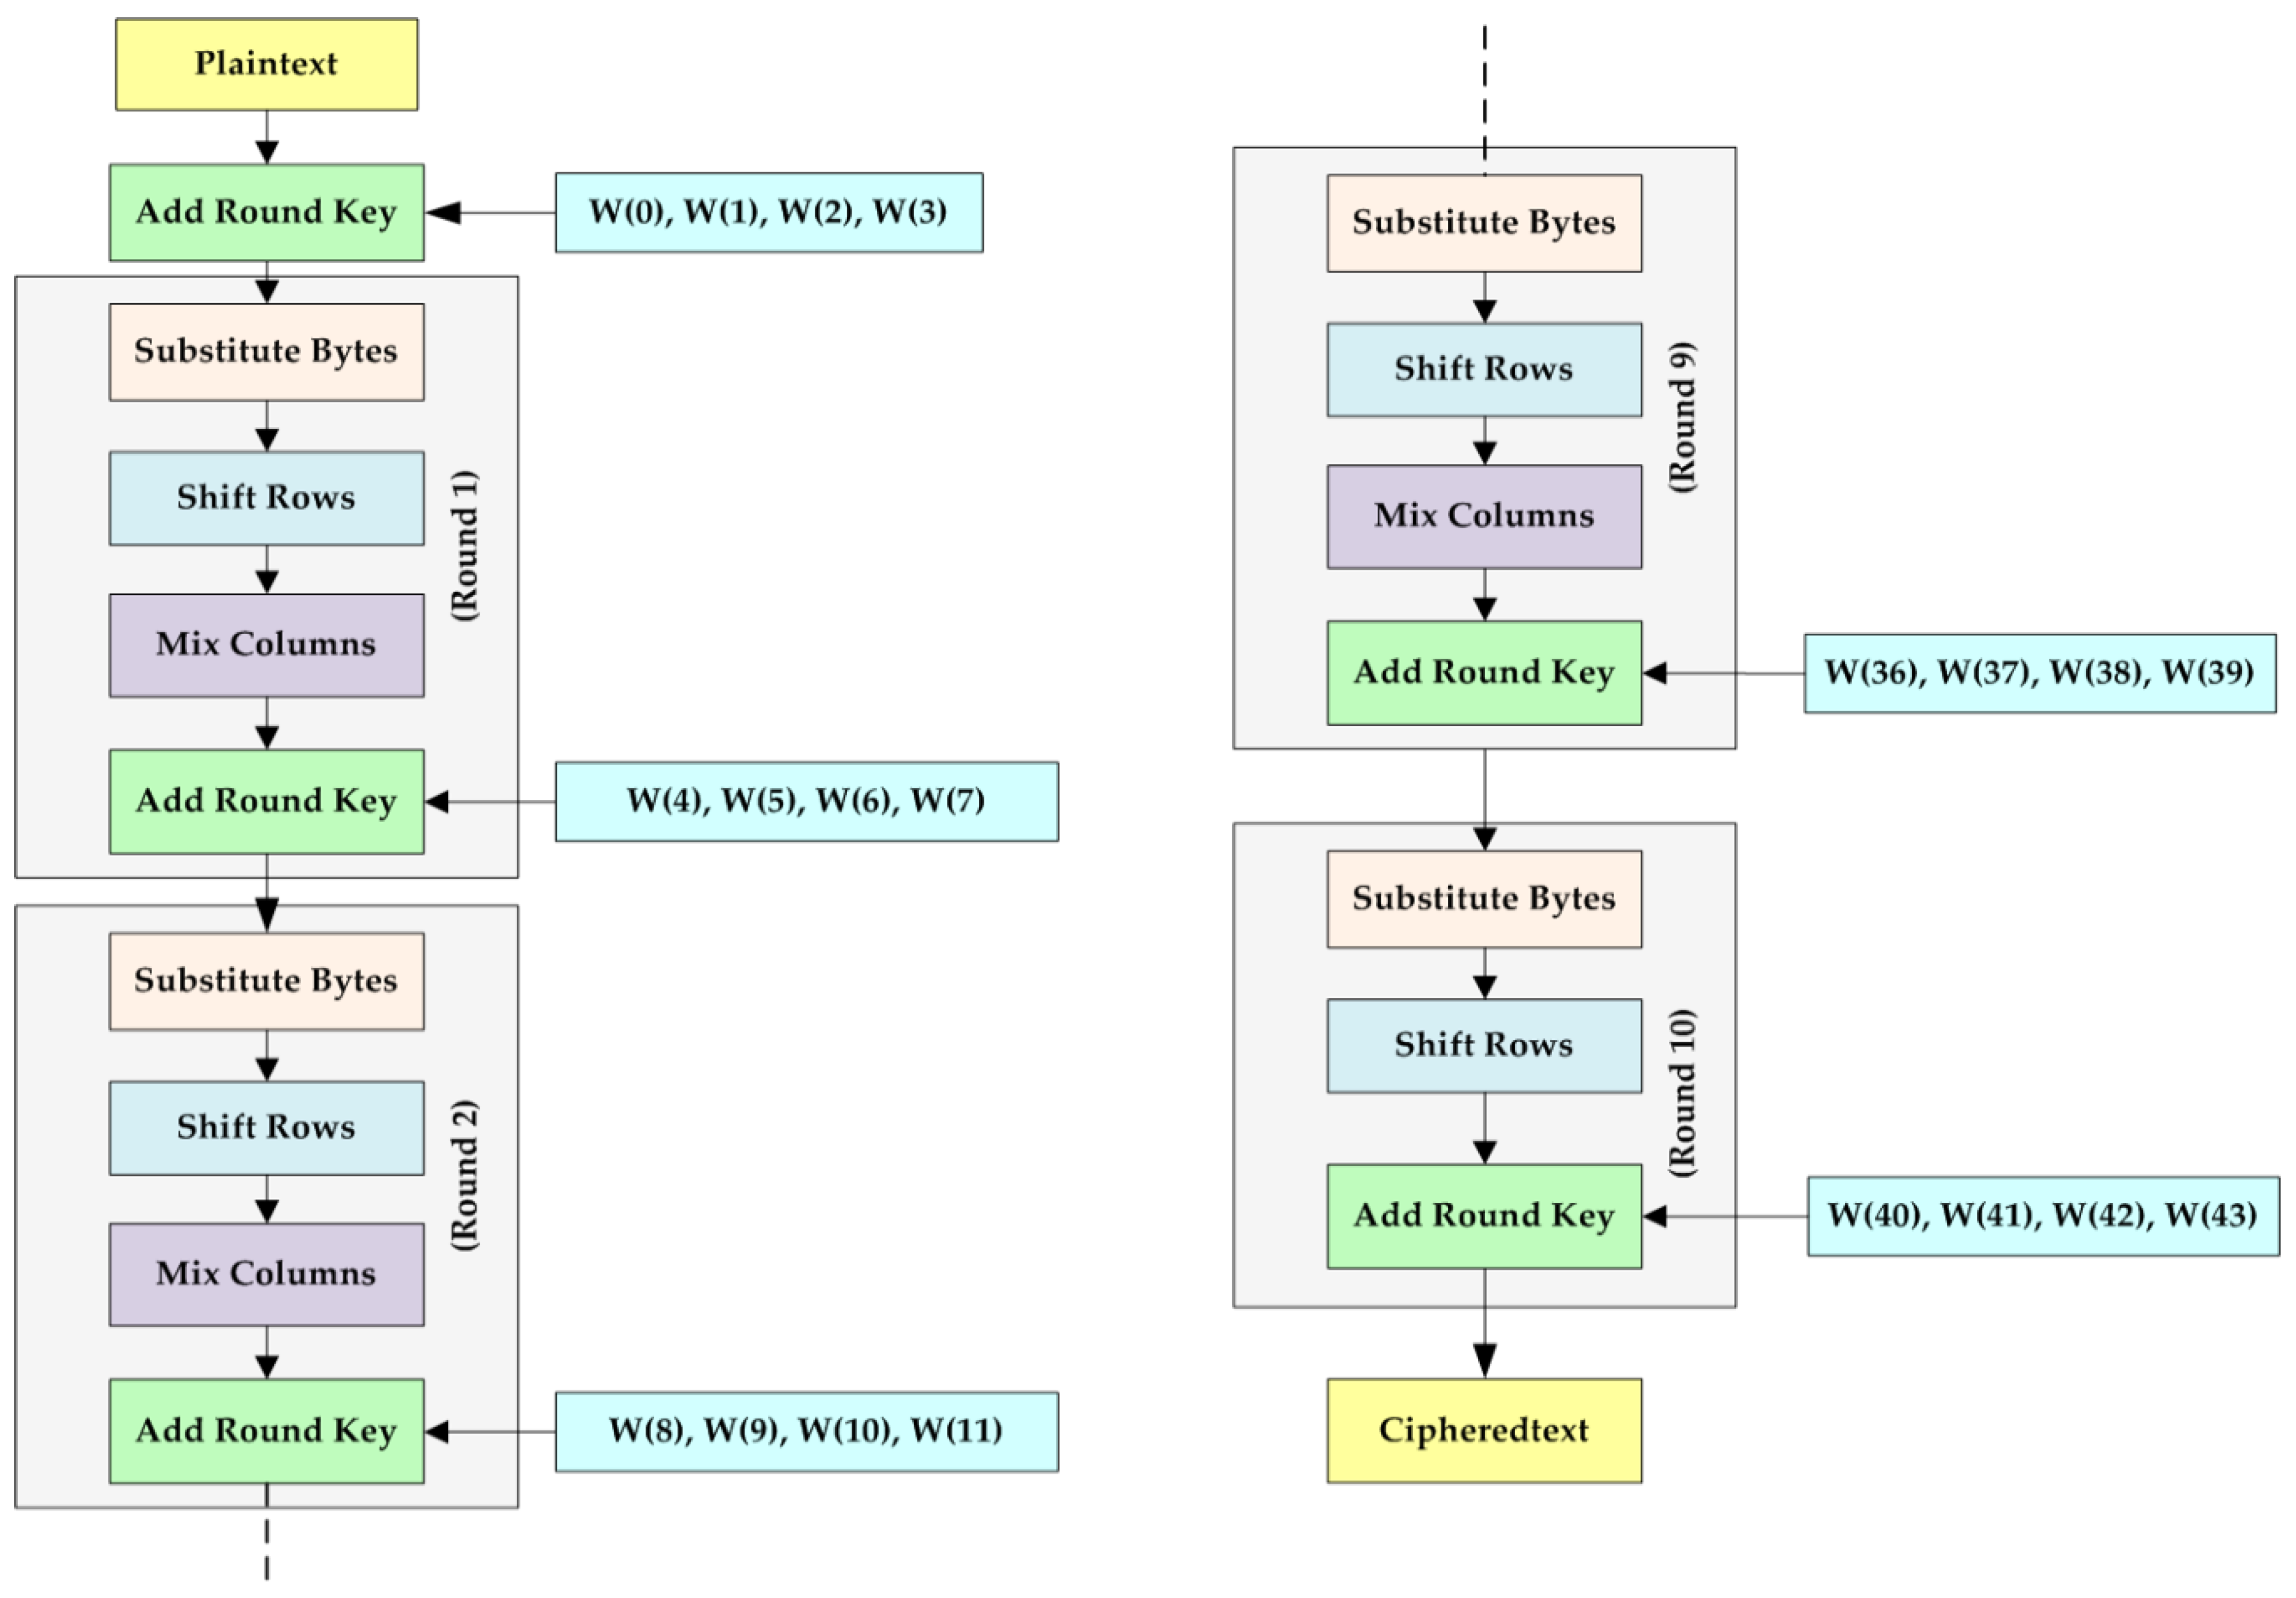


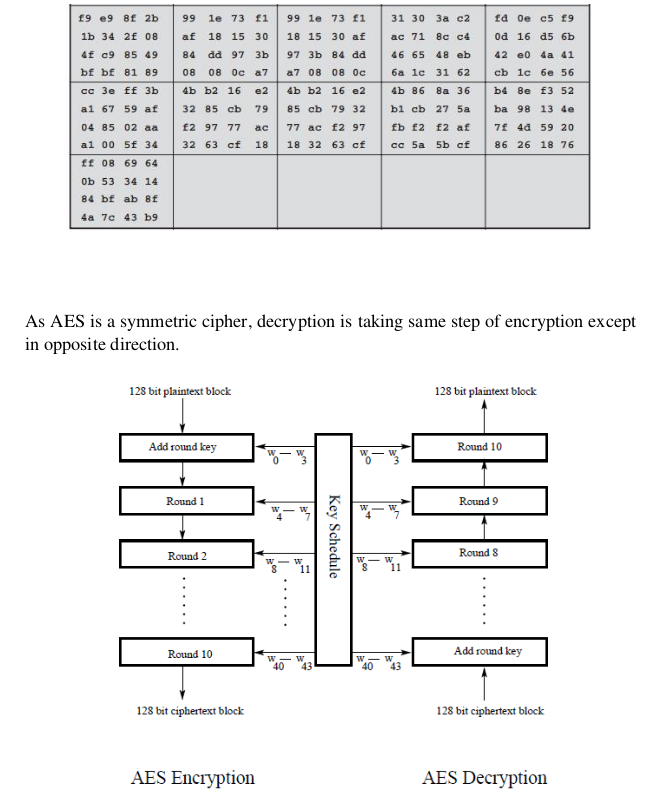


![[PDF] Block diagram of Rijndael ’ s AES : ( a ) Key Schedule , ( b ...](https://d3i71xaburhd42.cloudfront.net/917beee98c421ecd56bf0b3d798333774ee2f92a/3-Figure1-1.png)


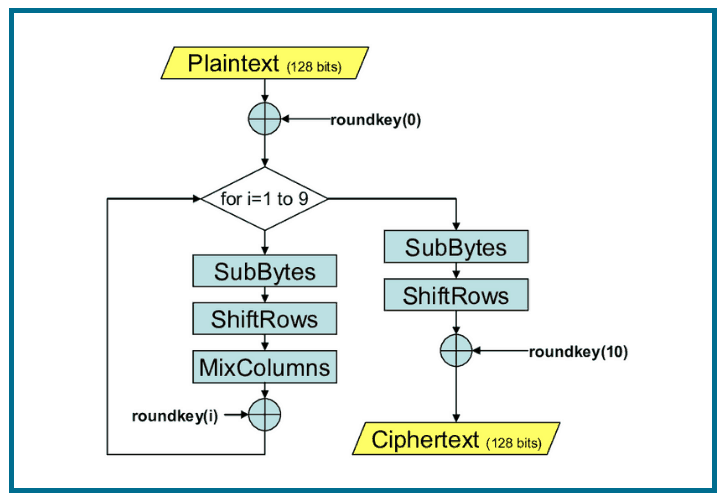
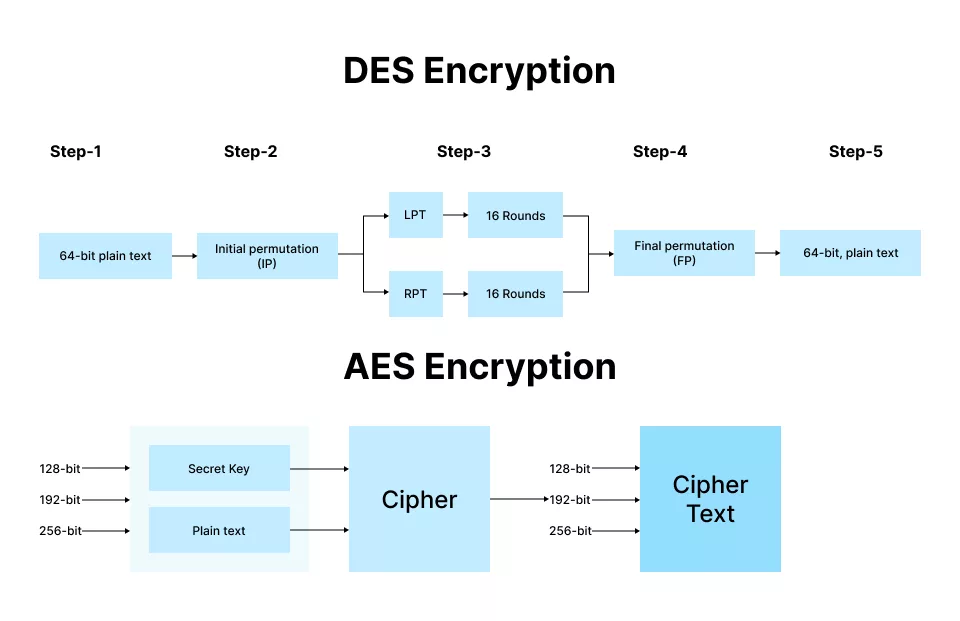
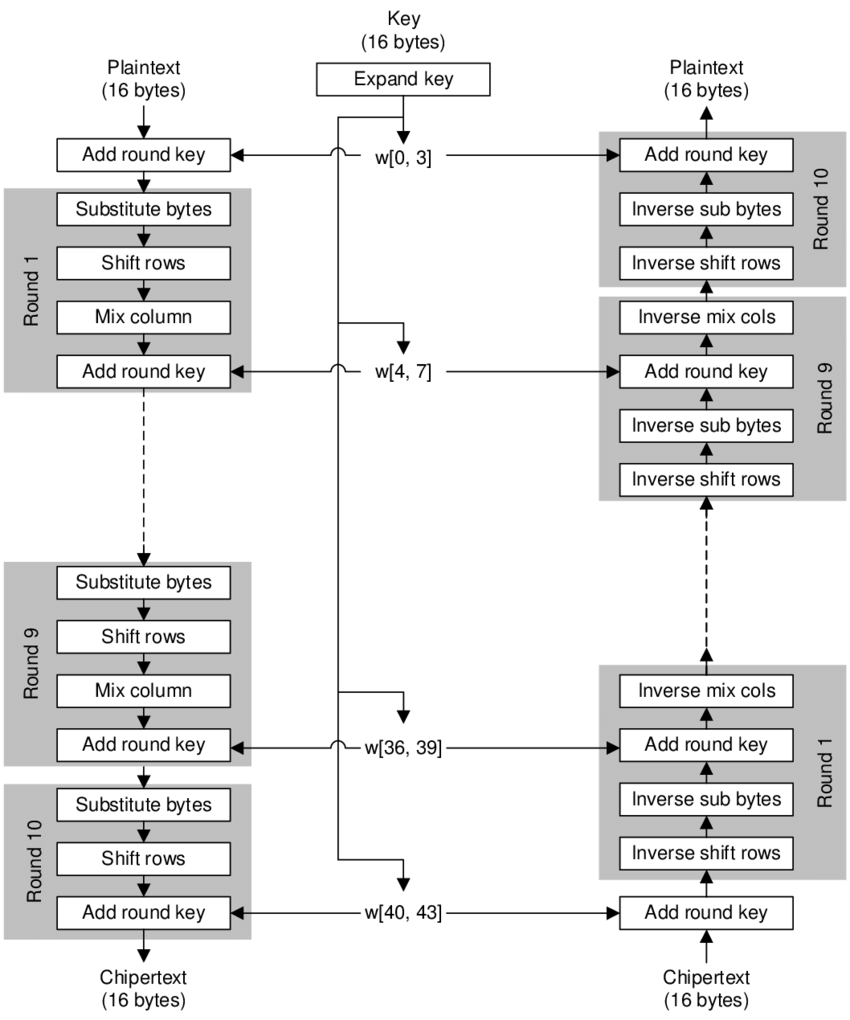
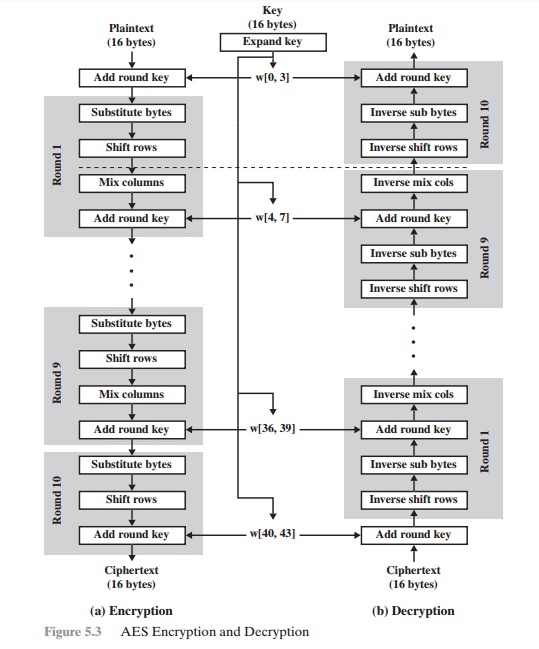
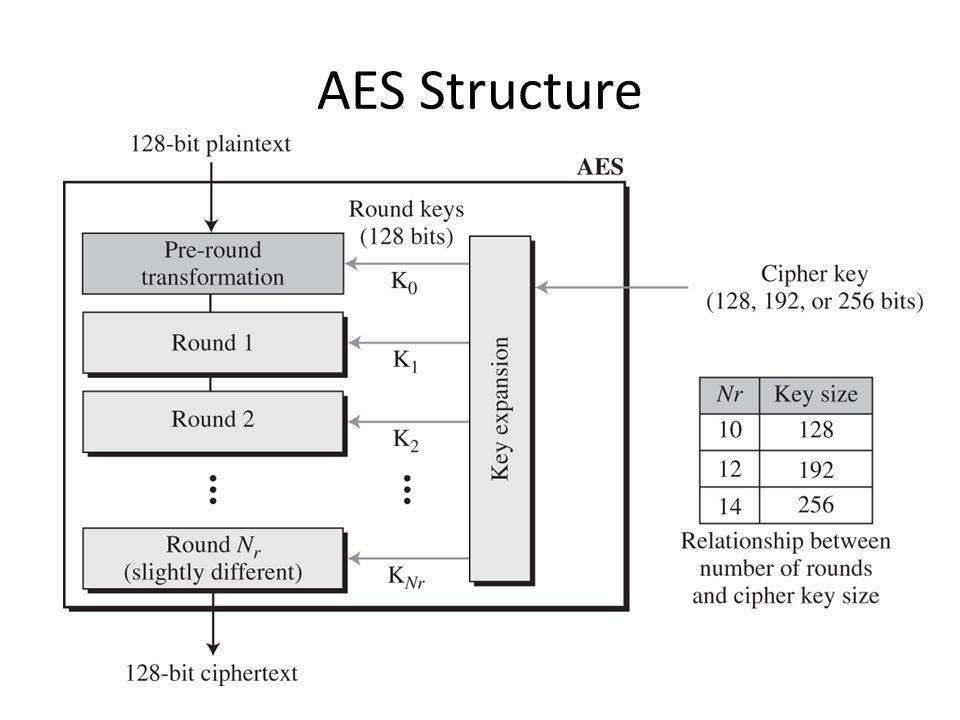
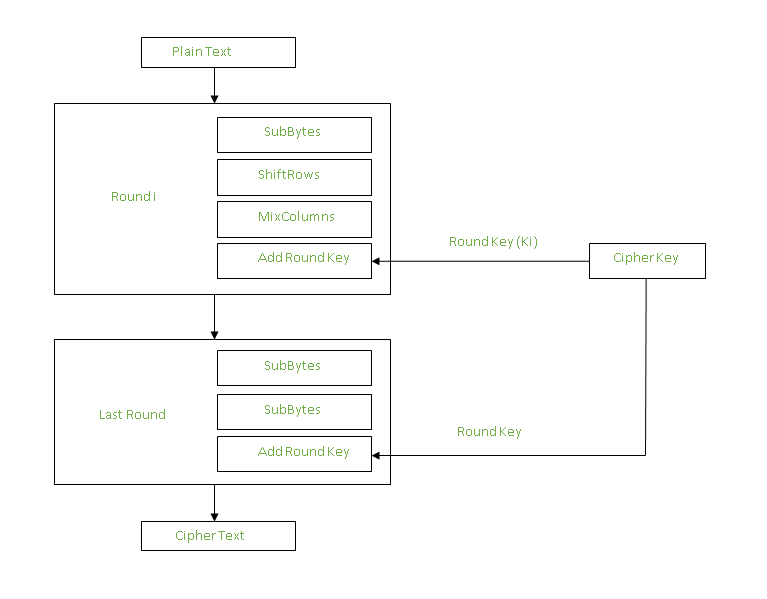
Collection of the diagram of aes algorithm: (a) encryption, (b) decryption featuring vast arrays of professional images. celebrating the unique characteristics of photography, images, and pictures. suitable for various professional and personal projects. Each the diagram of aes algorithm: (a) encryption, (b) decryption image is carefully selected for superior visual impact and professional quality. Suitable for various applications including web design, social media, personal projects, and digital content creation All the diagram of aes algorithm: (a) encryption, (b) decryption images are available in high resolution with professional-grade quality, optimized for both digital and print applications, and include comprehensive metadata for easy organization and usage. Our the diagram of aes algorithm: (a) encryption, (b) decryption gallery offers diverse visual resources to bring your ideas to life. Regular updates keep the the diagram of aes algorithm: (a) encryption, (b) decryption collection current with contemporary trends and styles. Each image in our the diagram of aes algorithm: (a) encryption, (b) decryption gallery undergoes rigorous quality assessment before inclusion. Cost-effective licensing makes professional the diagram of aes algorithm: (a) encryption, (b) decryption photography accessible to all budgets. Reliable customer support ensures smooth experience throughout the the diagram of aes algorithm: (a) encryption, (b) decryption selection process.