


![1. Two-Sum [Kotlin][LeetCode] - 知乎](https://pic4.zhimg.com/v2-804916bcb86b2c014bd8b75861e177df_b.jpg)


![[Leetcode - Algorithm] two sum](https://velog.velcdn.com/images/hareguu/post/3f71f0a5-821d-4ca4-ab90-ba611c11ccd7/%EC%8A%A4%ED%81%AC%EB%A6%B0%EC%83%B7%2C%202021-03-03%2013-13-05.png)


![[Leetcode 1] Two Sum - 4가지 방식의 풀이](https://img1.daumcdn.net/thumb/R1280x0/?scode=mtistory2&fname=https:%2F%2Fblog.kakaocdn.net%2Fdn%2FIeqs9%2FbtsCxGROfuv%2FphYgKIpNVfrds0wGjsw3tk%2Fimg.png)


![[자료구조 알고리즘] LeetCode 1. Two Sum 설명 & 자바로 구현 - YouTube](https://i.ytimg.com/vi/FHphOv2mmIA/maxresdefault.jpg)


![[LeetCode] #1_Two Sum. 解題紀錄 | by I caught a code | I Caught a Code | Medium](https://miro.medium.com/v2/resize:fit:1200/1*UENxkgwifBXQj2gpCrSiow.png)


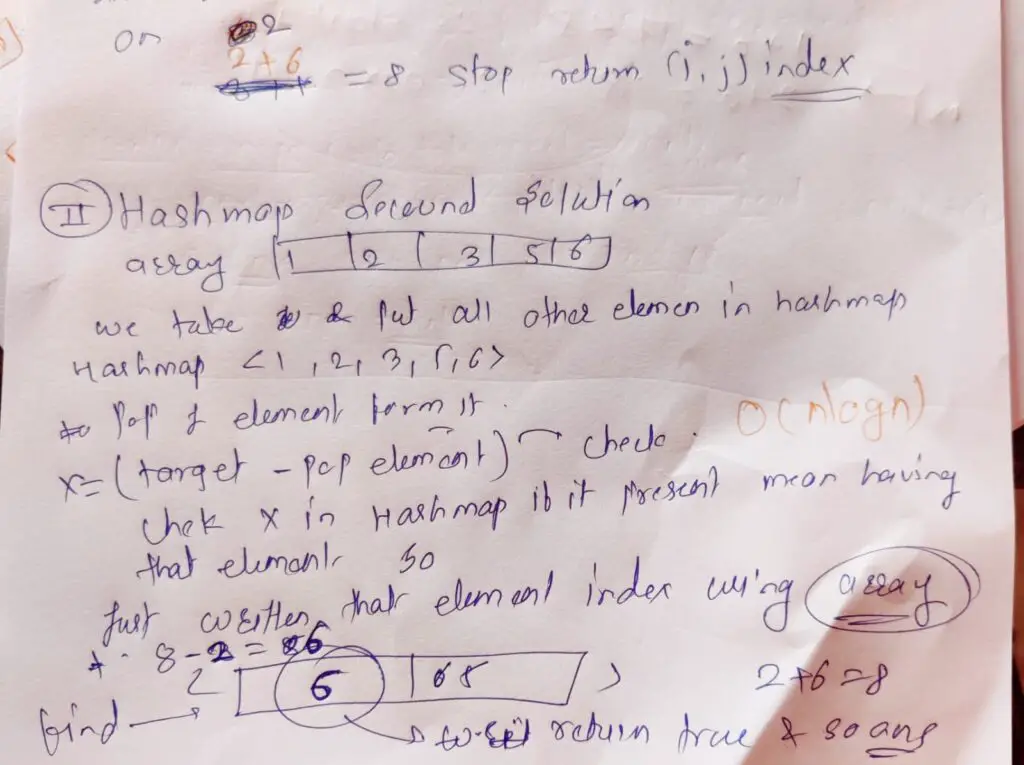
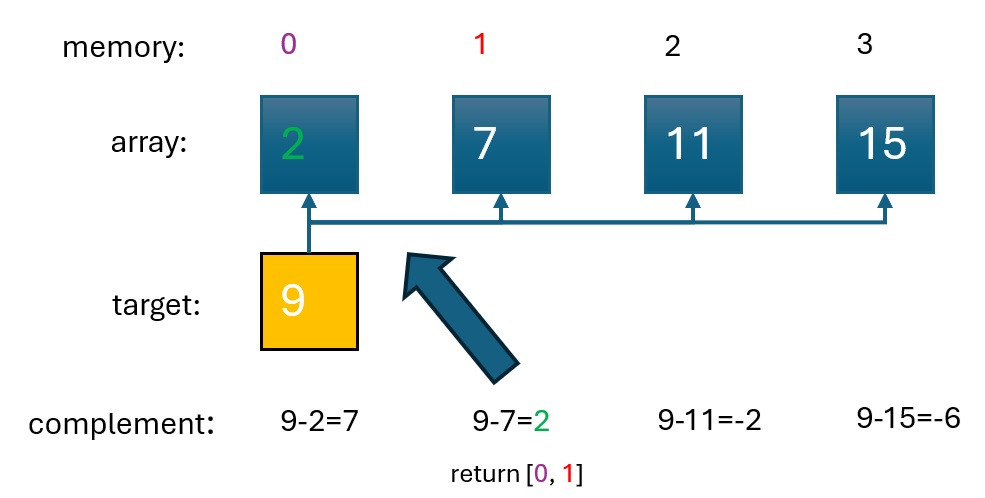
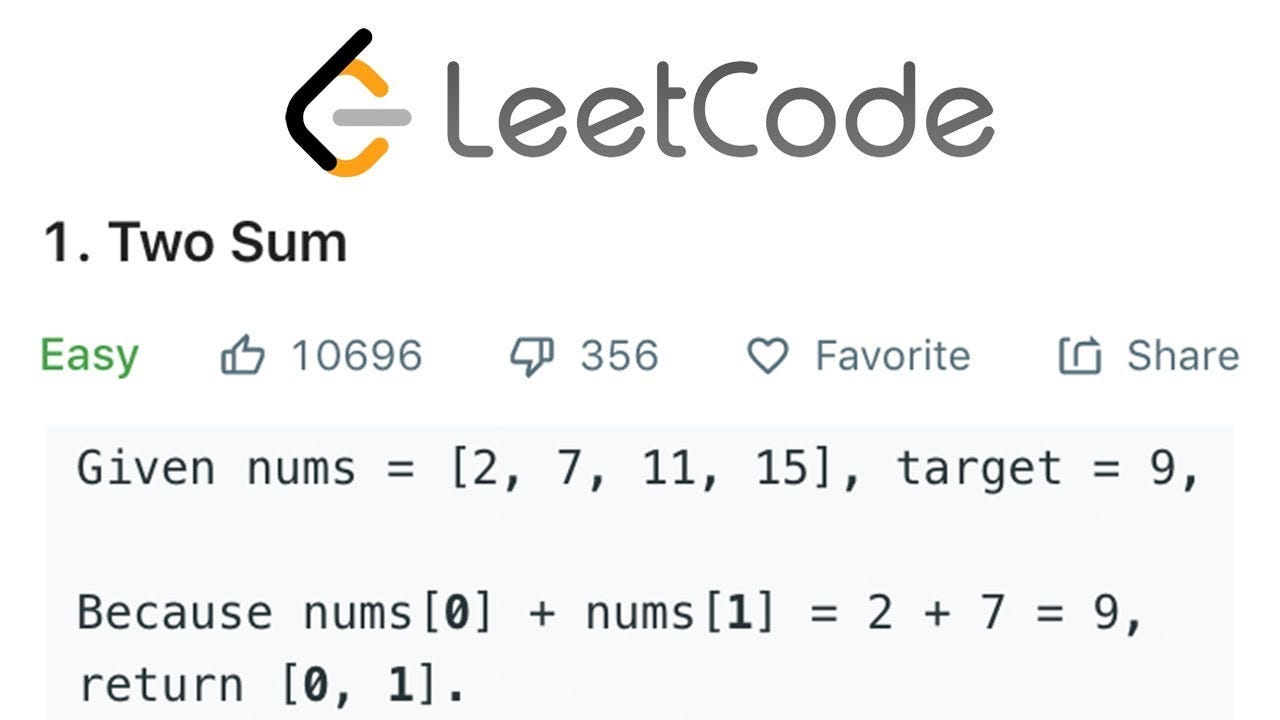
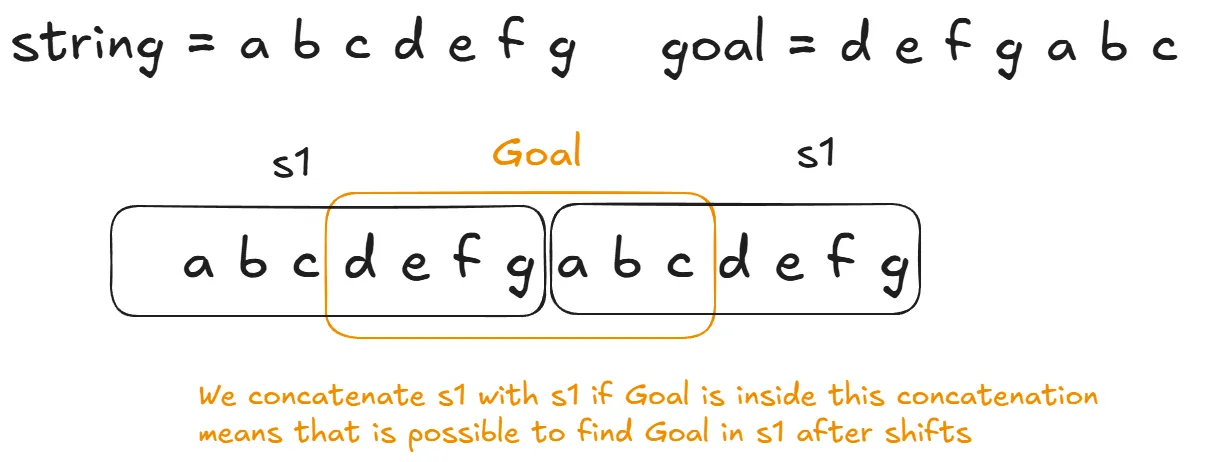
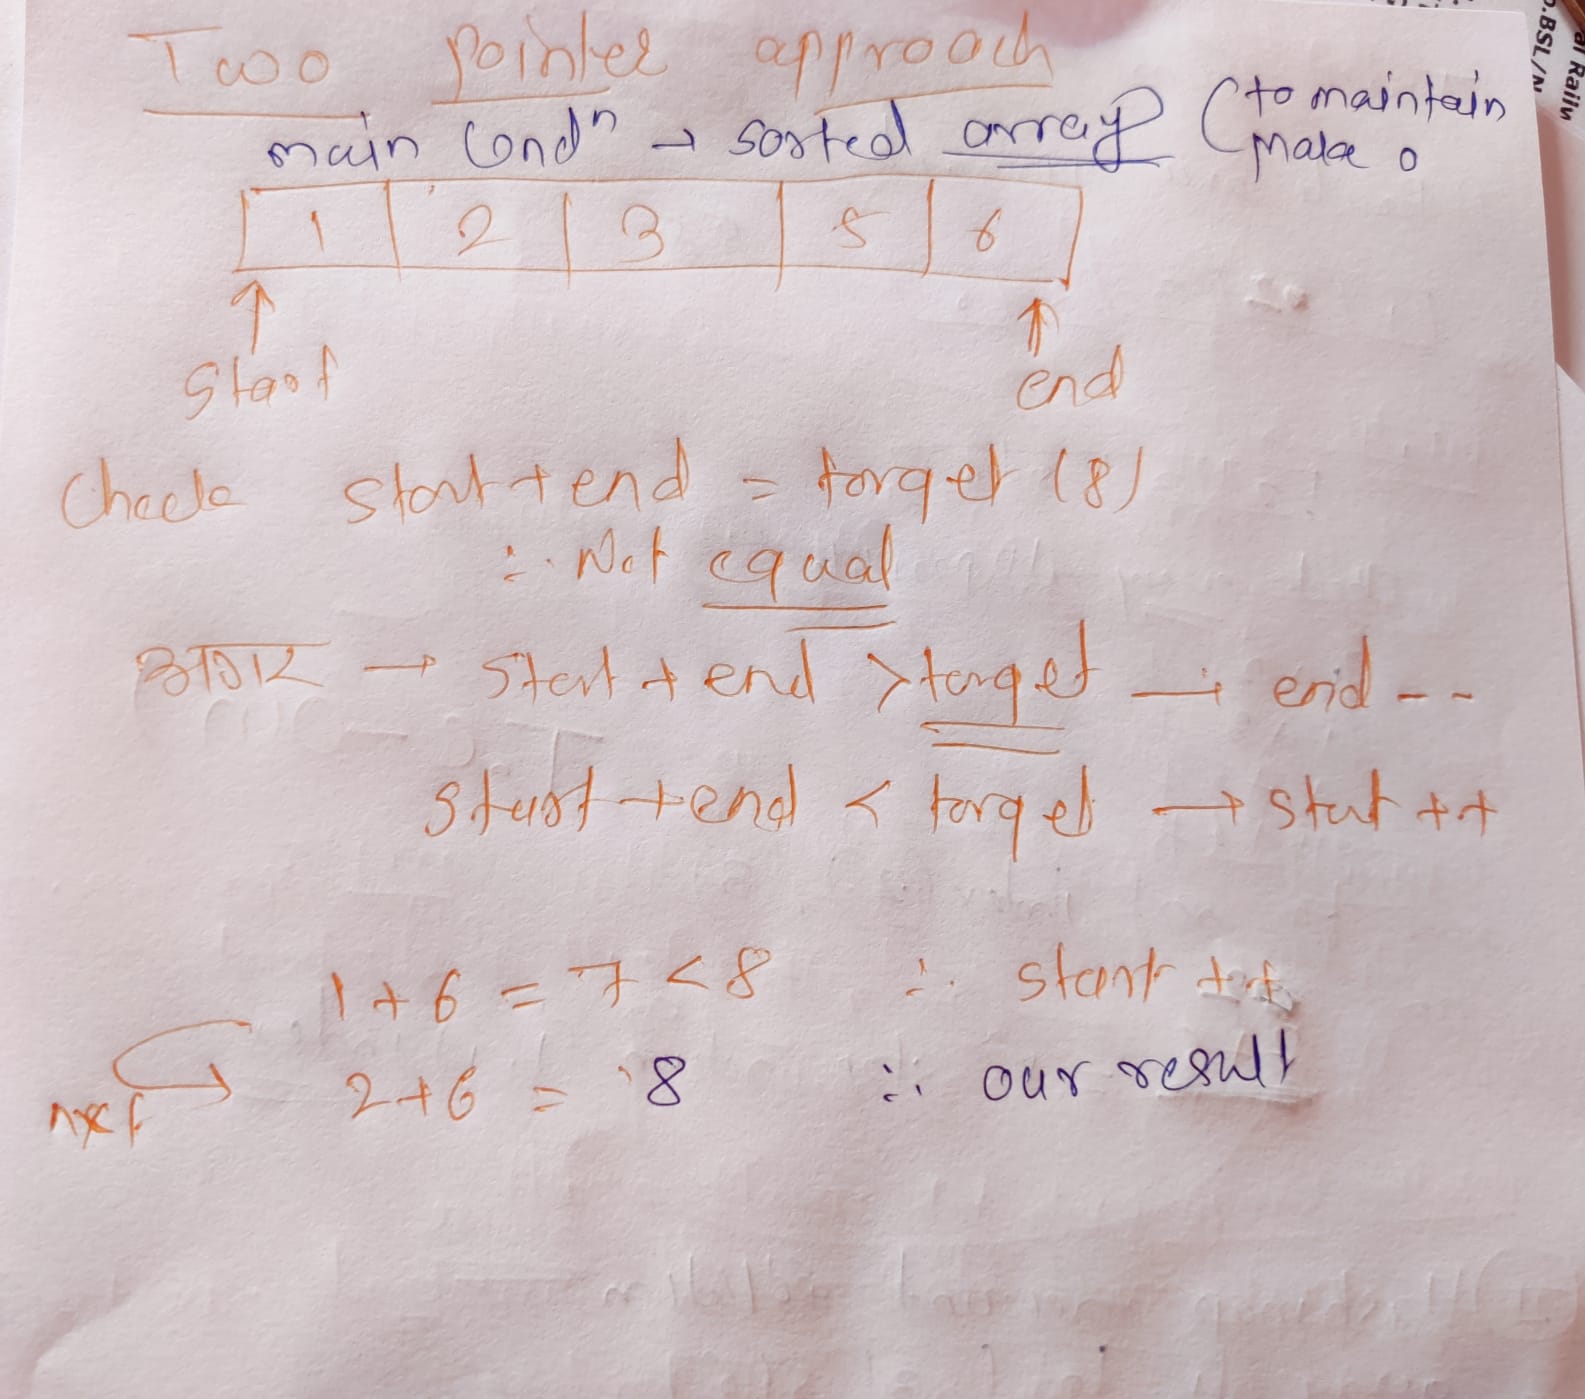
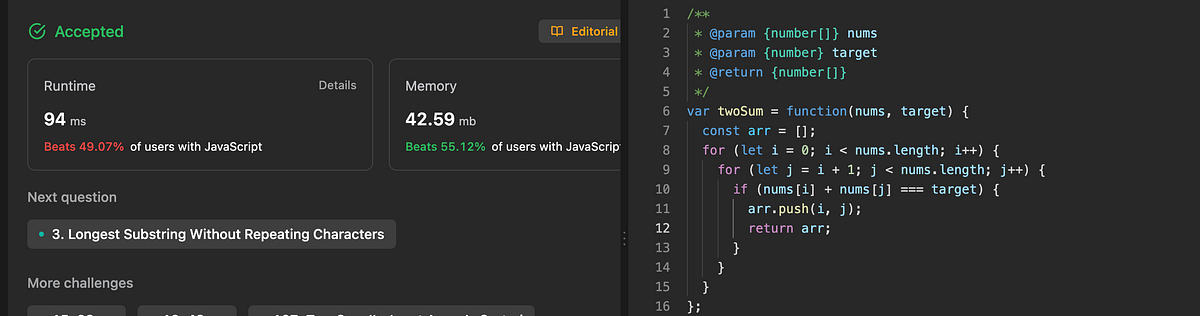
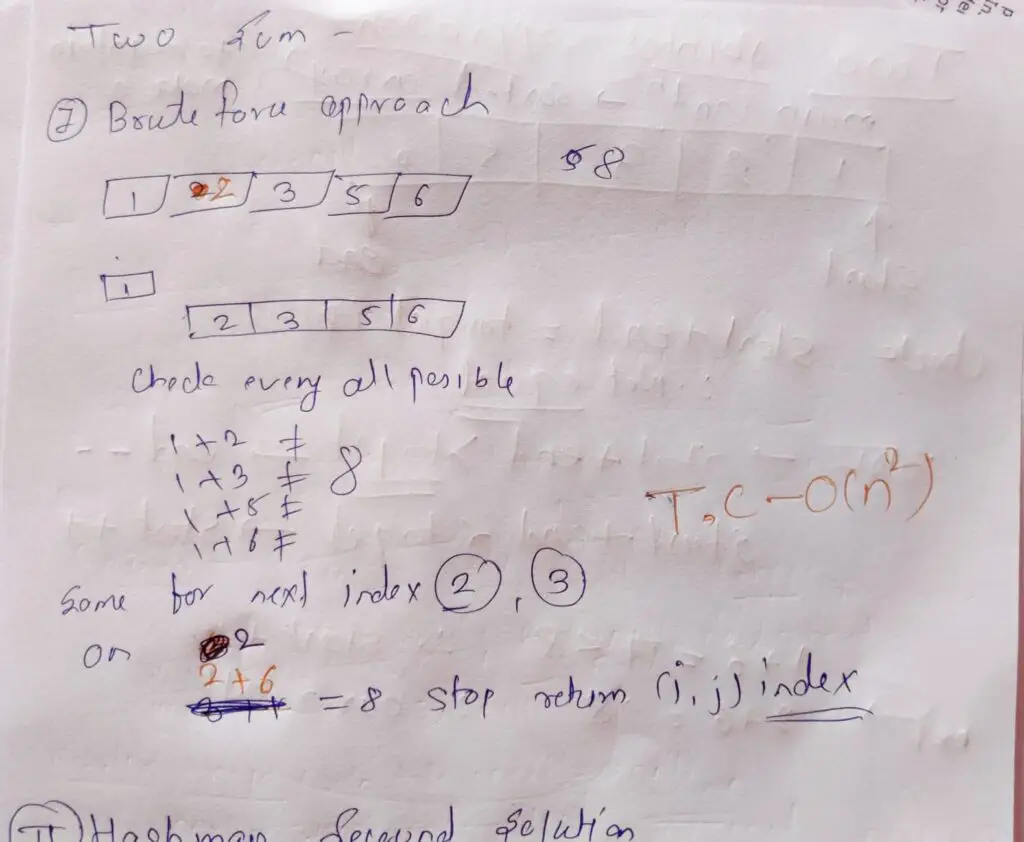
Honor legacy with our historical leetcode 1 two sum — hashmap approach: detailed explanation for gallery of hundreds of timeless images. heritage-preserving showcasing computer, digital, and electronic. designed to preserve historical significance. Discover high-resolution leetcode 1 two sum — hashmap approach: detailed explanation for images optimized for various applications. Suitable for various applications including web design, social media, personal projects, and digital content creation All leetcode 1 two sum — hashmap approach: detailed explanation for images are available in high resolution with professional-grade quality, optimized for both digital and print applications, and include comprehensive metadata for easy organization and usage. Discover the perfect leetcode 1 two sum — hashmap approach: detailed explanation for images to enhance your visual communication needs. The leetcode 1 two sum — hashmap approach: detailed explanation for archive serves professionals, educators, and creatives across diverse industries. Reliable customer support ensures smooth experience throughout the leetcode 1 two sum — hashmap approach: detailed explanation for selection process. Cost-effective licensing makes professional leetcode 1 two sum — hashmap approach: detailed explanation for photography accessible to all budgets. Comprehensive tagging systems facilitate quick discovery of relevant leetcode 1 two sum — hashmap approach: detailed explanation for content. Whether for commercial projects or personal use, our leetcode 1 two sum — hashmap approach: detailed explanation for collection delivers consistent excellence.