


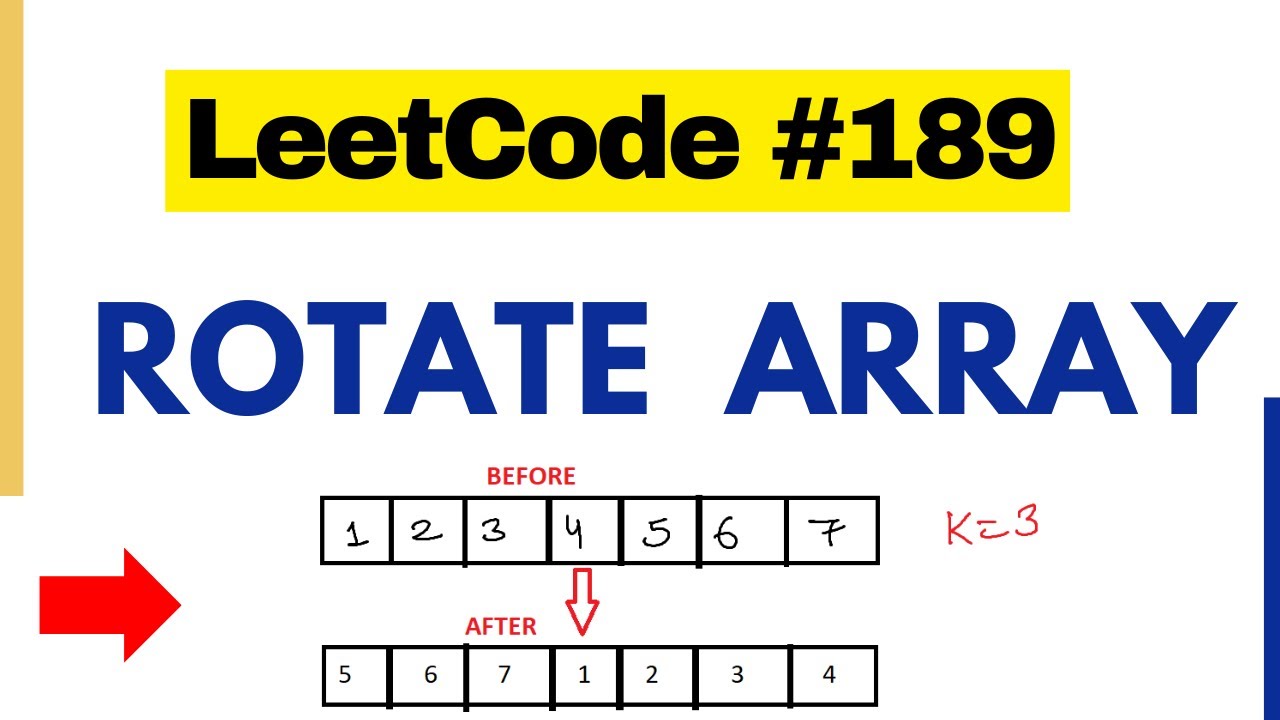

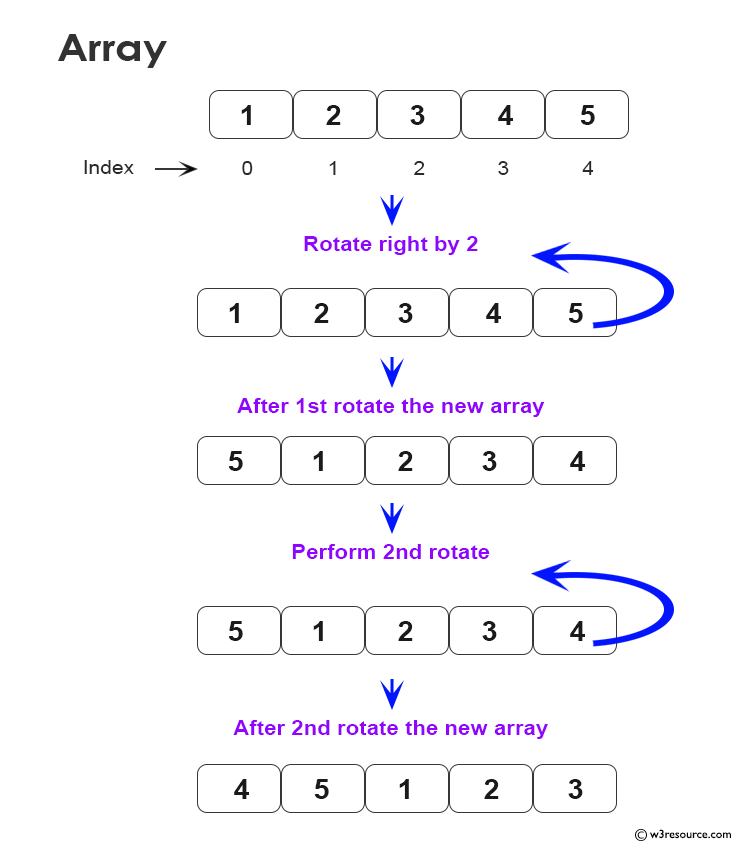
![[LeetCode/Python] 189. Rotate Array](https://velog.velcdn.com/images/dlwhsk0/post/a0187177-93b9-4729-9373-288c26328437/image.png)


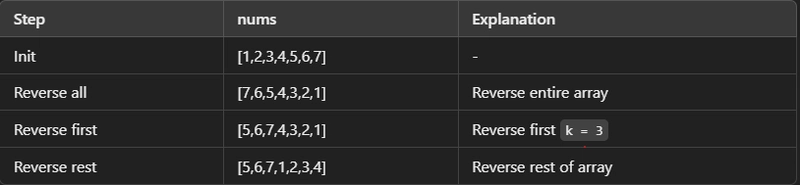
![[LeetCode] 189. Rotate Array](https://velog.velcdn.com/images/haden/post/bd378b7f-7ea7-413a-83d6-2a7e581e8347/image.png)


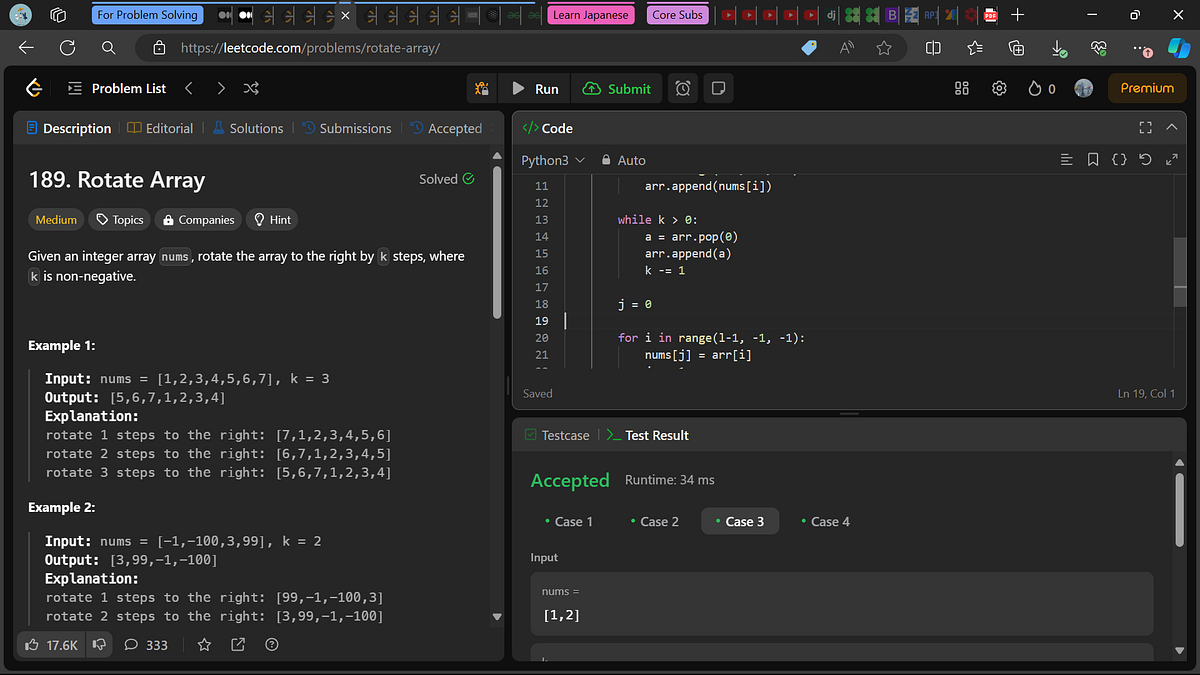
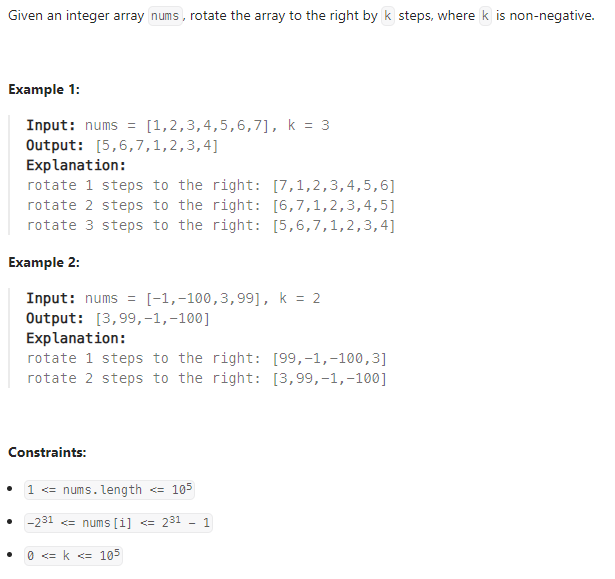
![[LeetCode] Rotate Array](https://velog.velcdn.com/images/bins1225/post/cd5f8434-3d63-4055-80cb-c25b9881870b/image.png)


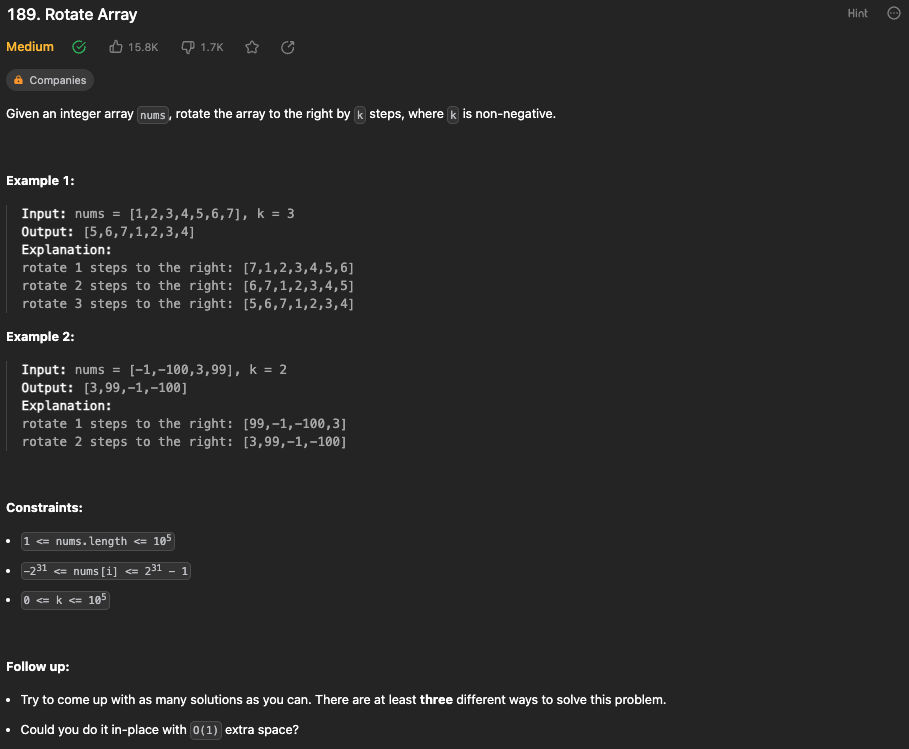
![[Array] Giải bài 189 Rotate Array - YouTube](https://i.ytimg.com/vi/39HqgMjHe0c/maxresdefault.jpg)


Discover the sophistication of leetcode 189 | rotate array solution visually explained | top interview with our curated gallery of numerous images. showcasing the grandeur of artistic, creative, and design. ideal for luxury lifestyle publications. The leetcode 189 | rotate array solution visually explained | top interview collection maintains consistent quality standards across all images. Suitable for various applications including web design, social media, personal projects, and digital content creation All leetcode 189 | rotate array solution visually explained | top interview images are available in high resolution with professional-grade quality, optimized for both digital and print applications, and include comprehensive metadata for easy organization and usage. Discover the perfect leetcode 189 | rotate array solution visually explained | top interview images to enhance your visual communication needs. Instant download capabilities enable immediate access to chosen leetcode 189 | rotate array solution visually explained | top interview images. Comprehensive tagging systems facilitate quick discovery of relevant leetcode 189 | rotate array solution visually explained | top interview content. Professional licensing options accommodate both commercial and educational usage requirements. The leetcode 189 | rotate array solution visually explained | top interview archive serves professionals, educators, and creatives across diverse industries. Regular updates keep the leetcode 189 | rotate array solution visually explained | top interview collection current with contemporary trends and styles. Cost-effective licensing makes professional leetcode 189 | rotate array solution visually explained | top interview photography accessible to all budgets.