


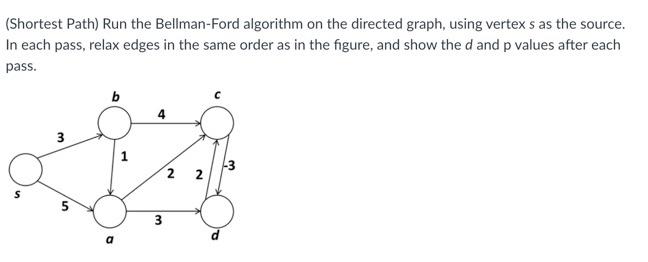
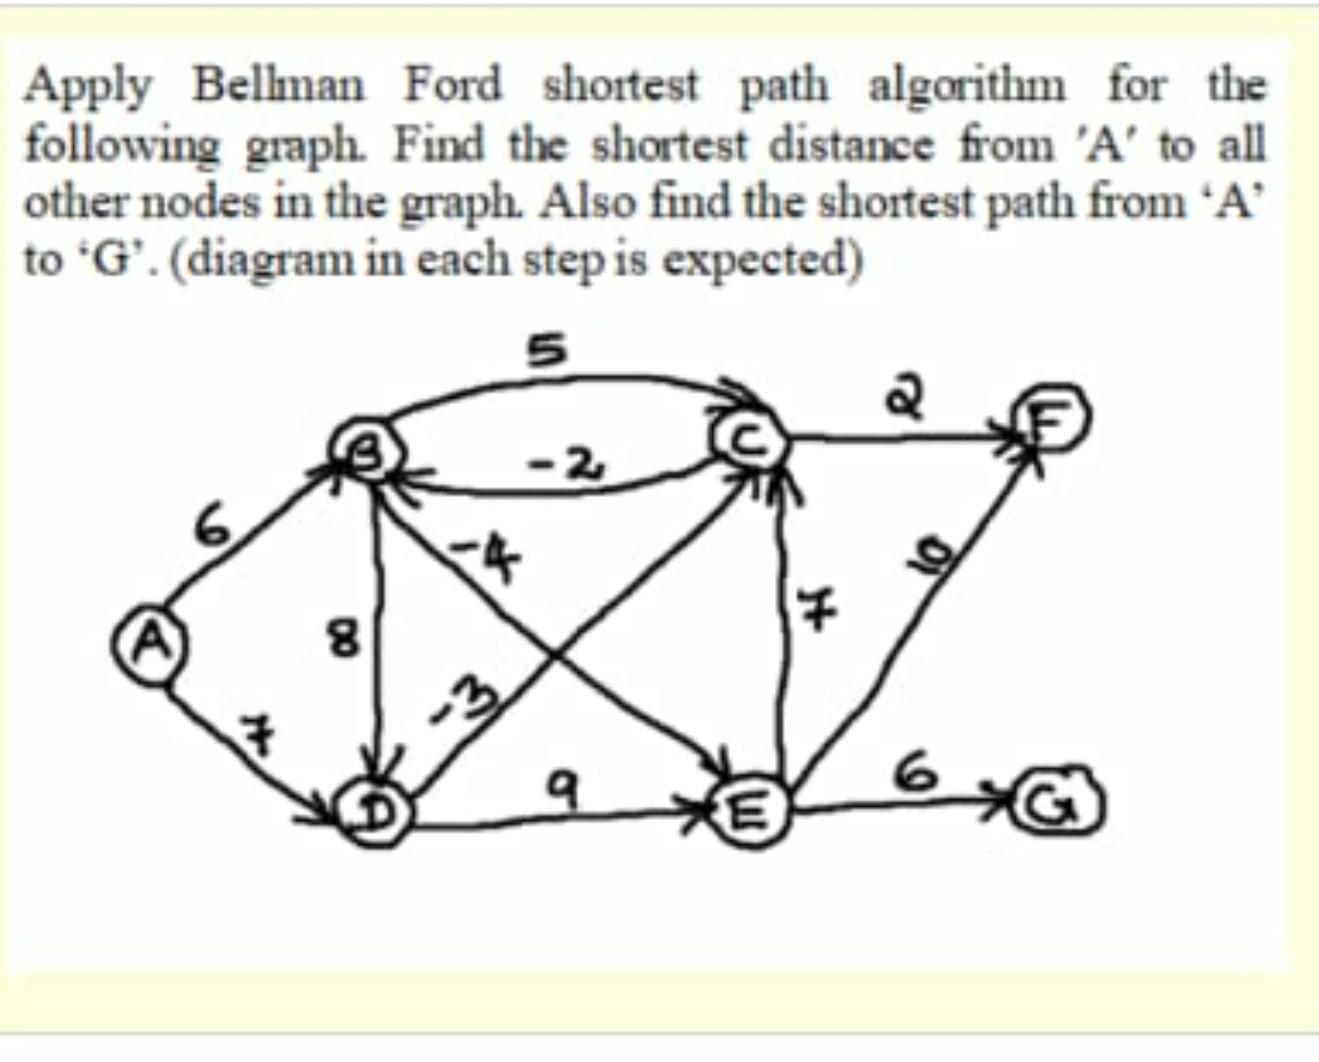
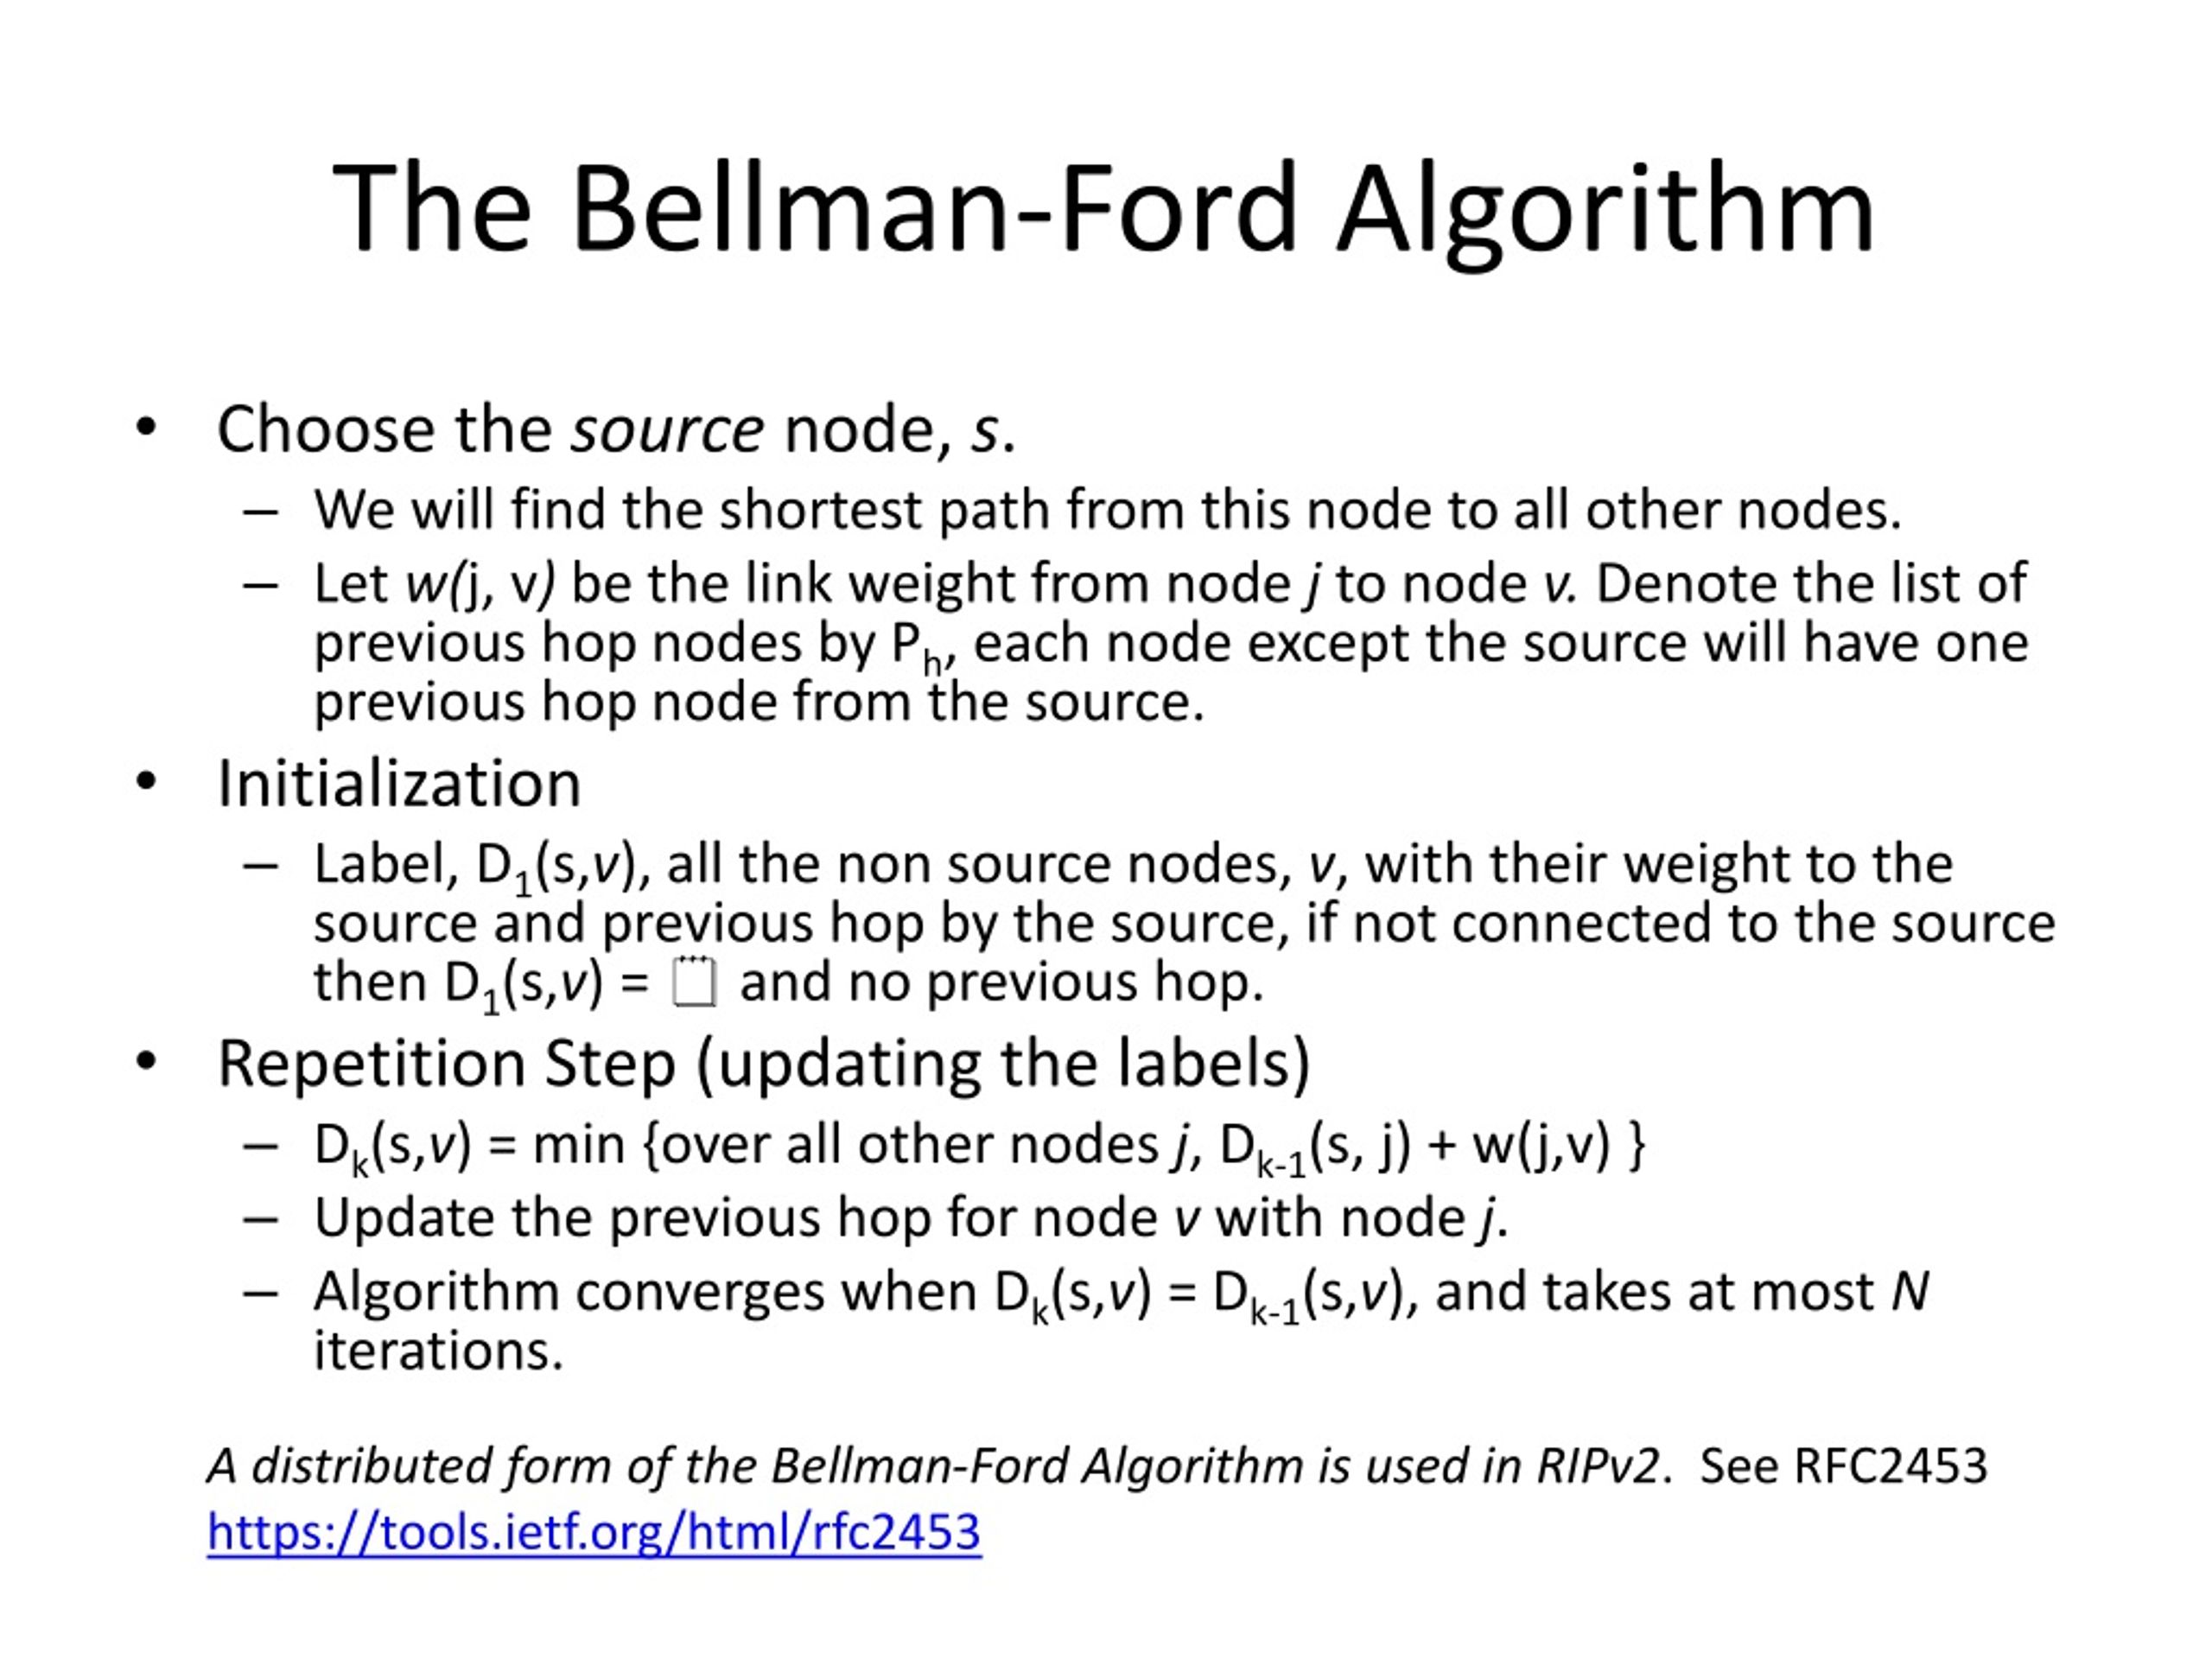
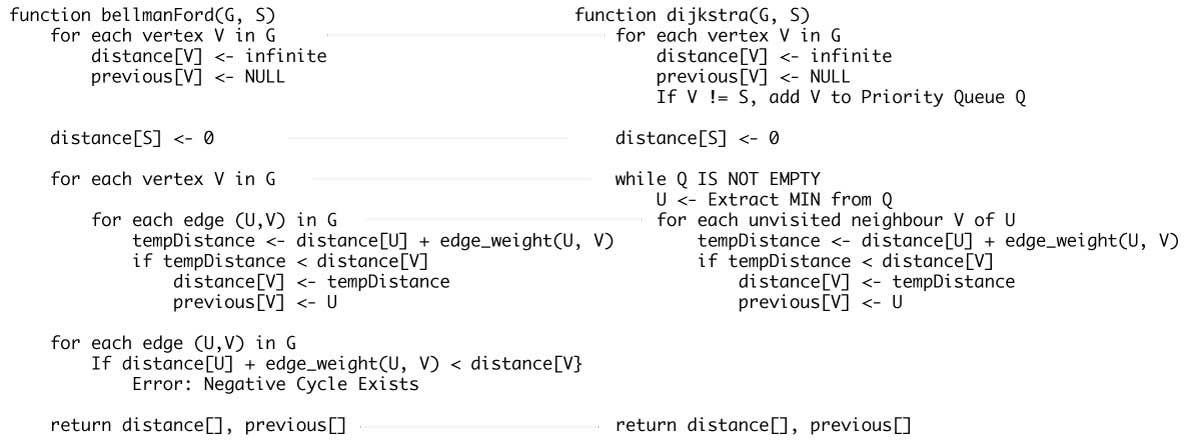
.png)


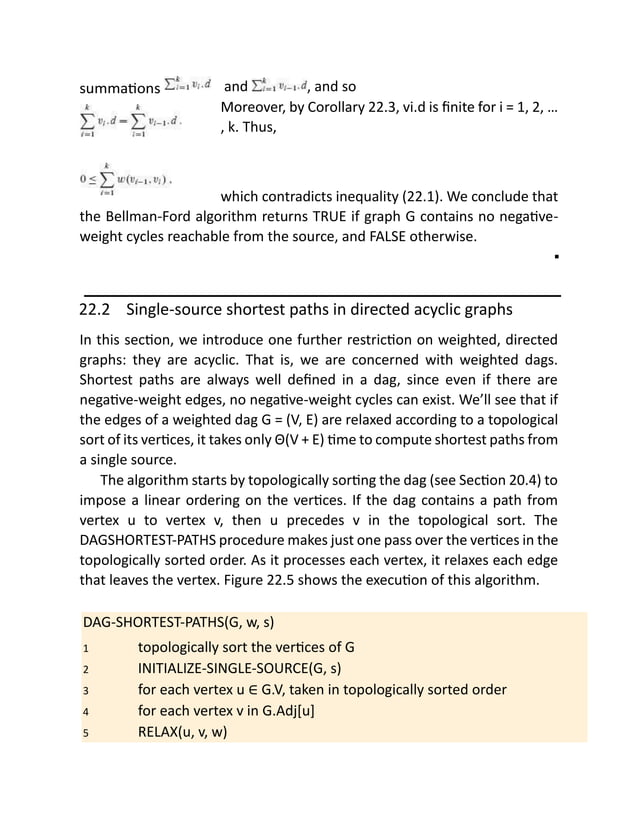


.png)
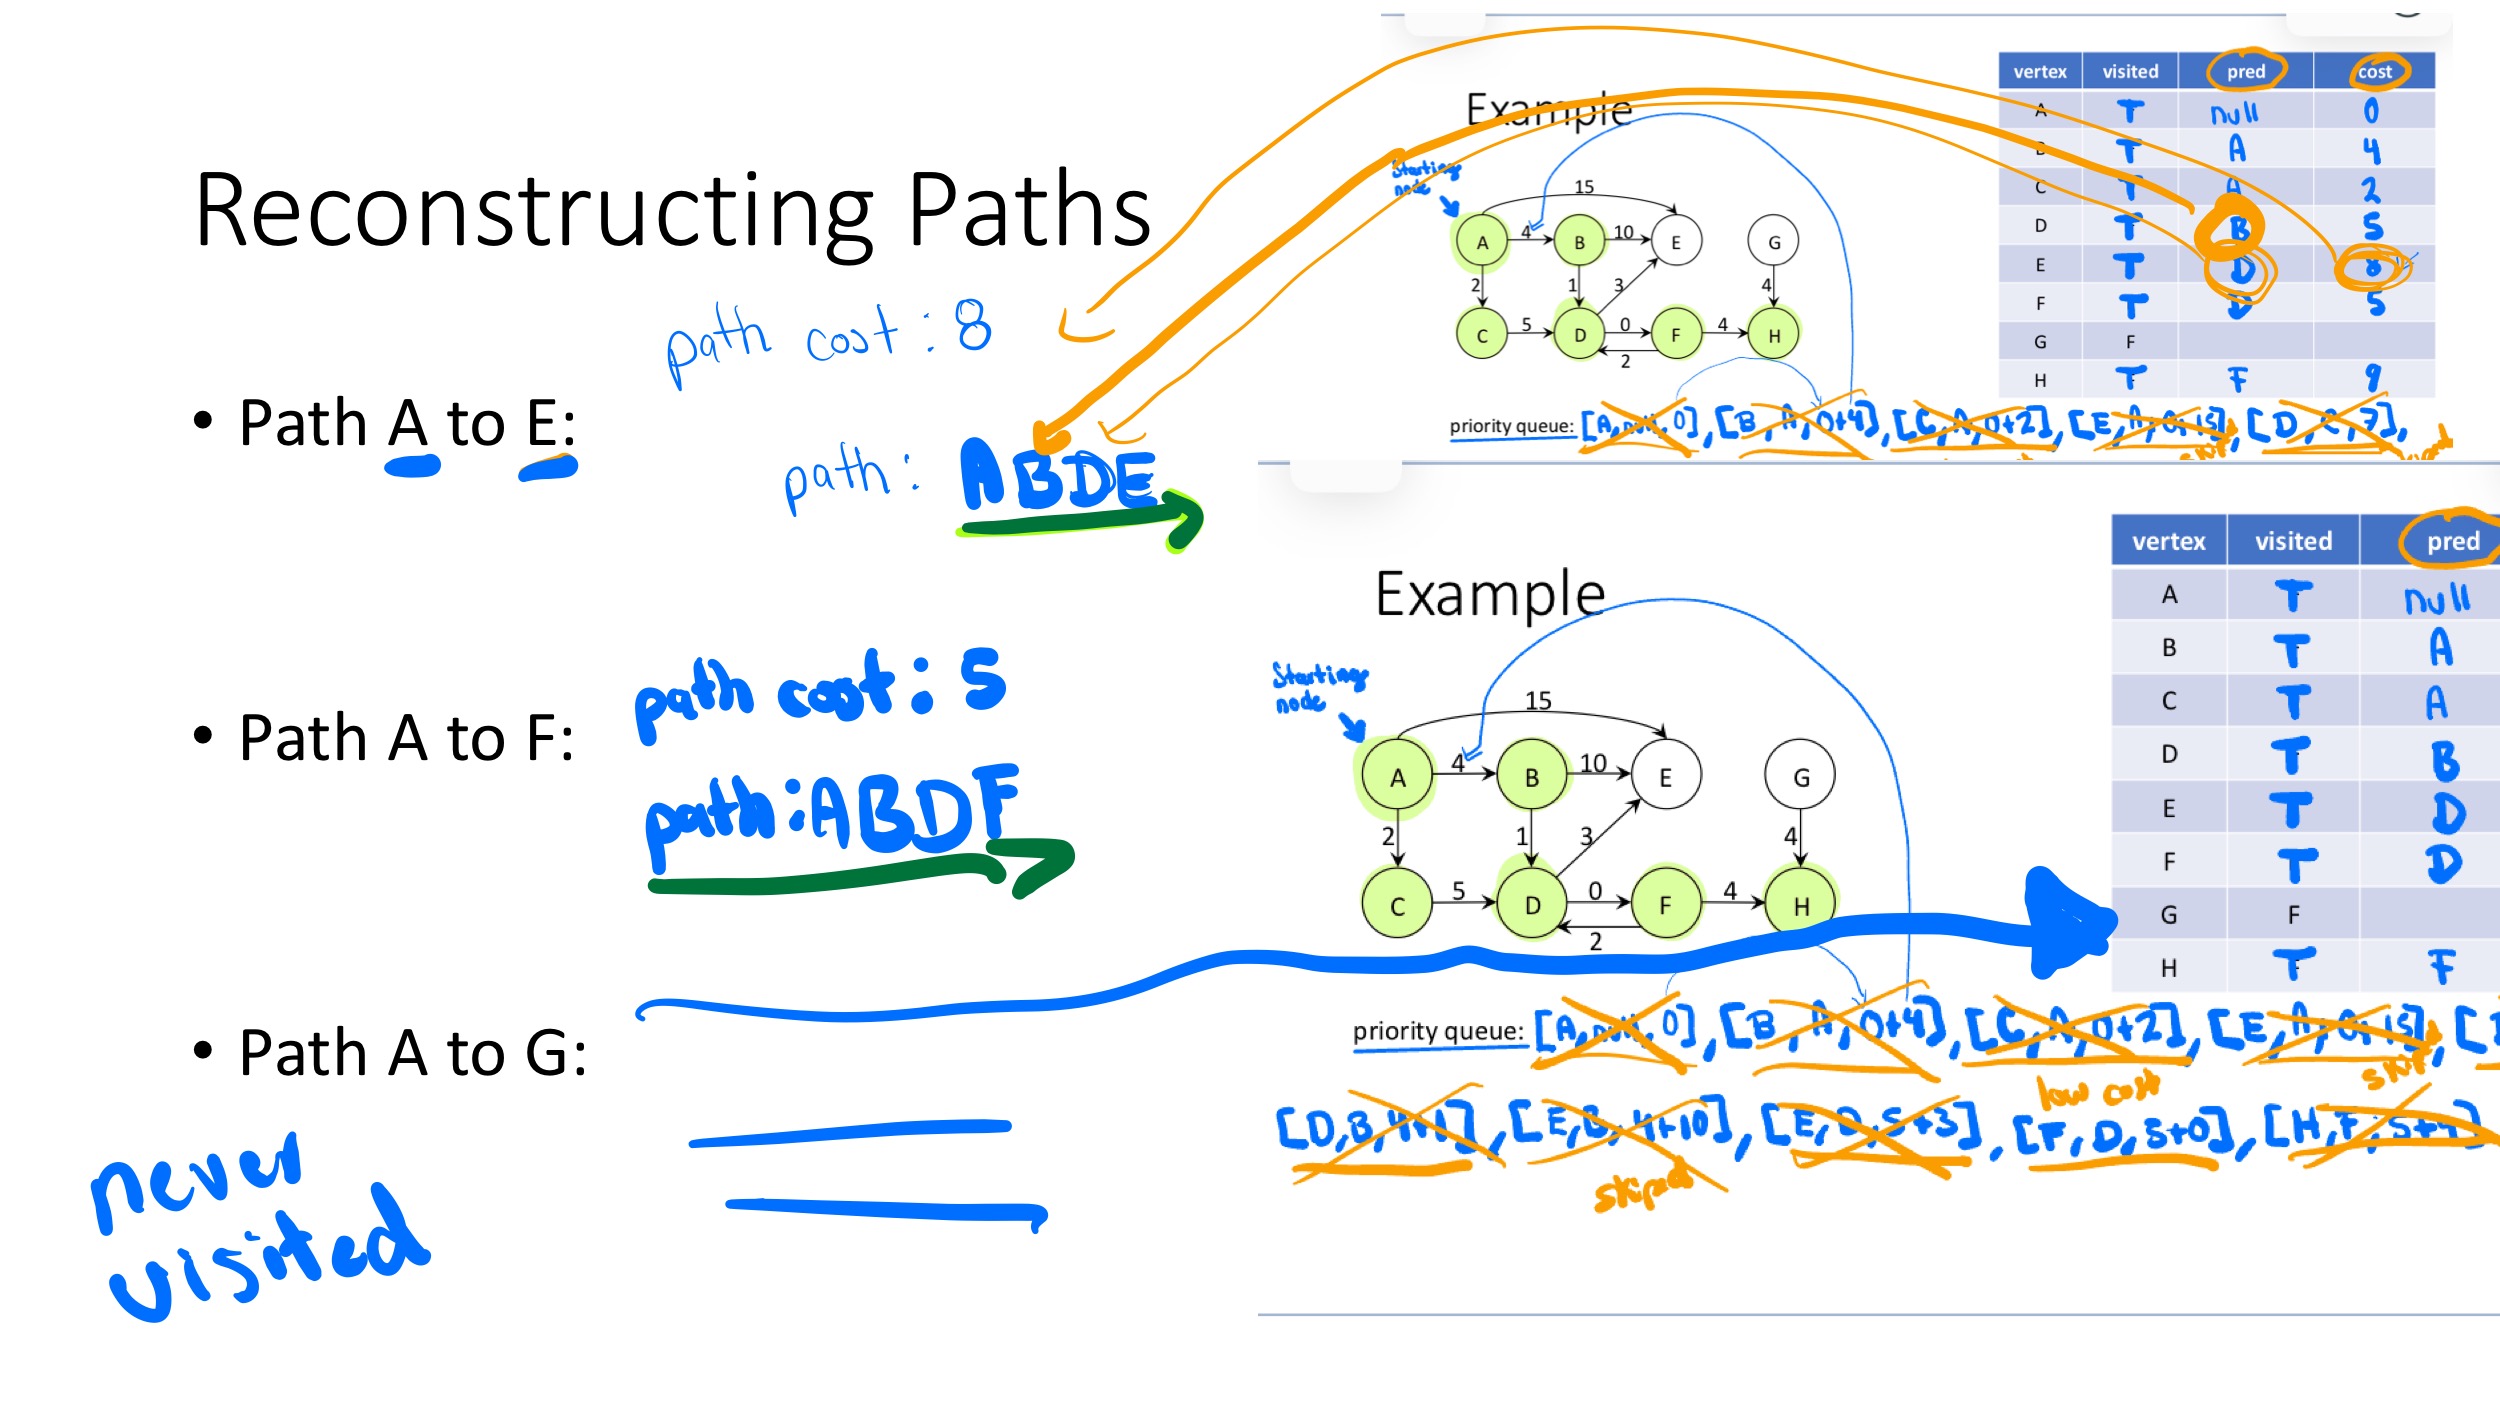

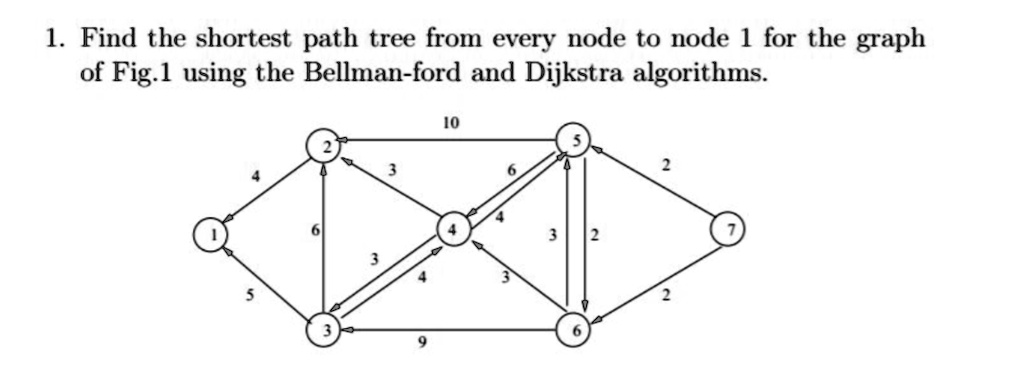

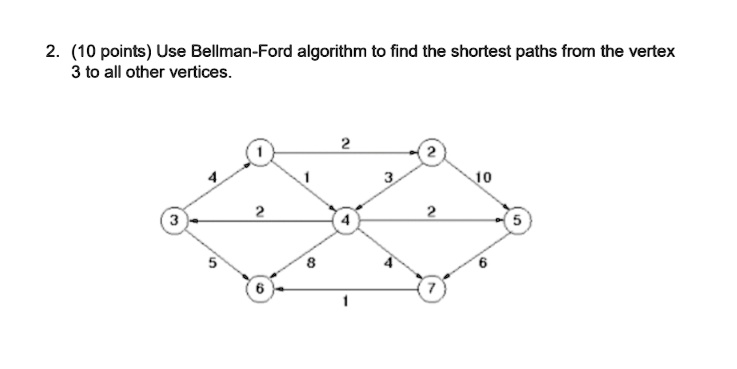


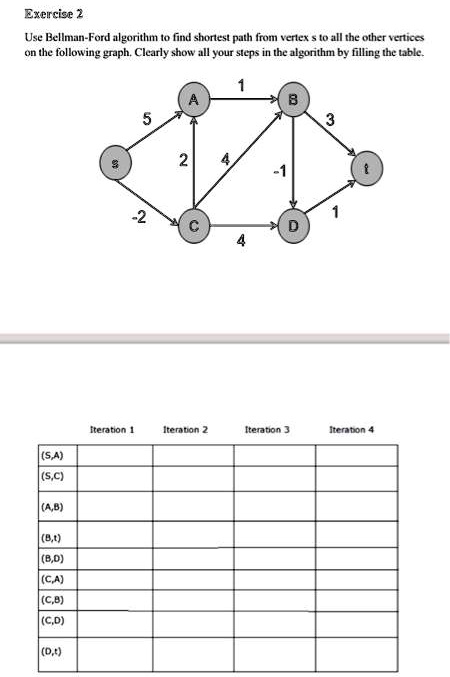


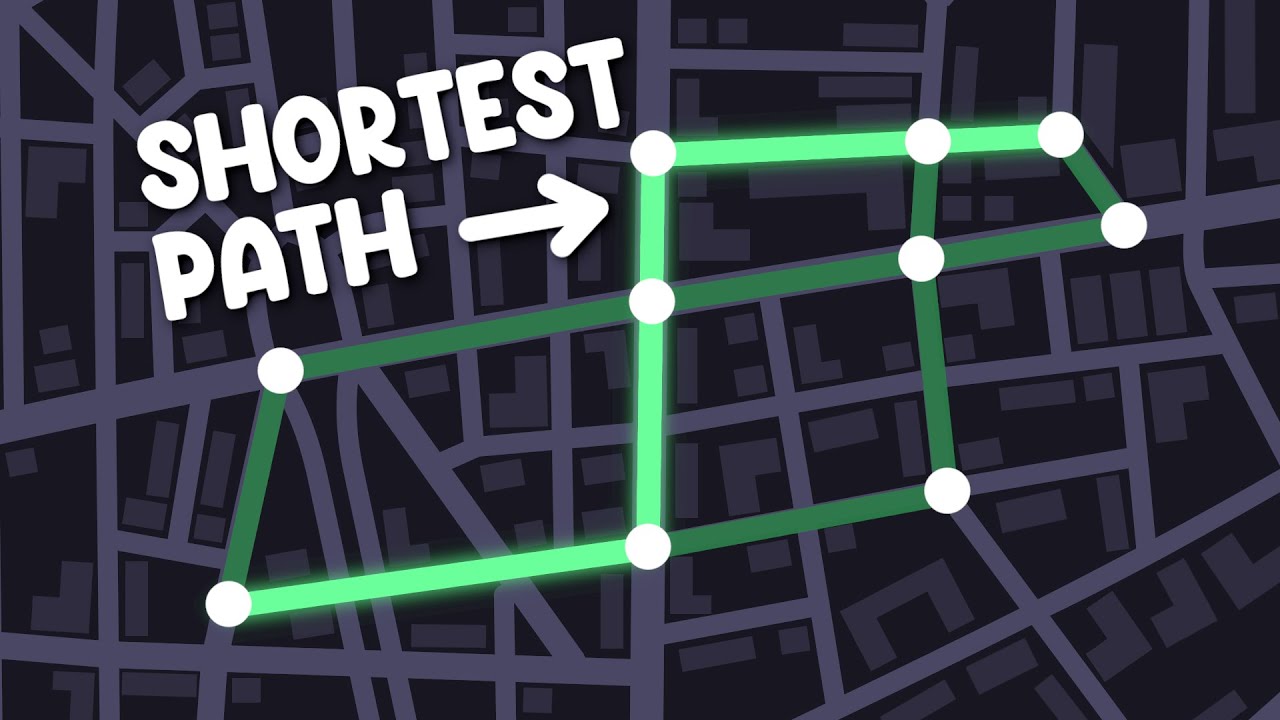
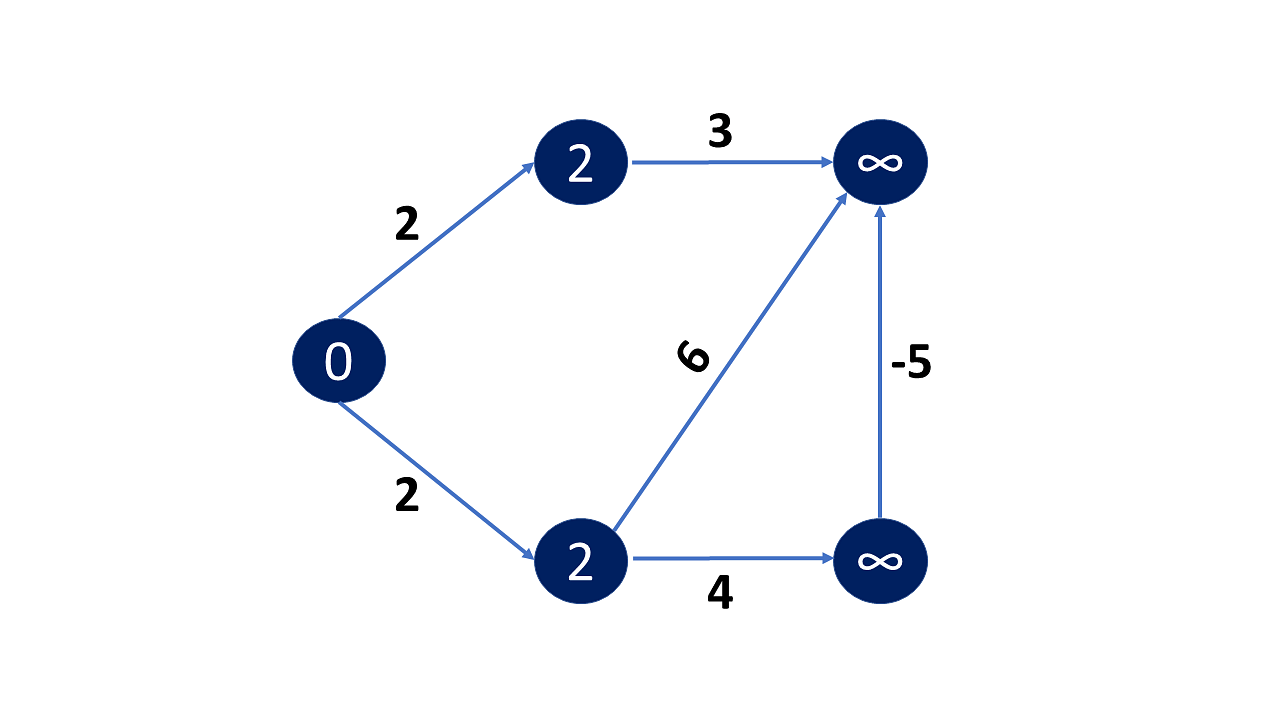
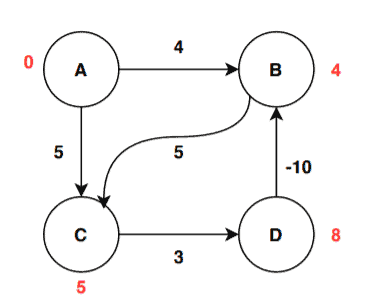
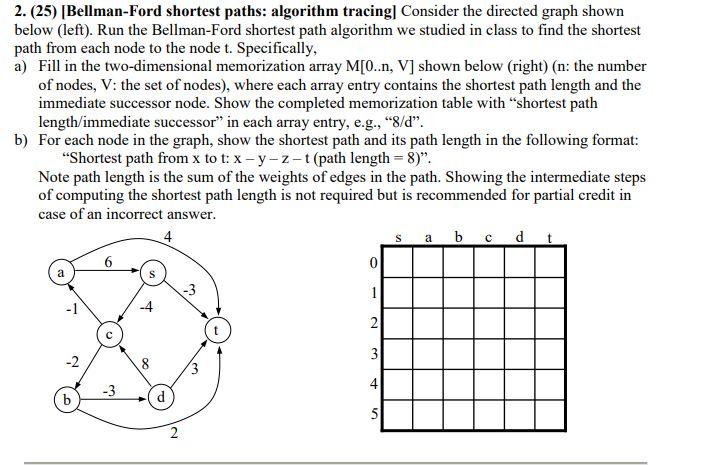
![[알고리즘] Graph - 최단 경로 [Dijkstra, Bellman-Ford, Floyd-Warshall]](https://velog.velcdn.com/images/dankj1991/post/71661fbe-ff53-4e6c-9751-aa7d6248b0d2/image.png)


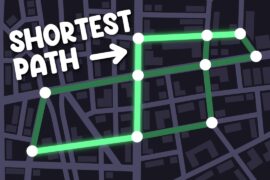
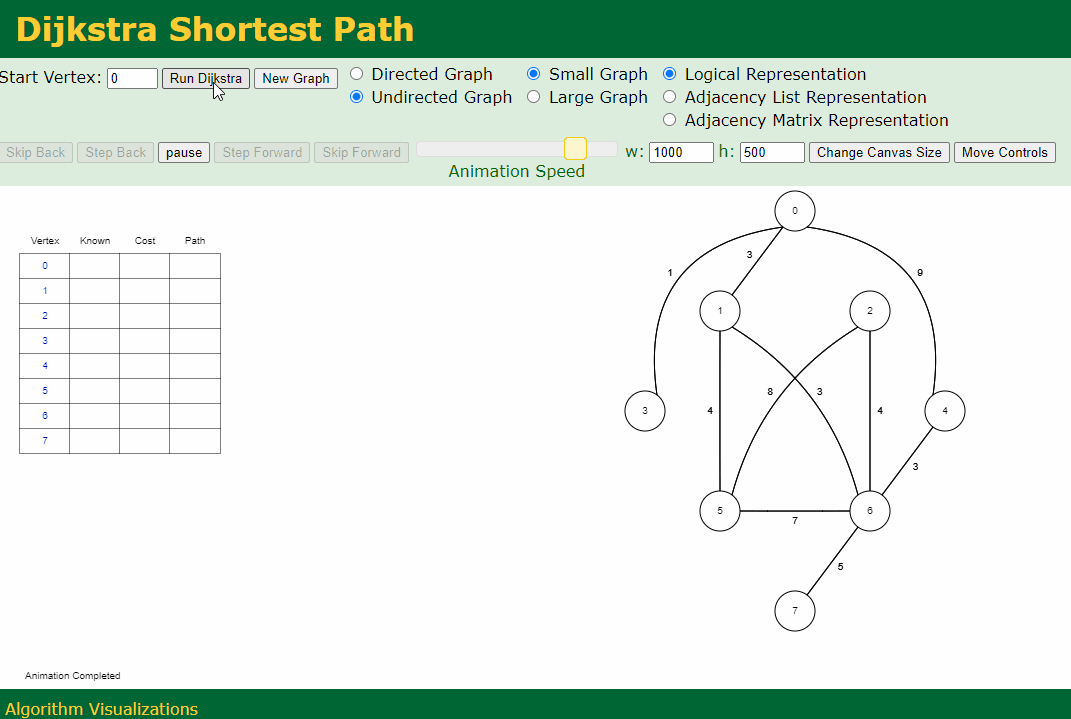
Browse our specialized shortest path algorithms explained (dijkstra's & bellman-ford) - python portfolio with countless expertly curated photographs. captured using advanced photographic techniques and professional equipment. providing reliable visual resources for business and academic use. Discover high-resolution shortest path algorithms explained (dijkstra's & bellman-ford) - python images optimized for various applications. Perfect for marketing materials, corporate presentations, advertising campaigns, and professional publications All shortest path algorithms explained (dijkstra's & bellman-ford) - python images are available in high resolution with professional-grade quality, optimized for both digital and print applications, and include comprehensive metadata for easy organization and usage. Each shortest path algorithms explained (dijkstra's & bellman-ford) - python image meets rigorous quality standards for commercial applications. The shortest path algorithms explained (dijkstra's & bellman-ford) - python archive serves professionals, educators, and creatives across diverse industries. Each image in our shortest path algorithms explained (dijkstra's & bellman-ford) - python gallery undergoes rigorous quality assessment before inclusion. Multiple resolution options ensure optimal performance across different platforms and applications. Regular updates keep the shortest path algorithms explained (dijkstra's & bellman-ford) - python collection current with contemporary trends and styles. Whether for commercial projects or personal use, our shortest path algorithms explained (dijkstra's & bellman-ford) - python collection delivers consistent excellence. Instant download capabilities enable immediate access to chosen shortest path algorithms explained (dijkstra's & bellman-ford) - python images.