Please enter url.
Login
Logout
Please enter url.
Part II - Understanding Low Carb High Fat - the solution
lchf-rd.com
source
Comments
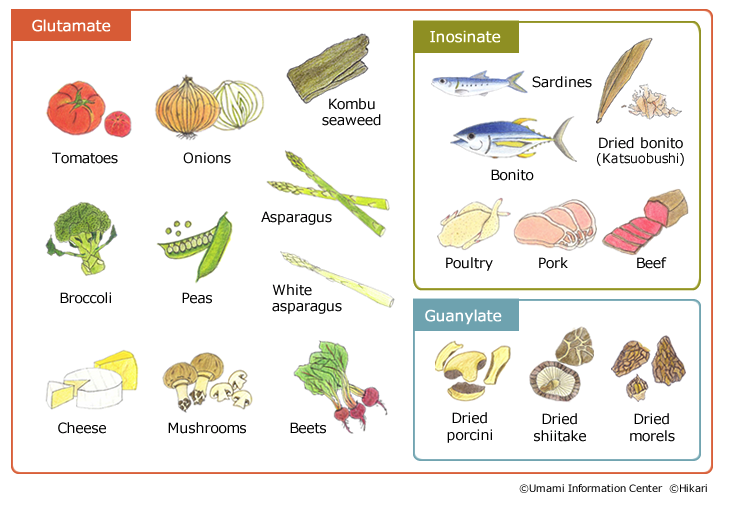
A LCHF Diet
How To Start A Low-Carb Diet (+ Macro Calculator) | No carb diets, Low ...
Pin by saydi mendoza on Mis recetas | Power salad, Plant based recipes ...
Low-Carb FAQ (Plus FREE Diet Sheet) - for beginners.
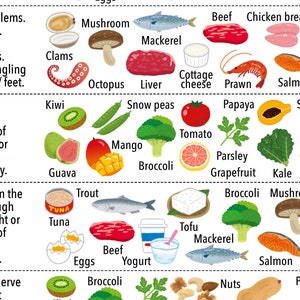
Protein-rich Foods – Time Smart Personal Training
Keto Grocery List Printable with Illustrations Keto Food List Low Carb ...
The Best Foods for Healthy Weight Loss – Diet Doctor
A Beginner's Guide to Oyster and Sake Pairings — In A Half Shell
What is a Protein Diet? Benefits of a Protein-Based Diet | BULB
Pin on Artists that inspire
Vitamin Foods Reference Chart, PRINTABLE / INSTANT DOWNLOAD Pdf, 'at-a ...
Diabetes : what do you need to know about healthy eating | NaturaMines ...
Pin on Health and Wellness
Zero-Carb Foods for Your Low-Carb Diet - Welltech
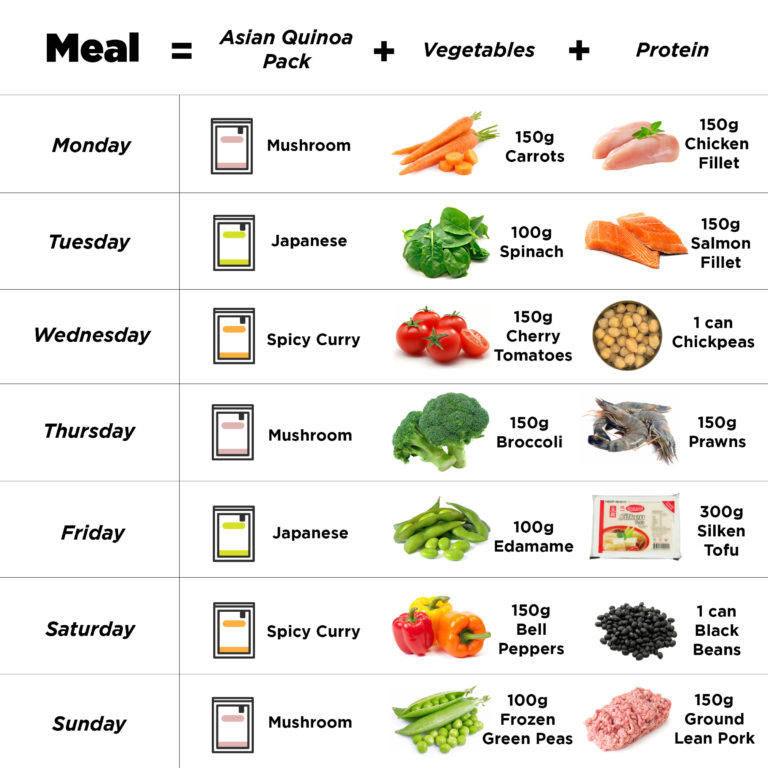
No excuses! Get your hands on our Quinoa NOW: Click here.
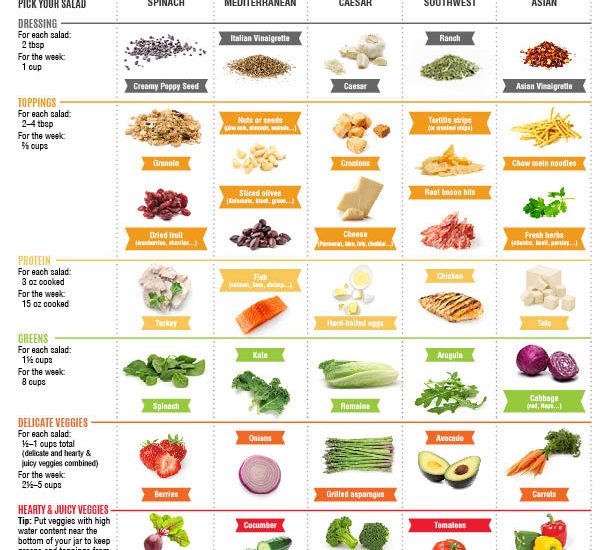
how-to-prep-salads-for-the-whole-week – TrimmedandToned
Low Carb Foods and Diets Guide
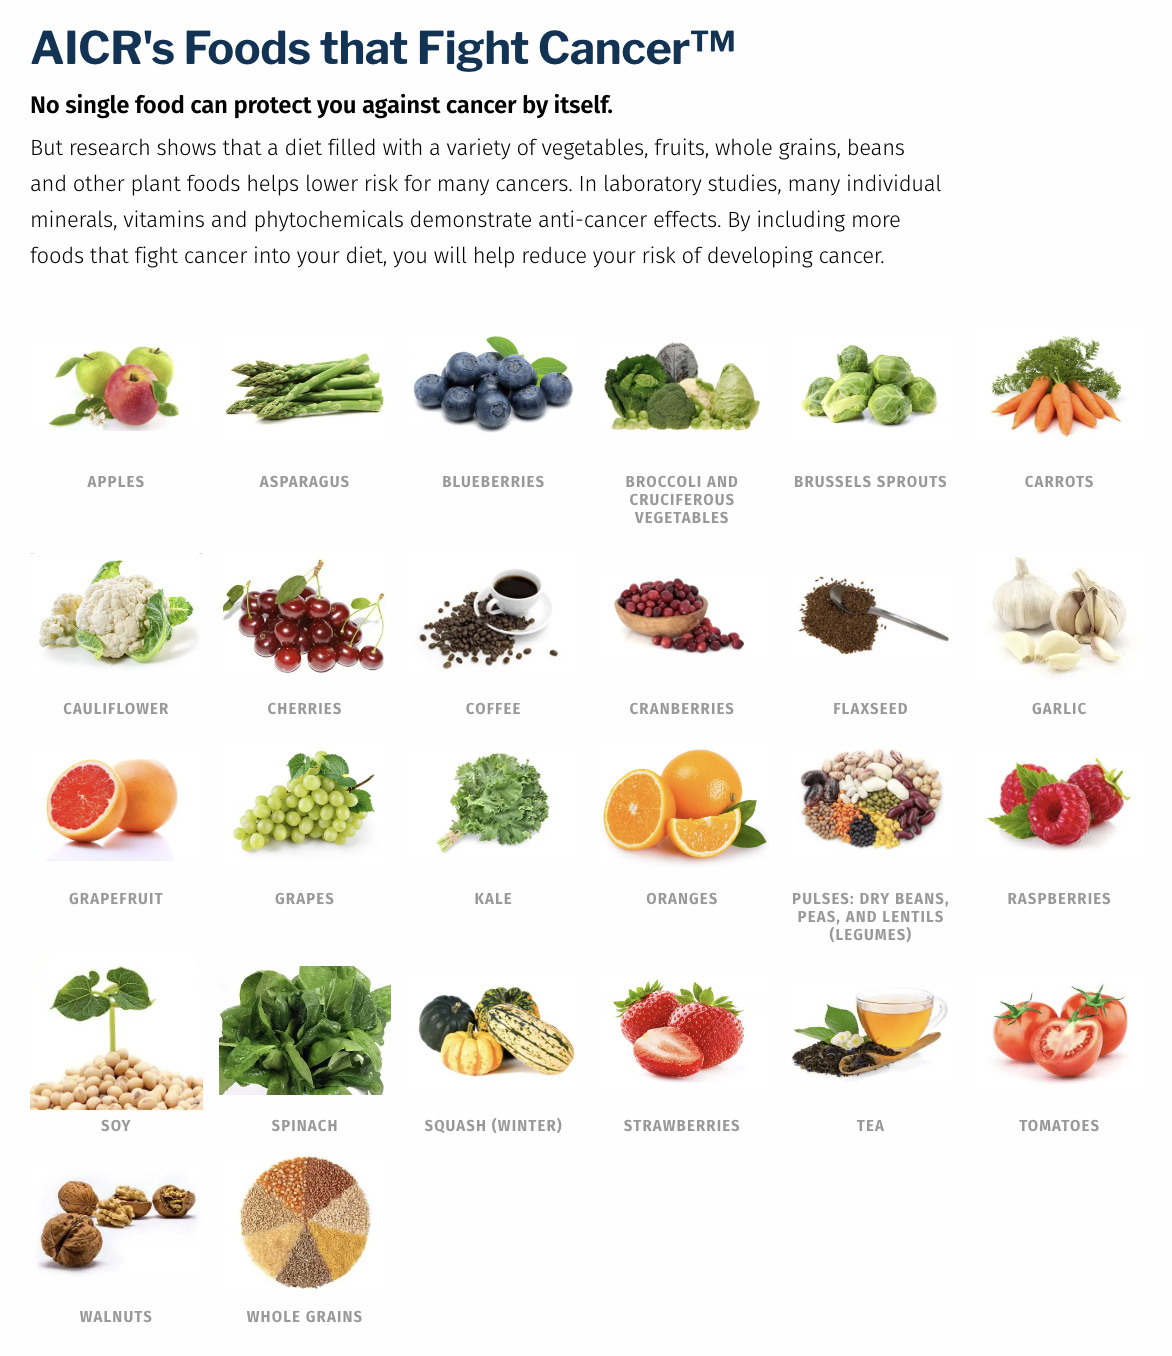
AICR: New American Plate
Vitalizer Fruits and vegetables that are on my vitamins. What’s In ...
Ulcer Diet: What to Eat For Better Management
The 15 Most Nutrient-Dense Foods On The Planet | Most nutrient dense ...
Restaurant health and safety
180 best images about Fitspiration Quotes on Pinterest | Law of ...
Nutrition IS Simple - Health My Lifestyle | Healthy food facts ...
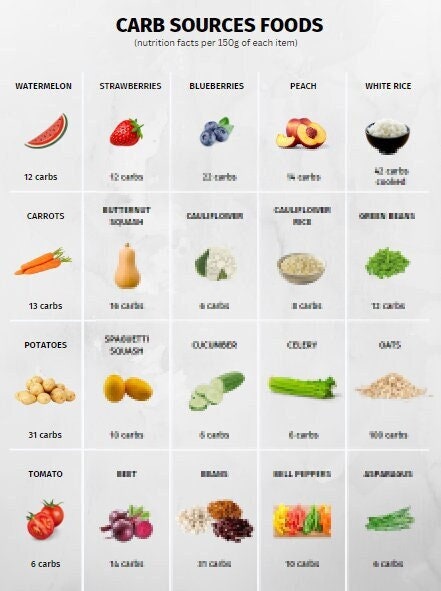
Carb Foods Reference Chart PRINTABLE / INSTANT (Download Now) - Etsy
What can I eat (With images) | Banting recipes, Food, What can i eat
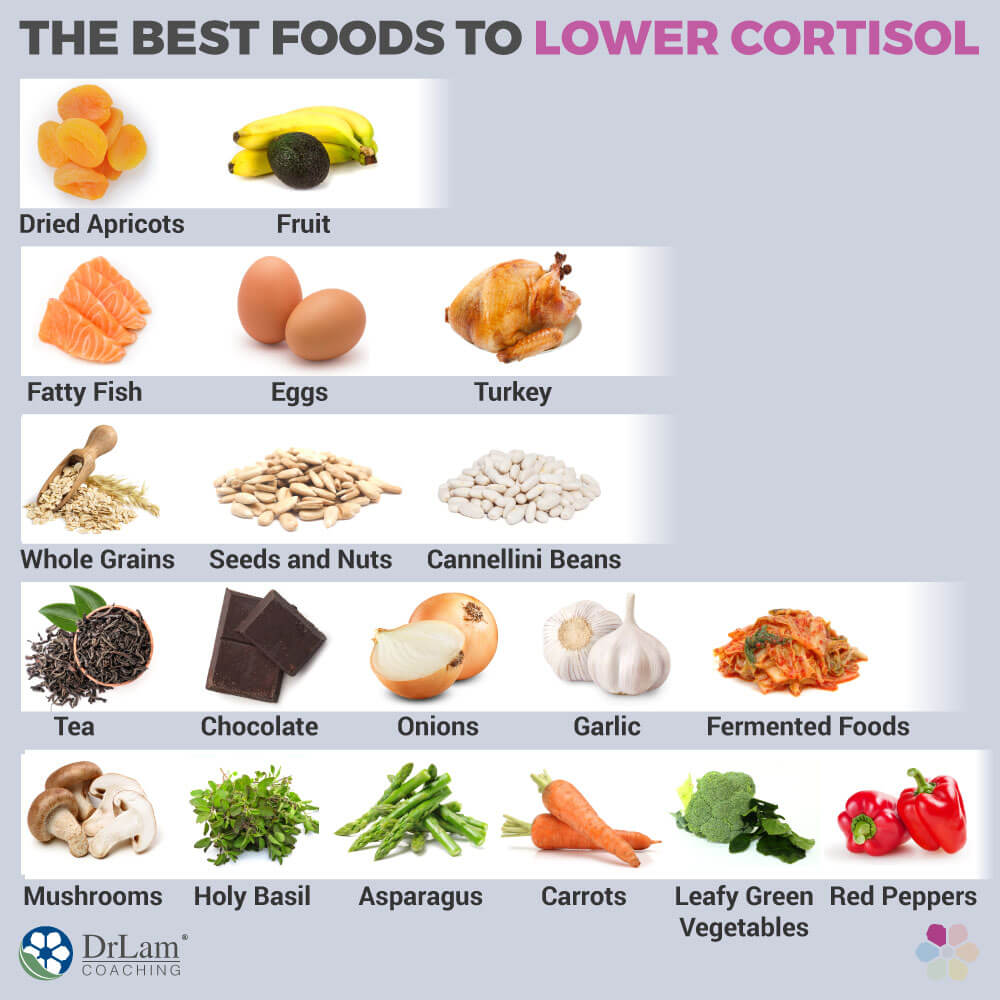
Foods To Lower Cortisol Levels And Support Adrenal Health
What Foods Are in Your Low Carb Meals Plan? | Low carb diet plan, Low ...
What can I eat Banting Recipes, Healthy Recipes, What Can I Eat, Cold ...
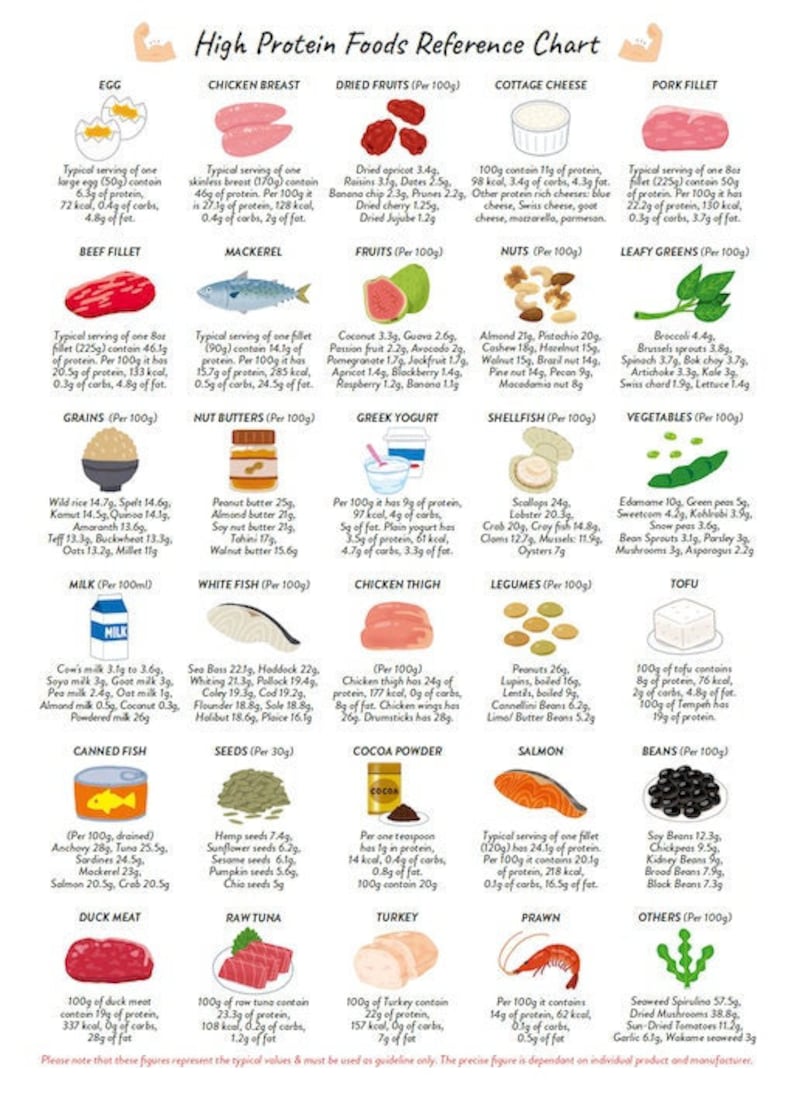
High Protein Foods Reference Chart PRINTABLE / INSTANT - Etsy Ireland
7-Day Leaky Gut Diet Plan - The Nutrition Insider
Friday Eye Candy | Special Edition - A Thoughtful Place
south-beach-diet-phase1-meal-plan | South beach diet, South beach diet ...
Pin by Renee Dozier on Healthy Living | Healthy, Health and nutrition ...
» Supplements for Skiing – Part 2
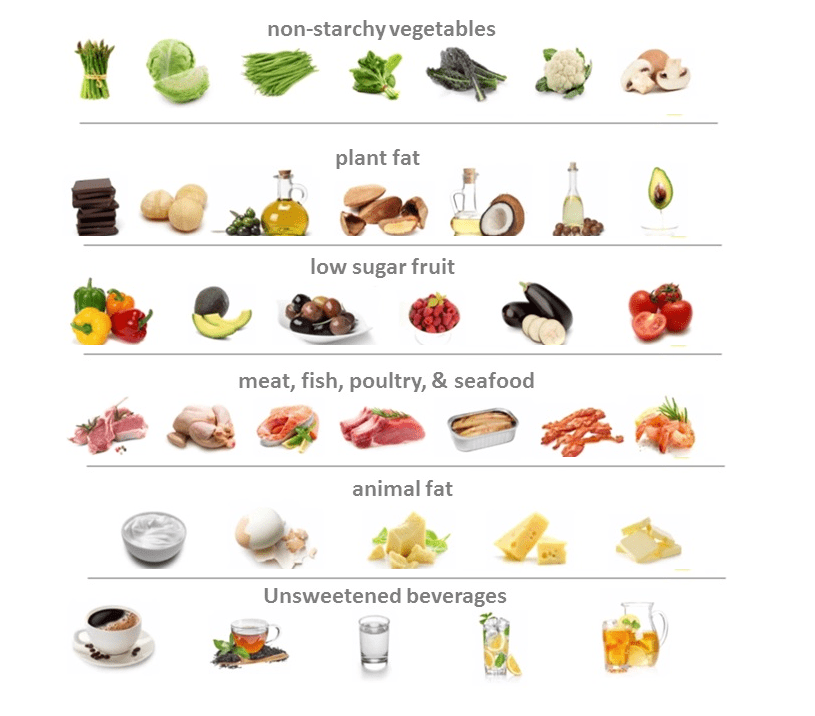
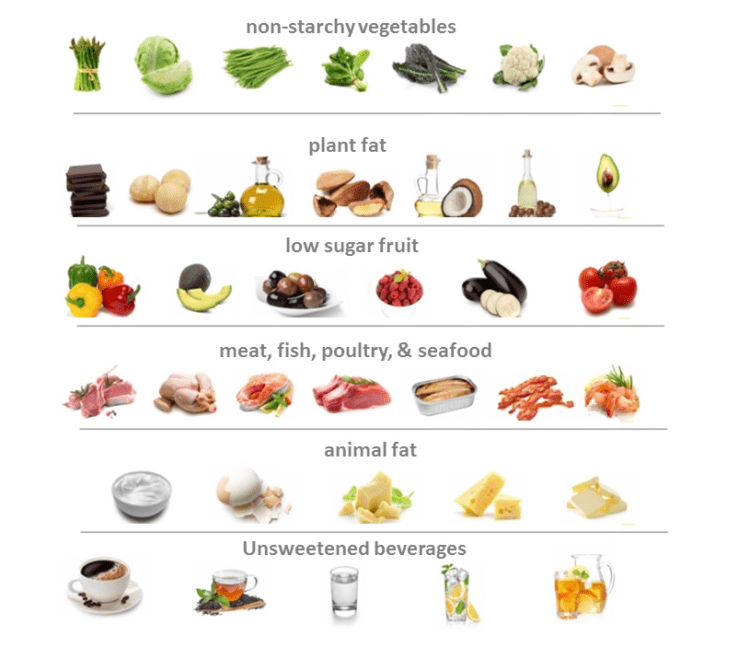
Low-Carb-High-Fat-Diet-Food-List
High-Fat-No-Carb-Foods
Foods-High-in-Fat-Low-in-Carbs
Low-Carb-Low-Calorie-Foods
No-Sugar-Low-Carb-Foods
Low-Carb-Food-Pyramid
Best-High-Fiber-Low-Carb-Foods
Healthy-Low-Carb-Diet
Low-Carb-Fast-Food
Printable-Low-Carb-Foods
Low-Carb-High-Fat-Meals
Low-Carb-Low-Fat-Snacks
High-Carb-Drinks
Low-Carb-High-Fat-Meal-Plan
Top-10-Low-Carb-Foods
Low-Carb-Foods-List-Free


:max_bytes(150000):strip_icc()/what-can-i-eat-if-i-have-a-peptic-ulcer-1742154-01-ec37a34d14c44195999f8d44372f820b.png)