


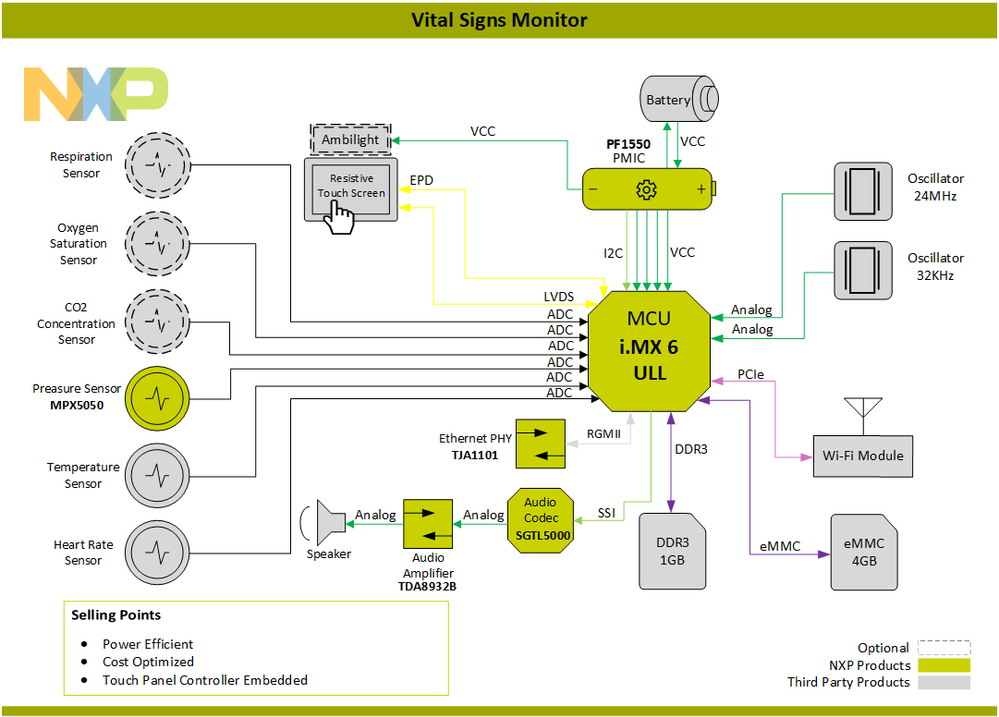
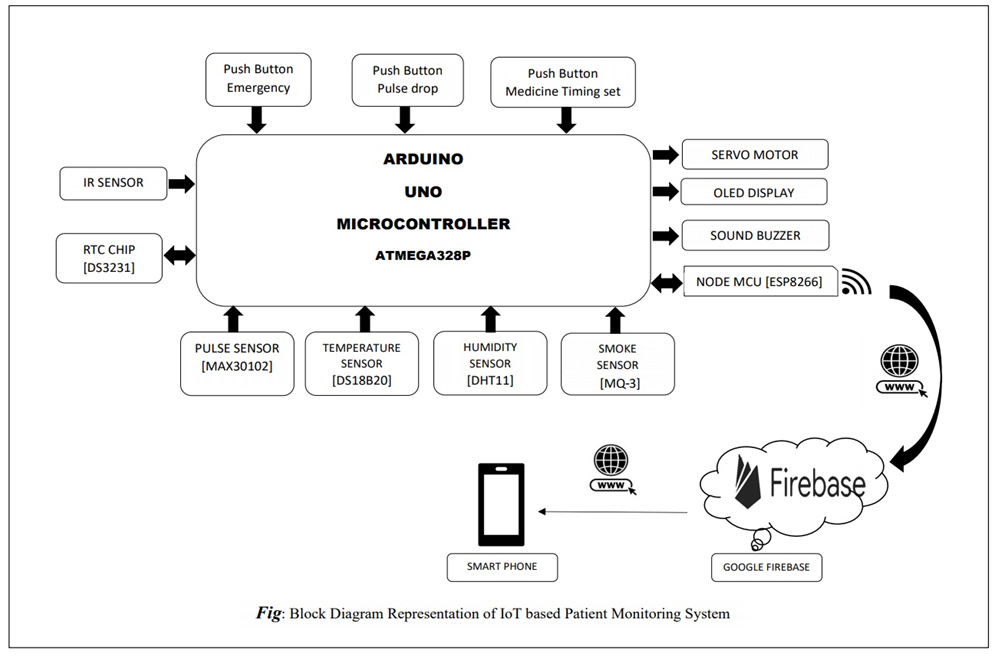
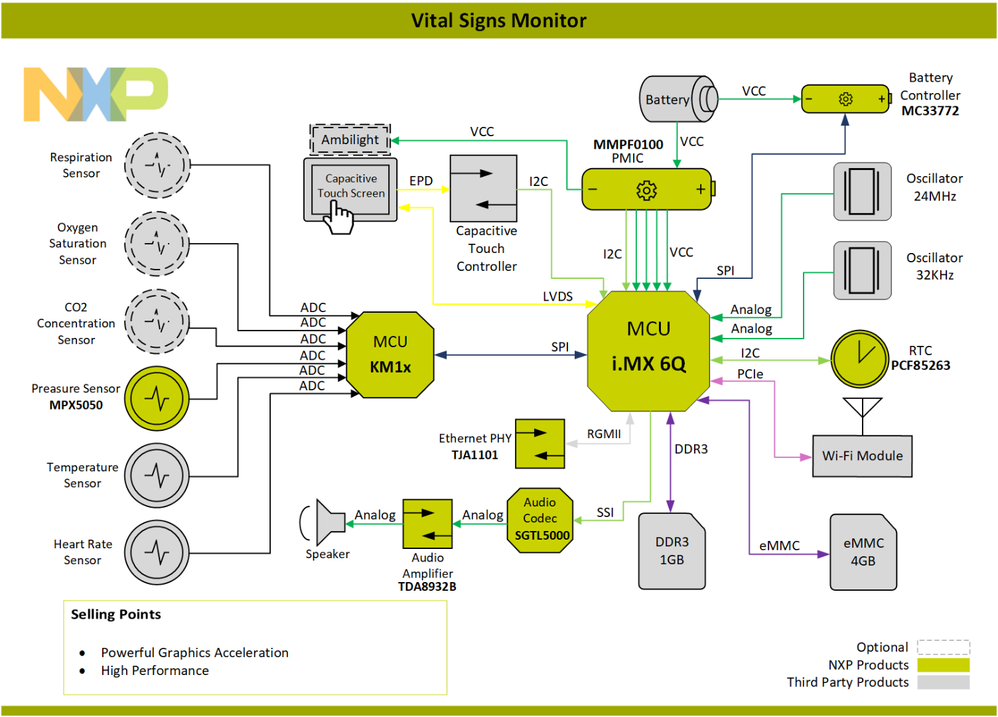
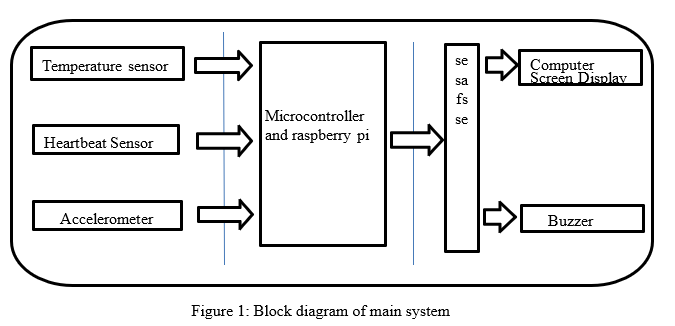
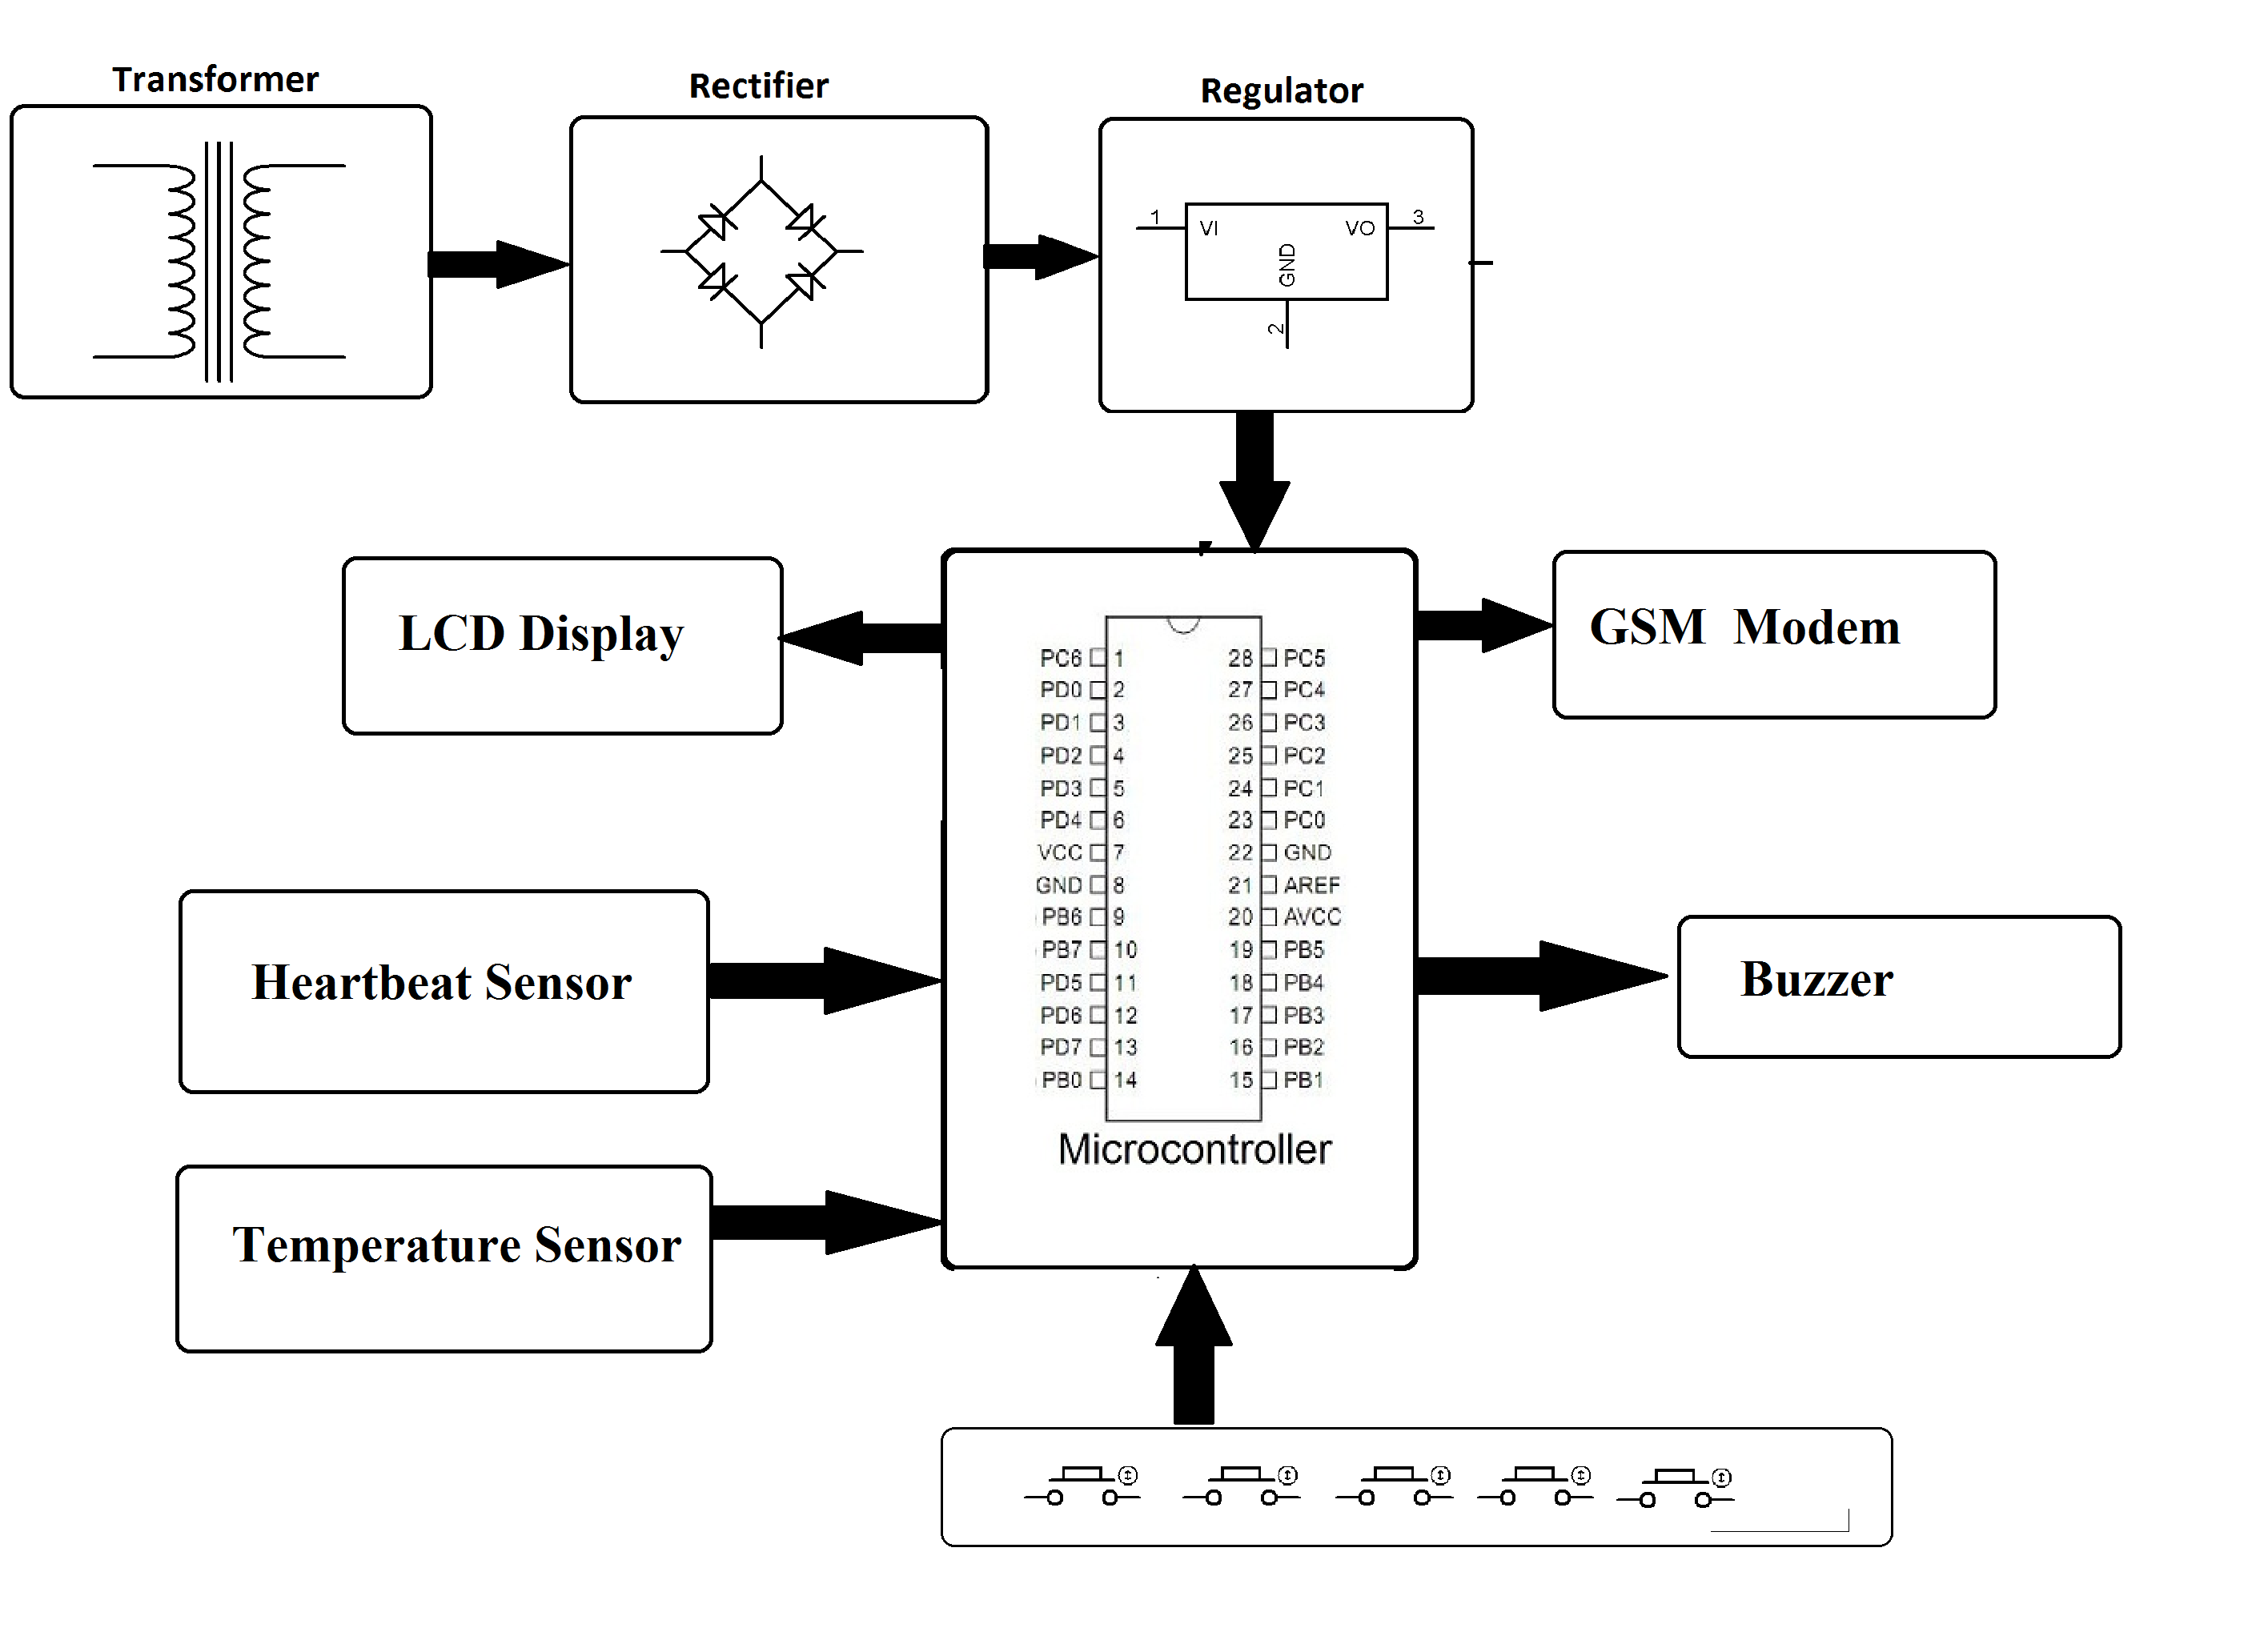
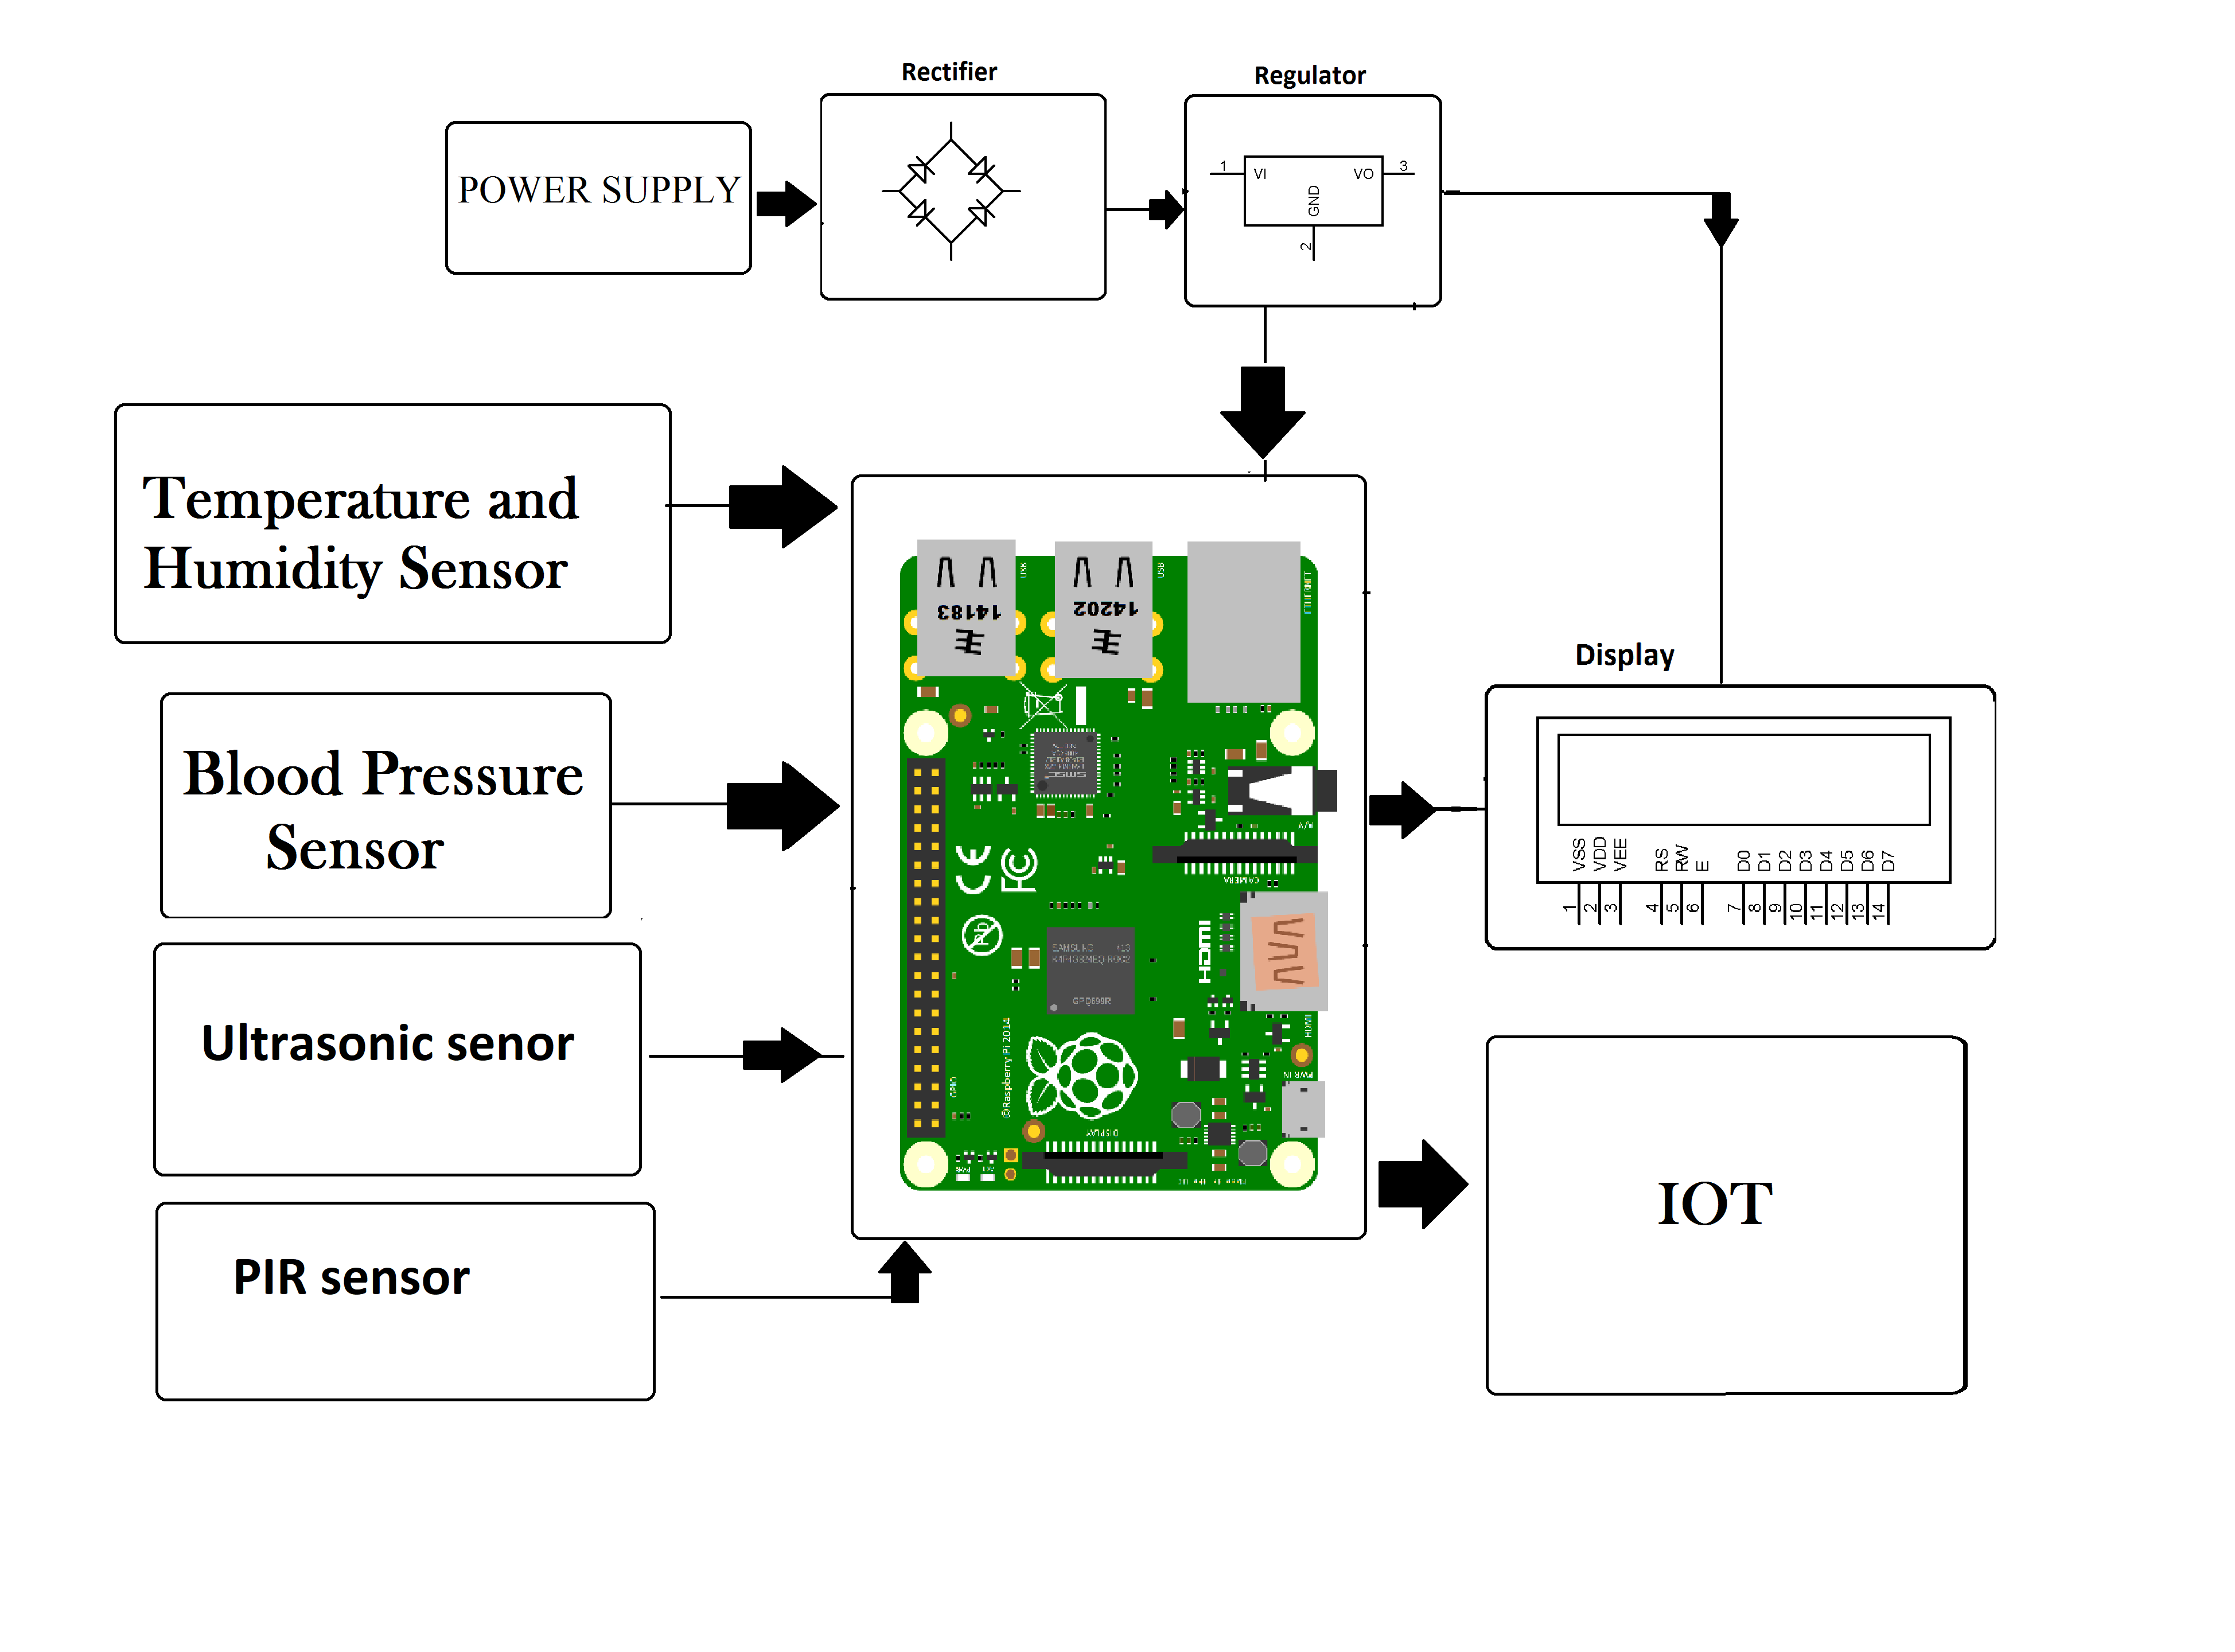
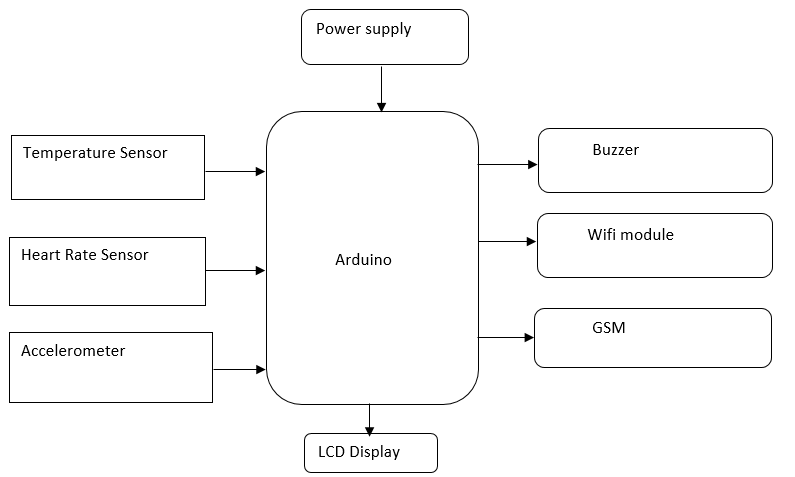
![Patient Monitoring System Structure [76] | Download Scientific Diagram](https://www.researchgate.net/publication/371124070/figure/fig3/AS:11431281162475310@1685330428526/Patient-Monitoring-System-Structure-76_Q640.jpg)


![Block Diagram Of Remote Patient Monitoring System [solved] P](https://www.nist.gov/sites/default/files/styles/960_x_960_limit/public/images/2020/09/17/RPM%20domains.jpg?itok=edbjH_it)


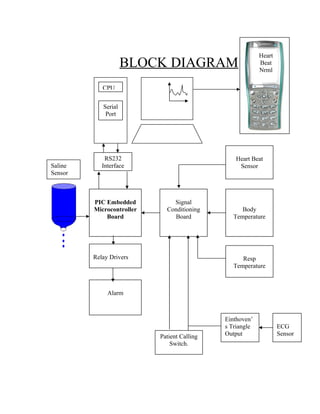

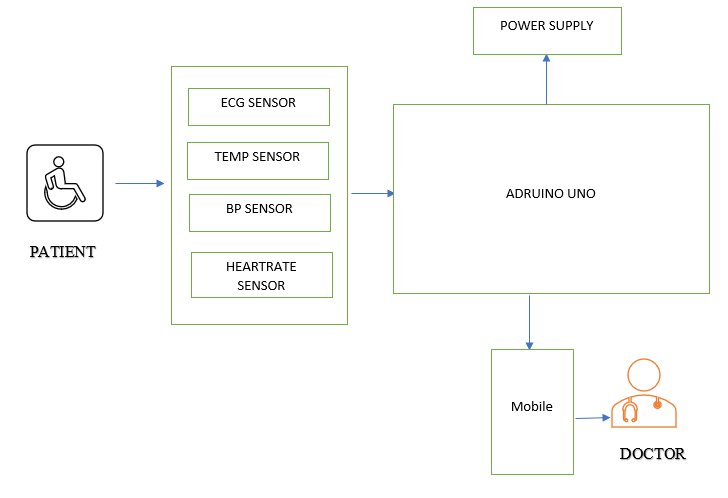


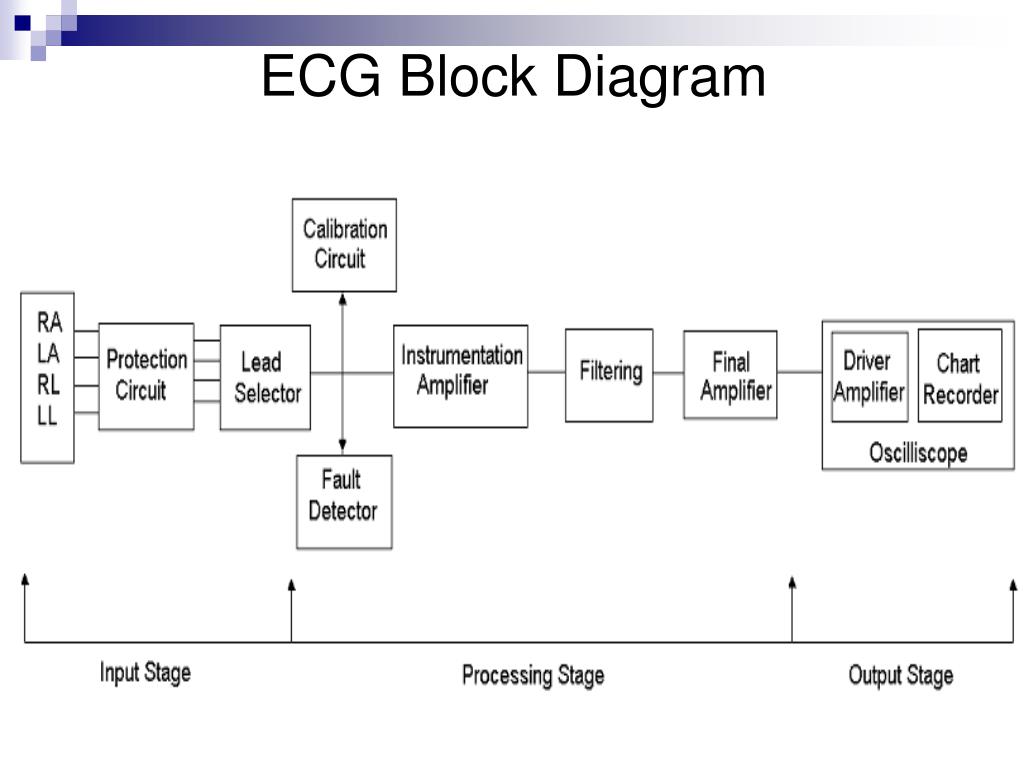


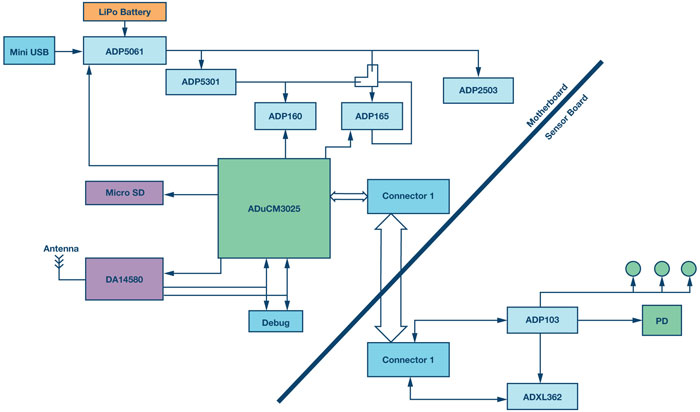


Explore cultural diversity with our remarkable patient monitoring system block diagram with explanation at wilma aron blog collection of substantial collections of multicultural images. celebrating diversity through photography, images, and pictures. perfect for cultural education and awareness. Our patient monitoring system block diagram with explanation at wilma aron blog collection features high-quality images with excellent detail and clarity. Suitable for various applications including web design, social media, personal projects, and digital content creation All patient monitoring system block diagram with explanation at wilma aron blog images are available in high resolution with professional-grade quality, optimized for both digital and print applications, and include comprehensive metadata for easy organization and usage. Discover the perfect patient monitoring system block diagram with explanation at wilma aron blog images to enhance your visual communication needs. Whether for commercial projects or personal use, our patient monitoring system block diagram with explanation at wilma aron blog collection delivers consistent excellence. Diverse style options within the patient monitoring system block diagram with explanation at wilma aron blog collection suit various aesthetic preferences. Advanced search capabilities make finding the perfect patient monitoring system block diagram with explanation at wilma aron blog image effortless and efficient. Instant download capabilities enable immediate access to chosen patient monitoring system block diagram with explanation at wilma aron blog images.