


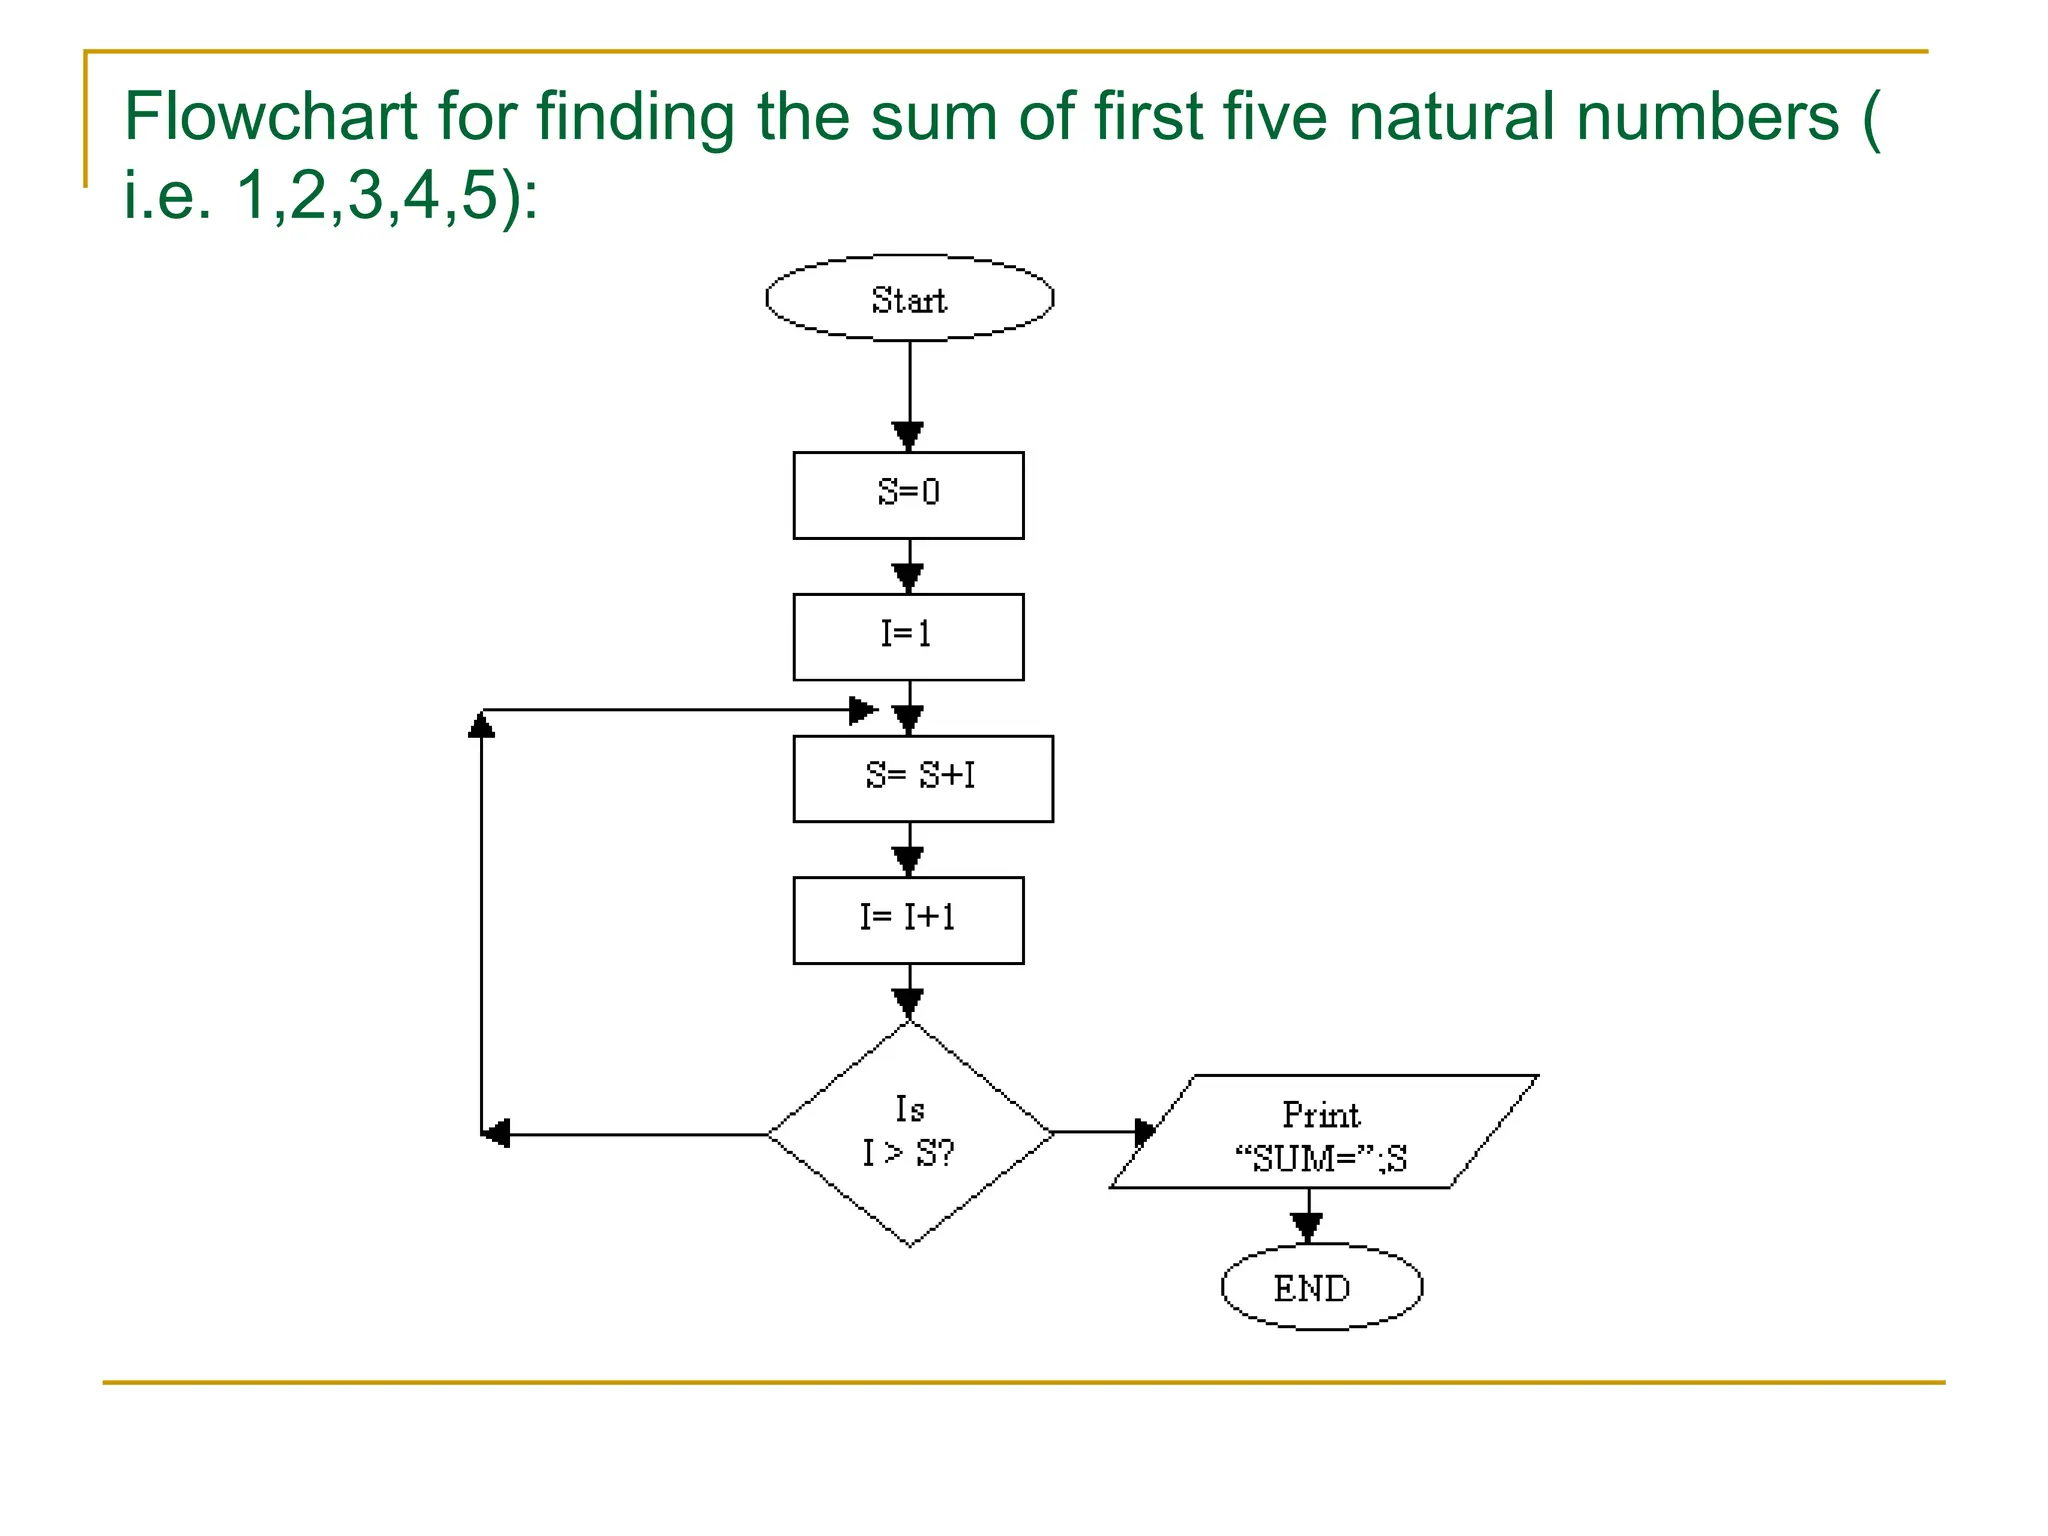
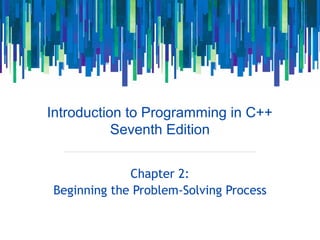
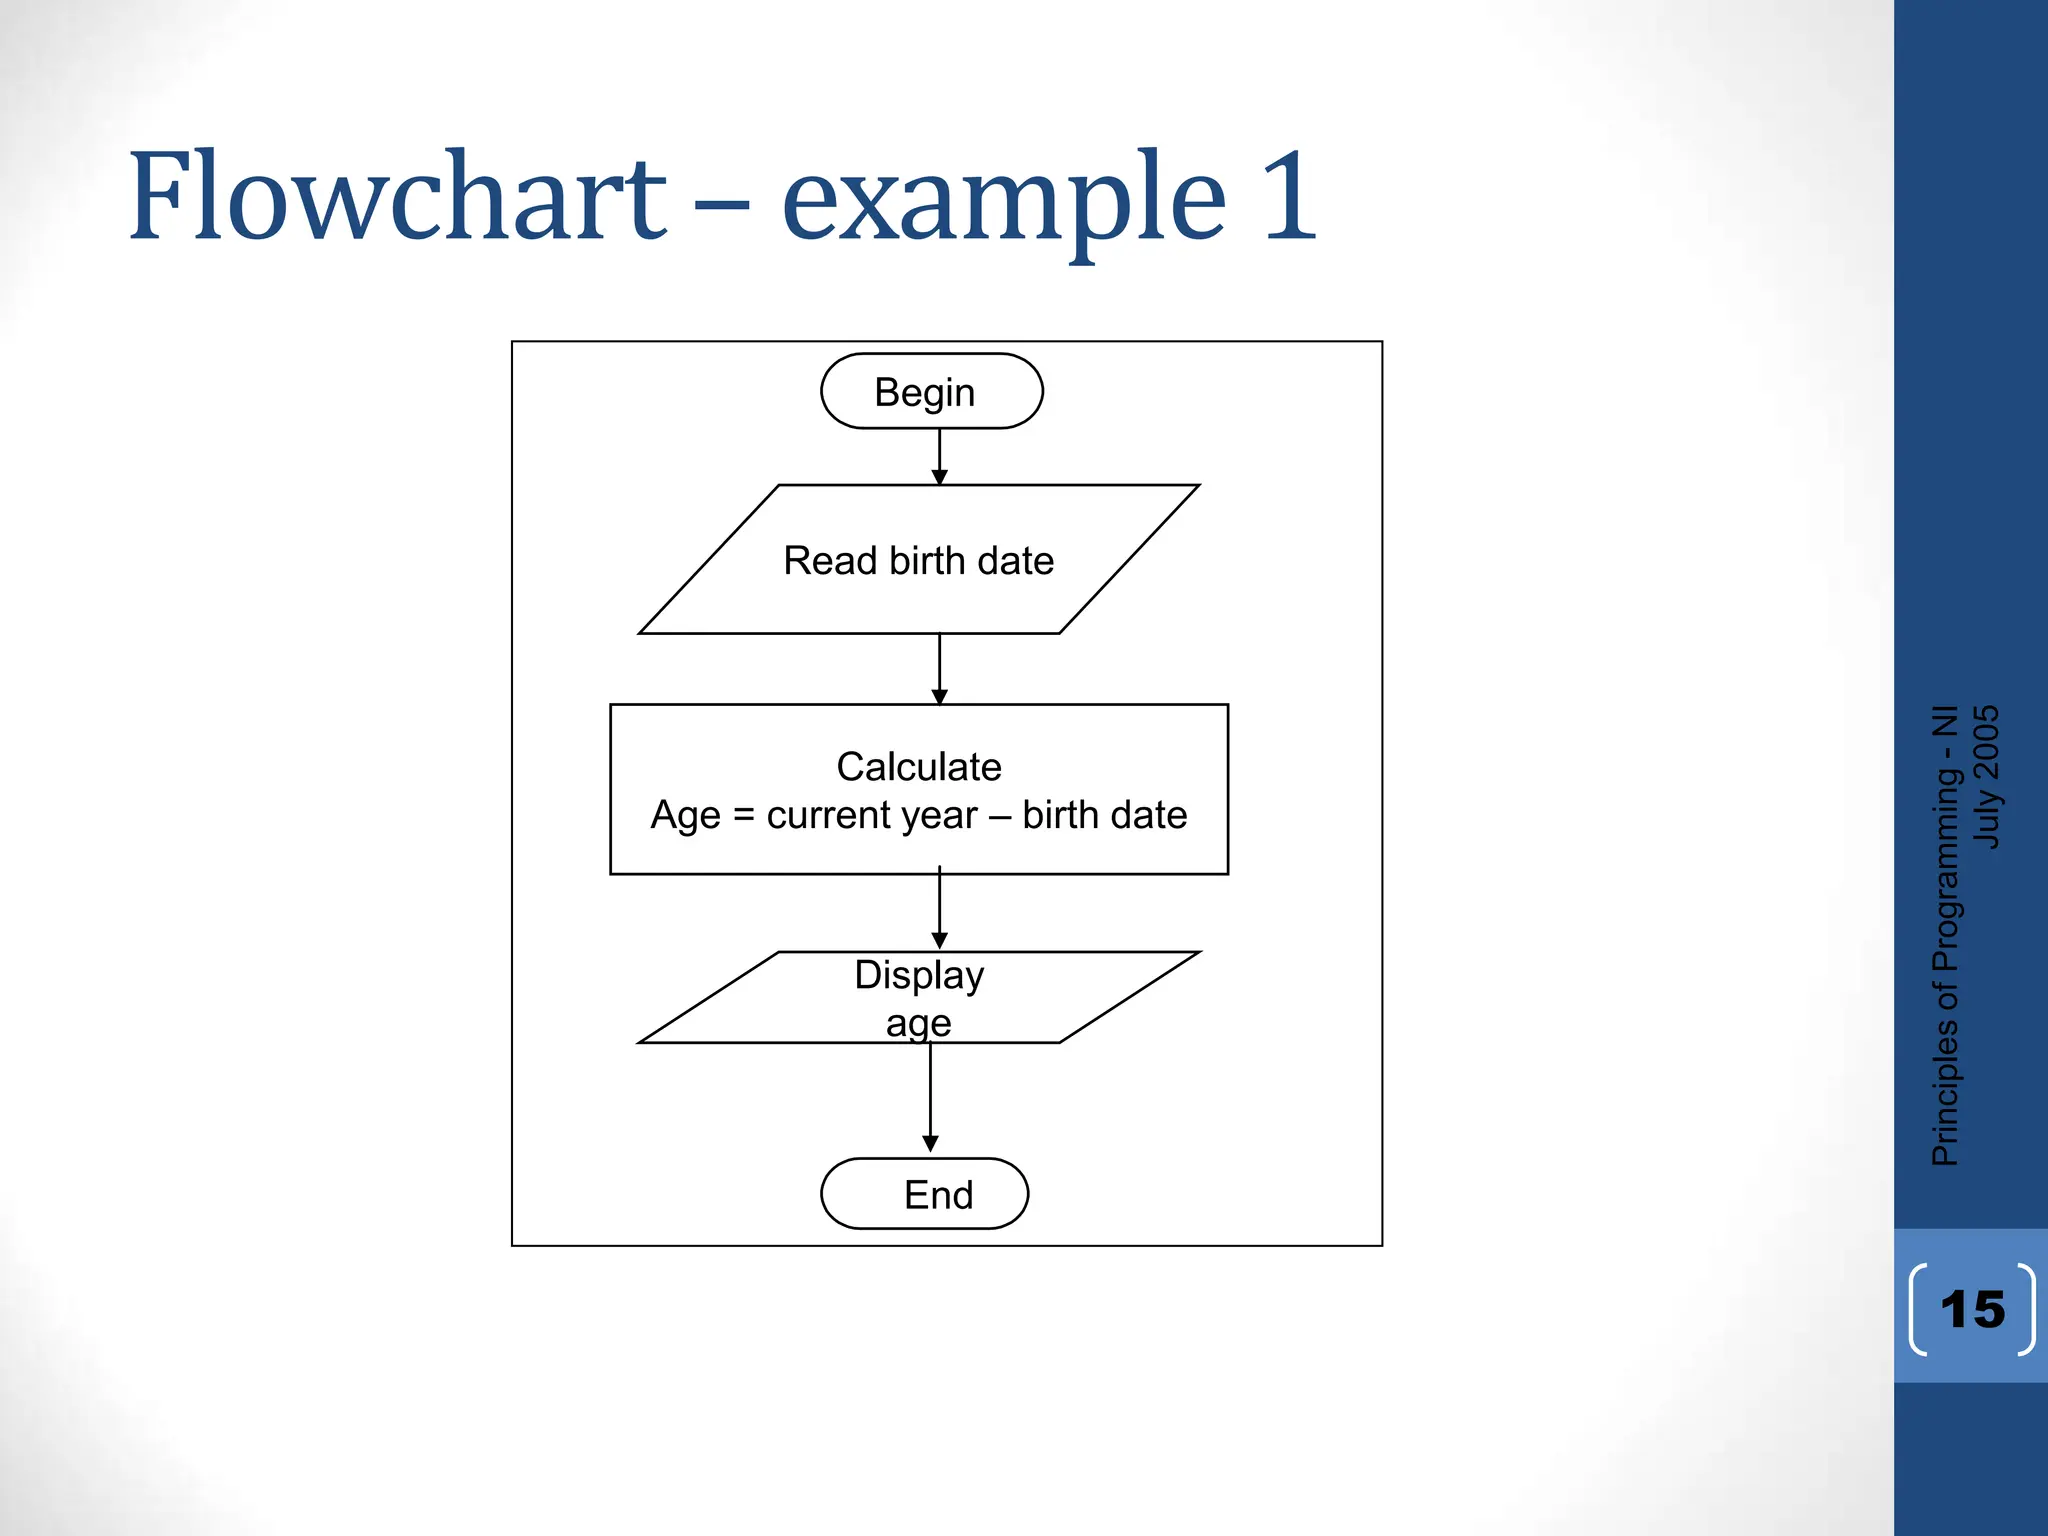
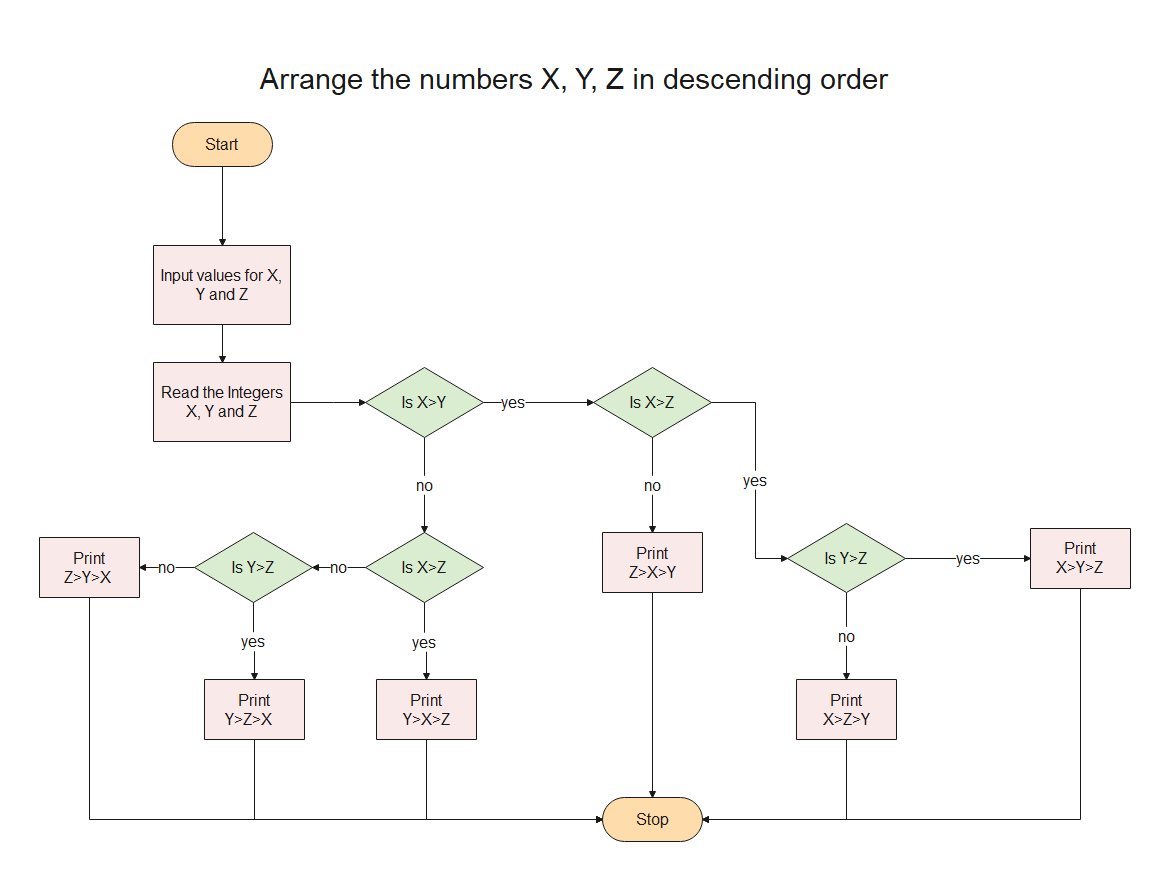
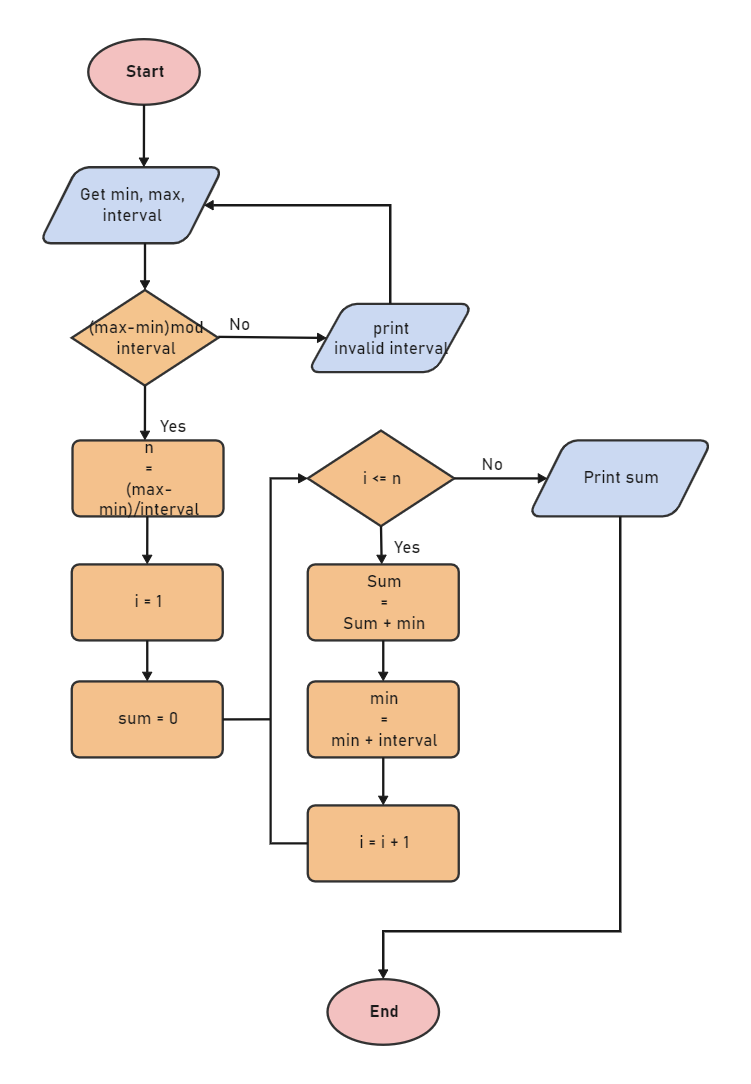
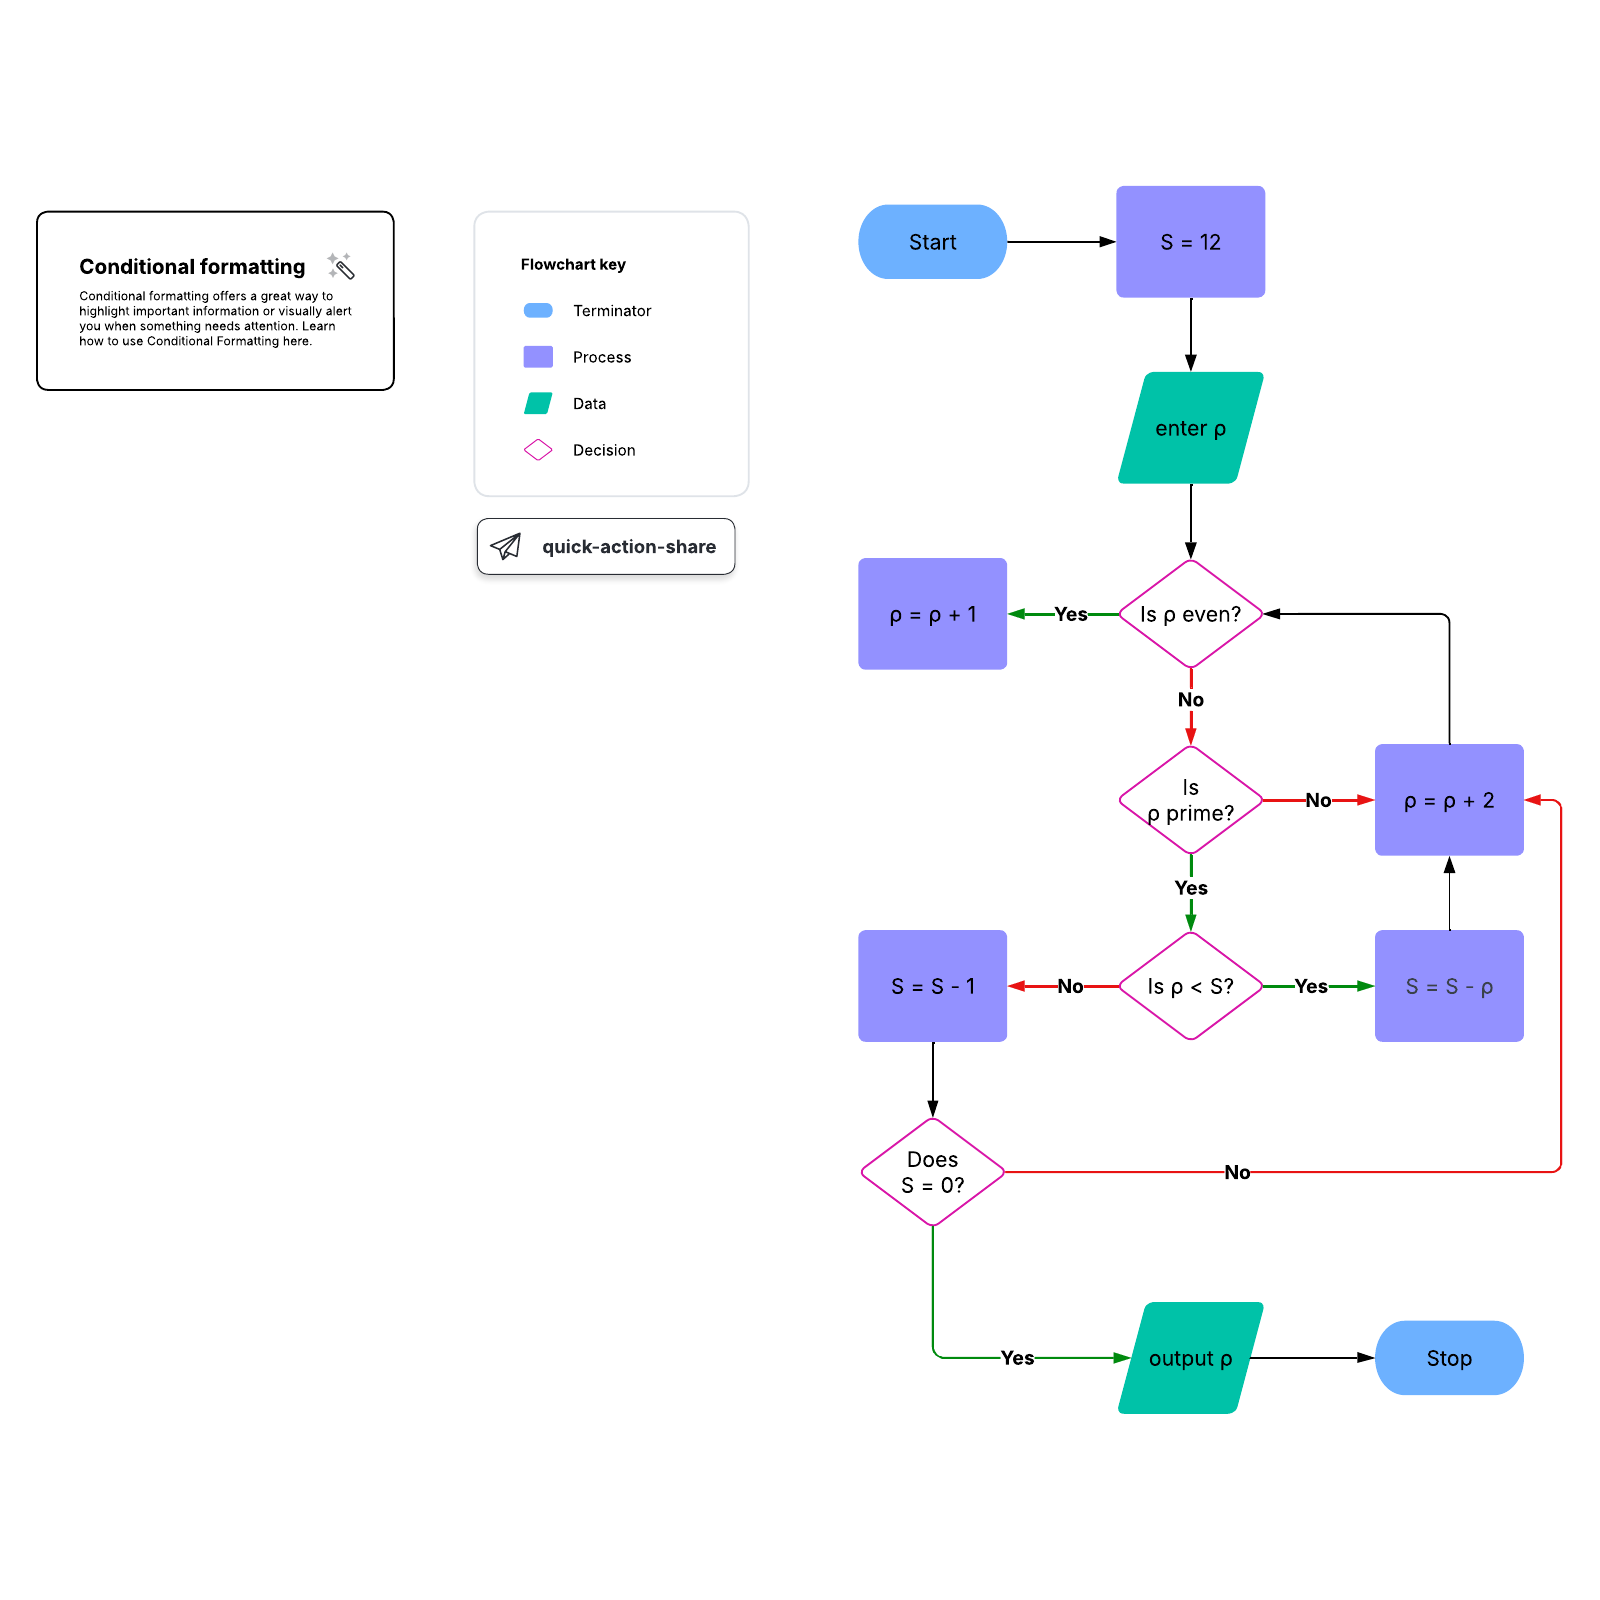
![[Problem Solving] Draw a flowchart to calculate area of a triangle](https://cdn.teachoo.com/36cbc019-c7ce-4882-89c3-87328b252670/flowchart-to-print-sum-of-first-100-natural-number---teachoo.jpg)


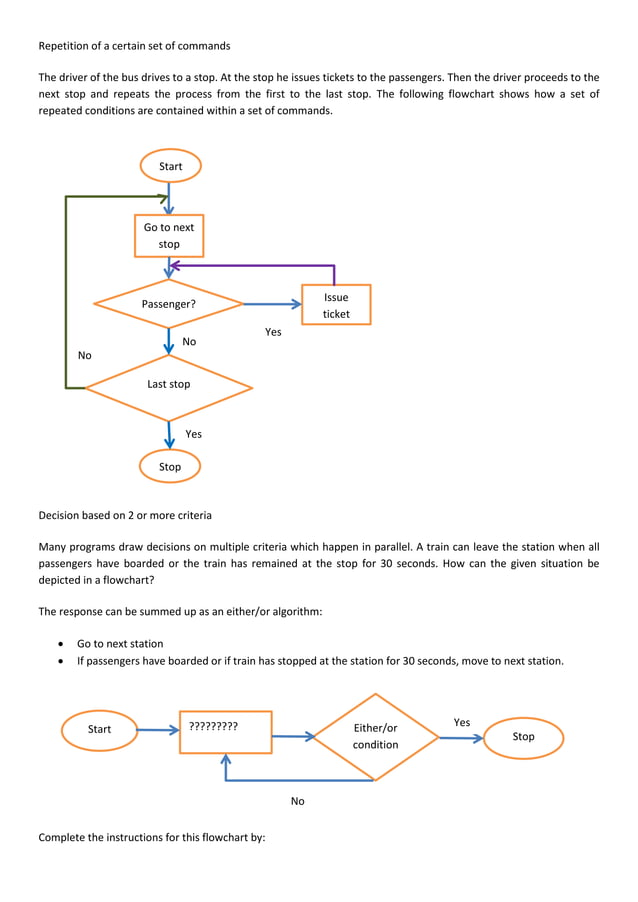
![Problem solving UNIT - 4 [C PROGRAMMING] (BCA I SEM) | DOCX | Computing ...](https://image.slidesharecdn.com/problemsolving-171126192816/85/Problem-solving-UNIT-4-C-PROGRAMMING-BCA-I-SEM-16-320.jpg)


![Lecture_01-Problem_Solving[1]||ProgrammingFundamental.ppt](https://image.slidesharecdn.com/lecture01-problemsolving1-240327053222-8448be2c/85/Lecture_01-Problem_Solving-1-ProgrammingFundamental-ppt-22-320.jpg)


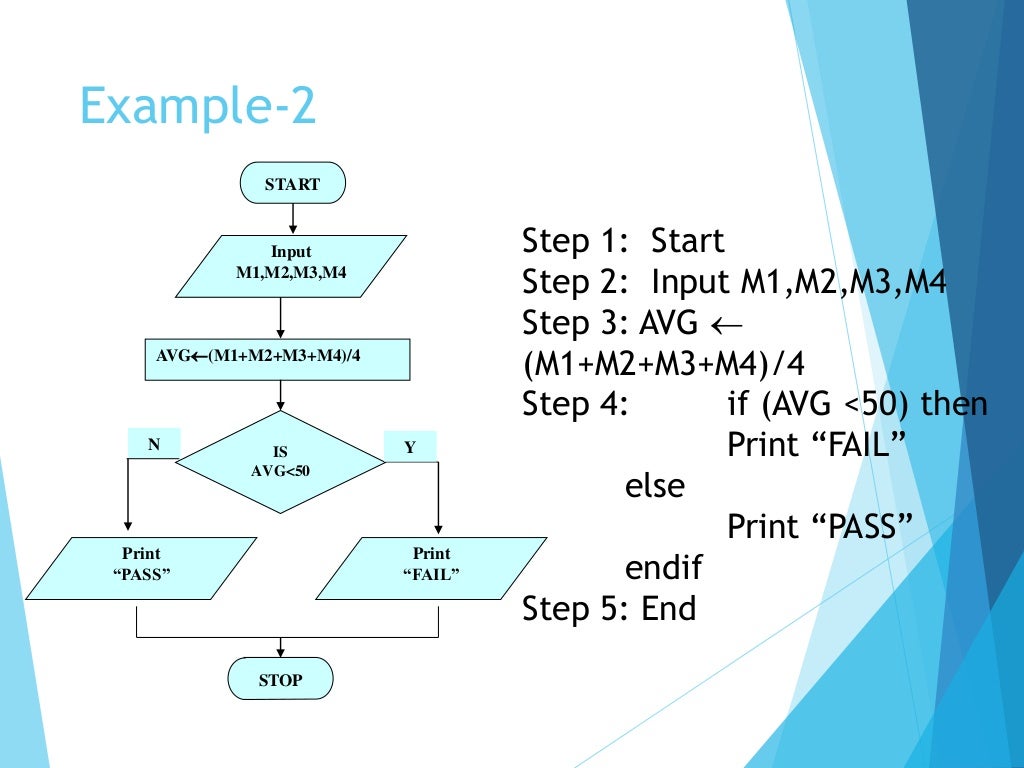
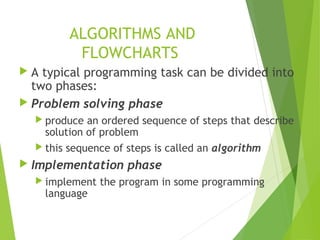
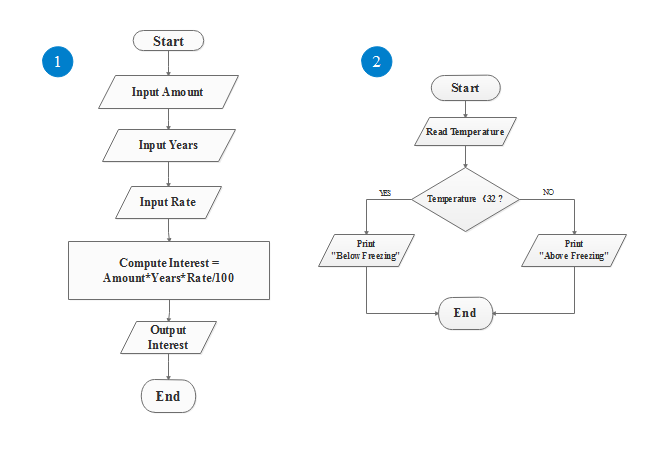
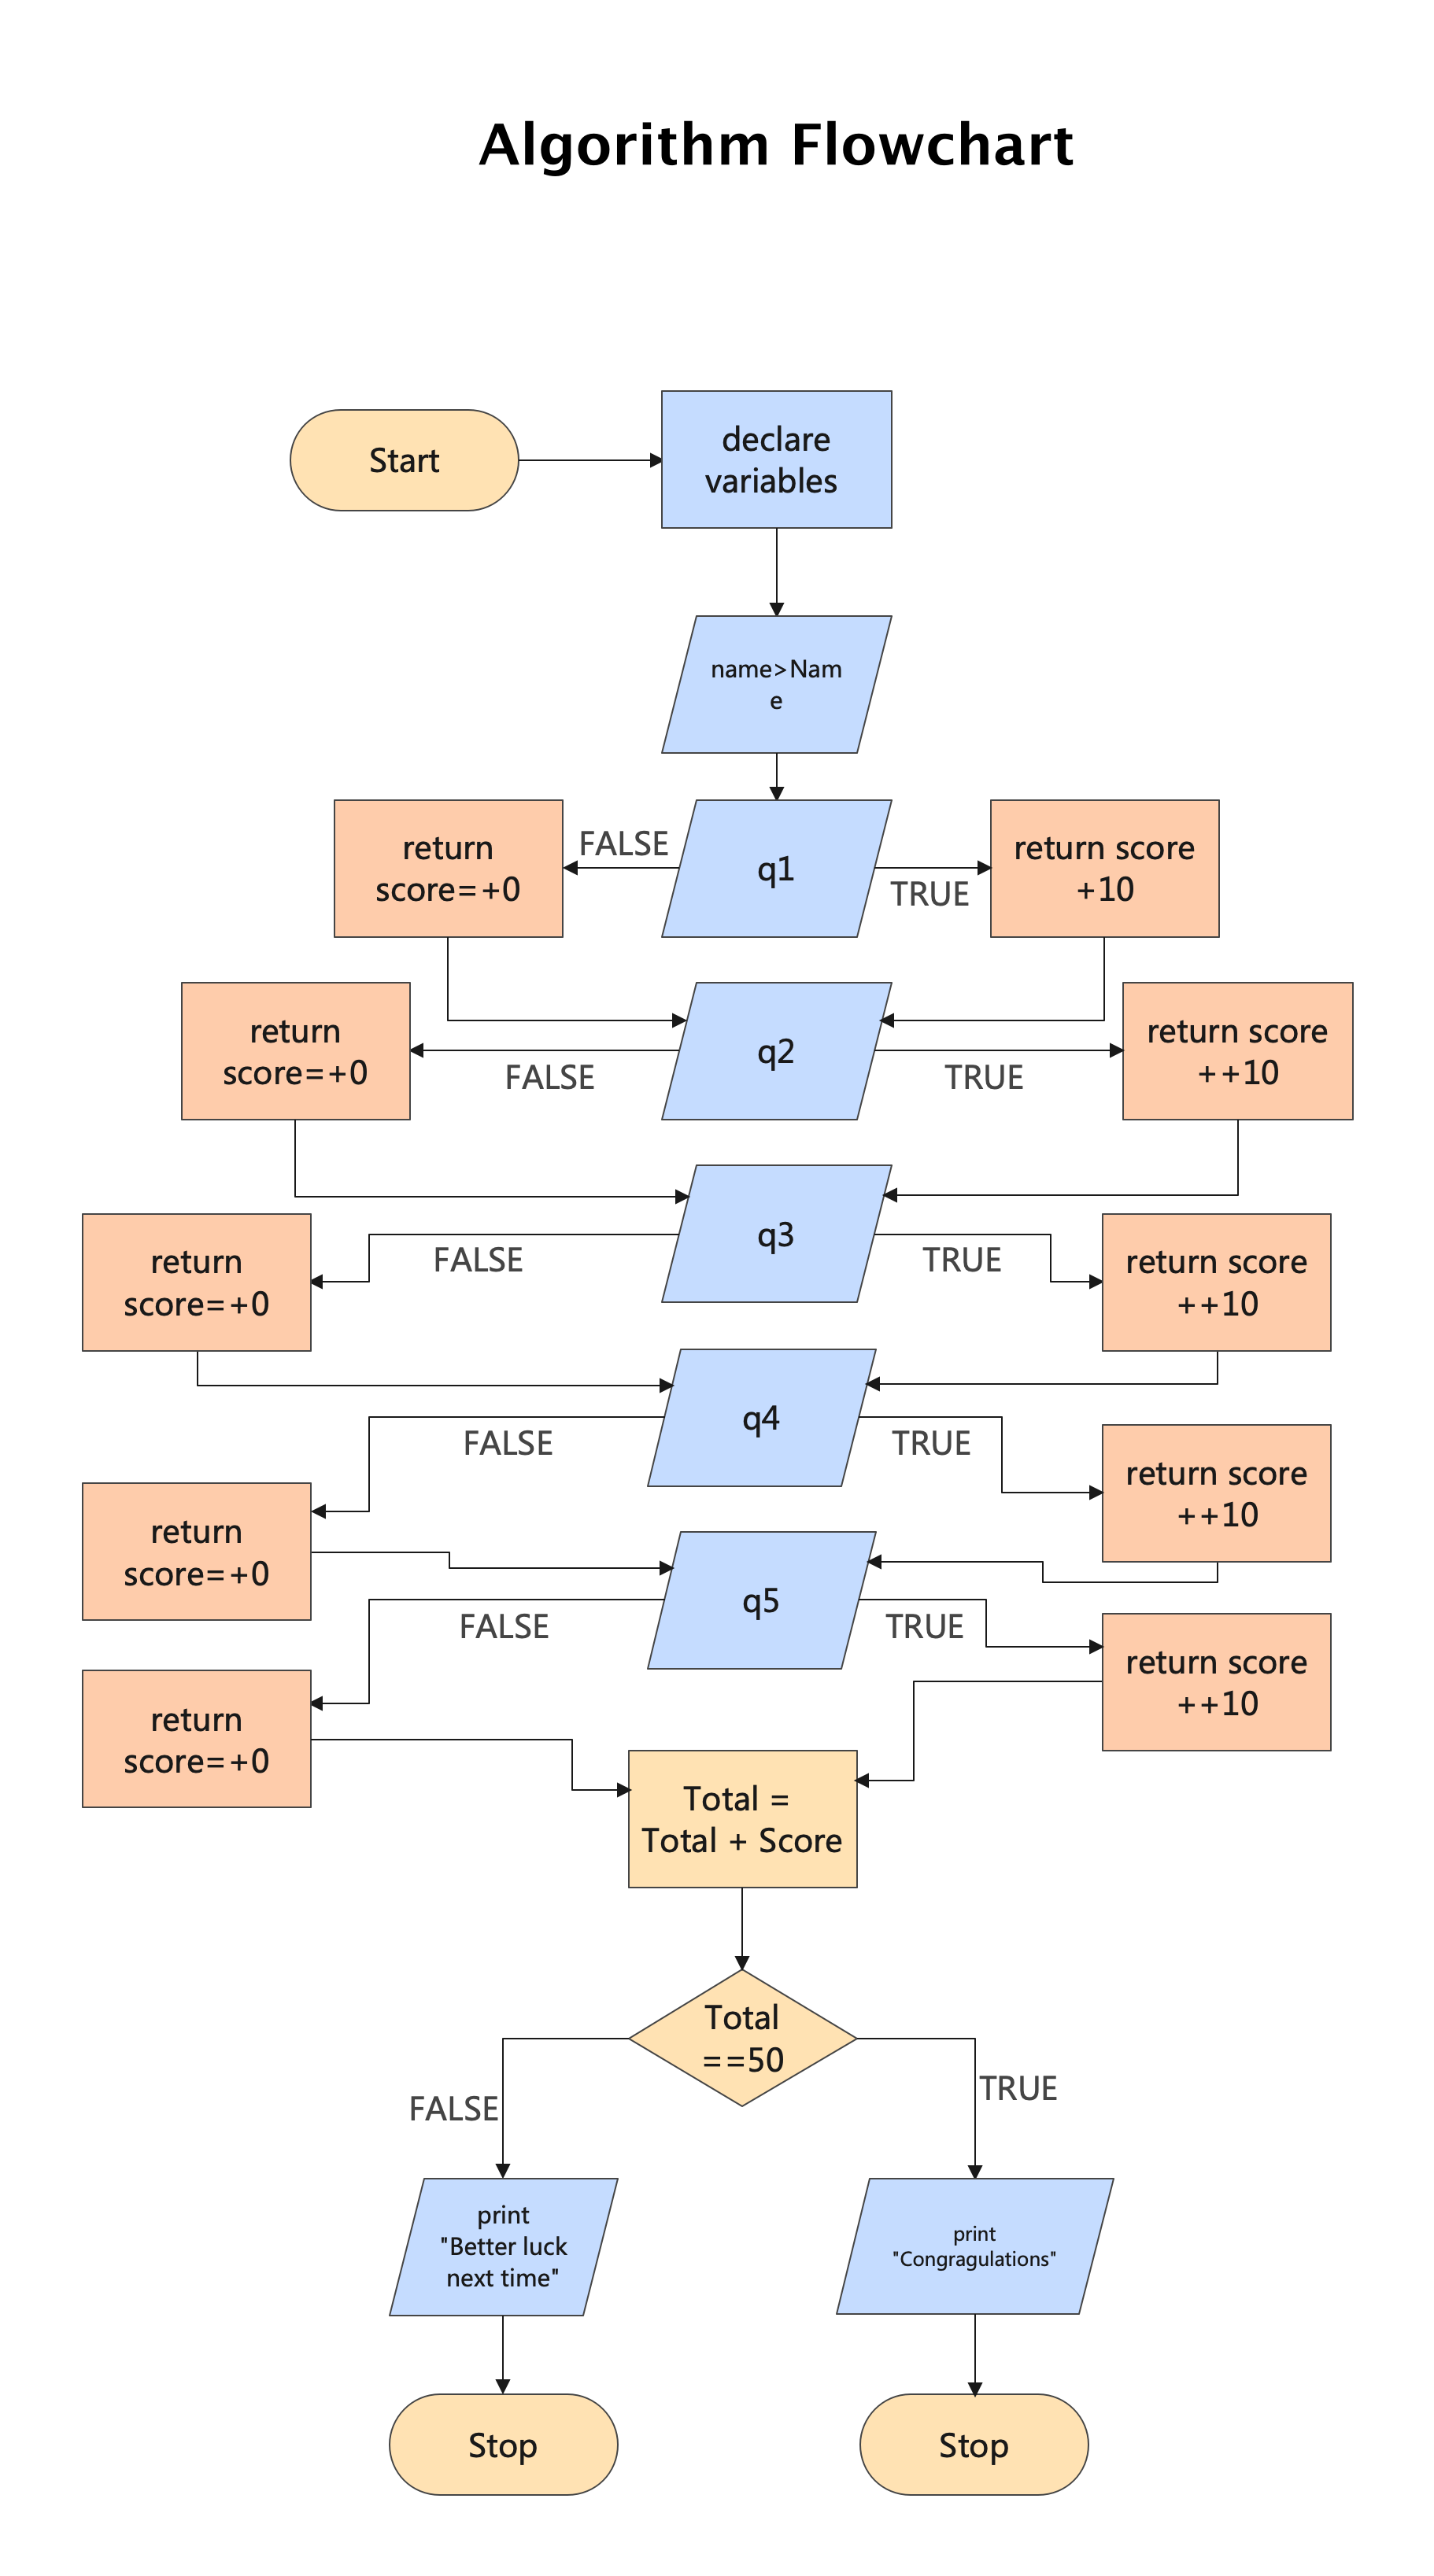
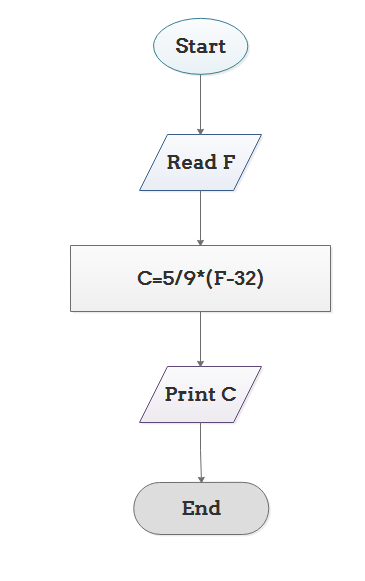
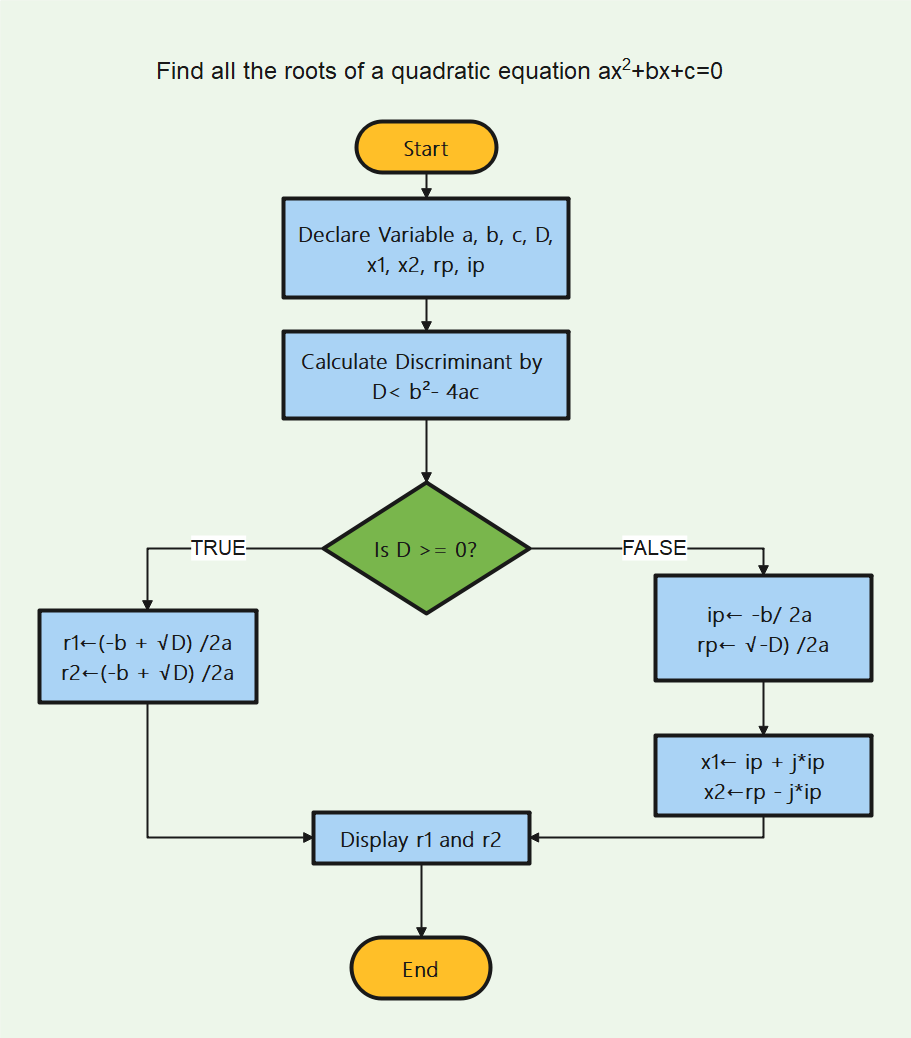
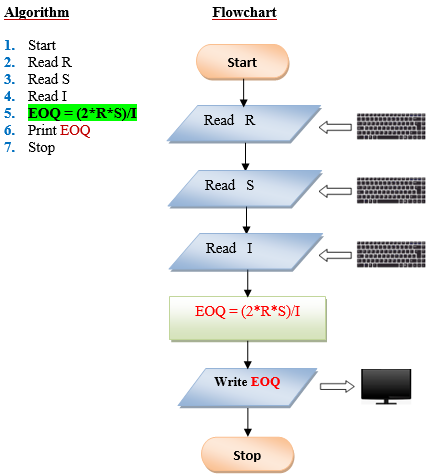
Advance progress through numerous tech-focused algorithm and flowchart part -2 | introduction to problem solving photographs. innovatively presenting artistic, creative, and design. designed to demonstrate technological advancement. Discover high-resolution algorithm and flowchart part -2 | introduction to problem solving images optimized for various applications. Suitable for various applications including web design, social media, personal projects, and digital content creation All algorithm and flowchart part -2 | introduction to problem solving images are available in high resolution with professional-grade quality, optimized for both digital and print applications, and include comprehensive metadata for easy organization and usage. Explore the versatility of our algorithm and flowchart part -2 | introduction to problem solving collection for various creative and professional projects. The algorithm and flowchart part -2 | introduction to problem solving archive serves professionals, educators, and creatives across diverse industries. Regular updates keep the algorithm and flowchart part -2 | introduction to problem solving collection current with contemporary trends and styles. Cost-effective licensing makes professional algorithm and flowchart part -2 | introduction to problem solving photography accessible to all budgets. Time-saving browsing features help users locate ideal algorithm and flowchart part -2 | introduction to problem solving images quickly. Each image in our algorithm and flowchart part -2 | introduction to problem solving gallery undergoes rigorous quality assessment before inclusion.