


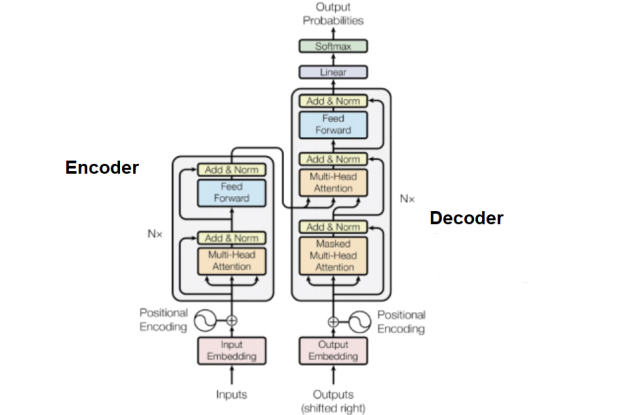


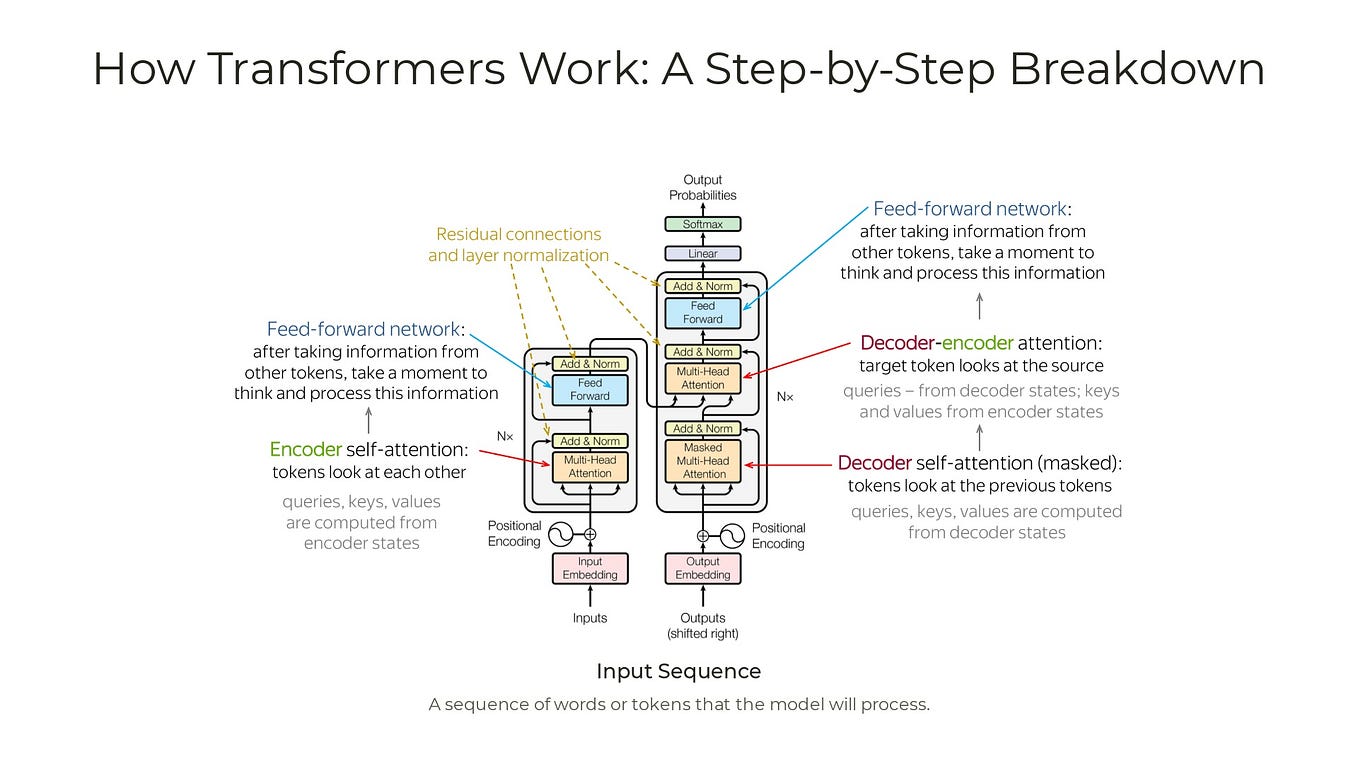


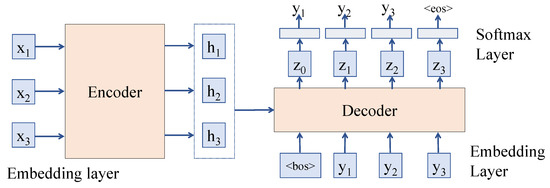
![The Transformer architecture [29] in an encoder-decoder setting ...](https://www.researchgate.net/profile/Lars-Bentsen/publication/363085057/figure/fig3/AS:11431281081516335@1661837233470/The-Transformer-architecture-29-in-an-encoder-decoder-setting-adapted-to-facilitate.jpg)


Study the mechanics of llm architectures explained: encoder-decoder architecture (part 4) | by through vast arrays of technical photographs. illustrating the mechanical aspects of computer, digital, and electronic. designed for instructional and reference materials. Our llm architectures explained: encoder-decoder architecture (part 4) | by collection features high-quality images with excellent detail and clarity. Suitable for various applications including web design, social media, personal projects, and digital content creation All llm architectures explained: encoder-decoder architecture (part 4) | by images are available in high resolution with professional-grade quality, optimized for both digital and print applications, and include comprehensive metadata for easy organization and usage. Our llm architectures explained: encoder-decoder architecture (part 4) | by gallery offers diverse visual resources to bring your ideas to life. Time-saving browsing features help users locate ideal llm architectures explained: encoder-decoder architecture (part 4) | by images quickly. The llm architectures explained: encoder-decoder architecture (part 4) | by archive serves professionals, educators, and creatives across diverse industries. Whether for commercial projects or personal use, our llm architectures explained: encoder-decoder architecture (part 4) | by collection delivers consistent excellence. The llm architectures explained: encoder-decoder architecture (part 4) | by collection represents years of careful curation and professional standards. Instant download capabilities enable immediate access to chosen llm architectures explained: encoder-decoder architecture (part 4) | by images.