Please enter url.
Login
Logout
Please enter url.
Hybrid Solo Hub Wiring Diagram
circuitdbkaren.z21.web.core.windows.net
source
Comments
Wiring Ideas
Wiring Ideas
Wiring Ideas
IP Based Alarm System
219.0US $ |New Shipping16 Fire Alarm Control Panel Detector System Sex ...
5 Loop Addressable Fire Alarm Control Panel, For Industrial, | ID ...
Canpro Fire Prevention
FDAS - Fire Detection And Alarm System Company, Contractor, Installer ...
Addressable Fire Alarm Control System – RPD FIRE SAFETY CORP.
MFS Conventional Hybrid Fire Alarm Panel, For Office at best price in ...
Manually Operated Electronic Fire Alarm System
Interconnected Smoke Alarms Wiring Diagram New | Wiring Diagram Image
Central Station Fire Alarm System - hideawaytips
Mircom FX-2009-12NDS Network Fire Alarm Control Panel Owner's Manual
Fire Alarm Circuit Diagram|Electronic Design|Schematic Circuit Power ...
get fire alarm pull station wiring diagram download | Fire alarm system ...
Hardwired Photoelectric Smoke Alarms - Sumring
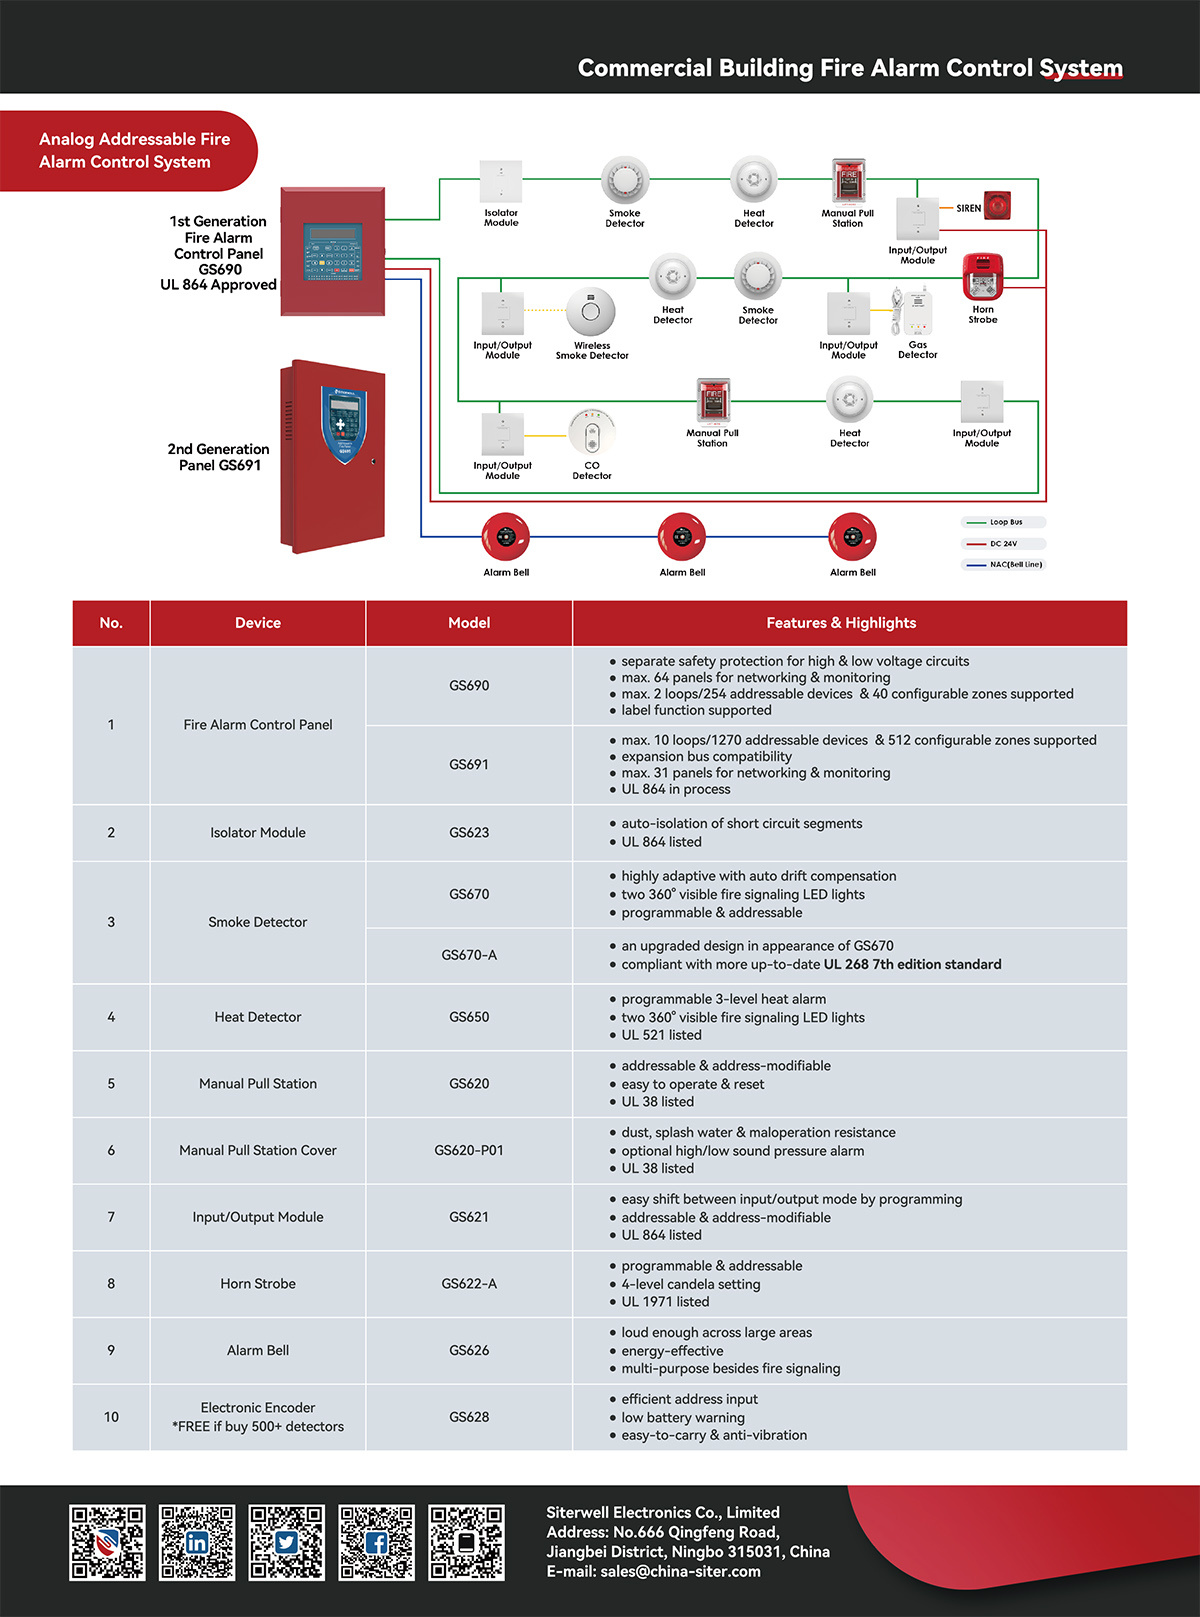
Commercial fire alarm system-SITERWELL
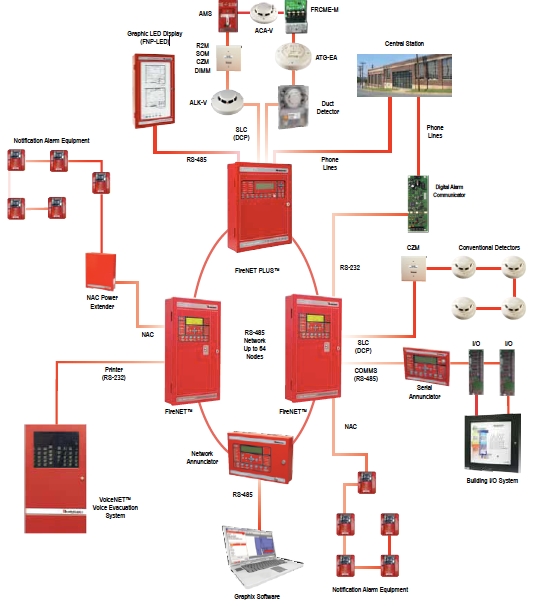
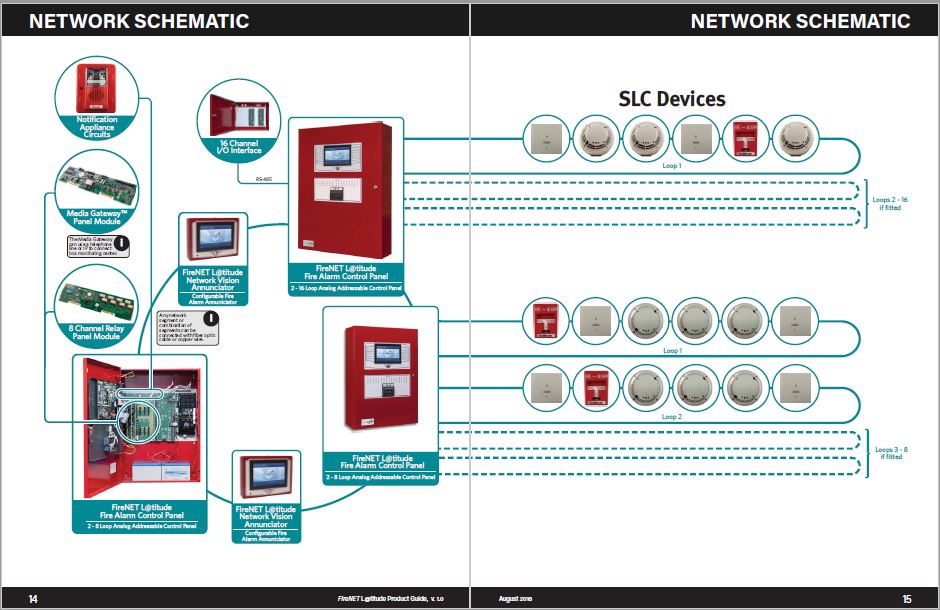
FireNET L@titude
Fire Alarm & Mass Notification Systems at Various Reserve Centers ...
Addressable Fire Alarm System at best price in New Delhi by Rajesh ...
Installing Fire Alarm System on Board Ship - Uni Marine Services Pte Ltd
Ctec Fire Alarm Wiring Diagram
Click 24 | What is the difference between a Conventional and ...
EVCS - Vox Ignis
Fire Alarm System at best price in New Delhi by Safe Tech Fire ...
DIT, INC
Fire Alarm Installation at best price in Noida | ID: 20216517991
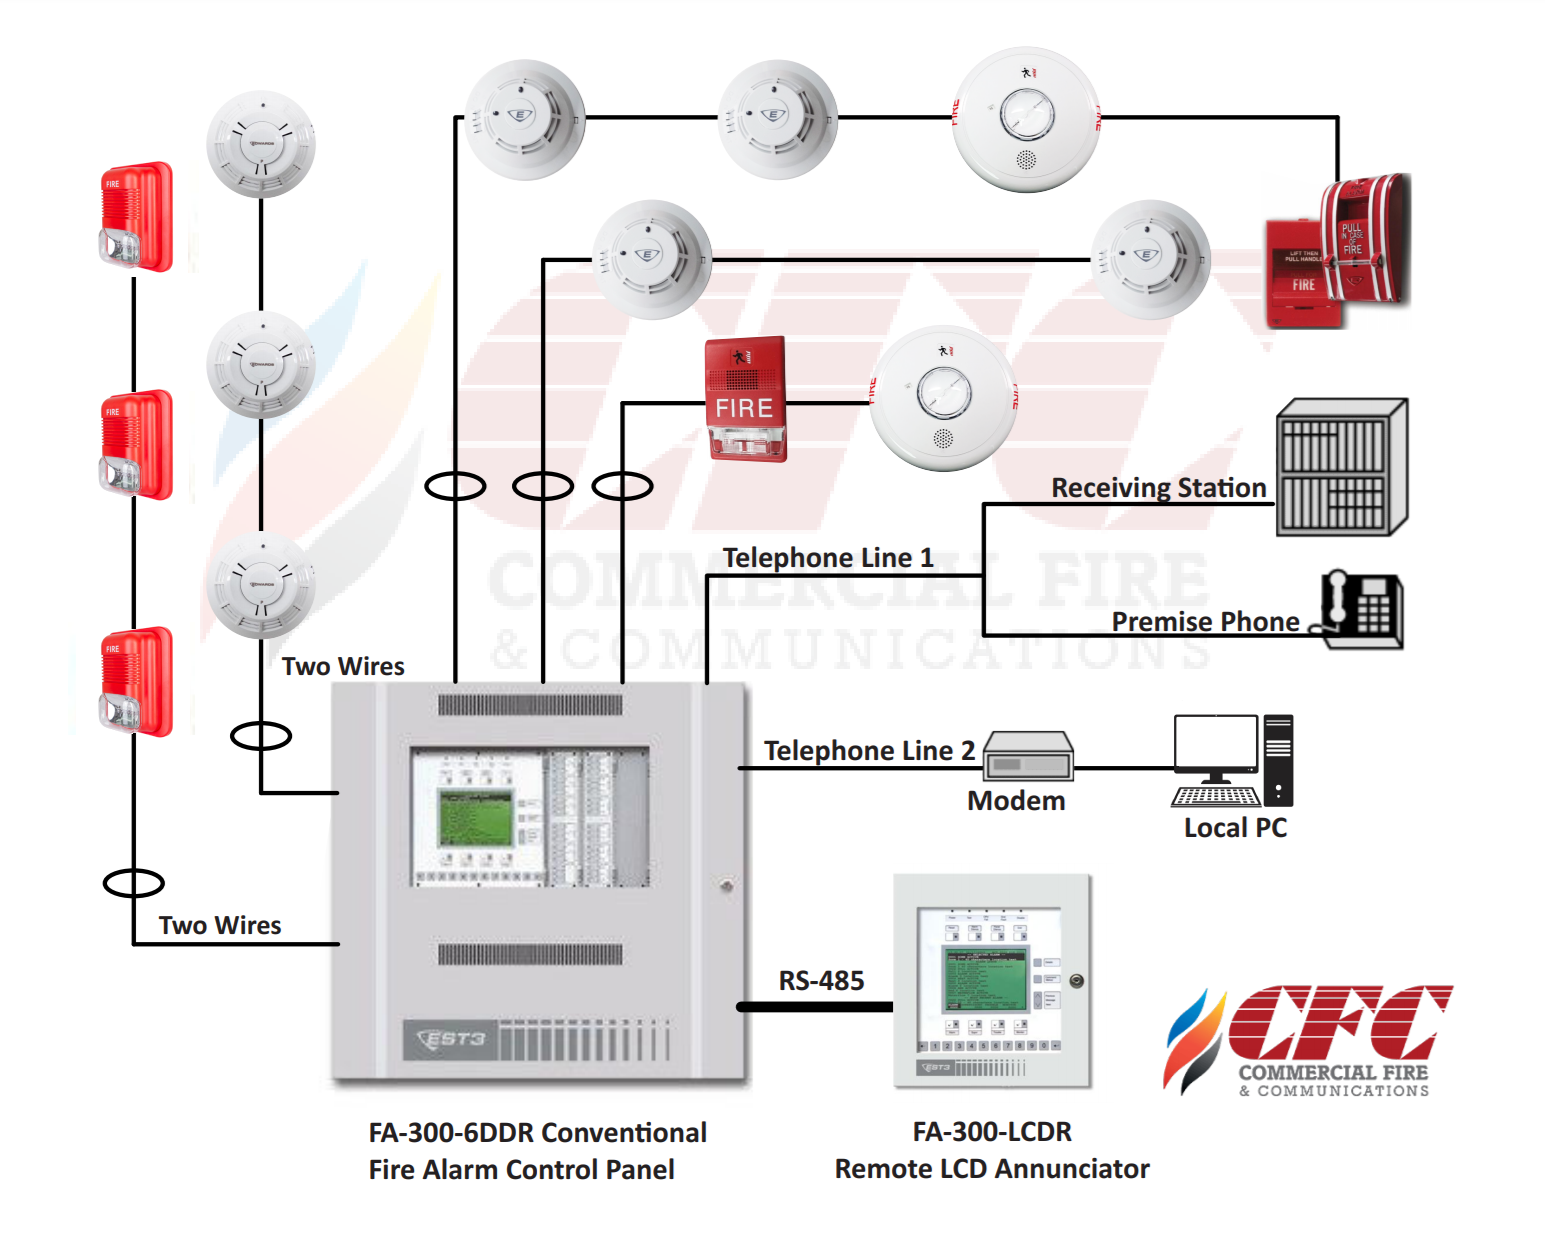
The Components Of A Commercial Fire Alarm System - Commercial Fire And ...
Fire Alarm Panels — Extreme Fire Solutions
Addressable Fire Alarm System – PT. Anugrah
Fire detection system | Building Catalog
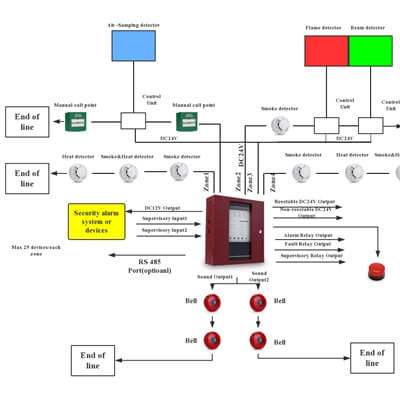
Fire alarm system schematic
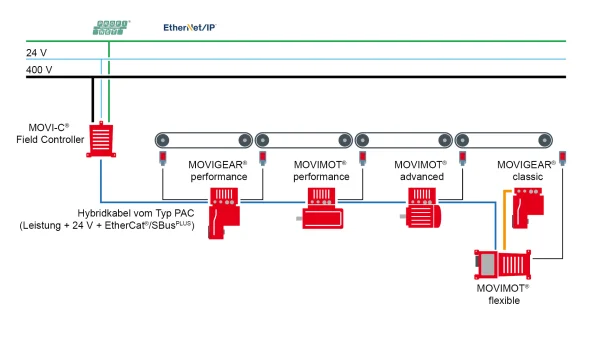
MOVI‑C® FIELD CONTROLLER | SEW‑EURODRIVE
ProFyre T8 2 Zone 2-Wire Fire Alarm Panel (T8-2)
Lexus-Wiring-Diagram
Hybrid-Car-Diagram
Hybrid-Solar-Inverter-Wiring-Diagram
Wiring-Diagram-Manual
Dodge-Wiring-Diagram
Auto-Electrical-Wiring-Diagram
Ford-Escape-Wiring-Diagram
Toyota-Camry-Wiring-Diagram
Honda-Civic-Wiring-Diagram
Toyota-Celica-Wiring-Diagram
Toyota-Auris-Wiring-Diagram
Prius-Wiring-Diagram
Hybrid-Circuit-Diagram
Wiring-Diagram-แบบ-Hybrid
Power-Window-Wiring-Diagram
Ecu-Wiring-Diagram