Please enter url.
Login
Logout
Please enter url.
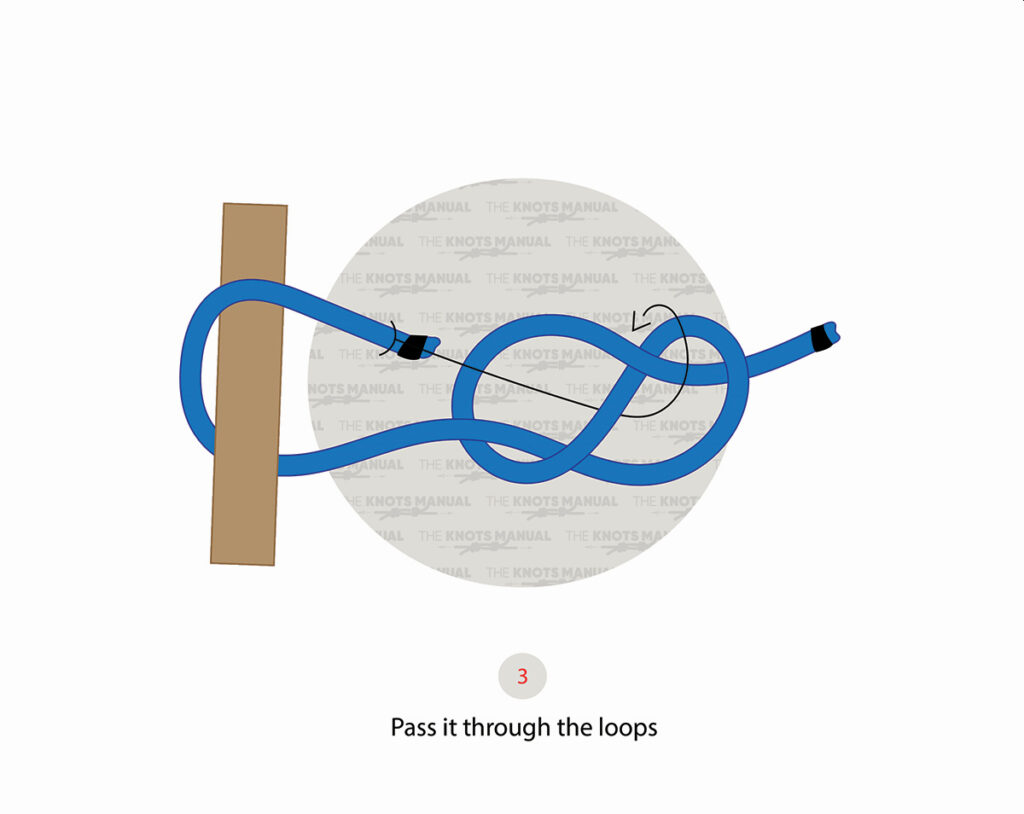
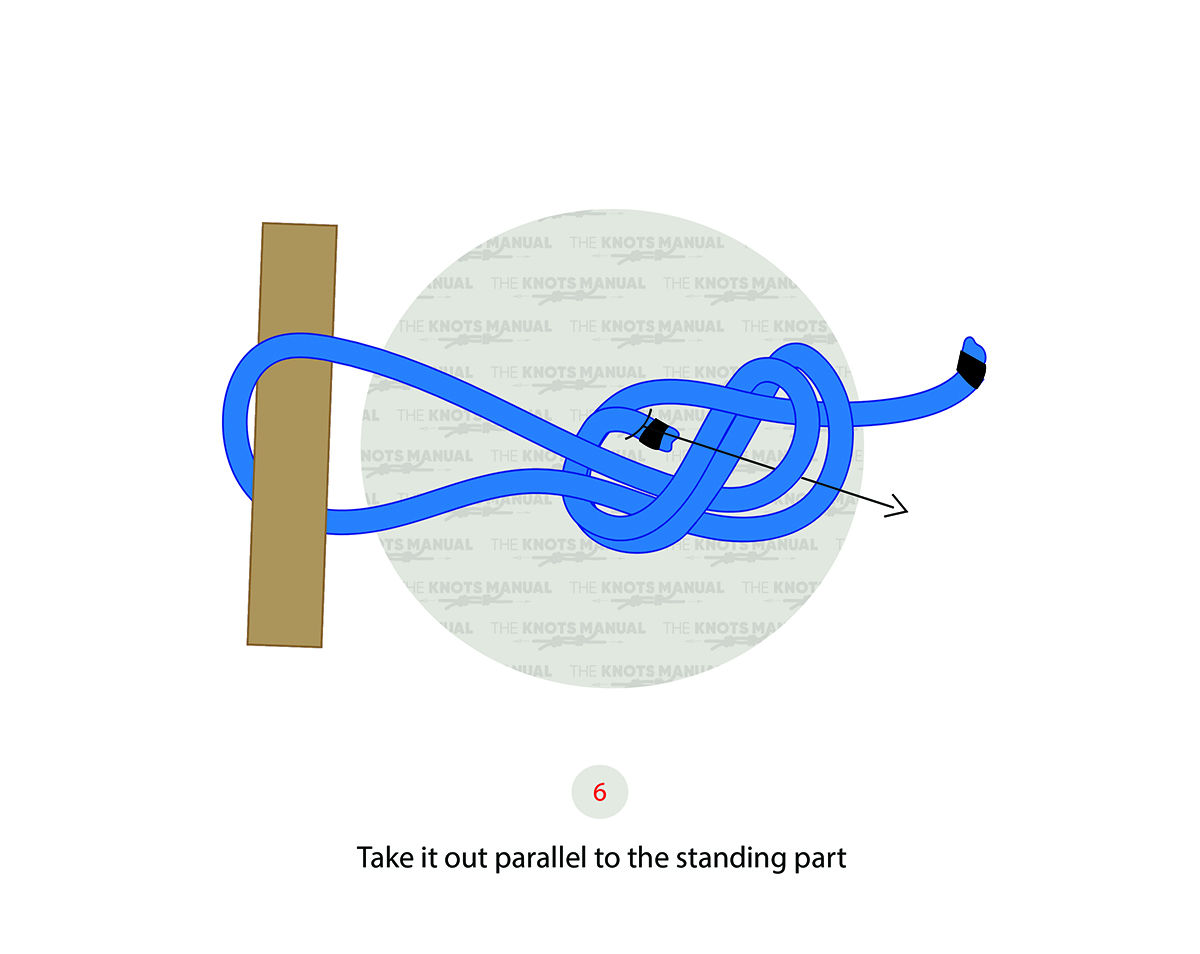
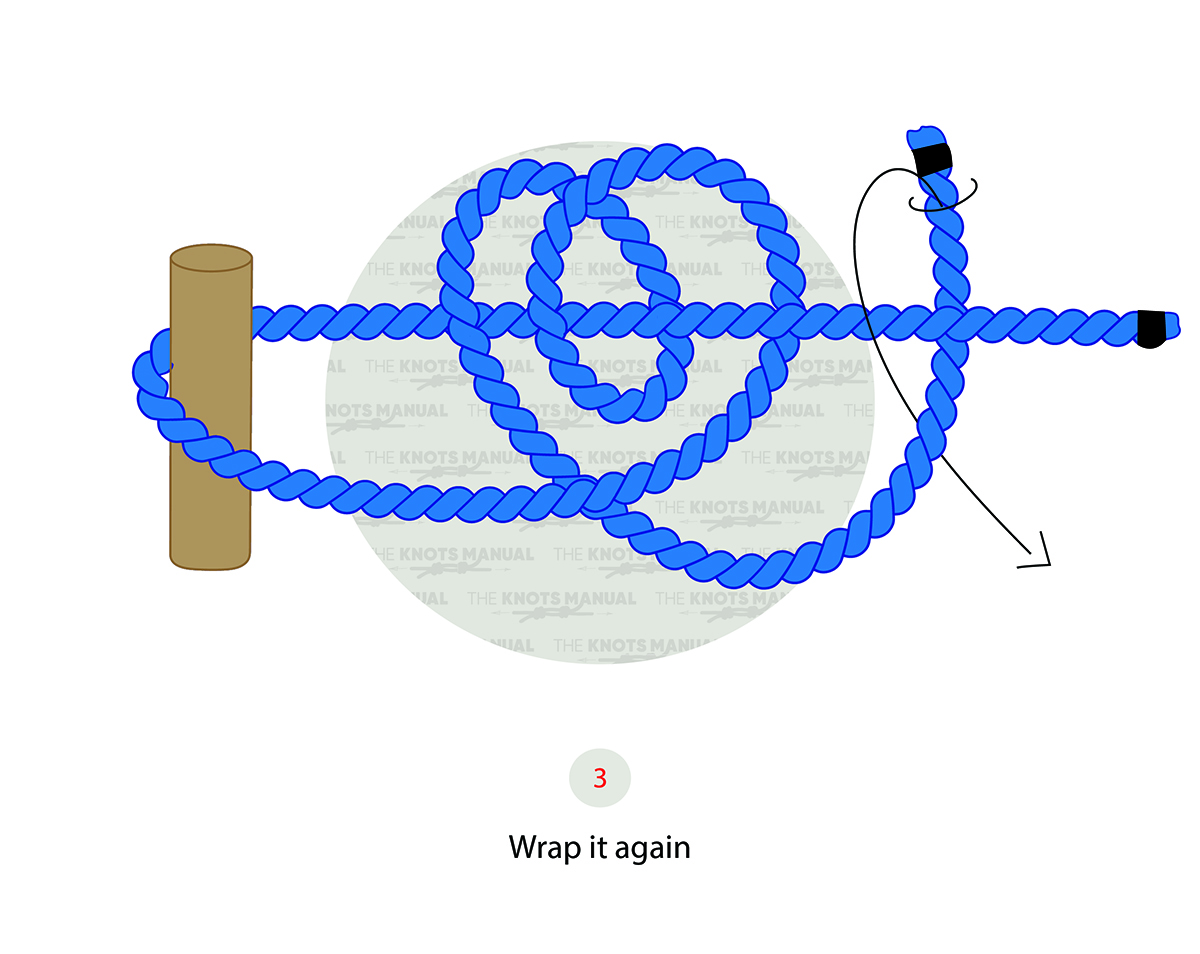
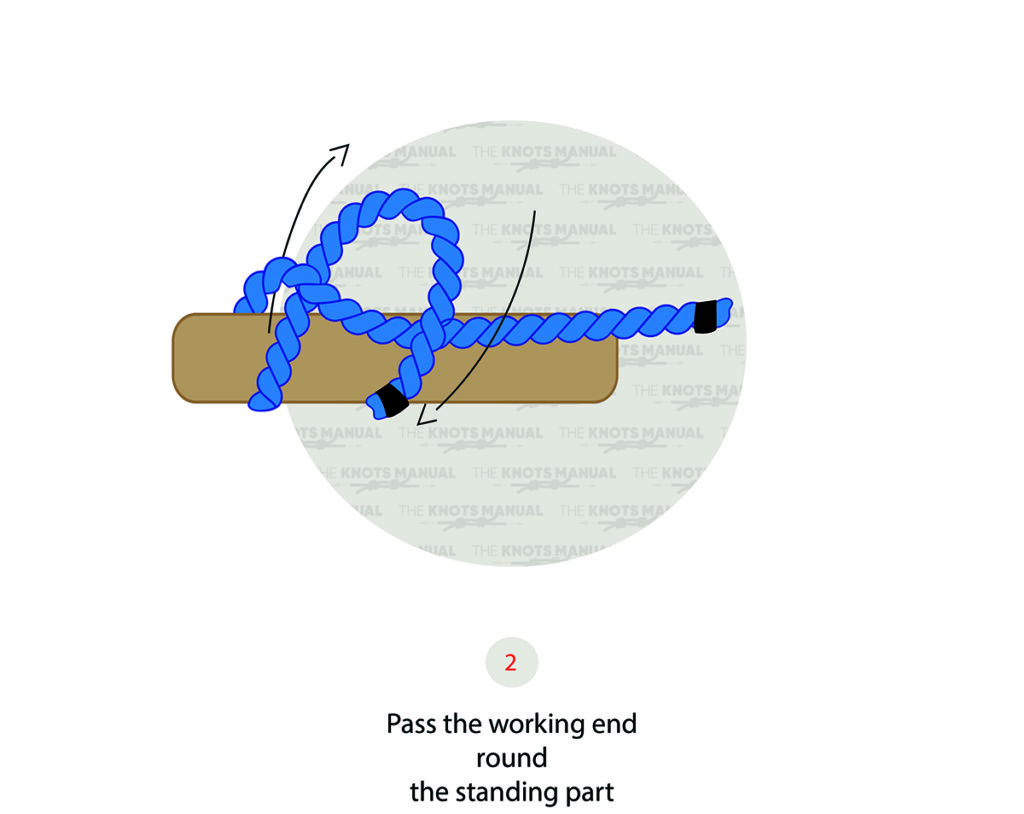
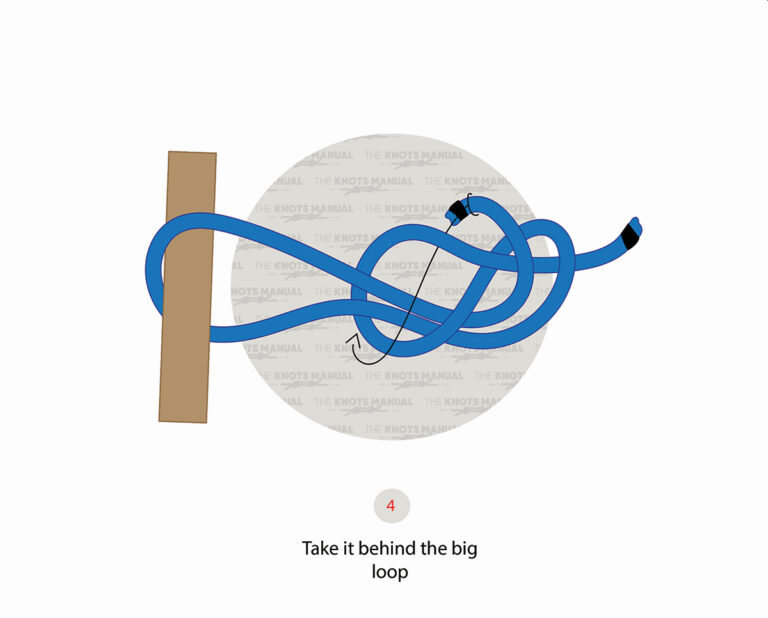
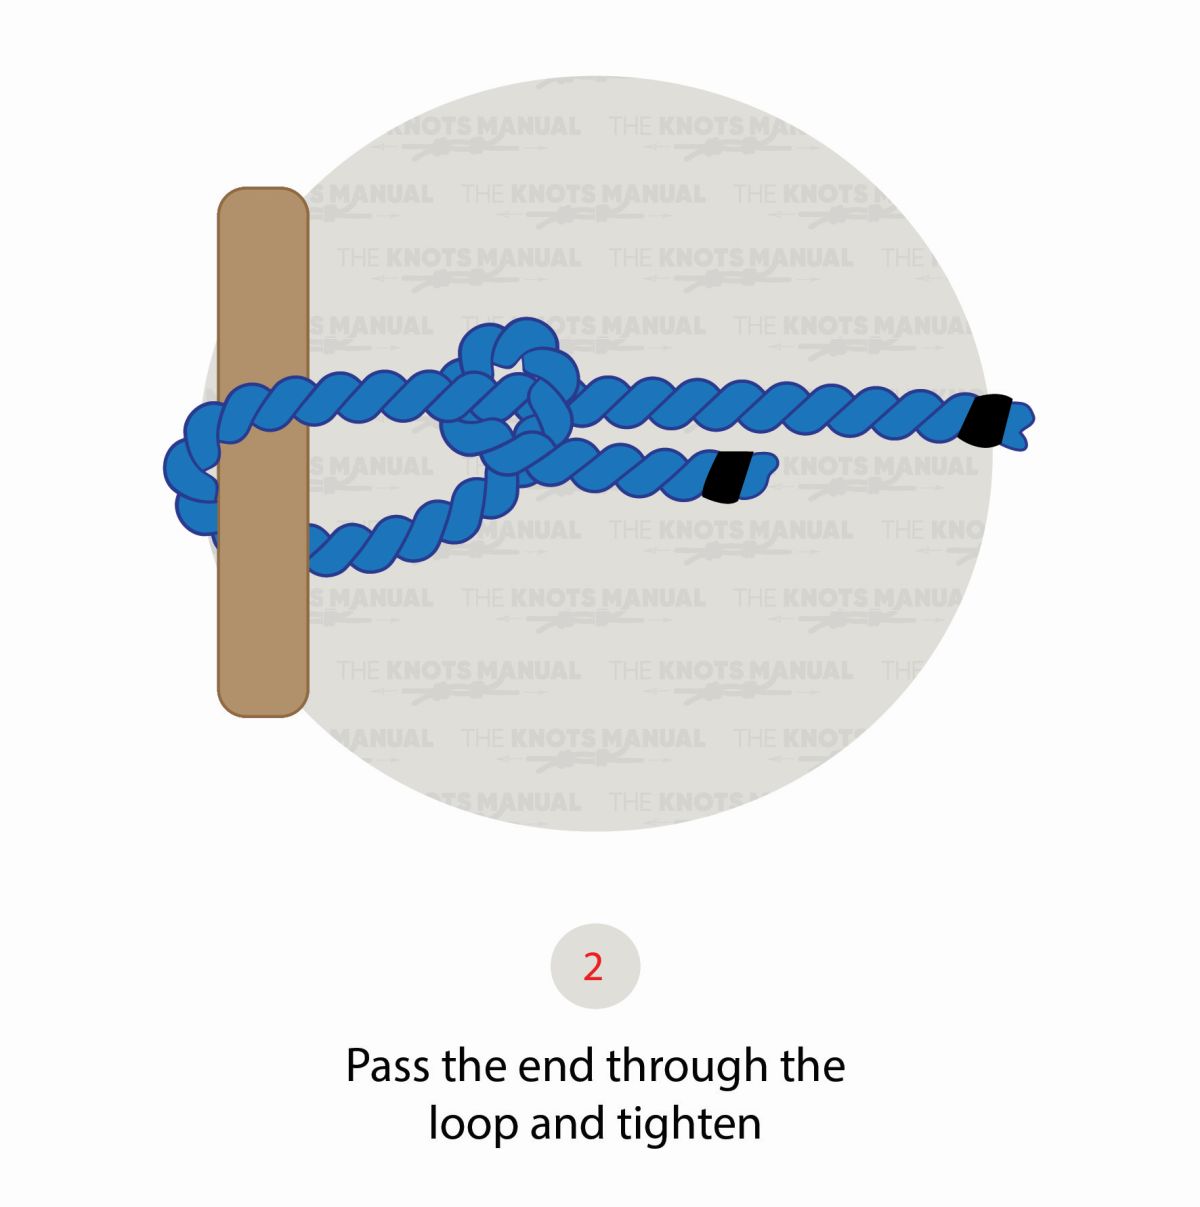
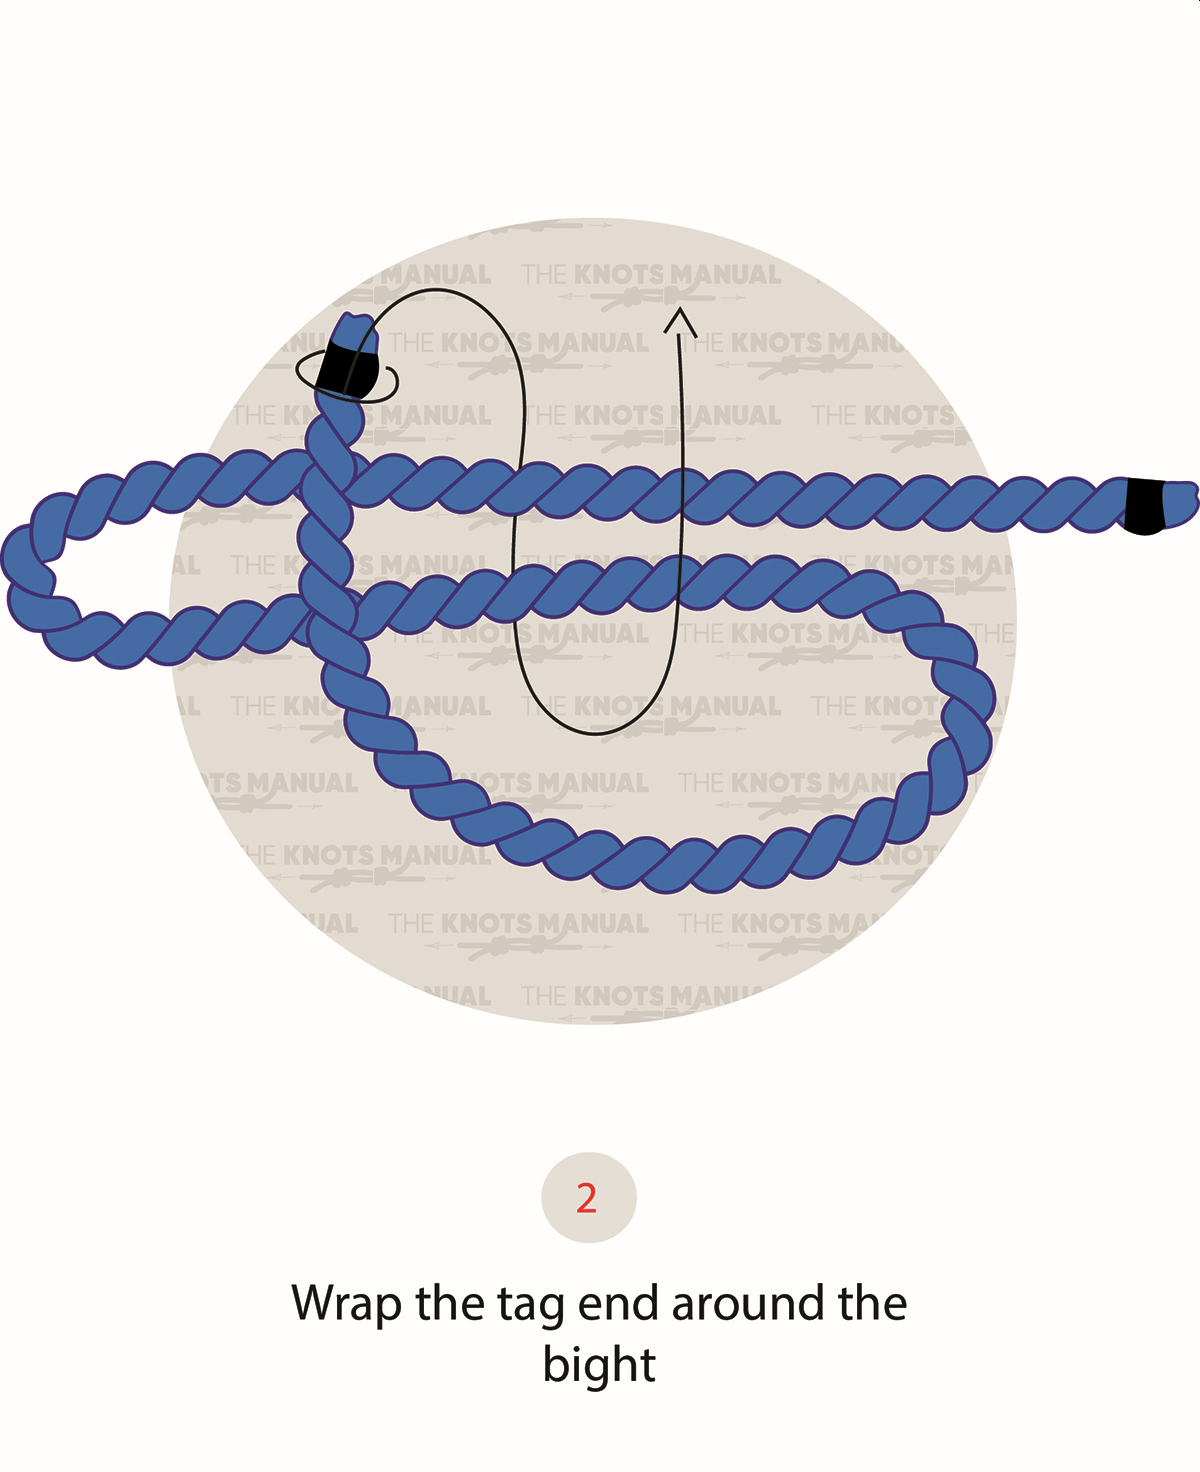
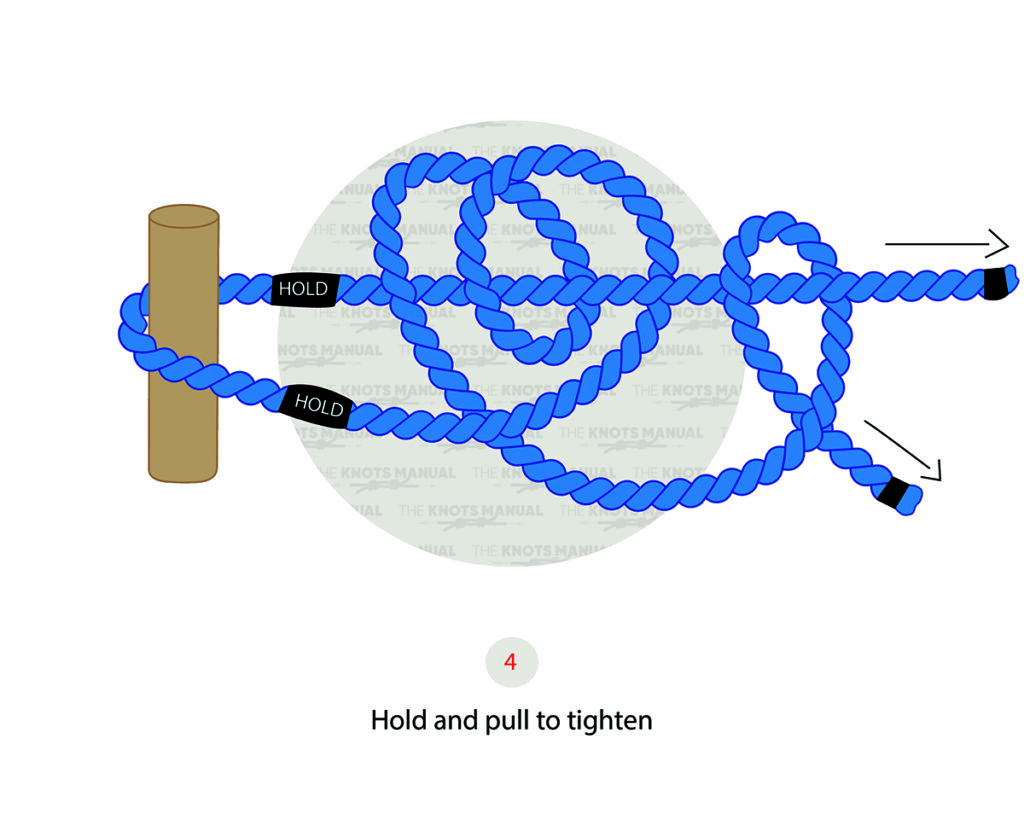
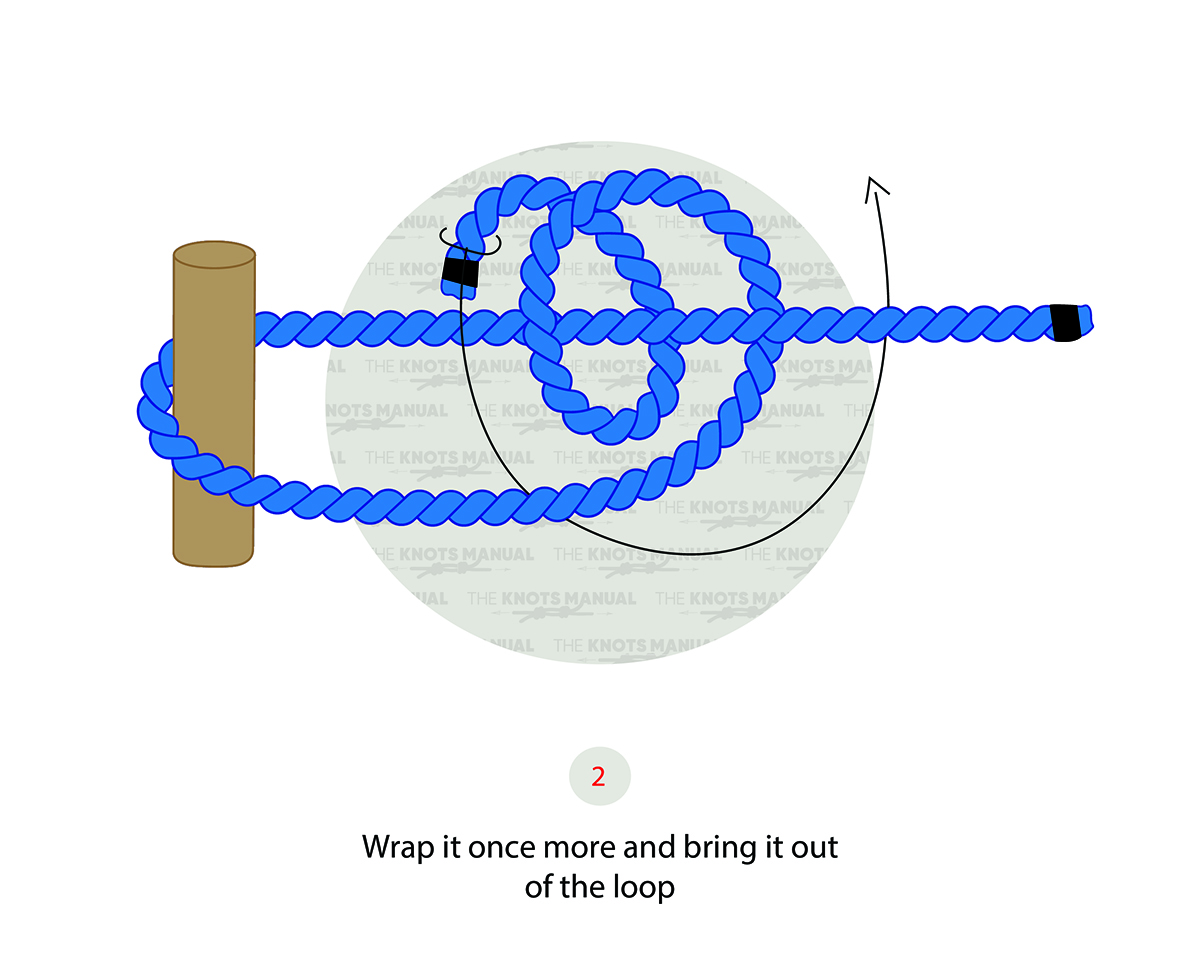
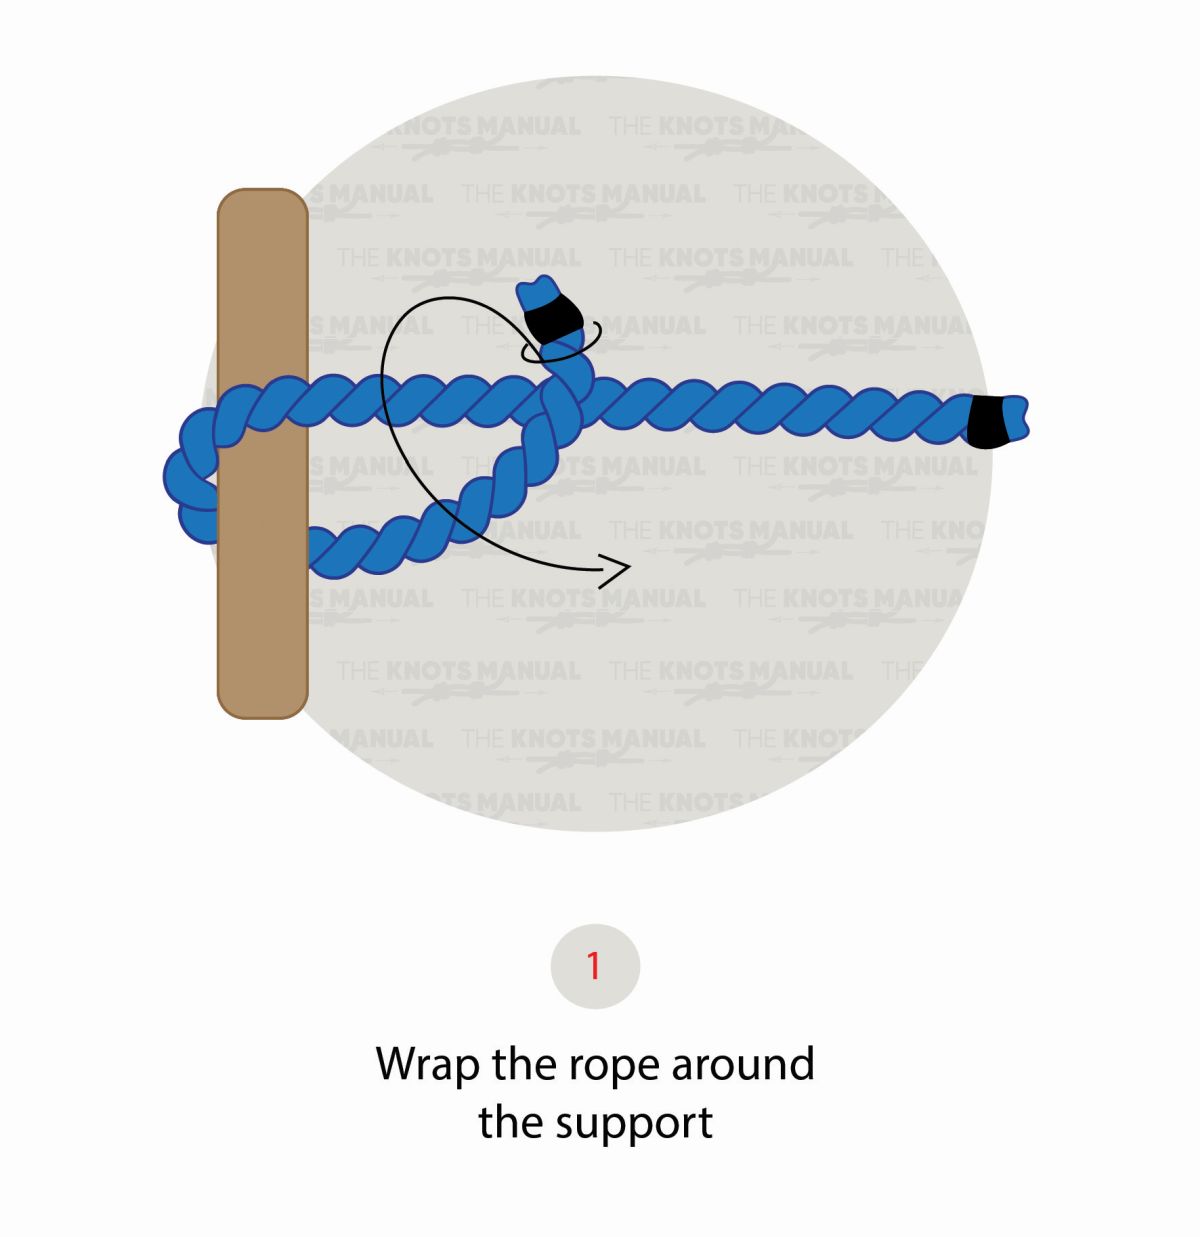
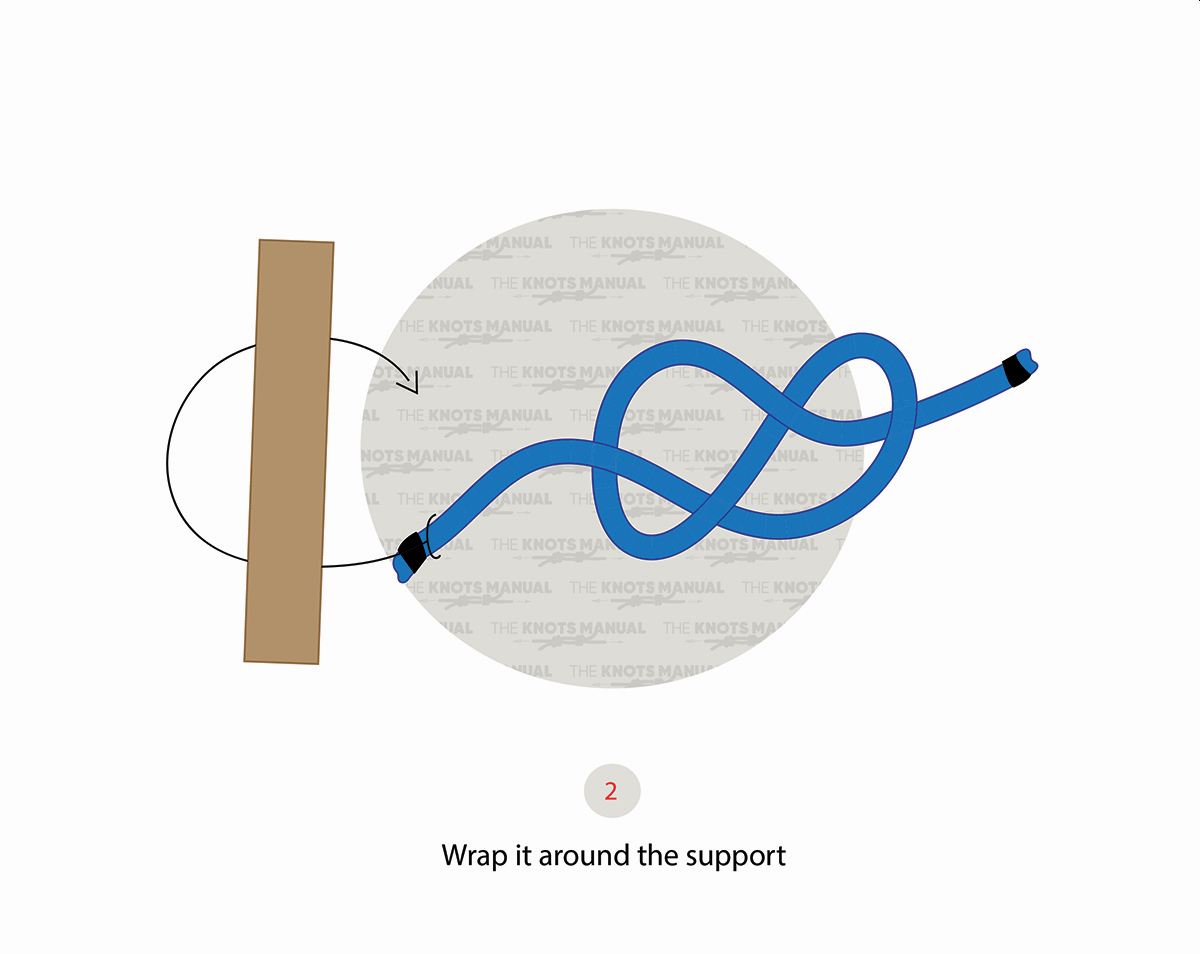
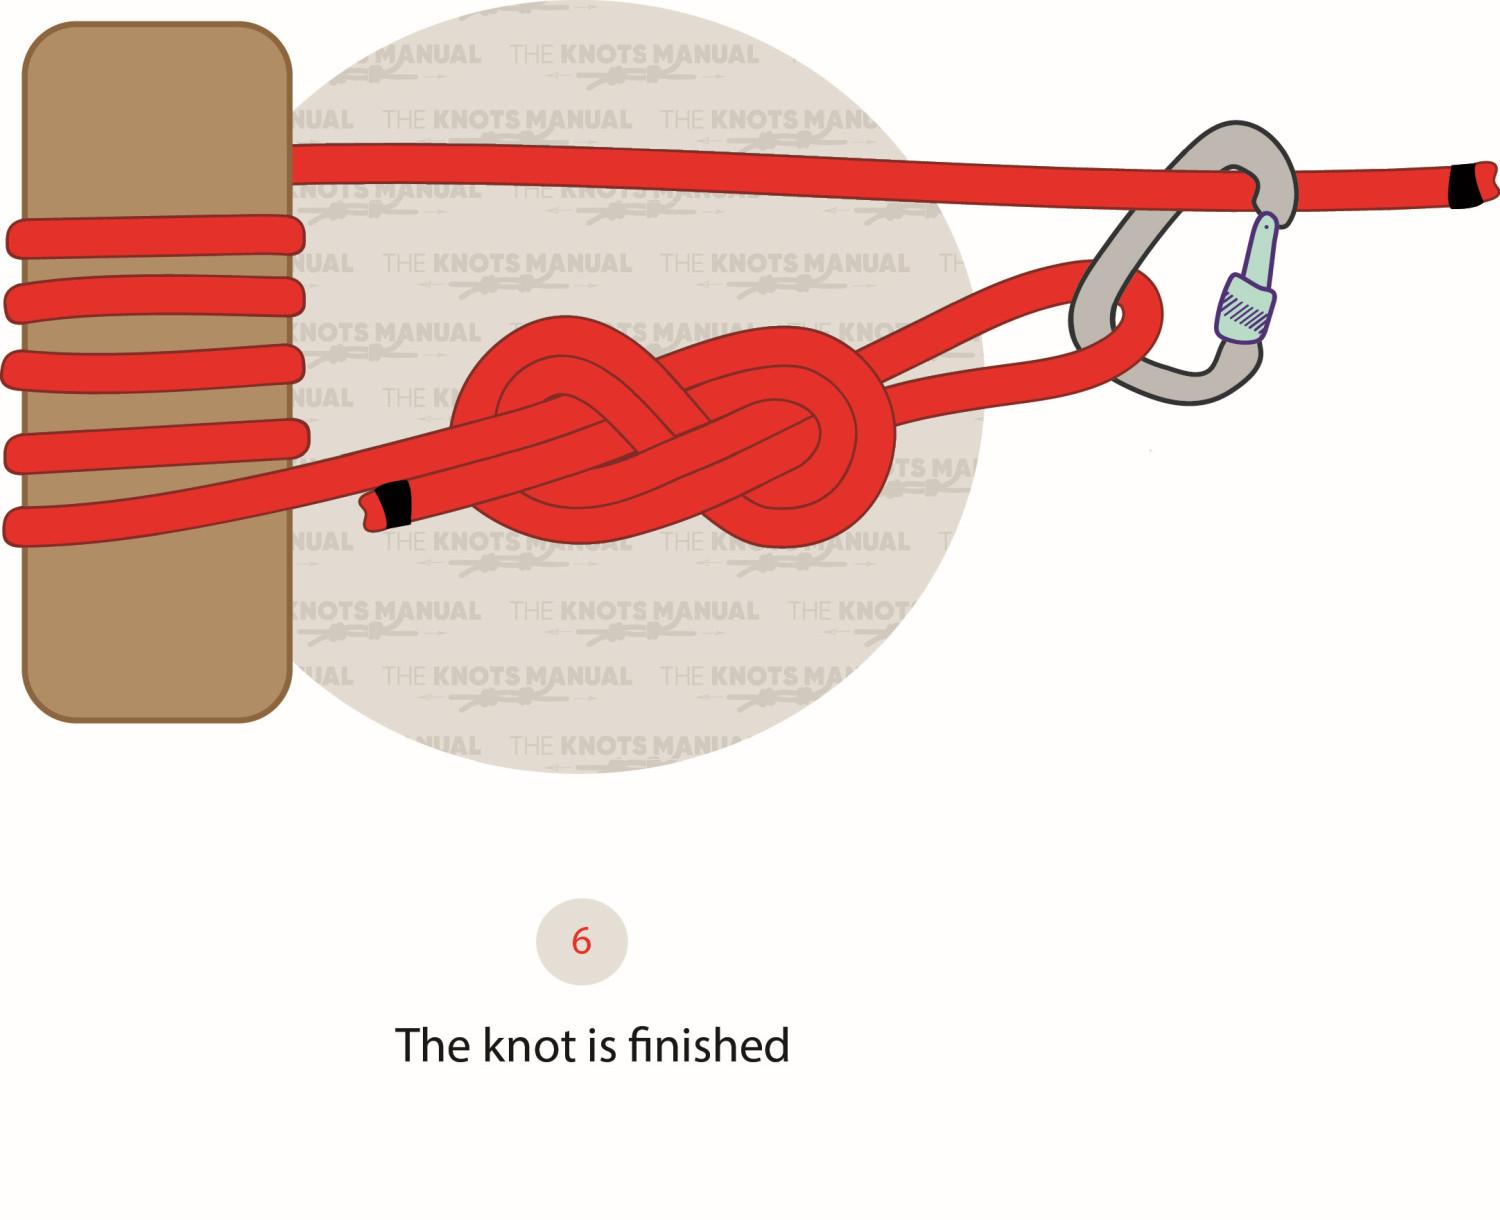
Figure 8 Follow Through Knot: Step-By-Step Guide
theknotsmanual.com
source
Comments
Figure 8 Follow Through Knot: Step-By-Step Guide
Figure 8 Follow Through Knot: Step-By-Step Guide
How To Tie A Taut Line Hitch
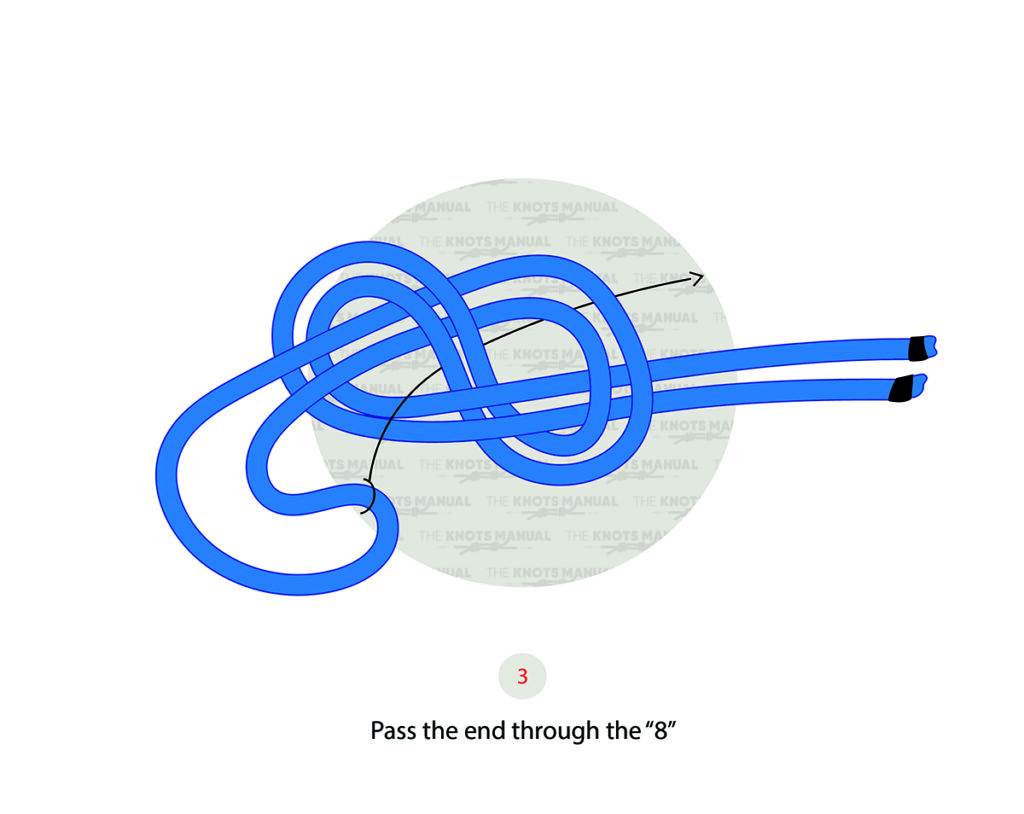
How to Tie a Double Figure 8 Loop Knot (Bunny Ears, Super 8)
How To Tie A Taut Line Hitch
How To Tie A Timber Hitch Knot
Figure 8 Follow Through Knot: Step-By-Step Guide
How To Tie A Half Hitch Knot?
How to Tie a (Quick Release) Trucker's Hitch Knot
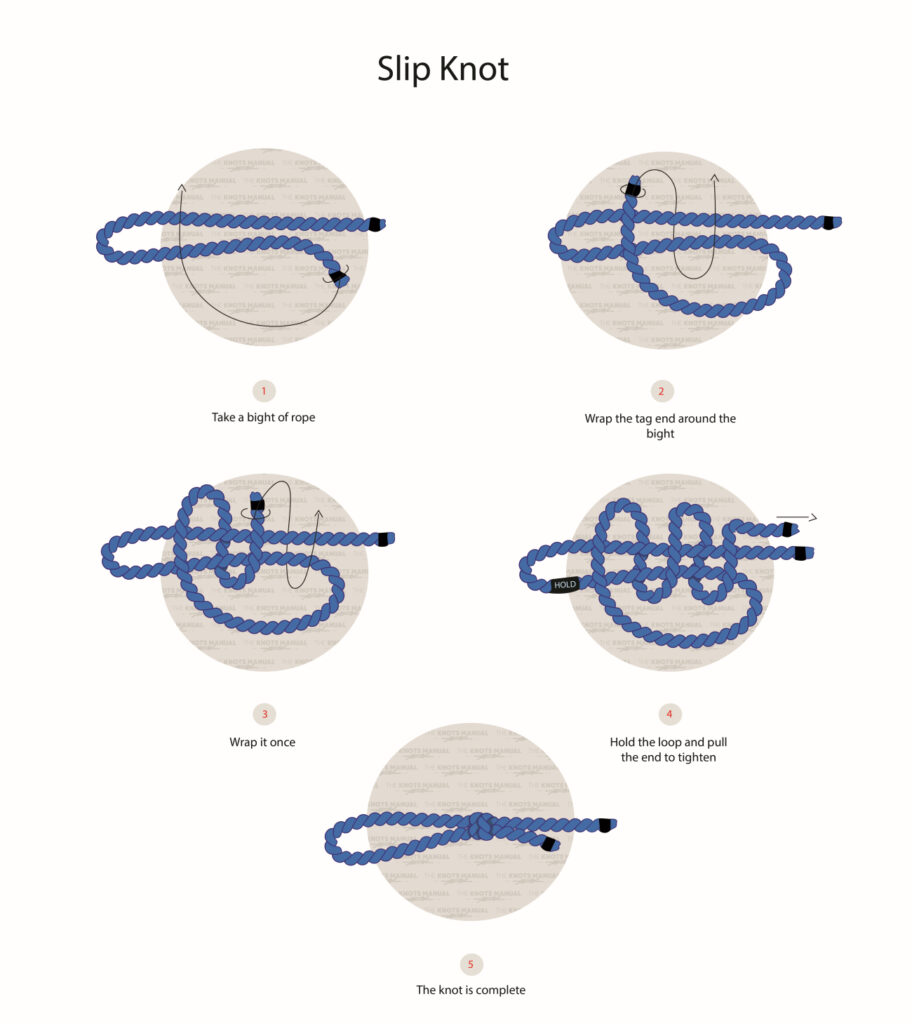
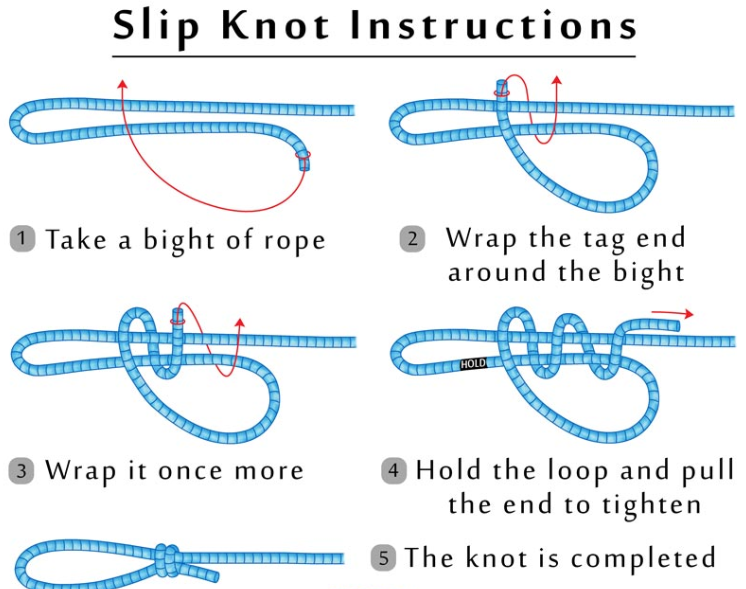
How To Tie A Slip Knot
How to Tie an Albright (Special) Knot: Step-By-Step Guide
How To Tie Two-Half Hitches
How To Tie A Taut Line Hitch
How To Tie A Taut Line Hitch
How To Tie A Taut Line Hitch
How to tie the Highwayman's Hitch Knot (Bank Robber's Knot)
Fisherman's Knot - Troop 226
16 Boating, Sailing and Scouting Knots ideas | knots, rope knots ...
overhand knot | Double Overhand Stopper Knot | 101 Knots | Overhand ...
Overhand Knot Clipart Etc
How To Tie Two Ends Of A Rope Together - howtocx
Boating Knots eBook: Andy Steer: Amazon.co.uk: Kindle Store | Knots ...
How To Tie A Slip Knot
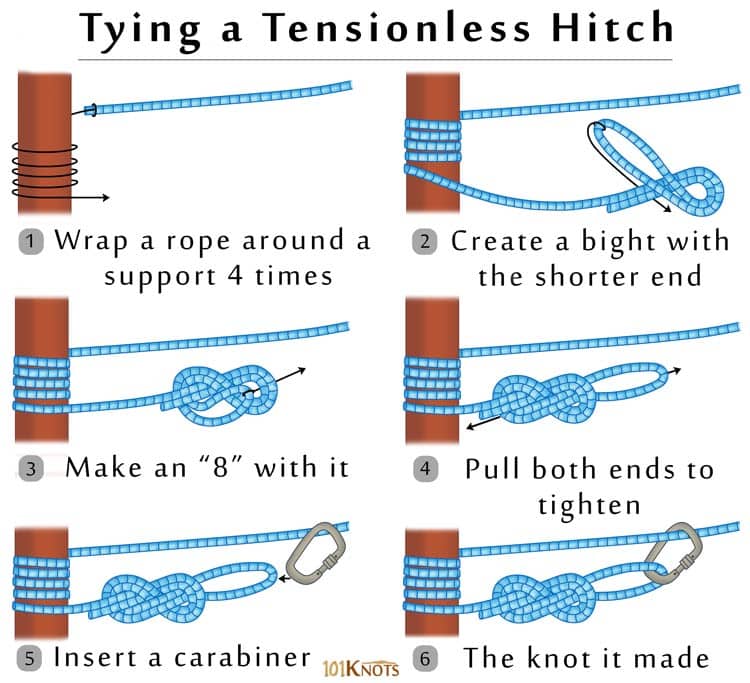
How to Tie a Tensionless Hitch? Quick & Easy Step by Step Guide
Cleat Hitch - Troop 226
How To Tie A Half Hitch Knot?
Figure 8 Follow Through Knot: Step-By-Step Guide
What is a Multifilament rope? - ZhongHe
How to Tie the Fish N Fool Knot: Quick Guide
How to Tie a Tensionless Hitch Knot (Step-By-Step Guide)
Knots for K9 Search and Rescue
How to Tie an Albright (Special) Knot: Step-By-Step Guide
What is a figure-8 knot used for? - Quora
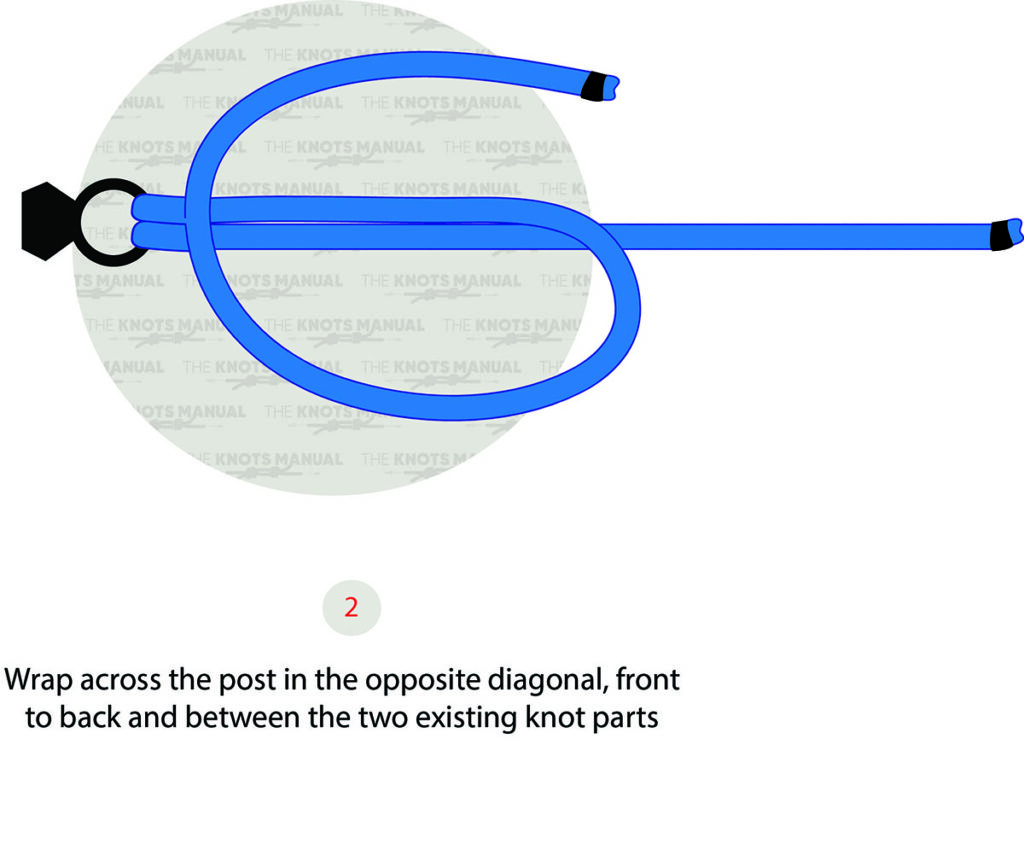
Sheepshank Knot - Troop 226
How to Tie a (Chinese) Crown Knot: Illustrated Guide