


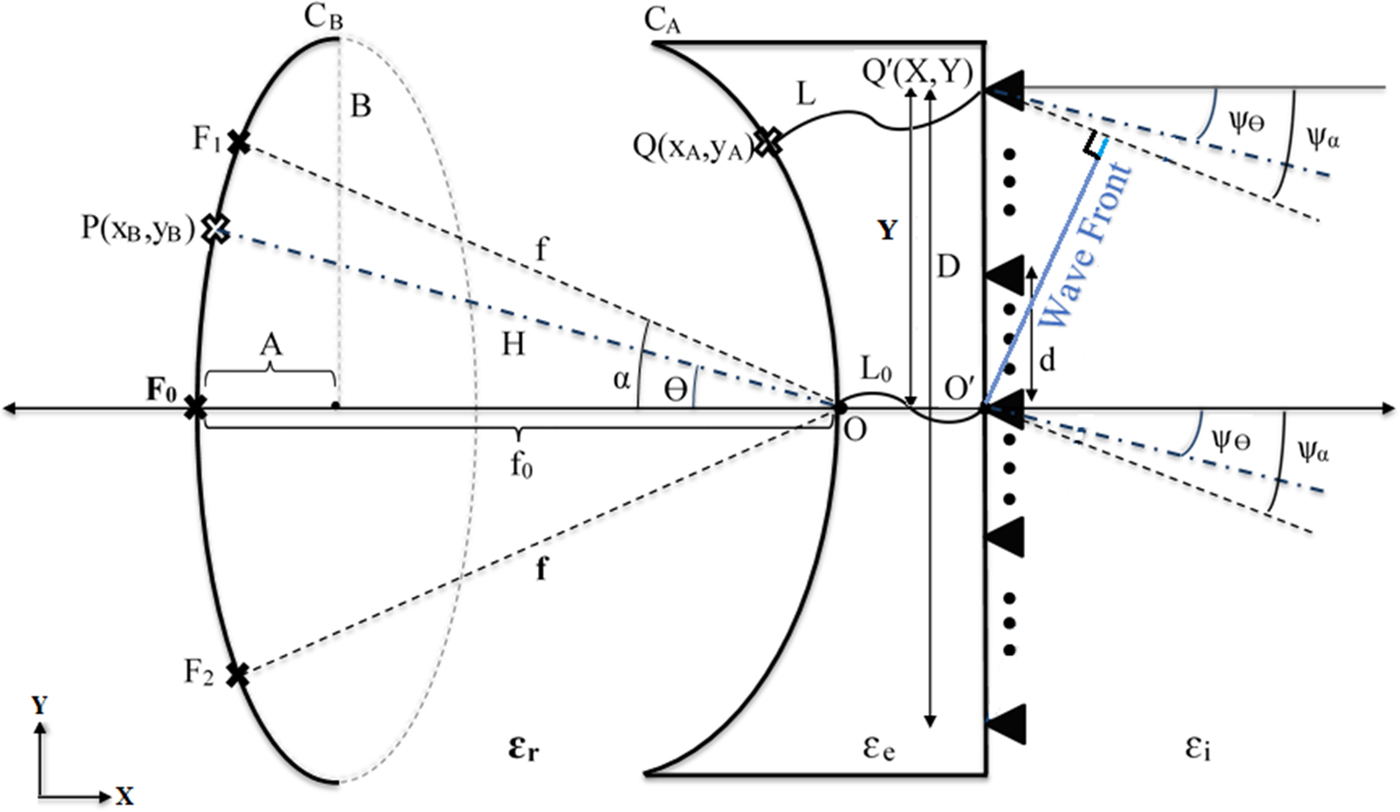
![The original Rotman lens scheme [94]. | Download Scientific Diagram](https://mavink.com/images/loadingwhitetransparent.gif)


![The Fourier Rotman lens [99]. | Download Scientific Diagram](https://www.researchgate.net/publication/354882620/figure/fig20/AS:1072923133632517@1632816217558/The-Fourier-Rotman-lens-99.jpg)


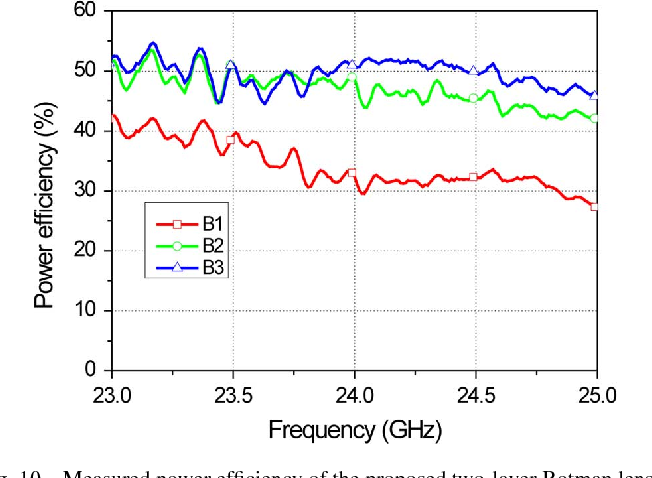
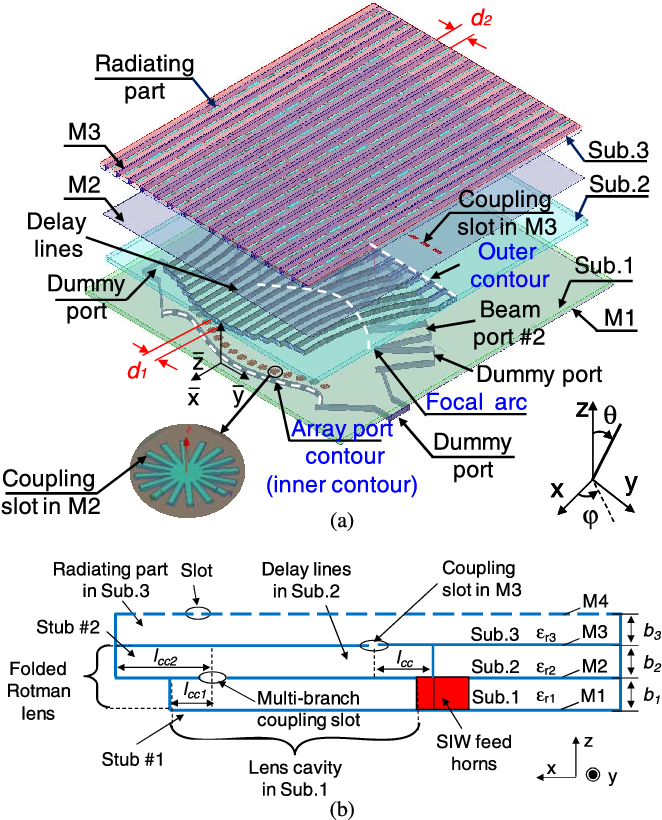
Experience the enduring appeal of figure 10 from compact two-layer rotman lens-fed microstrip antenna with extensive collections of traditional images. celebrating the traditional aspects of play, doll, and game. ideal for traditional publications and documentation. Our figure 10 from compact two-layer rotman lens-fed microstrip antenna collection features high-quality images with excellent detail and clarity. Suitable for various applications including web design, social media, personal projects, and digital content creation All figure 10 from compact two-layer rotman lens-fed microstrip antenna images are available in high resolution with professional-grade quality, optimized for both digital and print applications, and include comprehensive metadata for easy organization and usage. Discover the perfect figure 10 from compact two-layer rotman lens-fed microstrip antenna images to enhance your visual communication needs. Each image in our figure 10 from compact two-layer rotman lens-fed microstrip antenna gallery undergoes rigorous quality assessment before inclusion. Comprehensive tagging systems facilitate quick discovery of relevant figure 10 from compact two-layer rotman lens-fed microstrip antenna content. Whether for commercial projects or personal use, our figure 10 from compact two-layer rotman lens-fed microstrip antenna collection delivers consistent excellence. Time-saving browsing features help users locate ideal figure 10 from compact two-layer rotman lens-fed microstrip antenna images quickly. Regular updates keep the figure 10 from compact two-layer rotman lens-fed microstrip antenna collection current with contemporary trends and styles.