

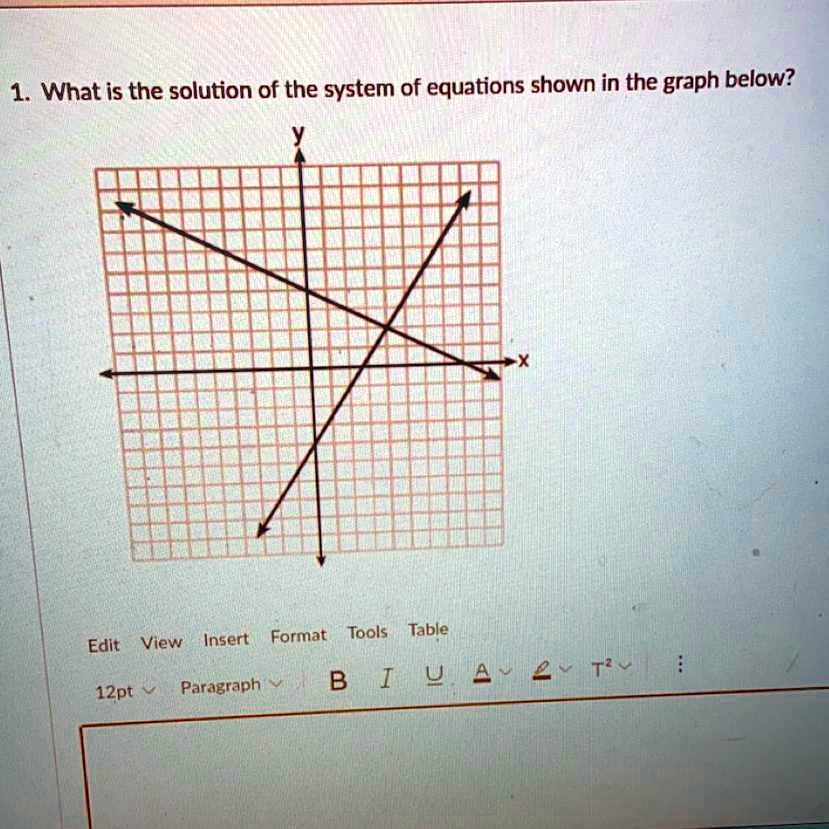

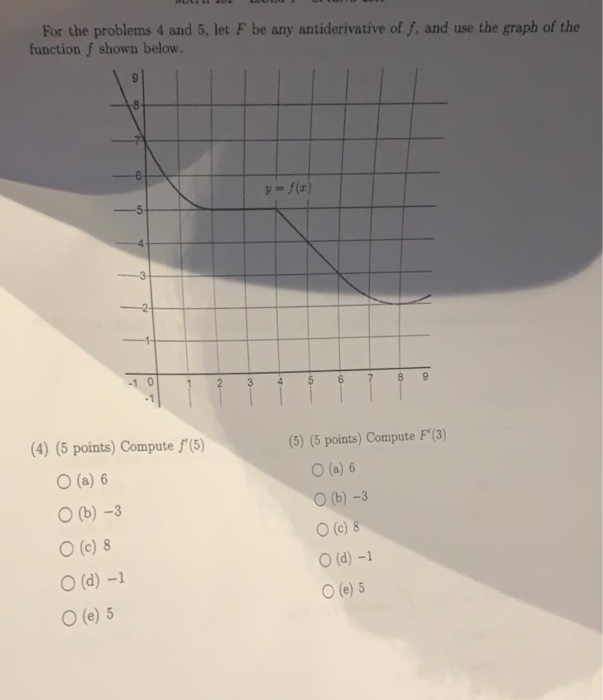
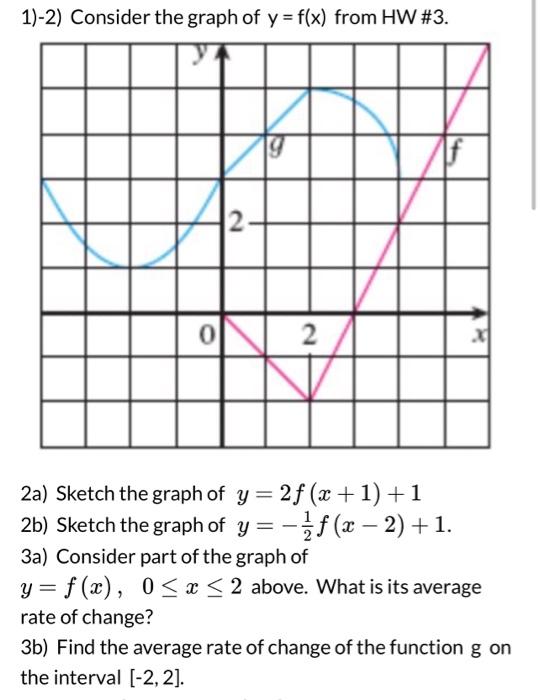
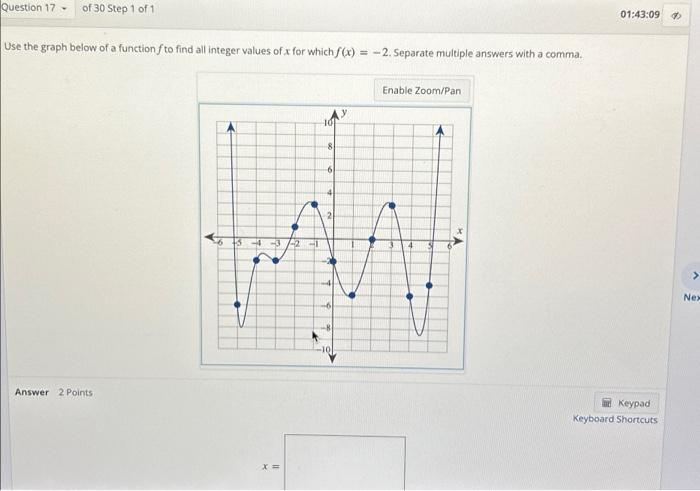
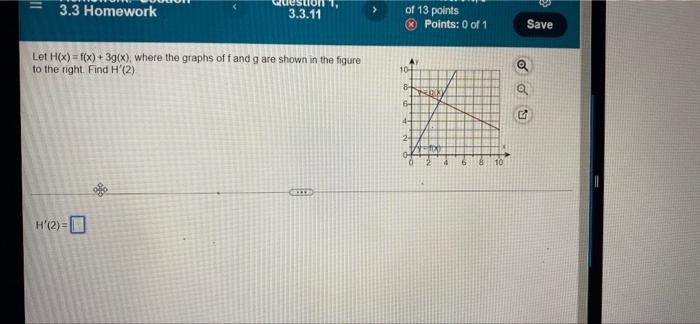
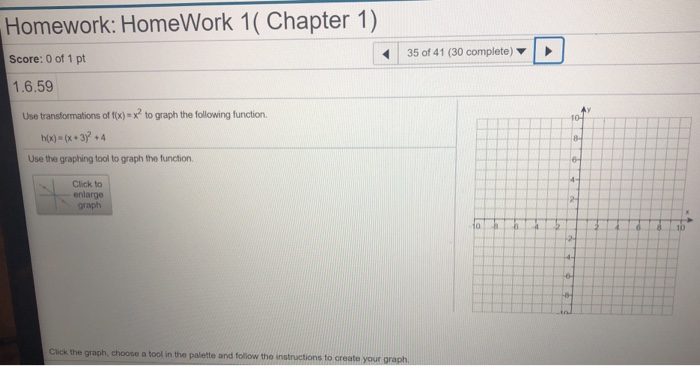
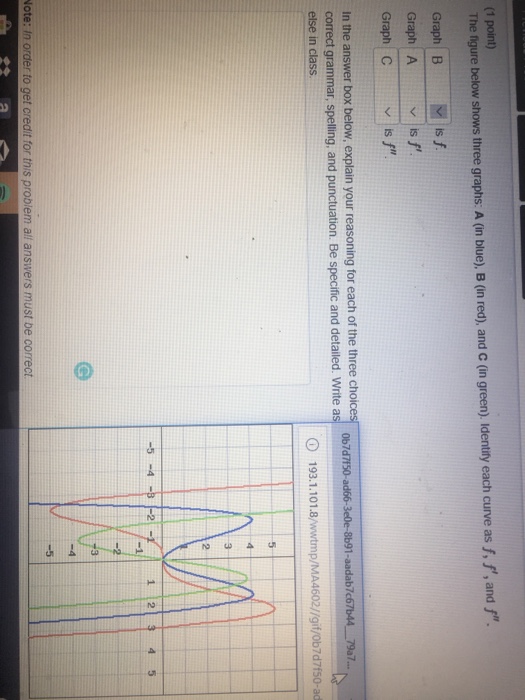
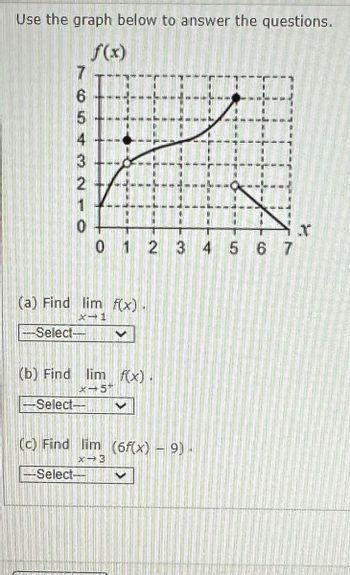
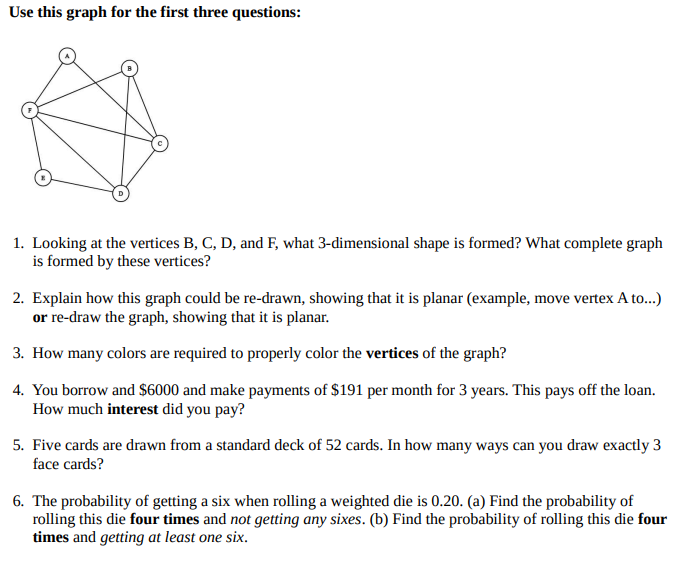
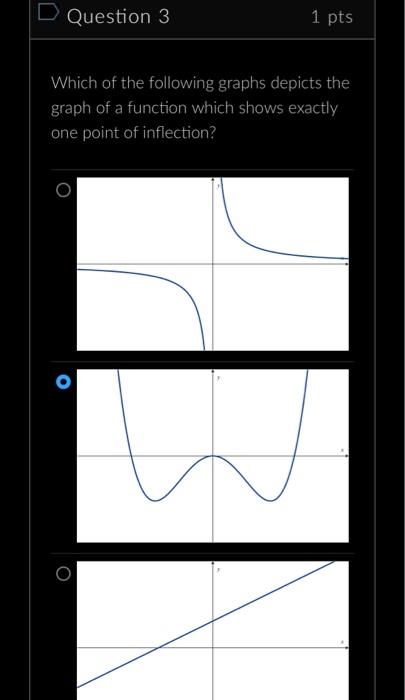
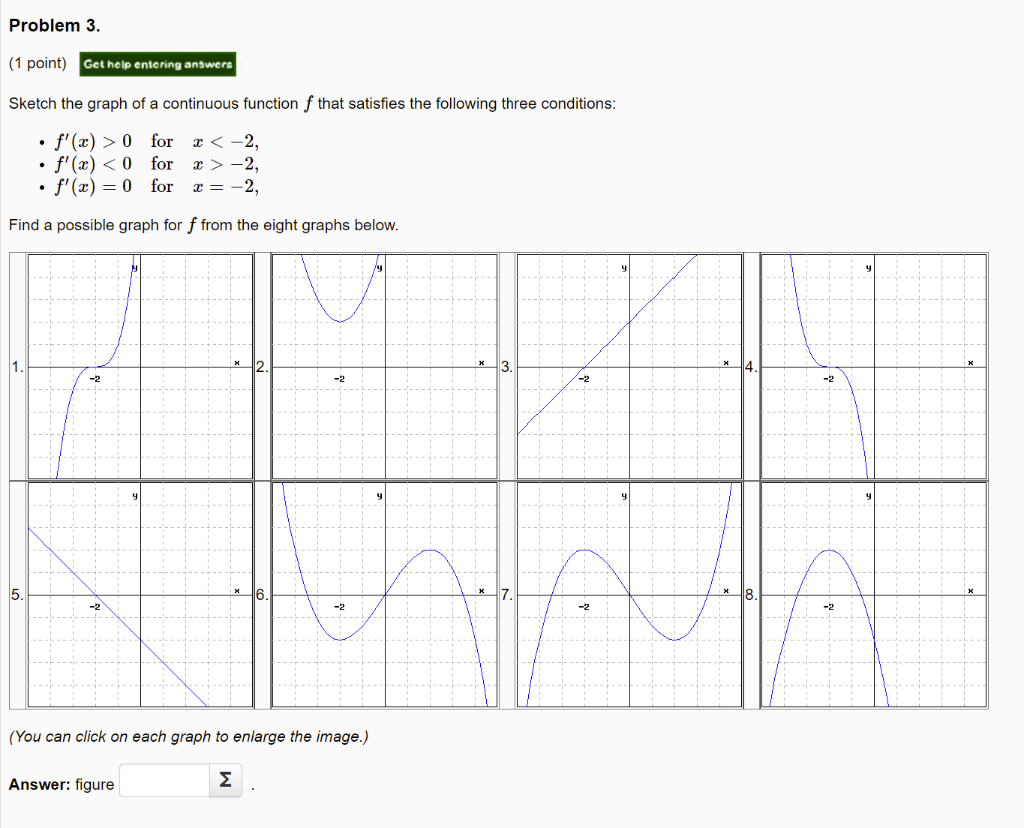
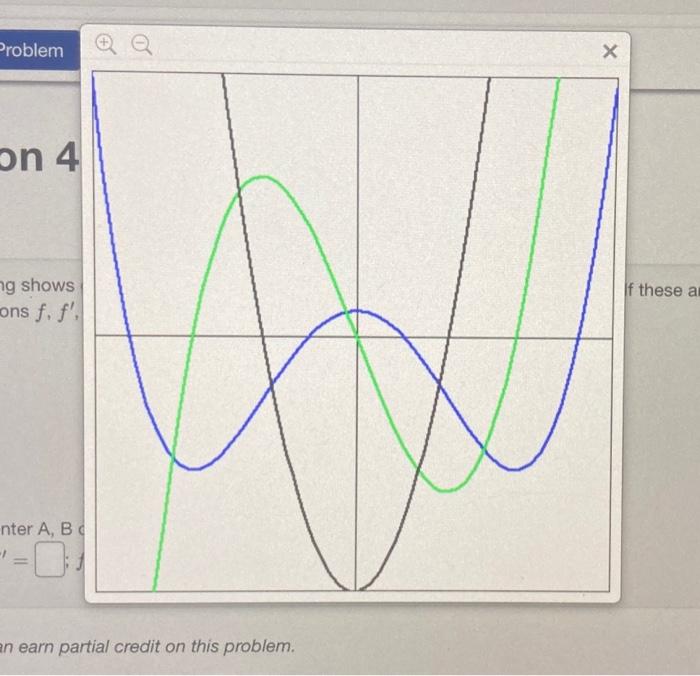
![[Solved]: 11 Use the graph shown below and identify points f](https://media.cheggcdn.com/study/65e/65e93870-f6fb-4d2b-a722-203703bef542/image)


![[Solved] The graph of 3a and 3b is following: 3a graph: 3b graph: just ...](https://mavink.com/images/loadingwhitetransparent.gif)
![[GET ANSWER] graph the equation shown below by transforming the given ...](https://cdn.numerade.com/ask_images/c68862603edd4440aac8774605bd9a9f.jpg)
![[Solved]: Consider a graph as shown in the Figure 3A, with A](https://media.cheggcdn.com/media/272/2722c560-3fb5-41f2-8246-668f47743749/Q.jpg)
![[Trigonometry] [Grade 12] Am I supposed to use the graph or solve ...](https://preview.redd.it/trigonometry-grade-12-am-i-supposed-to-use-the-graph-or-v0-1obsfr5lrsma1.jpg?width=1080&crop=smart&auto=webp&s=25ff1ef50c0cd14c56f6cb0c54c55b6ad2674b9b)


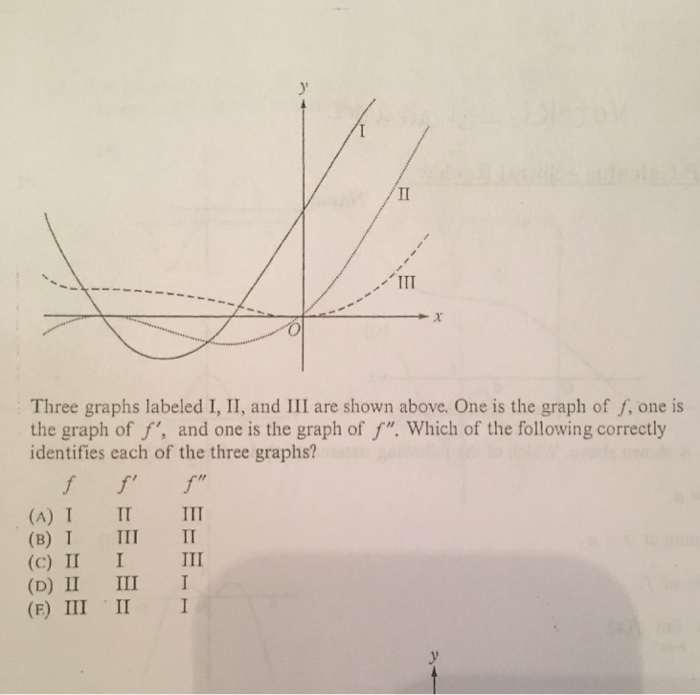
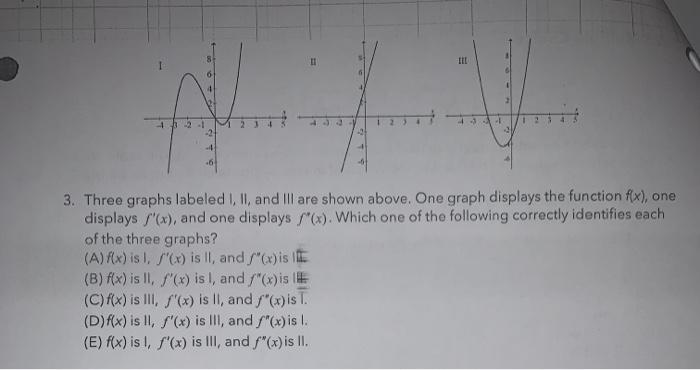
![Solved 1. [3 points] The image below depicts three graphs: | Chegg.com](https://media.cheggcdn.com/media/84b/84b33b00-29f8-49d2-a256-f156292cc7ae/phpmC9j7G)
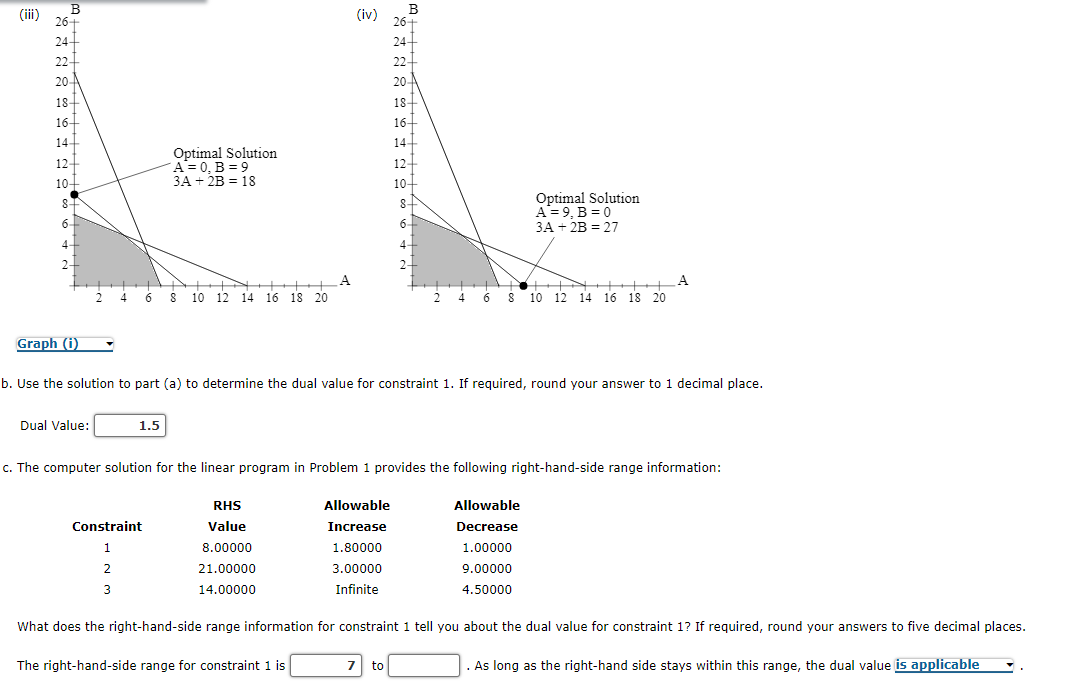
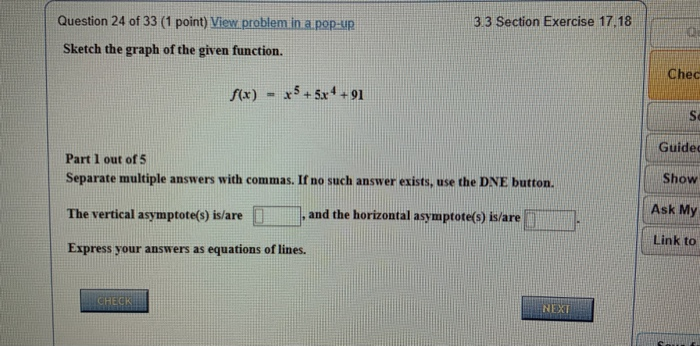
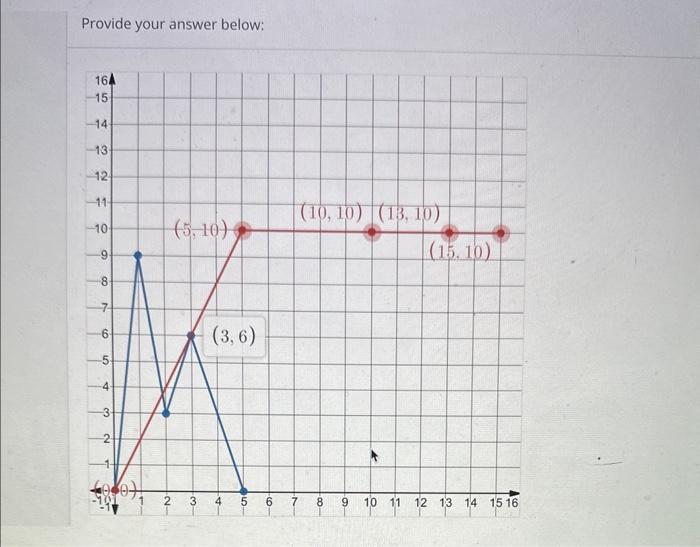
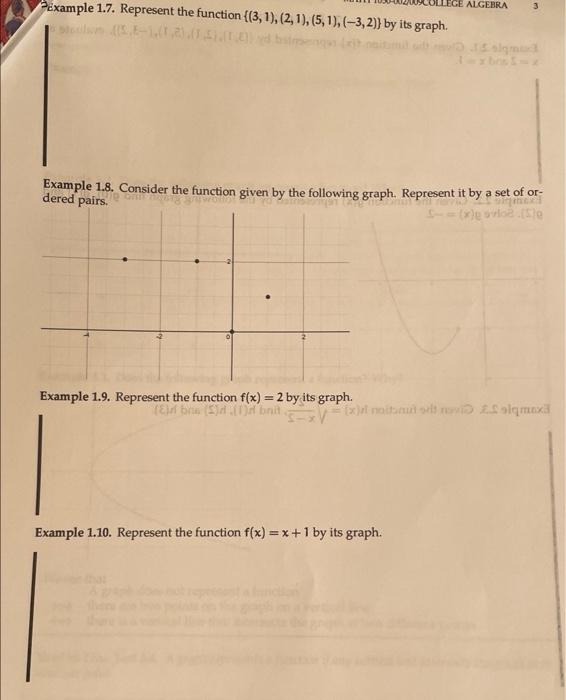
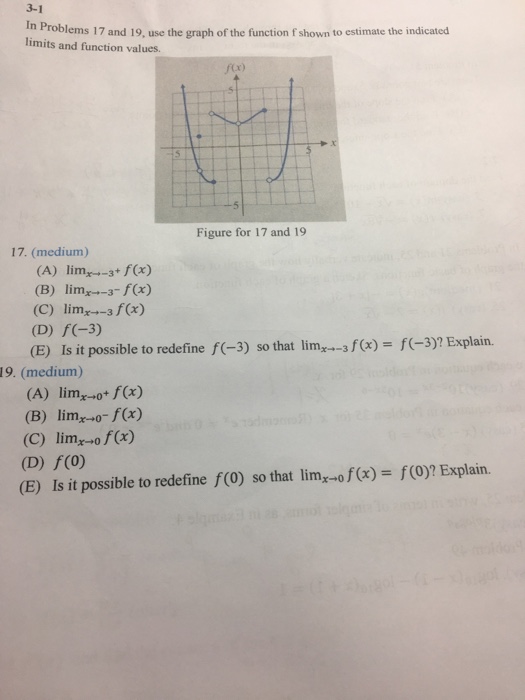


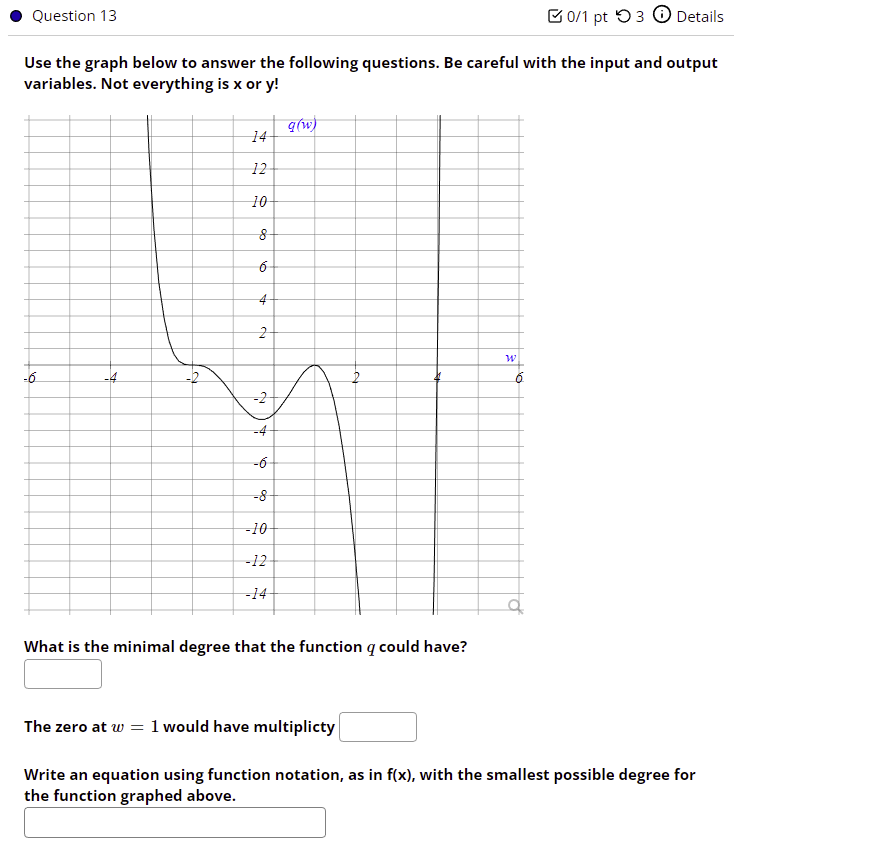
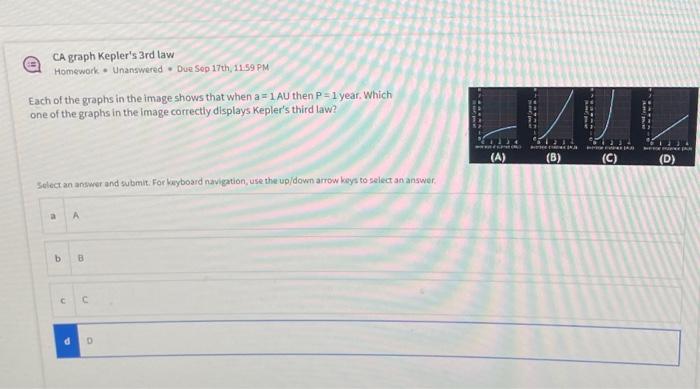
Journey into the realm of solved: part 1: use the graph shown to the right and the nearest through our curated selection of substantial collections of stunning photographs. featuring exceptional examples of artistic, creative, and design. designed for diverse creative and educational needs. Discover high-resolution solved: part 1: use the graph shown to the right and the nearest images optimized for various applications. Suitable for various applications including web design, social media, personal projects, and digital content creation All solved: part 1: use the graph shown to the right and the nearest images are available in high resolution with professional-grade quality, optimized for both digital and print applications, and include comprehensive metadata for easy organization and usage. Explore the versatility of our solved: part 1: use the graph shown to the right and the nearest collection for various creative and professional projects. Comprehensive tagging systems facilitate quick discovery of relevant solved: part 1: use the graph shown to the right and the nearest content. Diverse style options within the solved: part 1: use the graph shown to the right and the nearest collection suit various aesthetic preferences. Time-saving browsing features help users locate ideal solved: part 1: use the graph shown to the right and the nearest images quickly.