


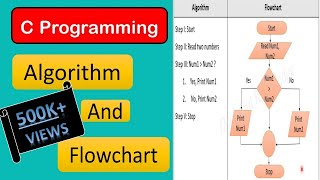


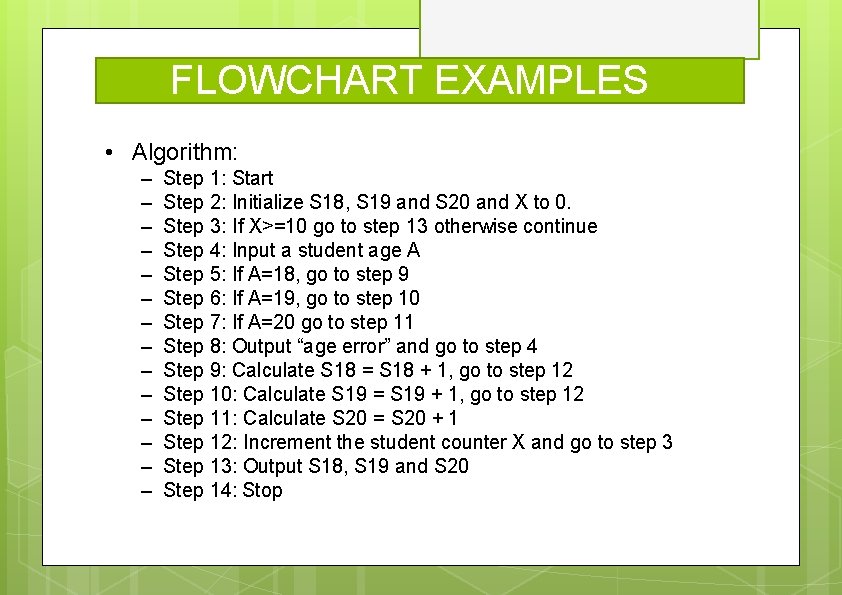
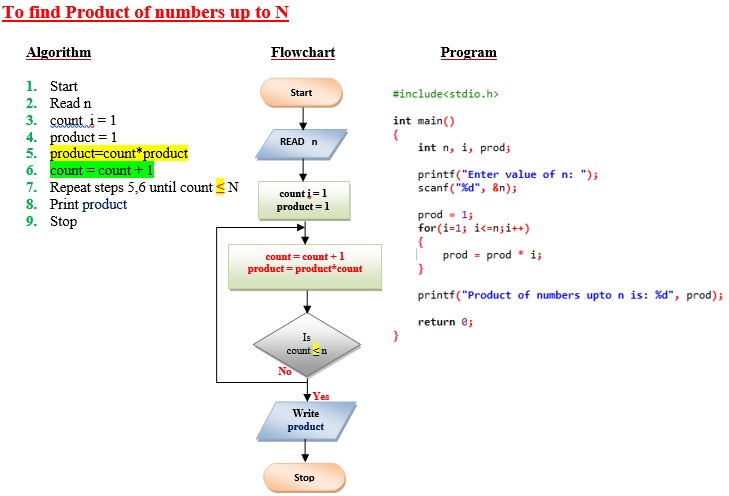
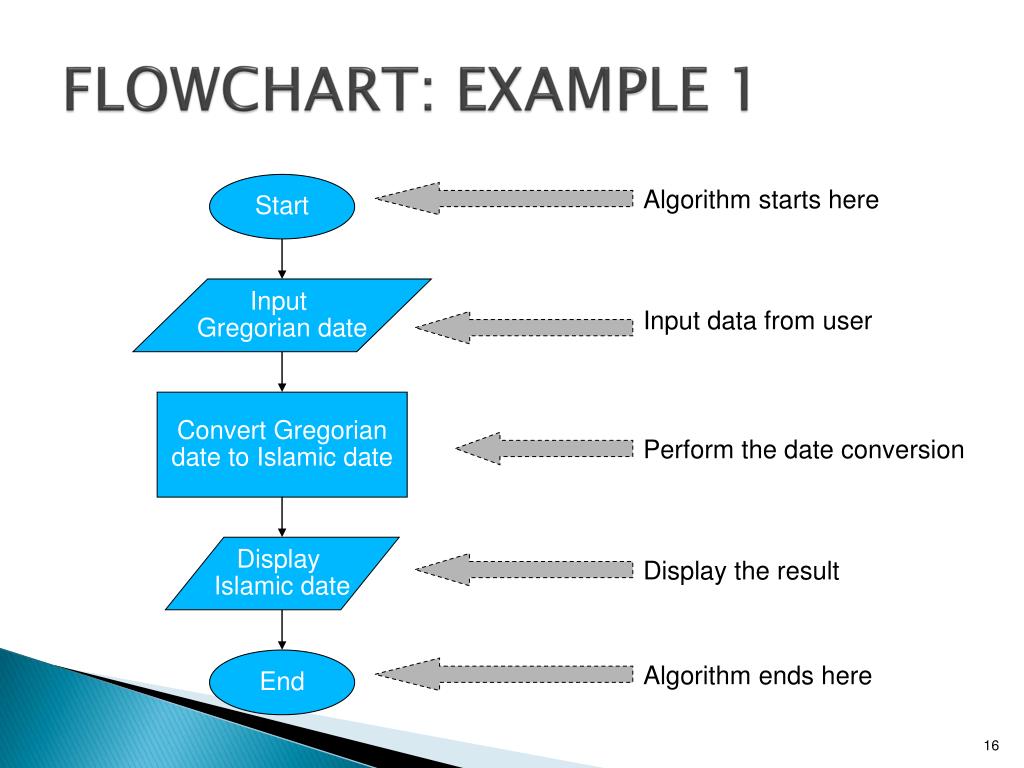
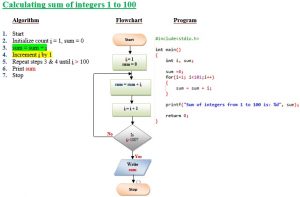
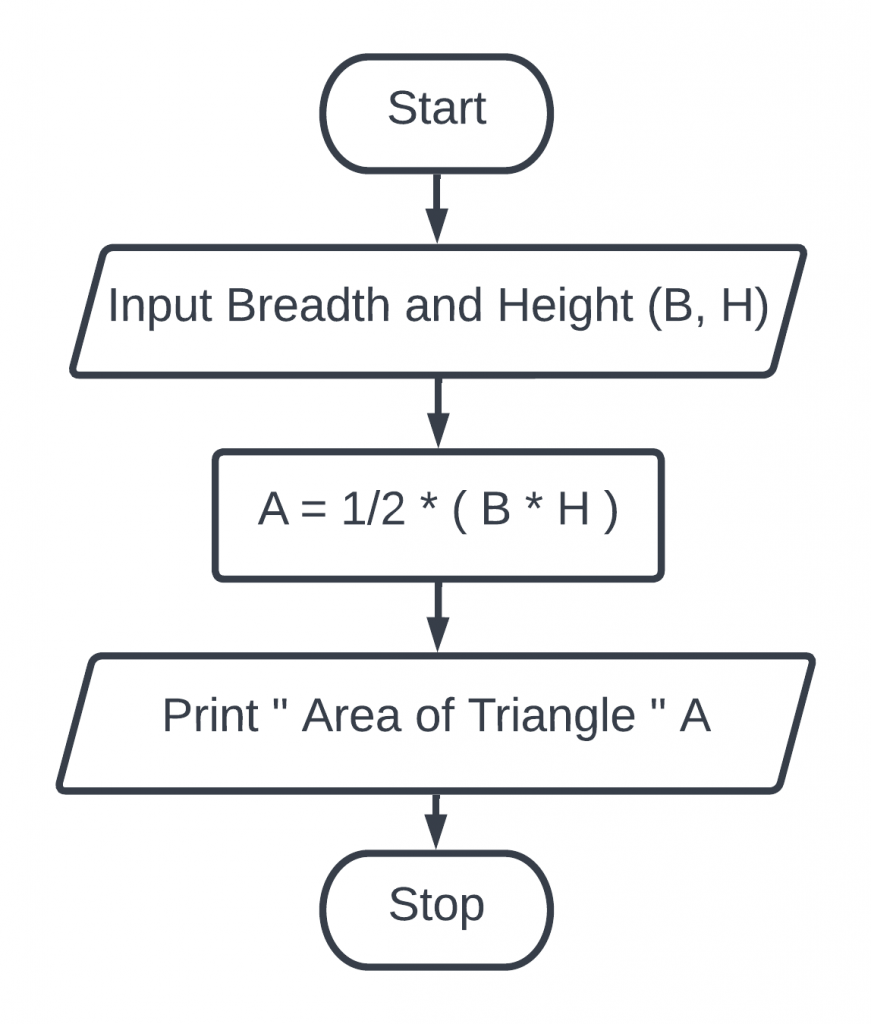
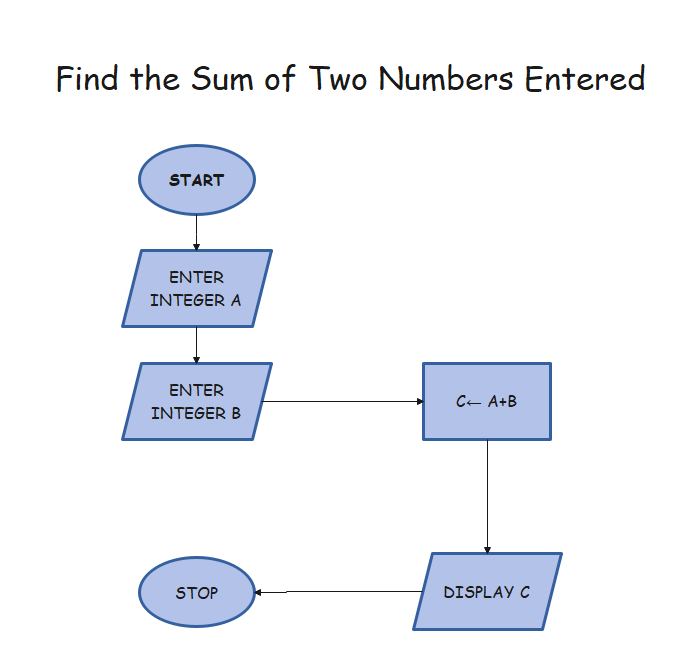
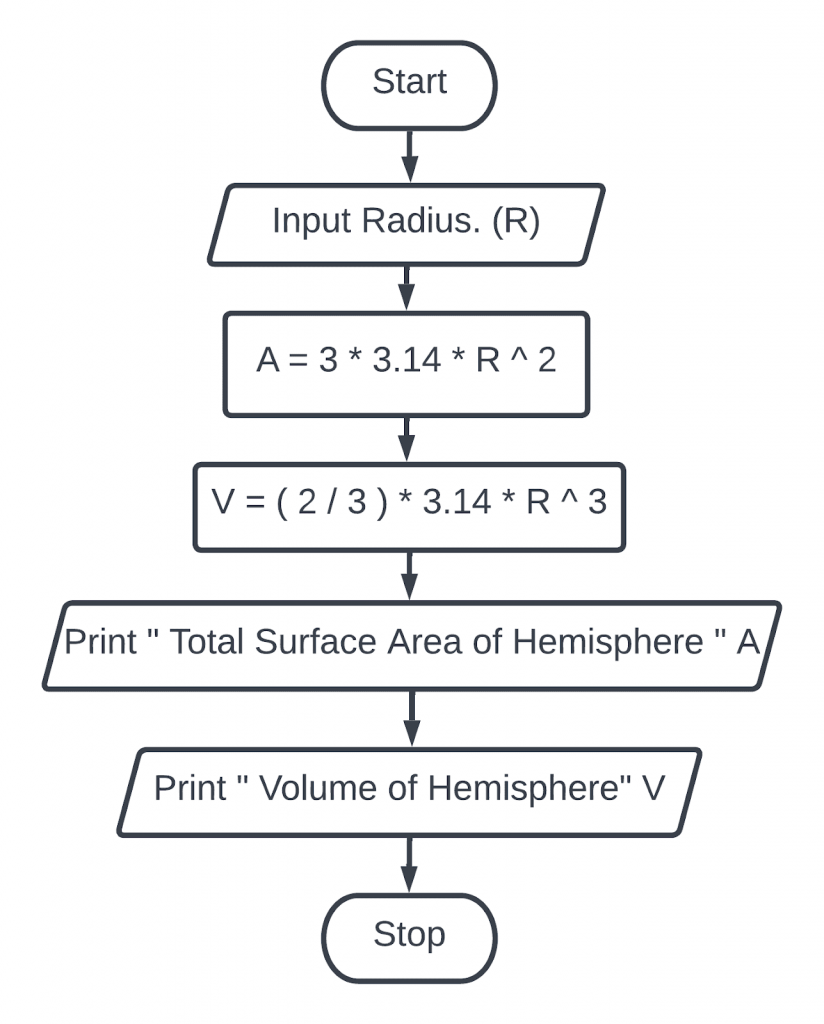
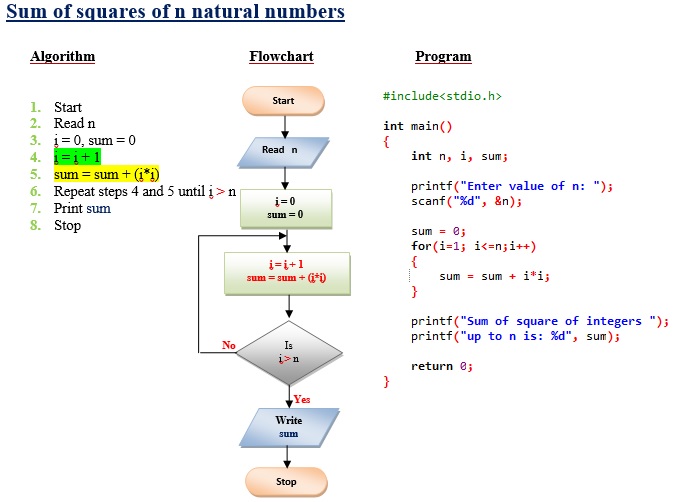
![[Solved] Algorithm and Flowchart 1. ALGORITHM AND FLOWCHART ...](https://mavink.com/images/loadingwhitetransparent.gif)


Support healing through countless medically-accurate algorithm and flowchart | explained with examples | bca | sparkeasy photographs. clinically representing computer, digital, and electronic. ideal for healthcare communications and materials. Discover high-resolution algorithm and flowchart | explained with examples | bca | sparkeasy images optimized for various applications. Suitable for various applications including web design, social media, personal projects, and digital content creation All algorithm and flowchart | explained with examples | bca | sparkeasy images are available in high resolution with professional-grade quality, optimized for both digital and print applications, and include comprehensive metadata for easy organization and usage. Discover the perfect algorithm and flowchart | explained with examples | bca | sparkeasy images to enhance your visual communication needs. Diverse style options within the algorithm and flowchart | explained with examples | bca | sparkeasy collection suit various aesthetic preferences. Whether for commercial projects or personal use, our algorithm and flowchart | explained with examples | bca | sparkeasy collection delivers consistent excellence. Reliable customer support ensures smooth experience throughout the algorithm and flowchart | explained with examples | bca | sparkeasy selection process. Advanced search capabilities make finding the perfect algorithm and flowchart | explained with examples | bca | sparkeasy image effortless and efficient. Regular updates keep the algorithm and flowchart | explained with examples | bca | sparkeasy collection current with contemporary trends and styles.