

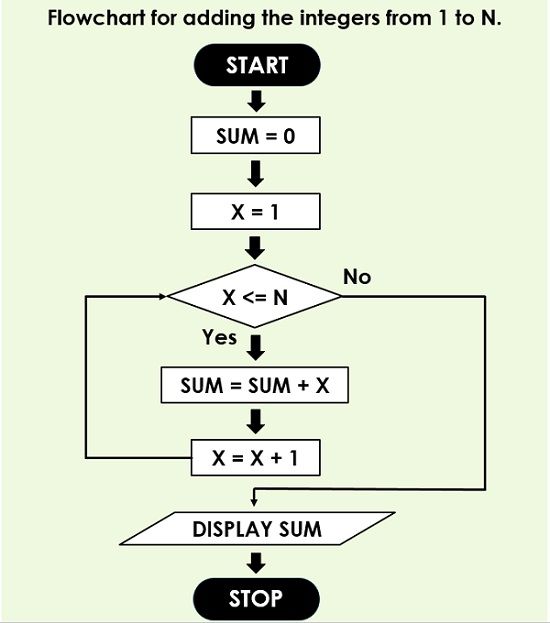
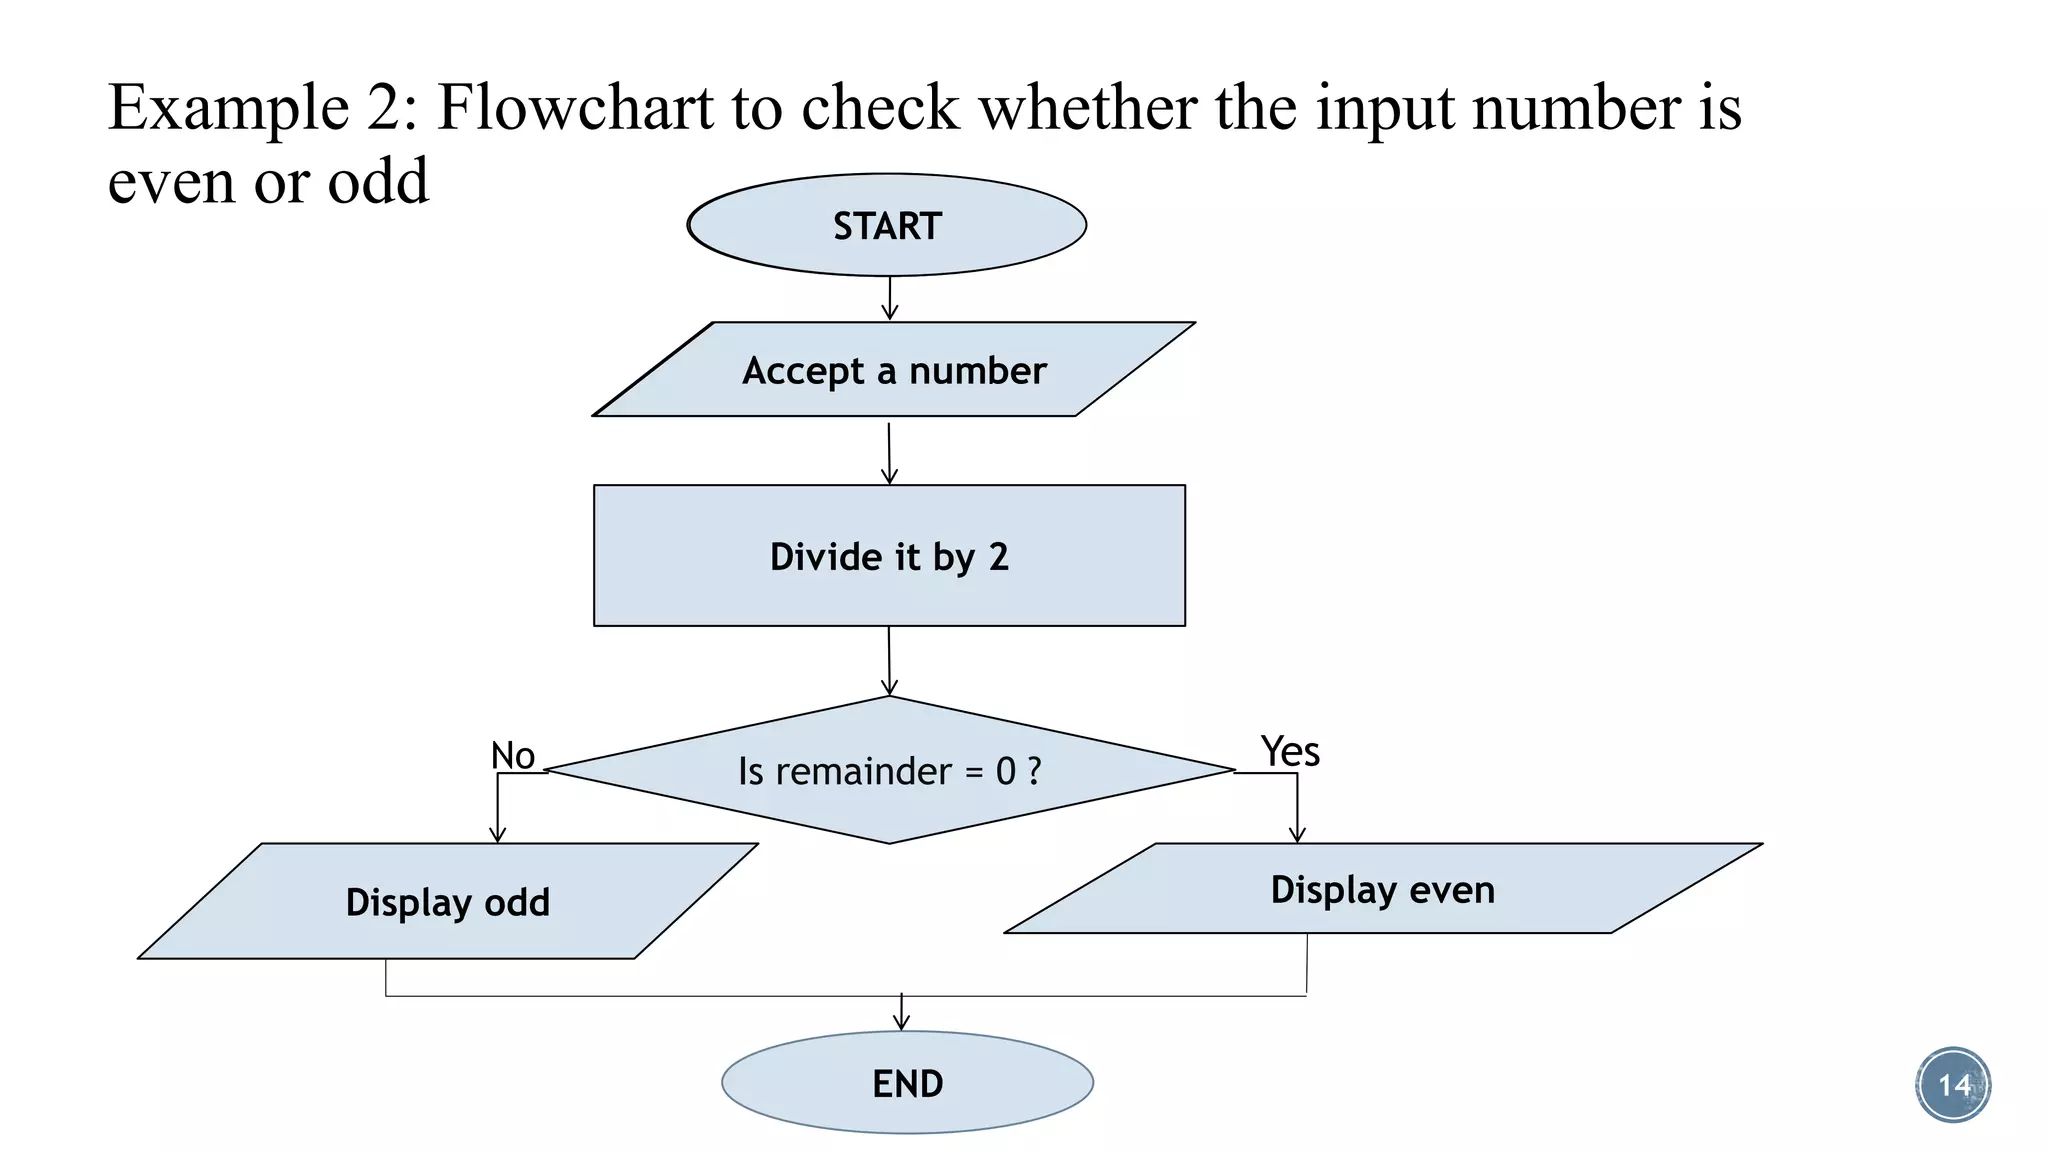
.jpg)


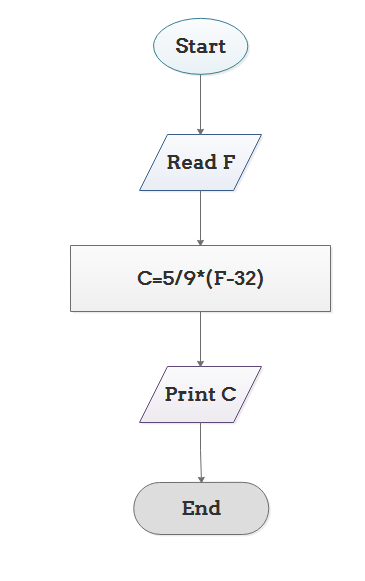


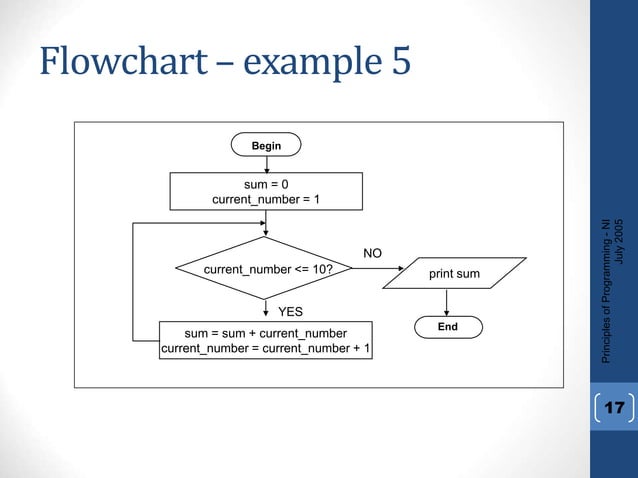
![Flowchart in C [ Explanation with Examples ] - Learnprogramo](https://learnprogramo.com/wp-content/uploads/2020/05/celsius-to-f-flowchart.png)

![[Solved] Algorithm and Flowchart 1. ALGORITHM AND FLOWCHART ...](https://mavink.com/images/loadingwhitetransparent.gif)


.jpg)


Immerse yourself in the remarkable artistic world of algorithm and flowchart | explained with examples | bca | sparkeasy with substantial collections of creative images. expressing the artistic vision of computer, digital, and electronic. ideal for creative portfolios and presentations. Discover high-resolution algorithm and flowchart | explained with examples | bca | sparkeasy images optimized for various applications. Suitable for various applications including web design, social media, personal projects, and digital content creation All algorithm and flowchart | explained with examples | bca | sparkeasy images are available in high resolution with professional-grade quality, optimized for both digital and print applications, and include comprehensive metadata for easy organization and usage. Explore the versatility of our algorithm and flowchart | explained with examples | bca | sparkeasy collection for various creative and professional projects. The algorithm and flowchart | explained with examples | bca | sparkeasy collection represents years of careful curation and professional standards. Professional licensing options accommodate both commercial and educational usage requirements. Comprehensive tagging systems facilitate quick discovery of relevant algorithm and flowchart | explained with examples | bca | sparkeasy content. The algorithm and flowchart | explained with examples | bca | sparkeasy archive serves professionals, educators, and creatives across diverse industries. Each image in our algorithm and flowchart | explained with examples | bca | sparkeasy gallery undergoes rigorous quality assessment before inclusion.