

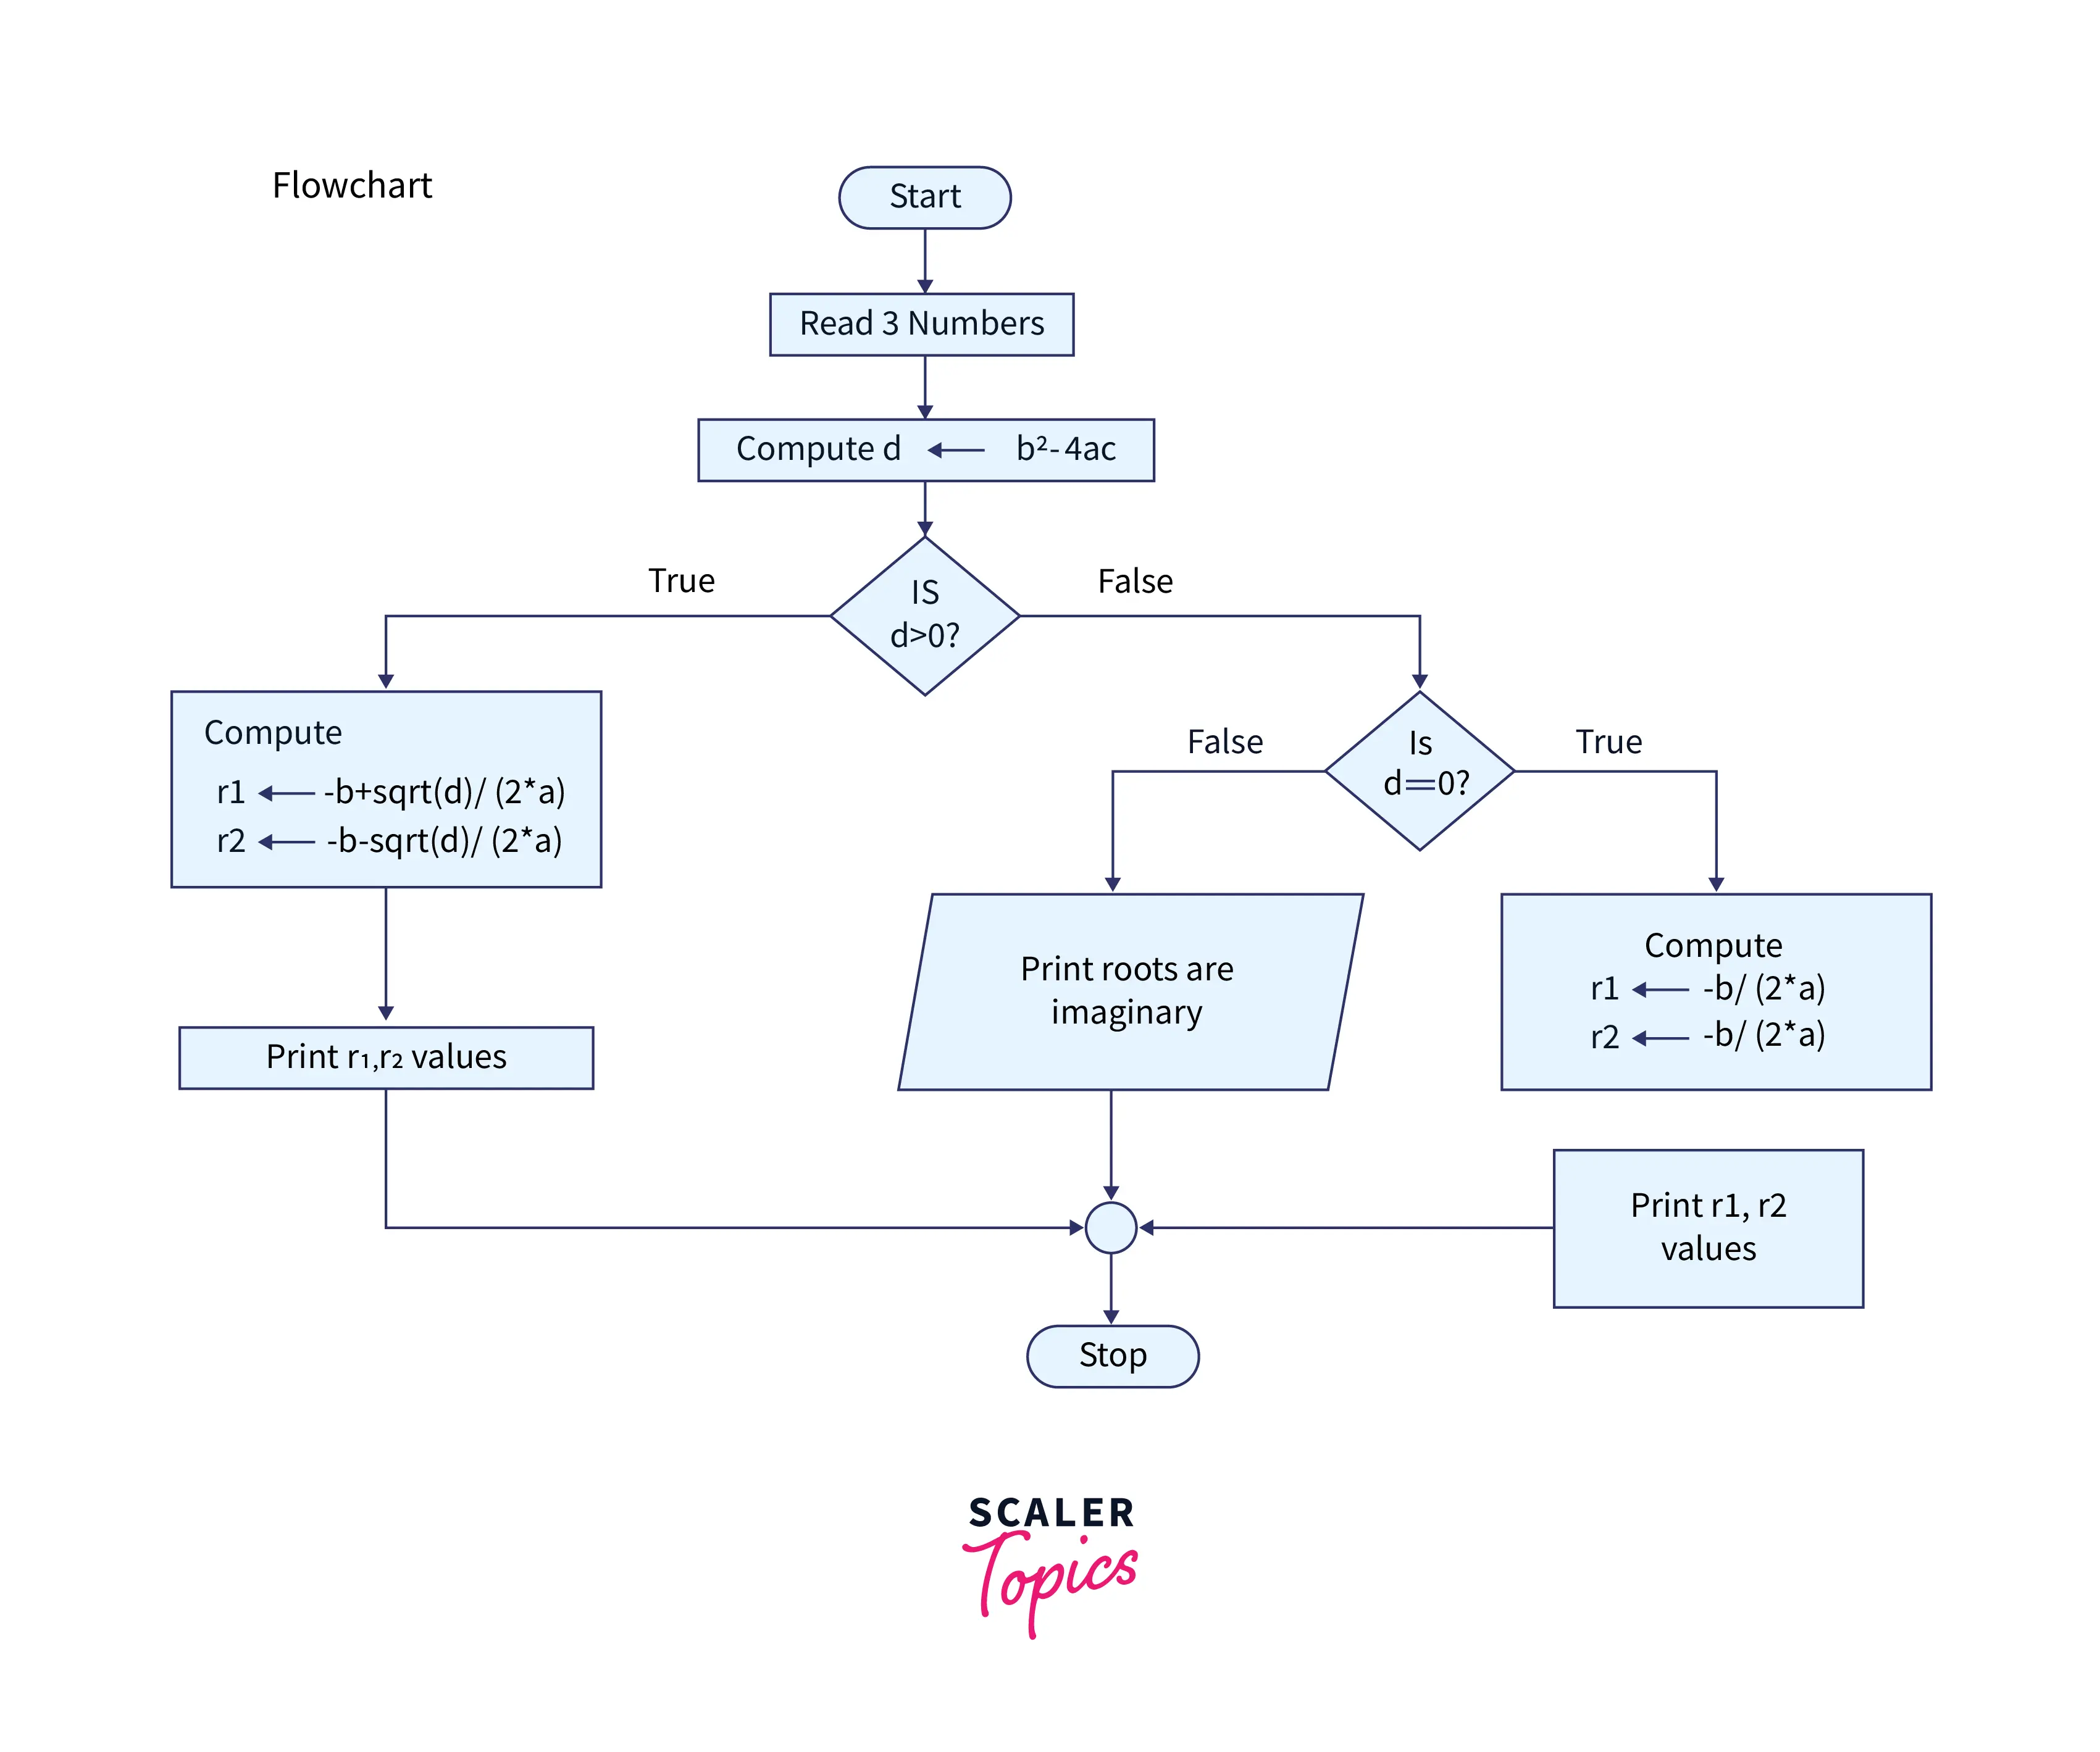


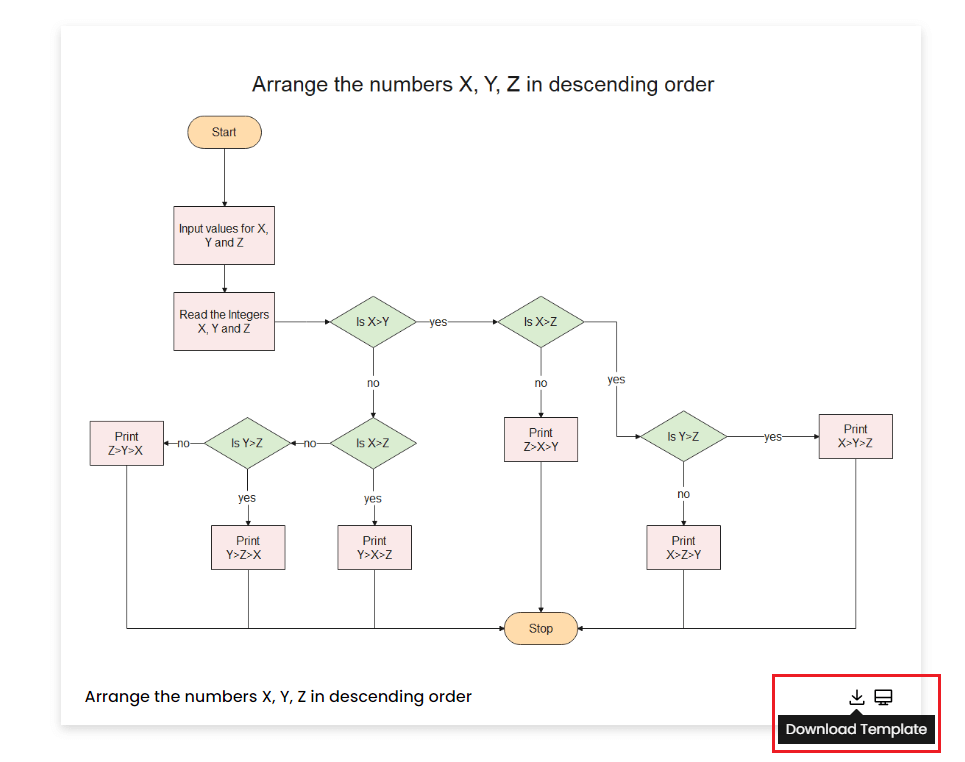


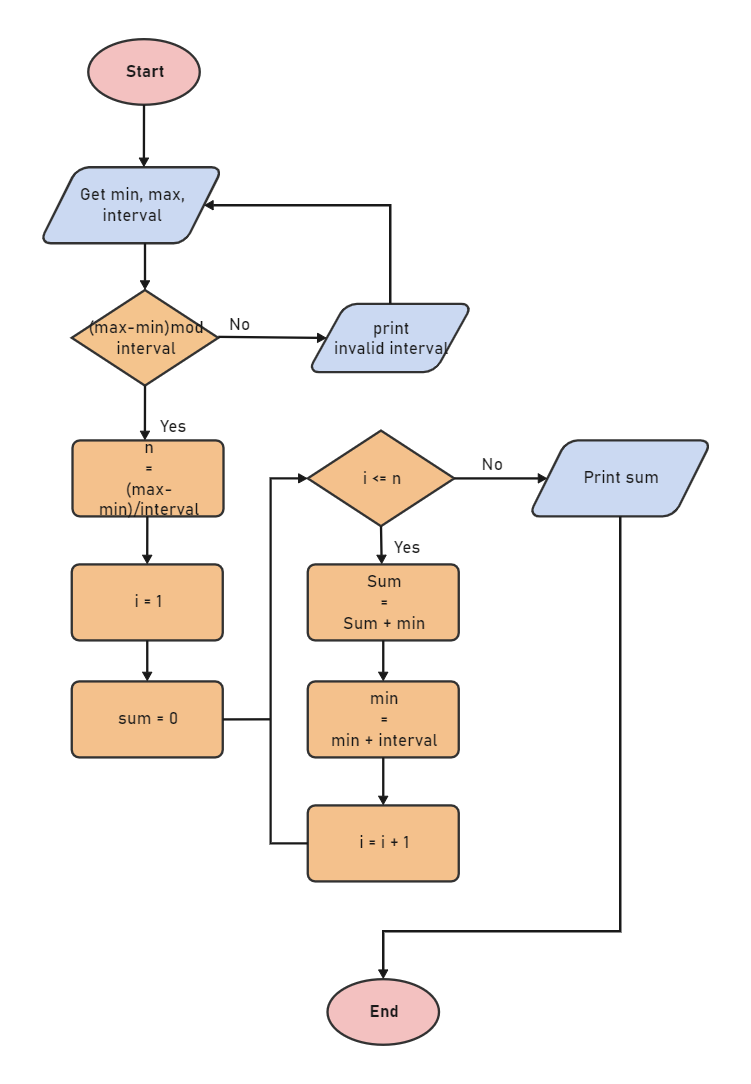


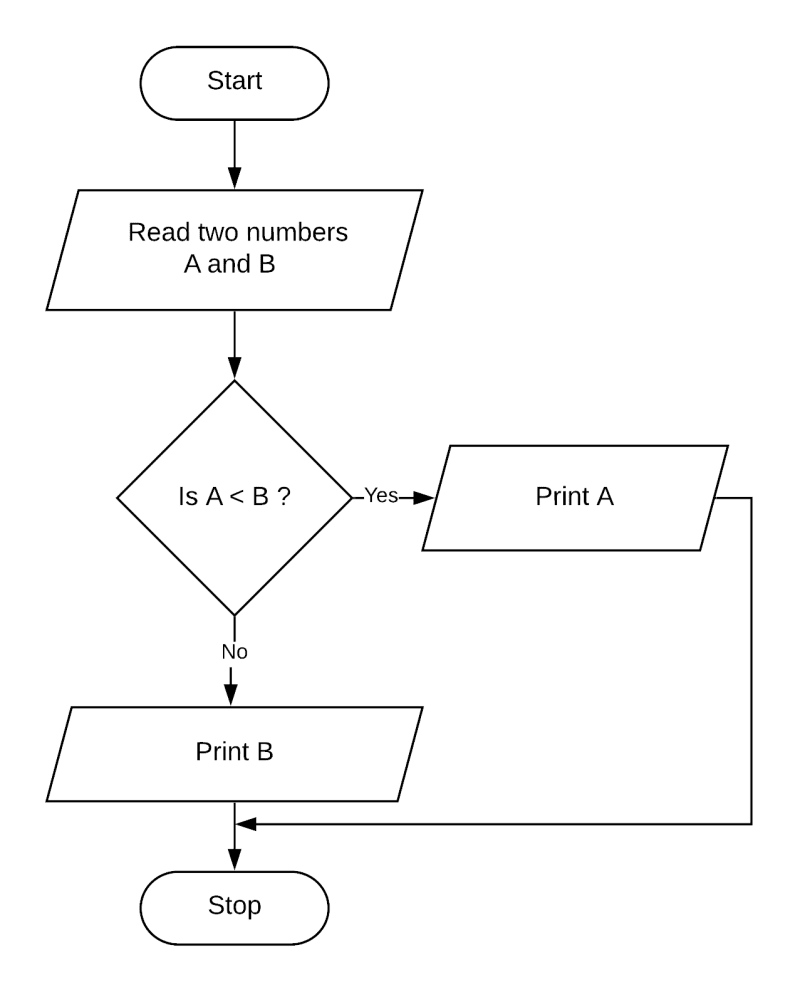
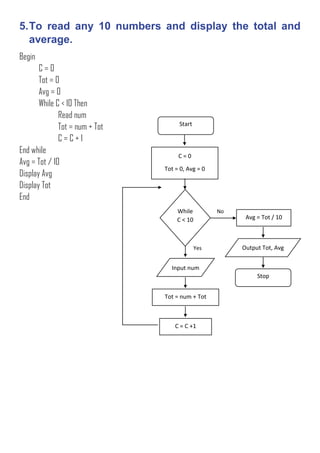


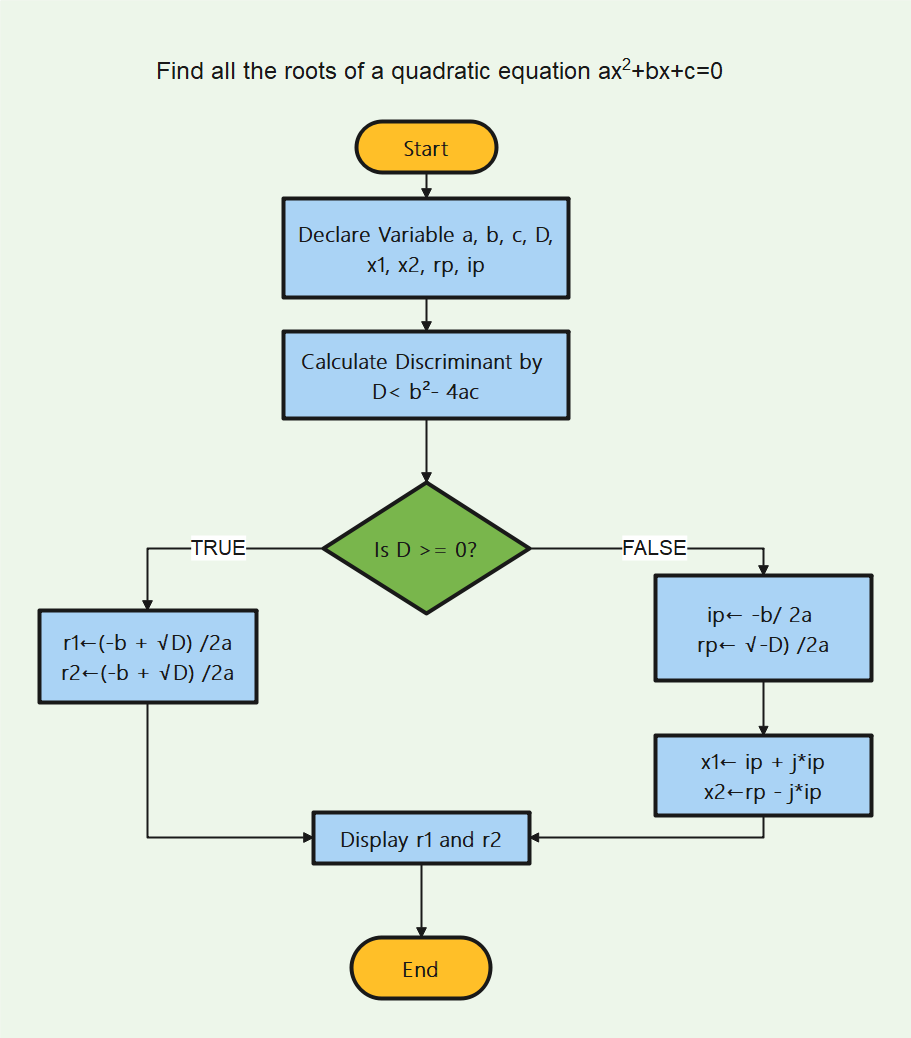
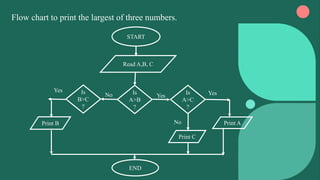
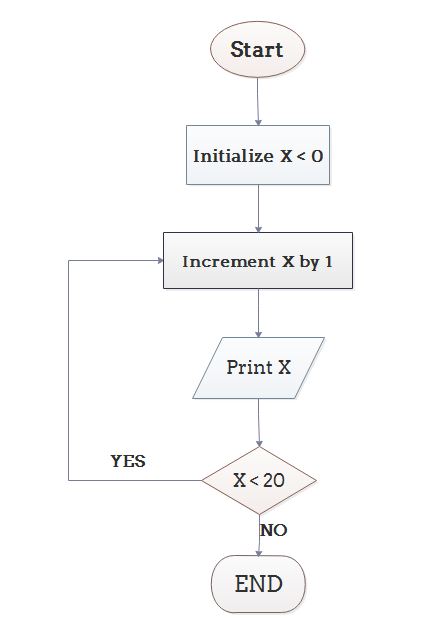
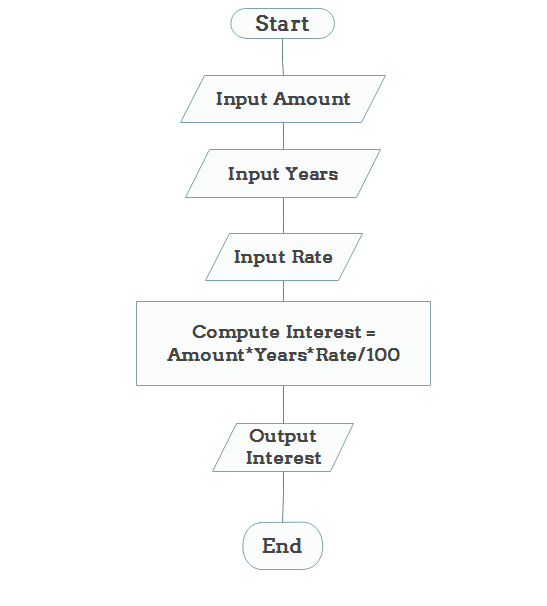
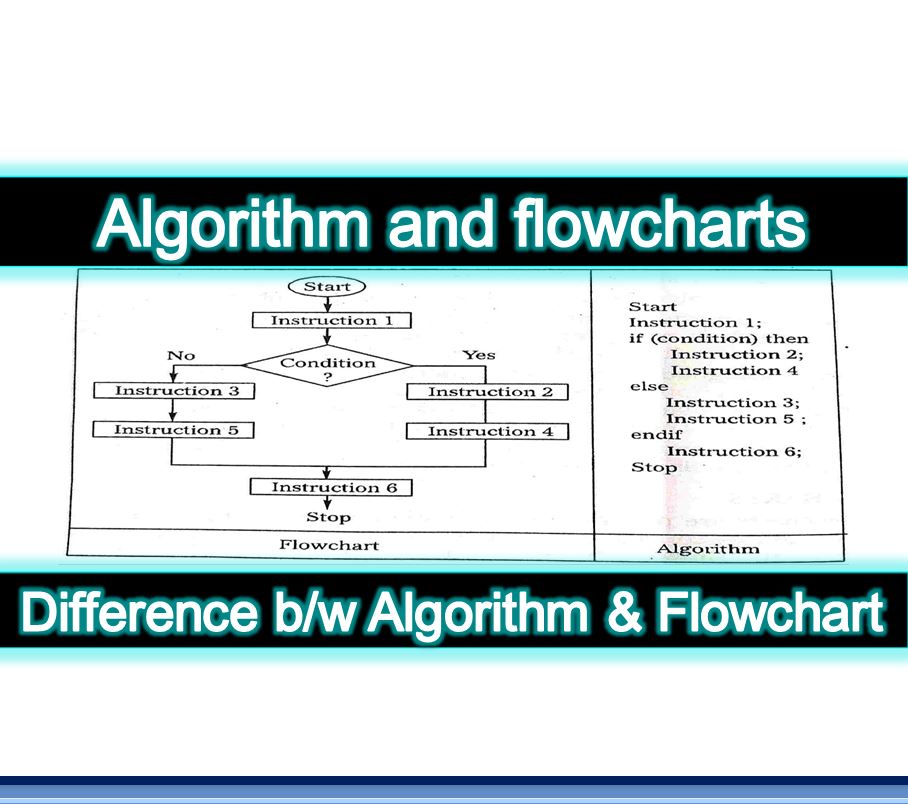


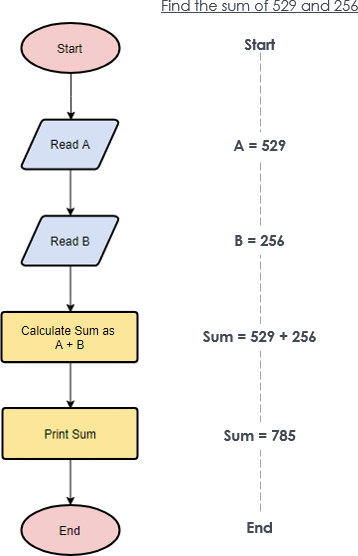
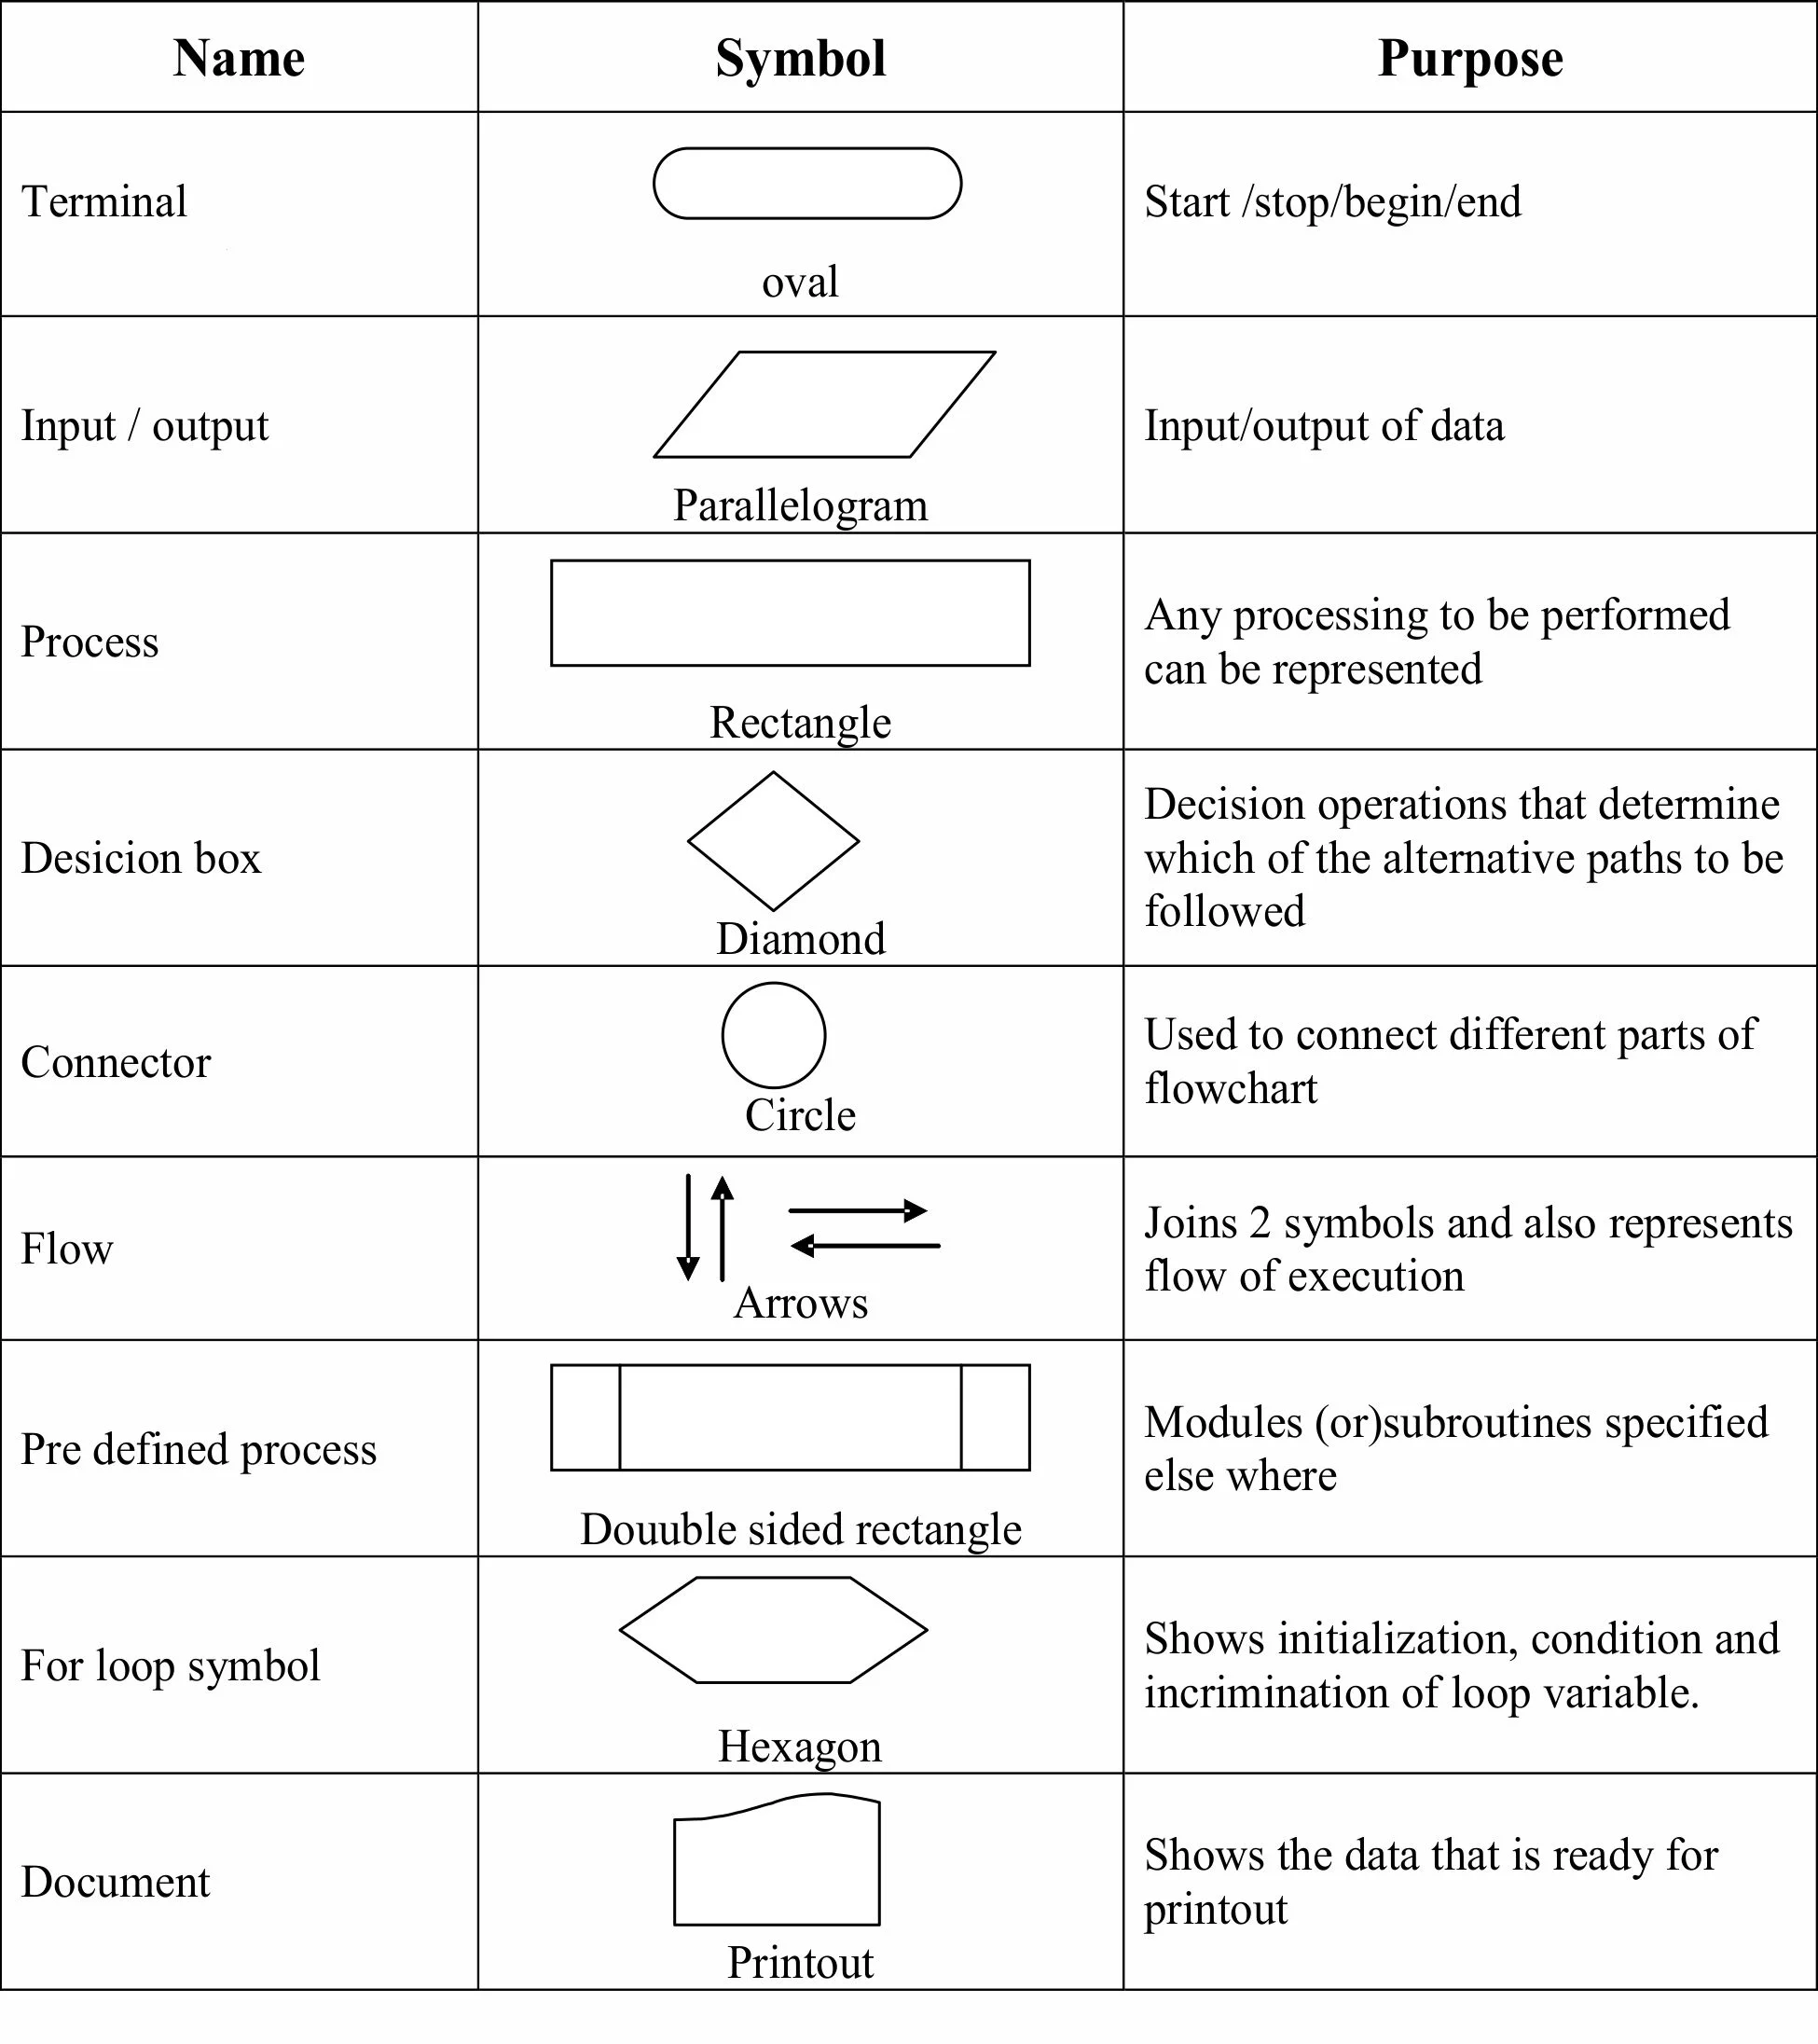
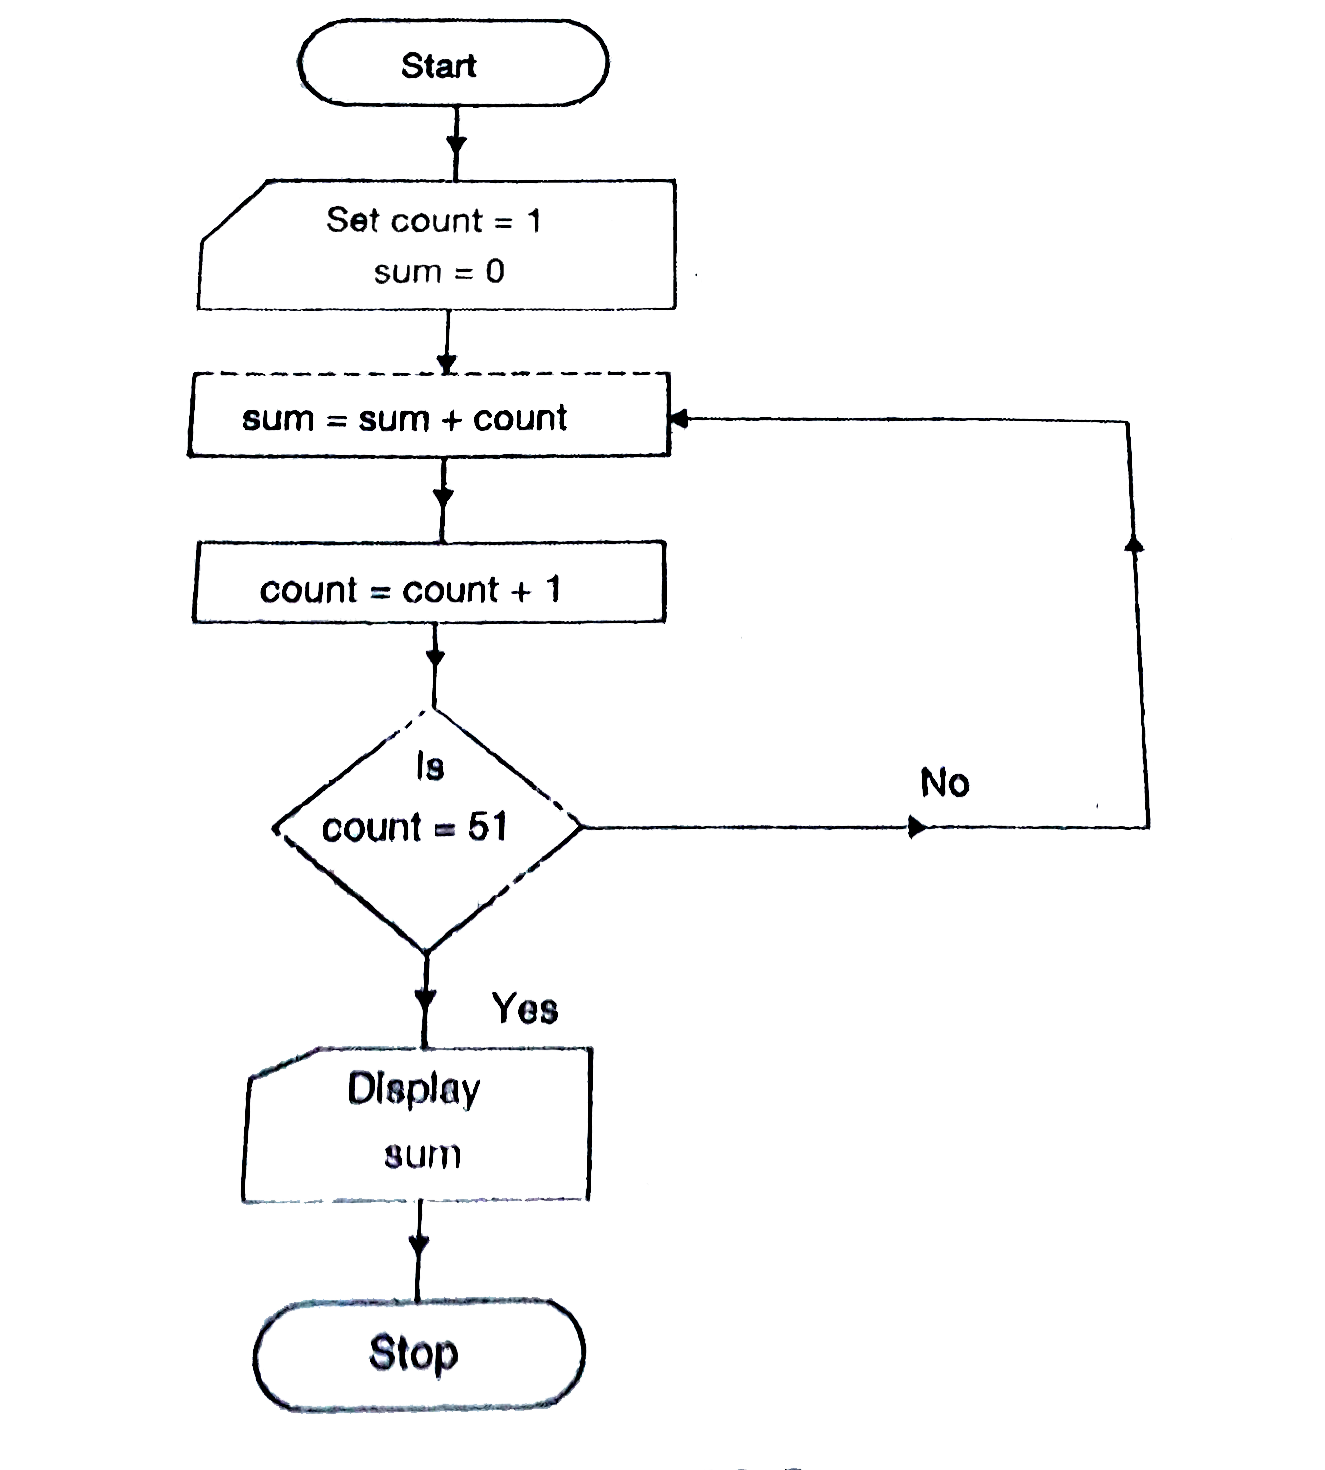
![[Solved] Algorithm and Flowchart 1. ALGORITHM AND FLOWCHART ...](https://mavink.com/images/loadingwhitetransparent.gif)


Appreciate the remarkable classic beauty of algorithm and flowchart | explained with examples | bca | sparkeasy through hundreds of timeless images. preserving the heritage of computer, digital, and electronic. ideal for traditional publications and documentation. The algorithm and flowchart | explained with examples | bca | sparkeasy collection maintains consistent quality standards across all images. Suitable for various applications including web design, social media, personal projects, and digital content creation All algorithm and flowchart | explained with examples | bca | sparkeasy images are available in high resolution with professional-grade quality, optimized for both digital and print applications, and include comprehensive metadata for easy organization and usage. Discover the perfect algorithm and flowchart | explained with examples | bca | sparkeasy images to enhance your visual communication needs. Professional licensing options accommodate both commercial and educational usage requirements. Each image in our algorithm and flowchart | explained with examples | bca | sparkeasy gallery undergoes rigorous quality assessment before inclusion. Our algorithm and flowchart | explained with examples | bca | sparkeasy database continuously expands with fresh, relevant content from skilled photographers. The algorithm and flowchart | explained with examples | bca | sparkeasy archive serves professionals, educators, and creatives across diverse industries. Instant download capabilities enable immediate access to chosen algorithm and flowchart | explained with examples | bca | sparkeasy images.