


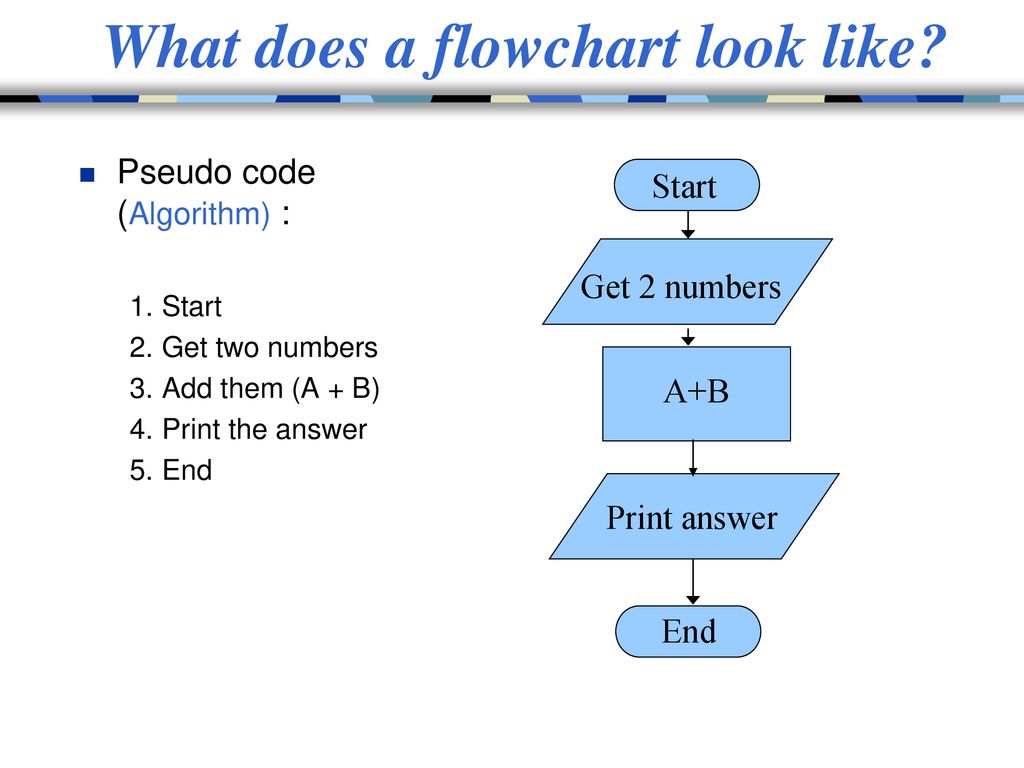


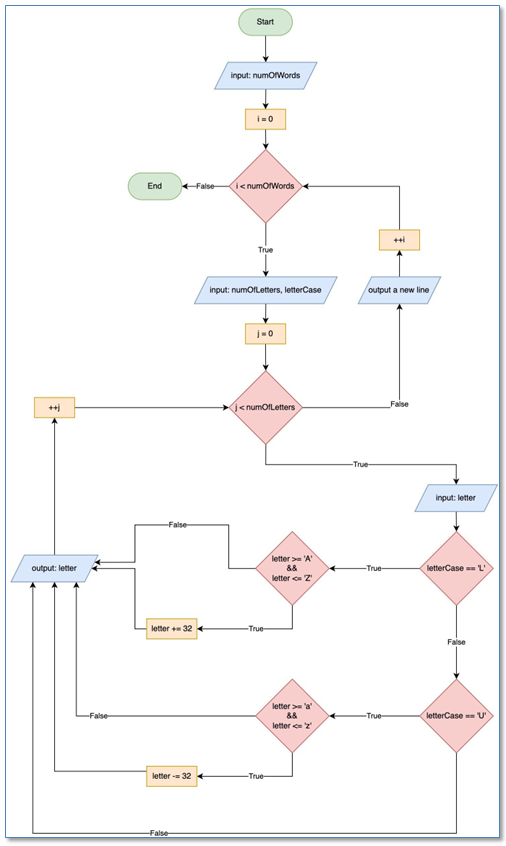
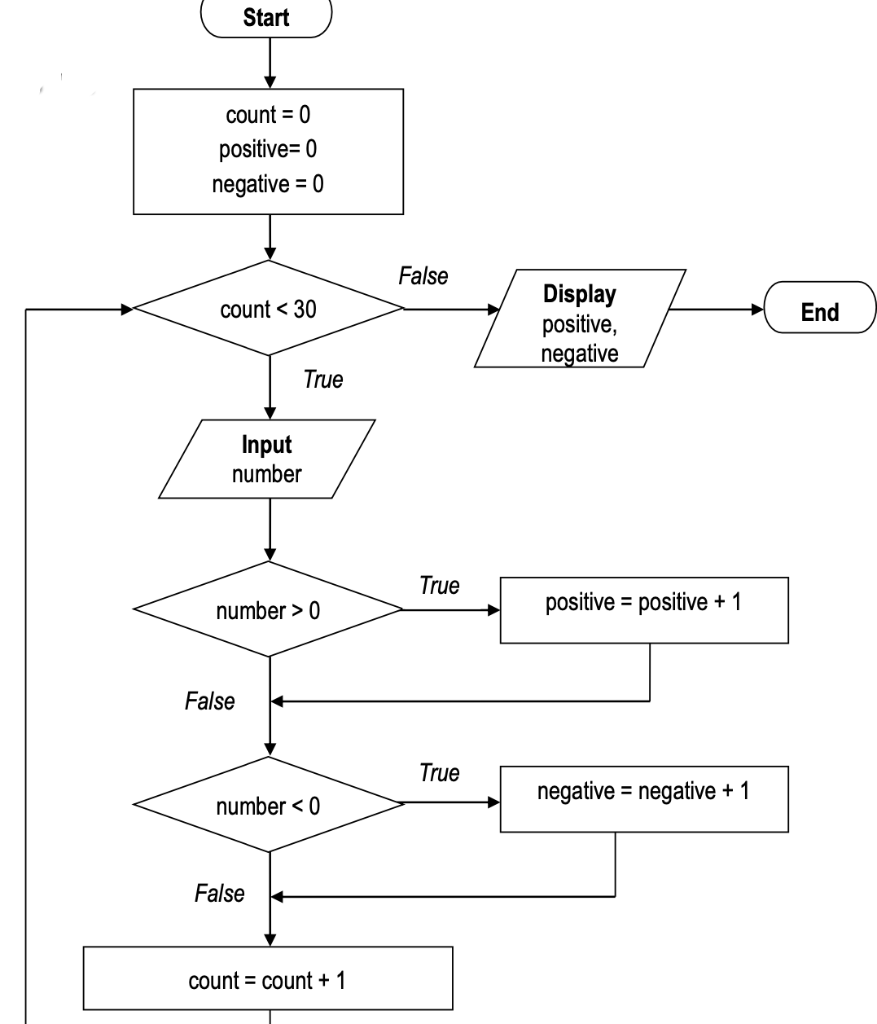
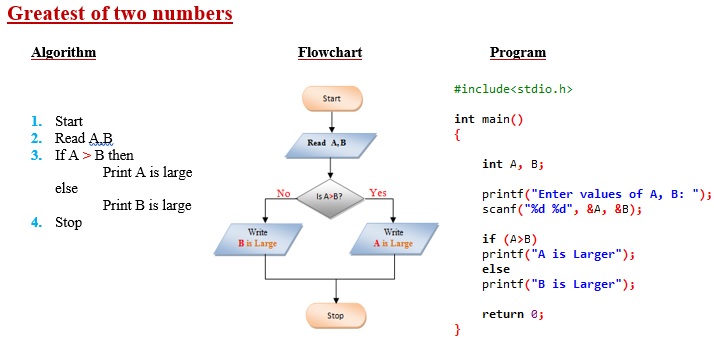


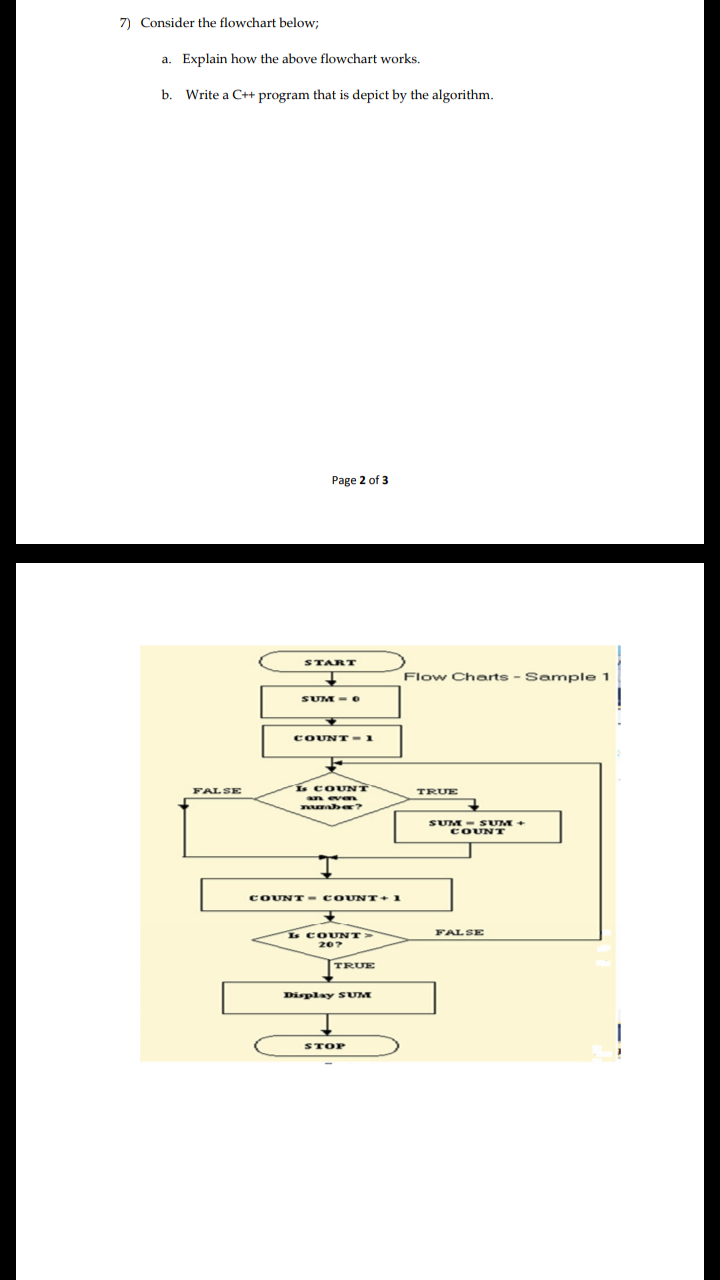


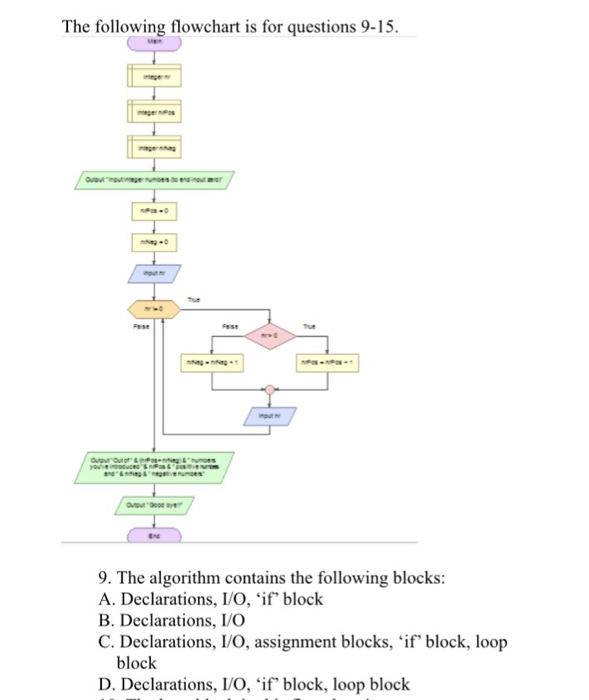


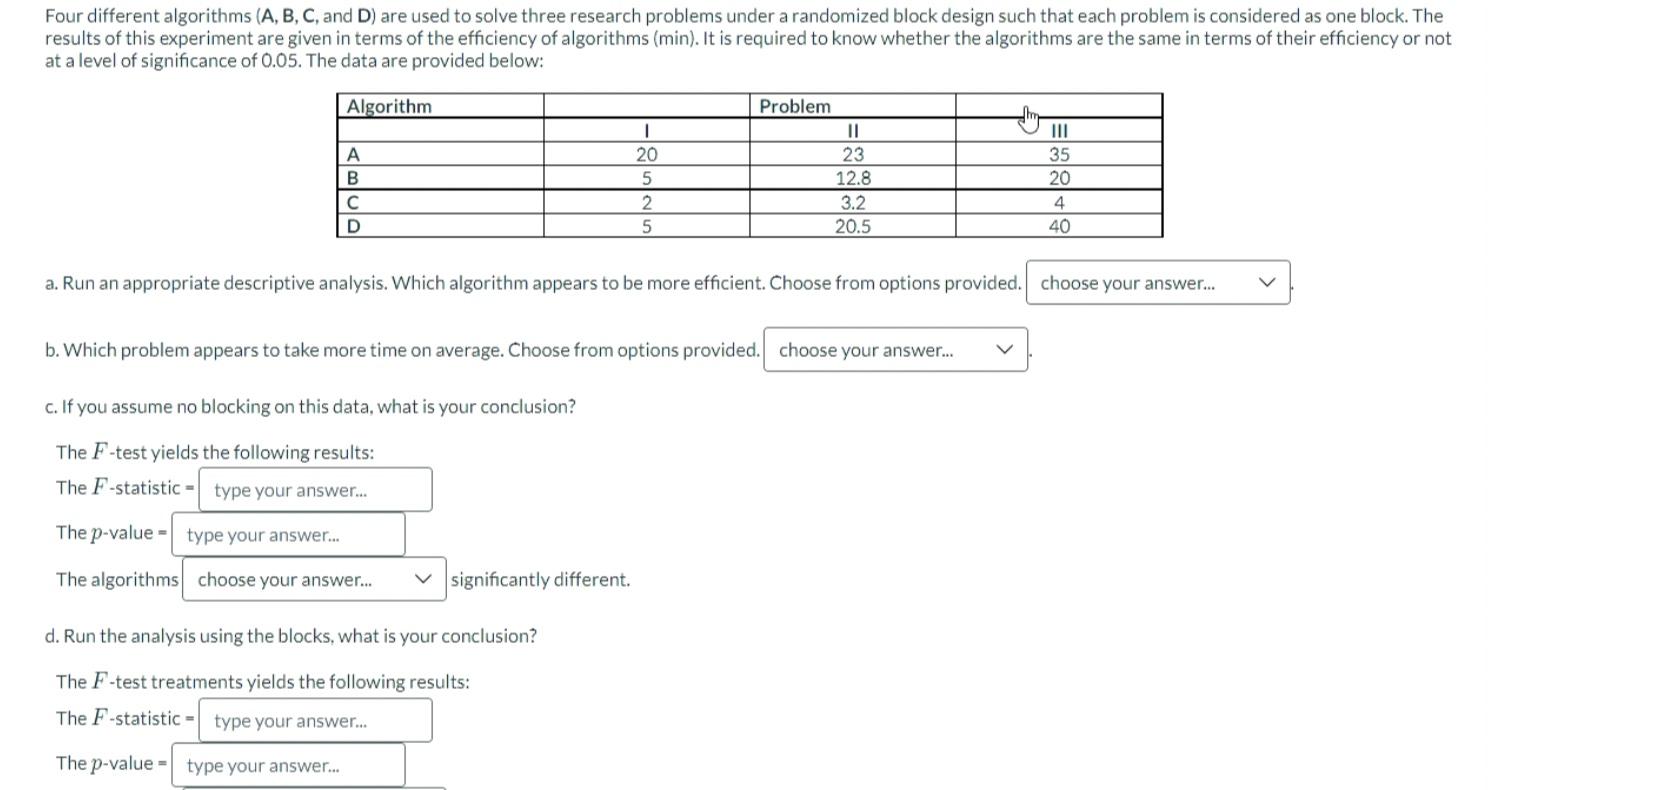


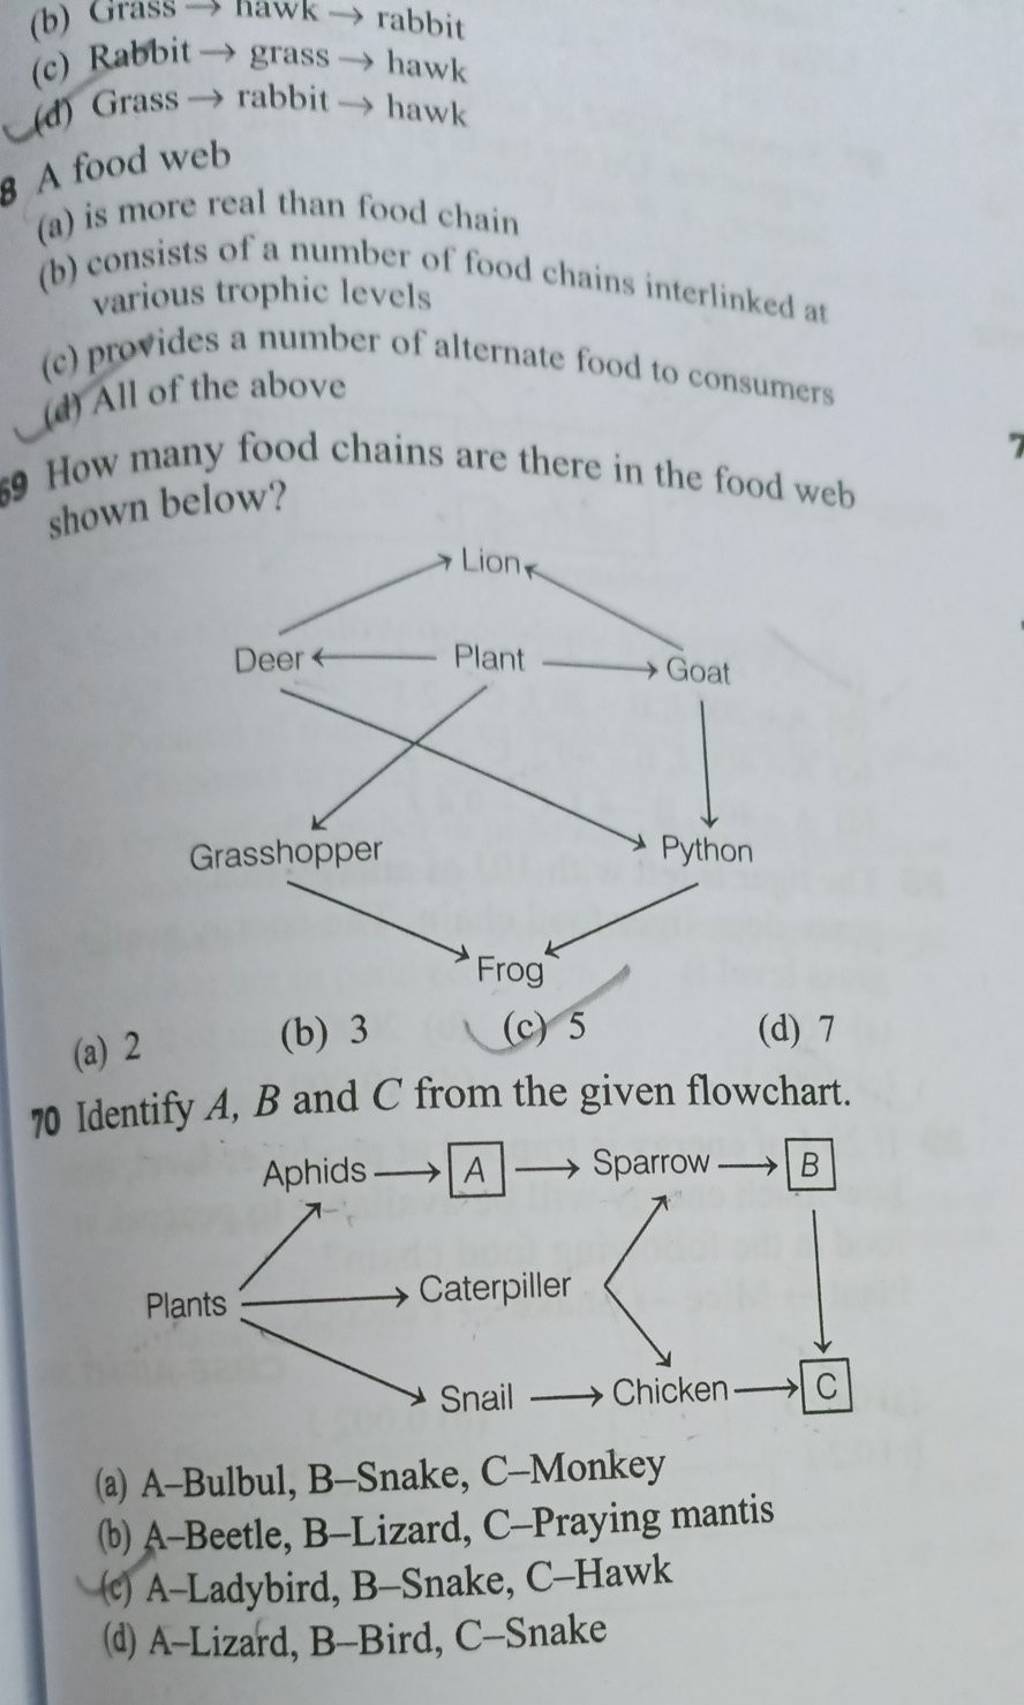


Browse our specialized algorithm and flowchart | explained with examples | bca | sparkeasy portfolio with substantial collections of expertly curated photographs. optimized for both digital and print applications across multiple platforms. meeting the demanding requirements of professional projects. Our algorithm and flowchart | explained with examples | bca | sparkeasy collection features high-quality images with excellent detail and clarity. Perfect for marketing materials, corporate presentations, advertising campaigns, and professional publications All algorithm and flowchart | explained with examples | bca | sparkeasy images are available in high resolution with professional-grade quality, optimized for both digital and print applications, and include comprehensive metadata for easy organization and usage. Professional photographers and designers trust our algorithm and flowchart | explained with examples | bca | sparkeasy images for their consistent quality and technical excellence. Our algorithm and flowchart | explained with examples | bca | sparkeasy database continuously expands with fresh, relevant content from skilled photographers. Cost-effective licensing makes professional algorithm and flowchart | explained with examples | bca | sparkeasy photography accessible to all budgets. Multiple resolution options ensure optimal performance across different platforms and applications. Comprehensive tagging systems facilitate quick discovery of relevant algorithm and flowchart | explained with examples | bca | sparkeasy content. Advanced search capabilities make finding the perfect algorithm and flowchart | explained with examples | bca | sparkeasy image effortless and efficient.