


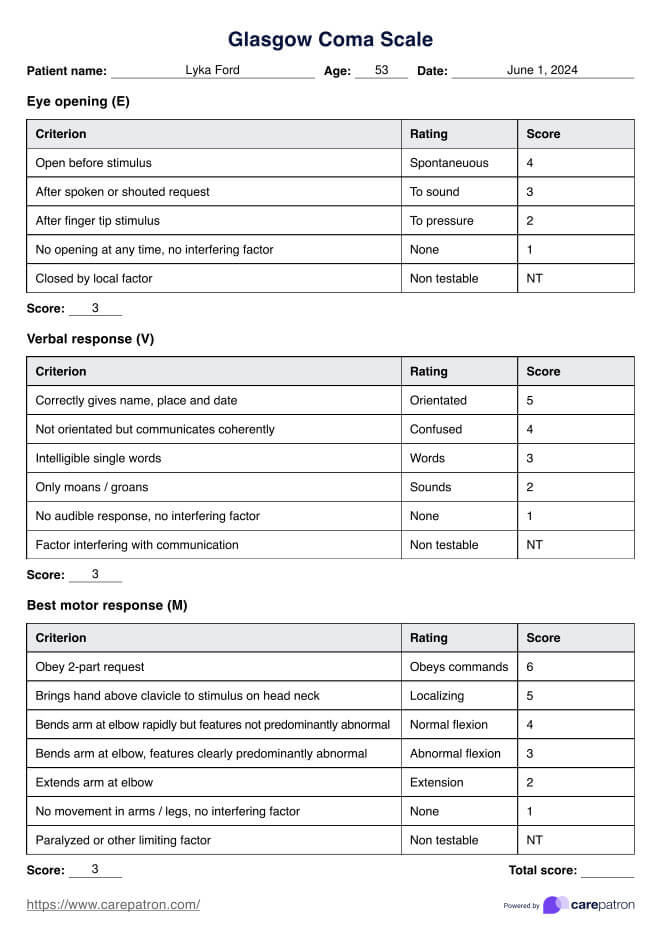
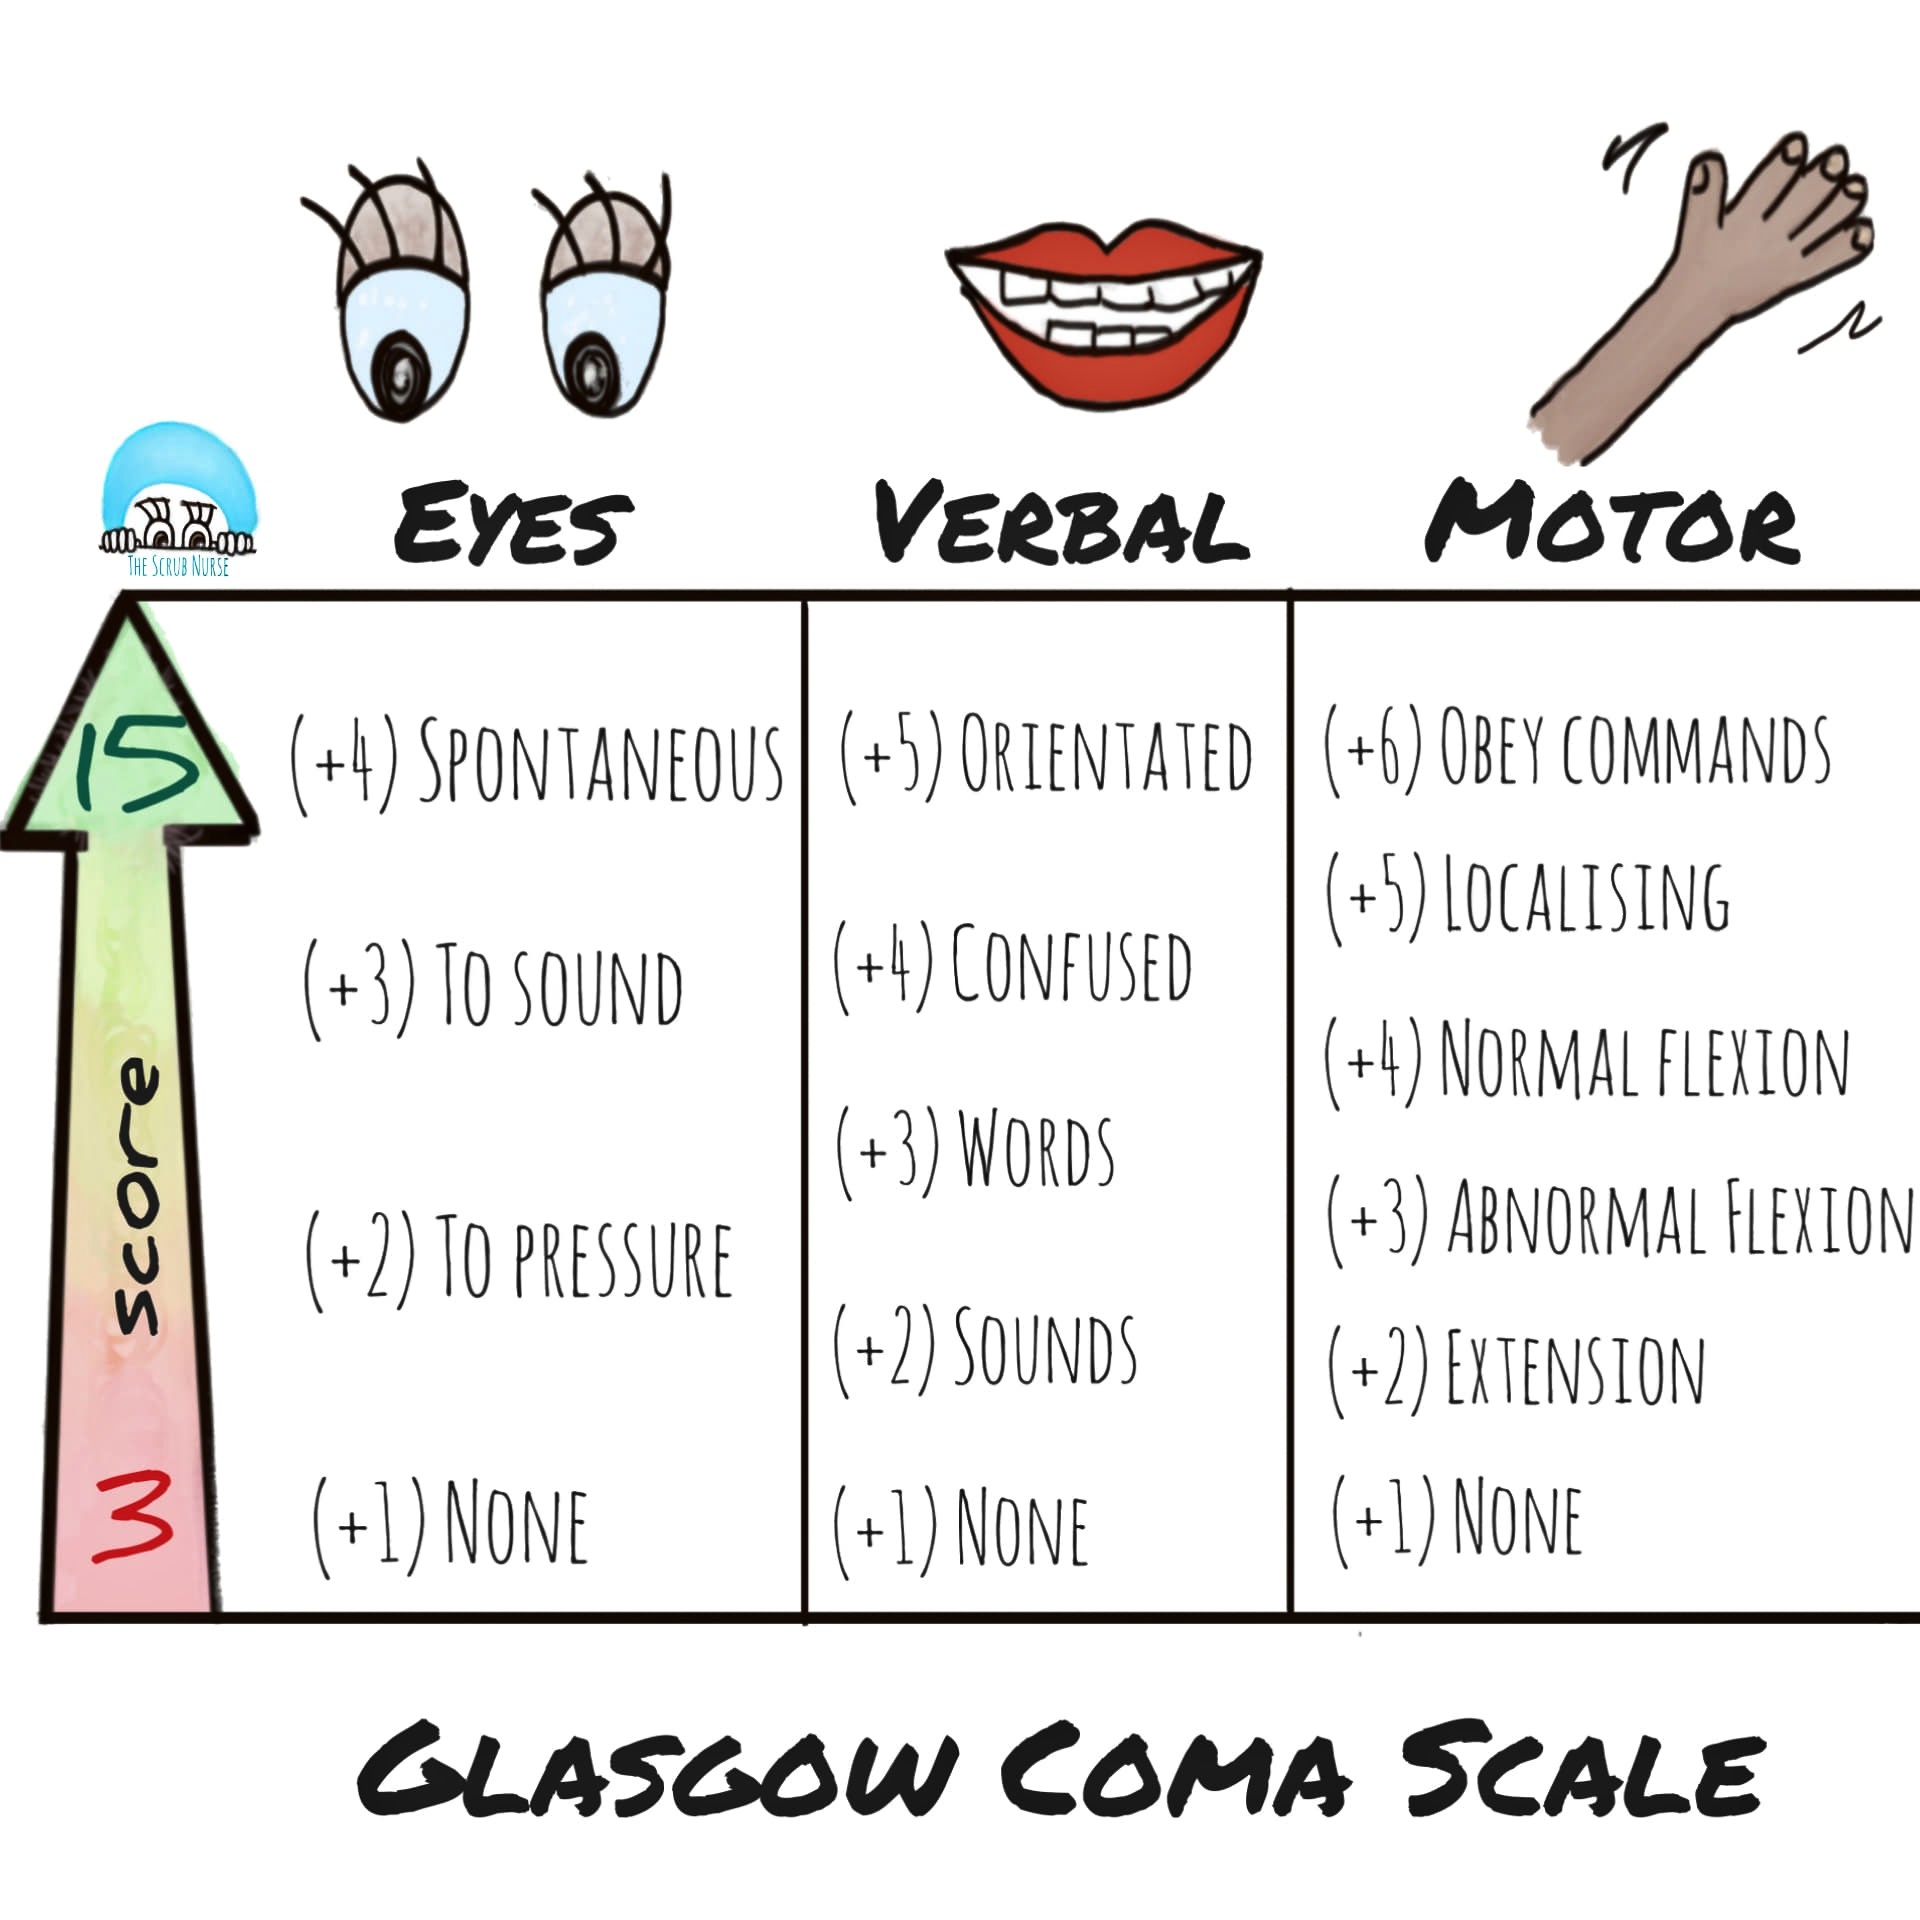
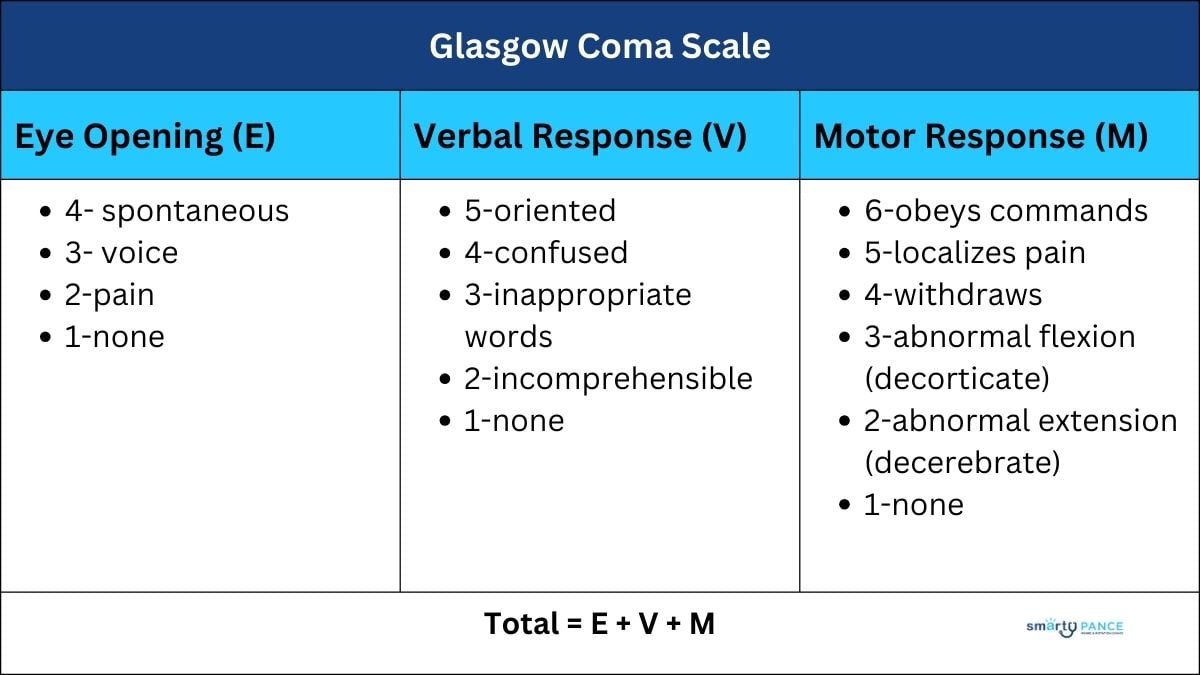
![Glasgow Coma Scale [ Free Cheat Sheet] – INGL](https://i.pinimg.com/originals/cd/f5/e7/cdf5e7313bc8667d05f84b4577cf2a73.jpg)


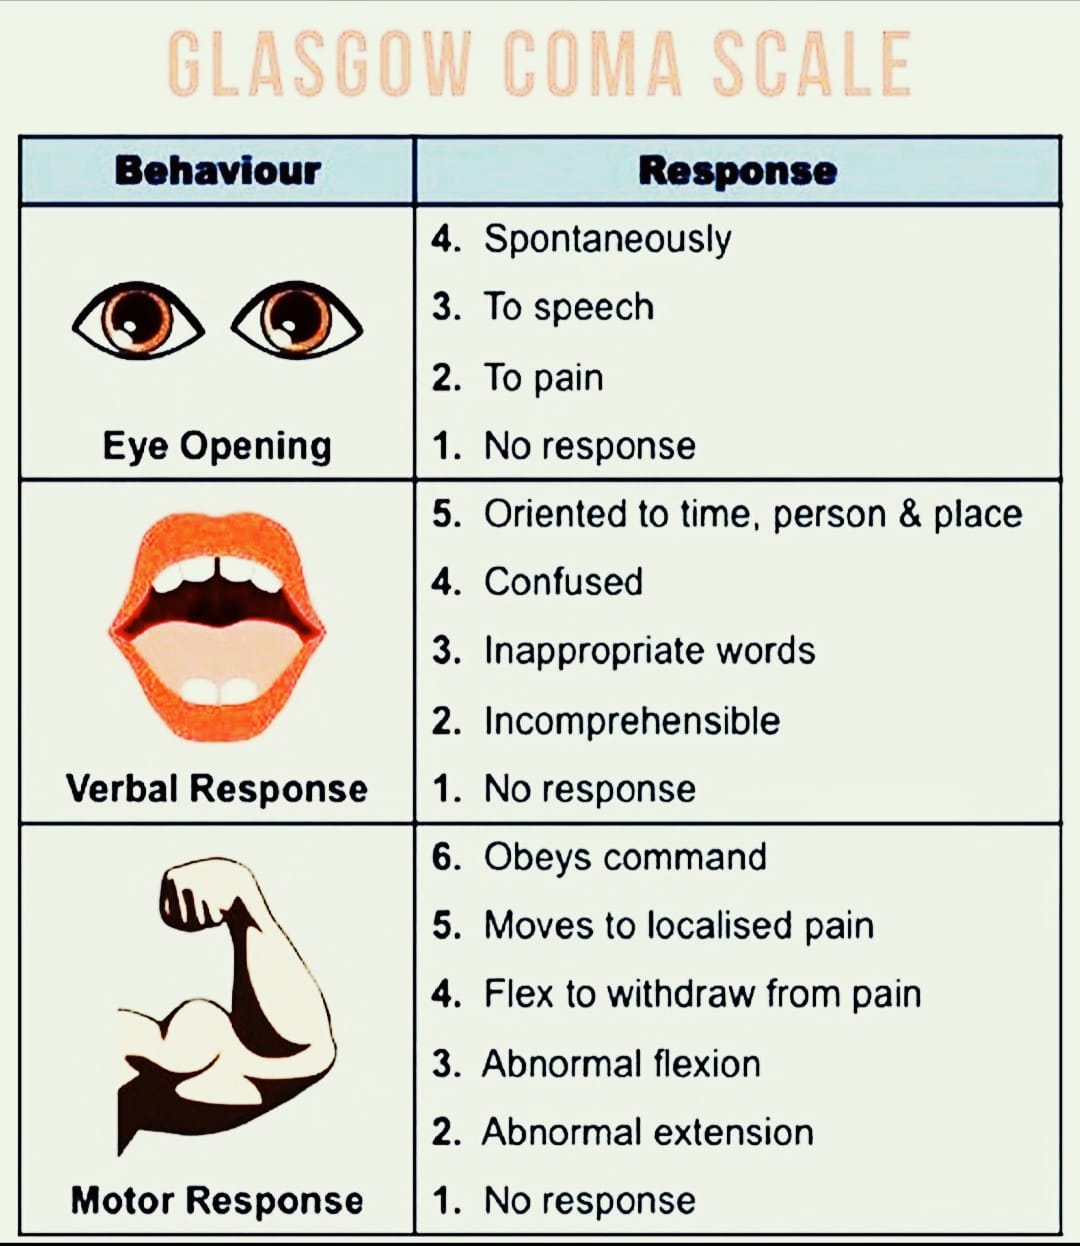
![Pediatric Glasgow Coma Scale [7] | Download Scientific Diagram](https://www.researchgate.net/publication/348752843/figure/tbl2/AS:1022341928730626@1620756718489/Pediatric-Glasgow-Coma-Scale-7.png)

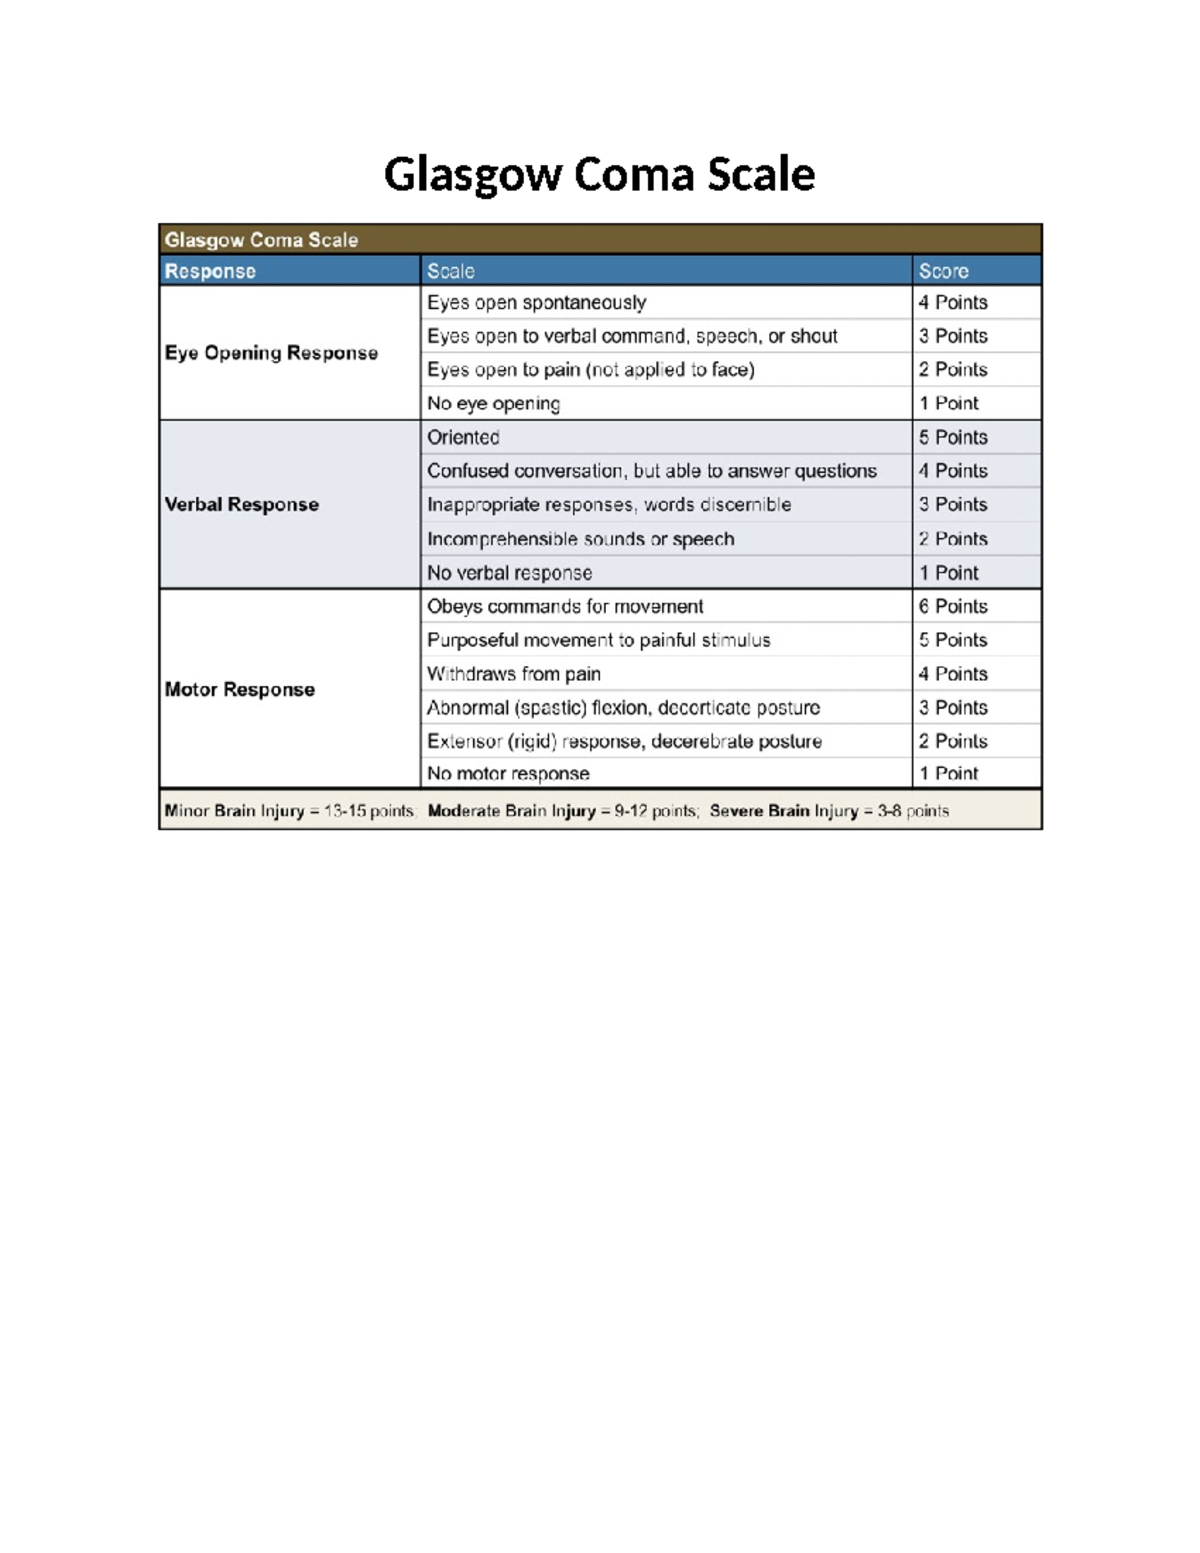
![Glasgow Coma Scale [ Free Cheat Sheet] – INGL](https://d1ipglwbj780rd.cloudfront.net/rcni/static/journals/en/aop/en.2016.e1638/graphic/en.2016.e1638_0001_tb1.jpg)

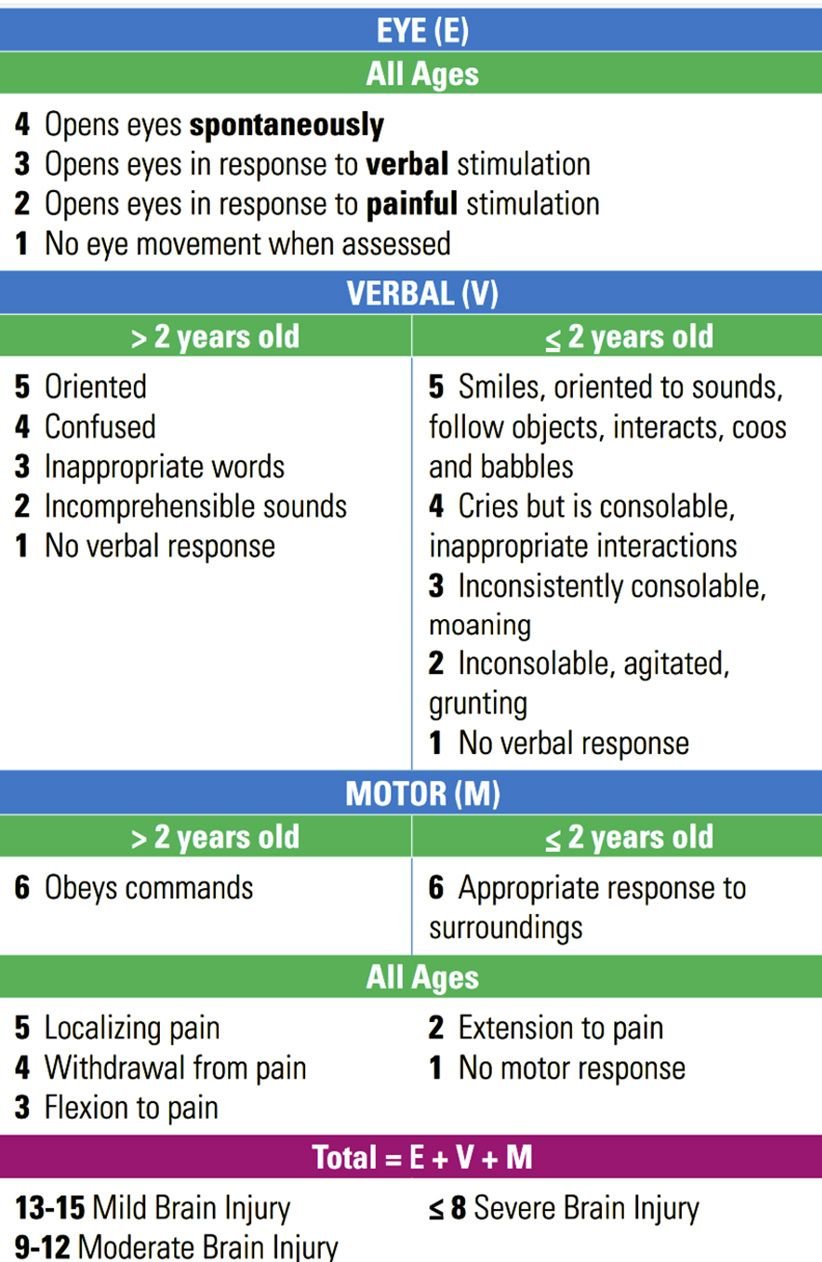
![Glasgow Coma Scale [+ Free Cheat Sheet] | Lecturio Nursing](https://cdn.lecturio.com/assets/Nursing_CS_Glasgow-Coma-Scale-1.jpg)


![Glasgow Coma Scale | Made Easy [Mnemonic] #emt #nursing - YouTube](https://i.ytimg.com/vi/v9UH6BKa8no/maxresdefault.jpg)


Experience the excitement of glasgow coma scale explained | the bmj with our extensive gallery of countless images. capturing the essence of computer, digital, and electronic. ideal for travel bloggers and adventure photographers. Discover high-resolution glasgow coma scale explained | the bmj images optimized for various applications. Suitable for various applications including web design, social media, personal projects, and digital content creation All glasgow coma scale explained | the bmj images are available in high resolution with professional-grade quality, optimized for both digital and print applications, and include comprehensive metadata for easy organization and usage. Our glasgow coma scale explained | the bmj gallery offers diverse visual resources to bring your ideas to life. Advanced search capabilities make finding the perfect glasgow coma scale explained | the bmj image effortless and efficient. Diverse style options within the glasgow coma scale explained | the bmj collection suit various aesthetic preferences. Professional licensing options accommodate both commercial and educational usage requirements. Our glasgow coma scale explained | the bmj database continuously expands with fresh, relevant content from skilled photographers. Comprehensive tagging systems facilitate quick discovery of relevant glasgow coma scale explained | the bmj content. Each image in our glasgow coma scale explained | the bmj gallery undergoes rigorous quality assessment before inclusion.