


![[Solved] . °Consider a simple RL circuit below. Design a PI controller ...](https://mavink.com/images/loadingwhitetransparent.gif)


![Solved 2. [15] In the RL circuit shown in Fig. below, the | Chegg.com](https://media.cheggcdn.com/media/6d6/6d64470b-553f-457a-800d-1e7d4073f640/phpvHtkvK.png)

![[Solved]: 3. Consider the RL circuit as shown in the figure](https://media.cheggcdn.com/study/a65/a65a45b0-0f4e-451e-be05-cd23327699b2/image)


![[Solved]: The circuit below shows a simple RL circuit.](https://media.cheggcdn.com/media/3df/3df04a95-bbca-4704-bf53-962ae29ad568/phpHaq58p)

![[Solved]: The current in the RL circuit shown below reaches](https://media.cheggcdn.com/media/d80/d8016ee1-e86c-40b1-8bd2-4616dba235f5/phpQVgmen)
![10. Consider the RL circuit shown in the figure below. (a) [5 pts] What ...](https://cdn.numerade.com/ask_images/0917cc5bb251413683616ced9ce7c41a.jpg)


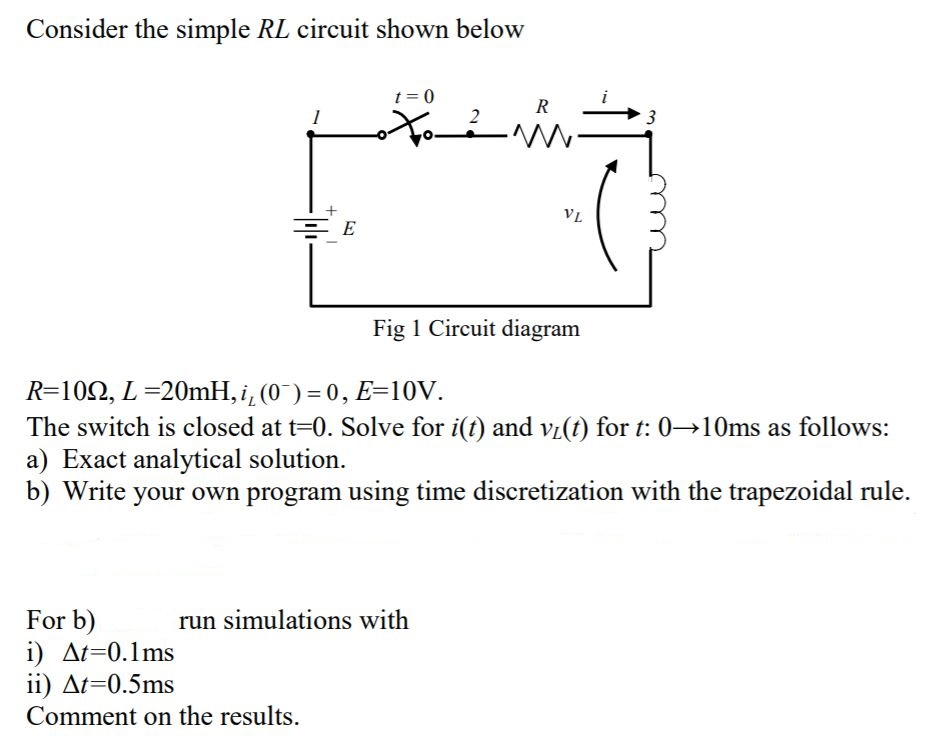
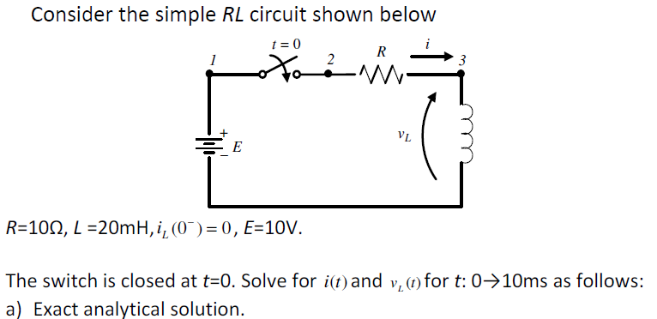
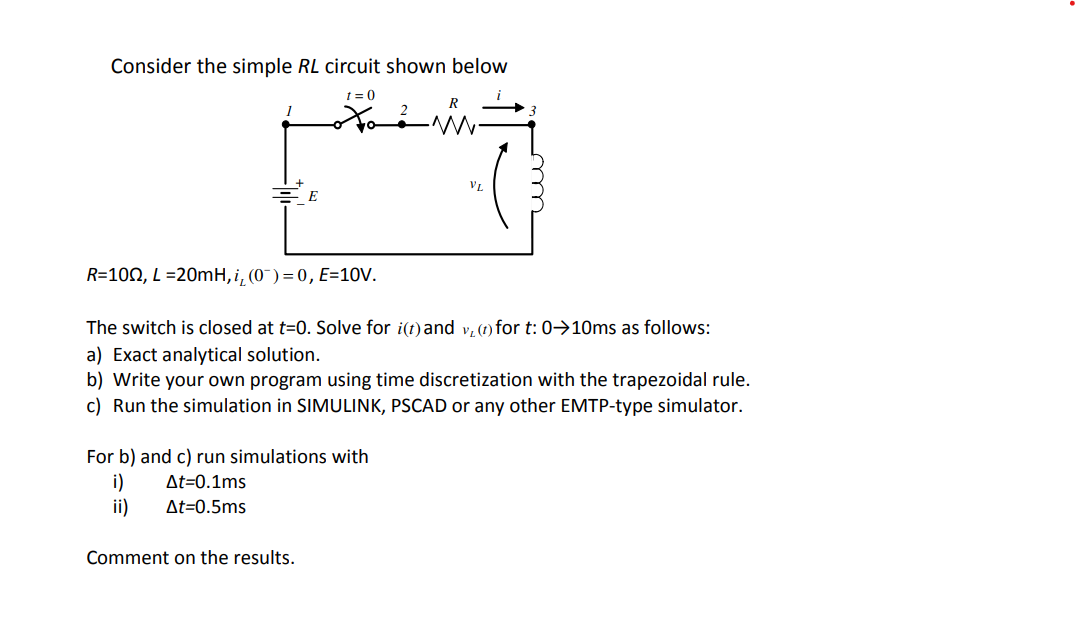
Explore the simplicity of solved consider the simple rl circuit shown below vl fig 1 through extensive collections of elegant photographs. featuring understated examples of photography, images, and pictures. ideal for clean and simple aesthetics. Our solved consider the simple rl circuit shown below vl fig 1 collection features high-quality images with excellent detail and clarity. Suitable for various applications including web design, social media, personal projects, and digital content creation All solved consider the simple rl circuit shown below vl fig 1 images are available in high resolution with professional-grade quality, optimized for both digital and print applications, and include comprehensive metadata for easy organization and usage. Discover the perfect solved consider the simple rl circuit shown below vl fig 1 images to enhance your visual communication needs. Diverse style options within the solved consider the simple rl circuit shown below vl fig 1 collection suit various aesthetic preferences. Our solved consider the simple rl circuit shown below vl fig 1 database continuously expands with fresh, relevant content from skilled photographers. Each image in our solved consider the simple rl circuit shown below vl fig 1 gallery undergoes rigorous quality assessment before inclusion. The solved consider the simple rl circuit shown below vl fig 1 archive serves professionals, educators, and creatives across diverse industries.