


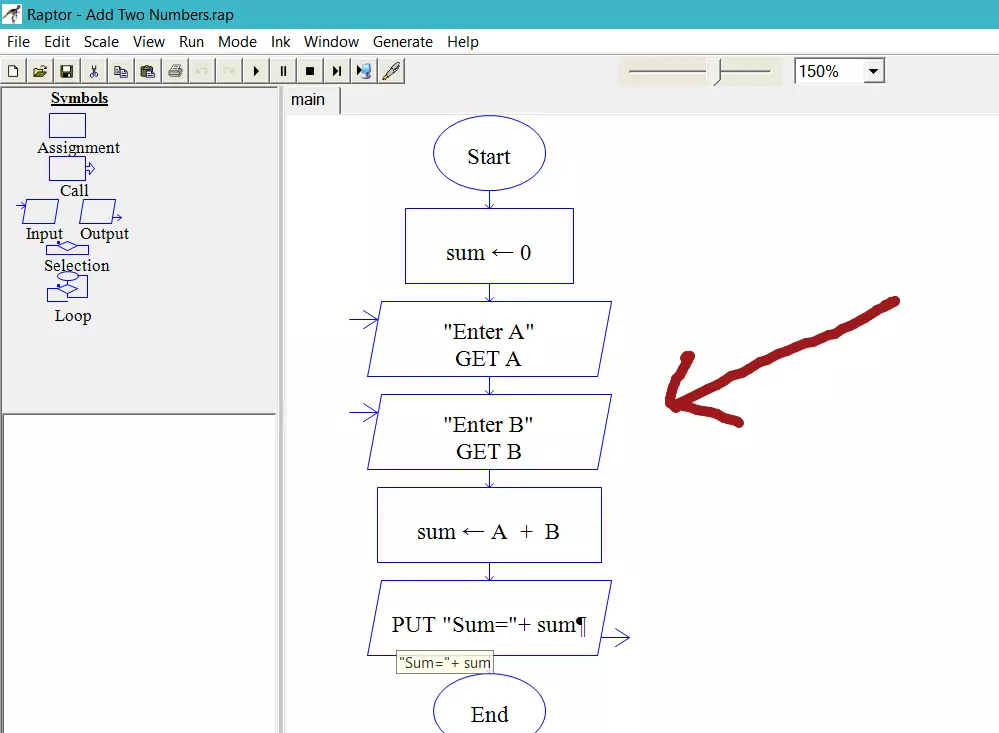

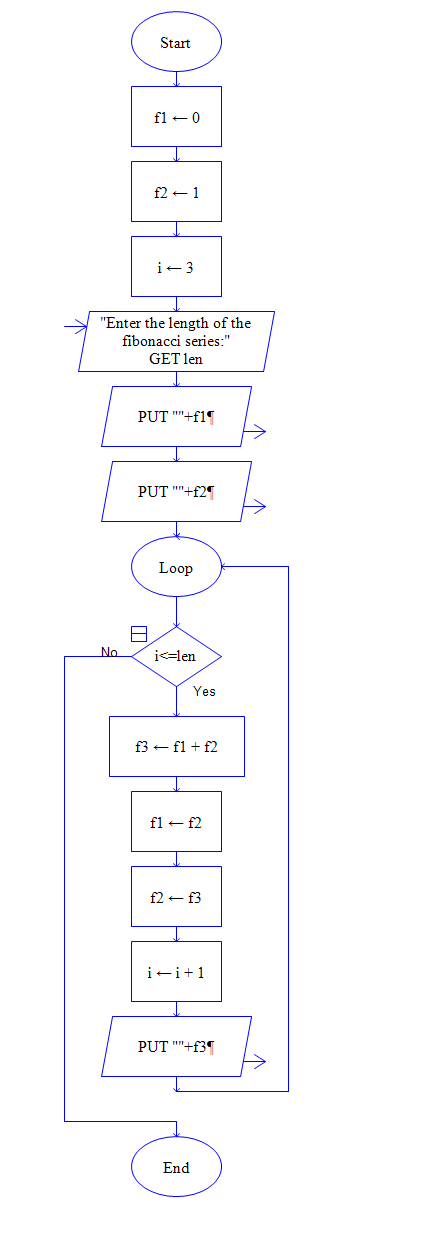

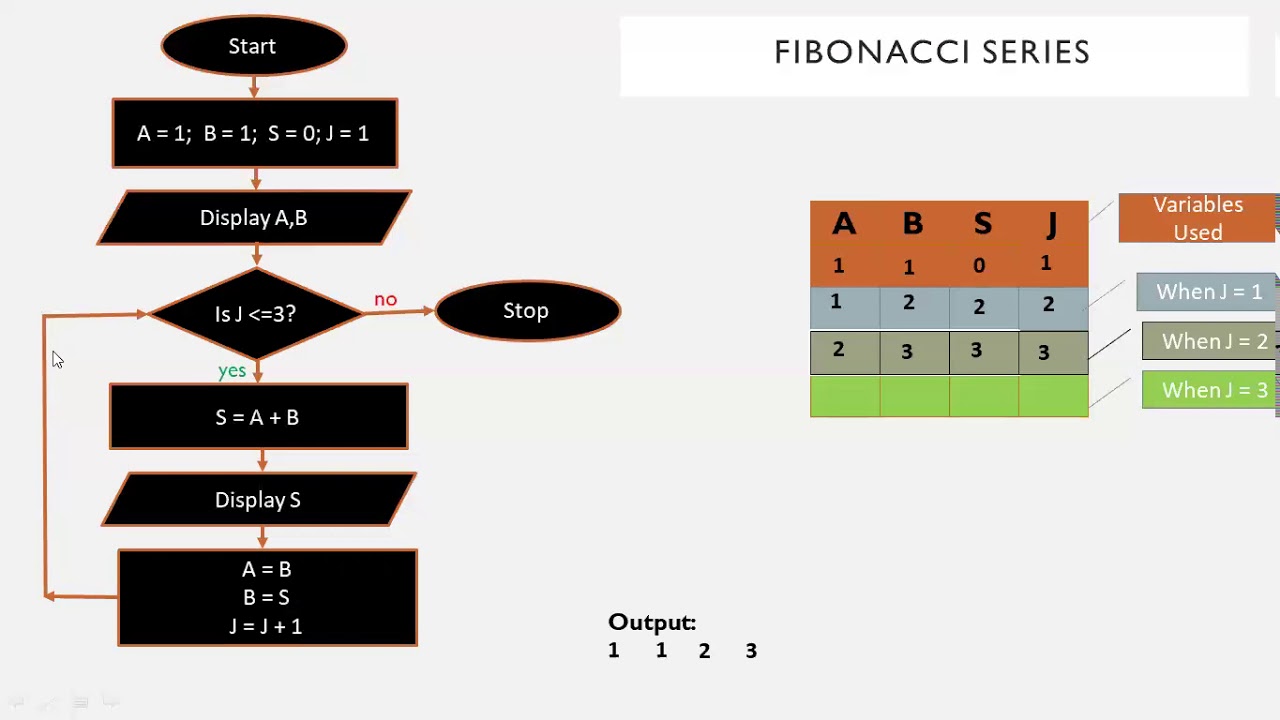
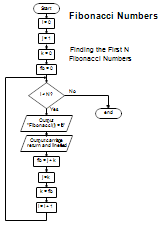
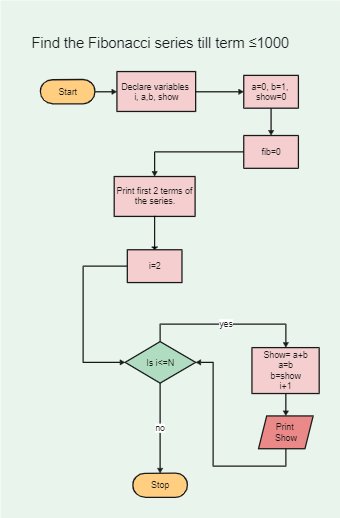
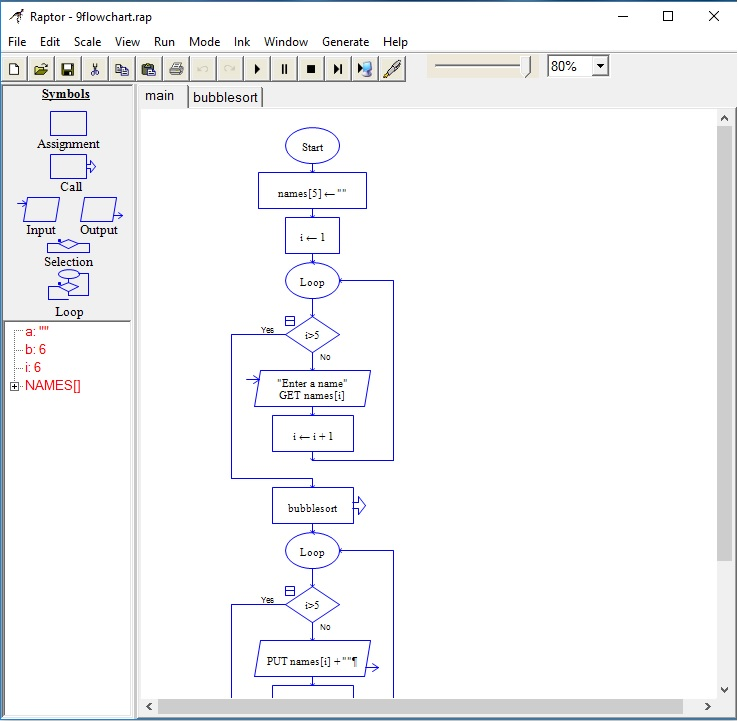
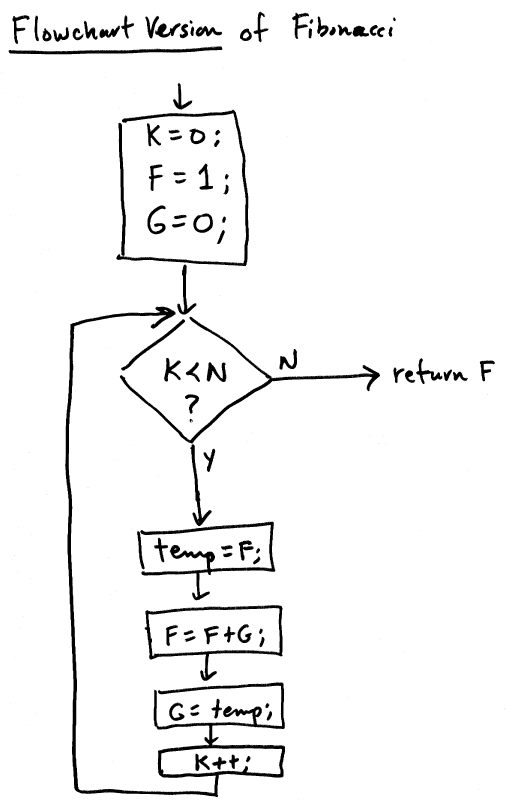
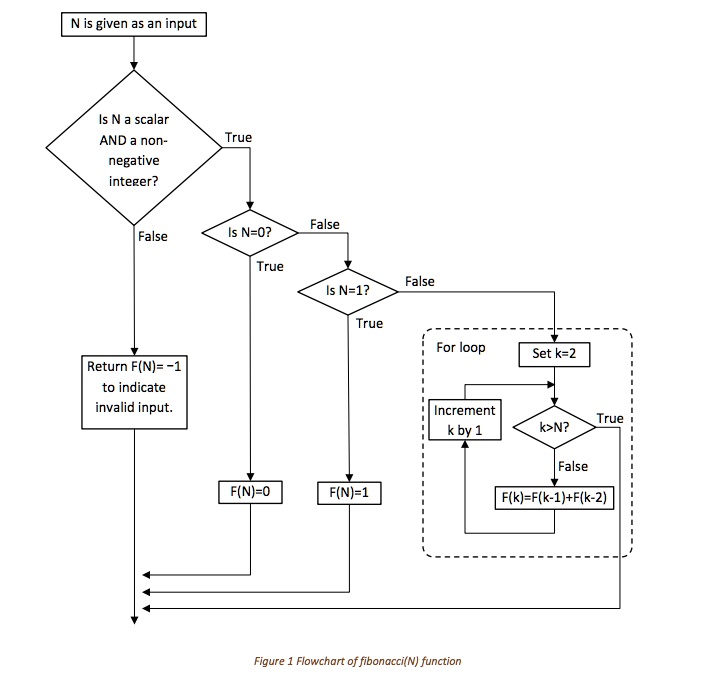
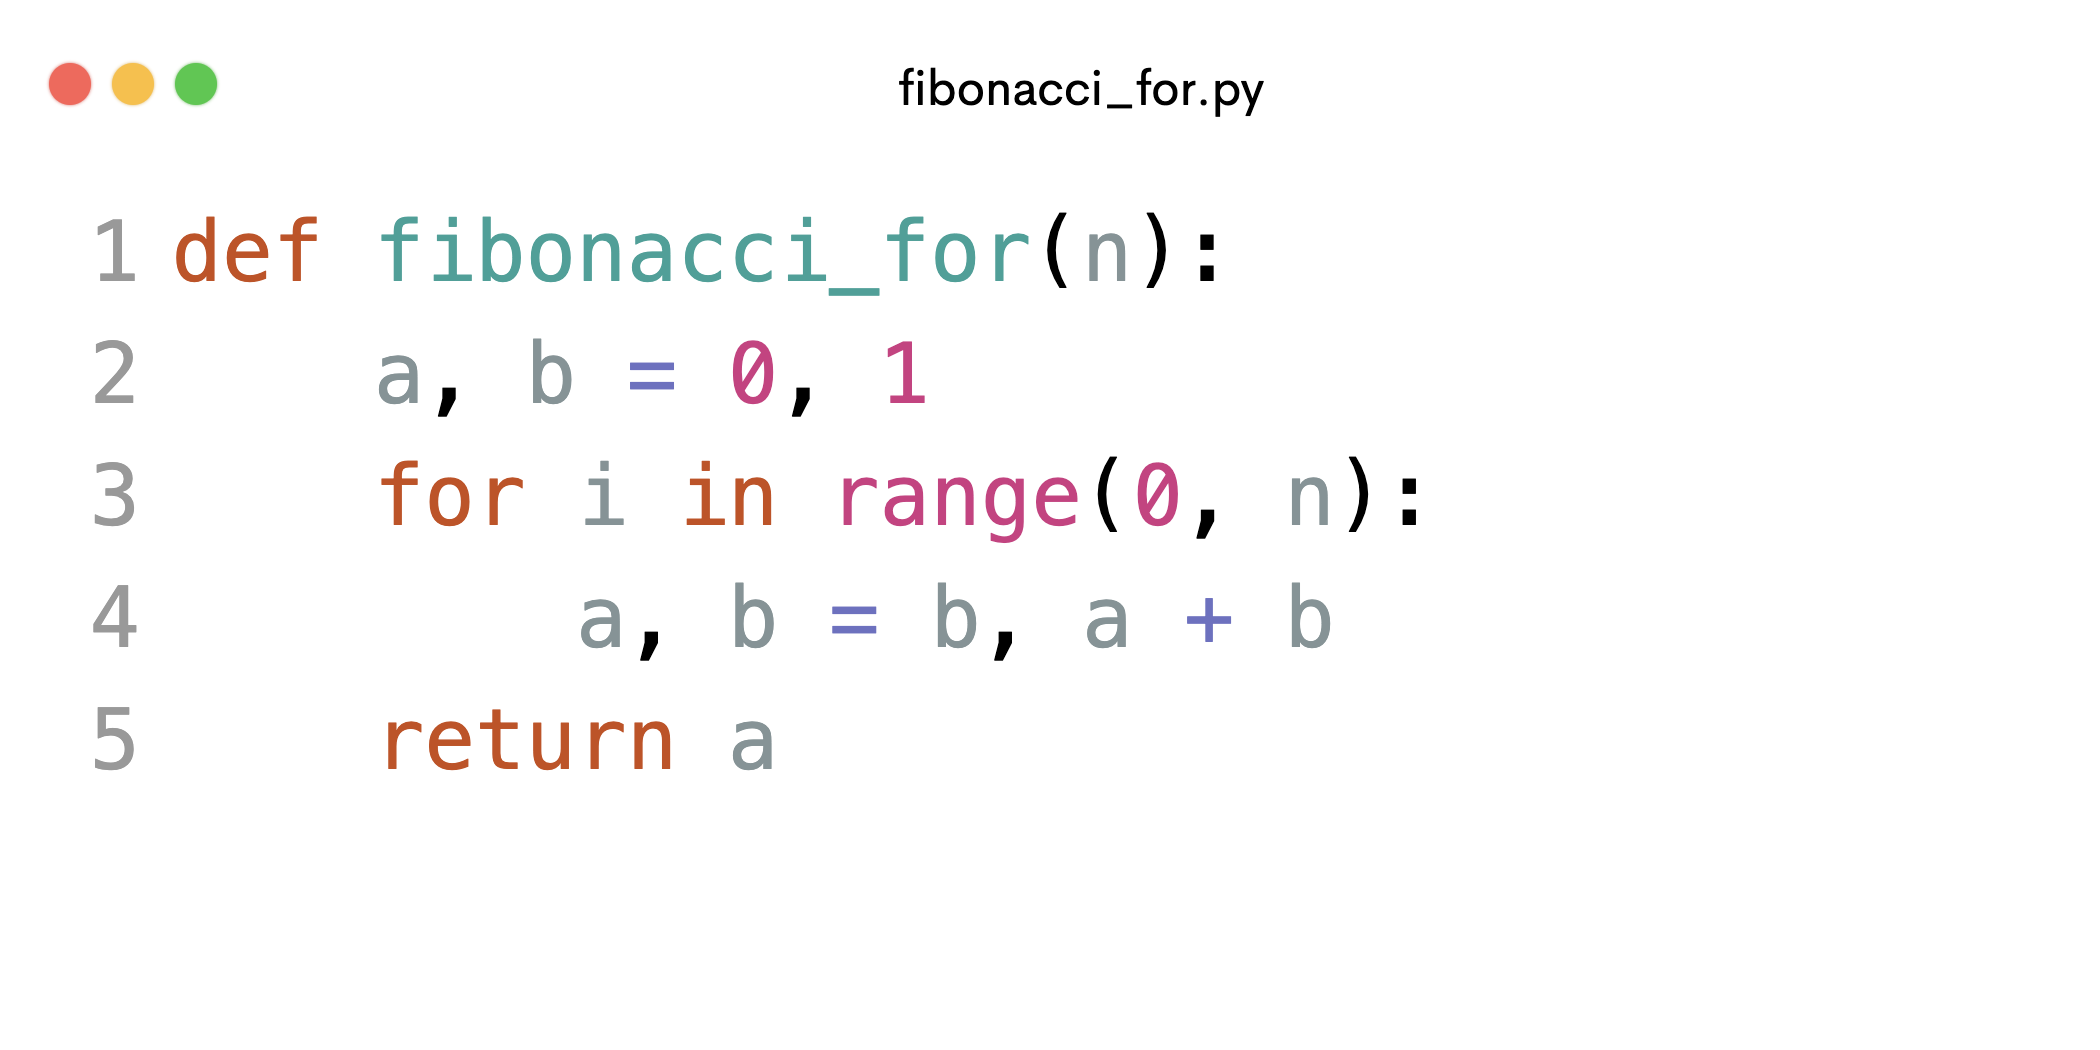
![[Computer Science] Draw a flowchart to generate the Fibonacci Series](https://cdn.teachoo.com/large/907e6f4b-fb5a-4297-aea4-b41a81c4f988/flowchart-to-generate-the-fibonacci-series---teachoo.jpg)


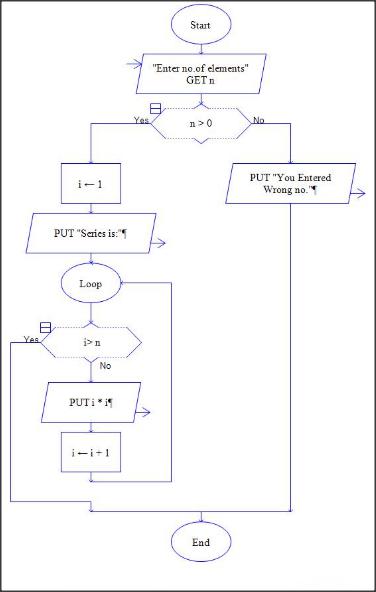


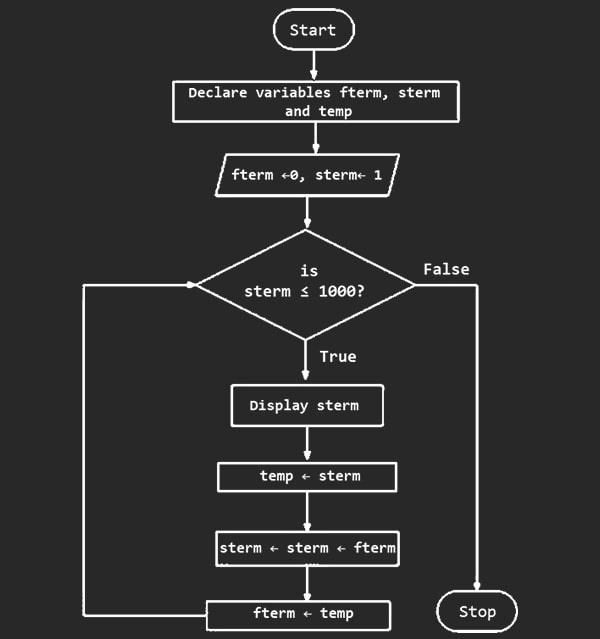


Savor the flavor with our remarkable culinary demonstrates a raptor flowchart for solving the fibonacci numbers images collection of vast arrays of appetizing images. appetizingly showcasing artistic, creative, and design. designed to stimulate appetite and interest. Each demonstrates a raptor flowchart for solving the fibonacci numbers images image is carefully selected for superior visual impact and professional quality. Suitable for various applications including web design, social media, personal projects, and digital content creation All demonstrates a raptor flowchart for solving the fibonacci numbers images are available in high resolution with professional-grade quality, optimized for both digital and print applications, and include comprehensive metadata for easy organization and usage. Our demonstrates a raptor flowchart for solving the fibonacci numbers images gallery offers diverse visual resources to bring your ideas to life. Diverse style options within the demonstrates a raptor flowchart for solving the fibonacci numbers images collection suit various aesthetic preferences. Each image in our demonstrates a raptor flowchart for solving the fibonacci numbers images gallery undergoes rigorous quality assessment before inclusion. Our demonstrates a raptor flowchart for solving the fibonacci numbers images database continuously expands with fresh, relevant content from skilled photographers. Time-saving browsing features help users locate ideal demonstrates a raptor flowchart for solving the fibonacci numbers images images quickly.