


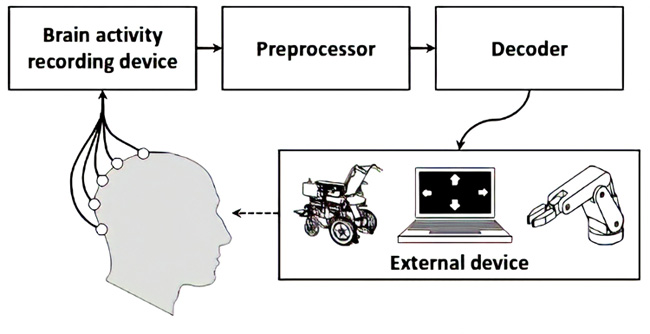
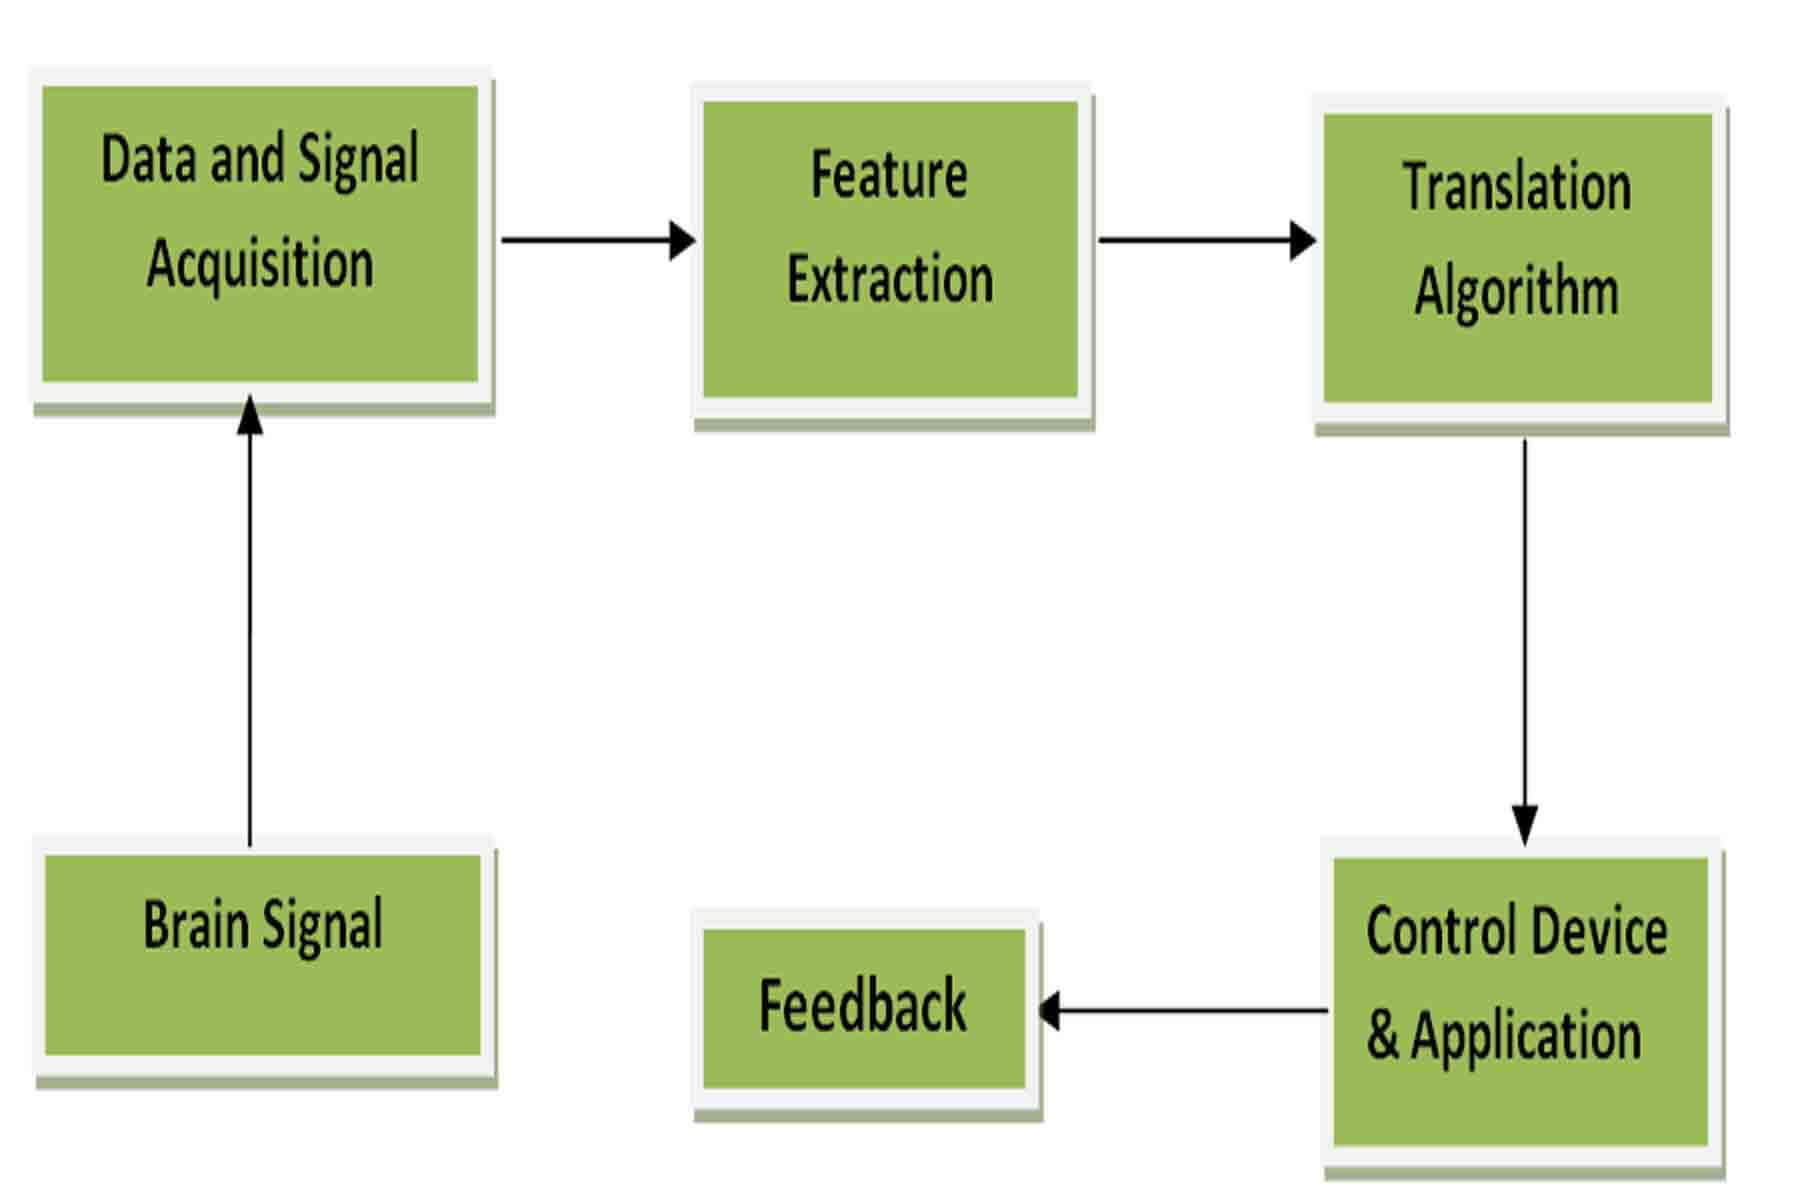
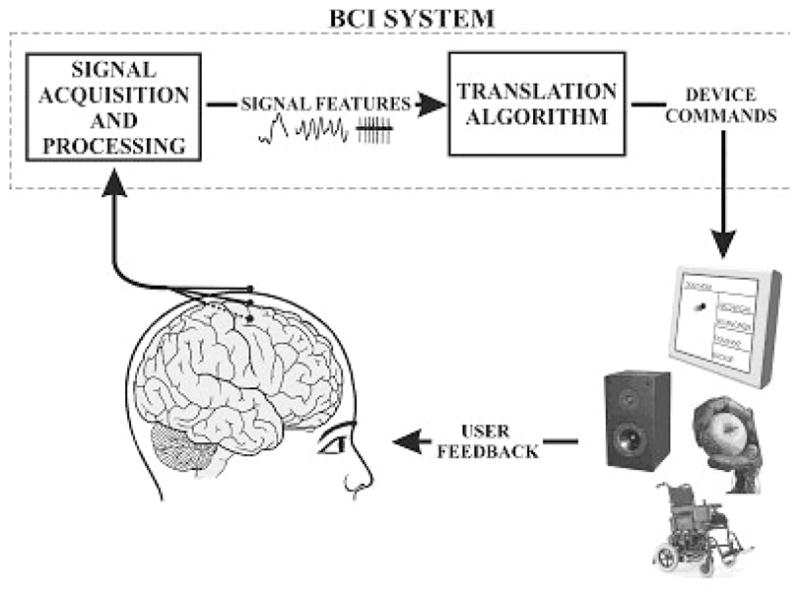
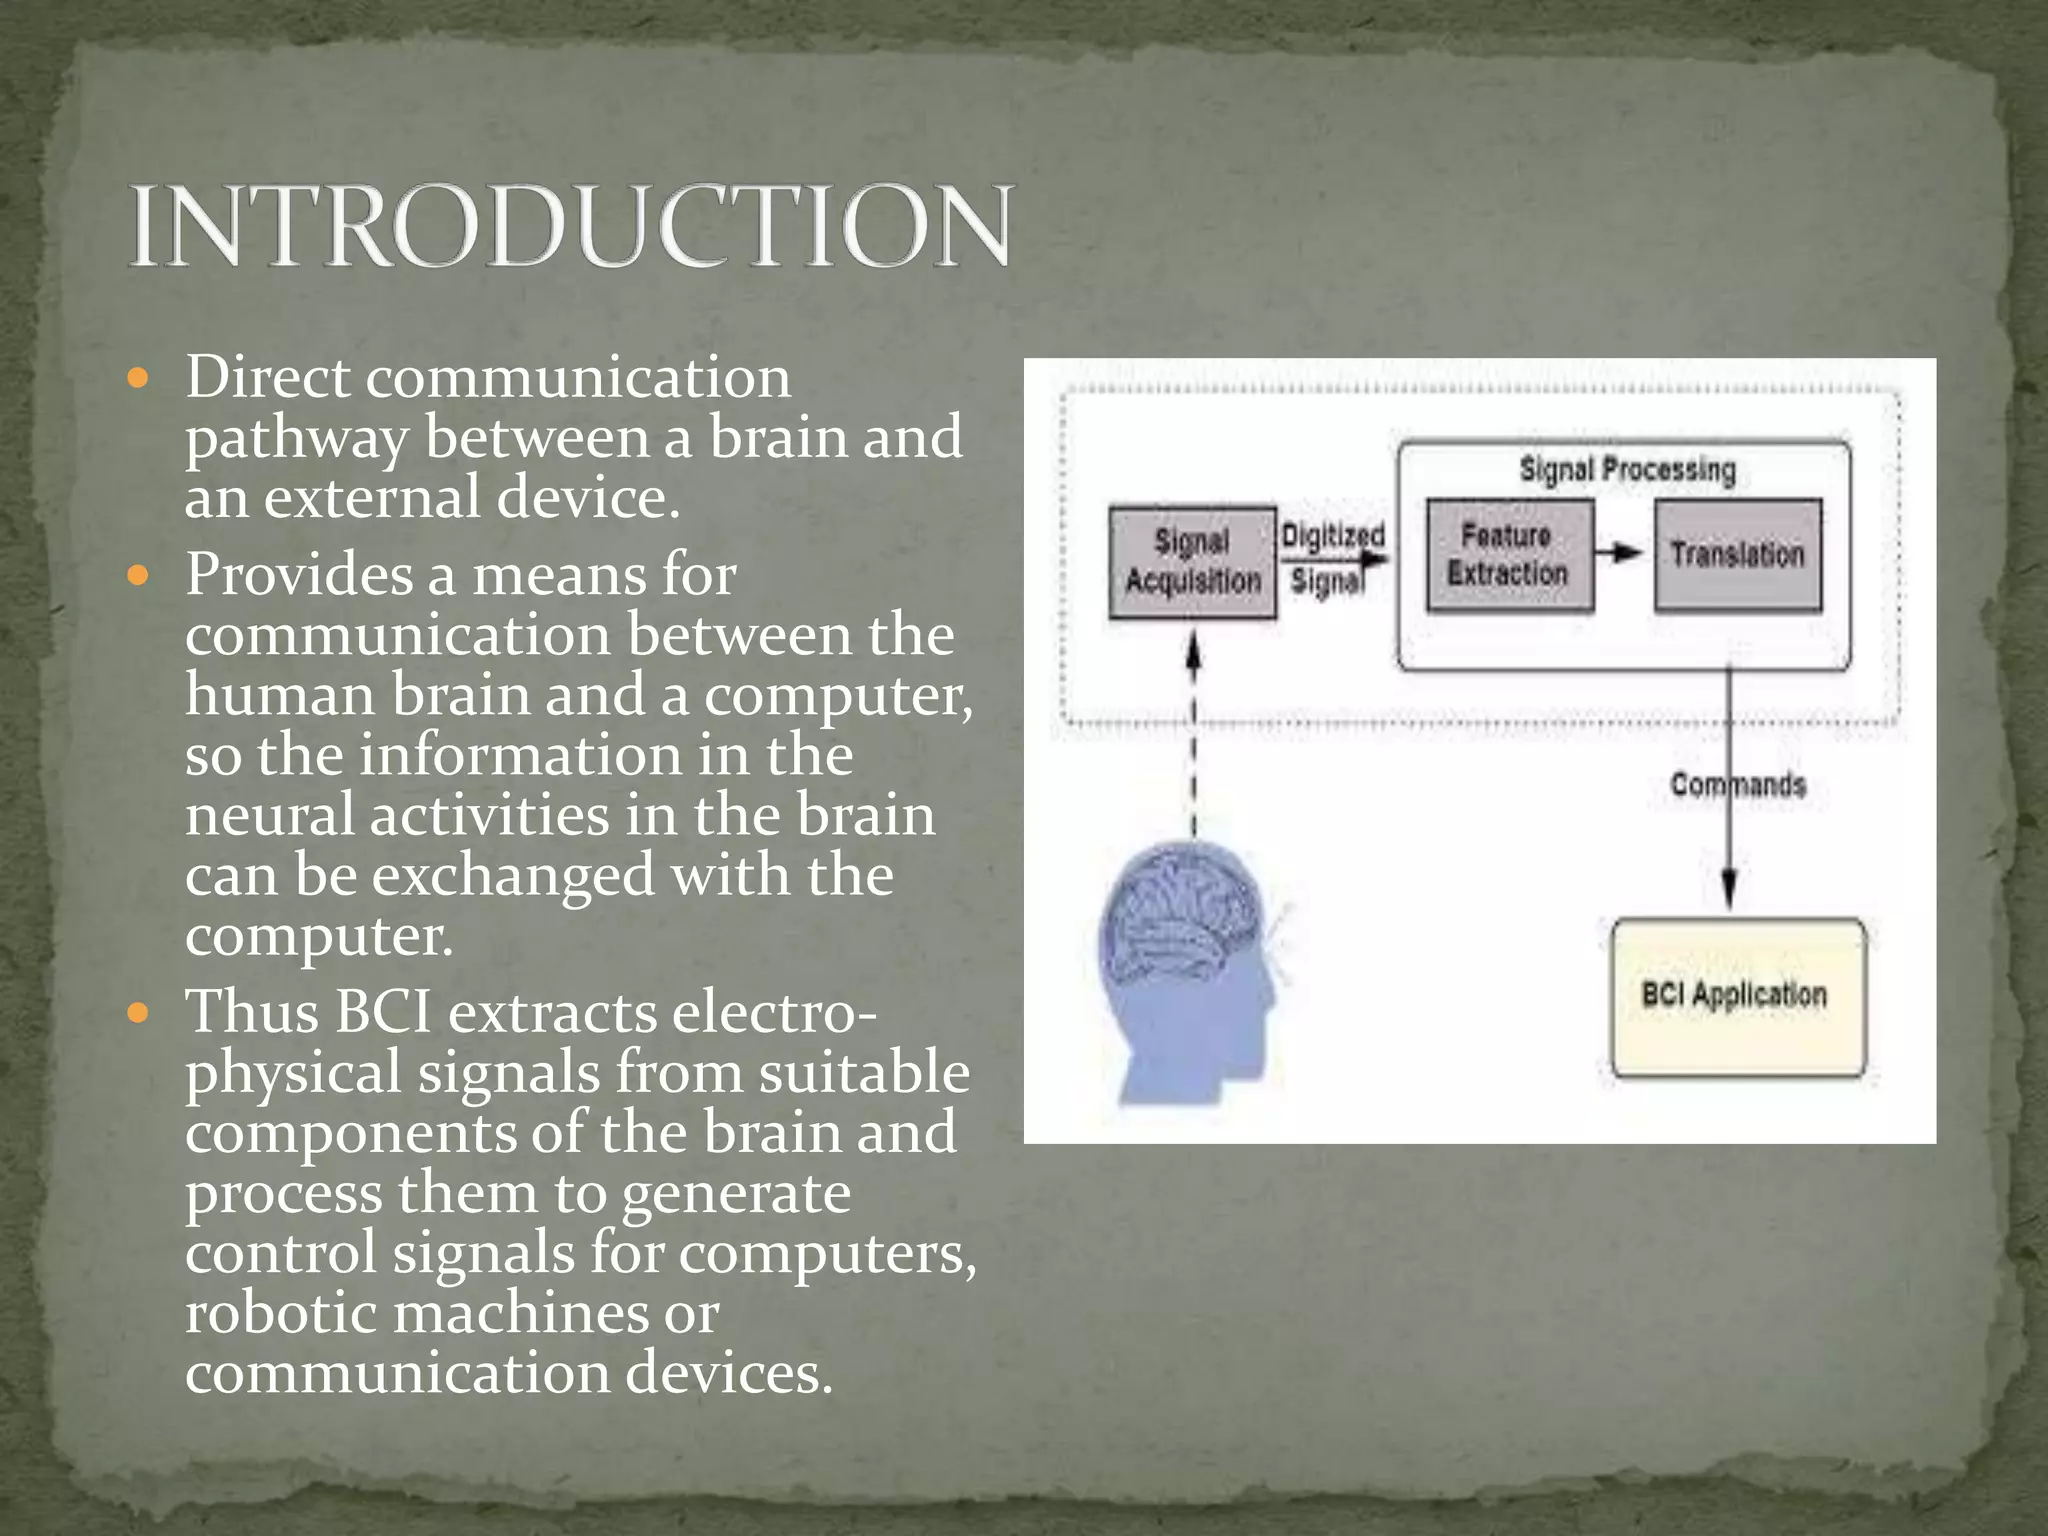
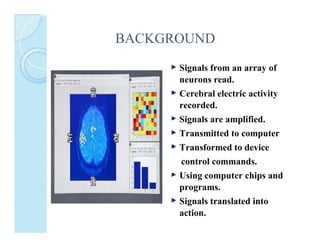
![[Brain-Computer Interface Systems] | OHSU](https://www.ohsu.edu/sites/default/files/2018-11/BCI-for-AT-Schematic-Diagram.JPG)


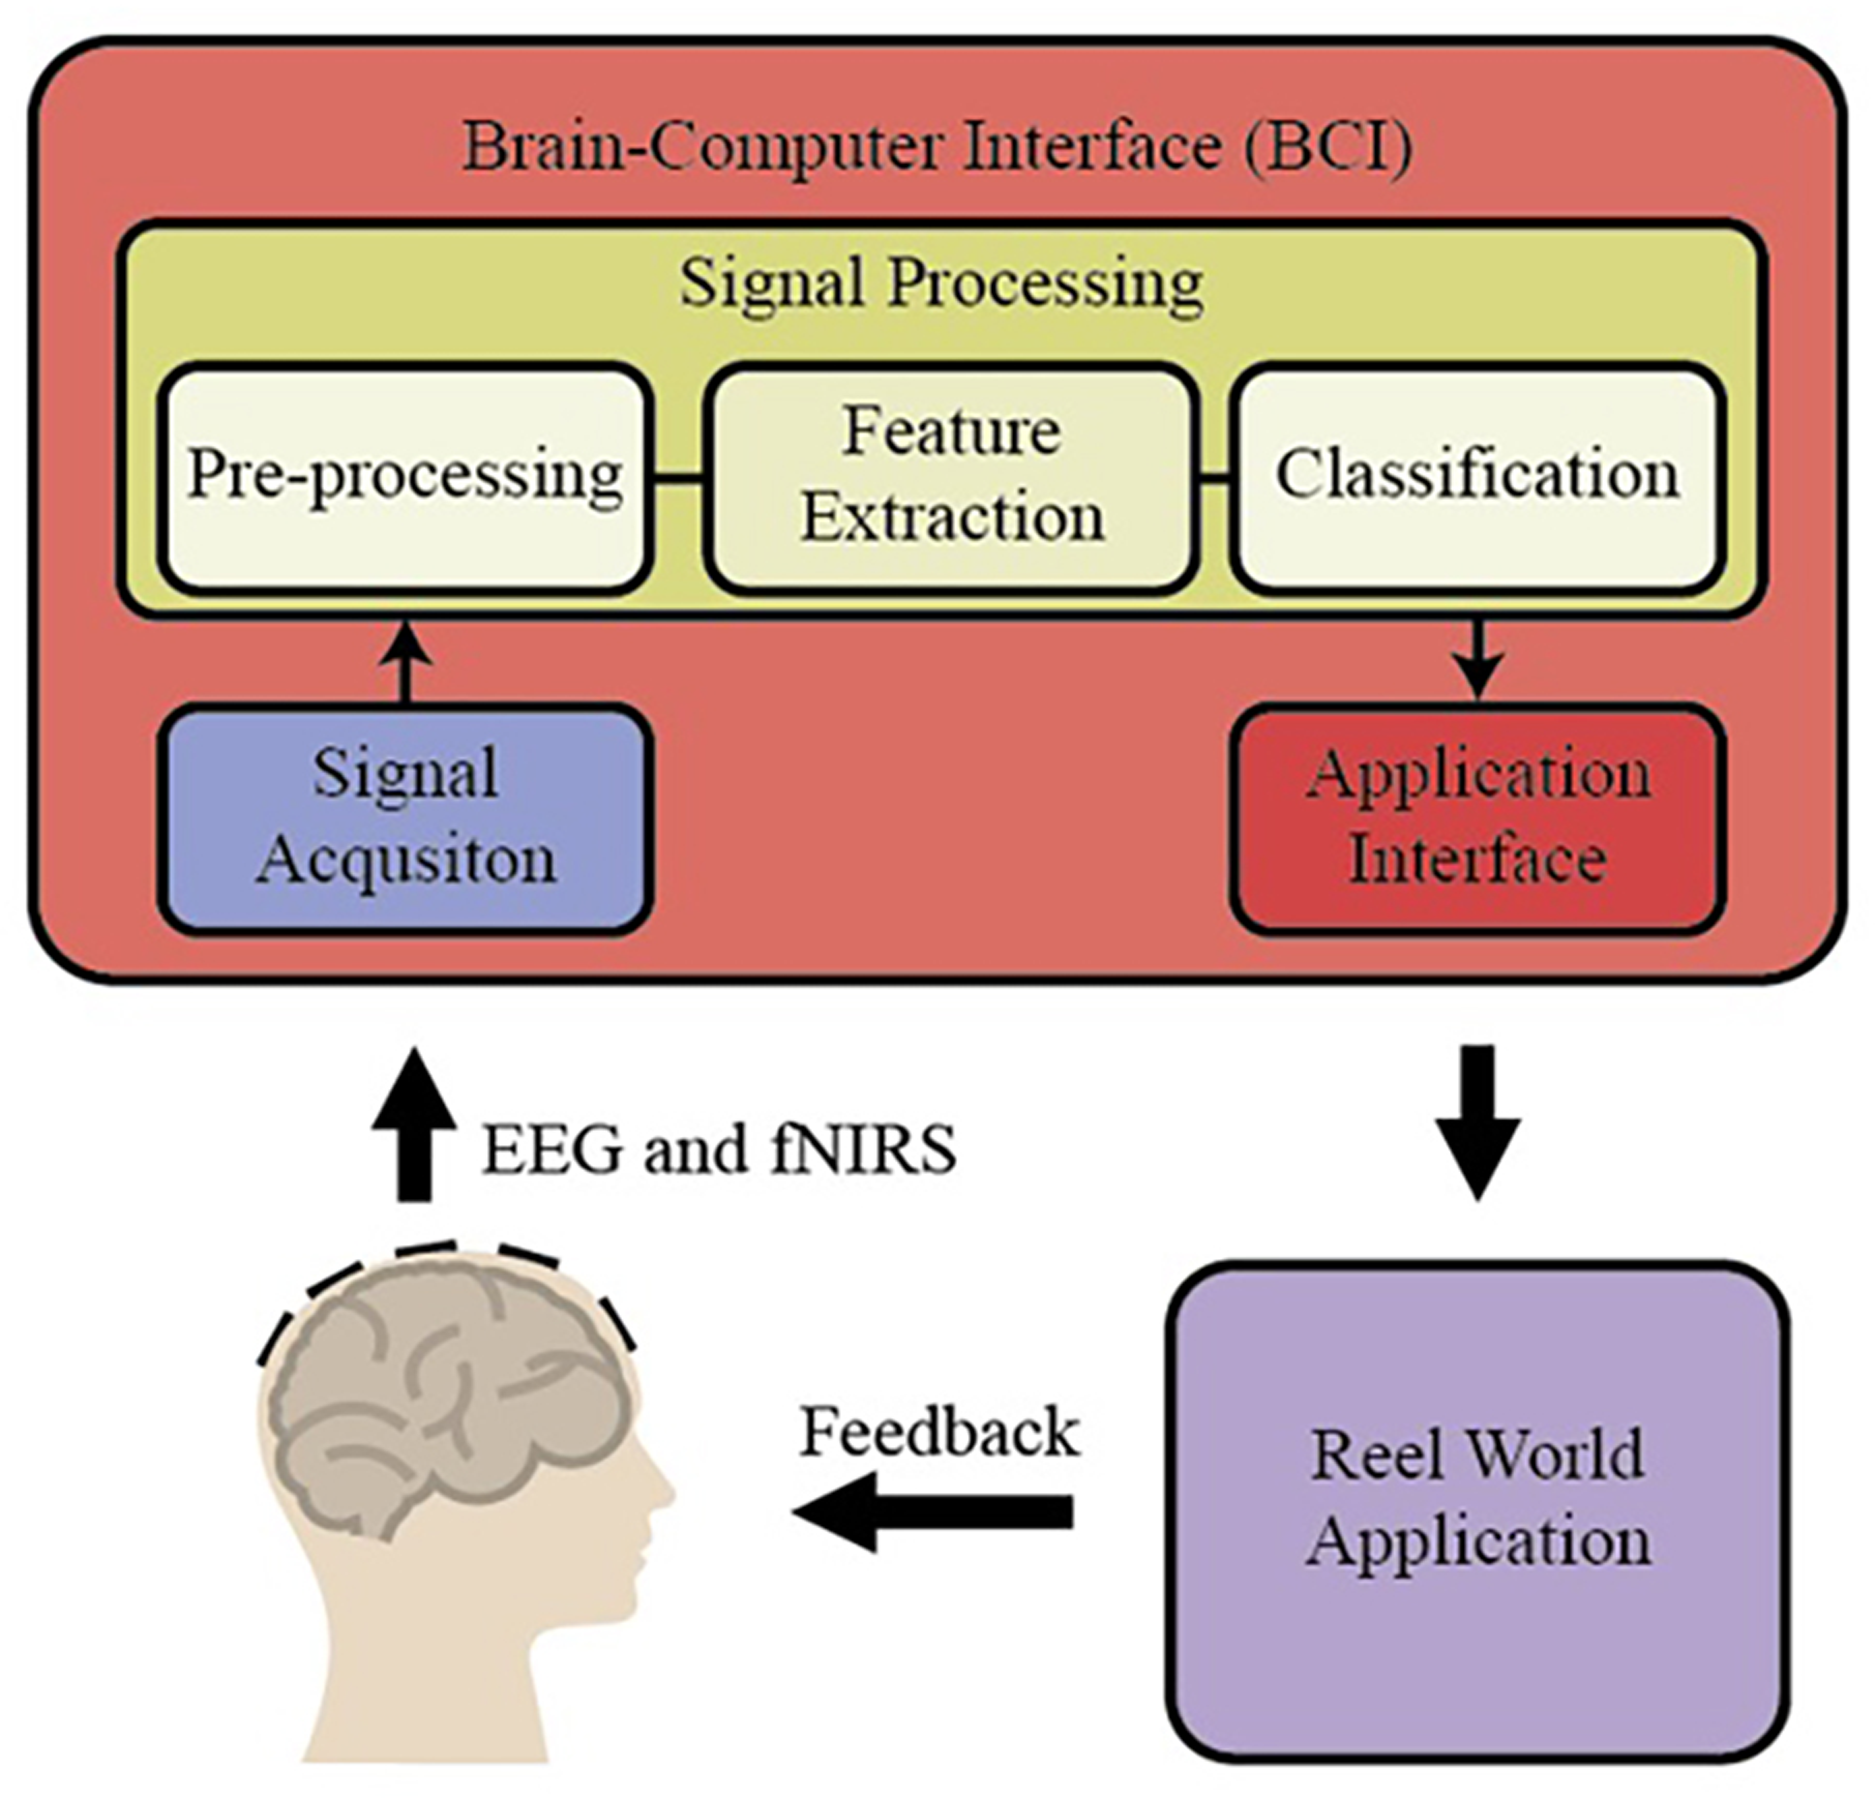
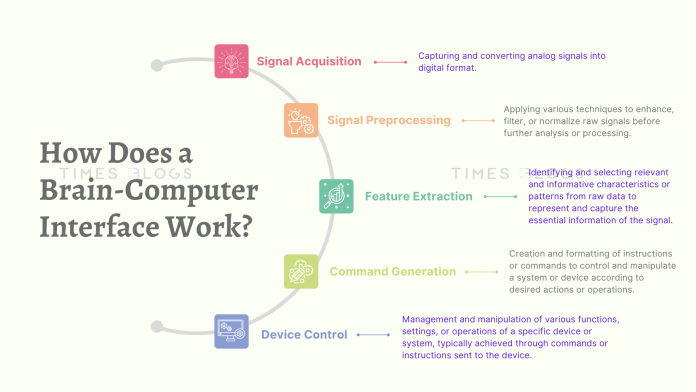
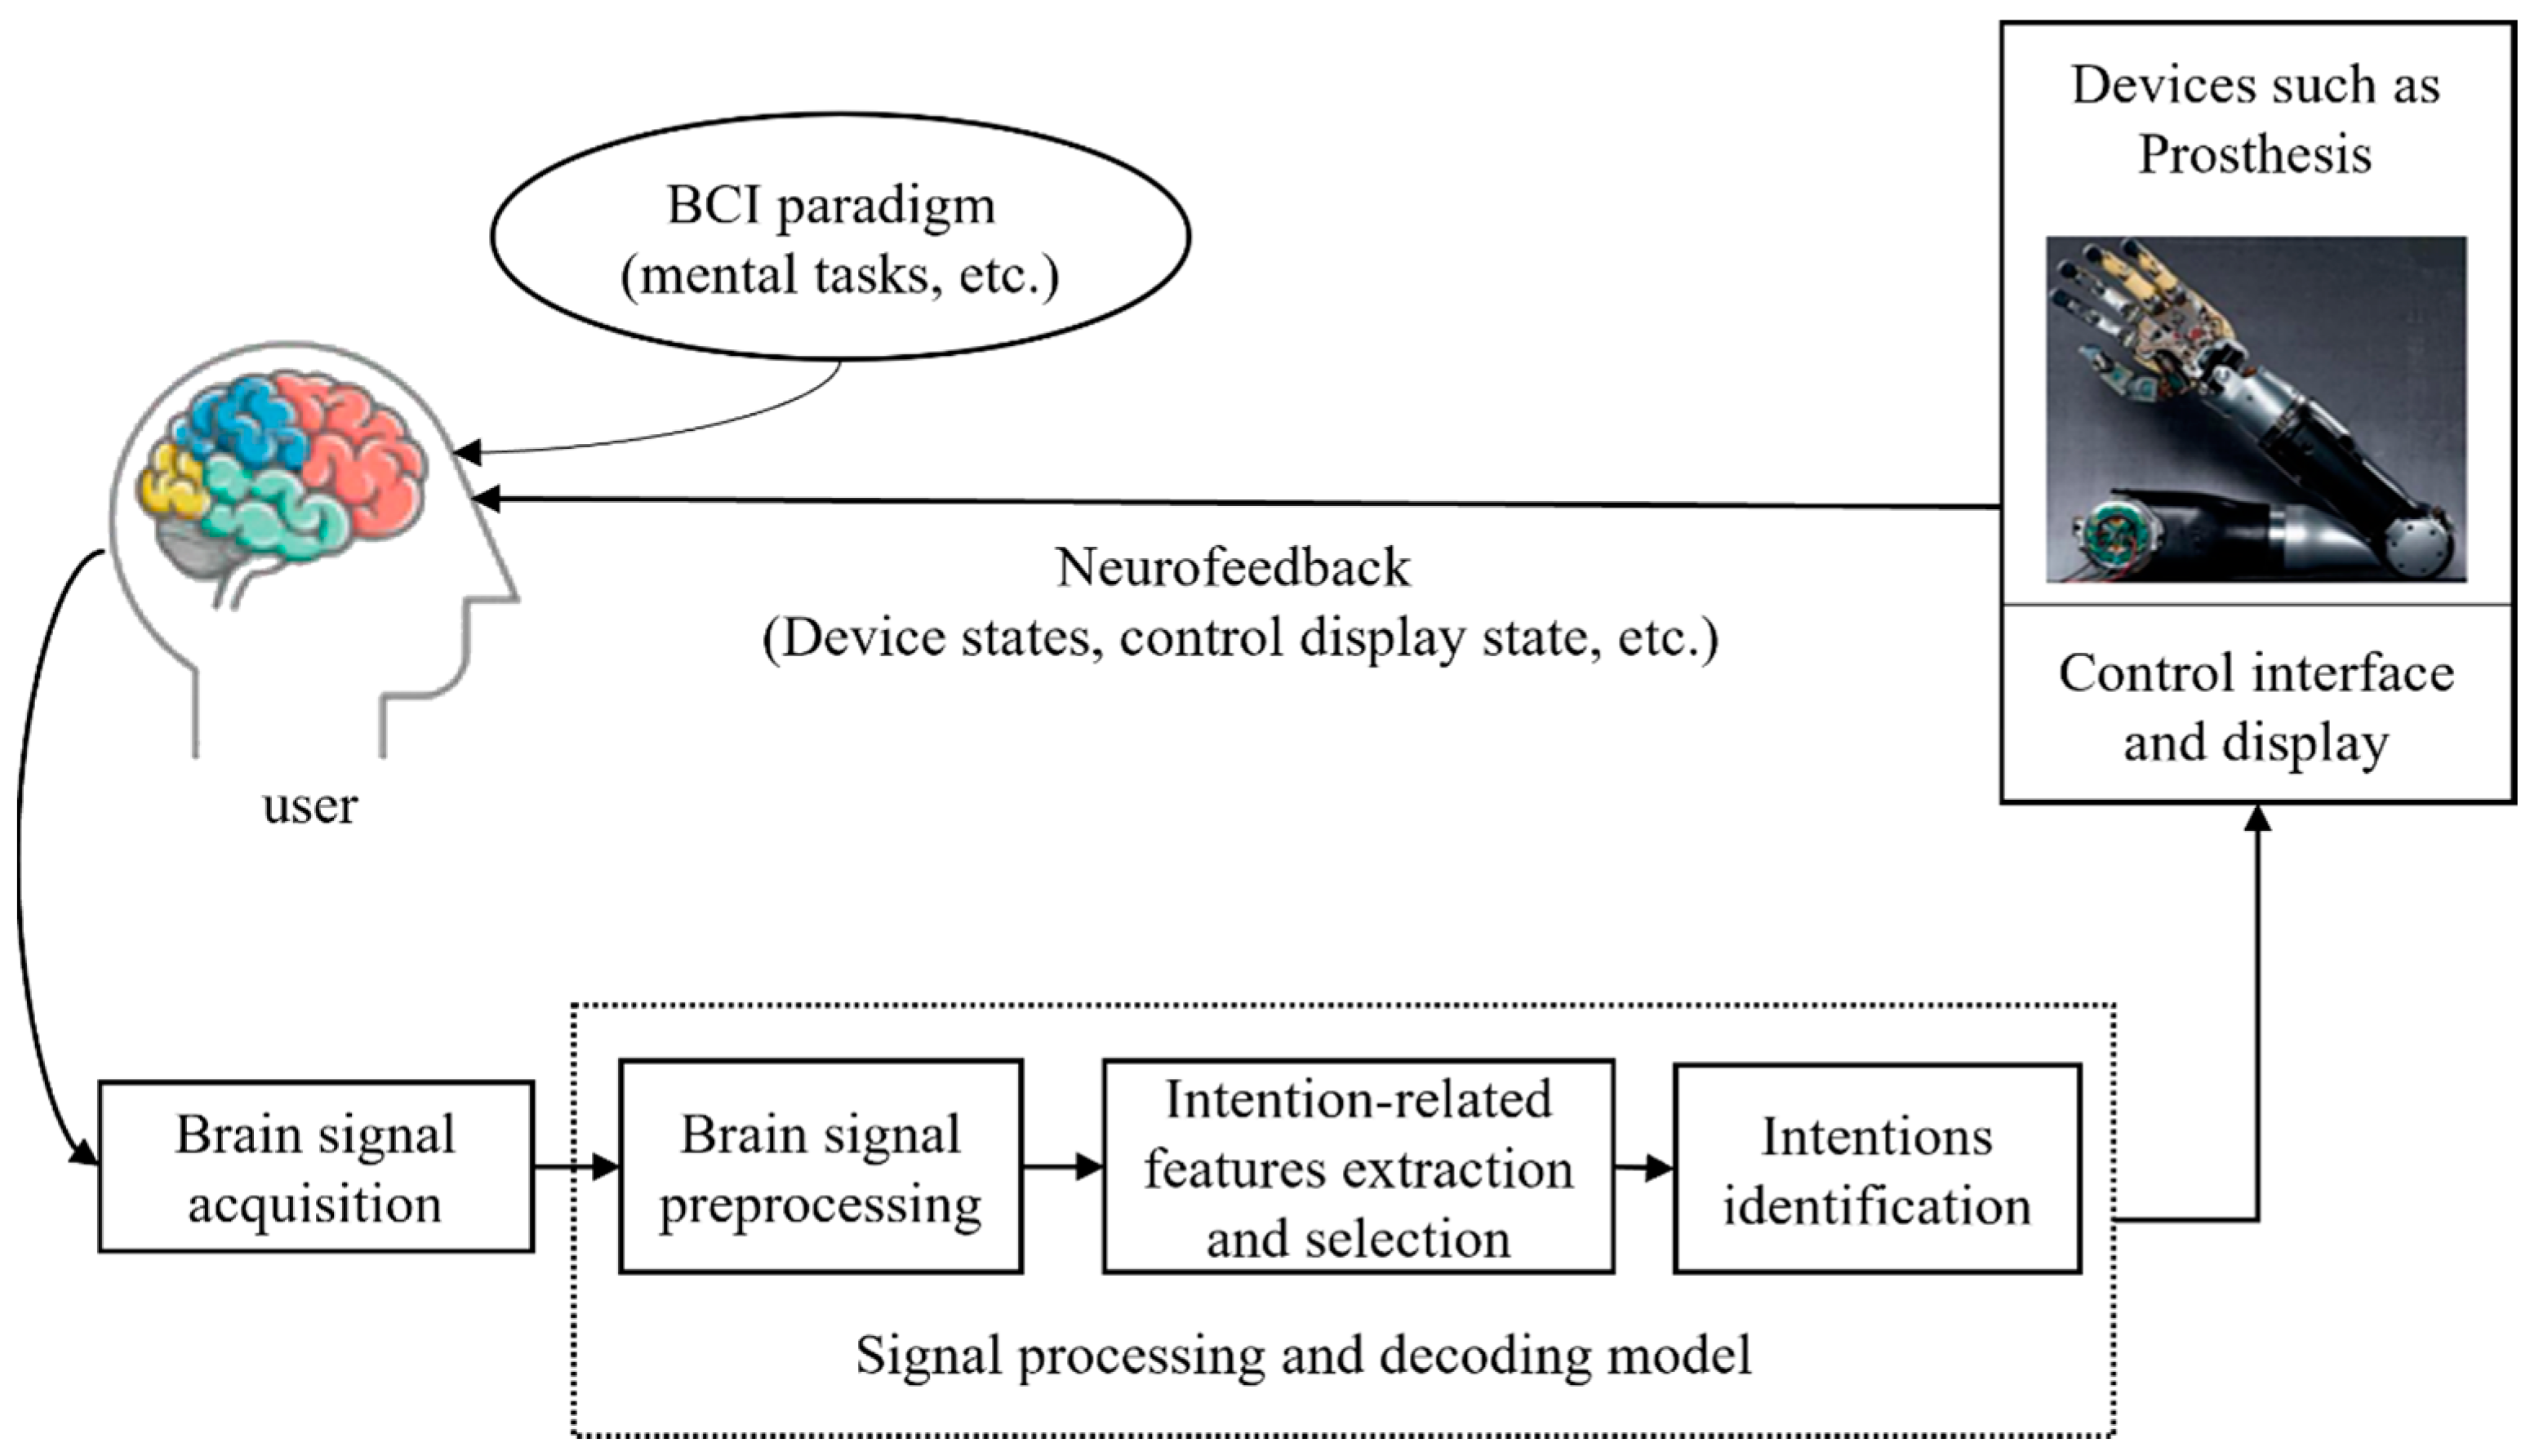
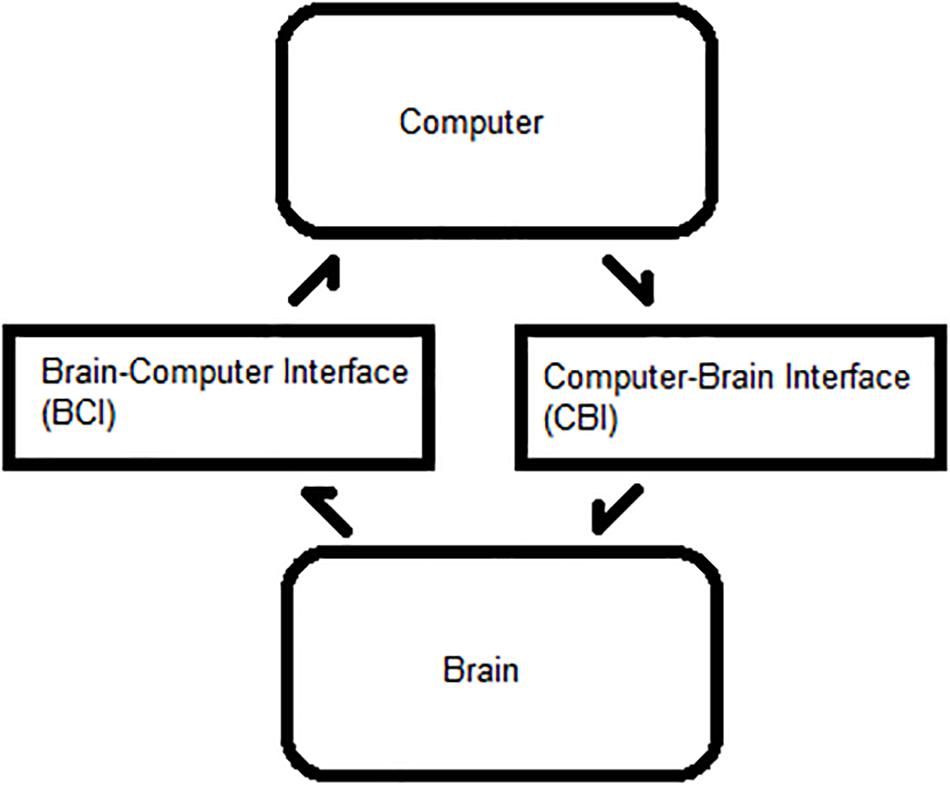
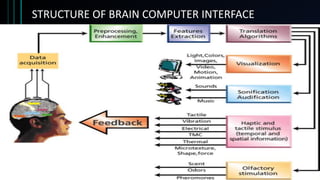
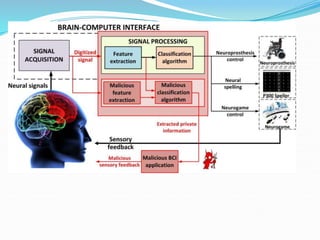
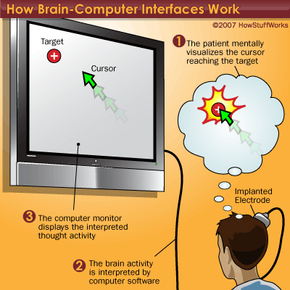
![Working of Brain-Computer Interfaces.[13] | Download Scientific Diagram](https://www.researchgate.net/profile/Poornima-Perera/publication/349536056/figure/fig1/AS:994424096059392@1614100588318/Working-of-Brain-Computer-Interfaces13_Q640.jpg)


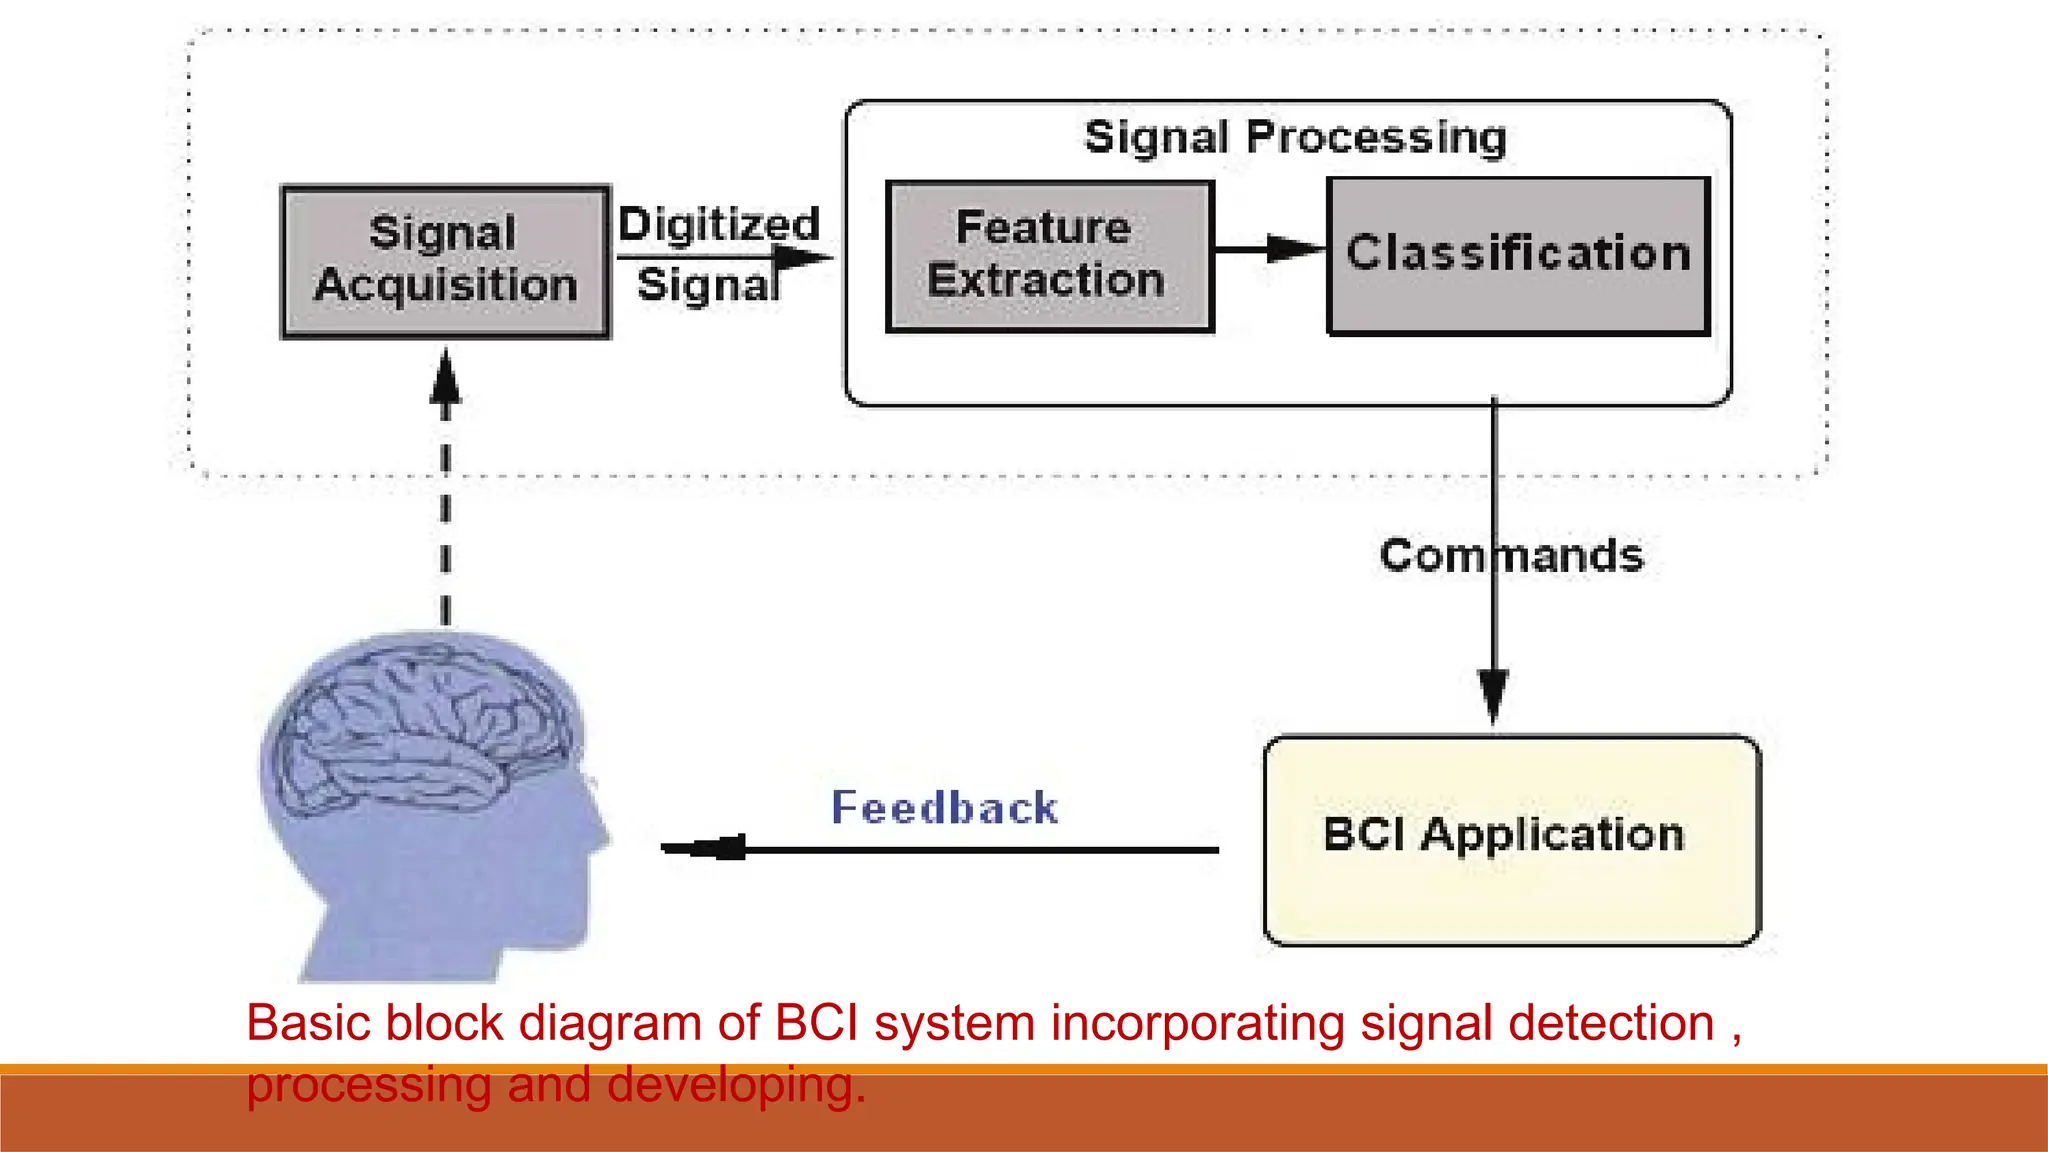


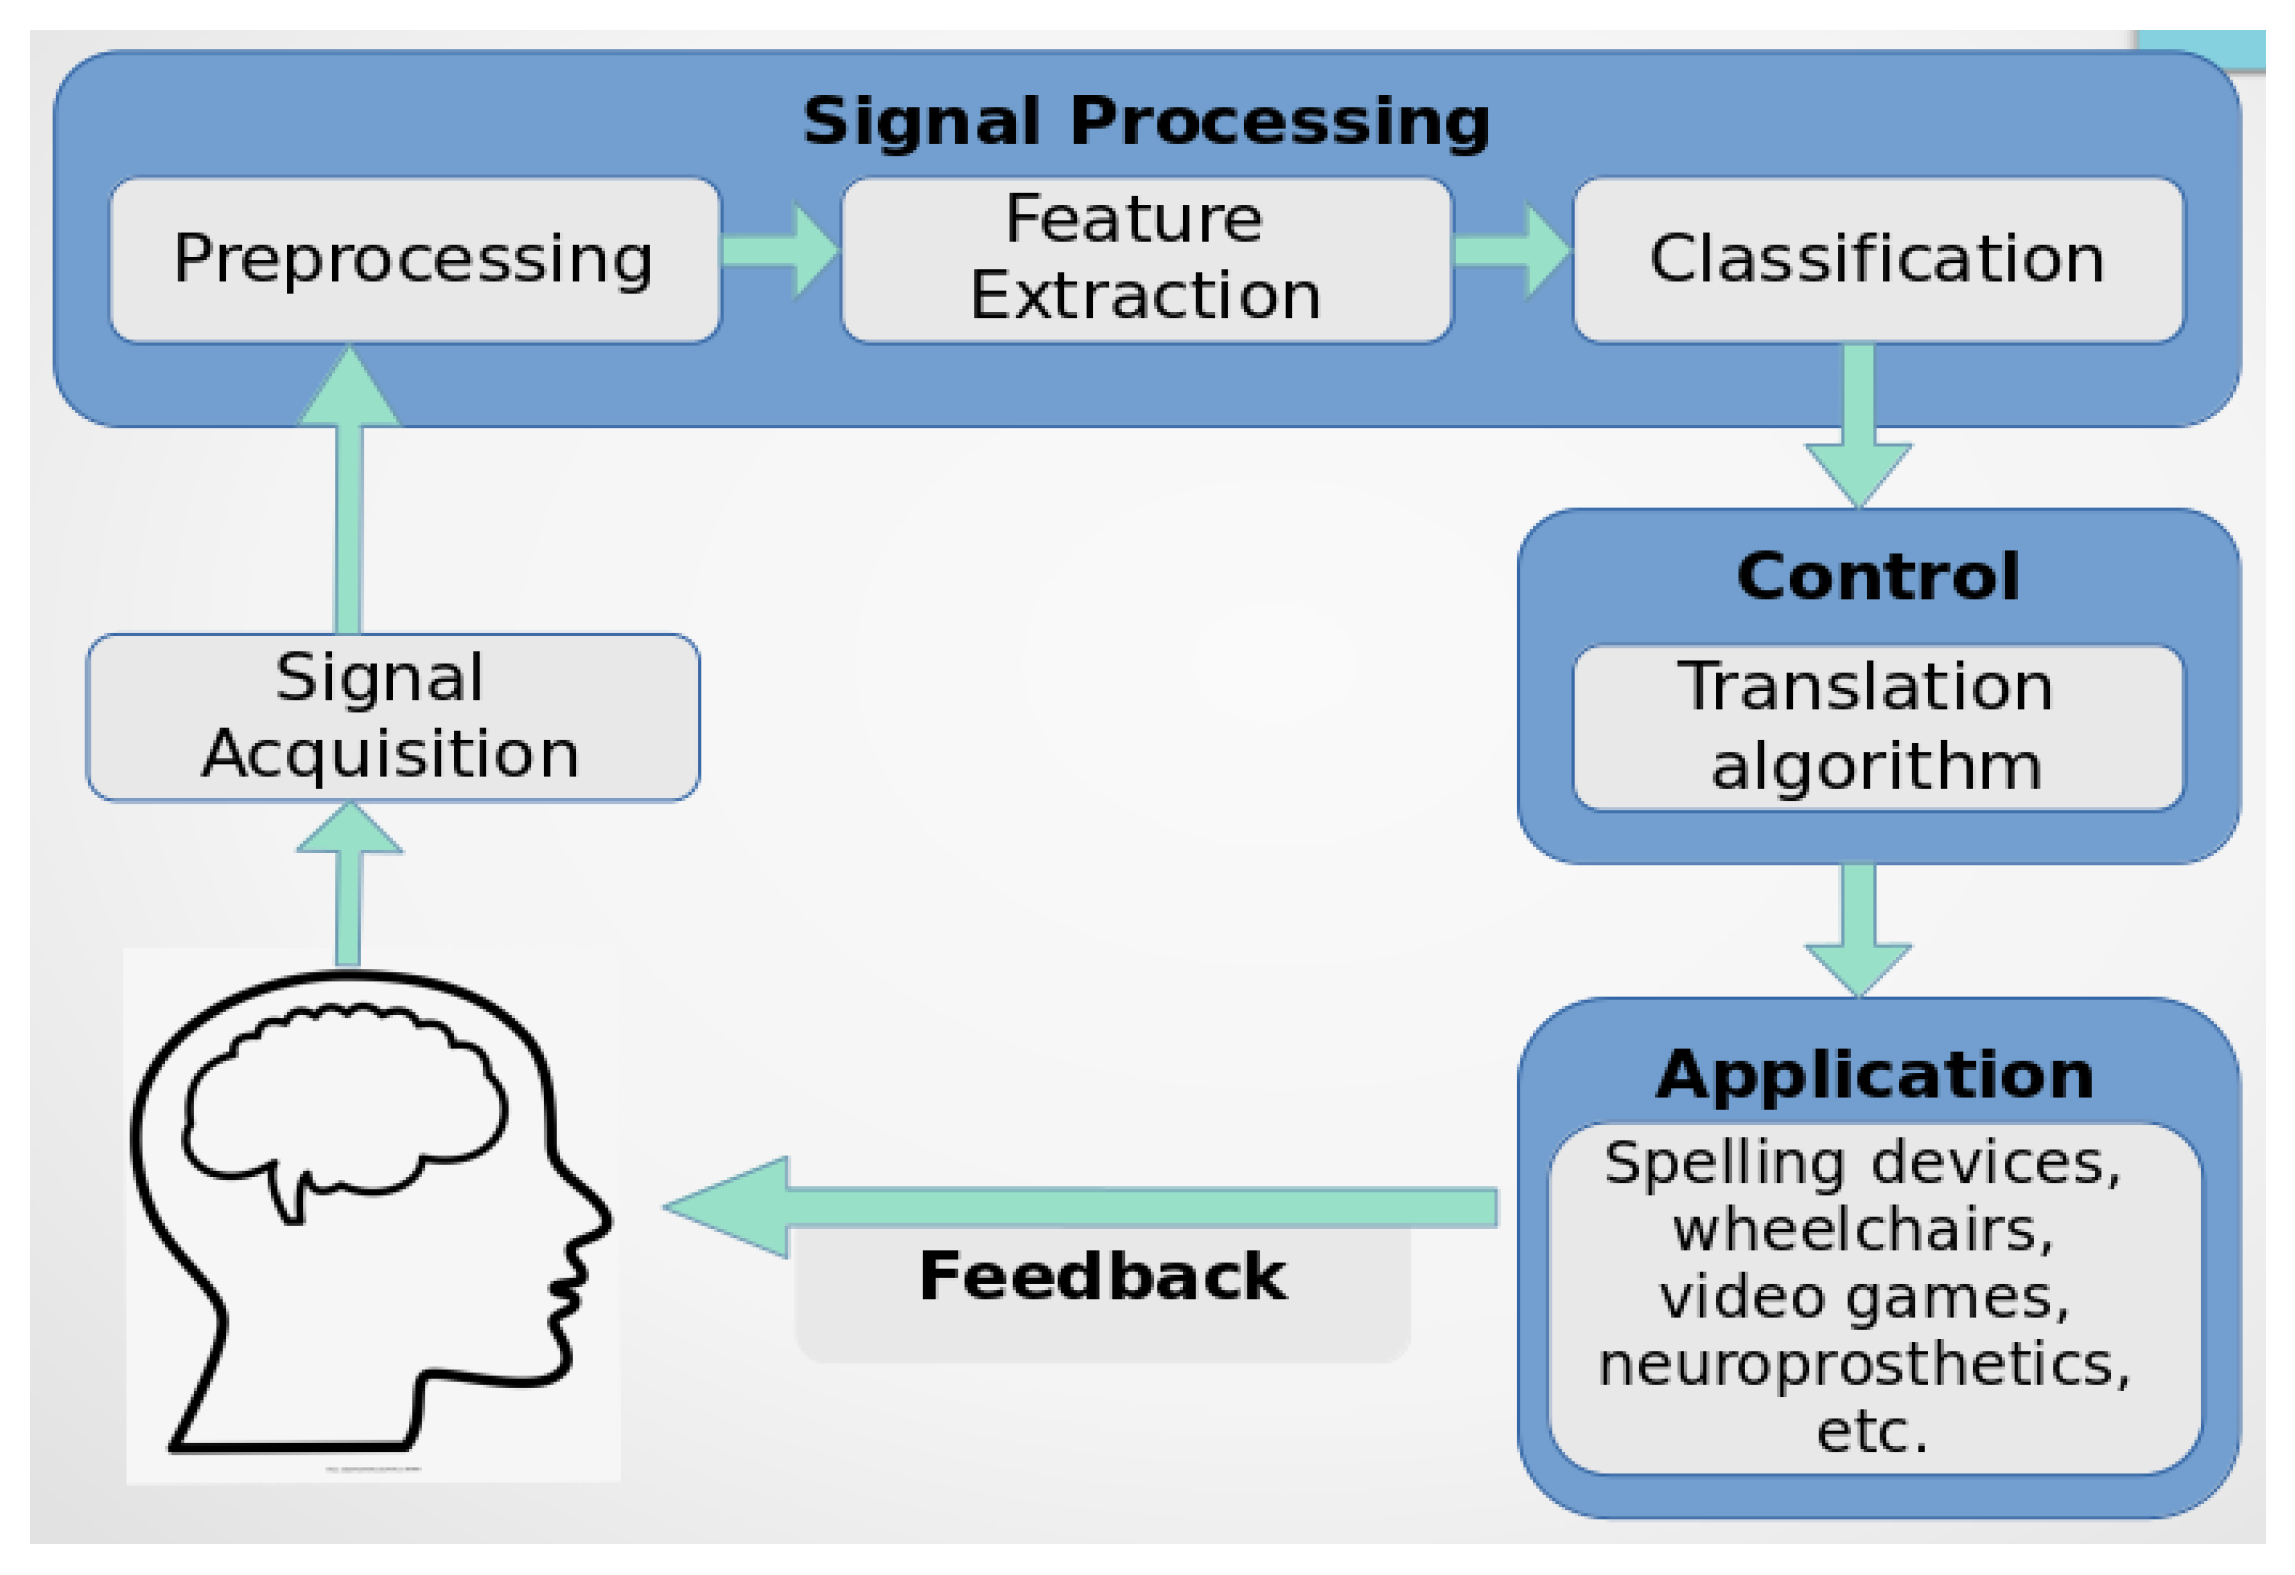
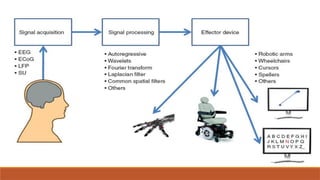
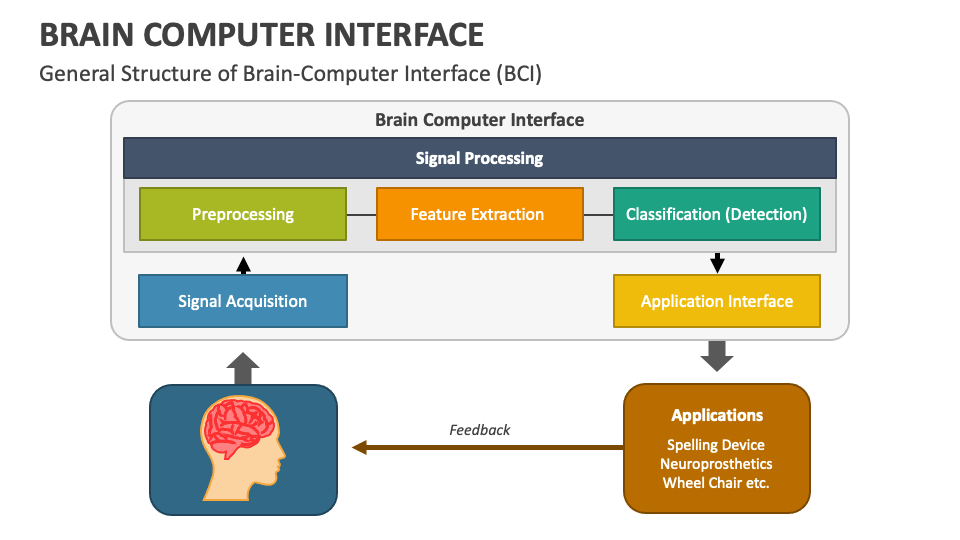
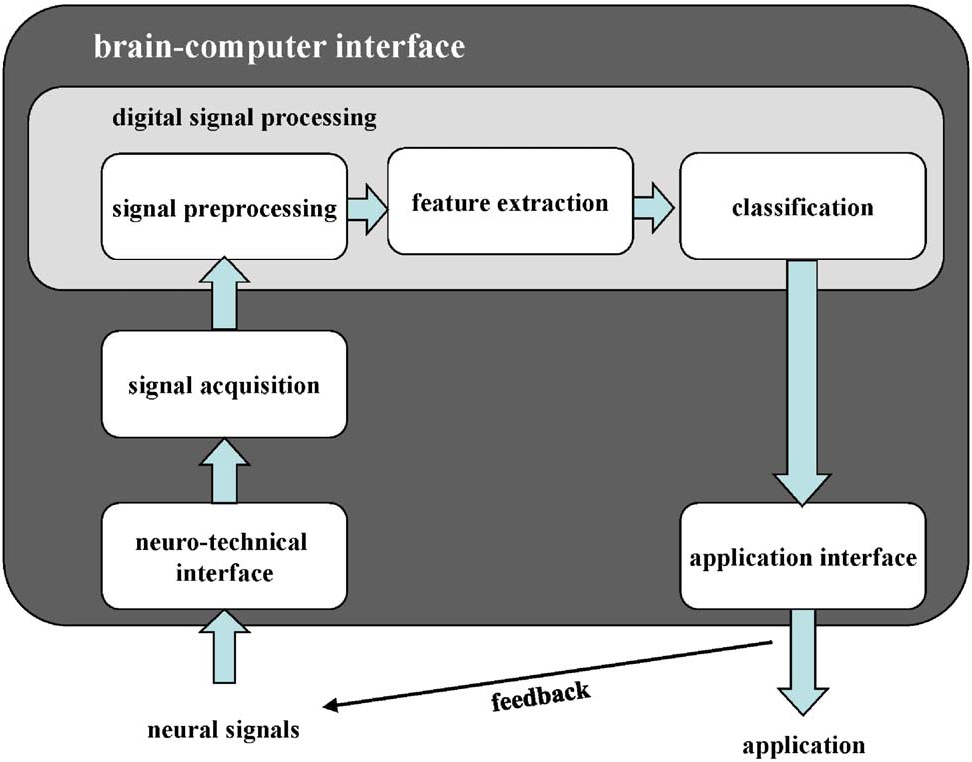
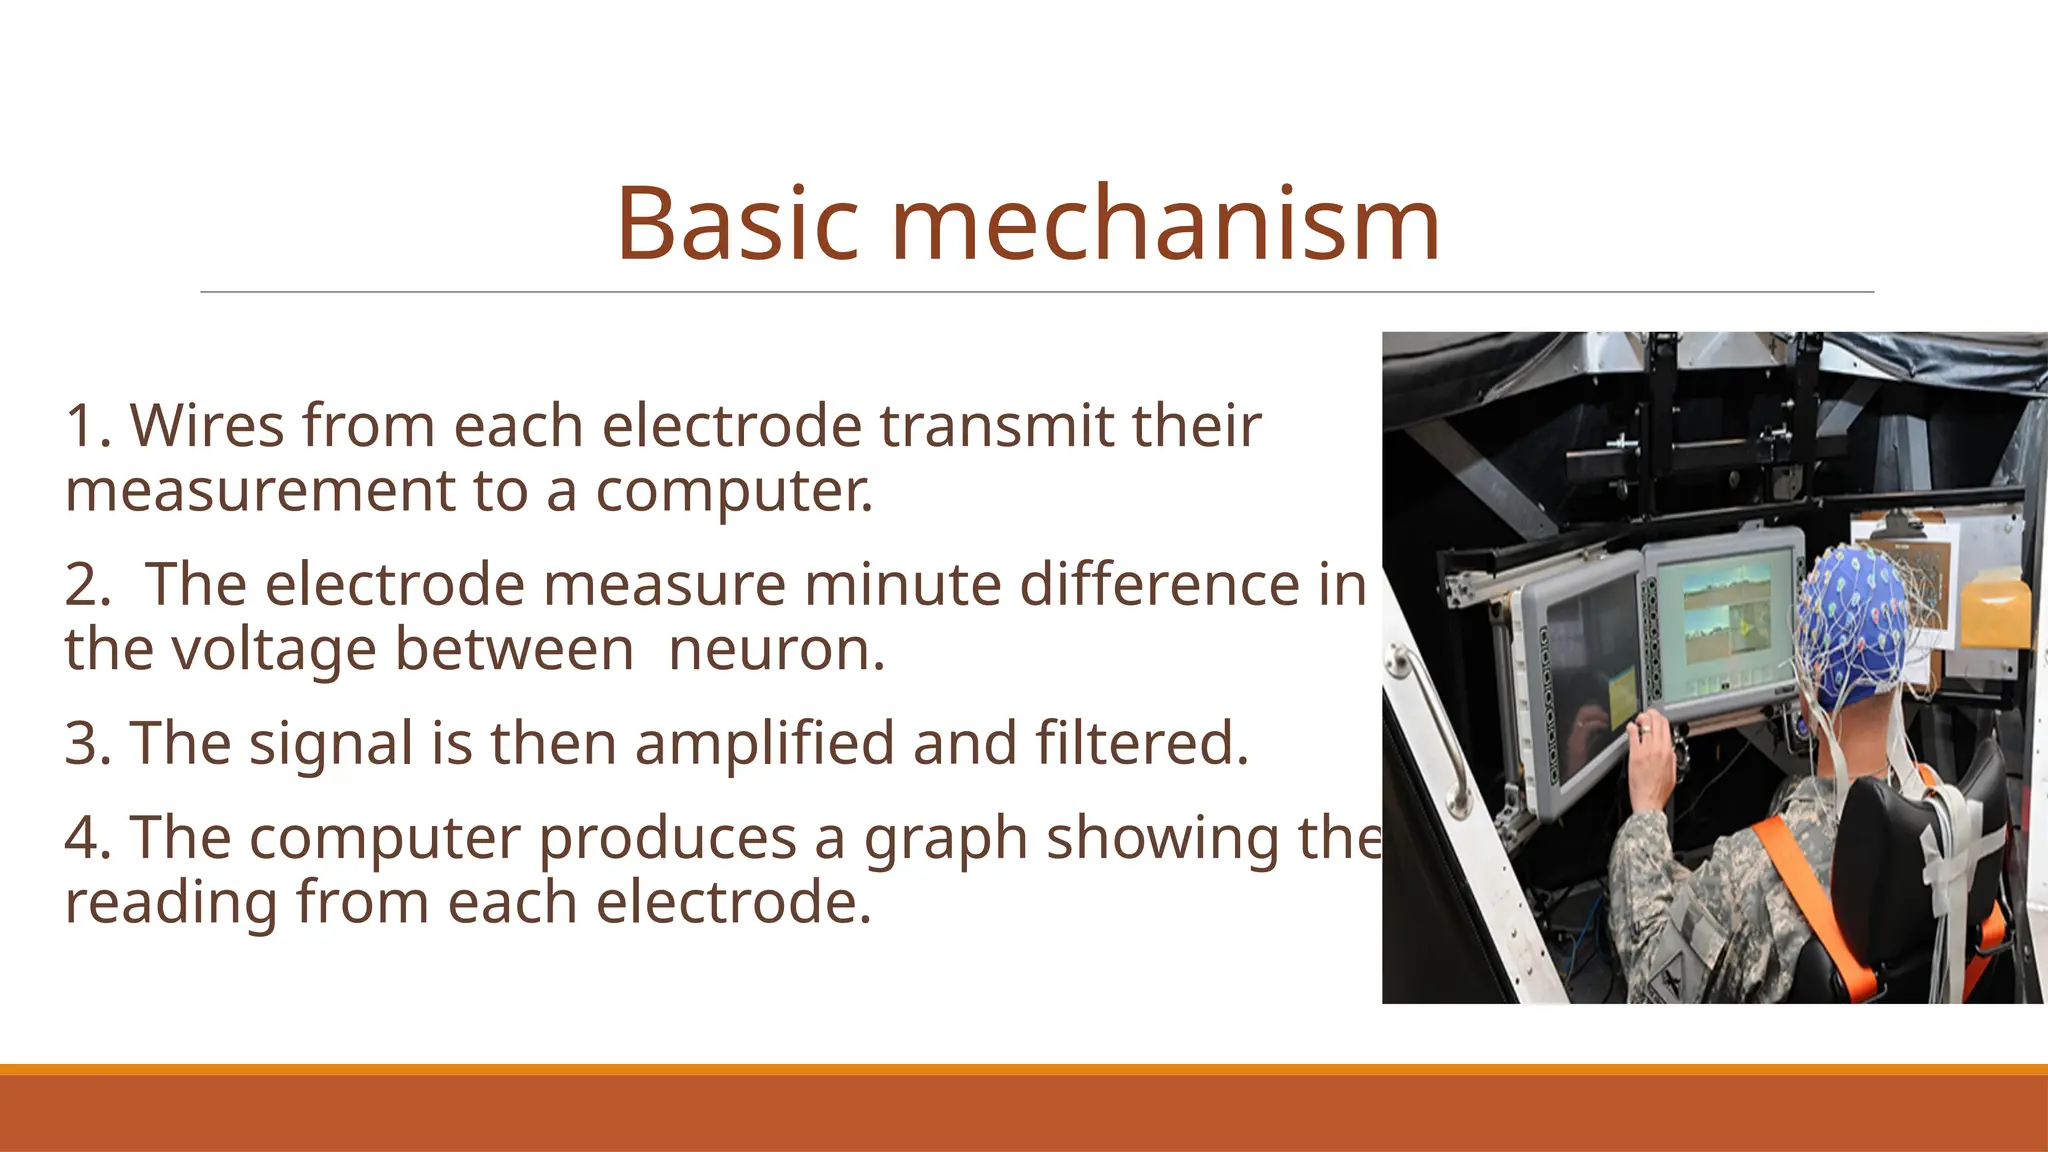
![Brain-computer interface basic block diagram [1] | Download Scientific ...](https://www.researchgate.net/publication/339046792/figure/fig1/AS:855200730472453@1580907151969/Brain-computer-interface-basic-block-diagram-1.jpg)


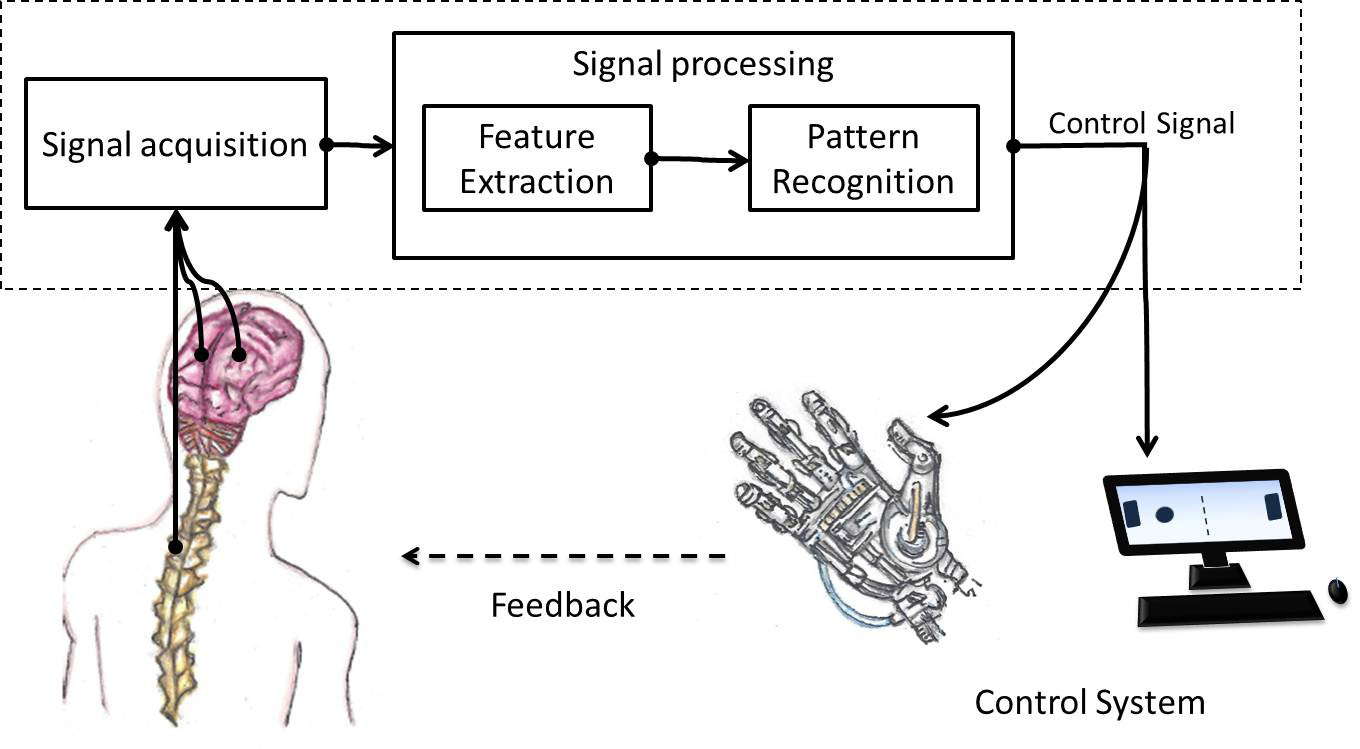


Explore the simplicity of schematic of a brain-computer interface system once signals are through countless elegant photographs. featuring understated examples of computer, digital, and electronic. designed to emphasize clarity and focus. Browse our premium schematic of a brain-computer interface system once signals are gallery featuring professionally curated photographs. Suitable for various applications including web design, social media, personal projects, and digital content creation All schematic of a brain-computer interface system once signals are images are available in high resolution with professional-grade quality, optimized for both digital and print applications, and include comprehensive metadata for easy organization and usage. Our schematic of a brain-computer interface system once signals are gallery offers diverse visual resources to bring your ideas to life. Cost-effective licensing makes professional schematic of a brain-computer interface system once signals are photography accessible to all budgets. Professional licensing options accommodate both commercial and educational usage requirements. The schematic of a brain-computer interface system once signals are archive serves professionals, educators, and creatives across diverse industries. Reliable customer support ensures smooth experience throughout the schematic of a brain-computer interface system once signals are selection process. Instant download capabilities enable immediate access to chosen schematic of a brain-computer interface system once signals are images.