


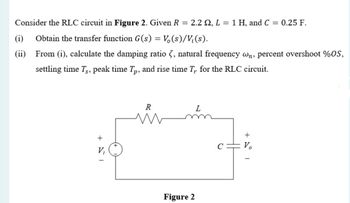
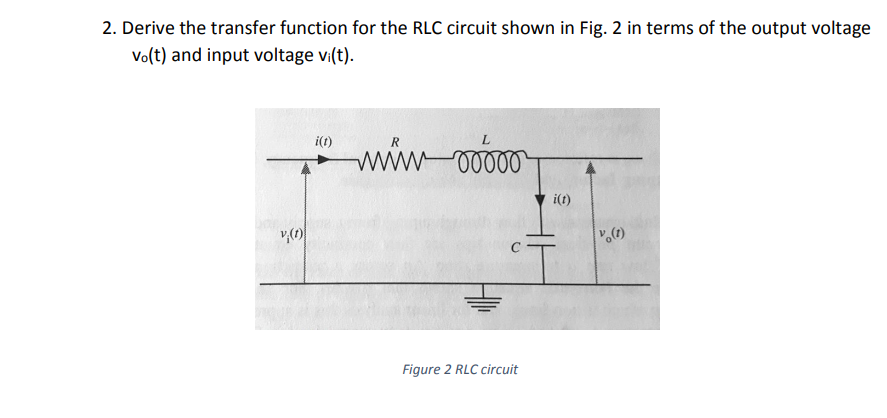
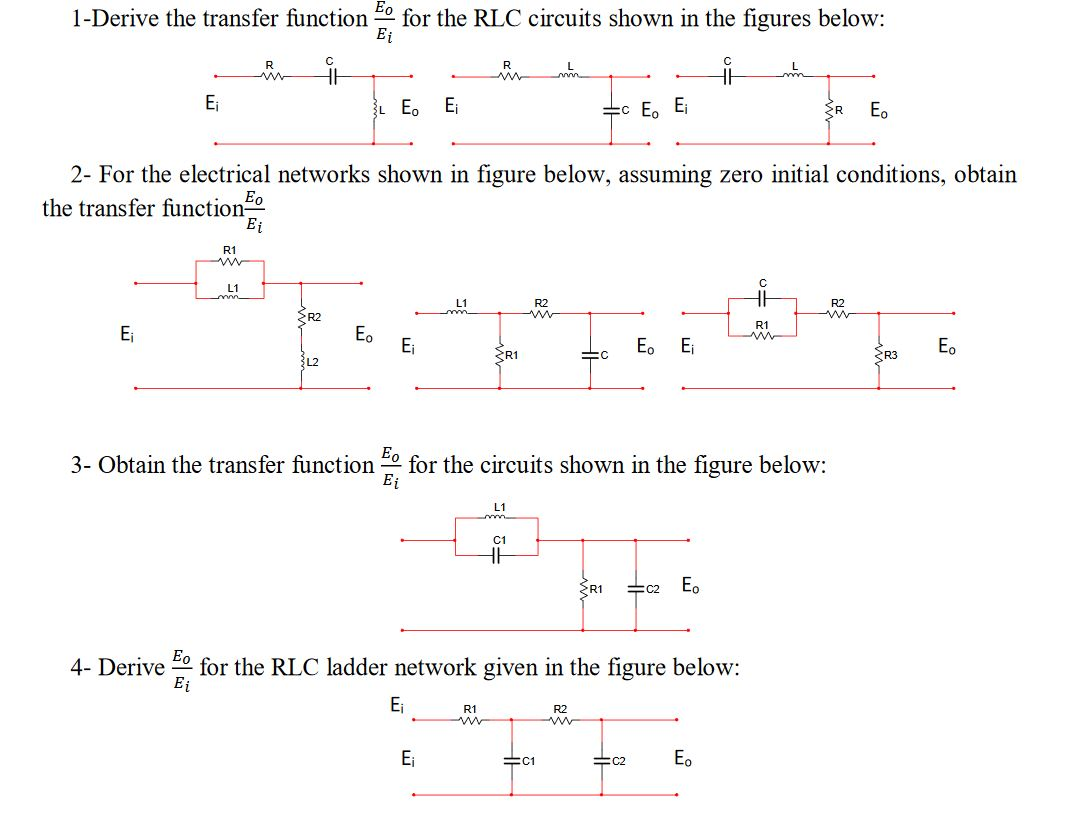
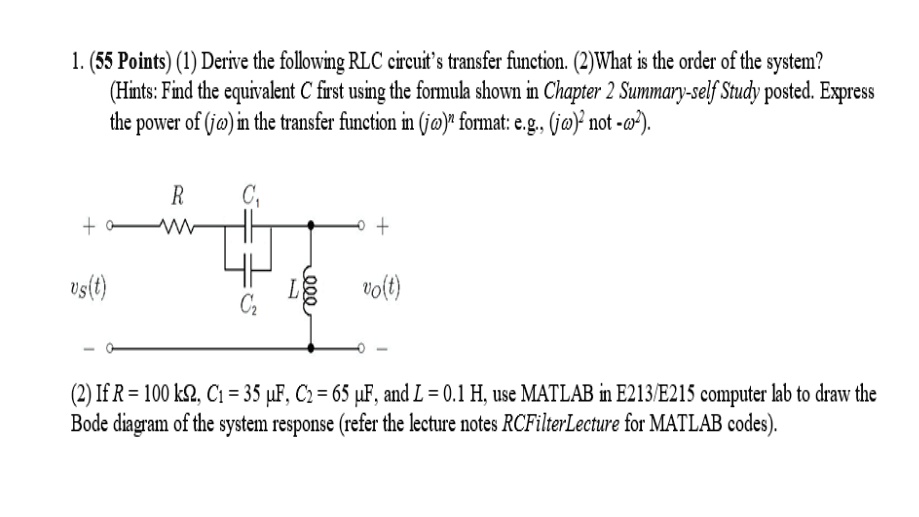


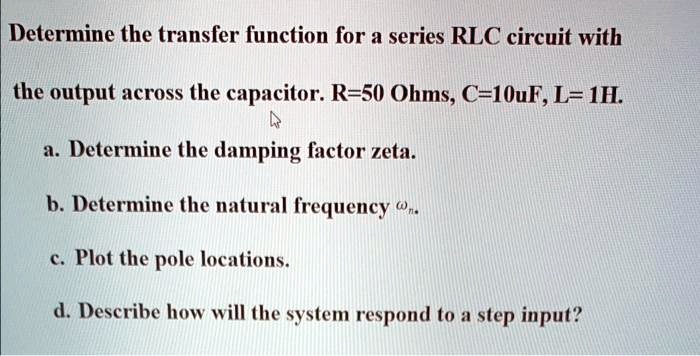
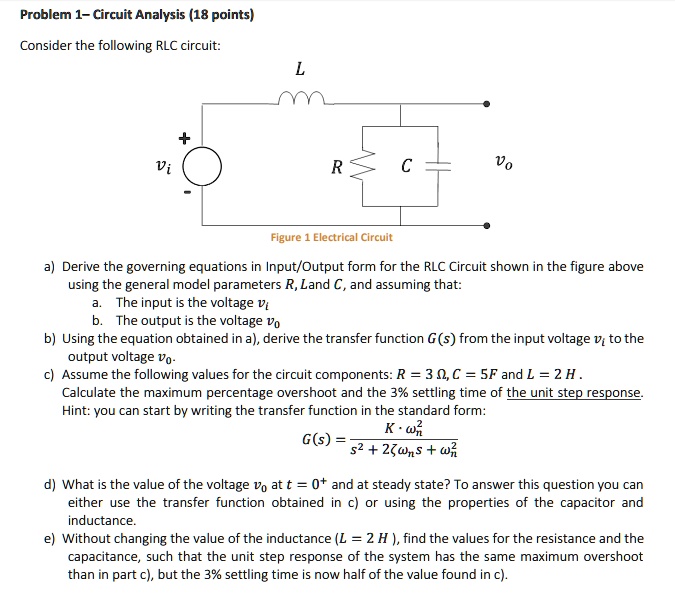
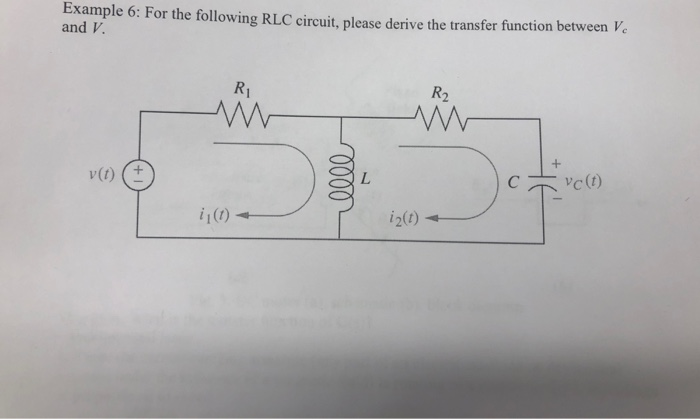
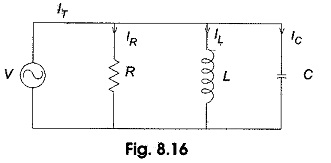
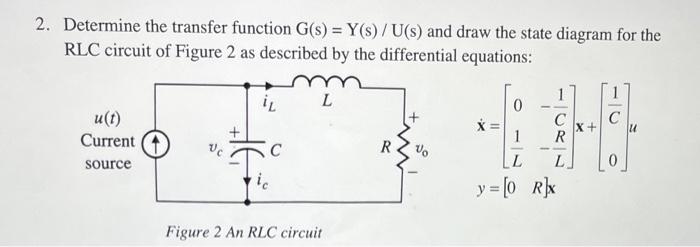
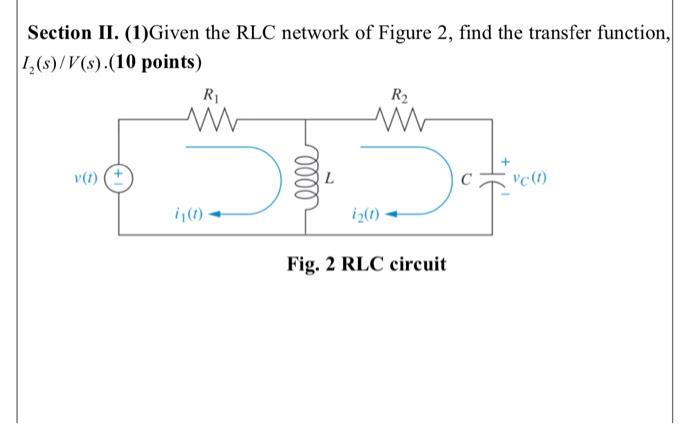
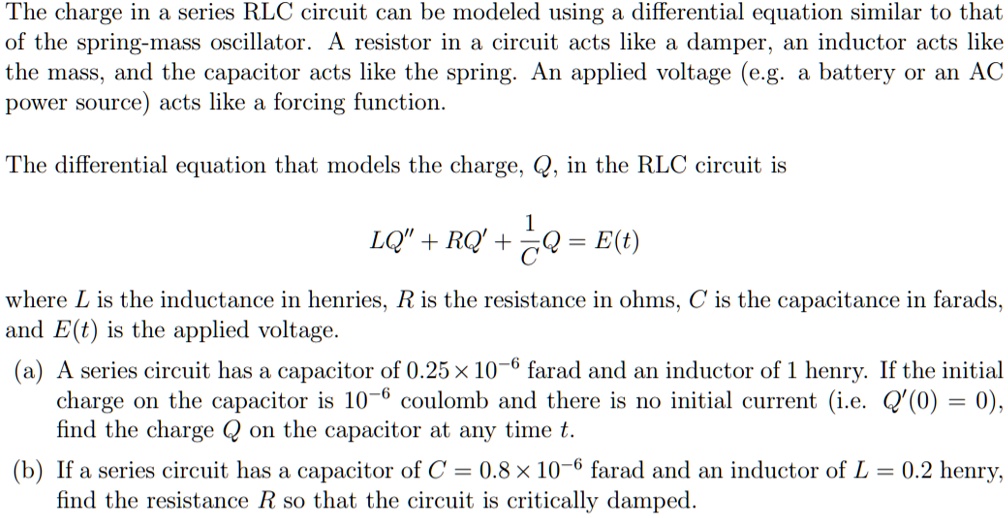
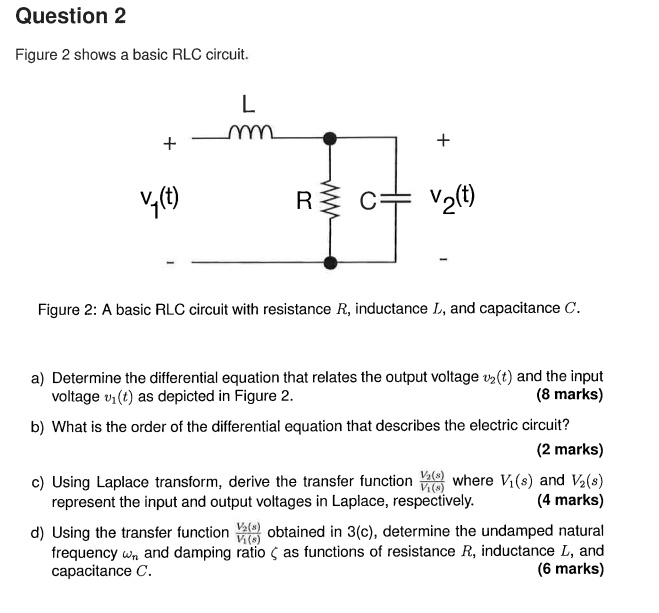
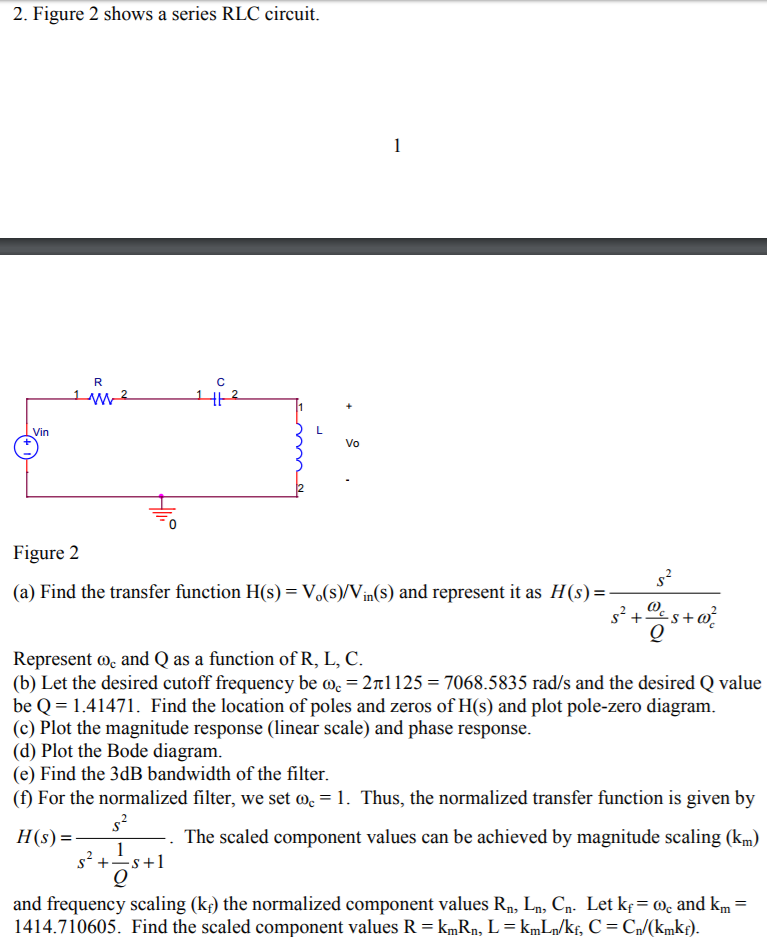
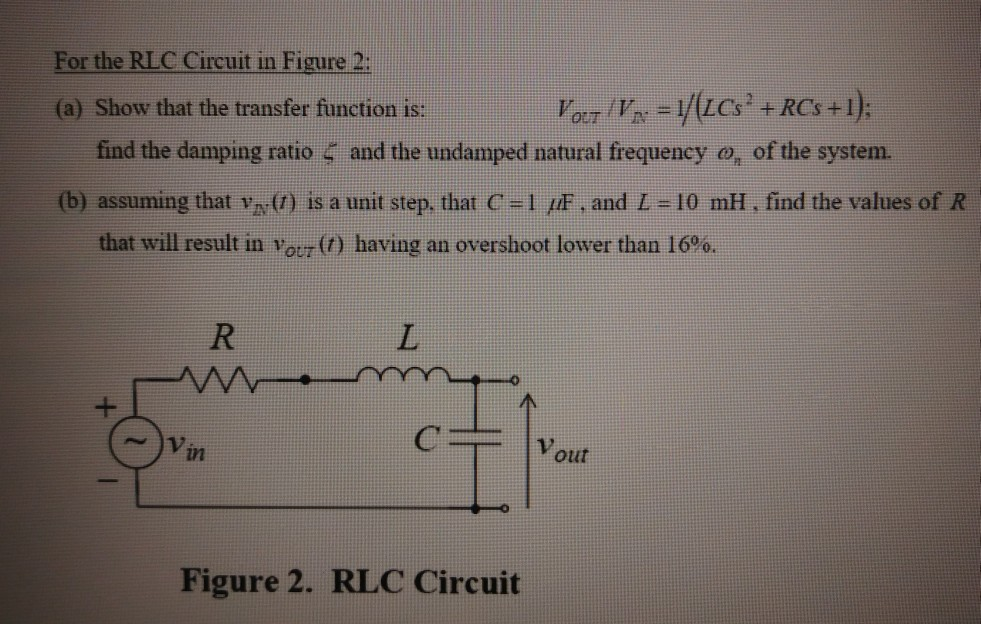
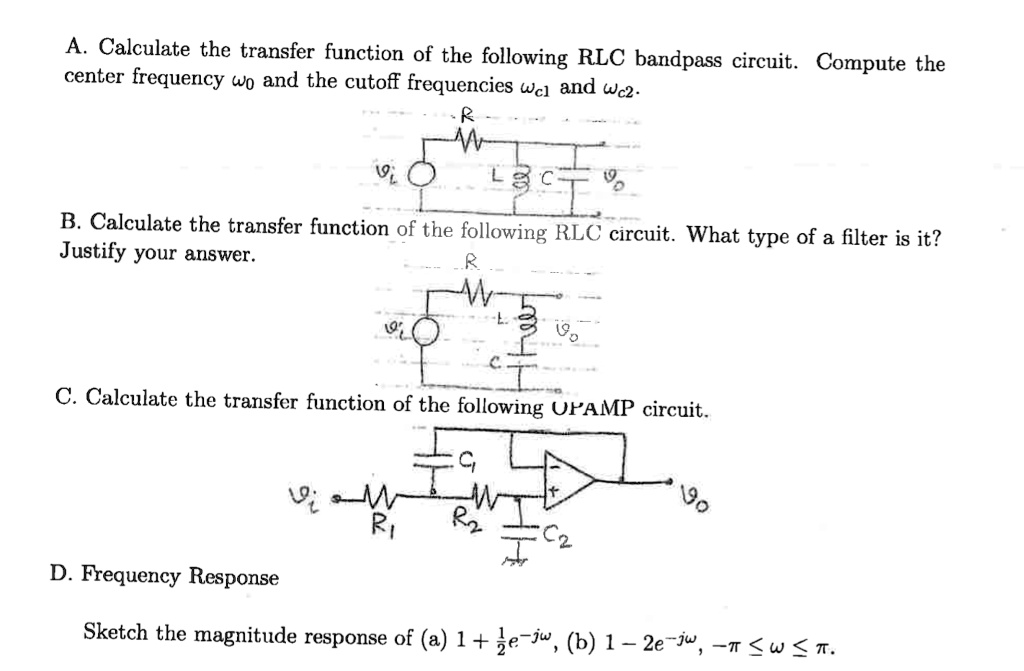
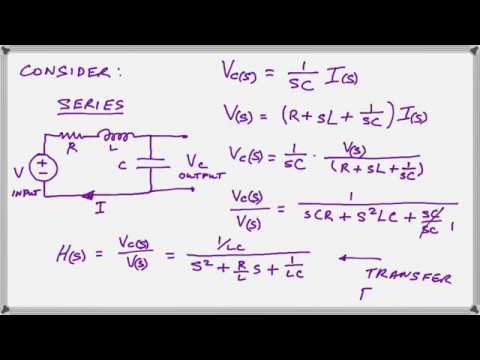
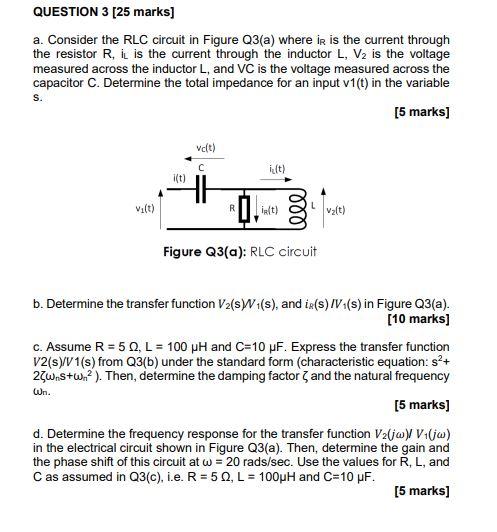
![[Solved] | SolutionInn](https://dsd5zvtm8ll6.cloudfront.net/questions/2023/11/65543c9c65818_1700019355879.jpg)


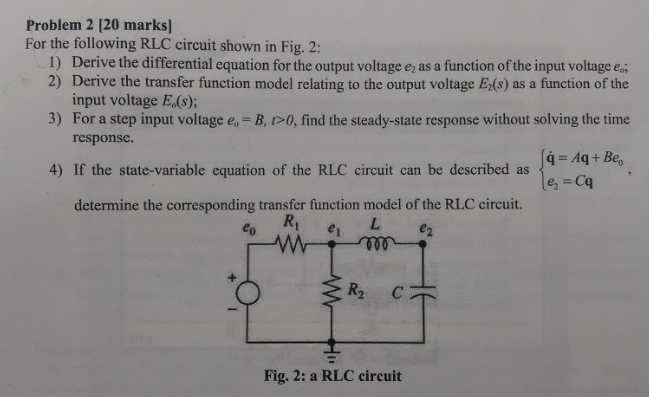
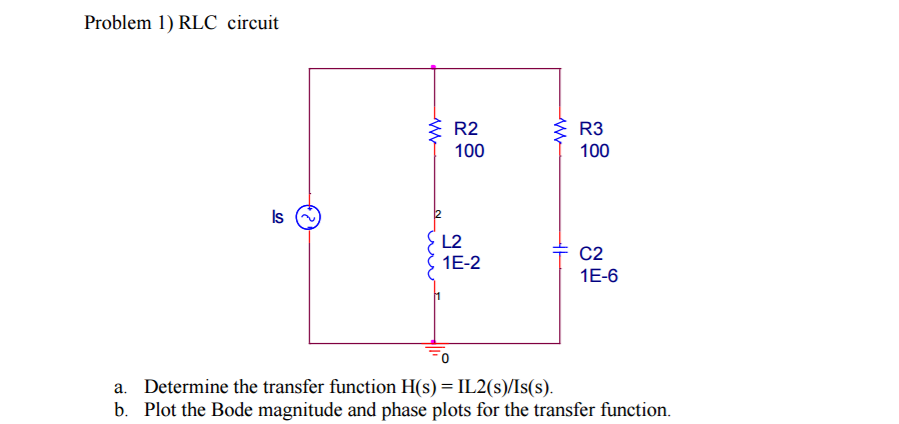
![SOLVED: Problem 2 [20 Marks] For the following RLC circuit shown in Fig ...](https://cdn.numerade.com/ask_images/dfeb77f531eb47dda6e1c691c8fc9a15.jpg)


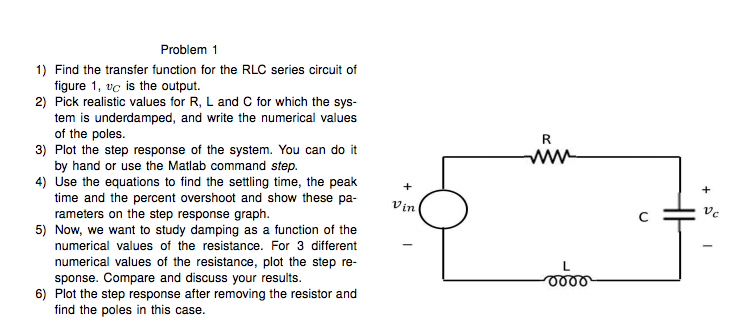
![SOLVED: i [10 marks] For the series RLC circuit shown in Figure 5 a. (4 ...](https://cdn.numerade.com/ask_images/fc05712cb63142e3bb21b6b2433f0f09.jpg)


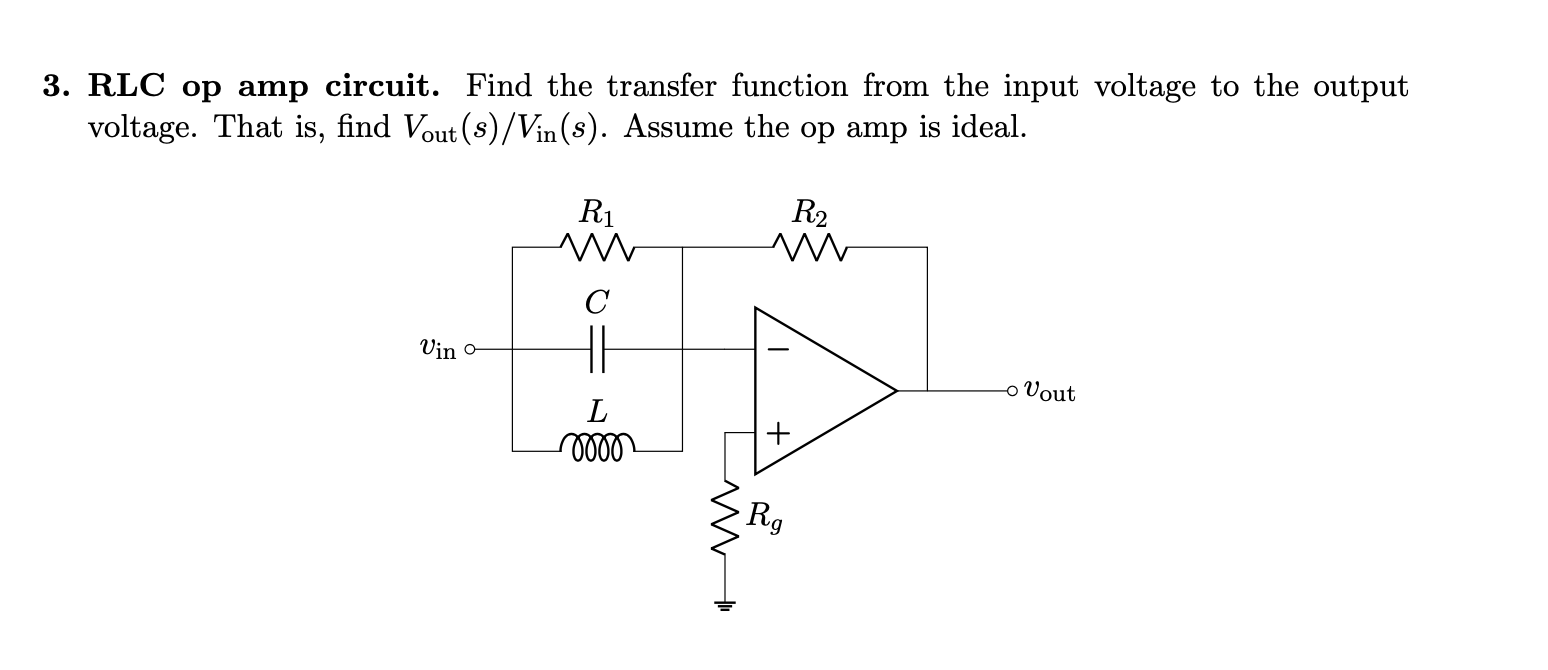
![SOLVED: Task 3 RLC circuit [3 points] Consider the circuit as in Figure ...](https://cdn.numerade.com/ask_images/3c1ae85a2de649a994fb2e5bc77bbe6d.jpg)


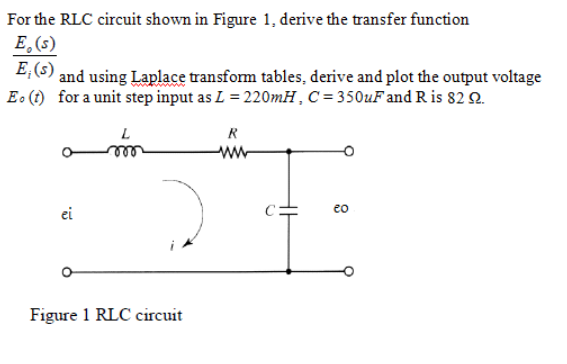
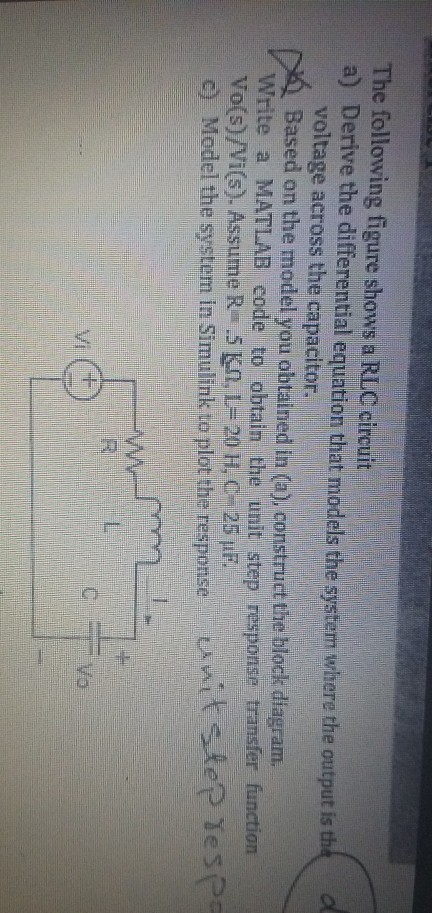
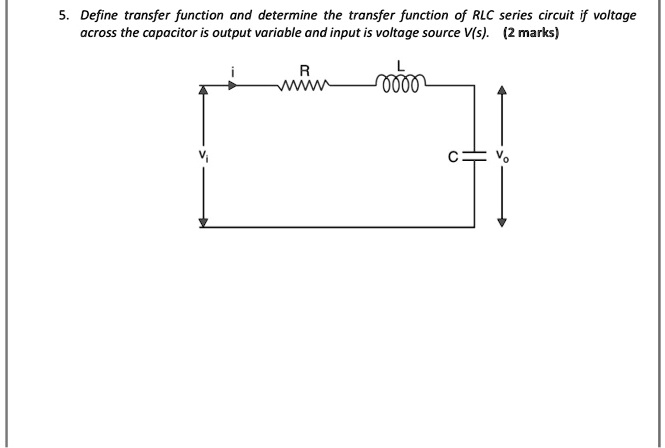
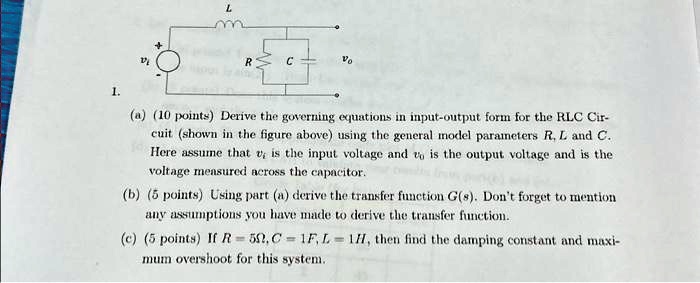
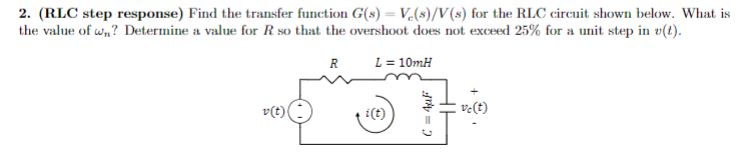
Discover the sophistication of solved: derive the transfer function model for the rlc circuit, g(s with our curated gallery of hundreds of images. featuring elegant examples of photography, images, and pictures. ideal for luxury lifestyle publications. Discover high-resolution solved: derive the transfer function model for the rlc circuit, g(s images optimized for various applications. Suitable for various applications including web design, social media, personal projects, and digital content creation All solved: derive the transfer function model for the rlc circuit, g(s images are available in high resolution with professional-grade quality, optimized for both digital and print applications, and include comprehensive metadata for easy organization and usage. Our solved: derive the transfer function model for the rlc circuit, g(s gallery offers diverse visual resources to bring your ideas to life. Cost-effective licensing makes professional solved: derive the transfer function model for the rlc circuit, g(s photography accessible to all budgets. Whether for commercial projects or personal use, our solved: derive the transfer function model for the rlc circuit, g(s collection delivers consistent excellence. Each image in our solved: derive the transfer function model for the rlc circuit, g(s gallery undergoes rigorous quality assessment before inclusion.