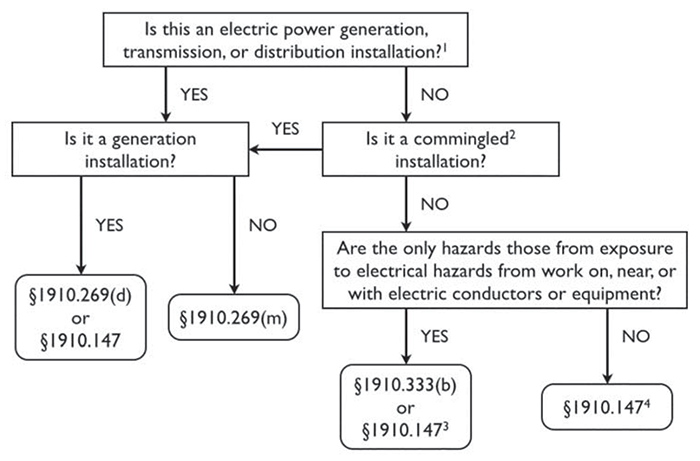
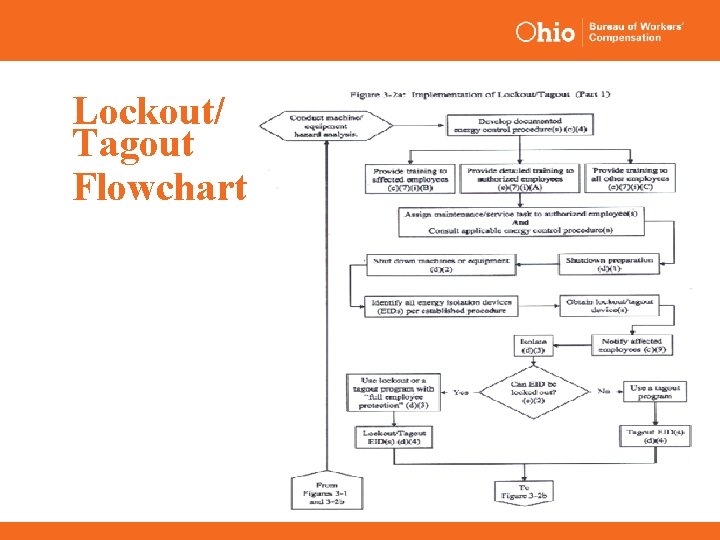
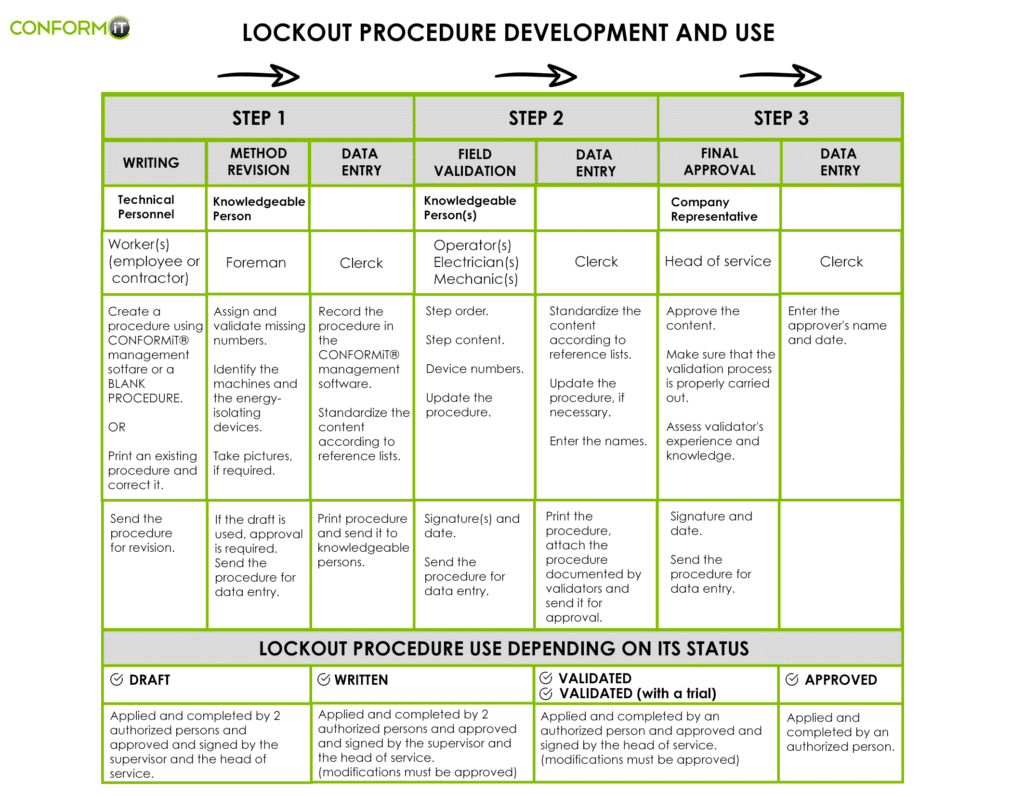
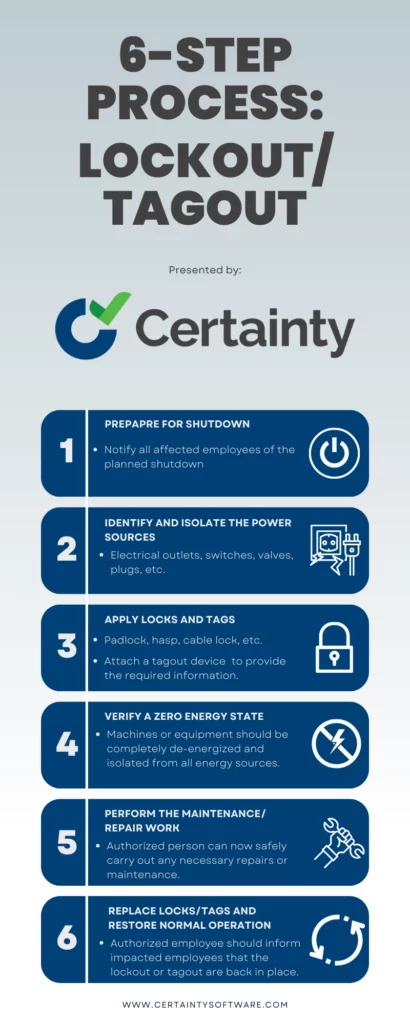
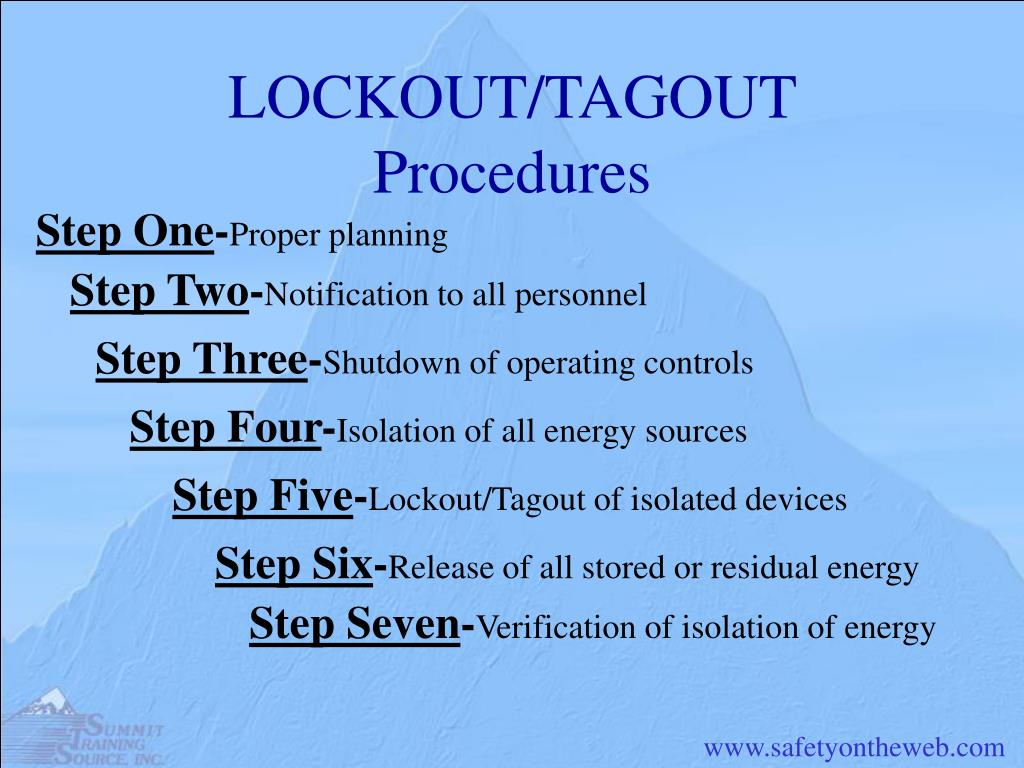
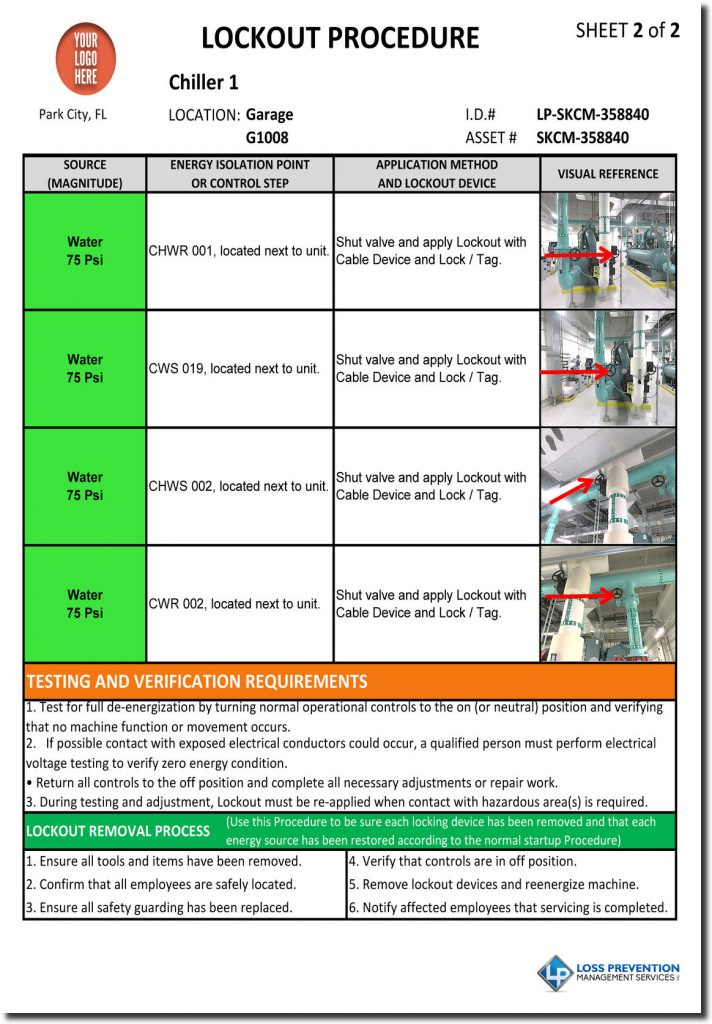
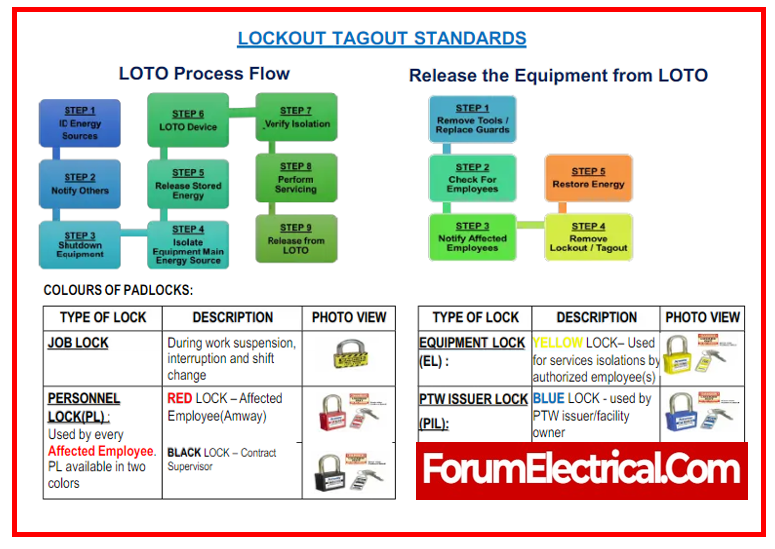
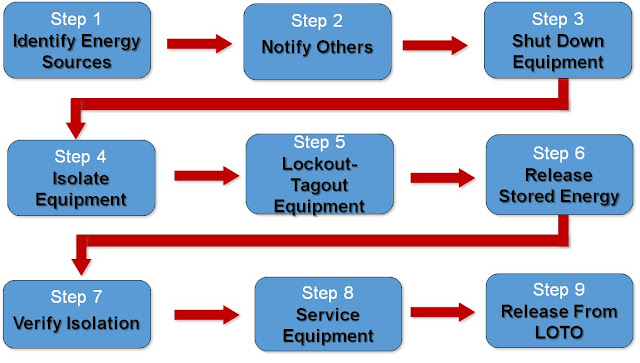
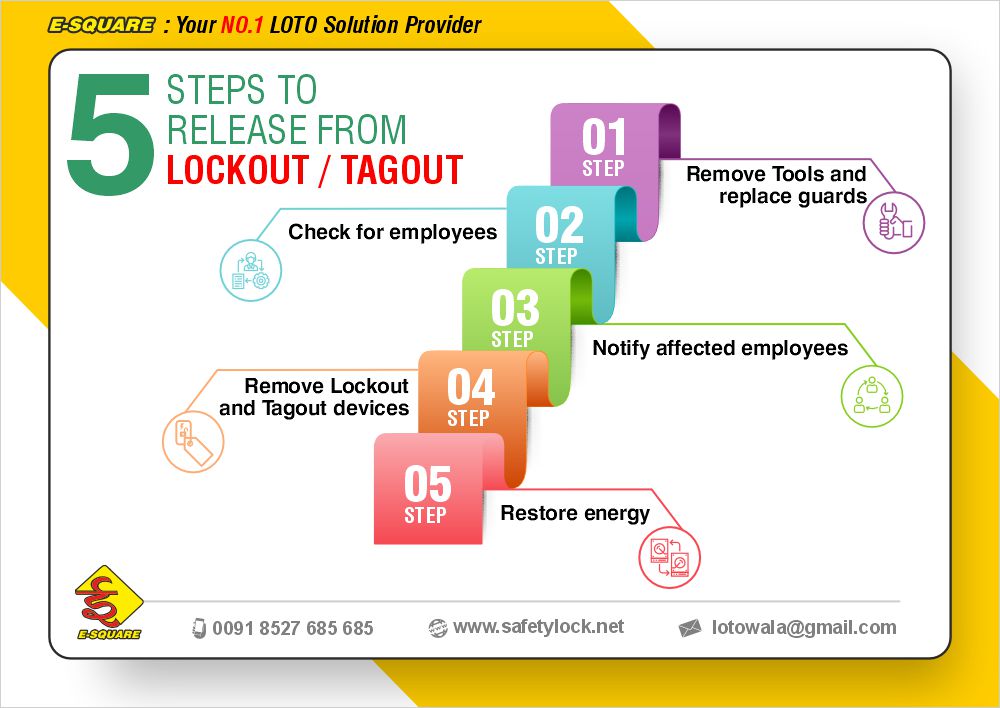
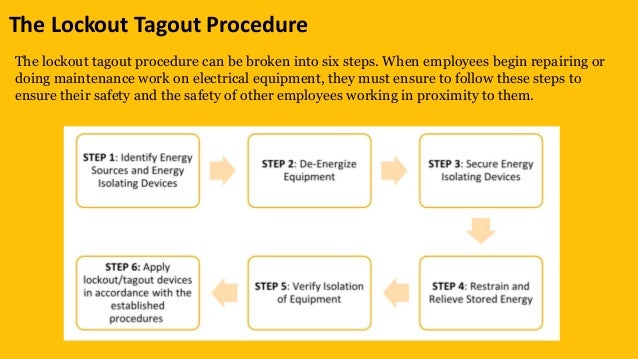
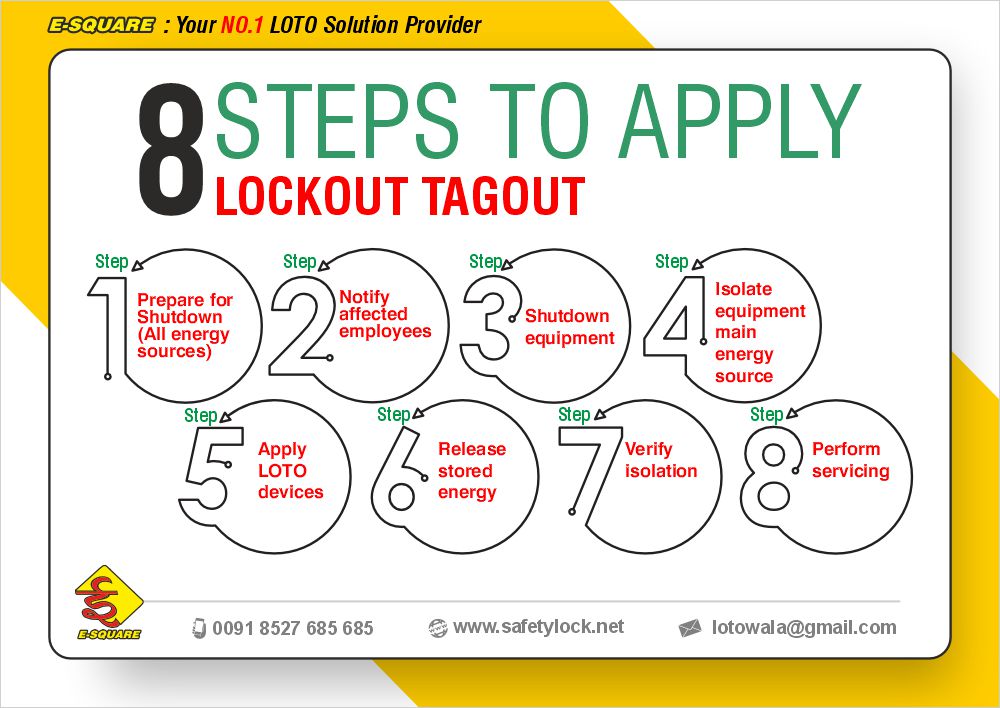
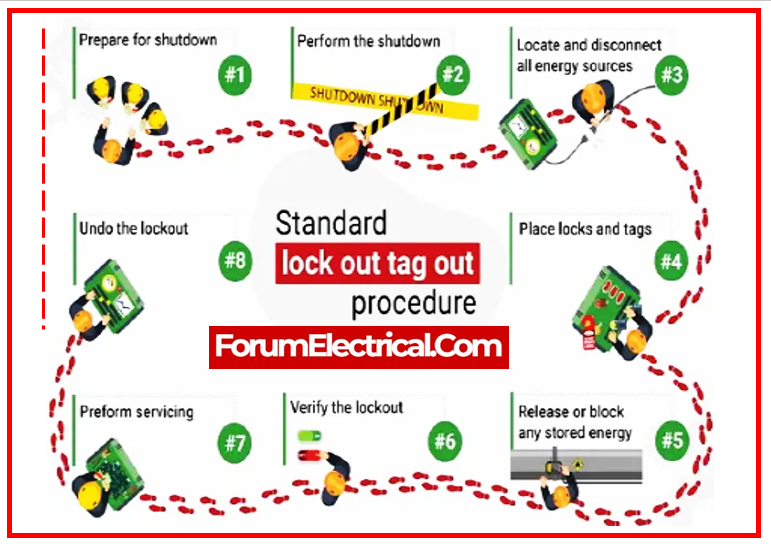
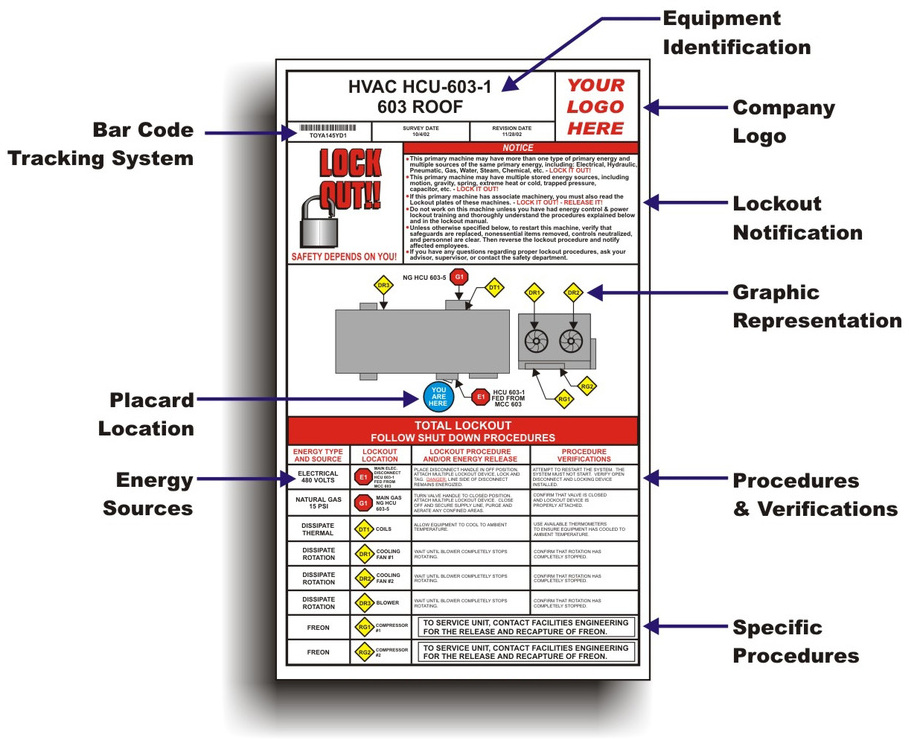
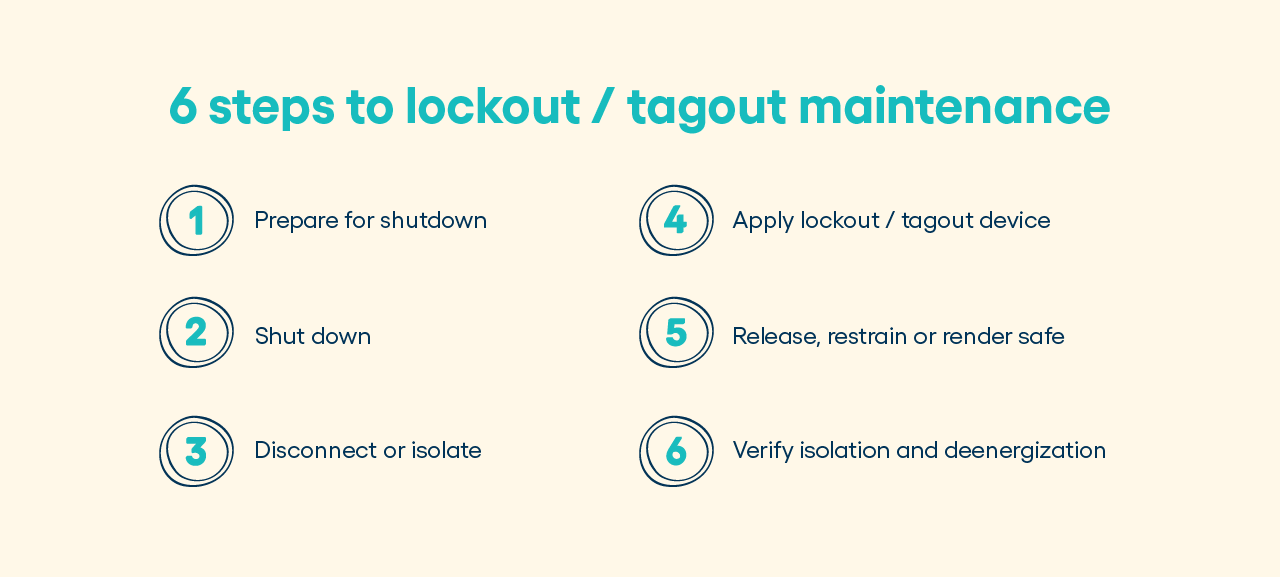
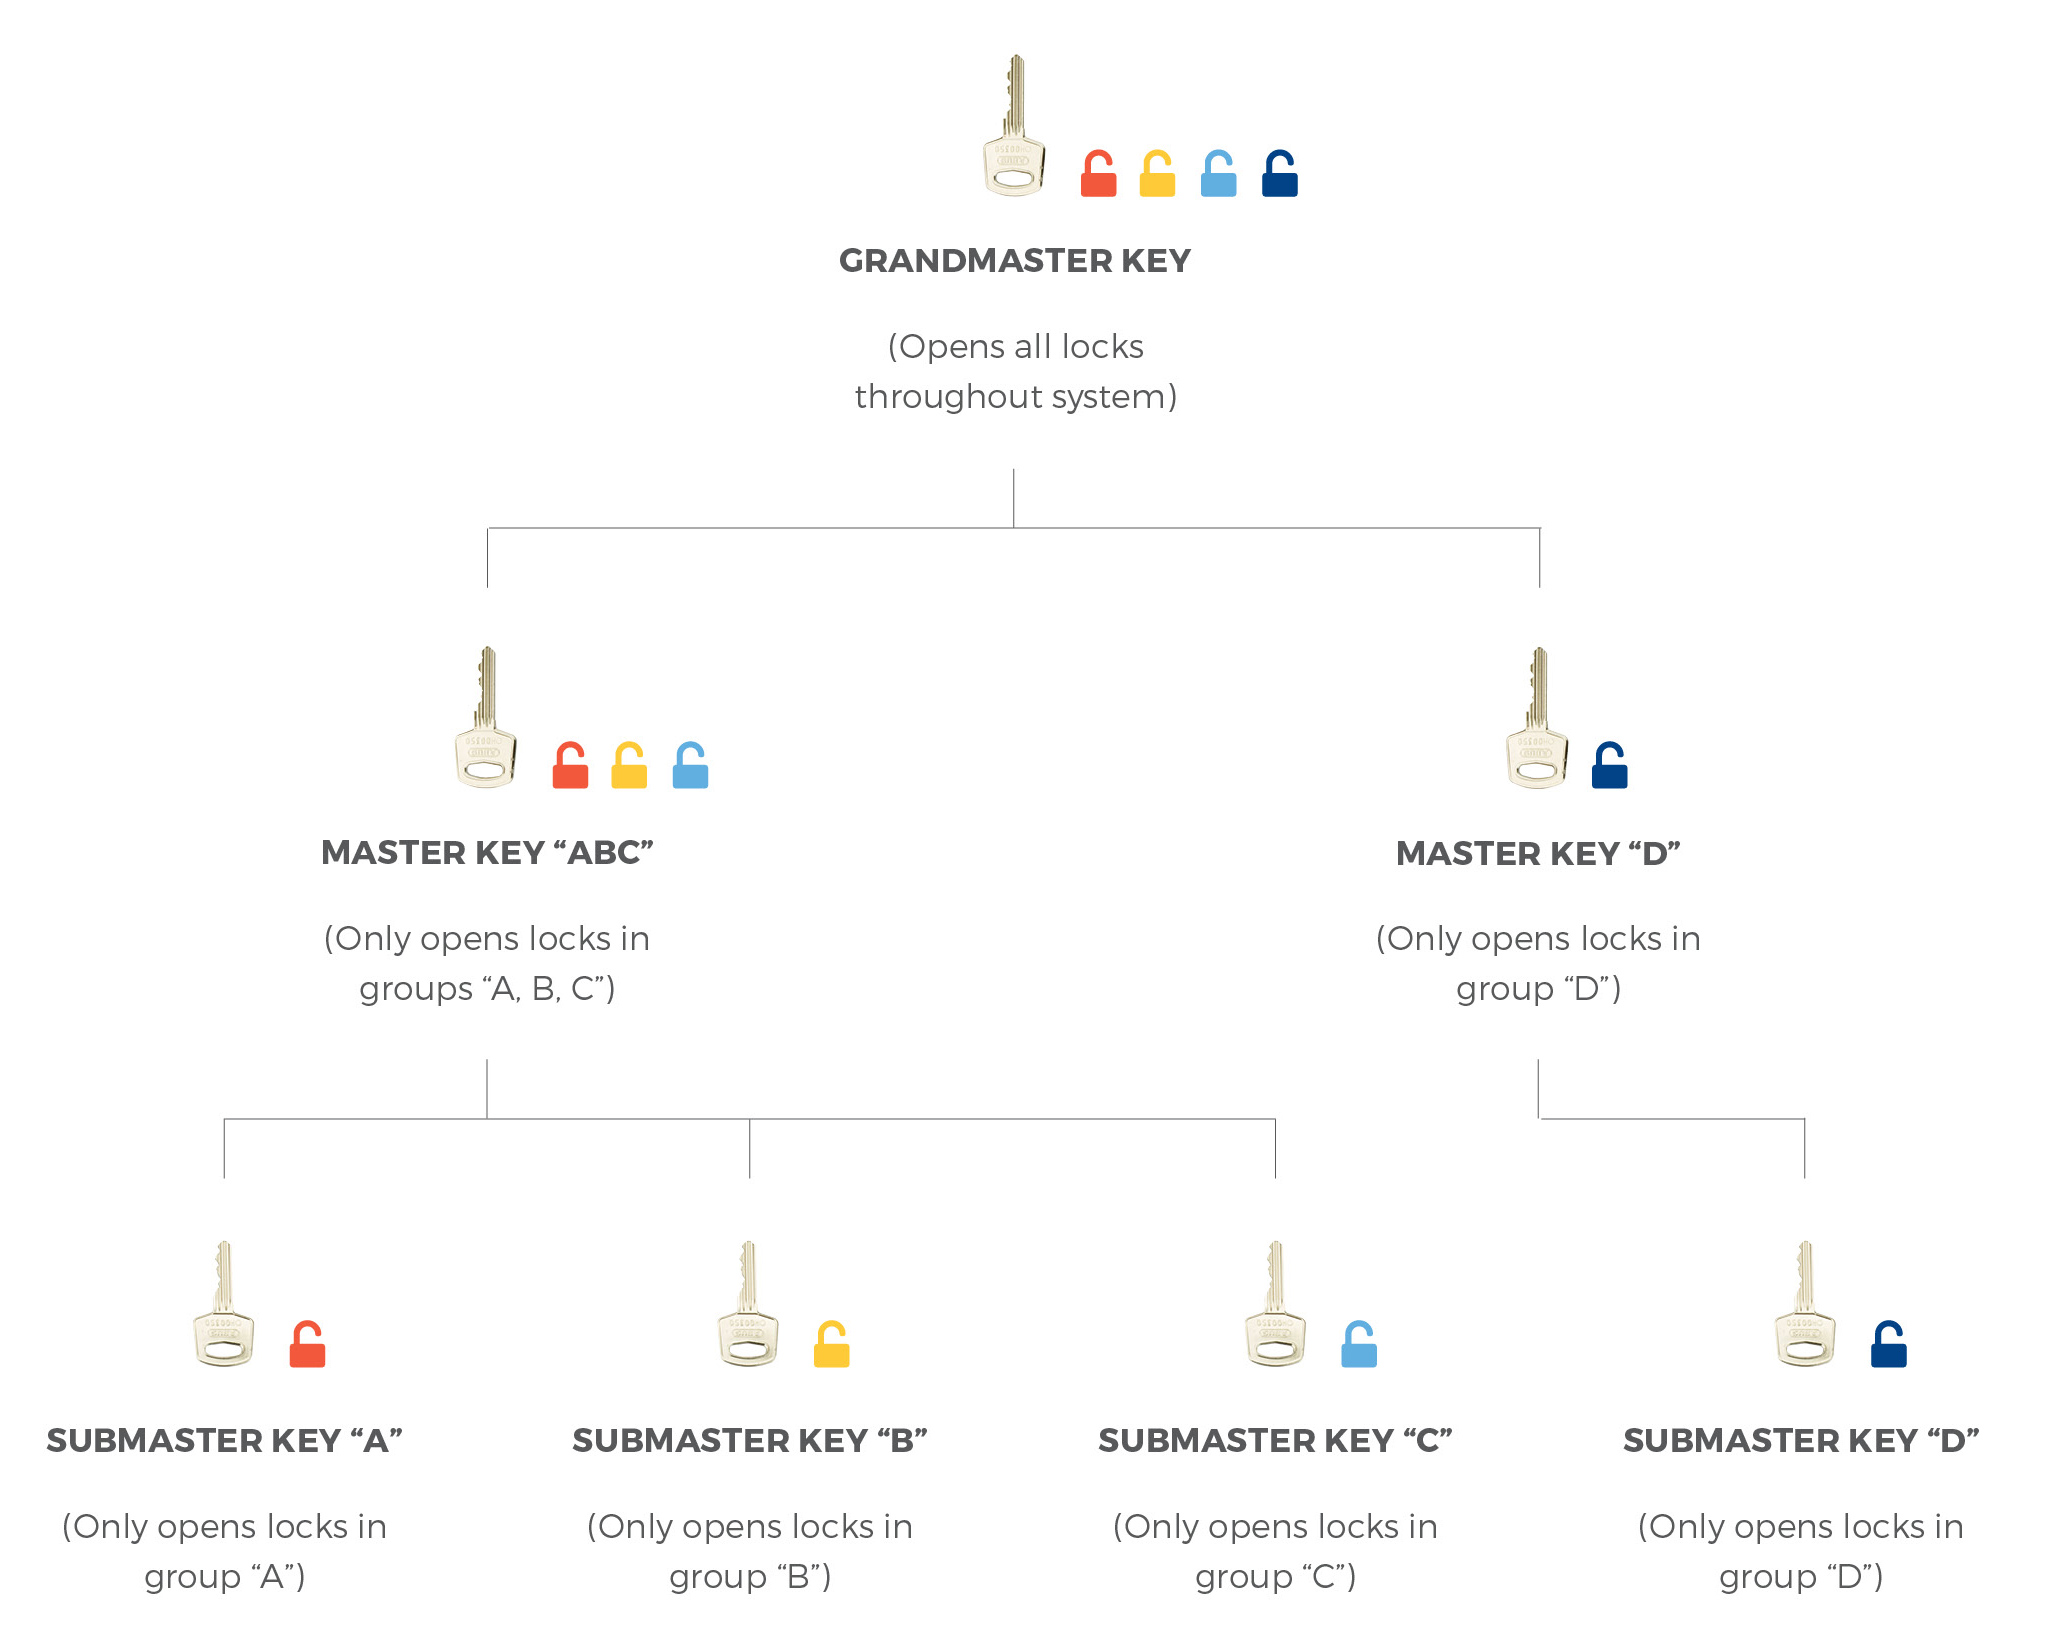
Simple Lockout/tagout Flow Chart


.png)


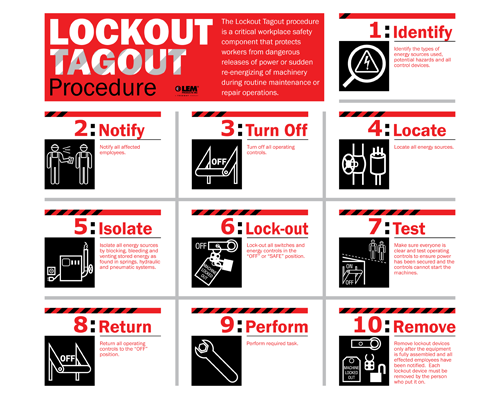
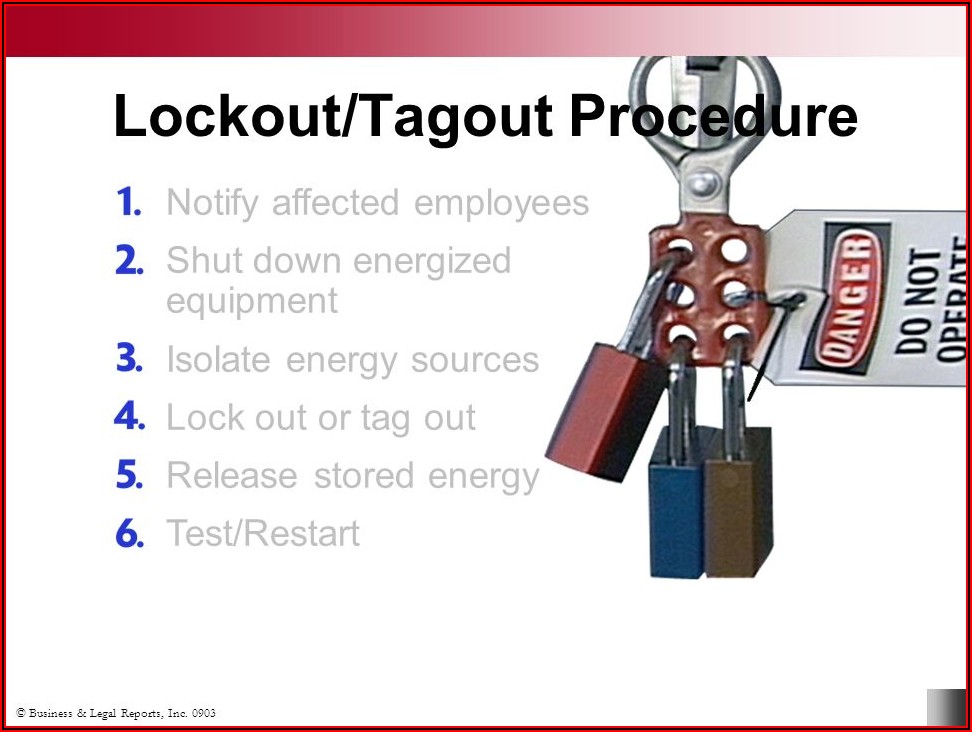
![Lockout Tagout Procedure [4] | Download Scientific Diagram](https://www.researchgate.net/profile/Fatihhi-Sj/publication/340134873/figure/fig1/AS:872814051606528@1585106494303/Lockout-Tagout-Procedure-4_Q320.jpg)


Analyze the structure of Simple Lockout/tagout Flow Chart with our comprehensive collection of vast arrays of technical images. documenting the technical details of artistic, creative, and design. designed for instructional and reference materials. Browse our premium Simple Lockout/tagout Flow Chart gallery featuring professionally curated photographs. Suitable for various applications including web design, social media, personal projects, and digital content creation All Simple Lockout/tagout Flow Chart images are available in high resolution with professional-grade quality, optimized for both digital and print applications, and include comprehensive metadata for easy organization and usage. Explore the versatility of our Simple Lockout/tagout Flow Chart collection for various creative and professional projects. Reliable customer support ensures smooth experience throughout the Simple Lockout/tagout Flow Chart selection process. Time-saving browsing features help users locate ideal Simple Lockout/tagout Flow Chart images quickly. Whether for commercial projects or personal use, our Simple Lockout/tagout Flow Chart collection delivers consistent excellence. Each image in our Simple Lockout/tagout Flow Chart gallery undergoes rigorous quality assessment before inclusion. Professional licensing options accommodate both commercial and educational usage requirements. Multiple resolution options ensure optimal performance across different platforms and applications. Comprehensive tagging systems facilitate quick discovery of relevant Simple Lockout/tagout Flow Chart content.