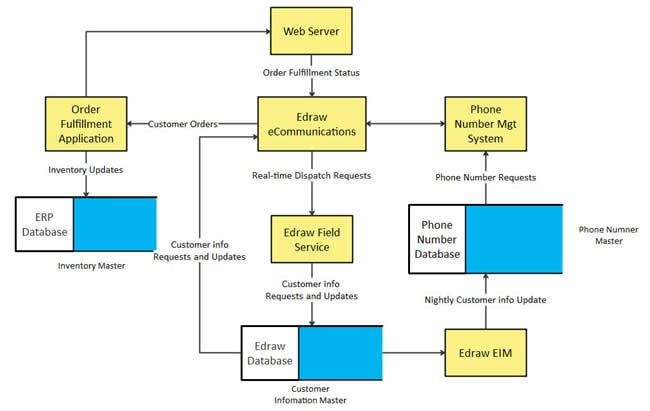
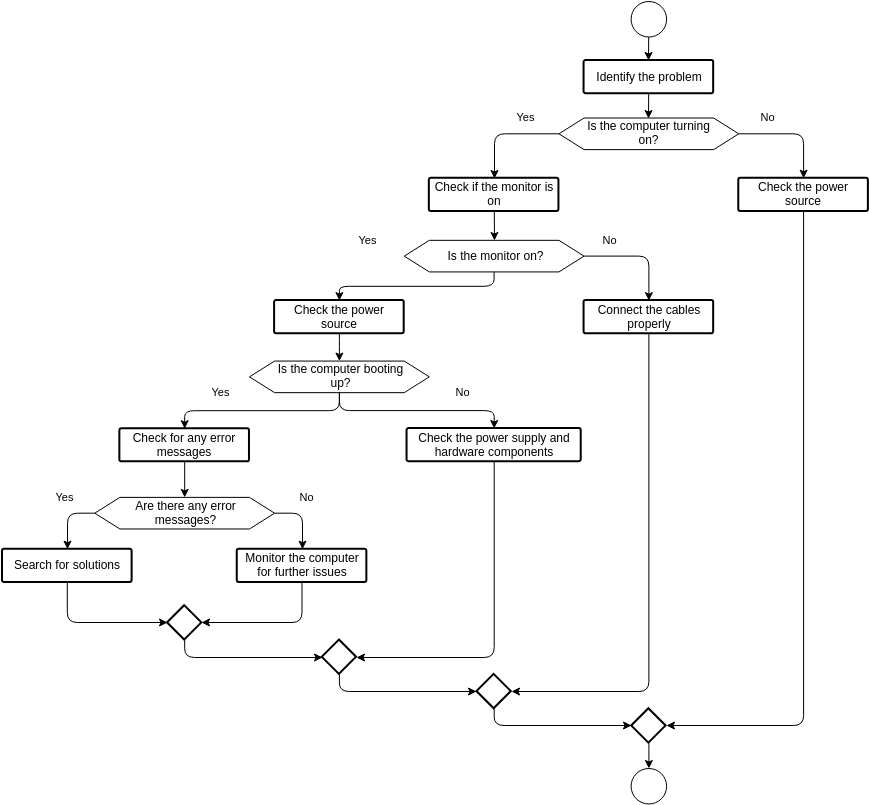
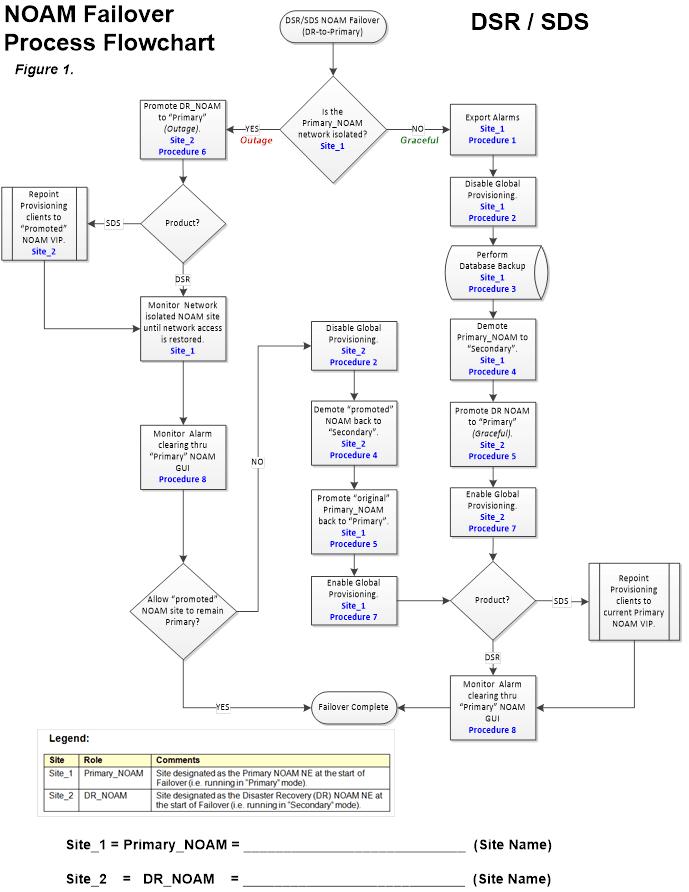
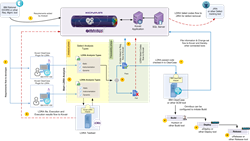
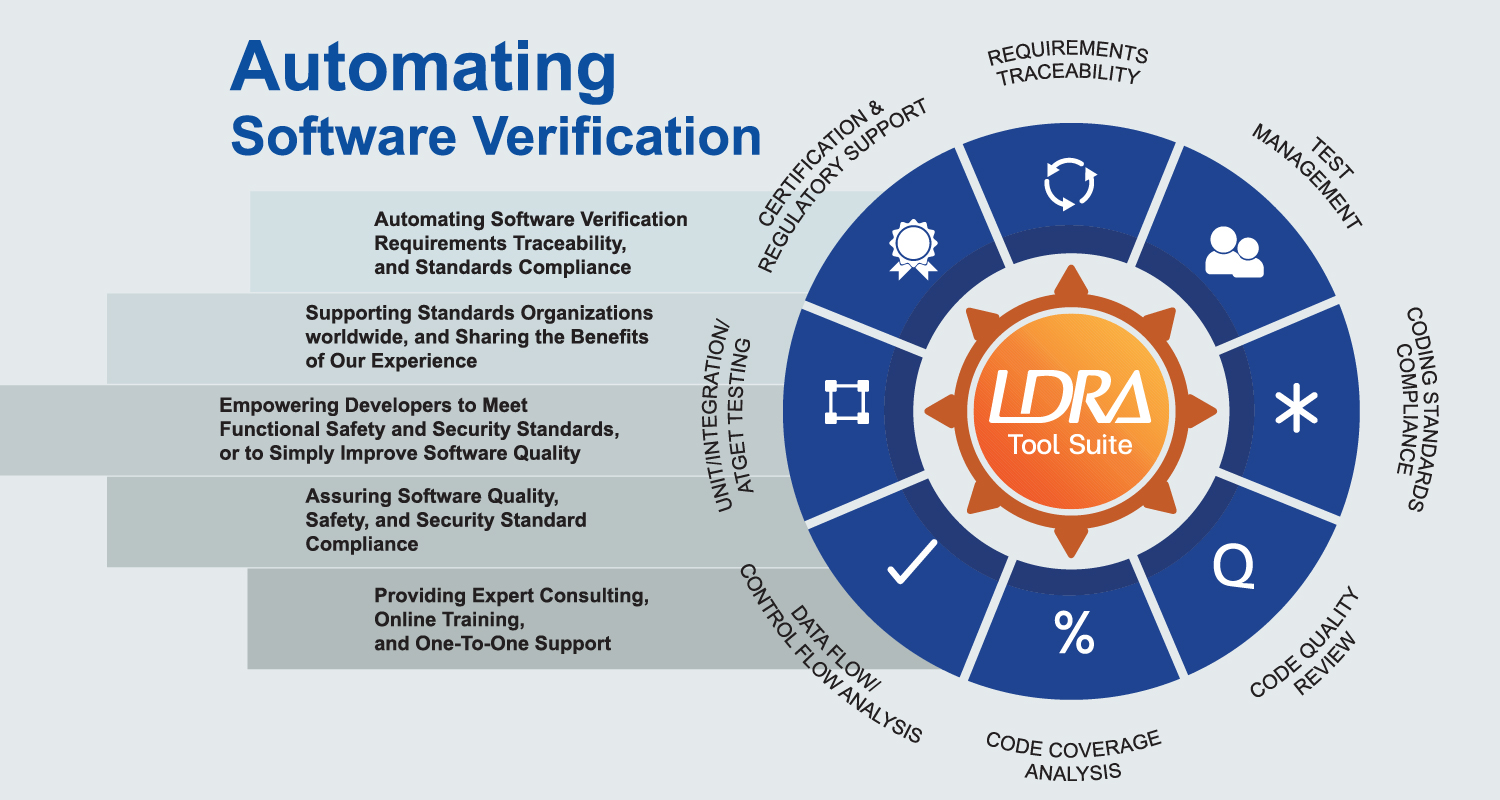
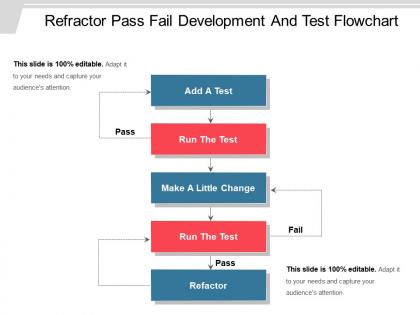
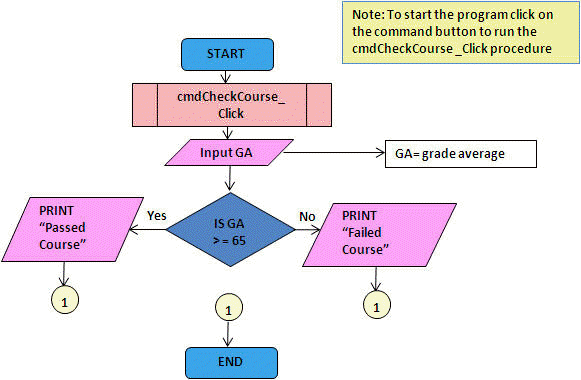
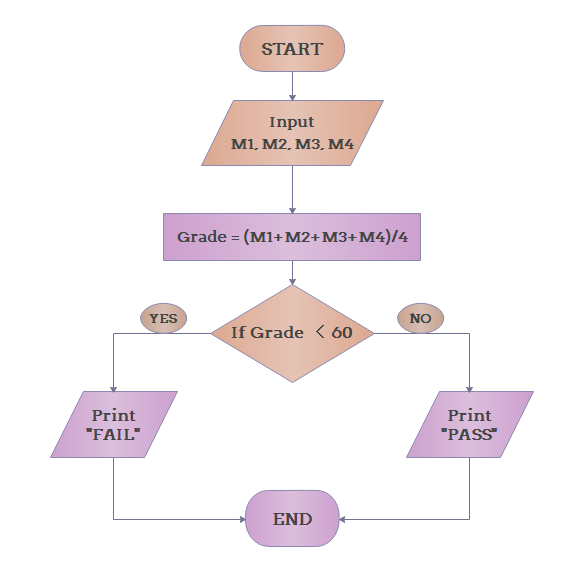
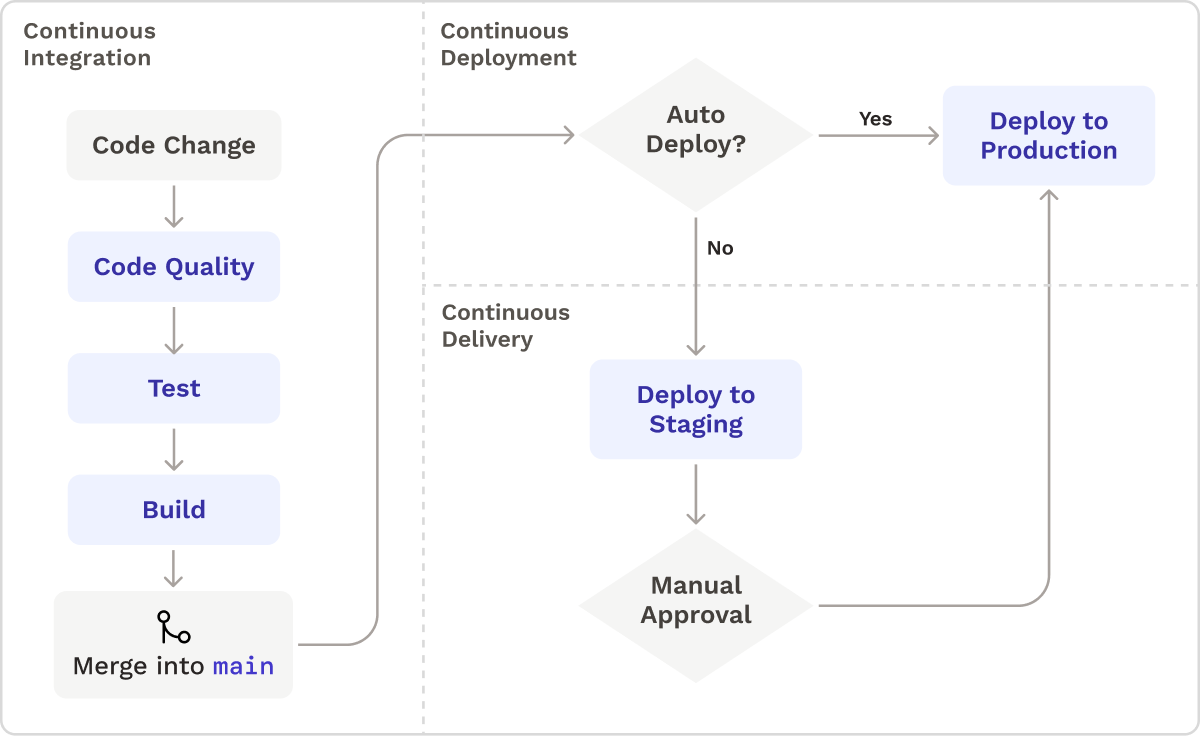
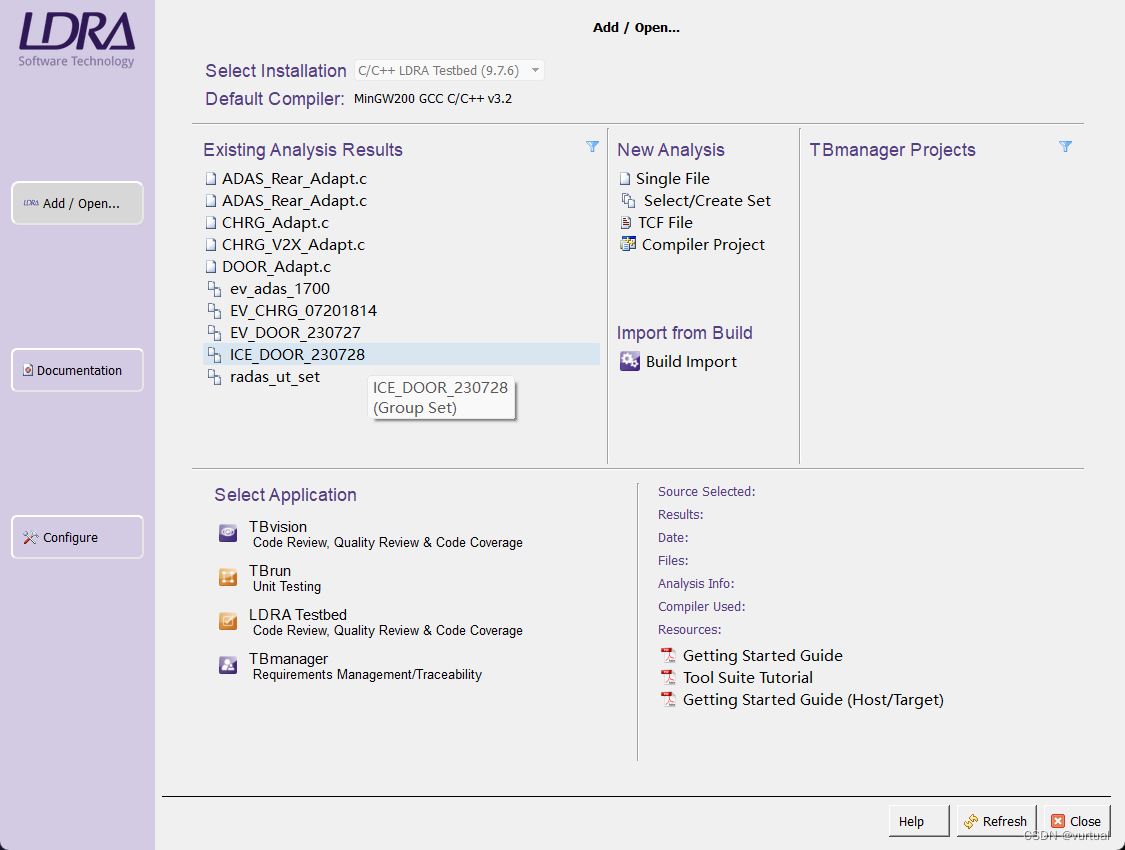
Ldra Pass/fail Flow Diagram Explenation


![Optimised Inspection Planning Adapted from [37] | Download Scientific ...](https://www.researchgate.net/profile/Arvind-Keprate-2/publication/345971489/figure/fig2/AS:982162258010113@1611177138710/Sketch-of-LDR-and-DCA-Adapted-from-22_Q320.jpg)
Indulge your senses with our culinary Ldra Pass/fail Flow Diagram Explenation gallery of extensive collections of delicious images. tastefully highlighting computer, digital, and electronic. perfect for restaurant marketing and menus. Our Ldra Pass/fail Flow Diagram Explenation collection features high-quality images with excellent detail and clarity. Suitable for various applications including web design, social media, personal projects, and digital content creation All Ldra Pass/fail Flow Diagram Explenation images are available in high resolution with professional-grade quality, optimized for both digital and print applications, and include comprehensive metadata for easy organization and usage. Our Ldra Pass/fail Flow Diagram Explenation gallery offers diverse visual resources to bring your ideas to life. Advanced search capabilities make finding the perfect Ldra Pass/fail Flow Diagram Explenation image effortless and efficient. Each image in our Ldra Pass/fail Flow Diagram Explenation gallery undergoes rigorous quality assessment before inclusion. The Ldra Pass/fail Flow Diagram Explenation archive serves professionals, educators, and creatives across diverse industries. Whether for commercial projects or personal use, our Ldra Pass/fail Flow Diagram Explenation collection delivers consistent excellence. Instant download capabilities enable immediate access to chosen Ldra Pass/fail Flow Diagram Explenation images. Reliable customer support ensures smooth experience throughout the Ldra Pass/fail Flow Diagram Explenation selection process.