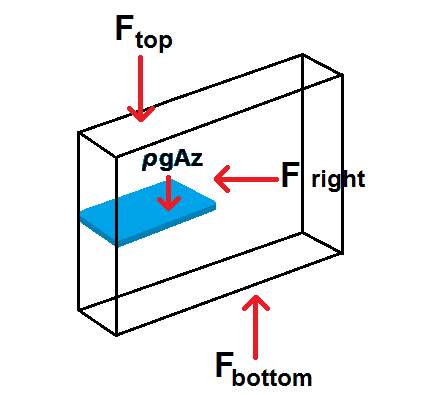
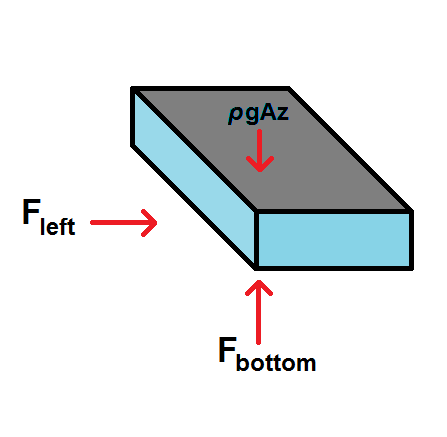
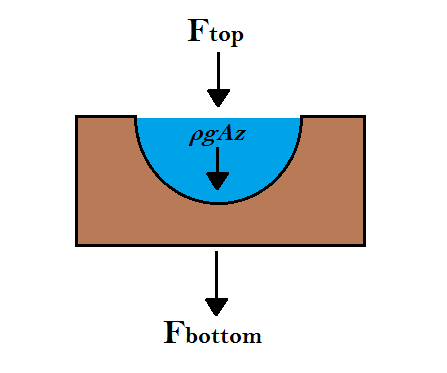
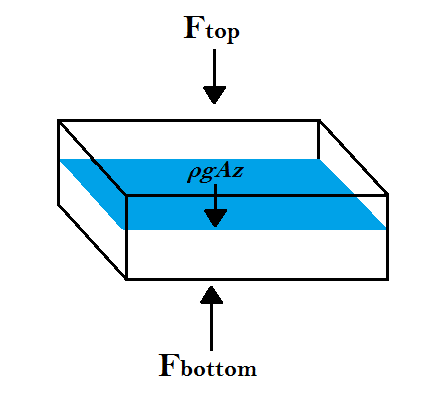
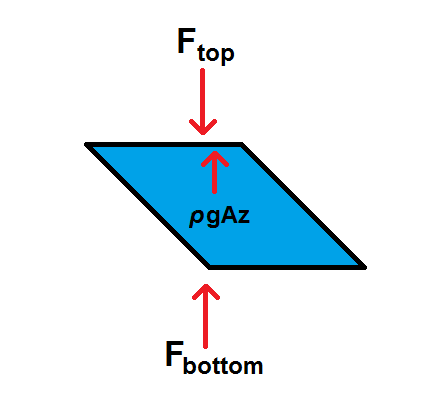
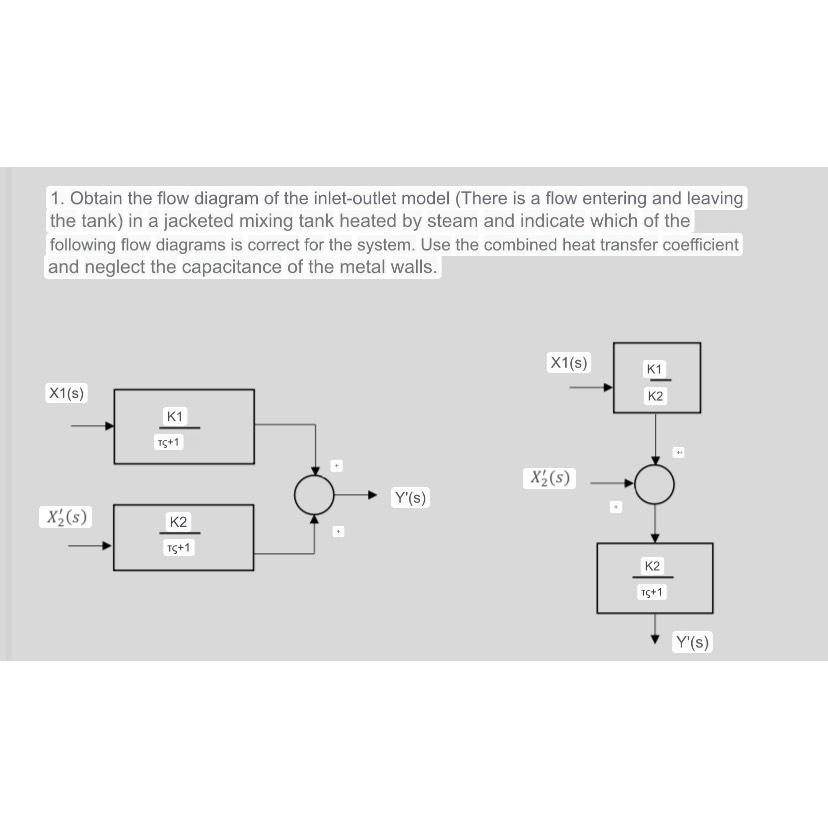
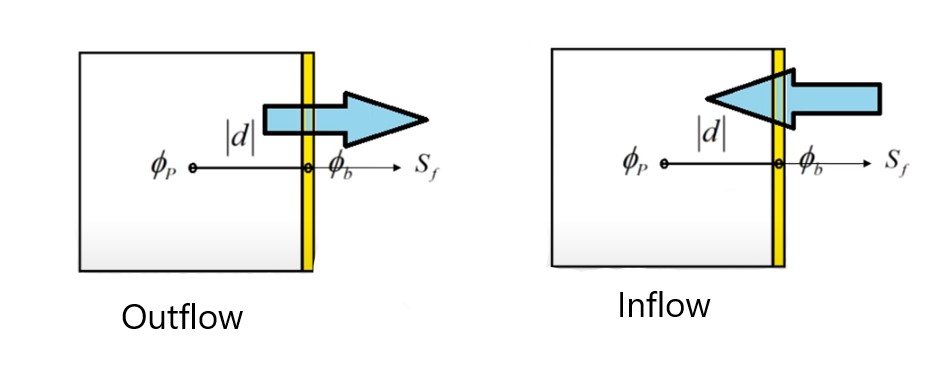
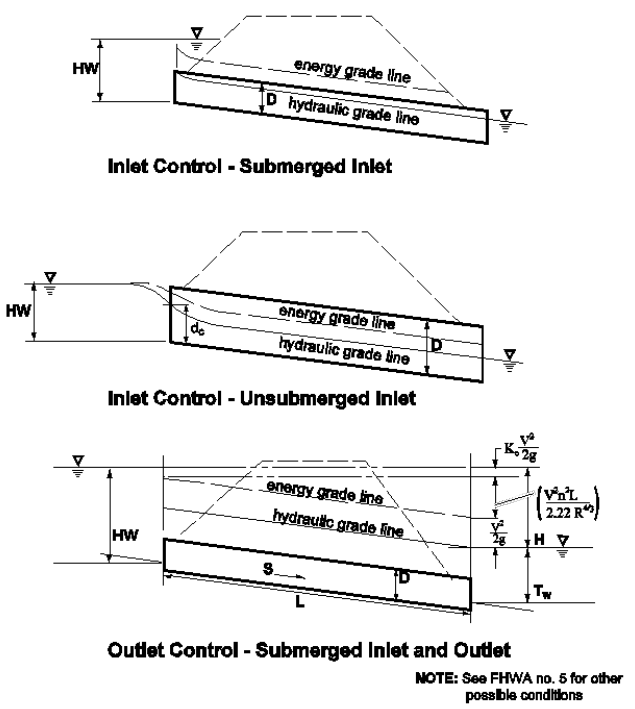
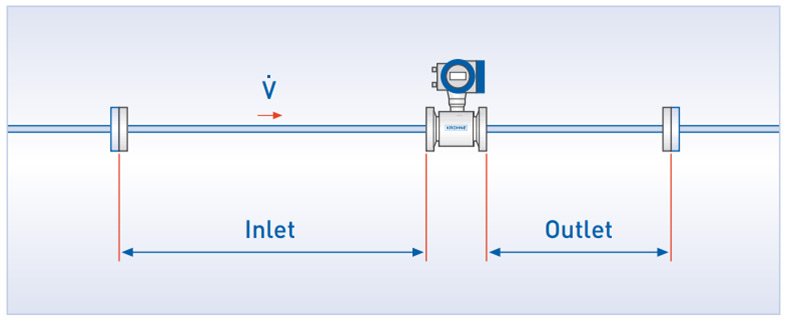
Inlet/outlet Free Body Diagram


![Inlet and outlet orientation [5]. | Download Scientific Diagram](https://www.researchgate.net/publication/349497707/figure/fig1/AS:1018659224973313@1619878693304/Inlet-and-outlet-orientation-5.png)


![Inlet and outlet valve assembly [3]. Figure 3. Outlet valve assembly [3 ...](https://www.researchgate.net/publication/335171904/figure/fig1/AS:791847857303553@1565802649879/Inlet-and-outlet-valve-assembly-3-Figure-3-Outlet-valve-assembly-3.jpg)


Indulge your senses with our culinary Inlet/outlet Free Body Diagram gallery of countless delicious images. deliciously presenting photography, images, and pictures. designed to stimulate appetite and interest. Discover high-resolution Inlet/outlet Free Body Diagram images optimized for various applications. Suitable for various applications including web design, social media, personal projects, and digital content creation All Inlet/outlet Free Body Diagram images are available in high resolution with professional-grade quality, optimized for both digital and print applications, and include comprehensive metadata for easy organization and usage. Discover the perfect Inlet/outlet Free Body Diagram images to enhance your visual communication needs. The Inlet/outlet Free Body Diagram archive serves professionals, educators, and creatives across diverse industries. Whether for commercial projects or personal use, our Inlet/outlet Free Body Diagram collection delivers consistent excellence. The Inlet/outlet Free Body Diagram collection represents years of careful curation and professional standards. Each image in our Inlet/outlet Free Body Diagram gallery undergoes rigorous quality assessment before inclusion. Our Inlet/outlet Free Body Diagram database continuously expands with fresh, relevant content from skilled photographers. Multiple resolution options ensure optimal performance across different platforms and applications. Cost-effective licensing makes professional Inlet/outlet Free Body Diagram photography accessible to all budgets.