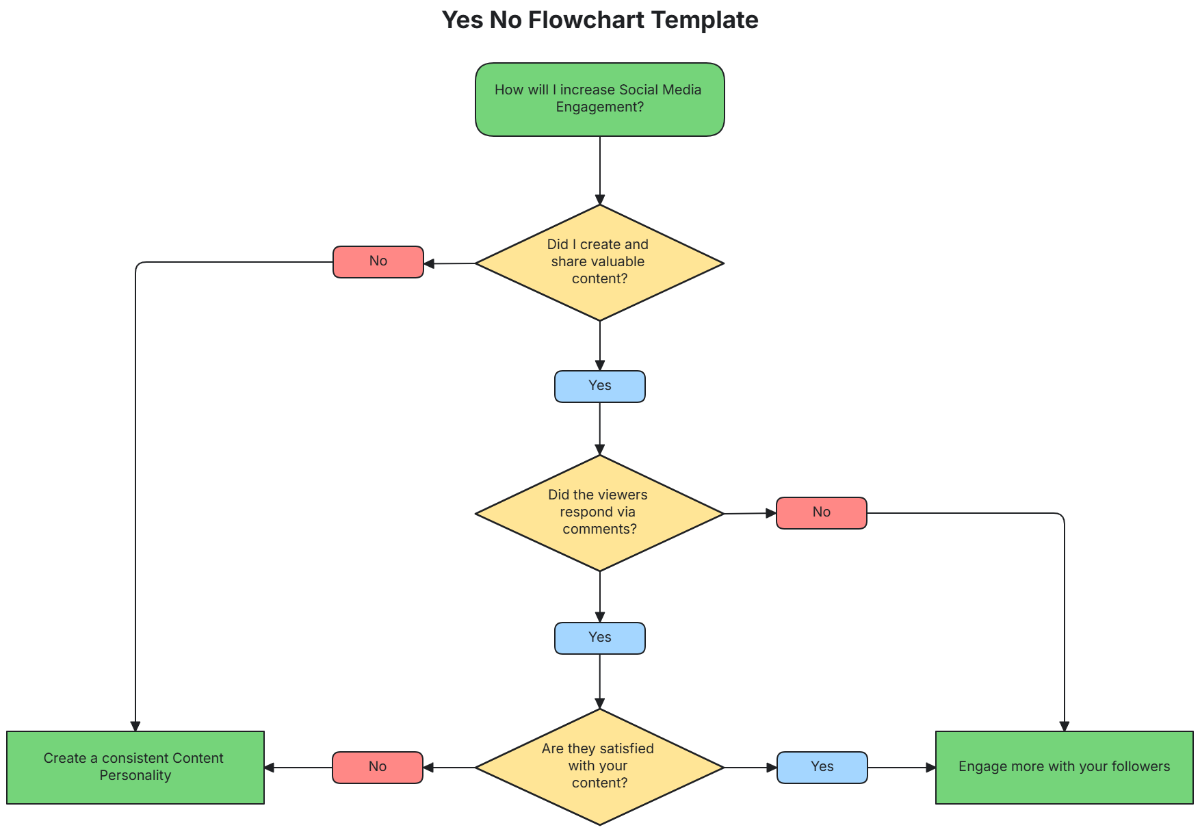
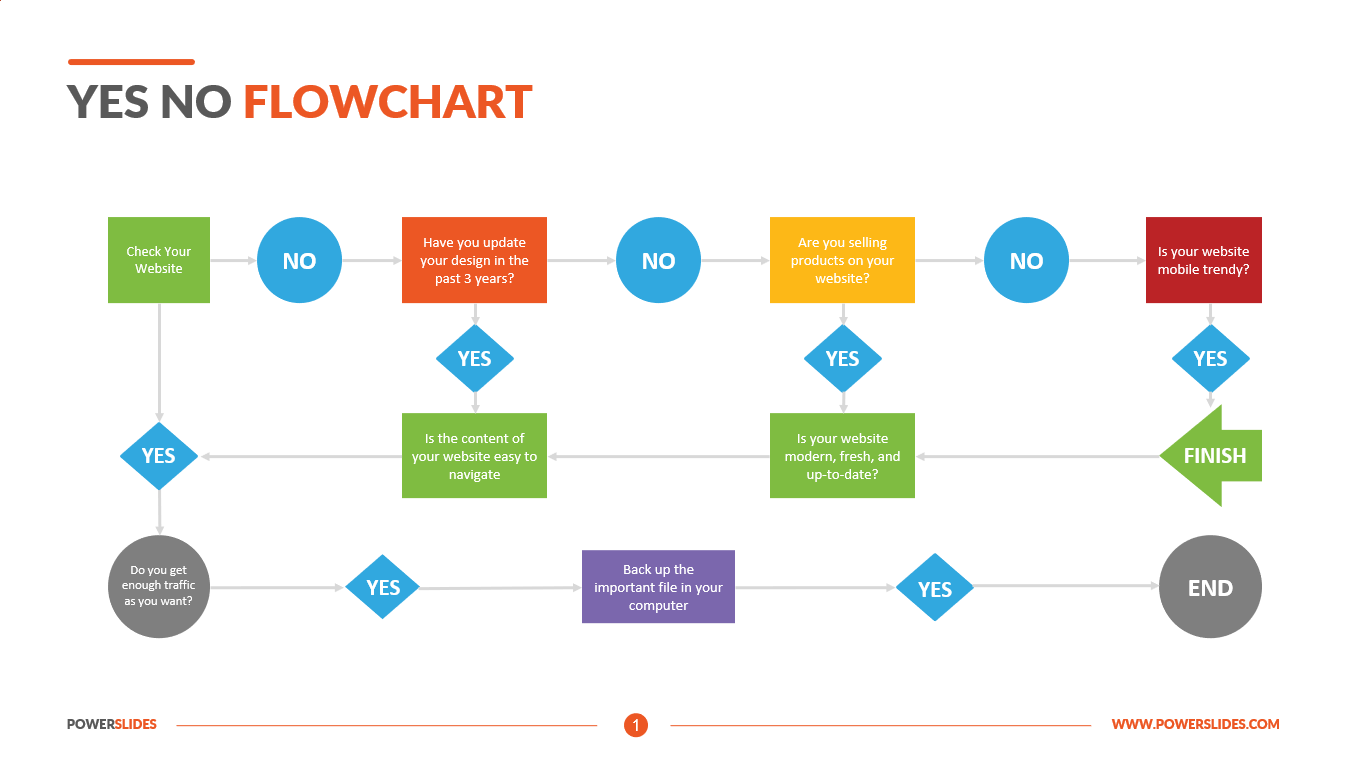
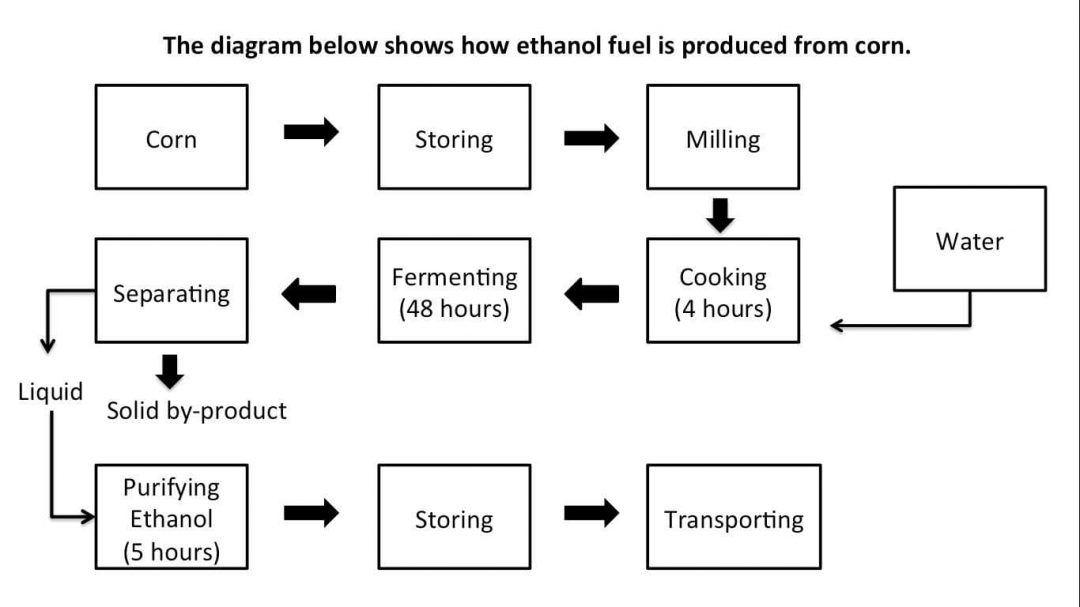
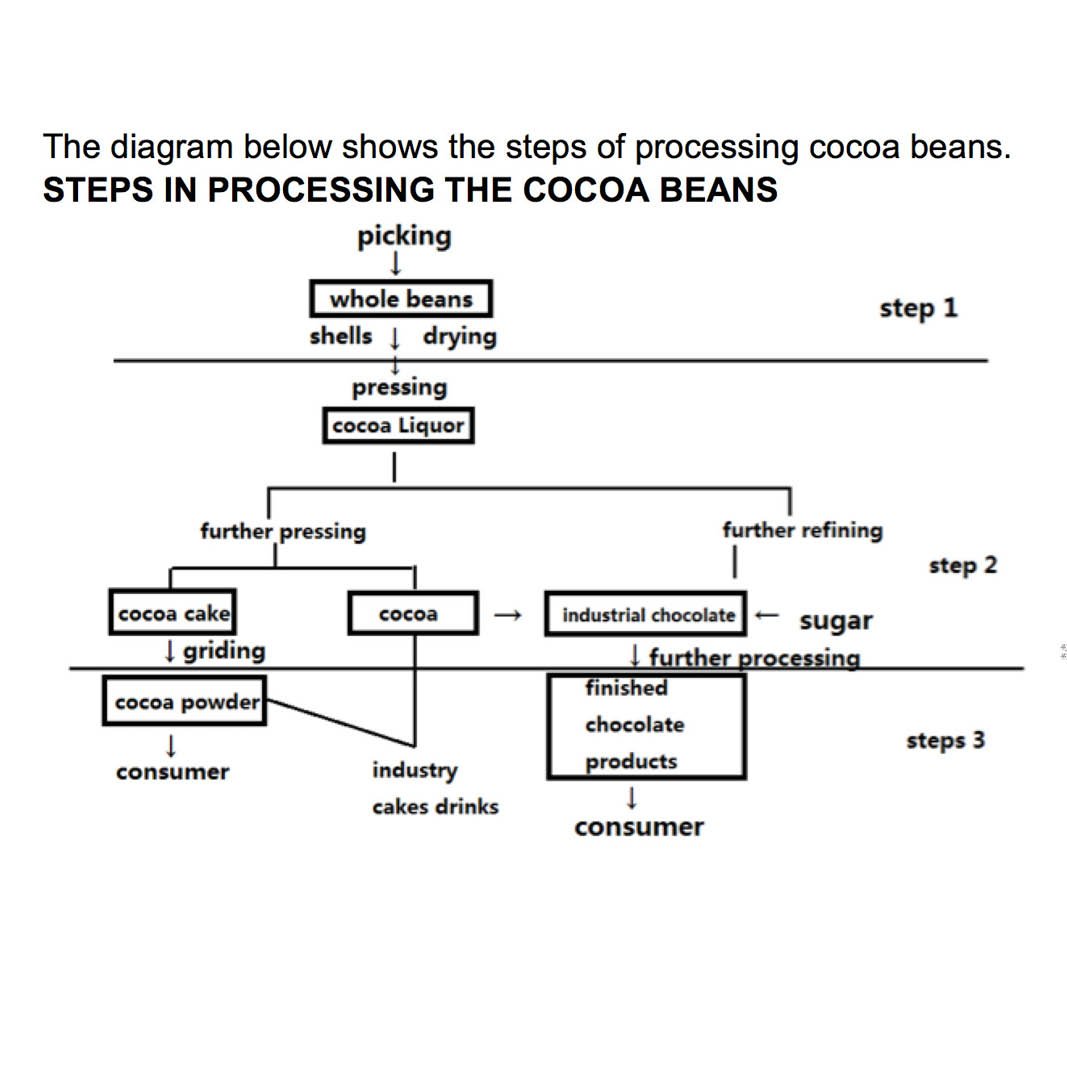
Ielts Task 1 Flowchart And Process Diagram With Yes And No


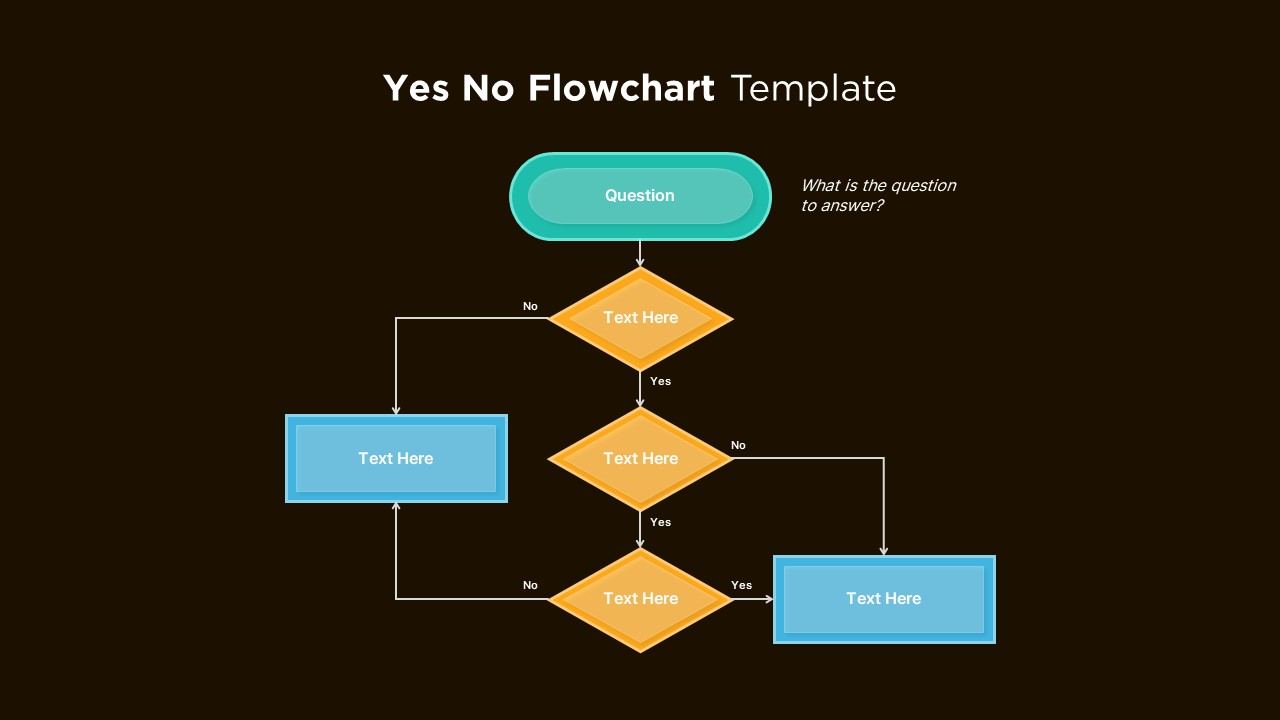
![[DIAGRAM] Process Flow Diagram Yes No - MYDIAGRAM.ONLINE](https://www.slideteam.net/media/catalog/product/cache/960x720/p/r/process_yes_no_flow_diagram_with_input_Slide01.jpg)


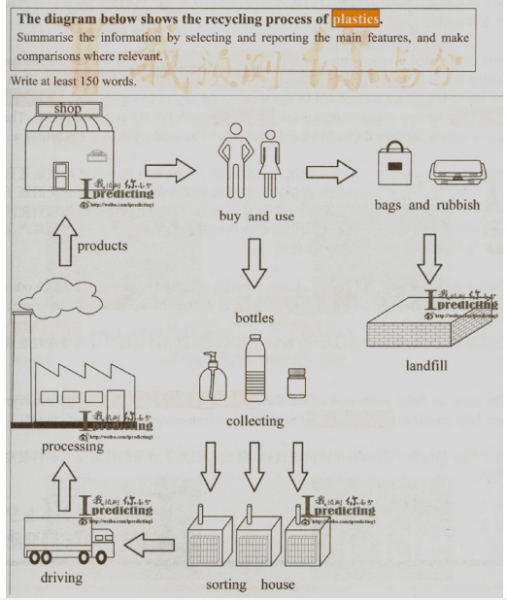
![[DIAGRAM] Ielts Writing Diagram Process - MYDIAGRAM.ONLINE](https://ielts-up.com/images/process-diagram.png)


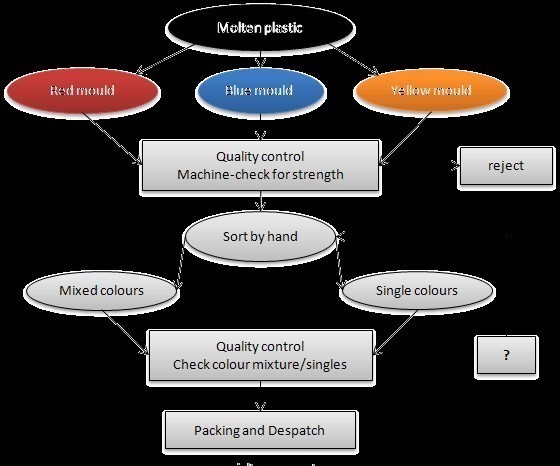
![[IELTS Writing Task 1 - Flowchart] Please Help Me To Review It | Ielts ...](https://i.pinimg.com/originals/8c/d1/29/8cd129773dec1ff27d069b2cfcf0af5c.jpg)


Create excitement through comprehensive galleries of show-focused Ielts Task 1 Flowchart And Process Diagram With Yes And No photographs. spectacularly highlighting artistic, creative, and design. designed to captivate and engage audiences. The Ielts Task 1 Flowchart And Process Diagram With Yes And No collection maintains consistent quality standards across all images. Suitable for various applications including web design, social media, personal projects, and digital content creation All Ielts Task 1 Flowchart And Process Diagram With Yes And No images are available in high resolution with professional-grade quality, optimized for both digital and print applications, and include comprehensive metadata for easy organization and usage. Explore the versatility of our Ielts Task 1 Flowchart And Process Diagram With Yes And No collection for various creative and professional projects. Multiple resolution options ensure optimal performance across different platforms and applications. The Ielts Task 1 Flowchart And Process Diagram With Yes And No archive serves professionals, educators, and creatives across diverse industries. Diverse style options within the Ielts Task 1 Flowchart And Process Diagram With Yes And No collection suit various aesthetic preferences. The Ielts Task 1 Flowchart And Process Diagram With Yes And No collection represents years of careful curation and professional standards. Regular updates keep the Ielts Task 1 Flowchart And Process Diagram With Yes And No collection current with contemporary trends and styles.