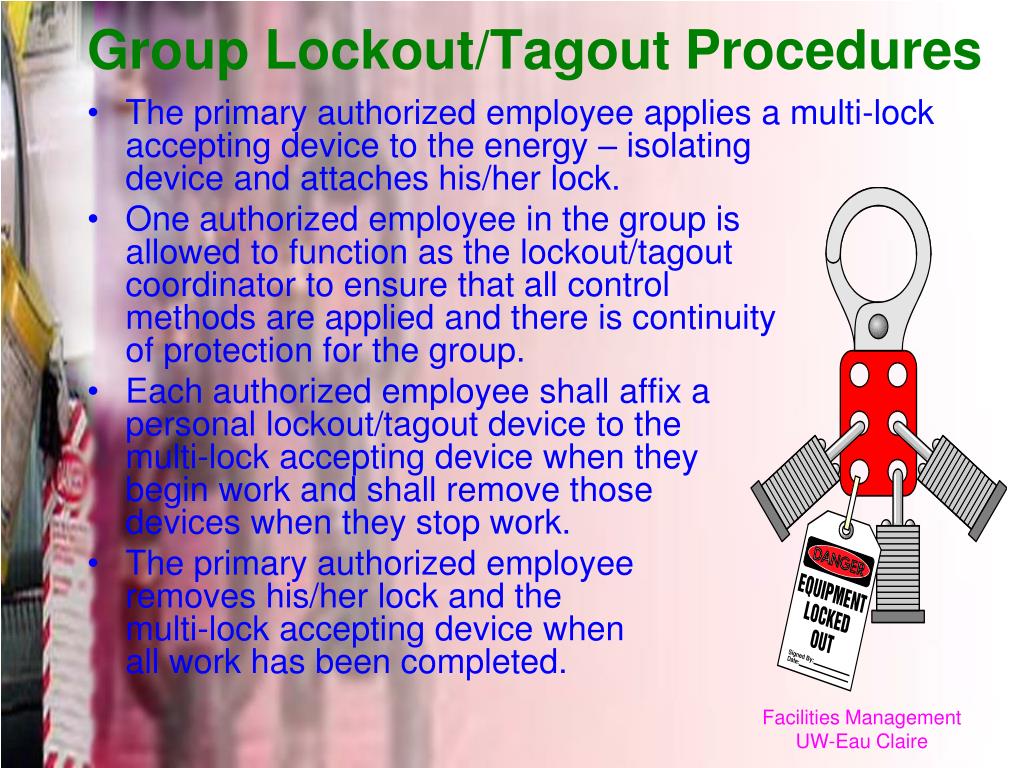
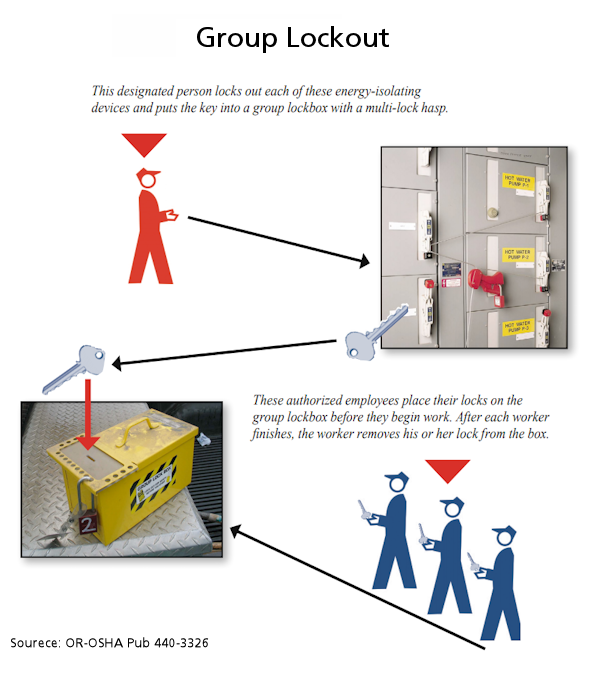
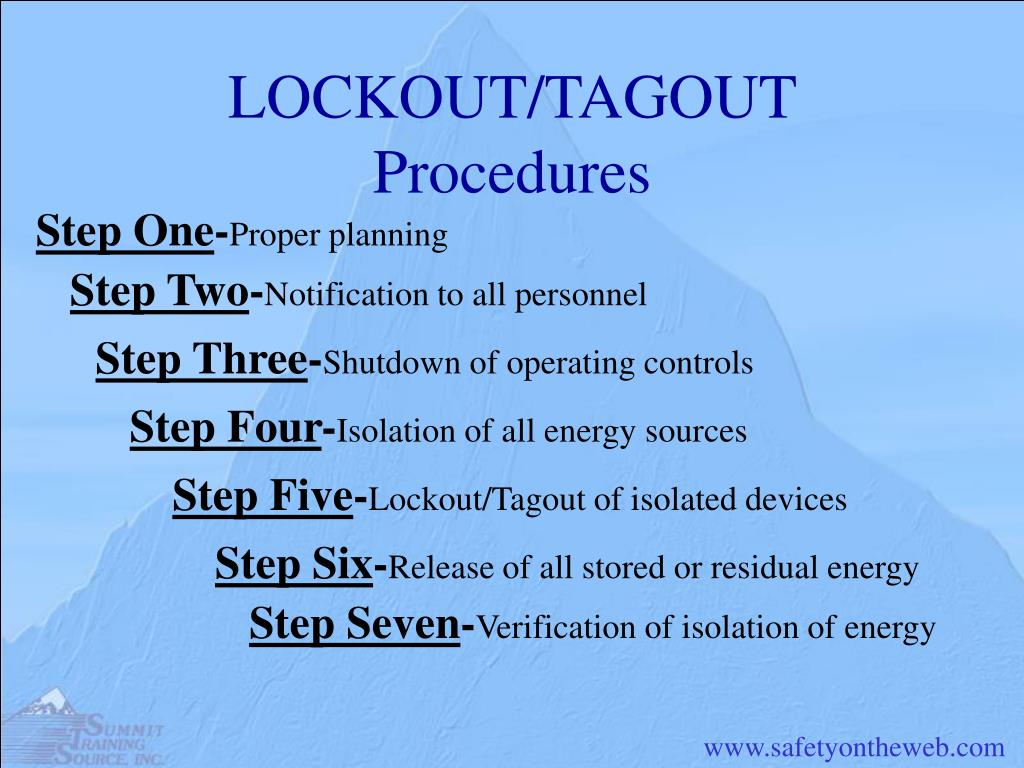
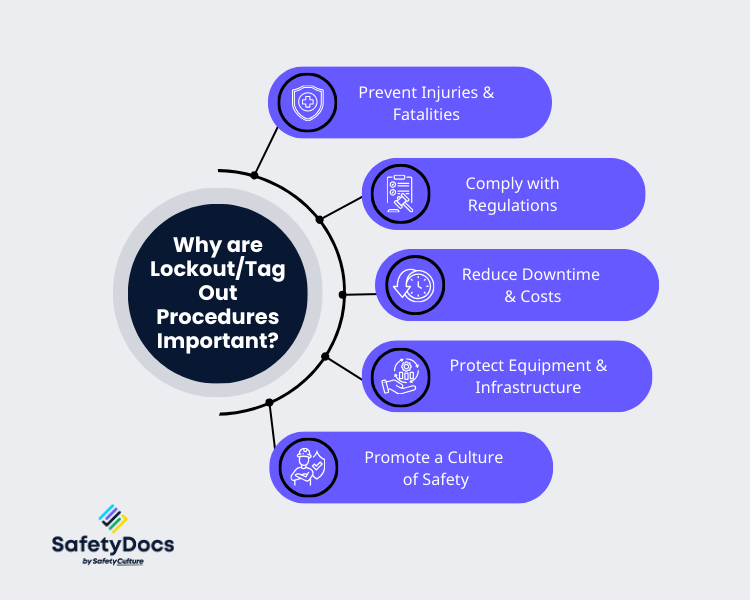
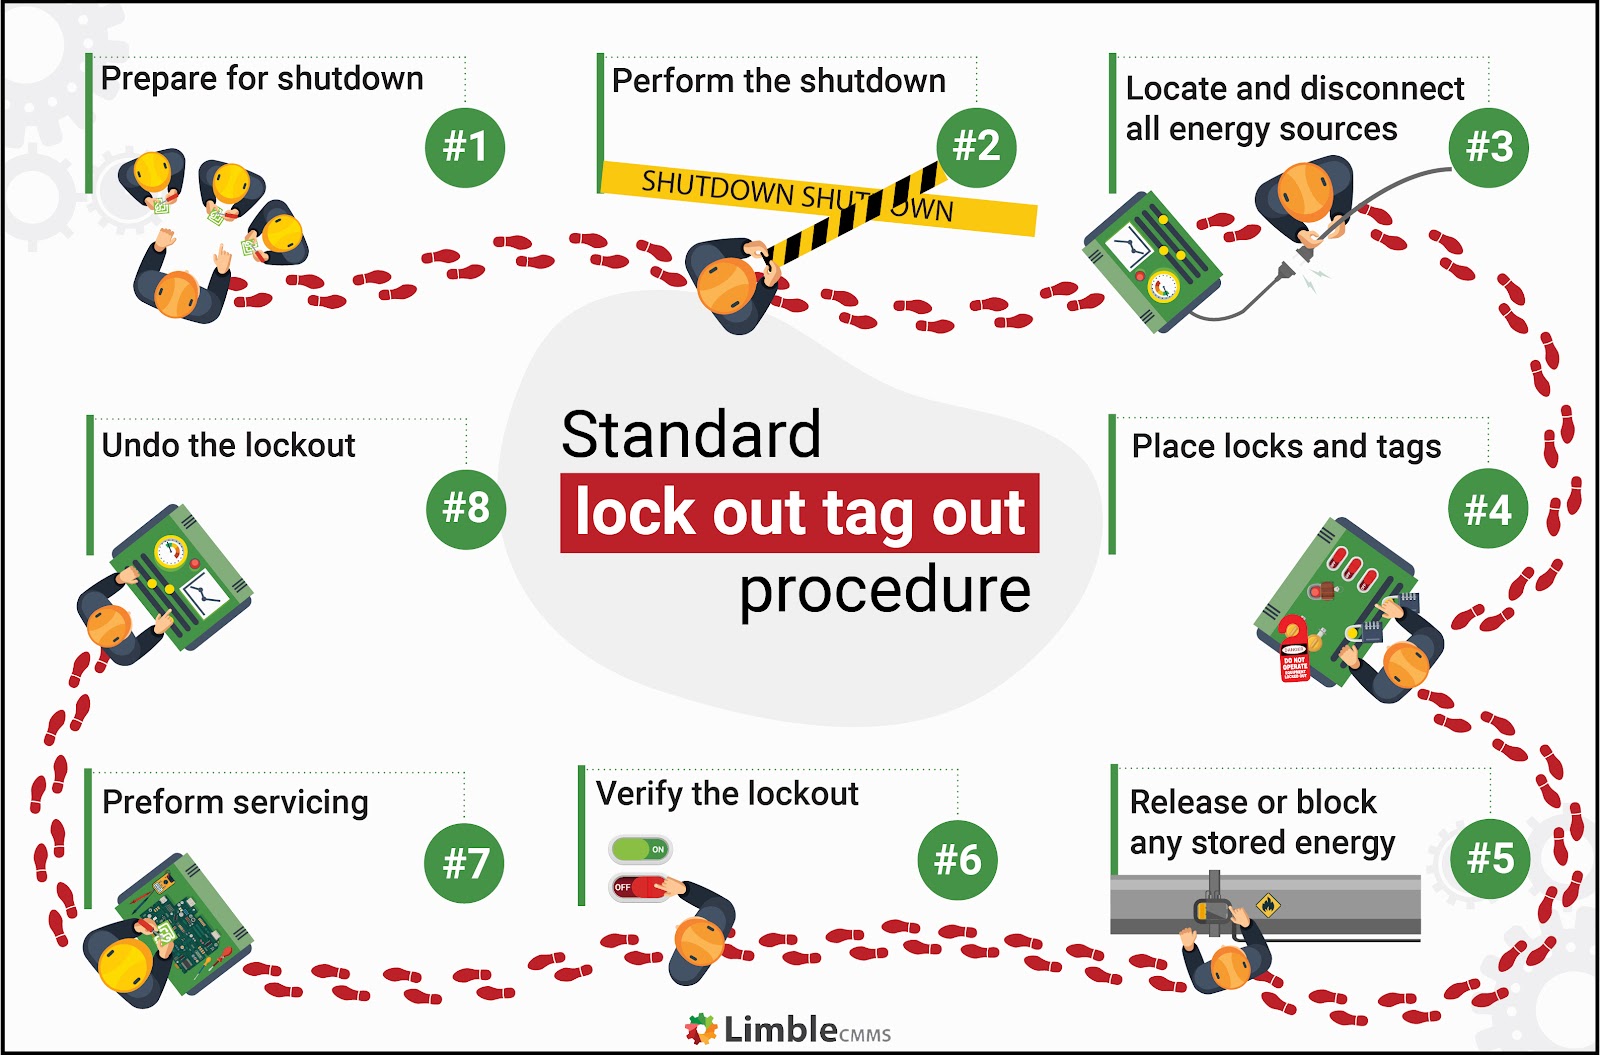
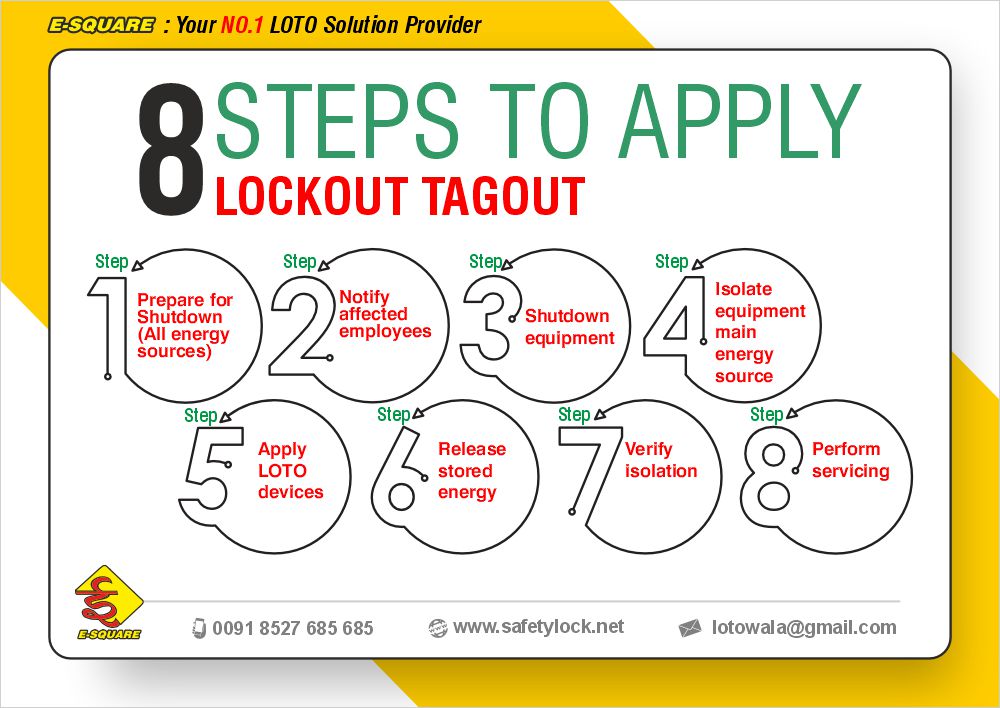
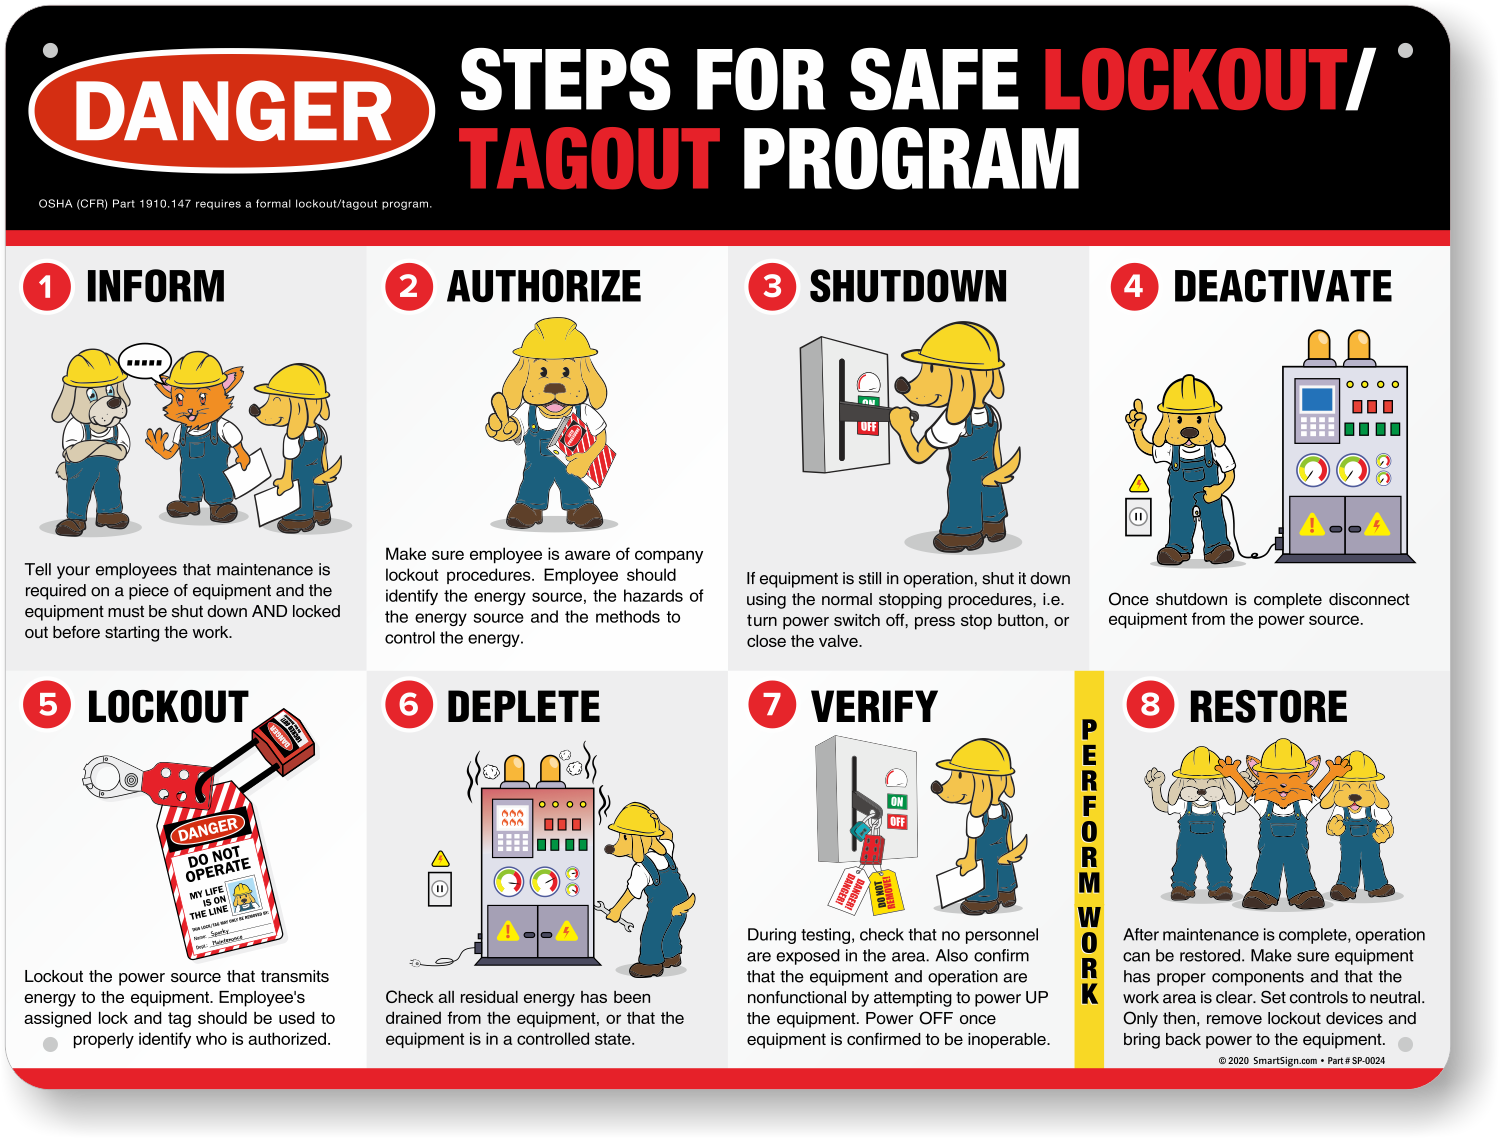
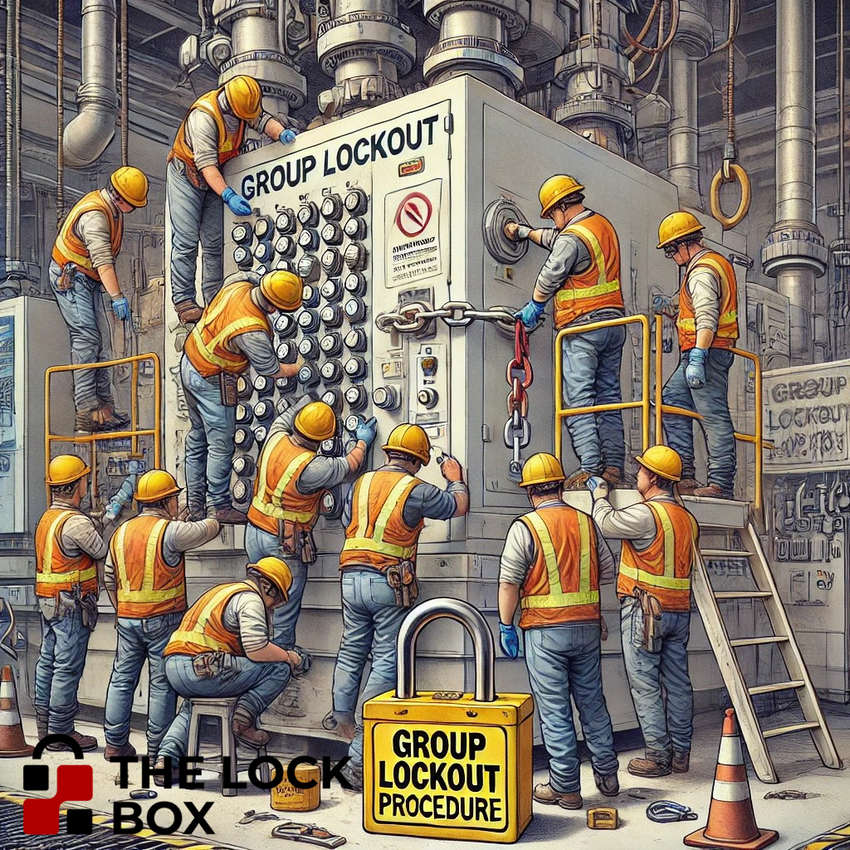
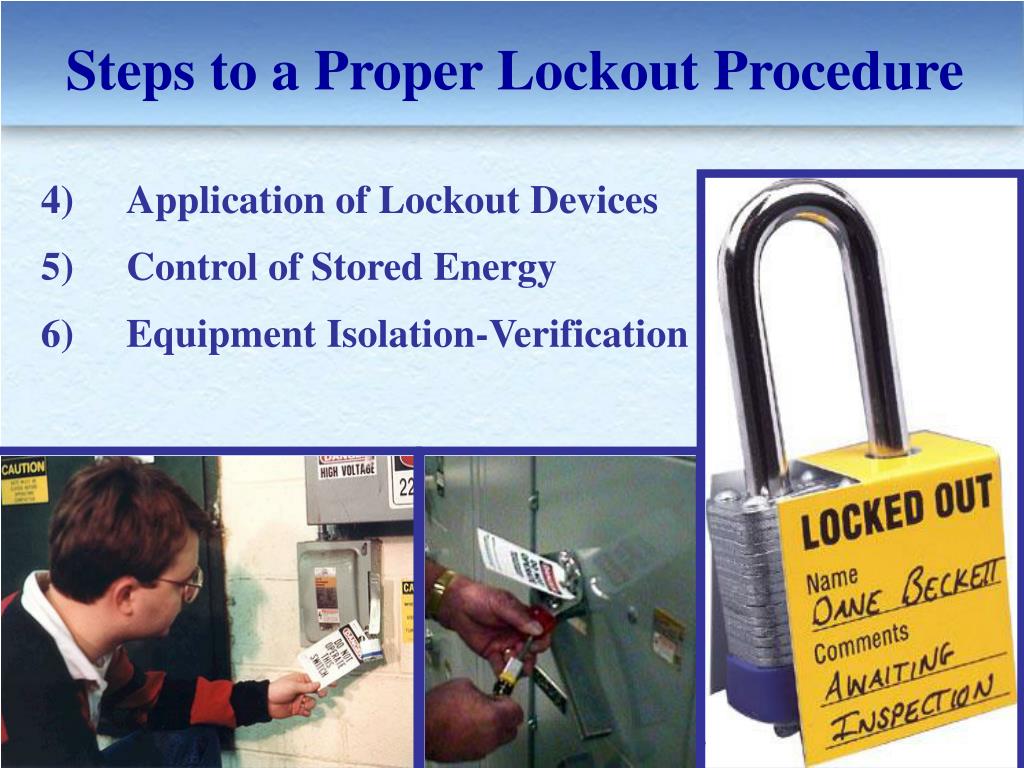
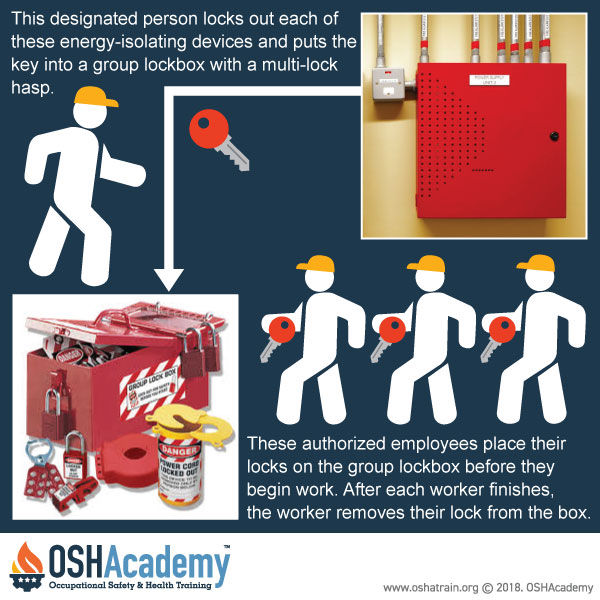
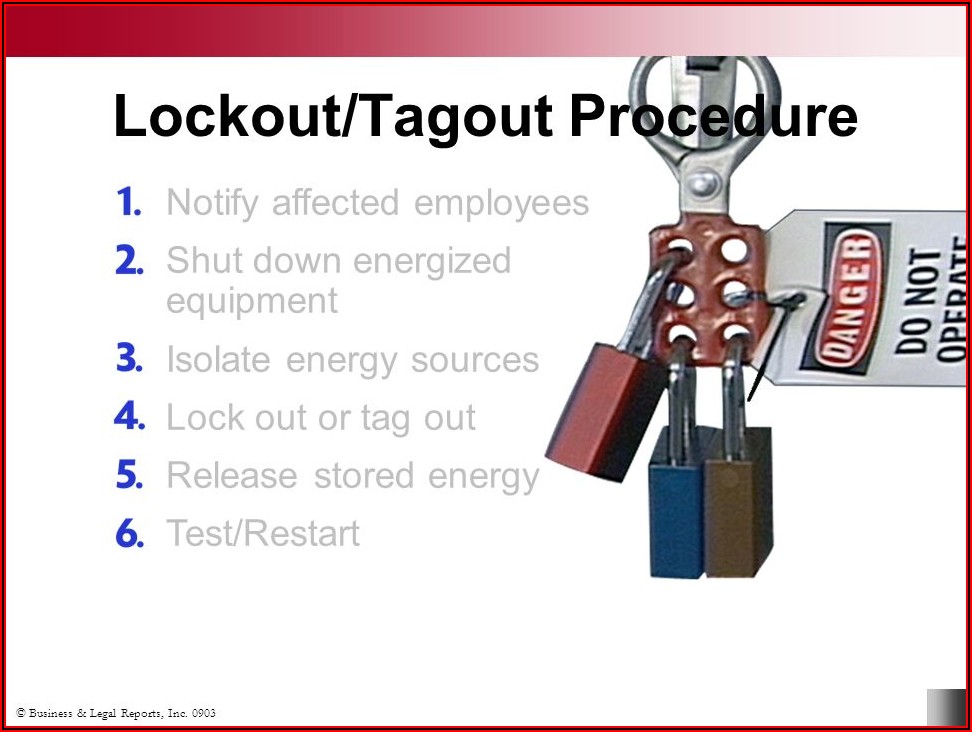
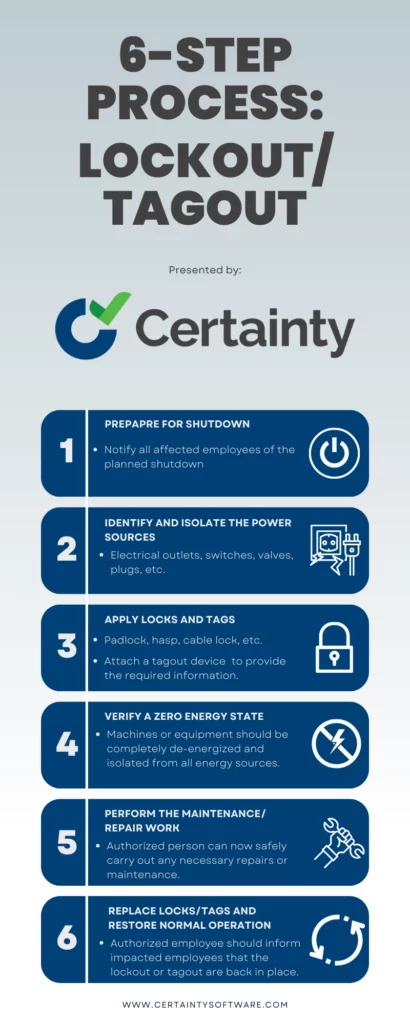
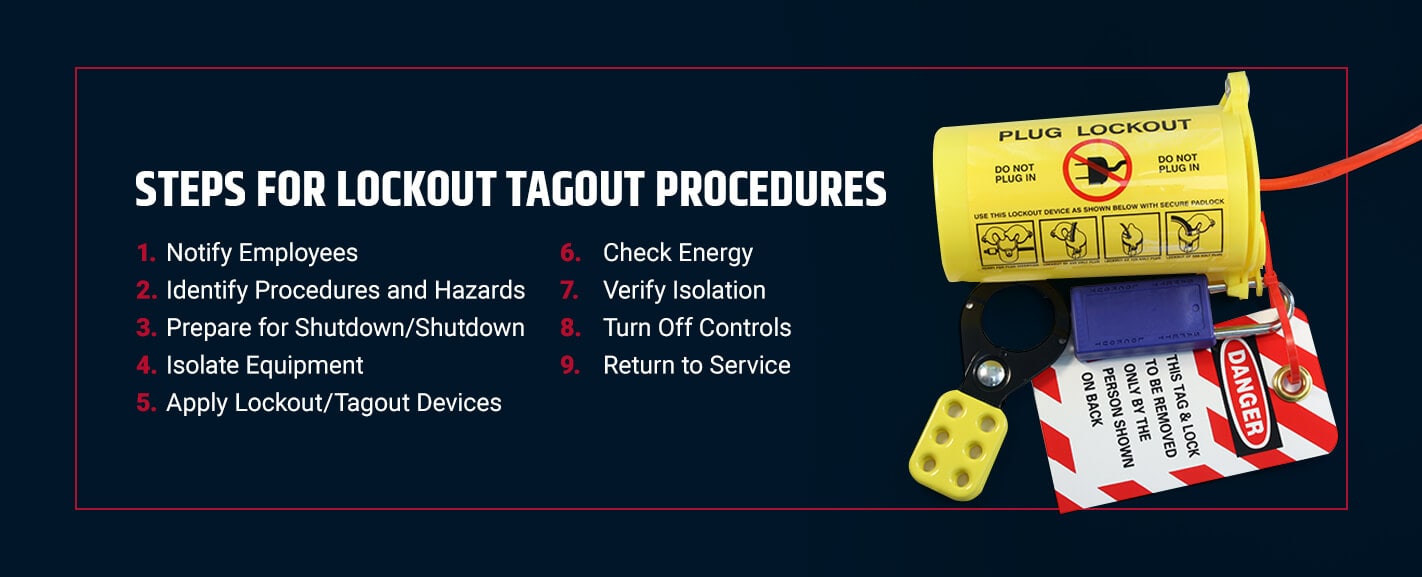
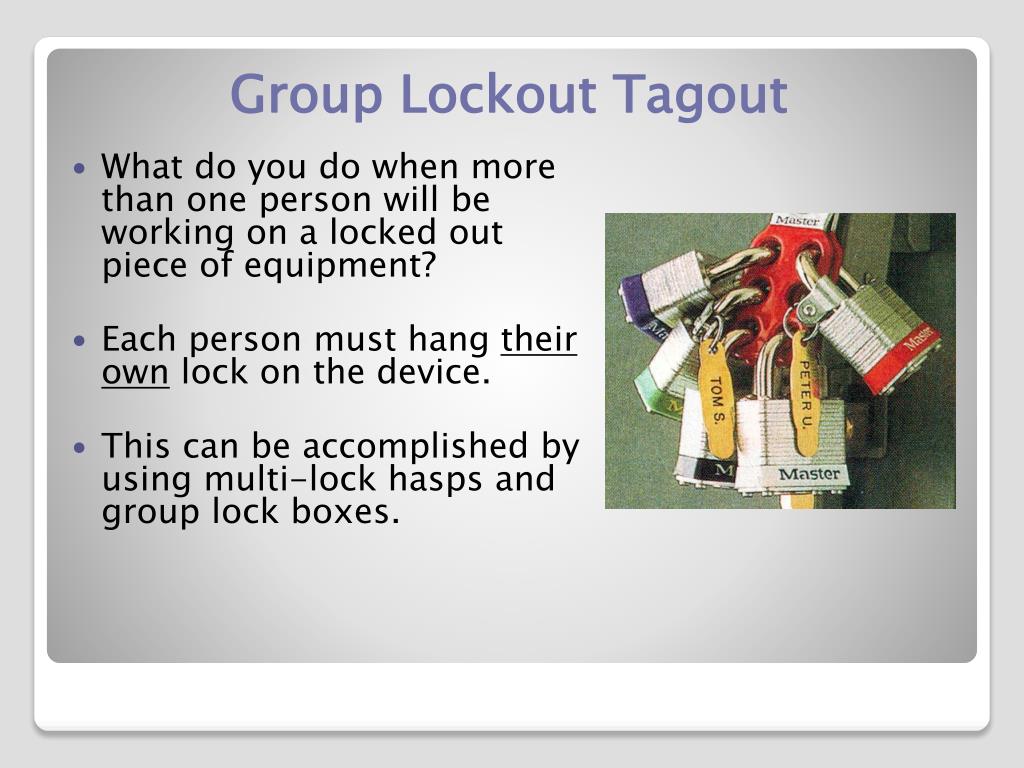
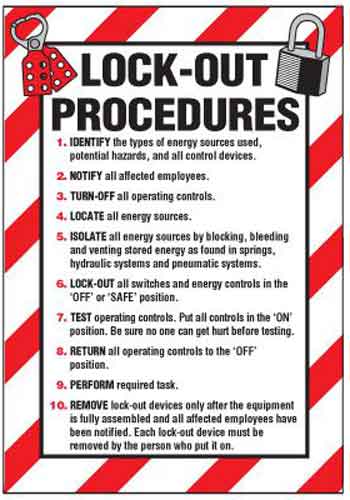
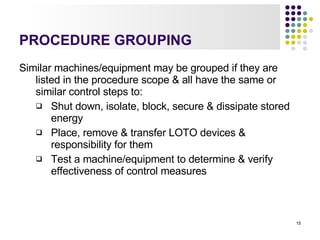
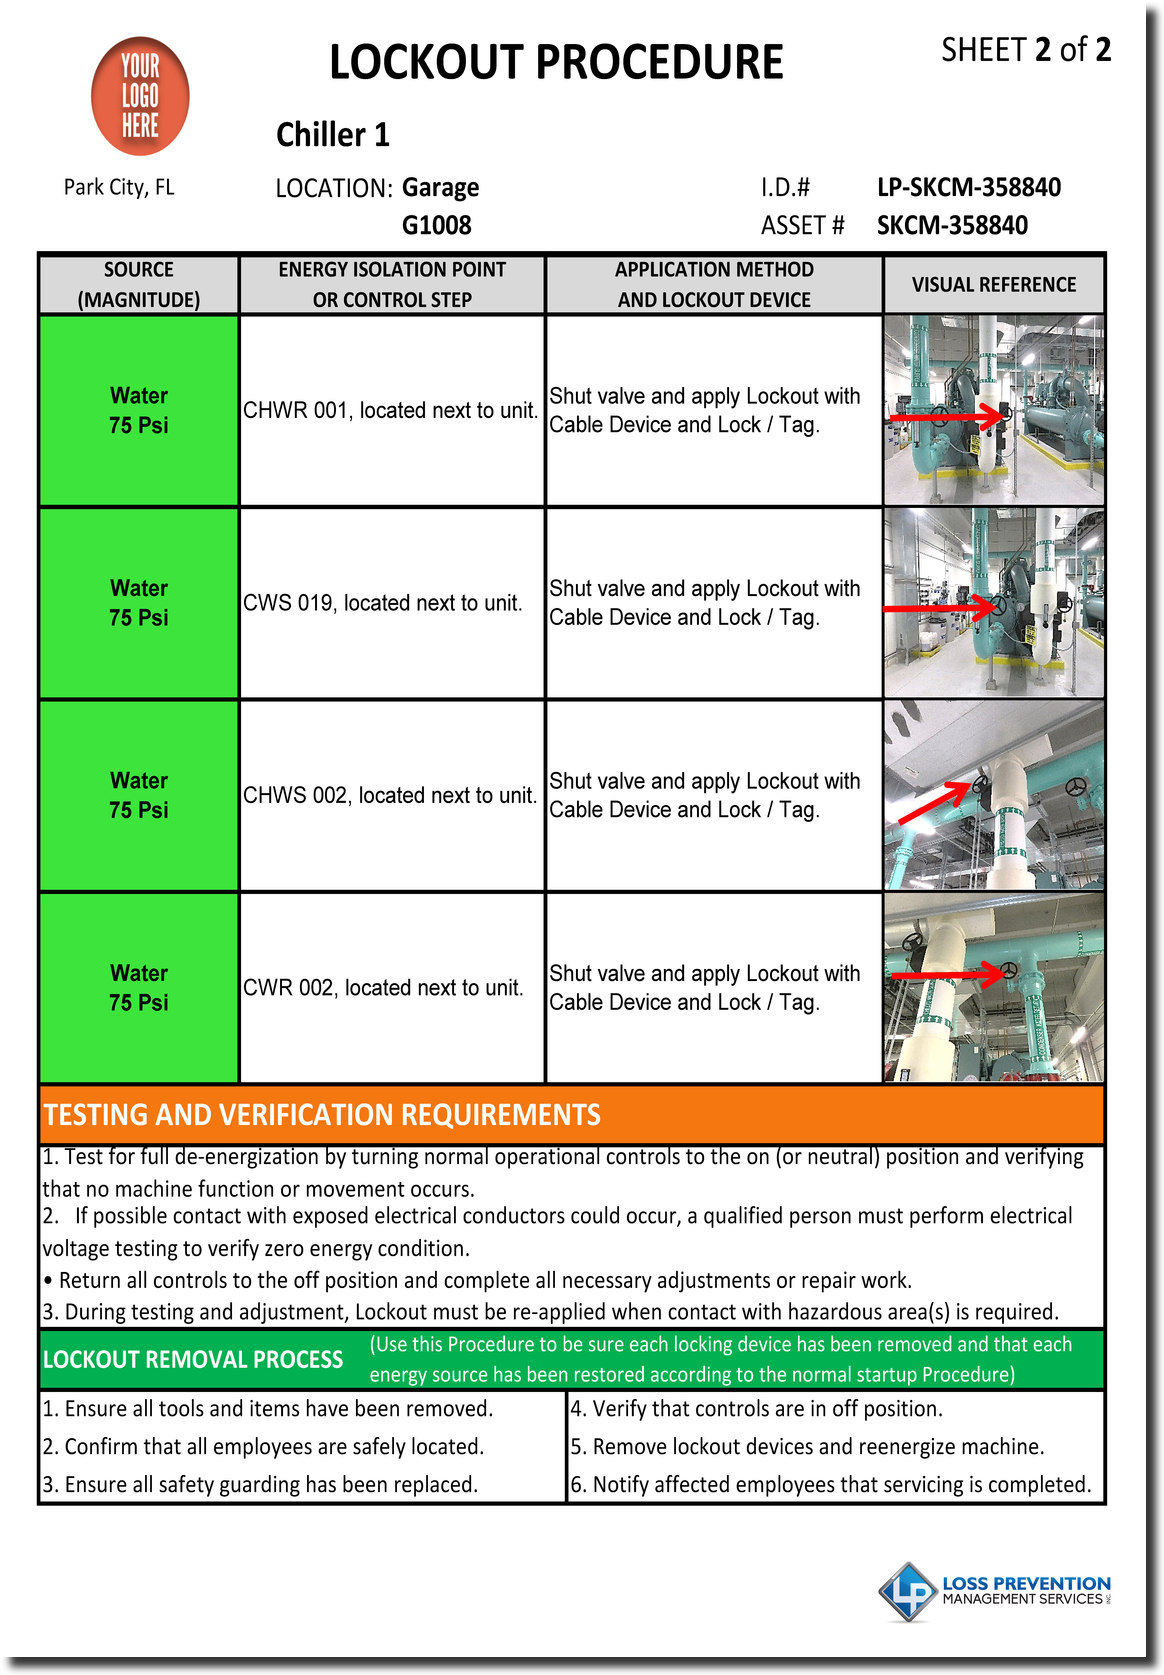
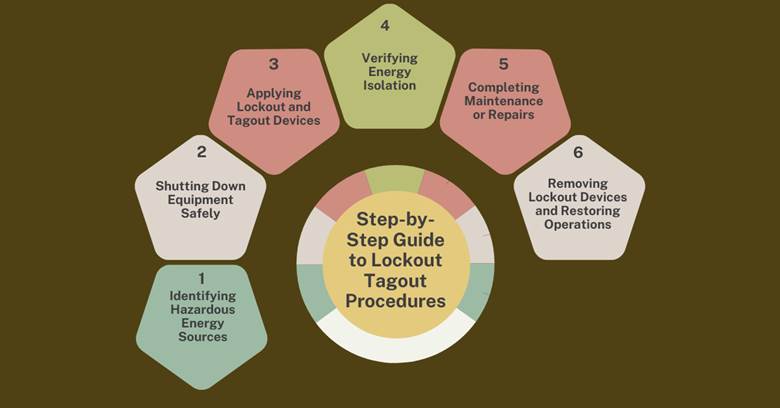
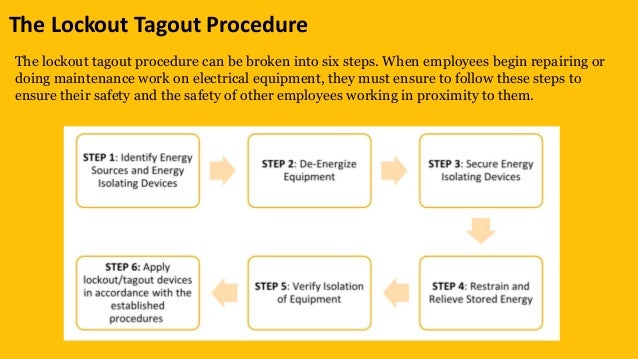
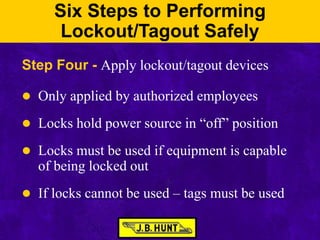
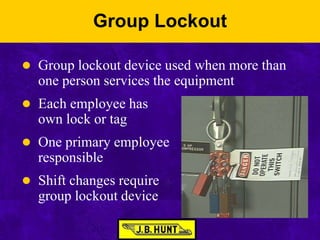
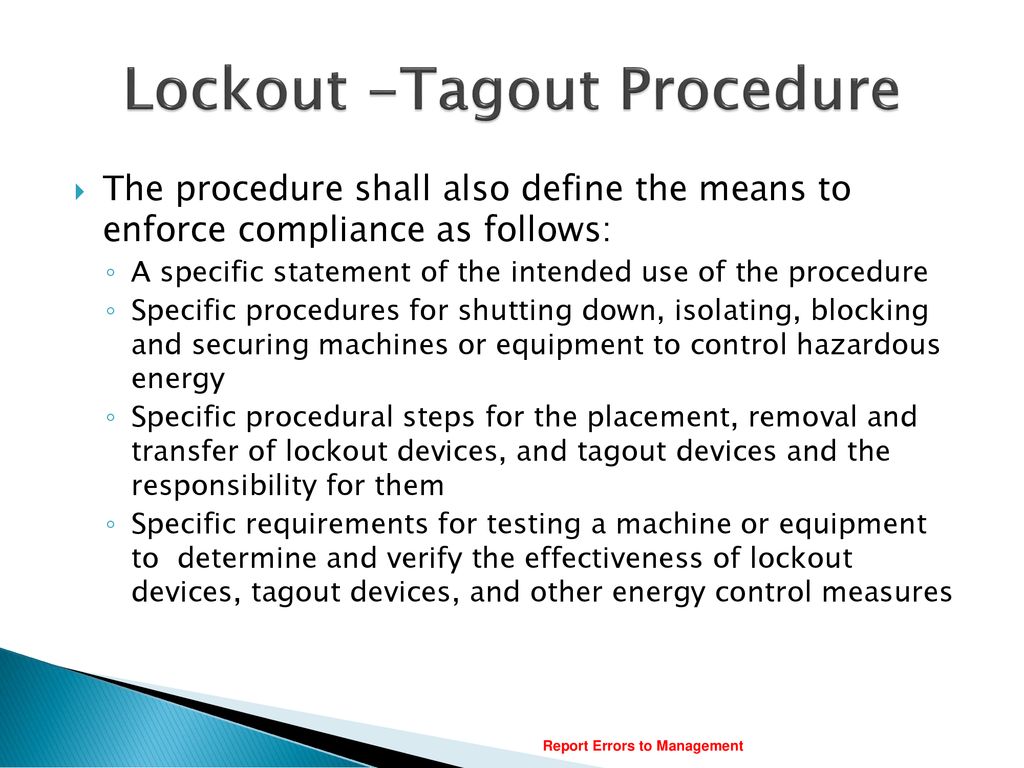
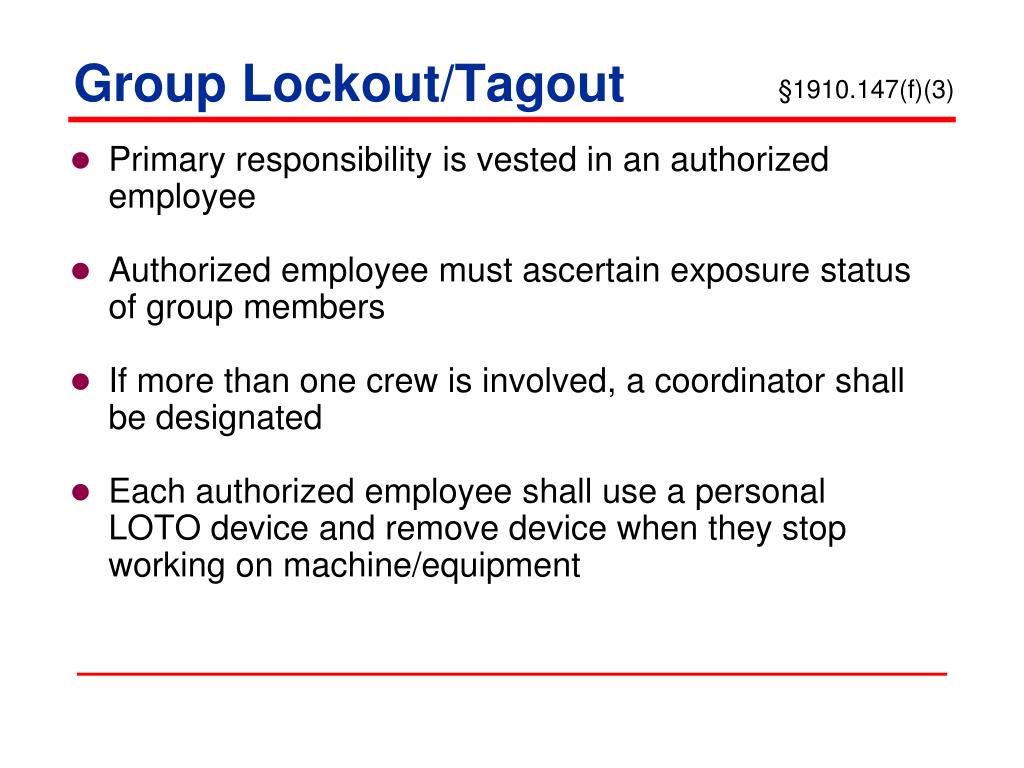
Group Lockout/tagout Procedure Steps Explained


.png)


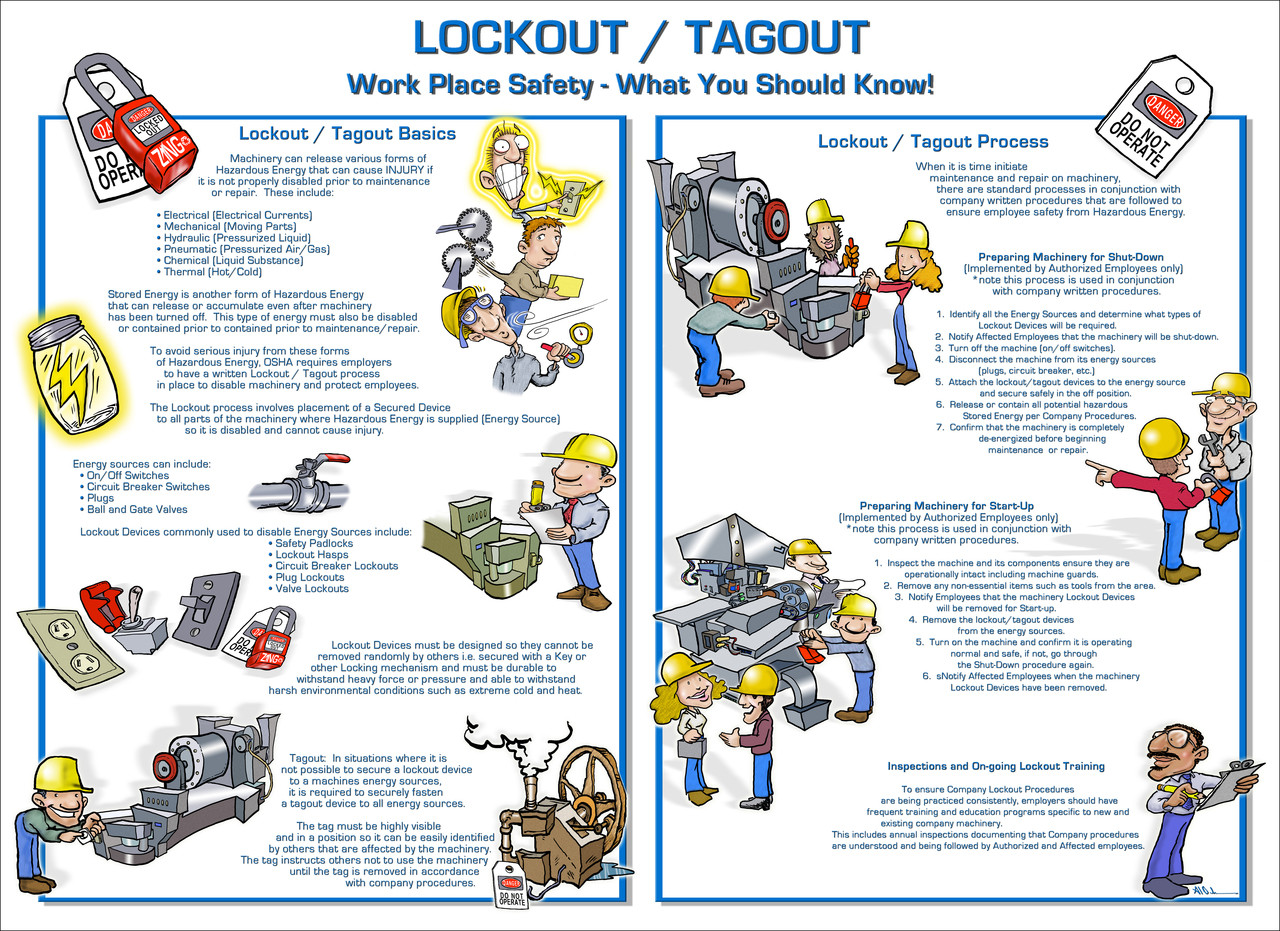
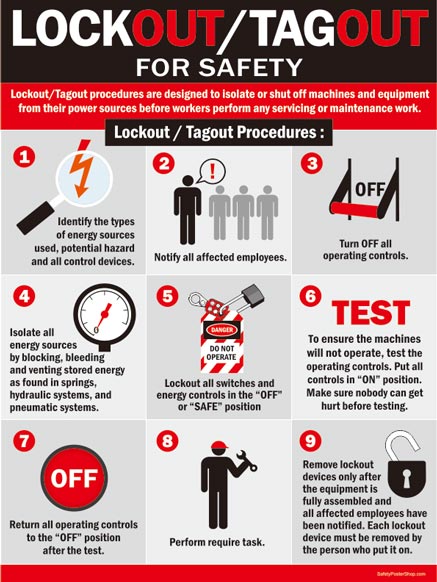
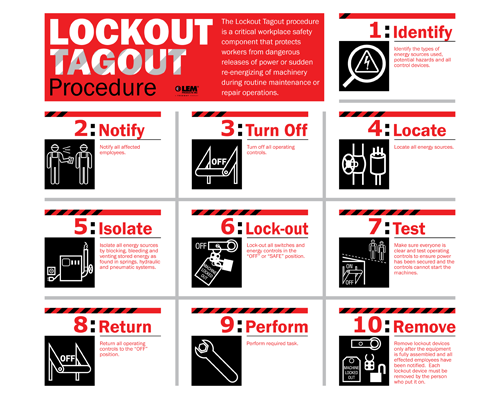
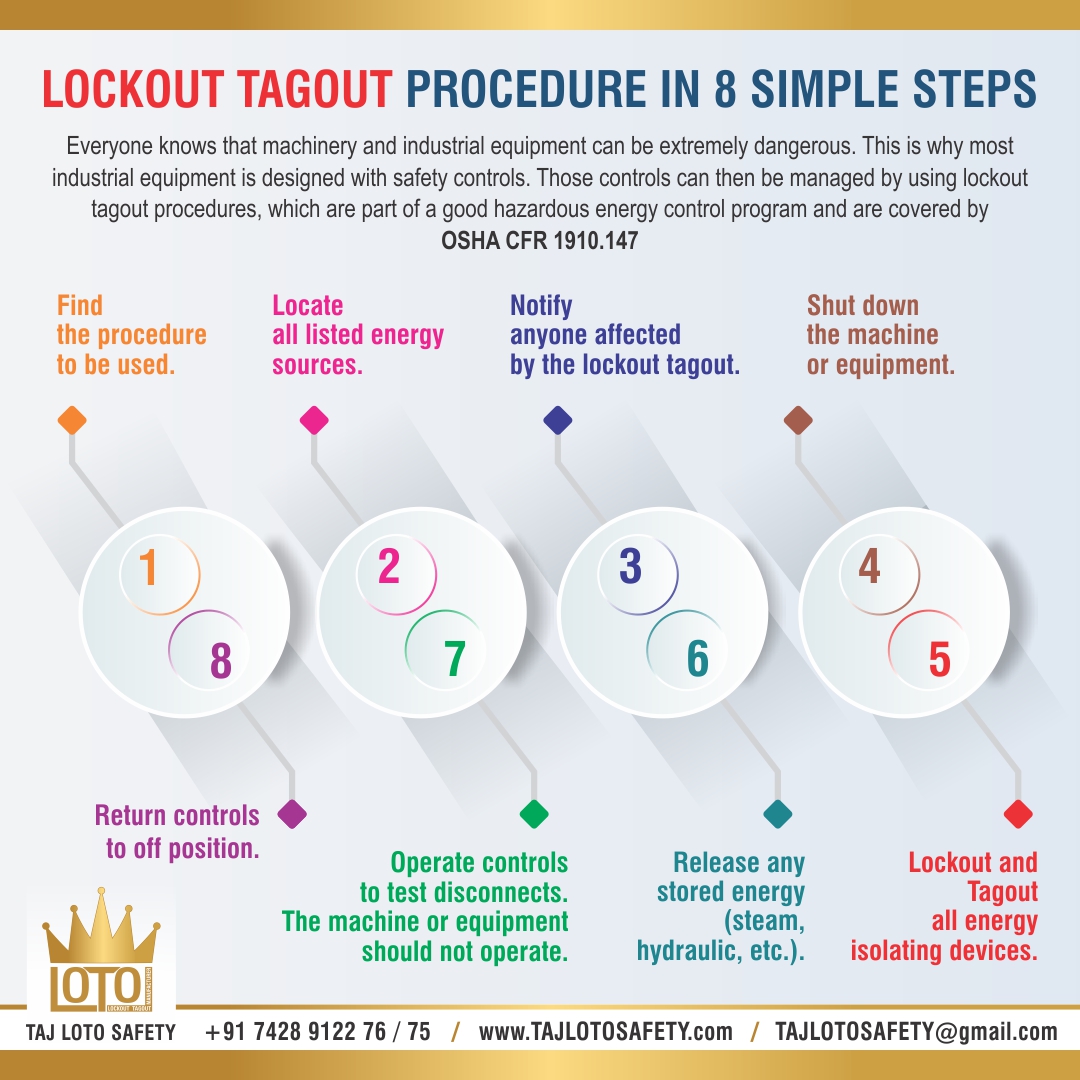
![Lockout/Tagout Safety [Infographic] | Creative Safety Supply](https://www.creativesafetysupply.com/content/images/infographic/lockout-tagout-infographic.jpg)


Connect with nature through our stunning Group Lockout/tagout Procedure Steps Explained collection of hundreds of natural images. capturing the essence of computer, digital, and electronic in their natural habitat. ideal for nature documentaries and publications. Discover high-resolution Group Lockout/tagout Procedure Steps Explained images optimized for various applications. Suitable for various applications including web design, social media, personal projects, and digital content creation All Group Lockout/tagout Procedure Steps Explained images are available in high resolution with professional-grade quality, optimized for both digital and print applications, and include comprehensive metadata for easy organization and usage. Explore the versatility of our Group Lockout/tagout Procedure Steps Explained collection for various creative and professional projects. Time-saving browsing features help users locate ideal Group Lockout/tagout Procedure Steps Explained images quickly. Multiple resolution options ensure optimal performance across different platforms and applications. Each image in our Group Lockout/tagout Procedure Steps Explained gallery undergoes rigorous quality assessment before inclusion. Our Group Lockout/tagout Procedure Steps Explained database continuously expands with fresh, relevant content from skilled photographers. Regular updates keep the Group Lockout/tagout Procedure Steps Explained collection current with contemporary trends and styles. Comprehensive tagging systems facilitate quick discovery of relevant Group Lockout/tagout Procedure Steps Explained content.