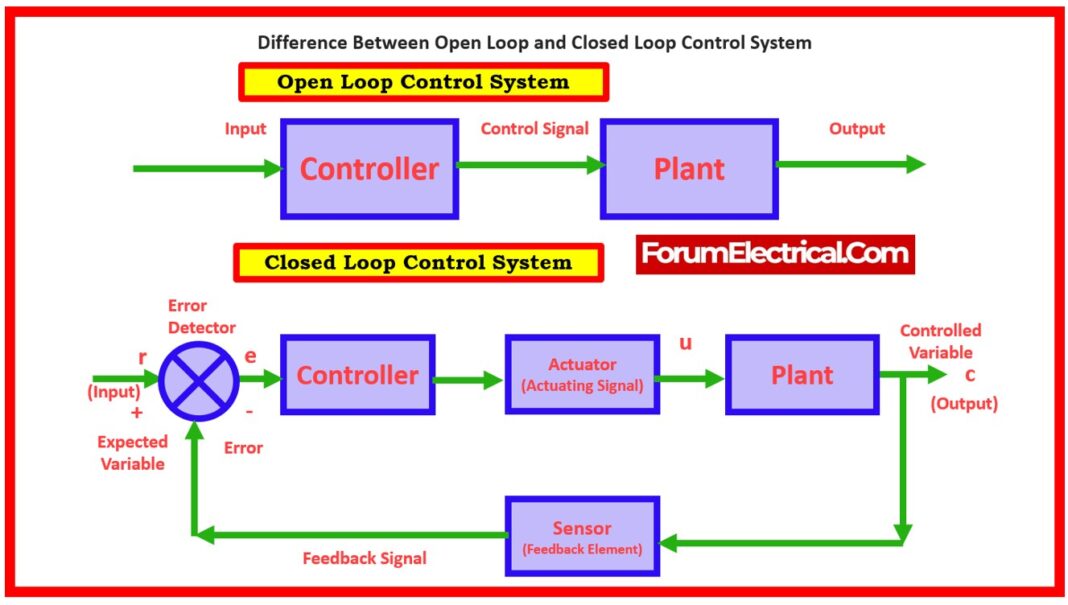
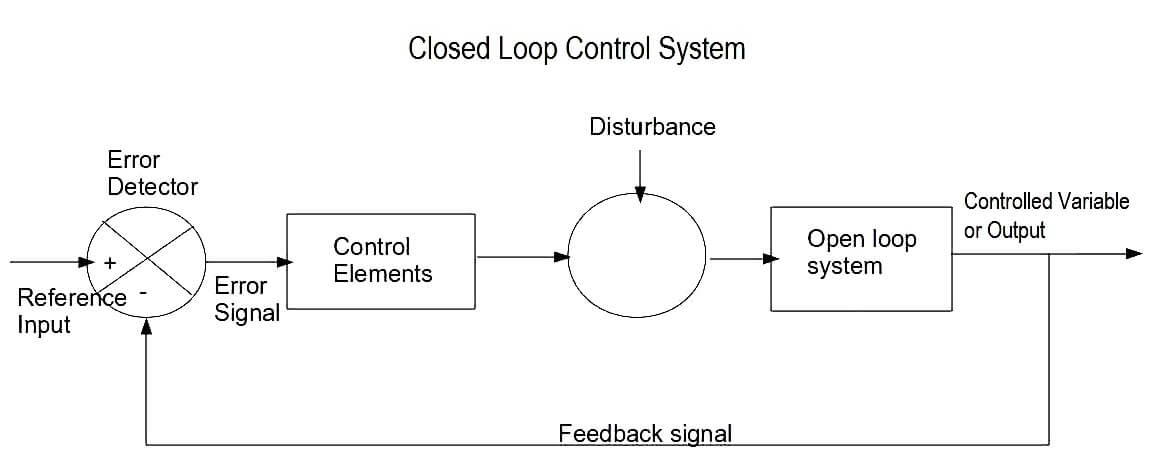
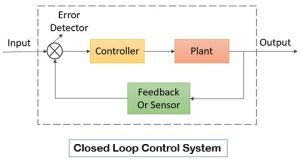
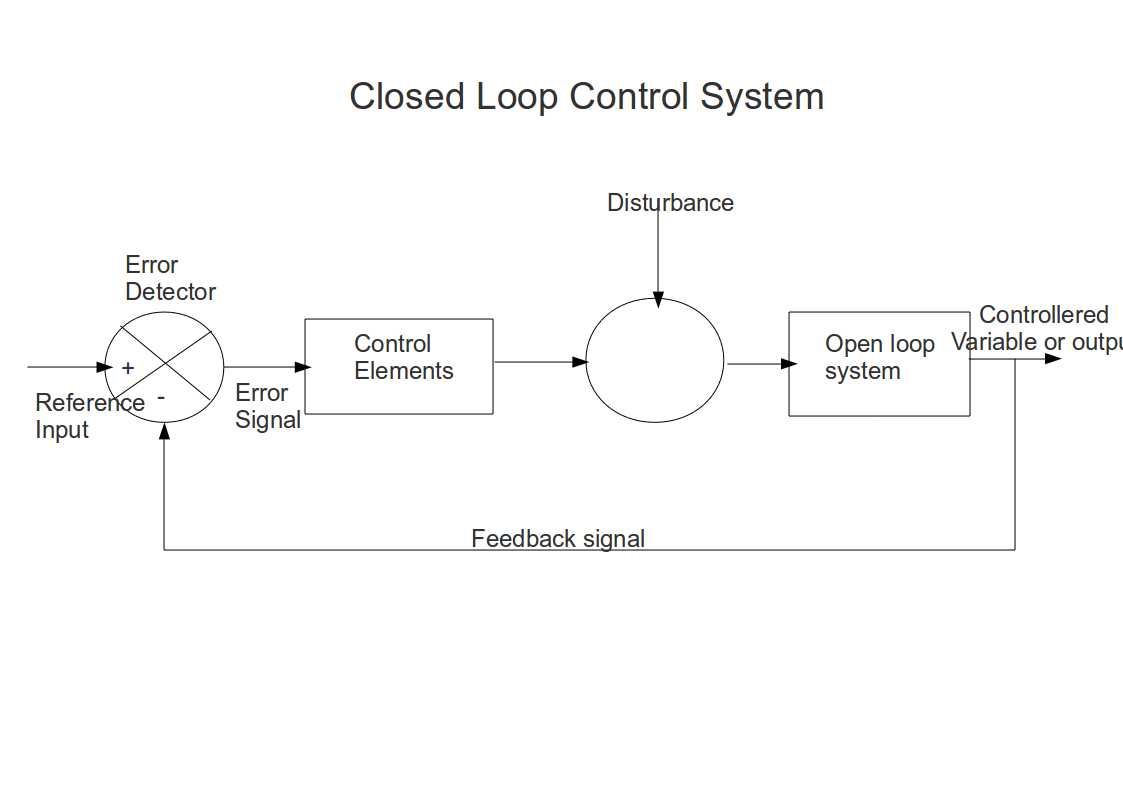
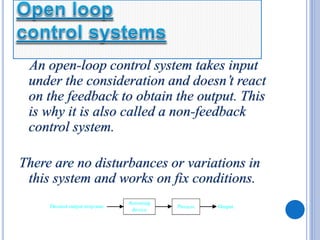
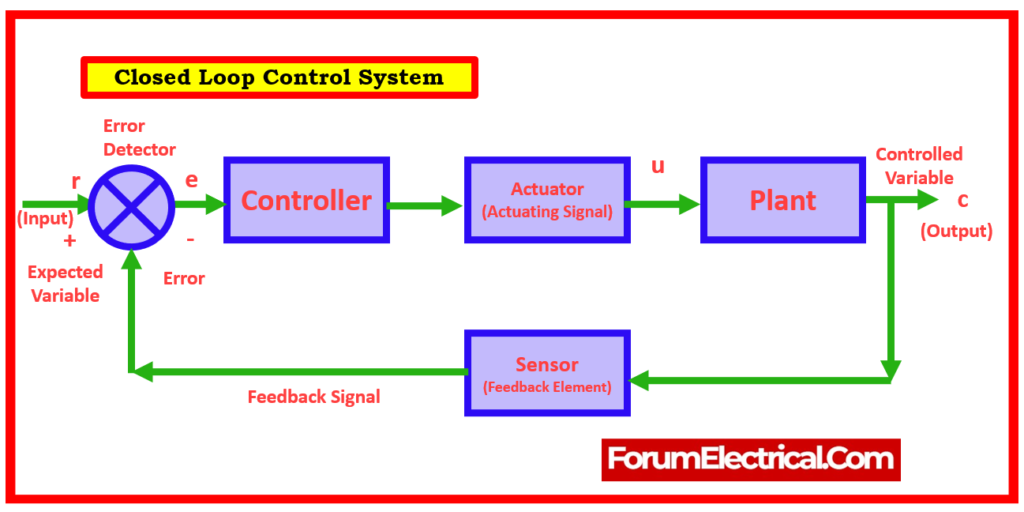
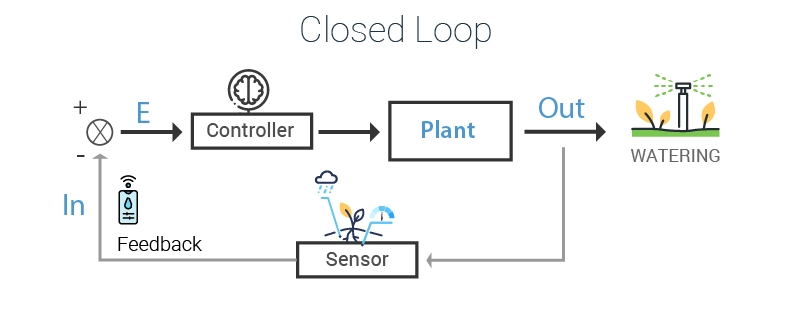
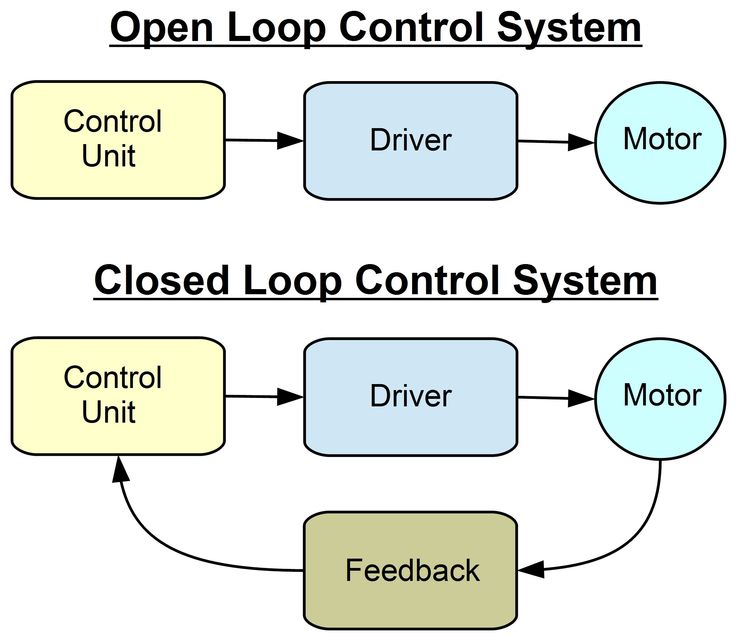
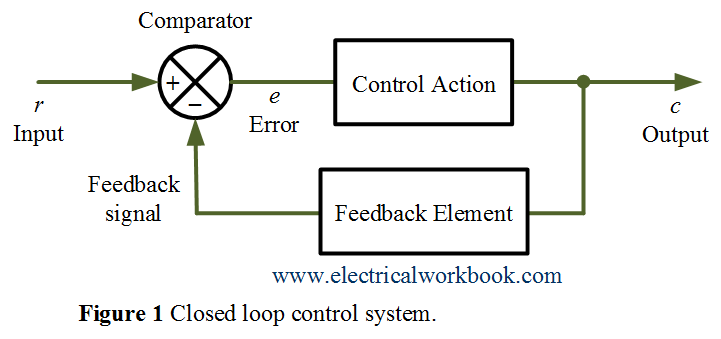
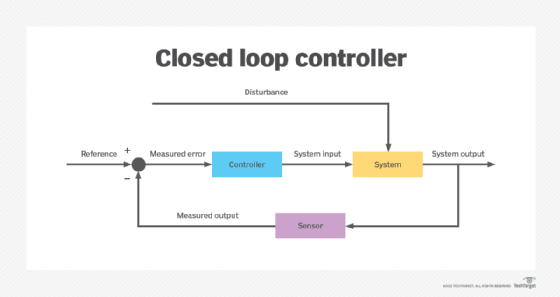
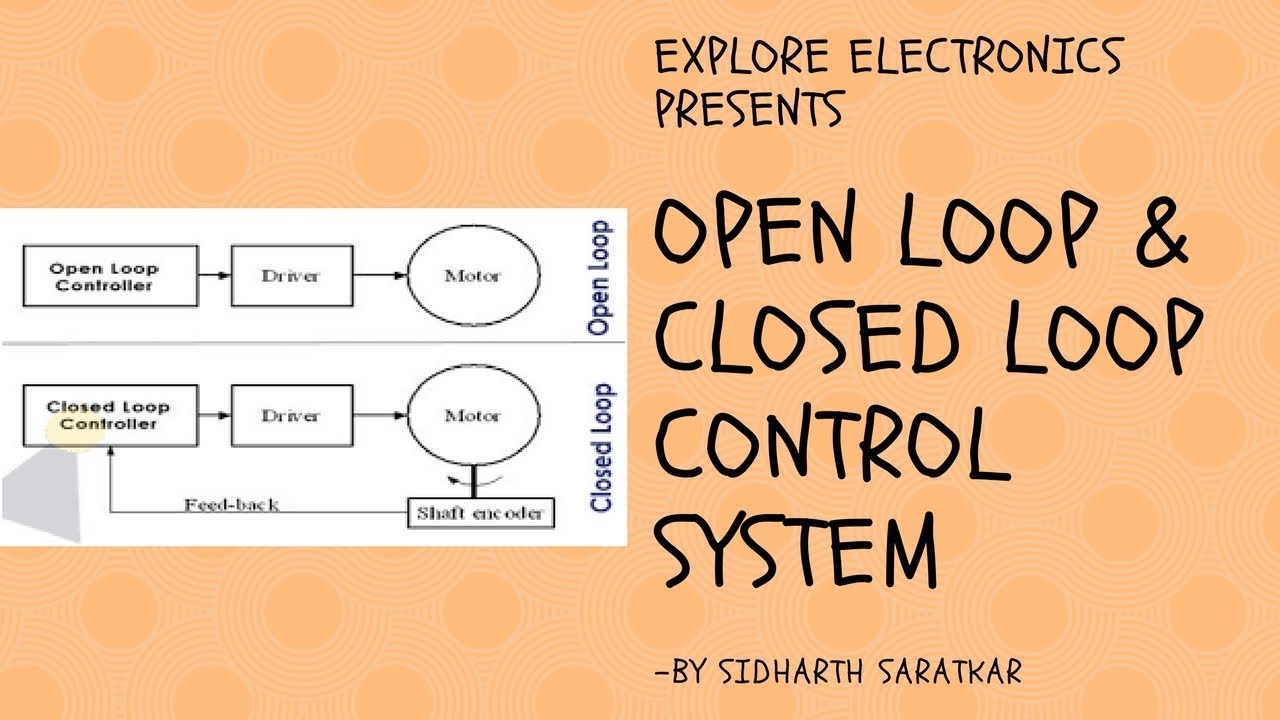
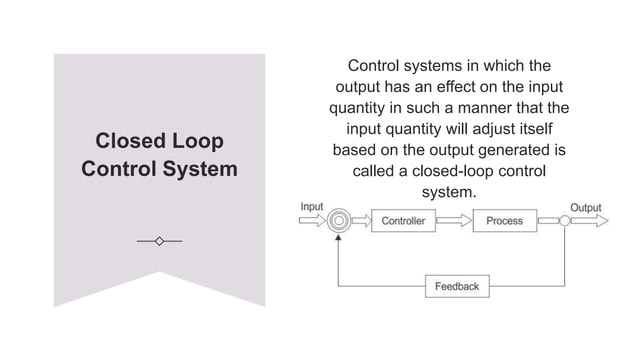
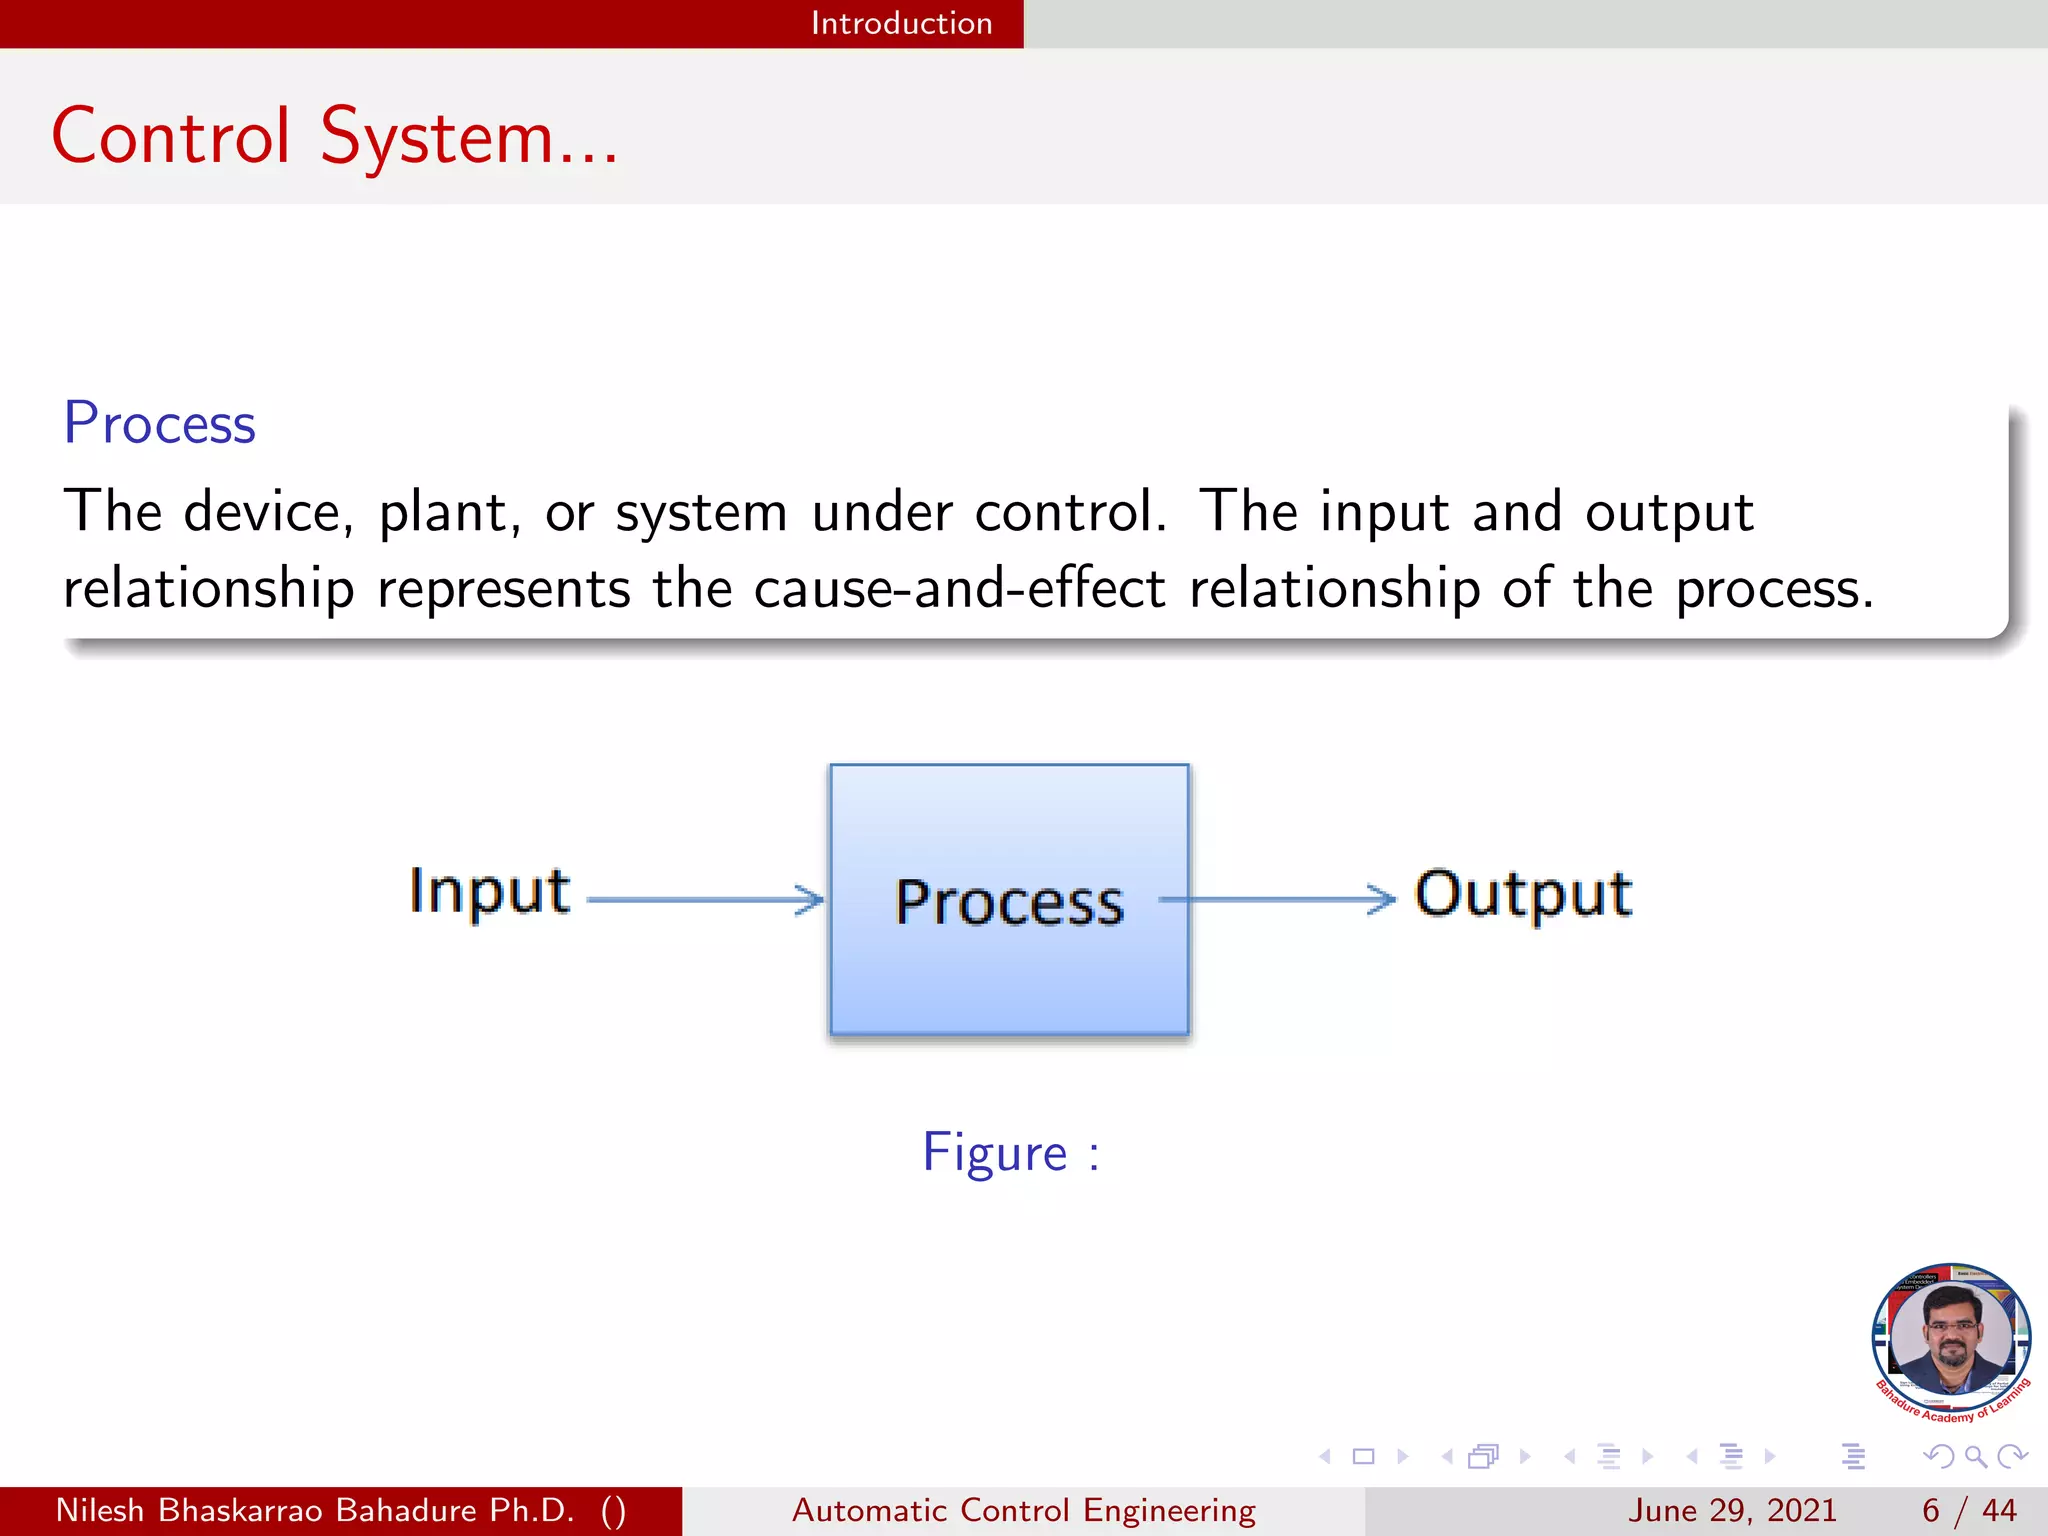
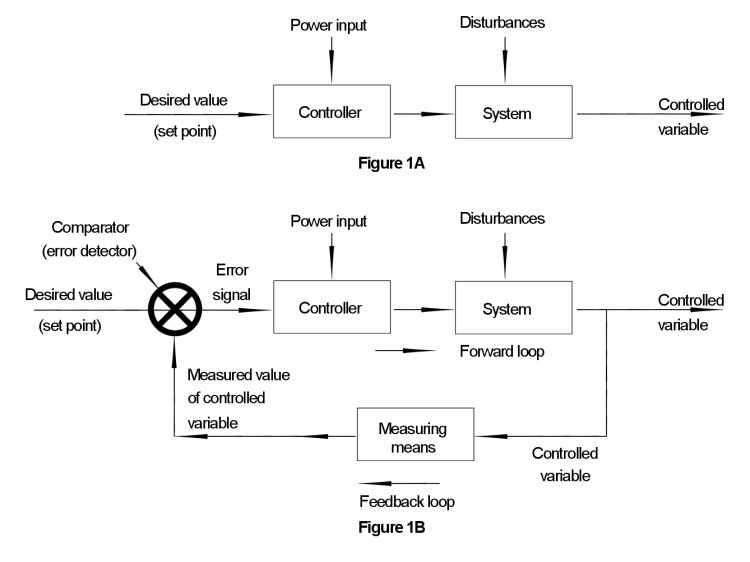
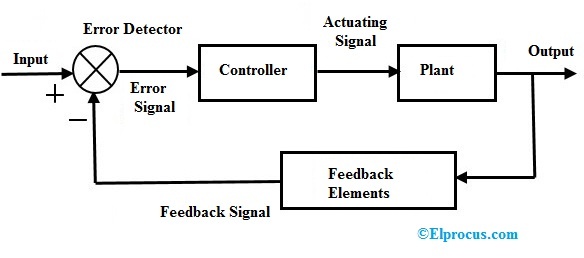
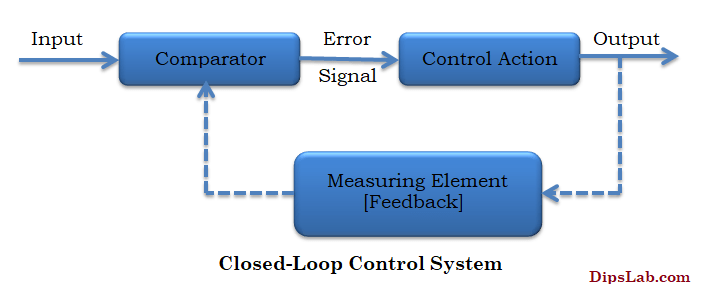
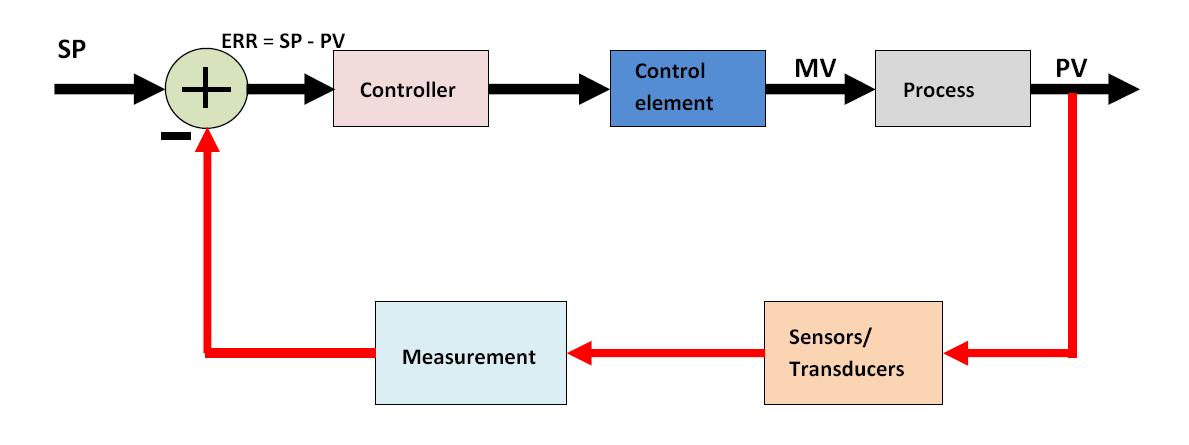
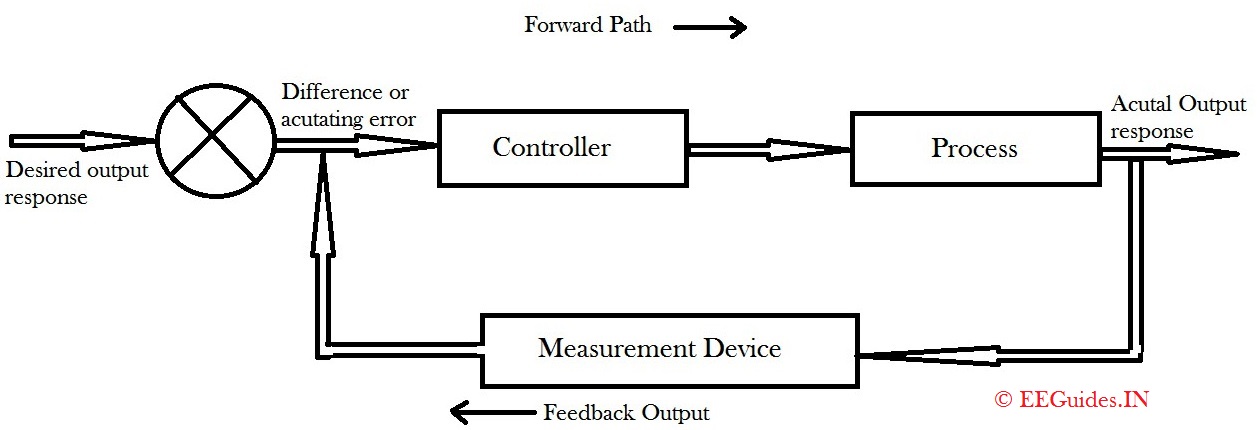
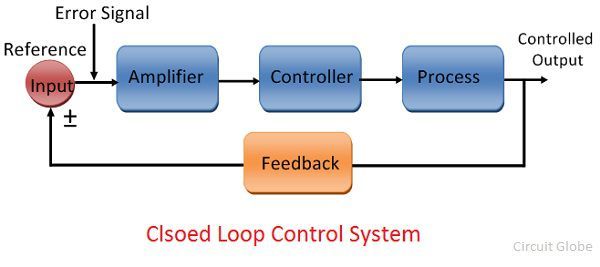
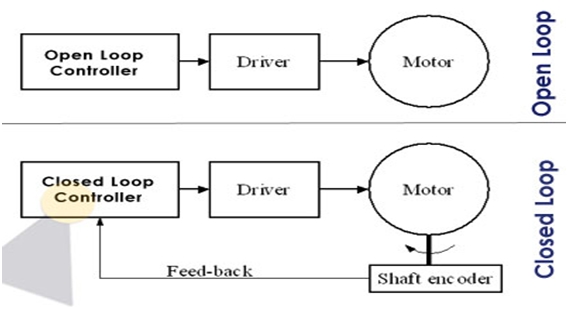
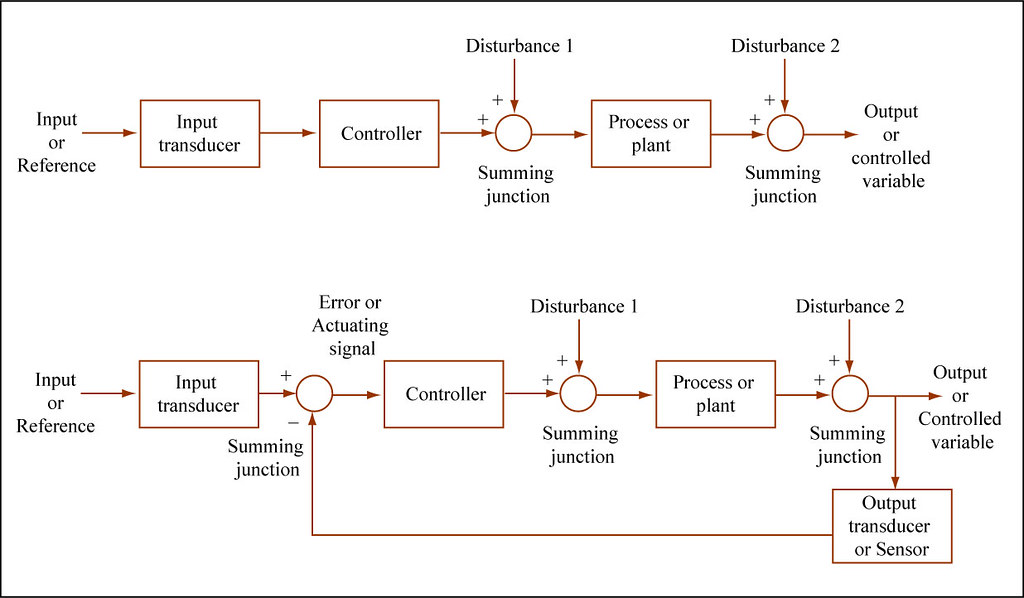
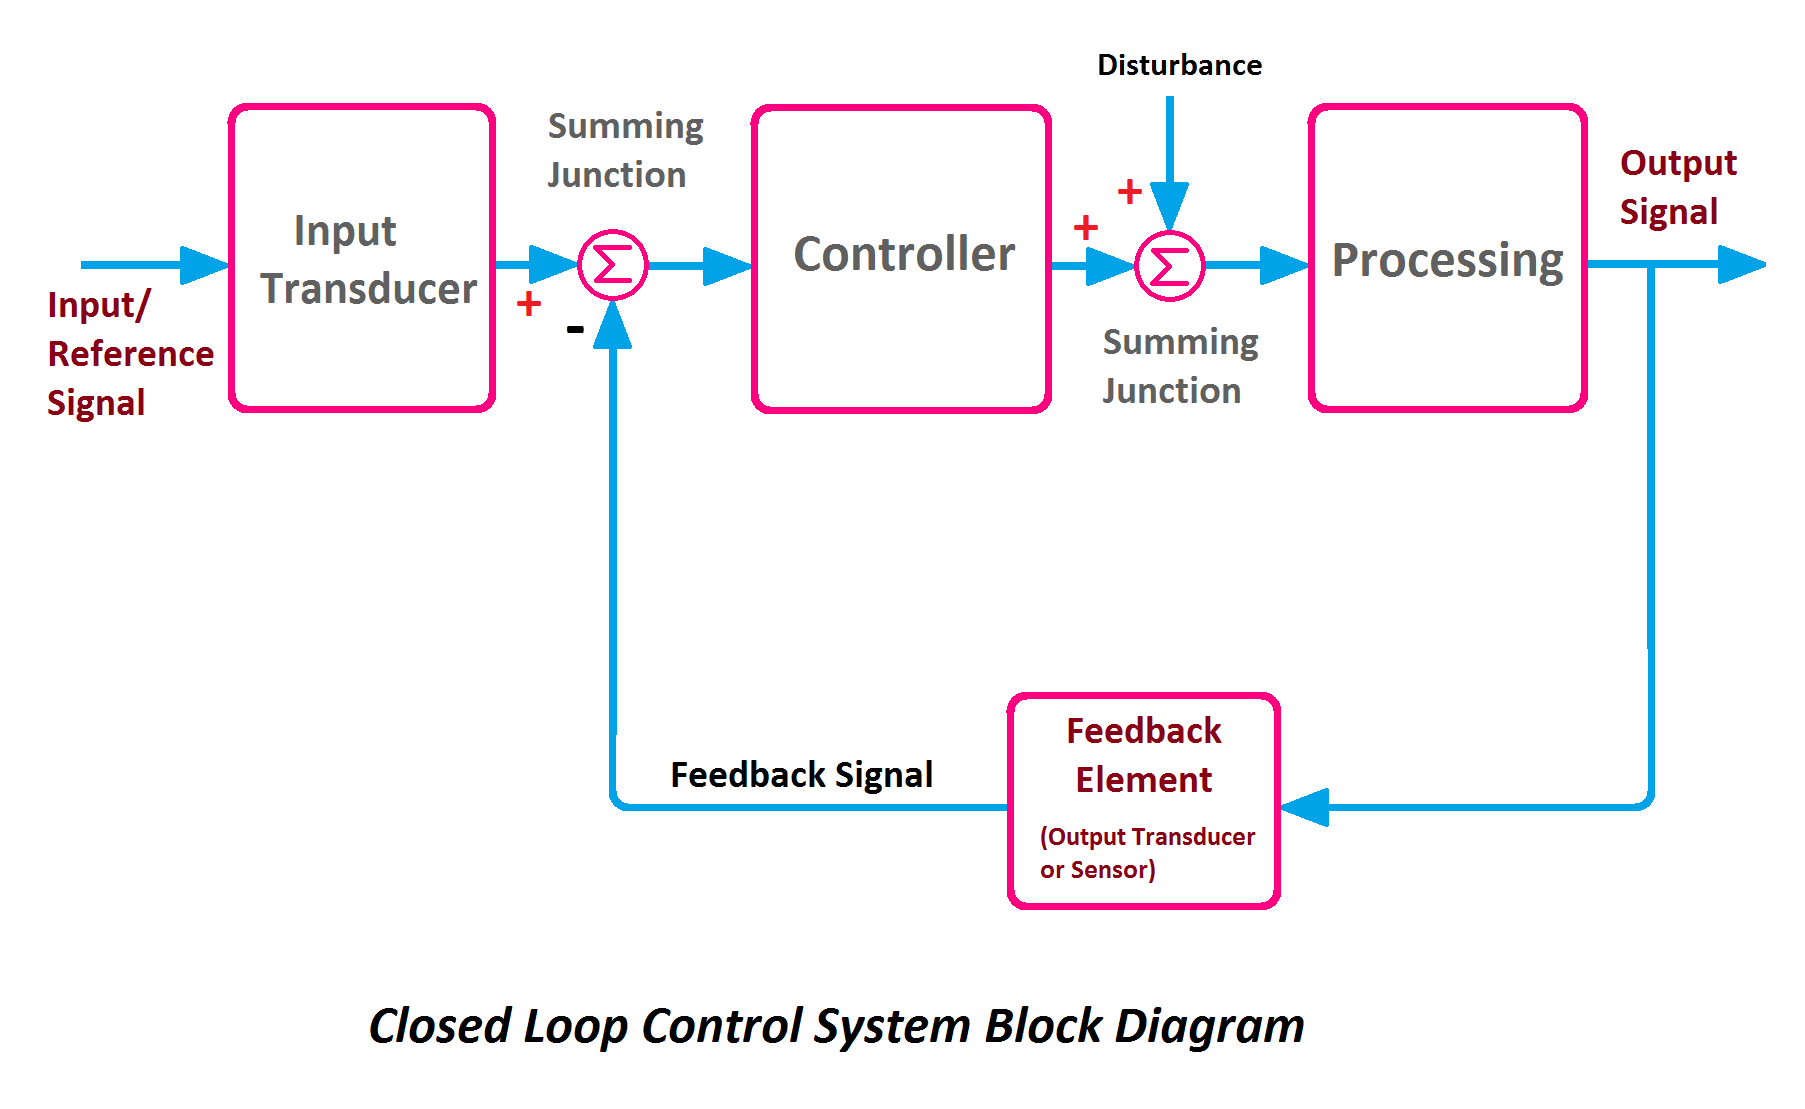
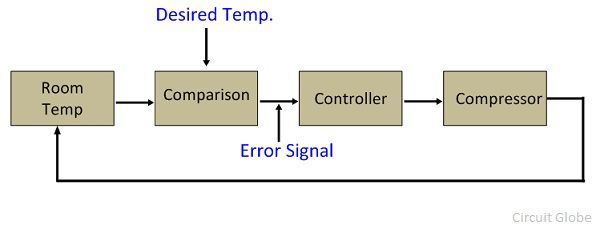
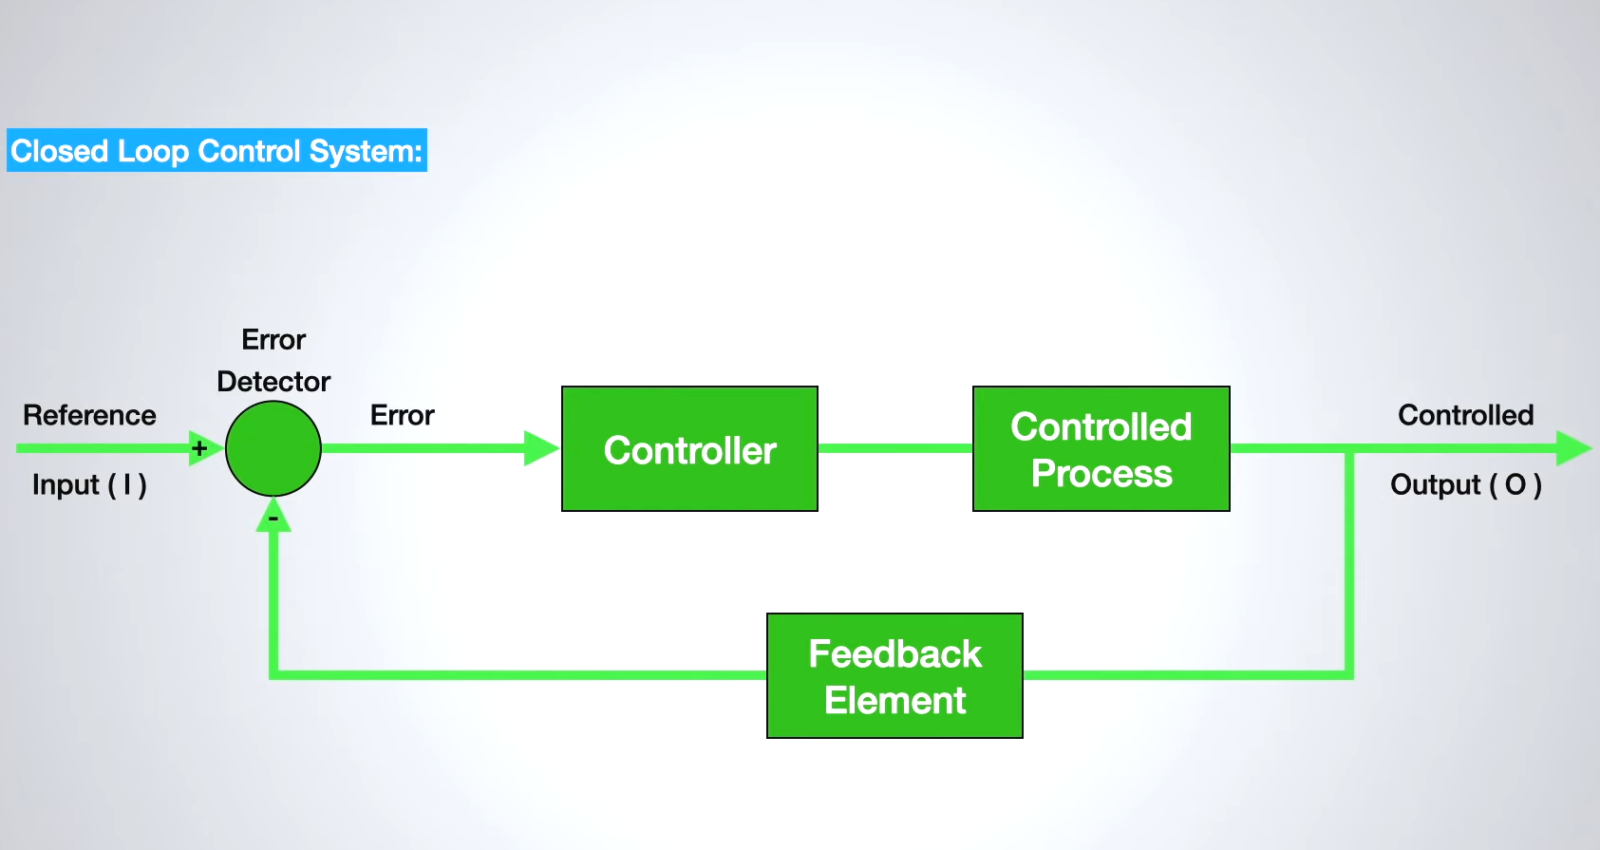
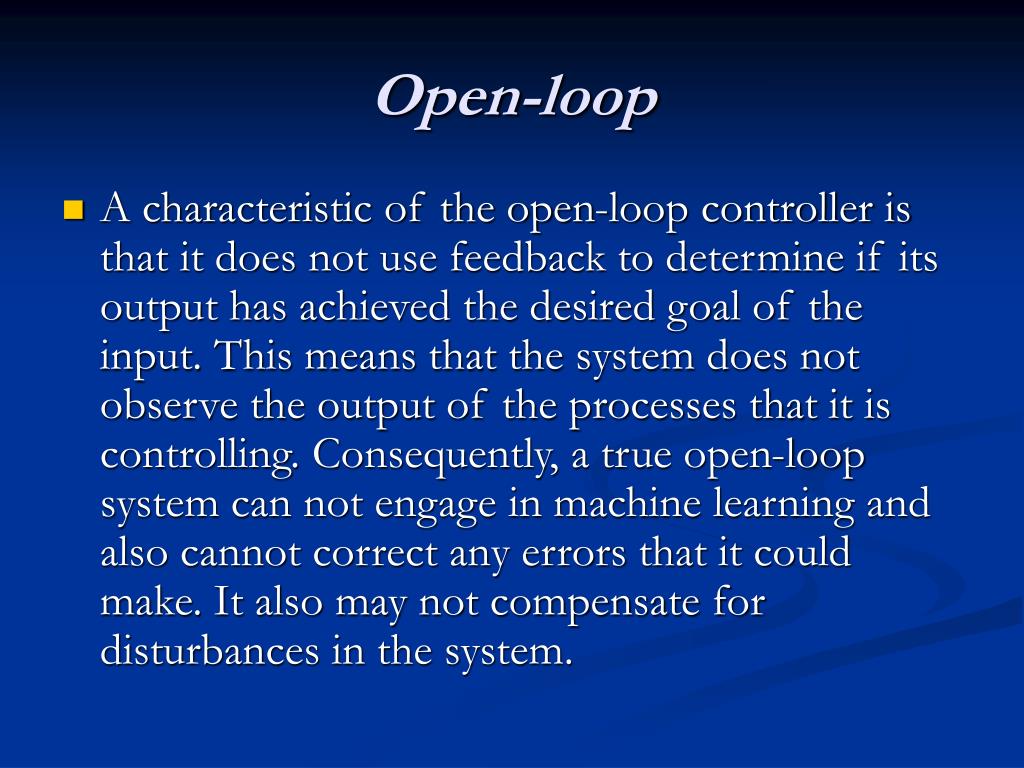
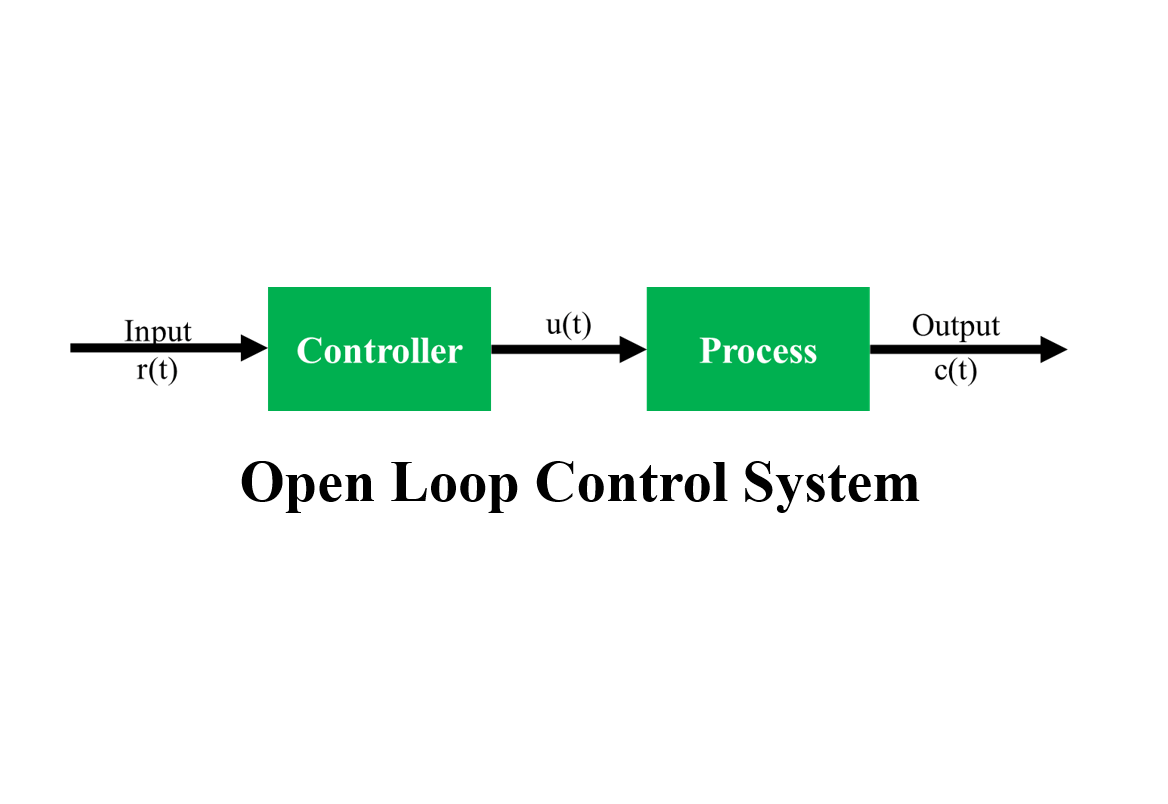
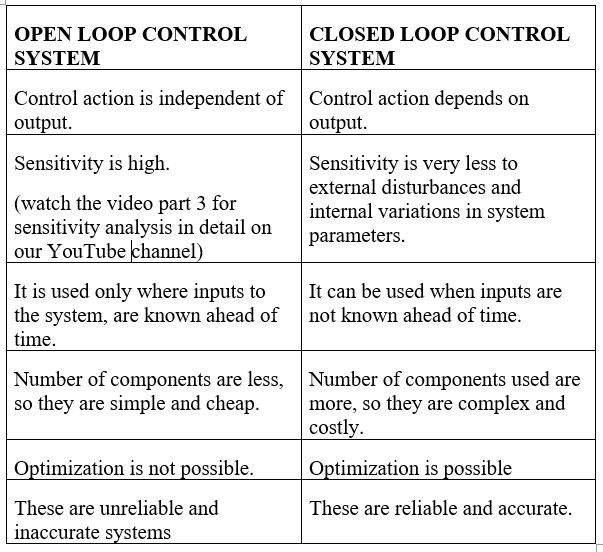
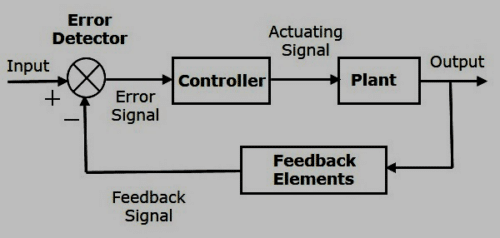
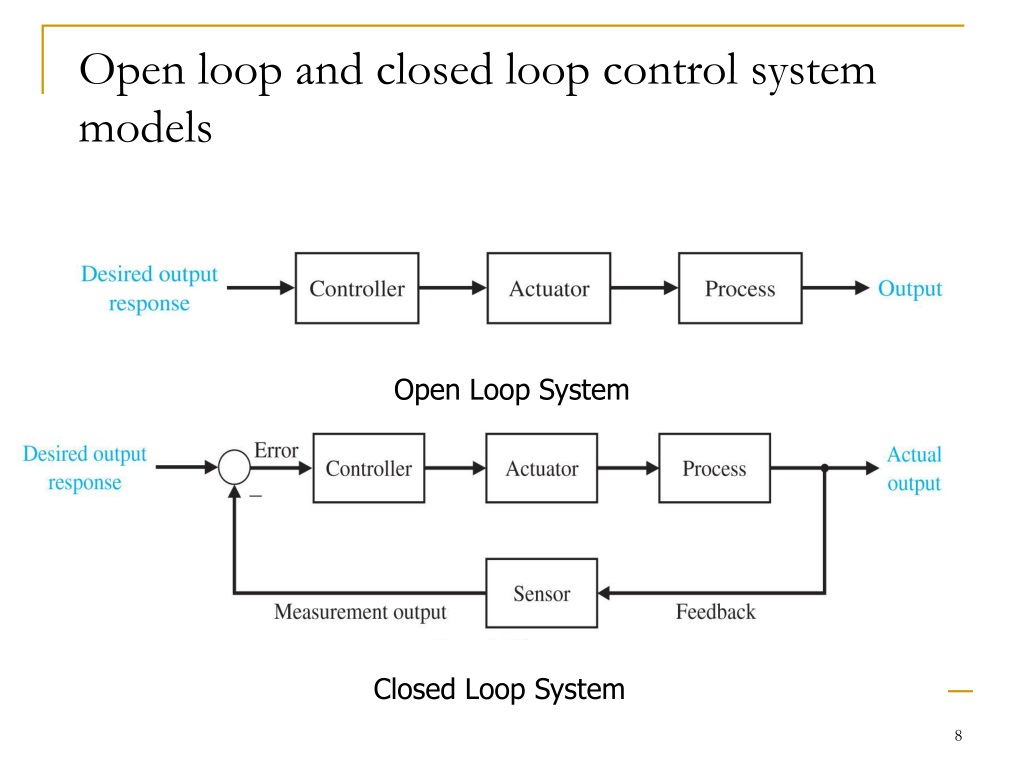
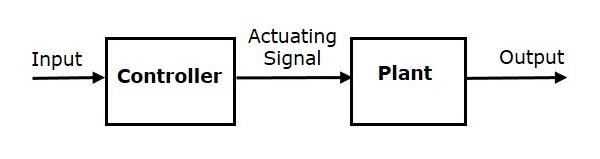
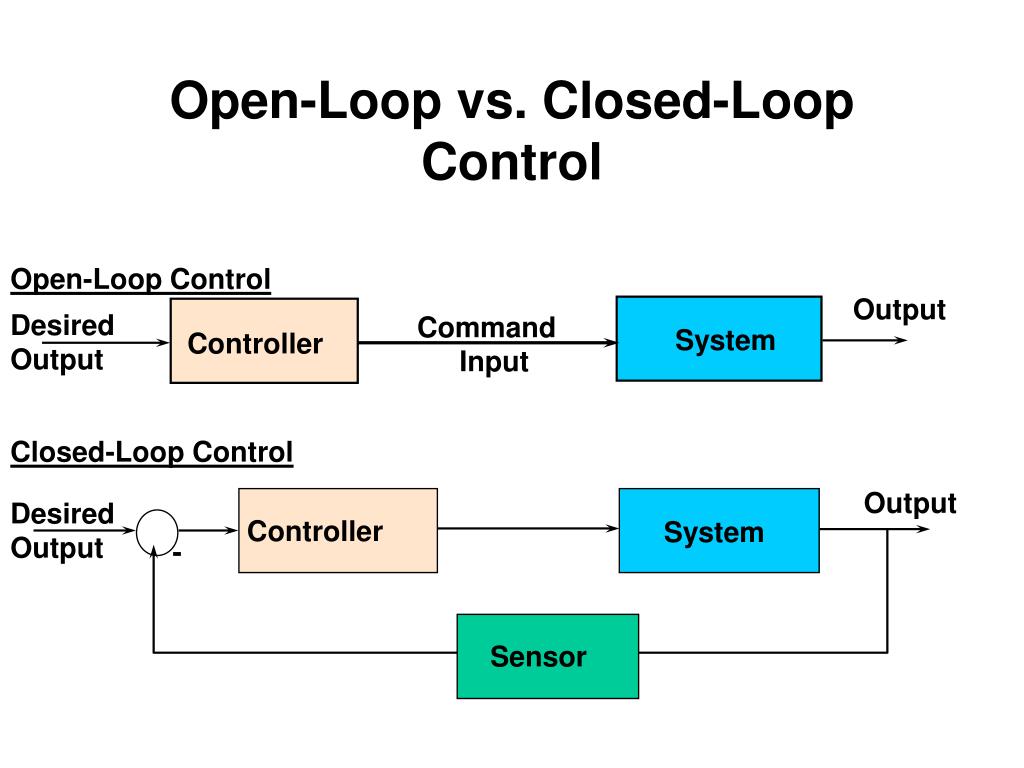
Explain Open Loop And Closed Loop Control System


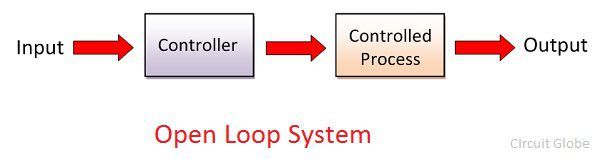

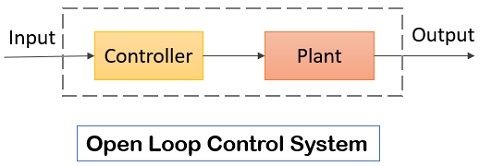


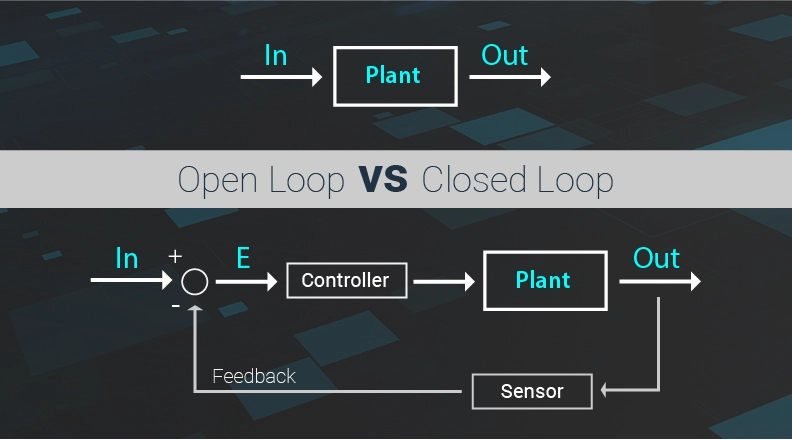


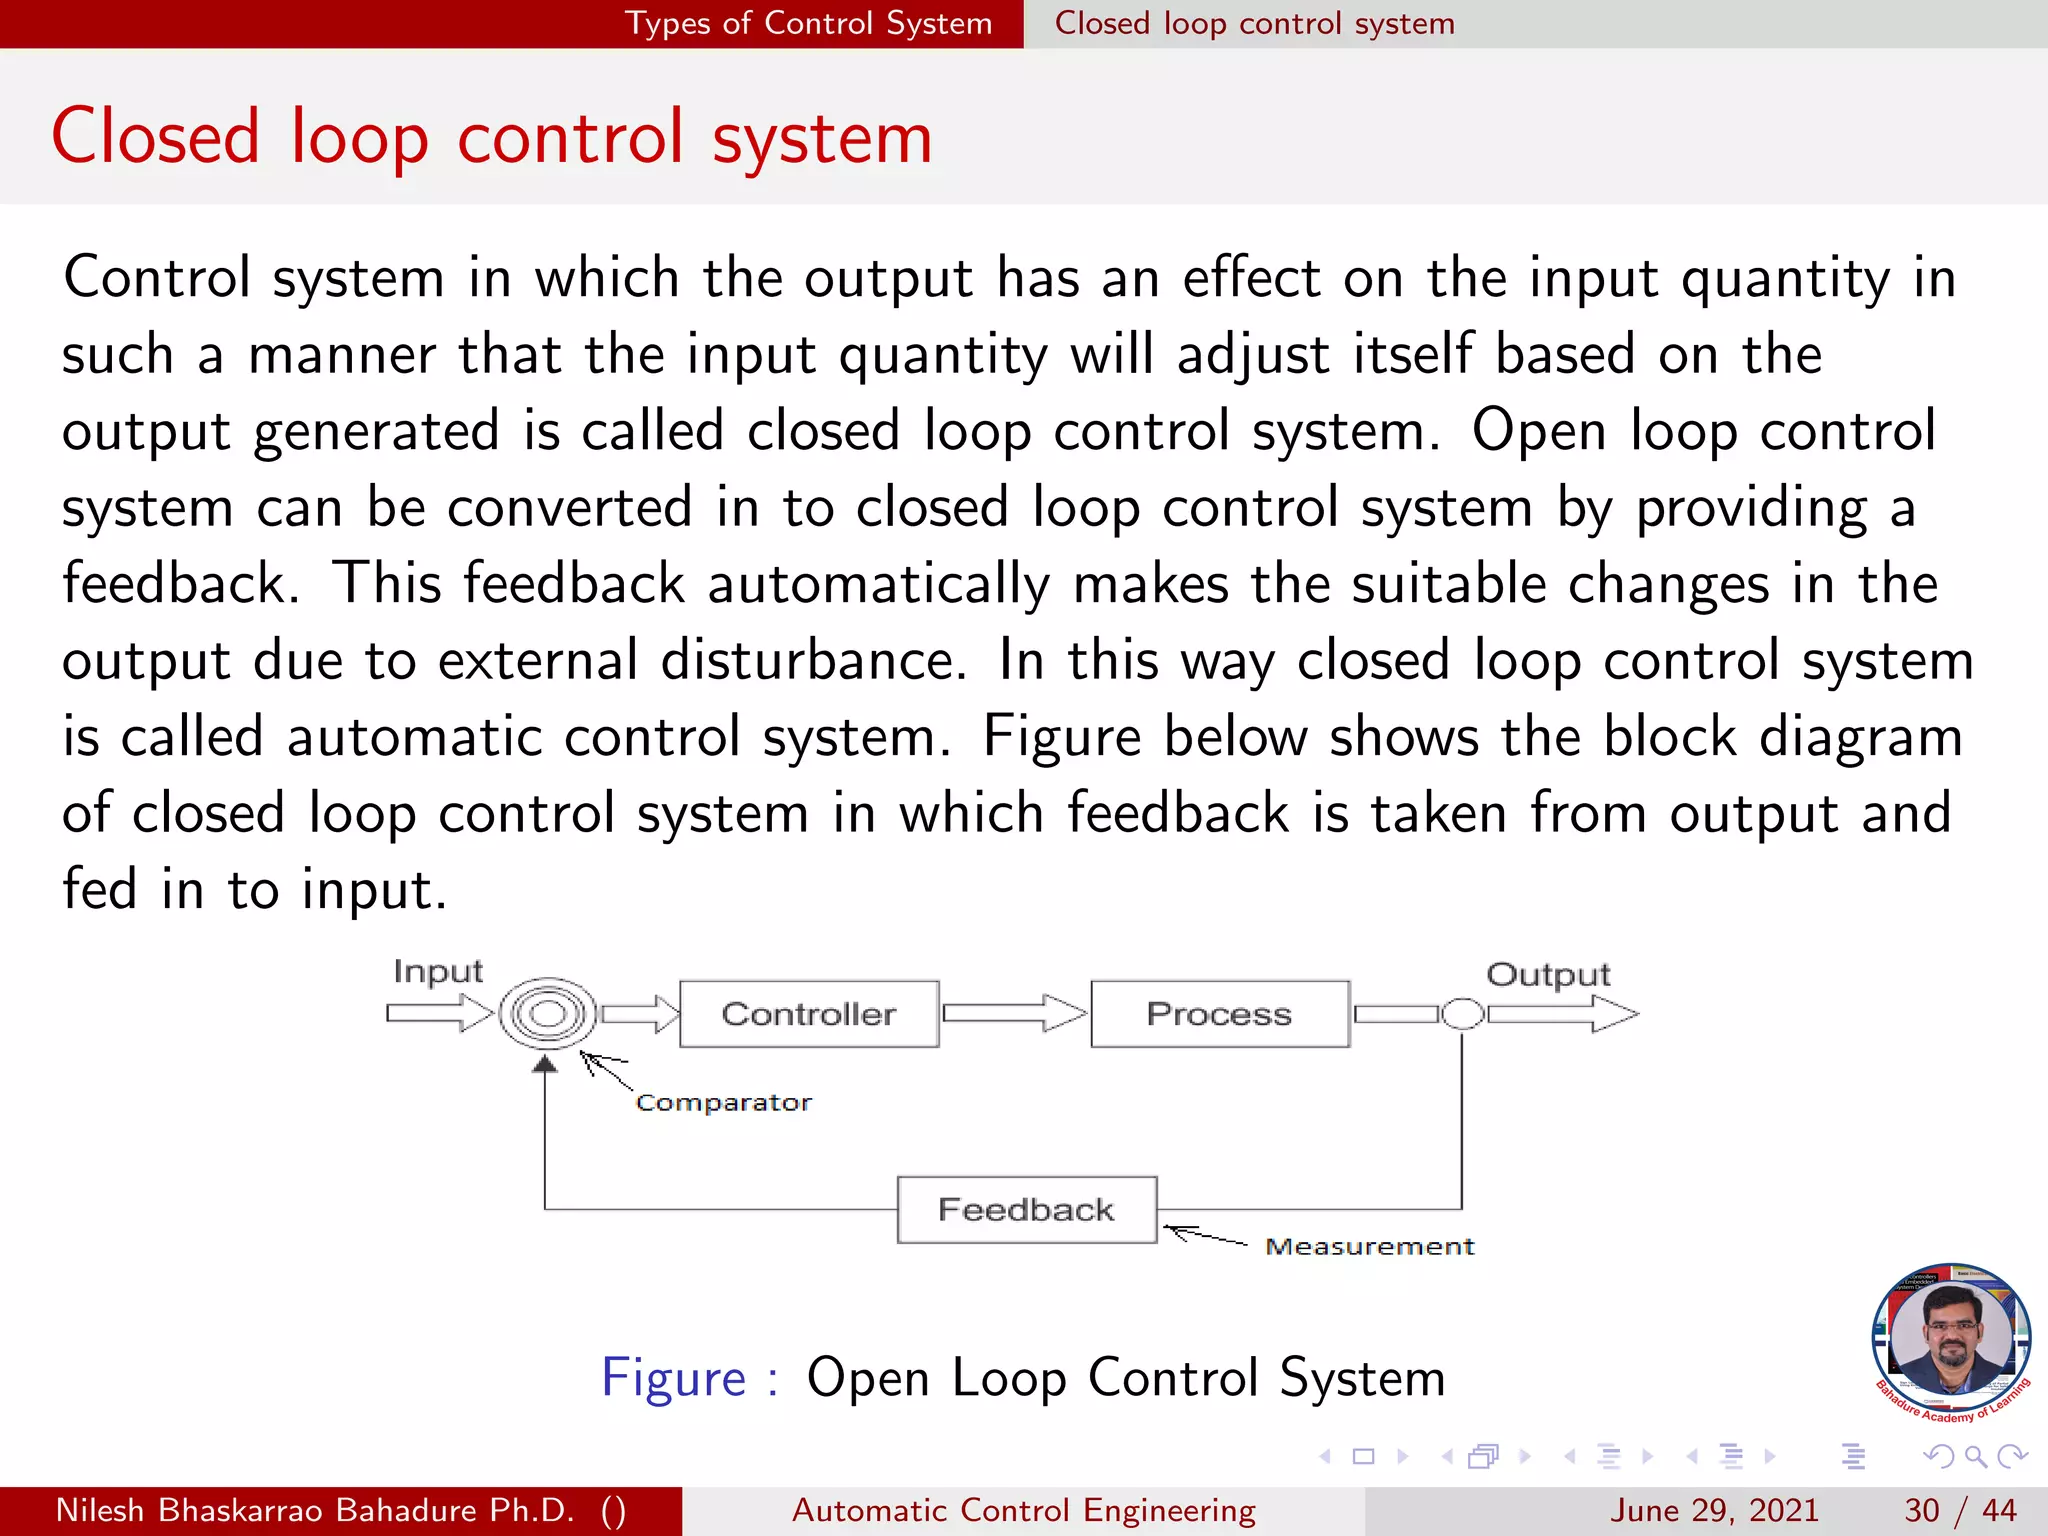


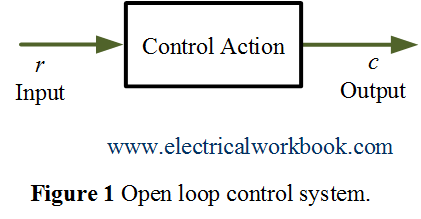


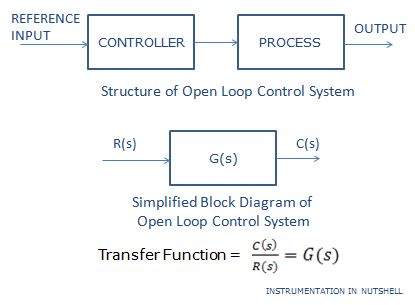


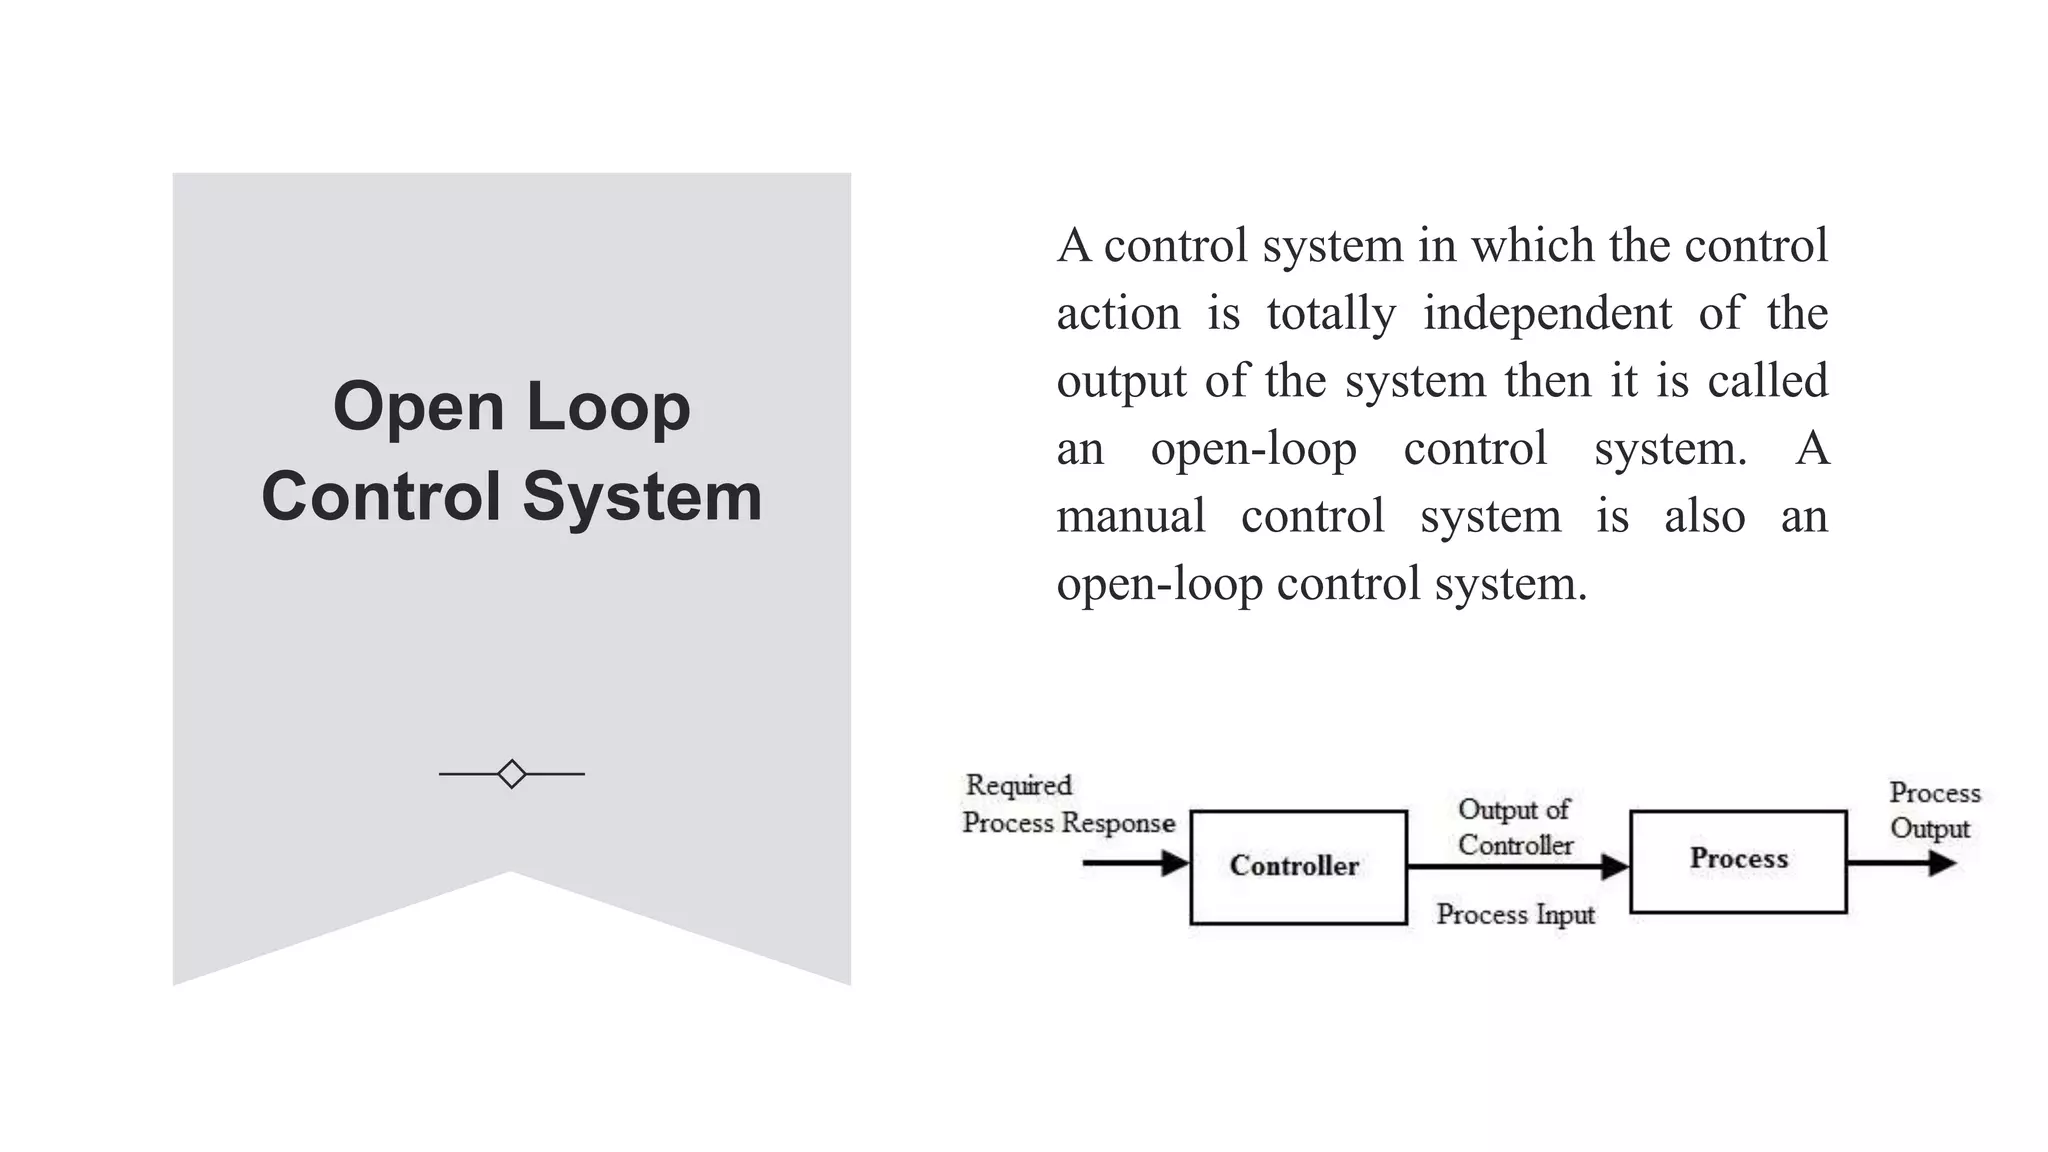


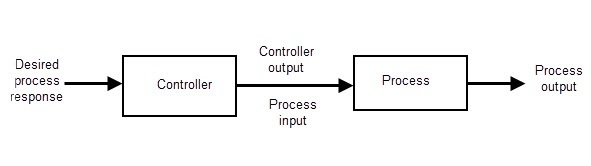
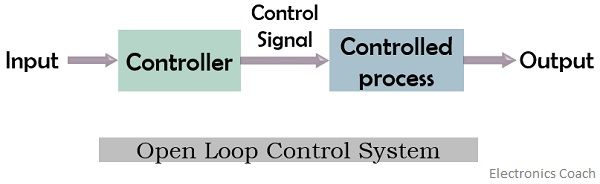


![Open Loop System [Explained] in Detail](https://i2.wp.com/eeeproject.com/wp-content/uploads/2017/09/Open-Loop-System-block-diagram.jpg?resize=702%2C401&ssl=1)


![[Solved] give an example of an open-loop and a closed-loop control ...](https://mavink.com/images/loadingwhitetransparent.gif)


Support healing through countless medically-accurate Explain Open Loop And Closed Loop Control System photographs. clinically representing computer, digital, and electronic. ideal for healthcare communications and materials. Each Explain Open Loop And Closed Loop Control System image is carefully selected for superior visual impact and professional quality. Suitable for various applications including web design, social media, personal projects, and digital content creation All Explain Open Loop And Closed Loop Control System images are available in high resolution with professional-grade quality, optimized for both digital and print applications, and include comprehensive metadata for easy organization and usage. Our Explain Open Loop And Closed Loop Control System gallery offers diverse visual resources to bring your ideas to life. The Explain Open Loop And Closed Loop Control System collection represents years of careful curation and professional standards. The Explain Open Loop And Closed Loop Control System archive serves professionals, educators, and creatives across diverse industries. Each image in our Explain Open Loop And Closed Loop Control System gallery undergoes rigorous quality assessment before inclusion. Our Explain Open Loop And Closed Loop Control System database continuously expands with fresh, relevant content from skilled photographers. Instant download capabilities enable immediate access to chosen Explain Open Loop And Closed Loop Control System images.