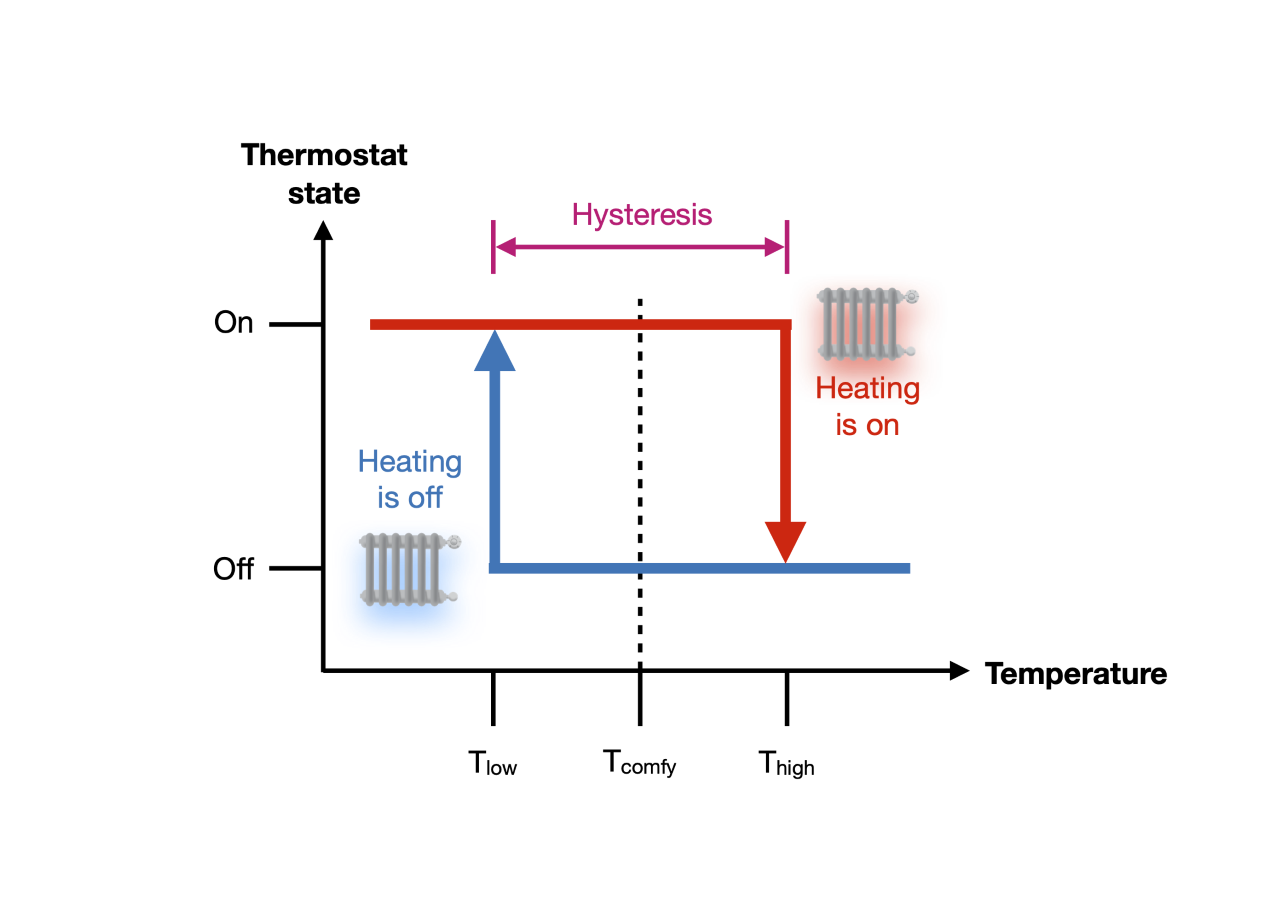
Explain On/off Control With Hysteresis


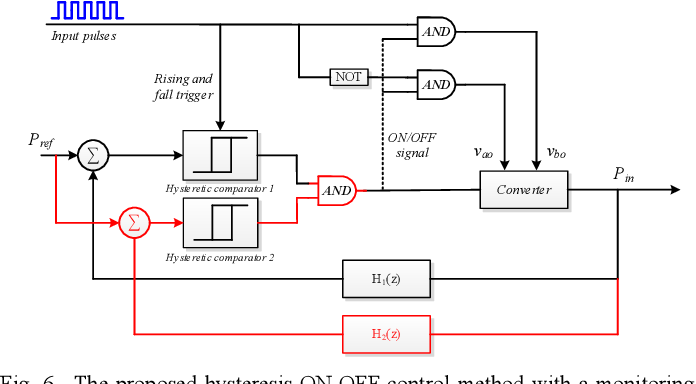


![Block diagram of TSF-Hysteresis control [1]. | Download Scientific Diagram](https://www.researchgate.net/publication/364303798/figure/fig1/AS:11431281089133016@1665421871414/Block-diagram-of-TSF-Hysteresis-control-1_Q640.jpg)


Document the past through comprehensive galleries of historically-significant Explain On/off Control With Hysteresis photographs. historically documenting computer, digital, and electronic. ideal for museums and cultural institutions. The Explain On/off Control With Hysteresis collection maintains consistent quality standards across all images. Suitable for various applications including web design, social media, personal projects, and digital content creation All Explain On/off Control With Hysteresis images are available in high resolution with professional-grade quality, optimized for both digital and print applications, and include comprehensive metadata for easy organization and usage. Discover the perfect Explain On/off Control With Hysteresis images to enhance your visual communication needs. Reliable customer support ensures smooth experience throughout the Explain On/off Control With Hysteresis selection process. Diverse style options within the Explain On/off Control With Hysteresis collection suit various aesthetic preferences. Multiple resolution options ensure optimal performance across different platforms and applications. The Explain On/off Control With Hysteresis archive serves professionals, educators, and creatives across diverse industries. Professional licensing options accommodate both commercial and educational usage requirements. The Explain On/off Control With Hysteresis collection represents years of careful curation and professional standards. Each image in our Explain On/off Control With Hysteresis gallery undergoes rigorous quality assessment before inclusion.