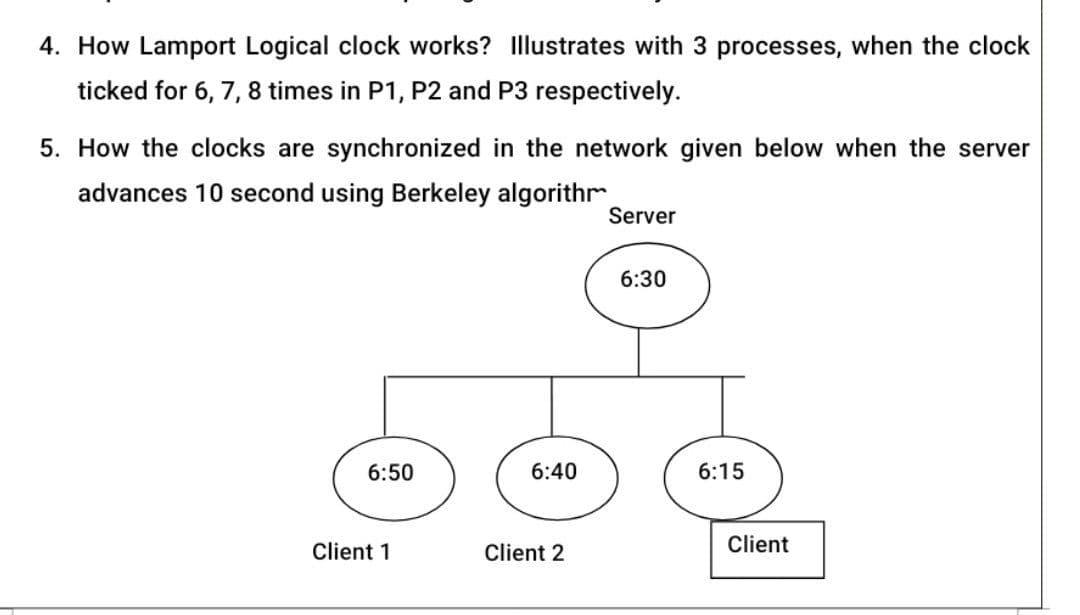
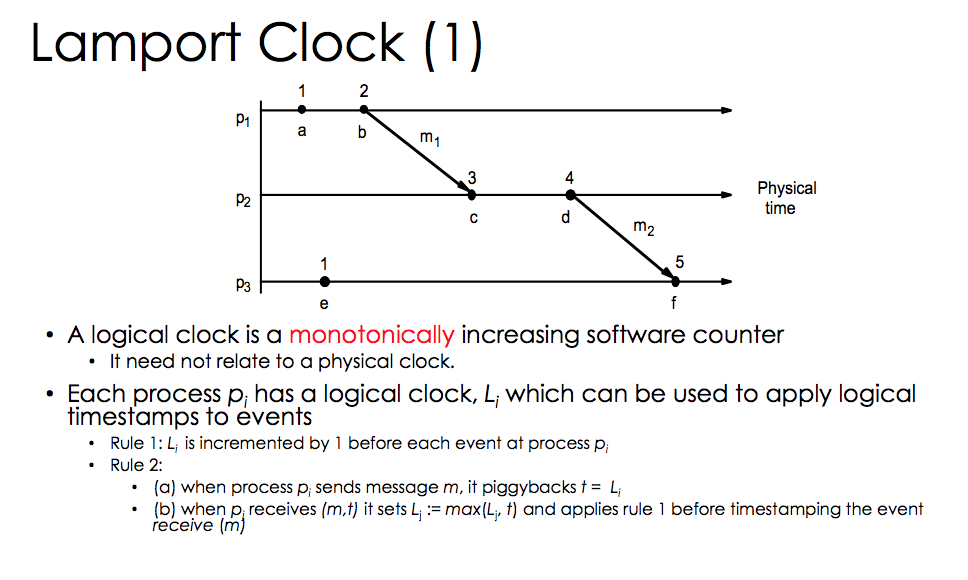
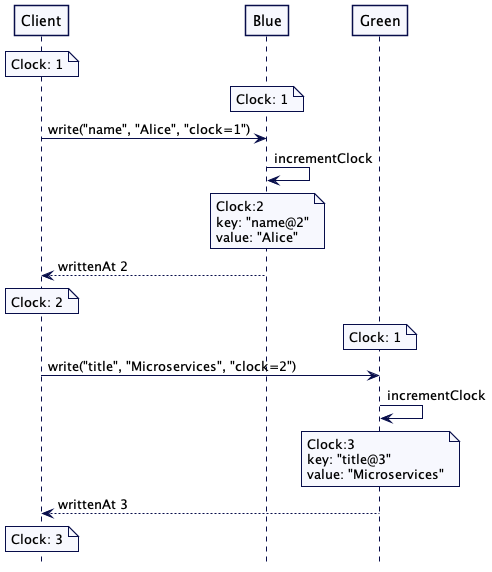
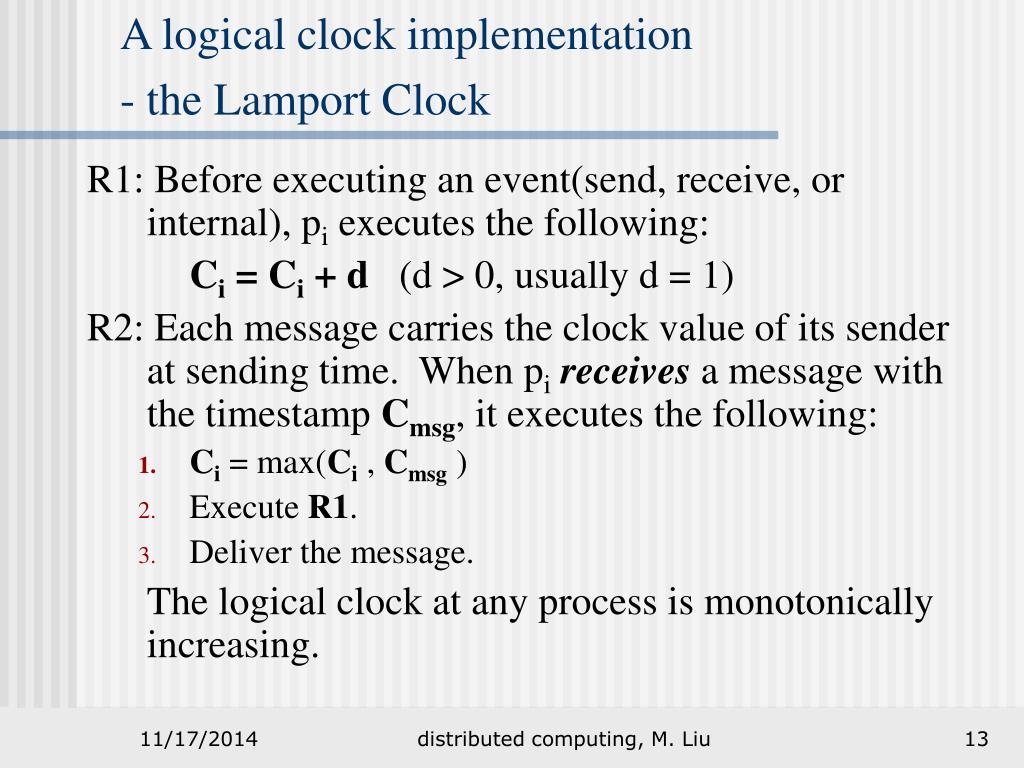
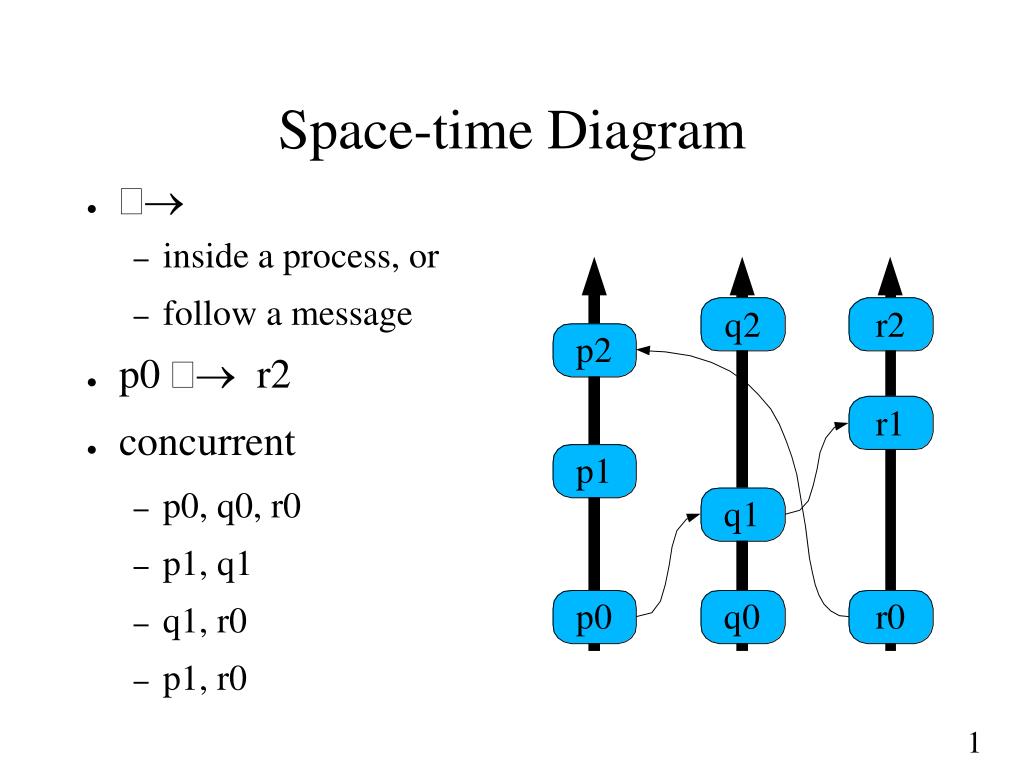
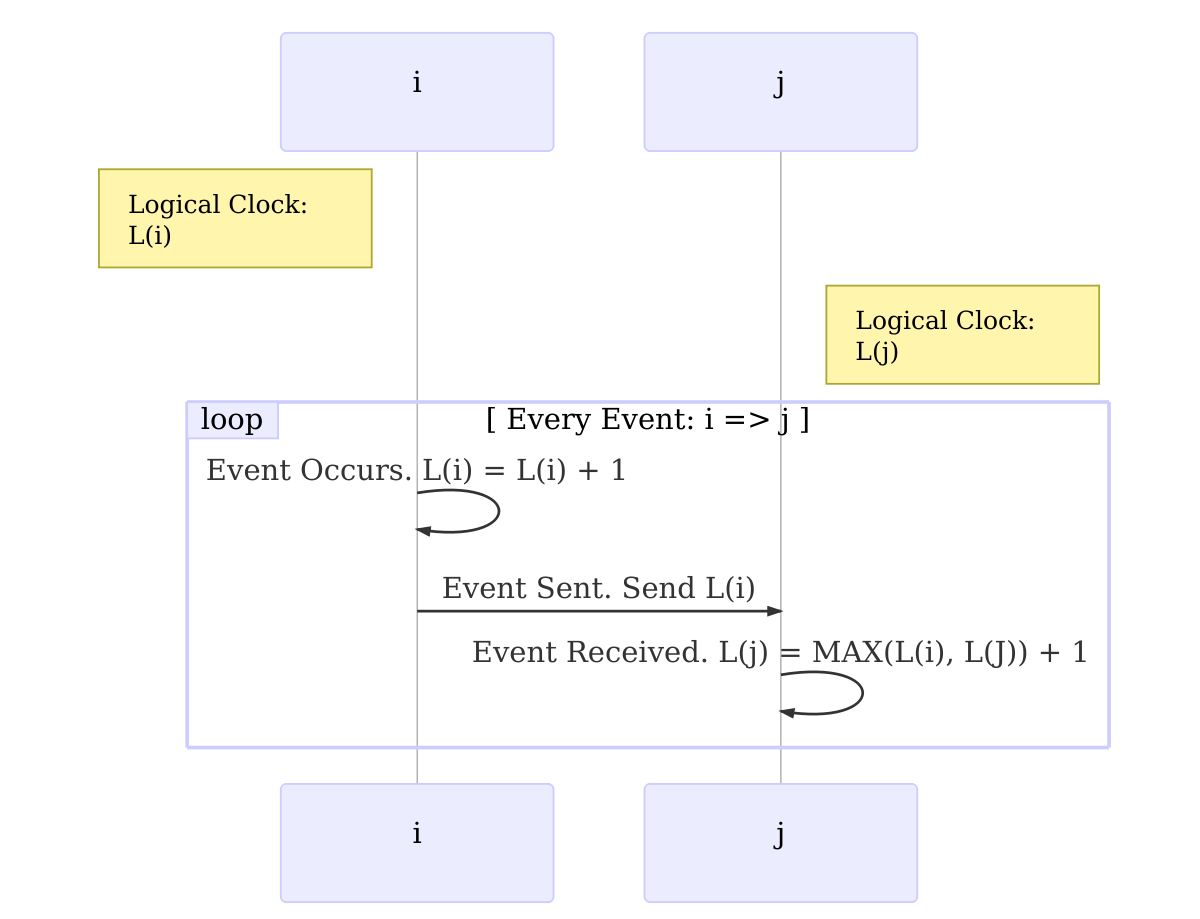
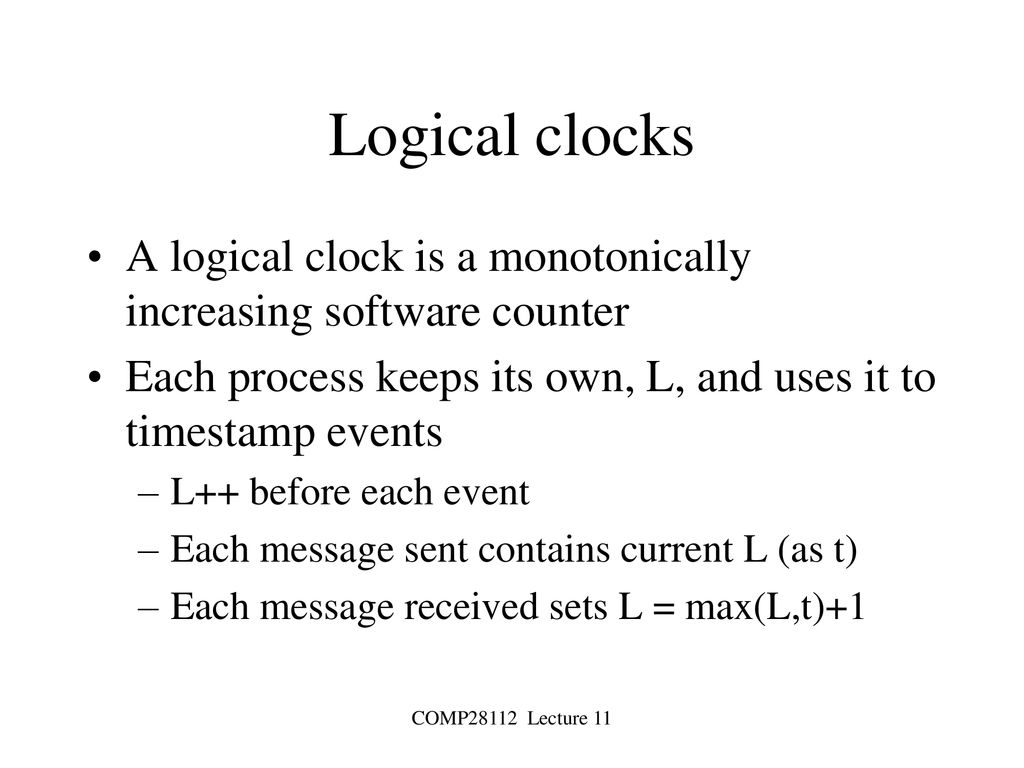
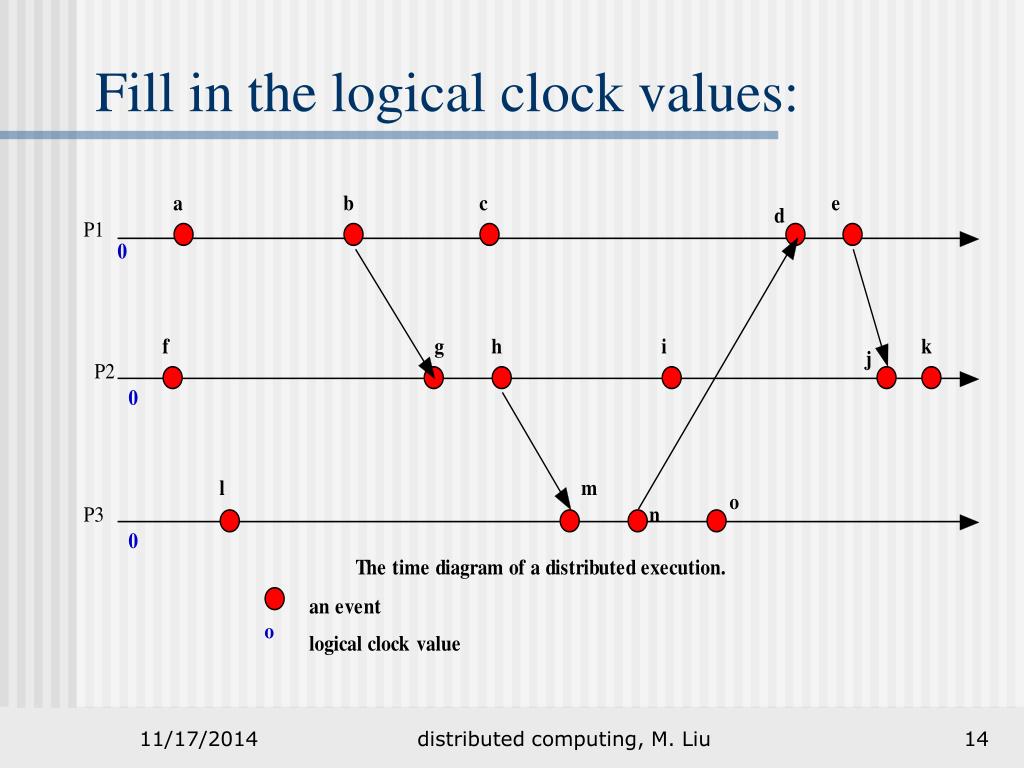
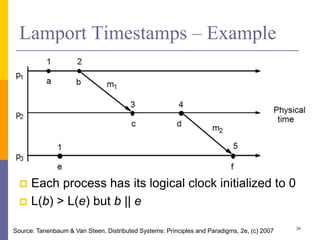
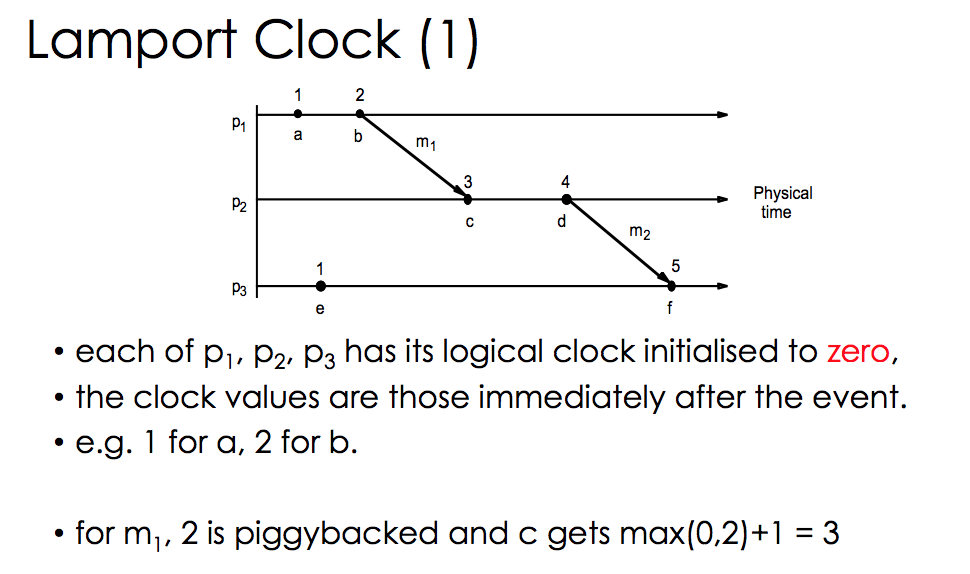
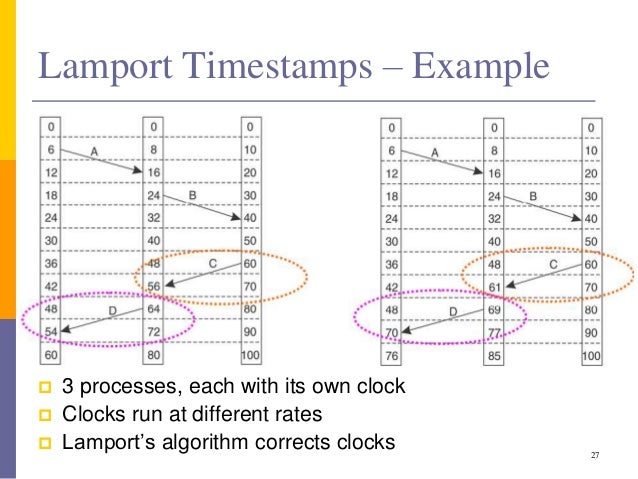
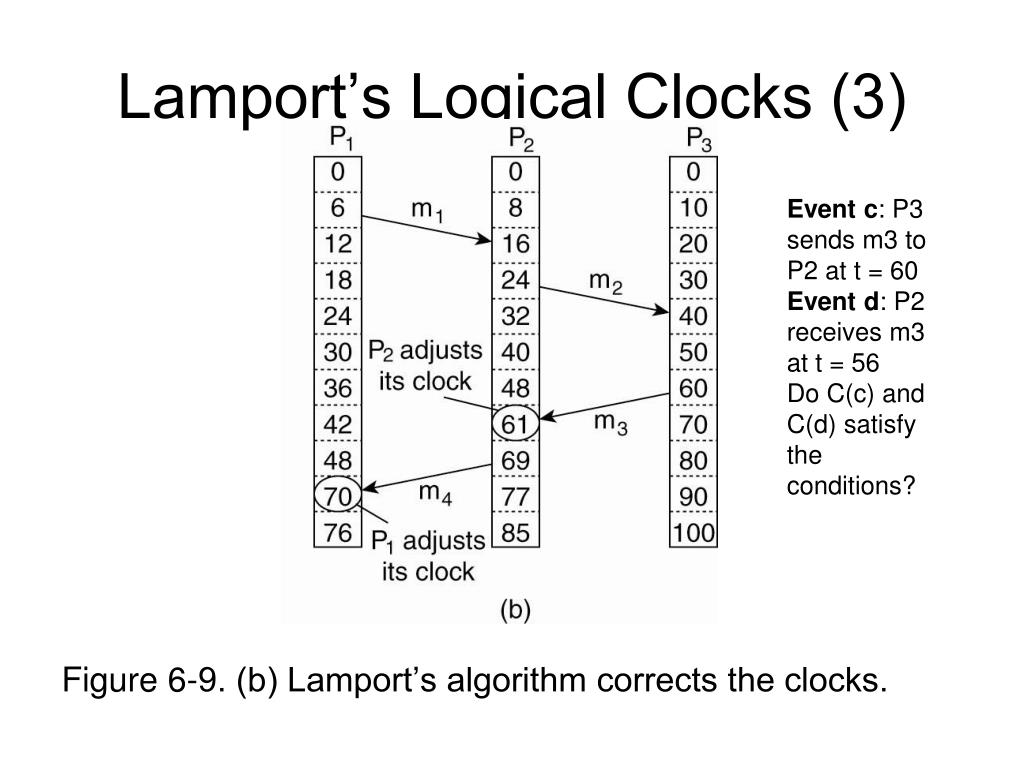
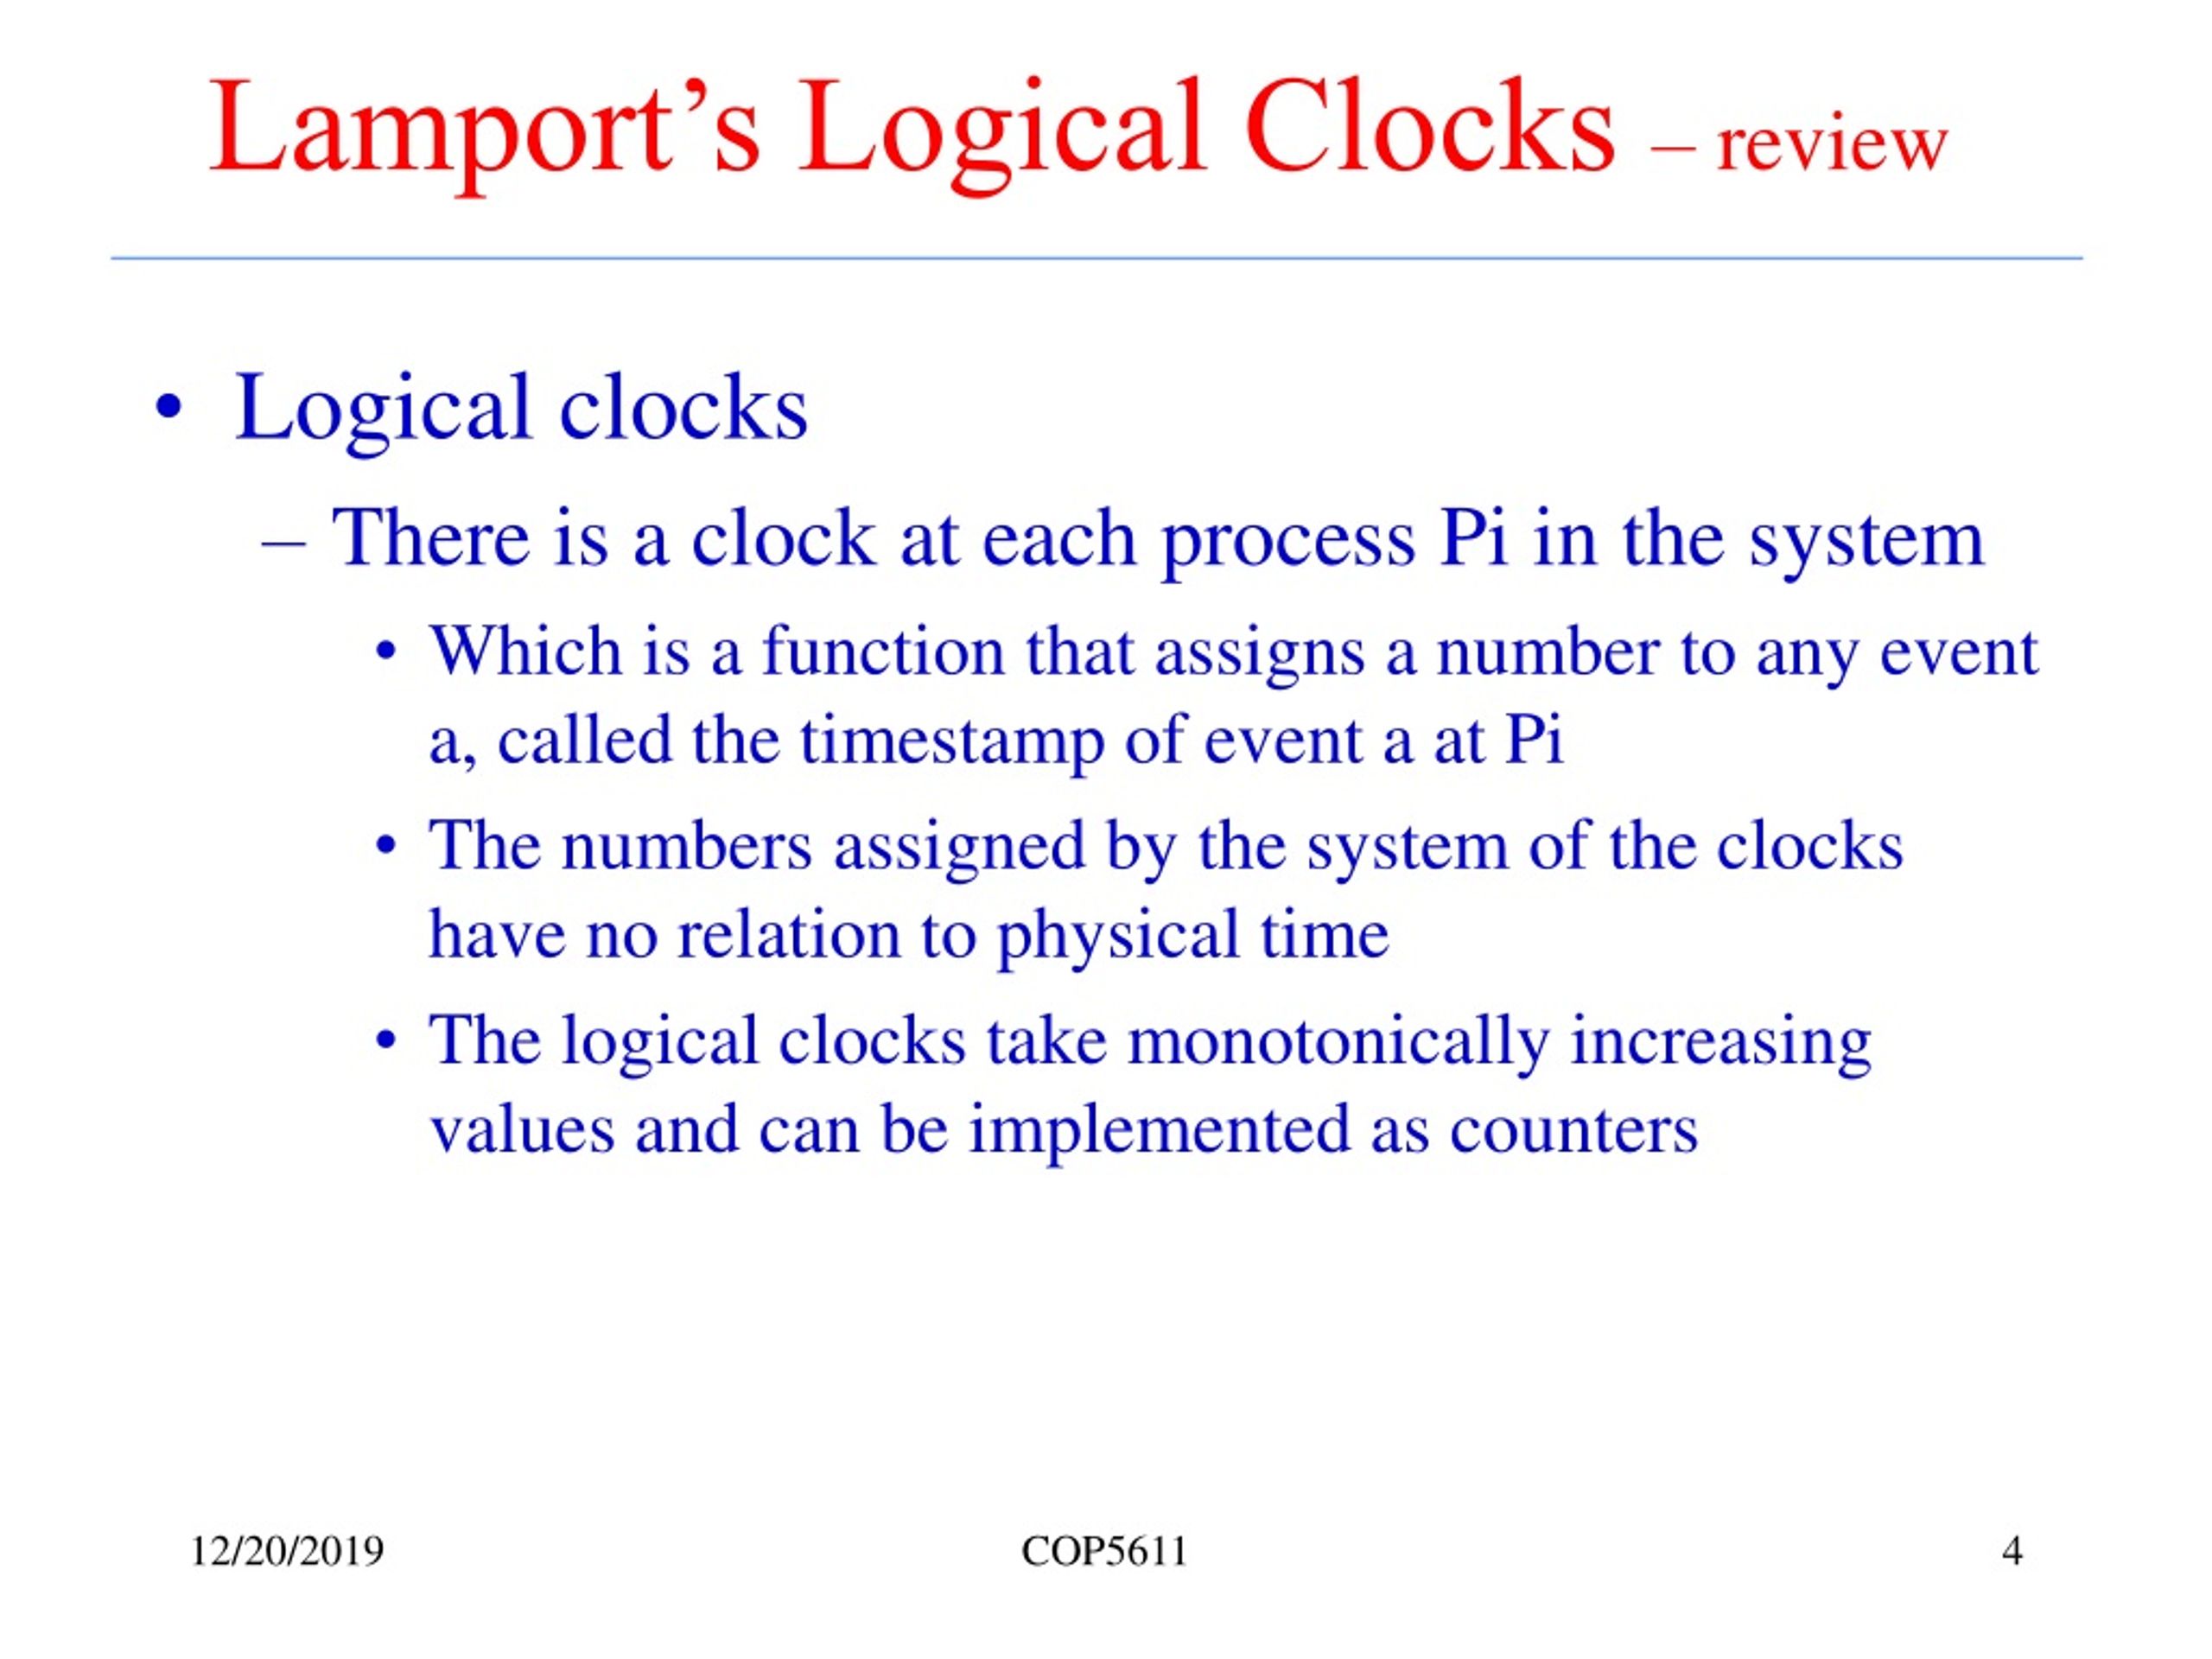
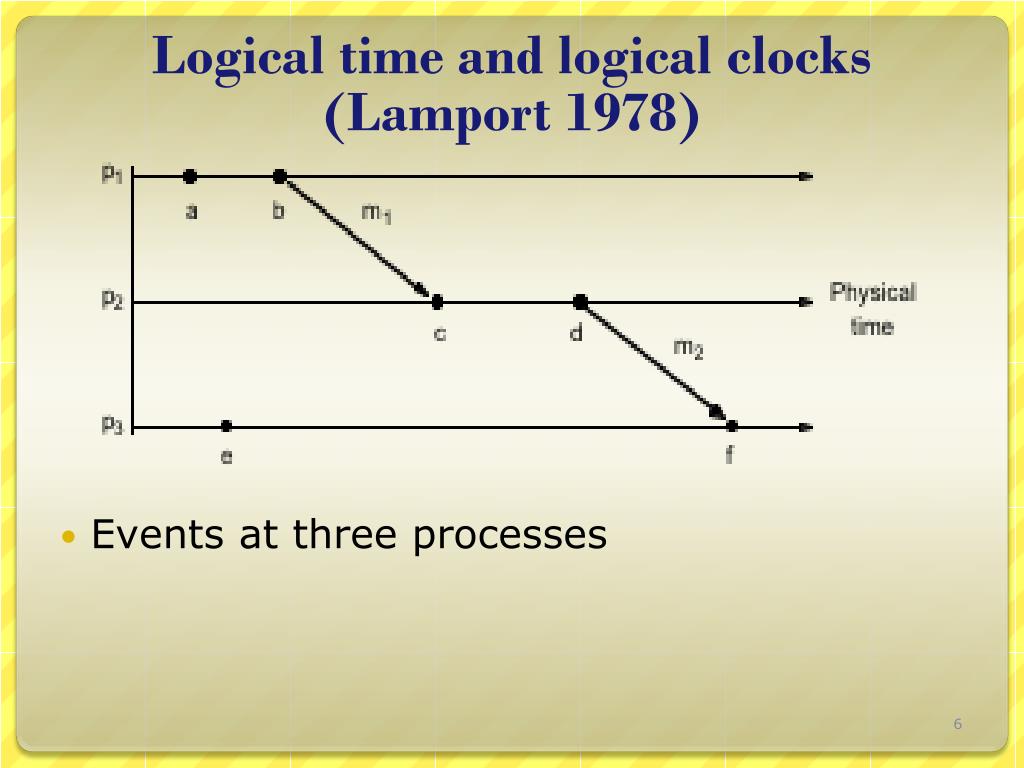
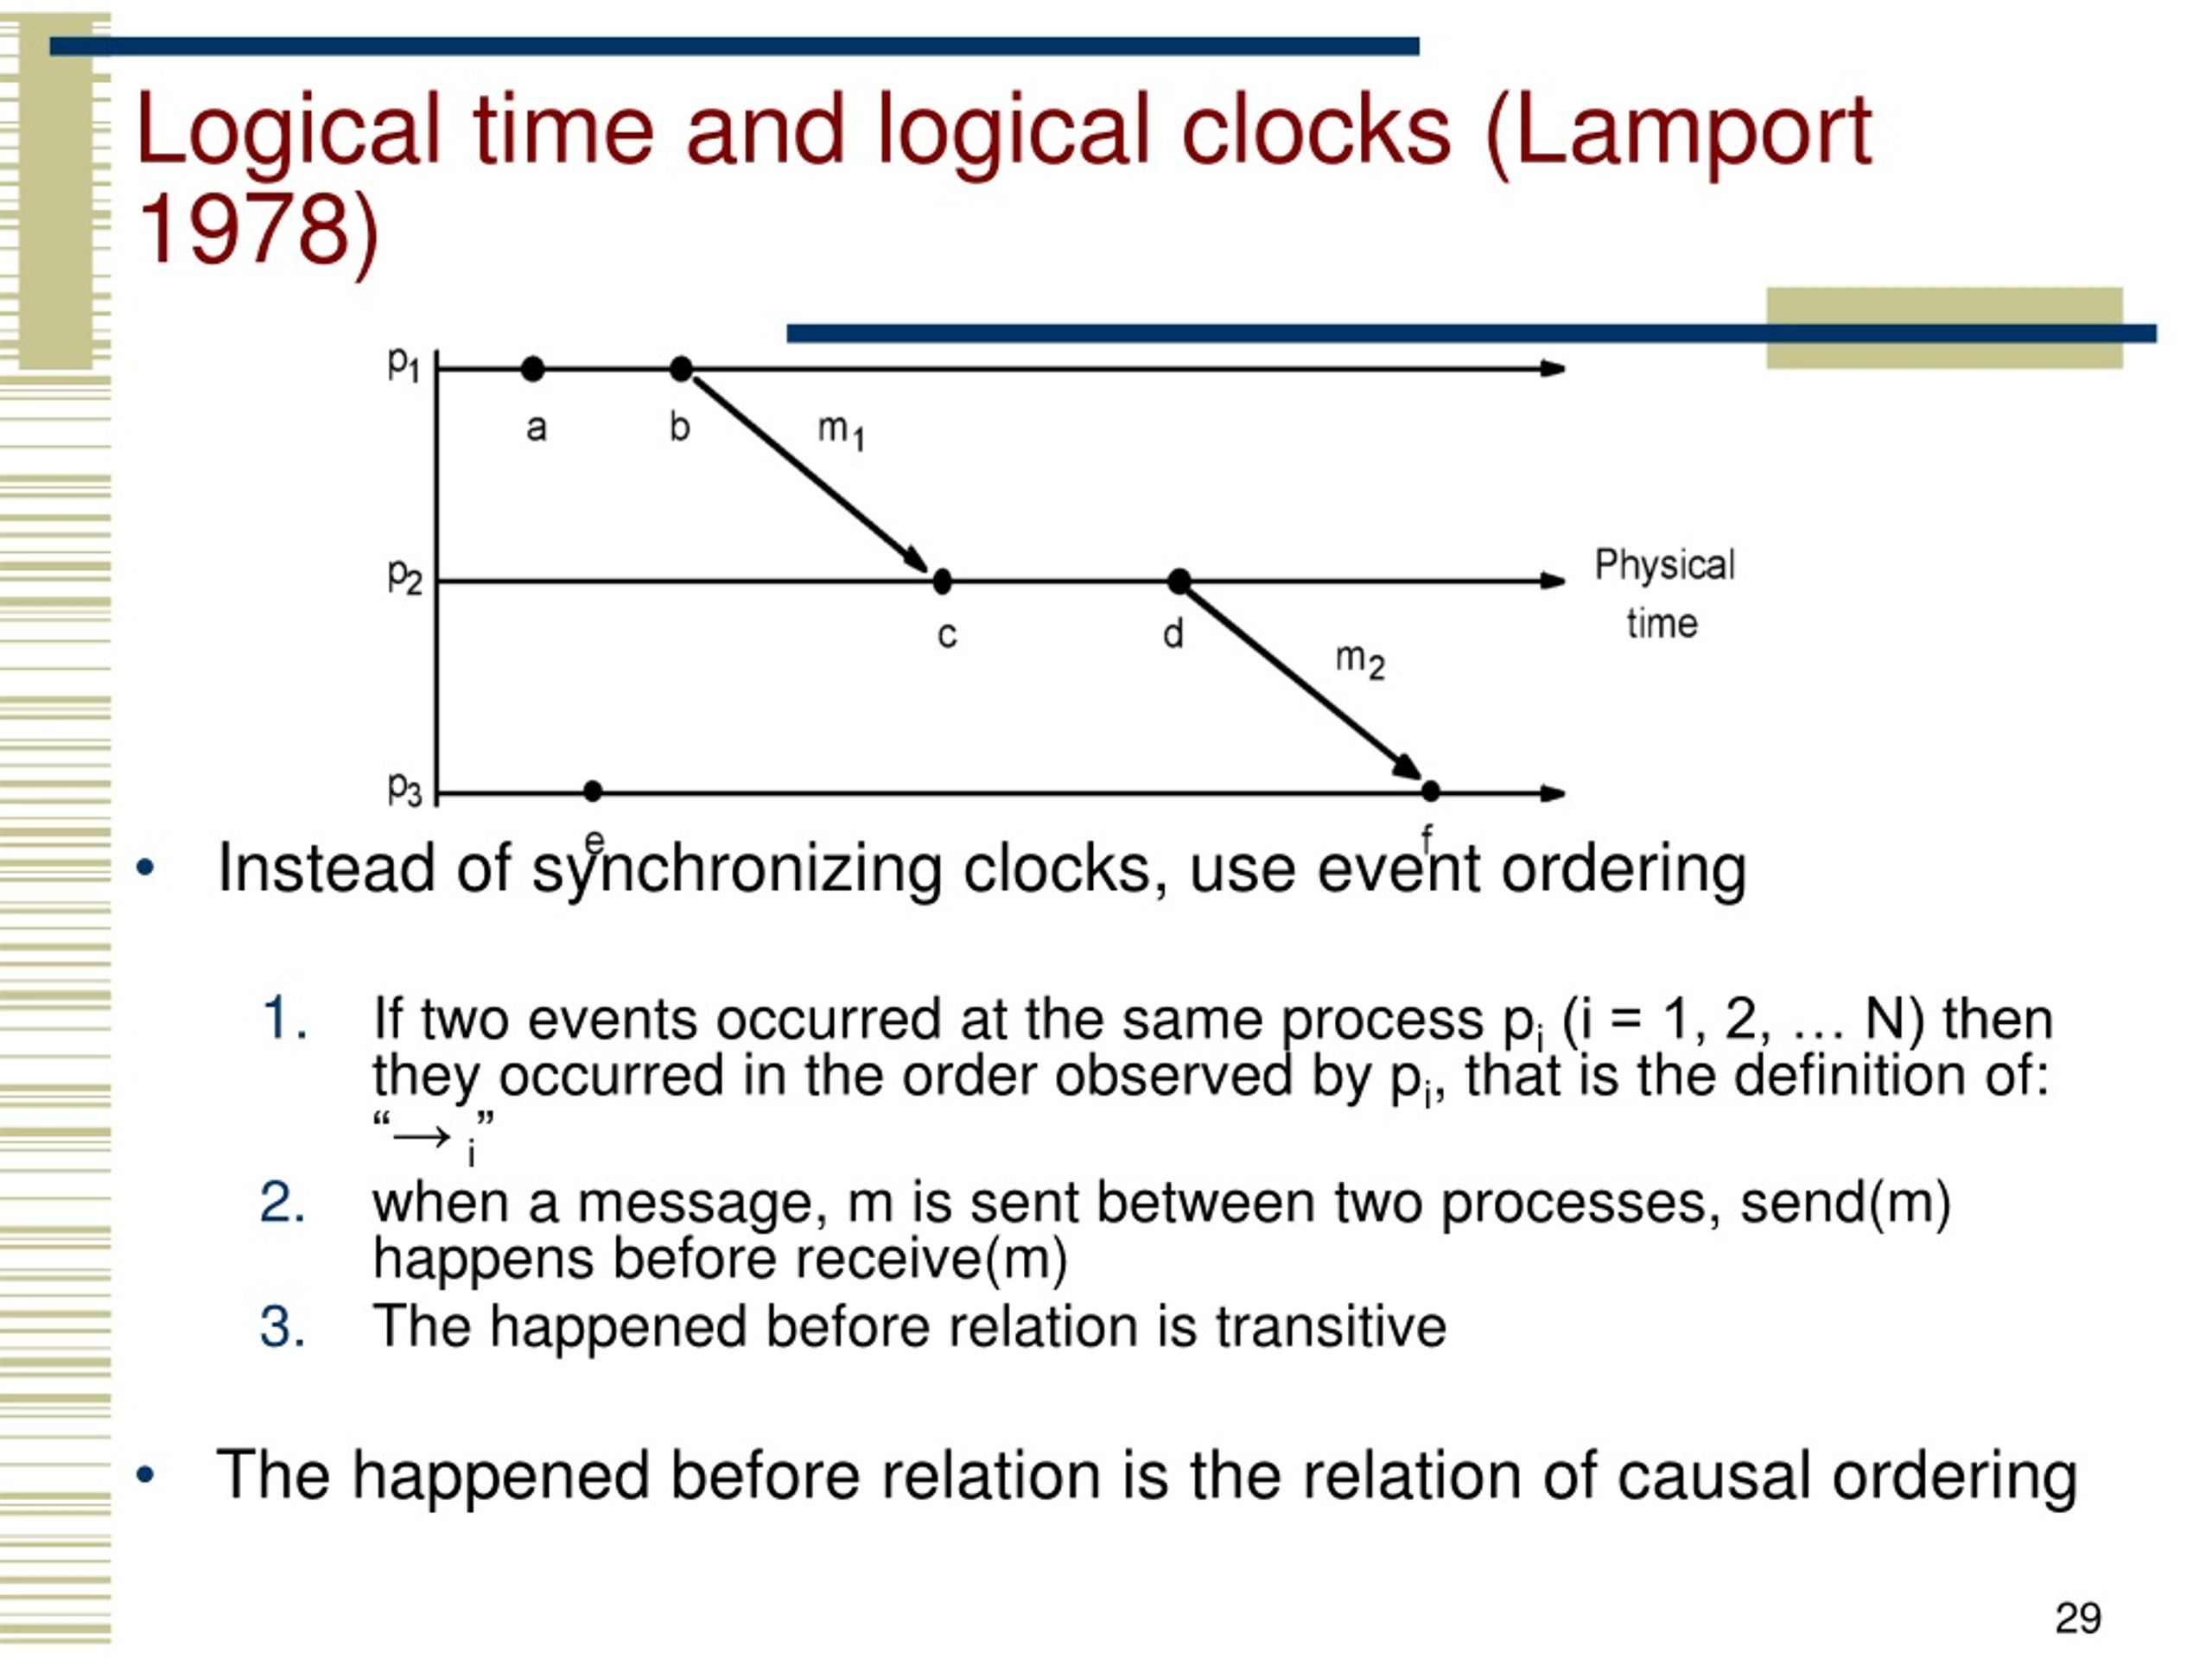
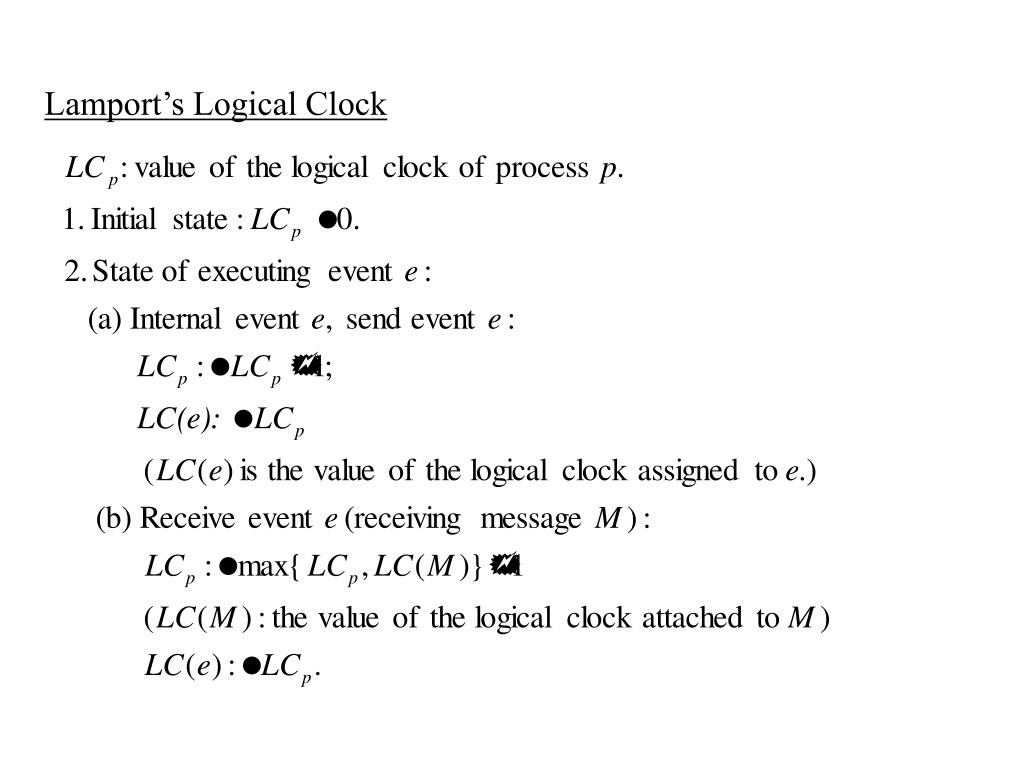
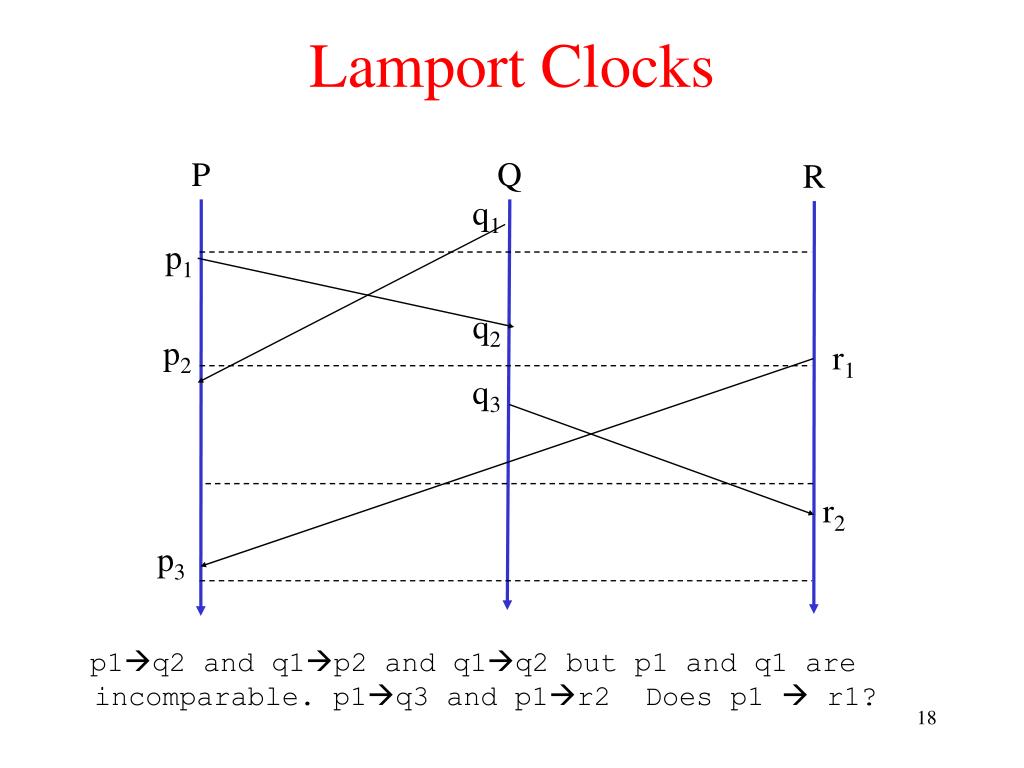
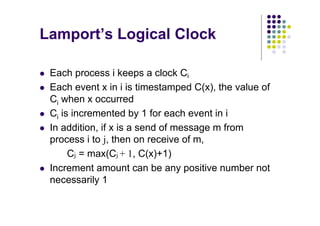
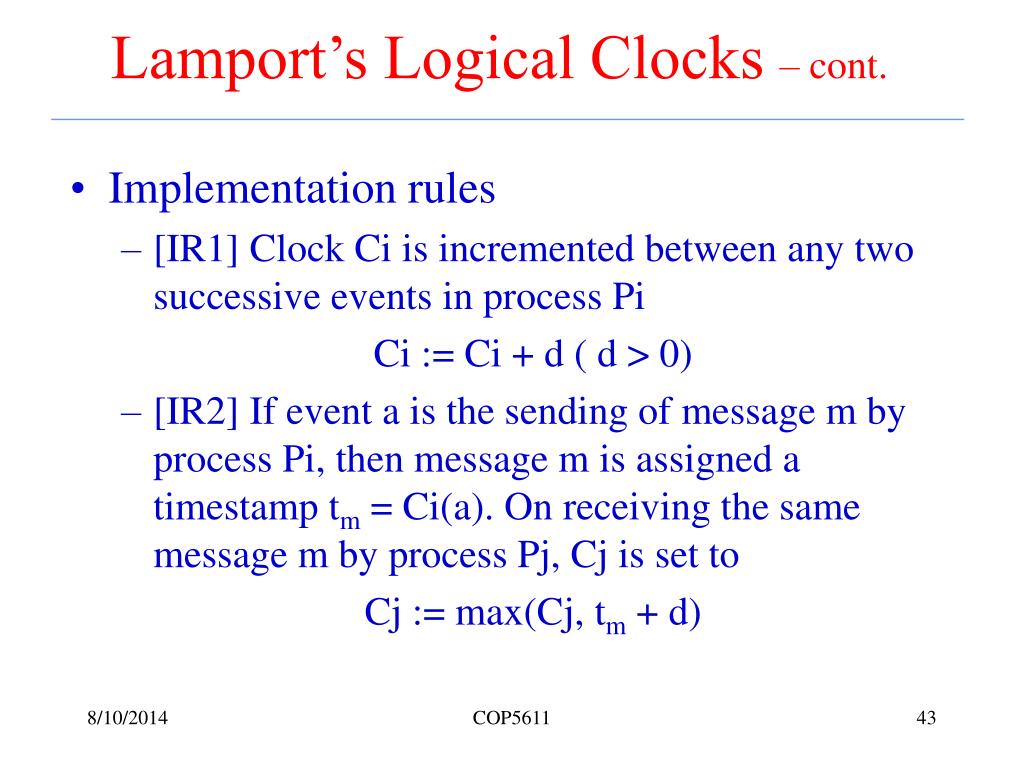
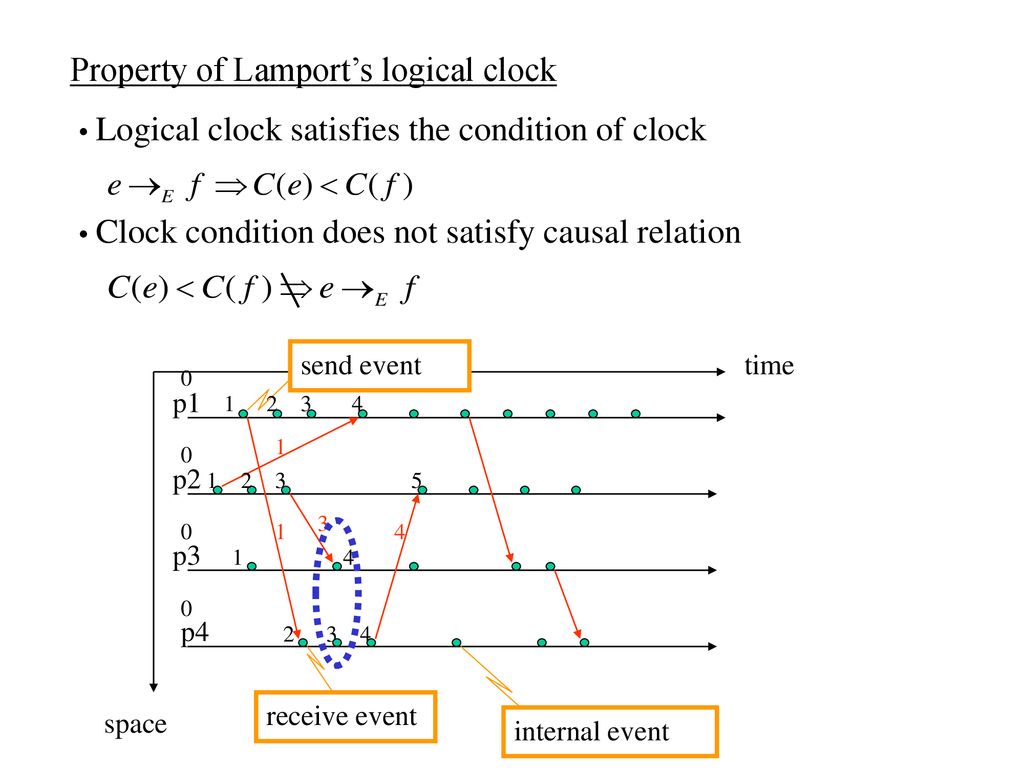
Explain Lamport Logical Clock With Diagram


.jpg)


![SOLVED: [3] Using the following rules, R1 and R2, about logical clocks ...](https://cdn.numerade.com/ask_images/9fe0cb2b3ed049c0a432f3abb9e6b2d6.jpg)


.jpg)

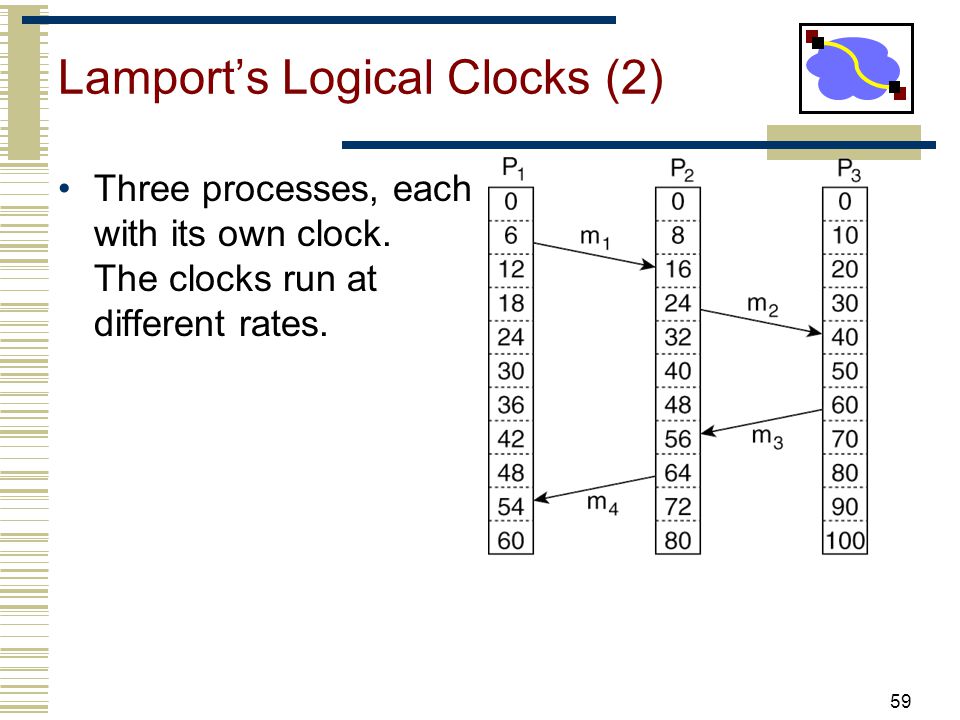
+Three+processes%2C+each+with+its+own+clock..jpg)


![Solved (c) [4 Marks] Adjust the clocks on the following | Chegg.com](https://media.cheggcdn.com/media/08b/08ba8b62-1a75-43b6-847f-ed23bf1ee123/phpSGEUS7)


.jpg)
.jpg)


.jpg)


![Solved [Lamport Clocks] Example 4LOCAL CLOCKS TEND TO RUN | Chegg.com](https://media.cheggcdn.com/media/991/991c6d00-9933-4873-9789-931061c301db/Screenshot2024-09-03at12.46.24AM.png)

.jpg)


..jpg)


+showed+that:.jpg)


Boost your marketing with comprehensive galleries of commercial-grade Explain Lamport Logical Clock With Diagram photographs. crafted for marketing purposes showcasing computer, digital, and electronic. perfect for advertising and marketing campaigns. Our Explain Lamport Logical Clock With Diagram collection features high-quality images with excellent detail and clarity. Suitable for various applications including web design, social media, personal projects, and digital content creation All Explain Lamport Logical Clock With Diagram images are available in high resolution with professional-grade quality, optimized for both digital and print applications, and include comprehensive metadata for easy organization and usage. Explore the versatility of our Explain Lamport Logical Clock With Diagram collection for various creative and professional projects. Cost-effective licensing makes professional Explain Lamport Logical Clock With Diagram photography accessible to all budgets. Time-saving browsing features help users locate ideal Explain Lamport Logical Clock With Diagram images quickly. Whether for commercial projects or personal use, our Explain Lamport Logical Clock With Diagram collection delivers consistent excellence. The Explain Lamport Logical Clock With Diagram archive serves professionals, educators, and creatives across diverse industries. Diverse style options within the Explain Lamport Logical Clock With Diagram collection suit various aesthetic preferences. Reliable customer support ensures smooth experience throughout the Explain Lamport Logical Clock With Diagram selection process.