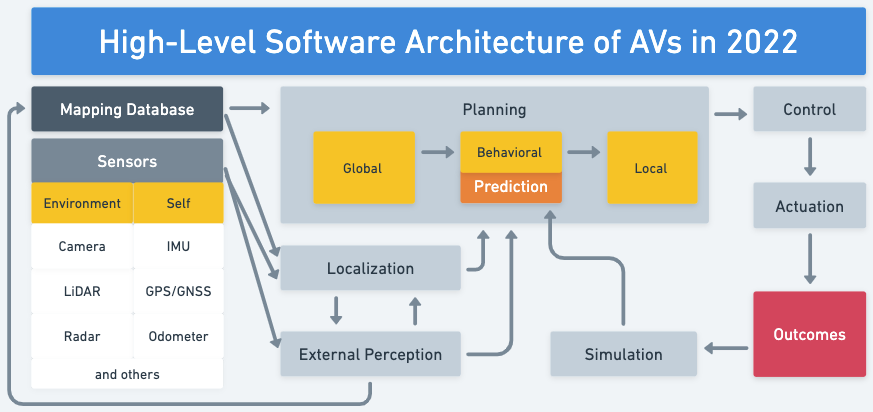
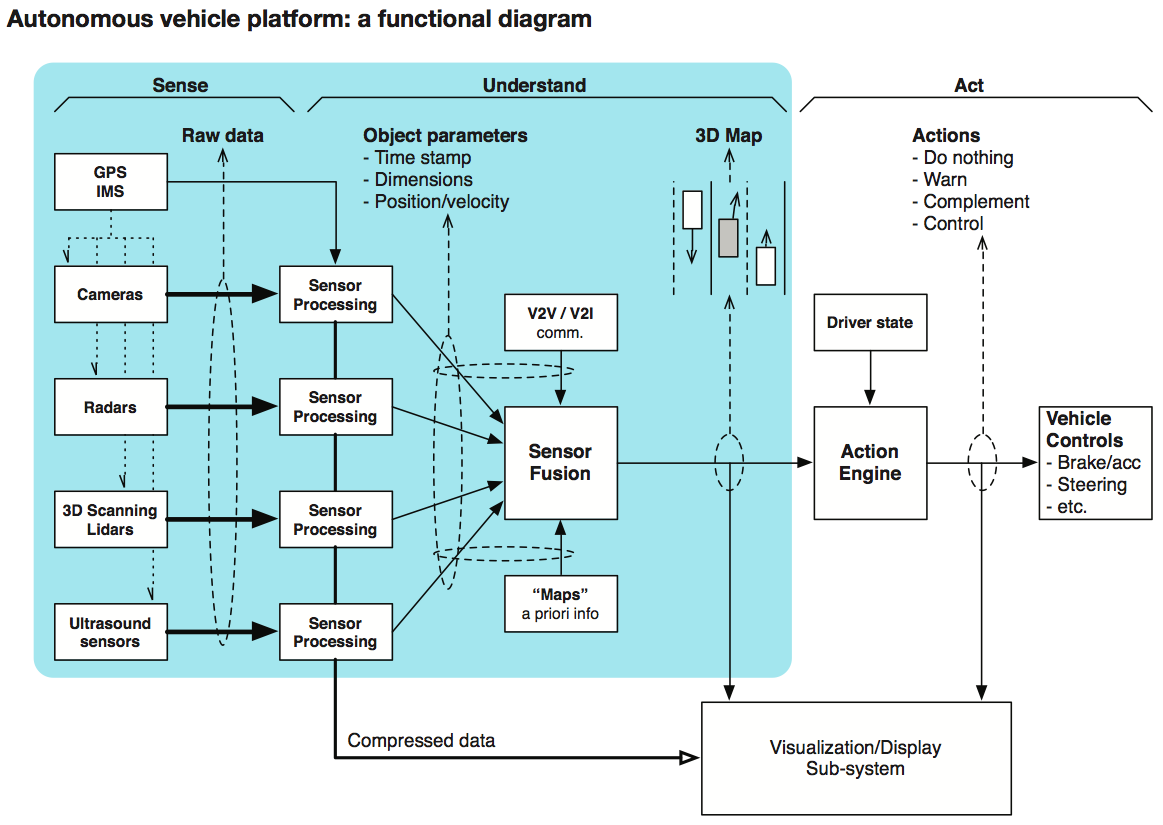
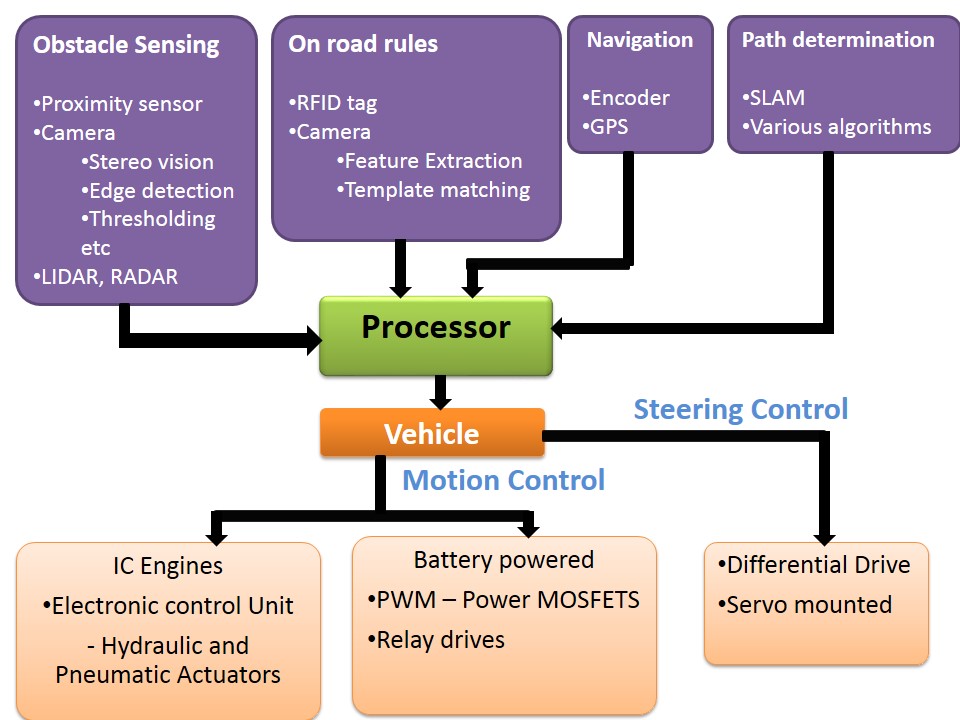
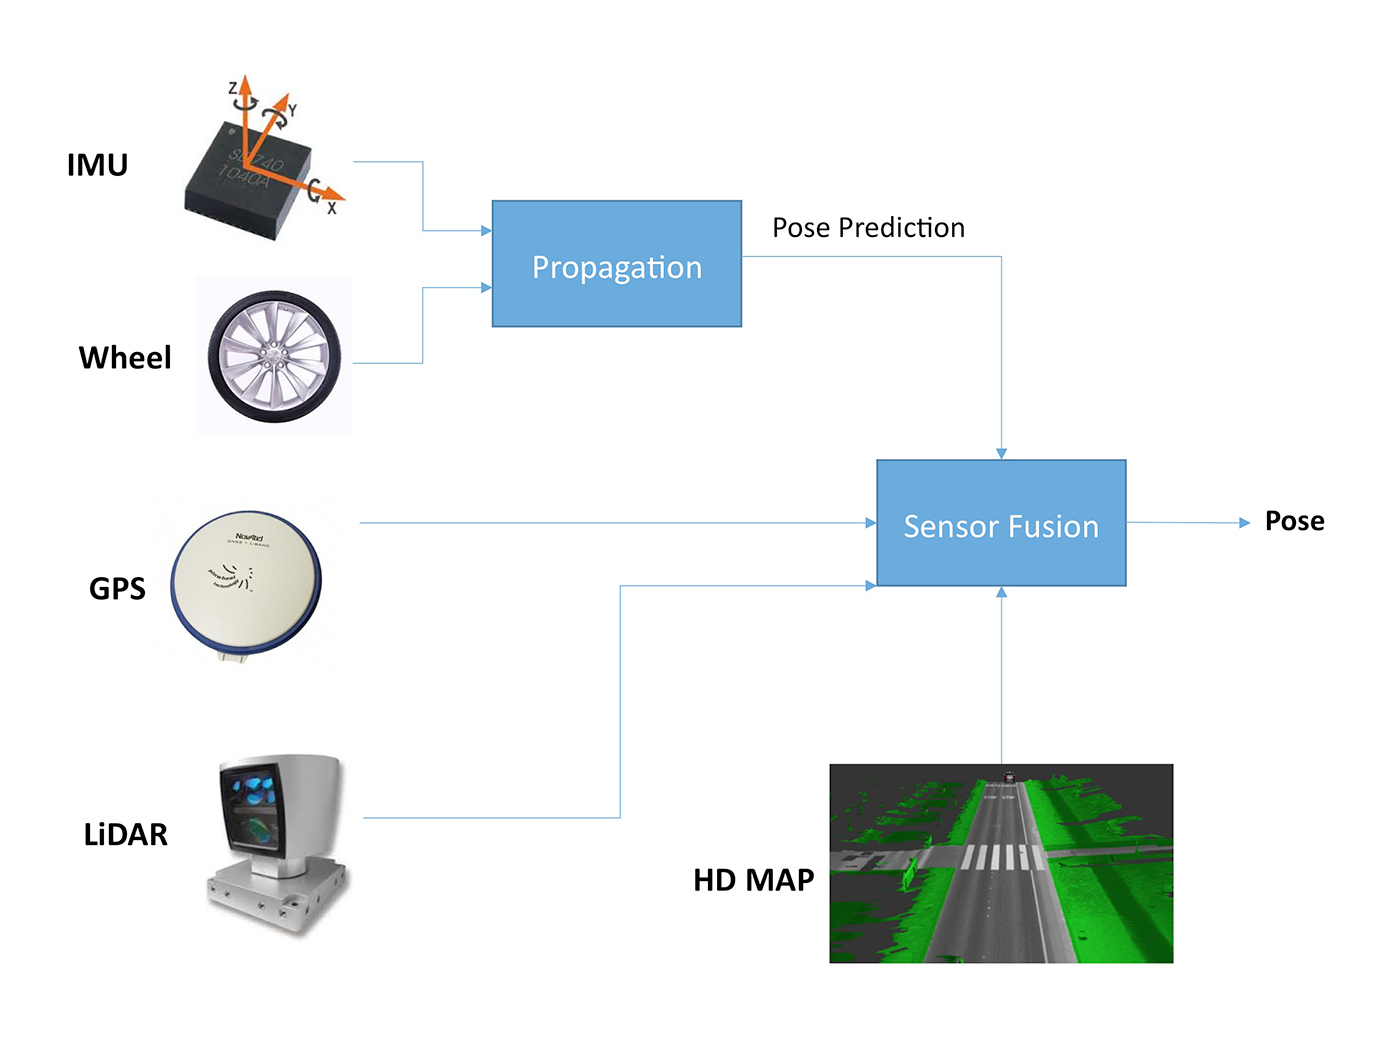
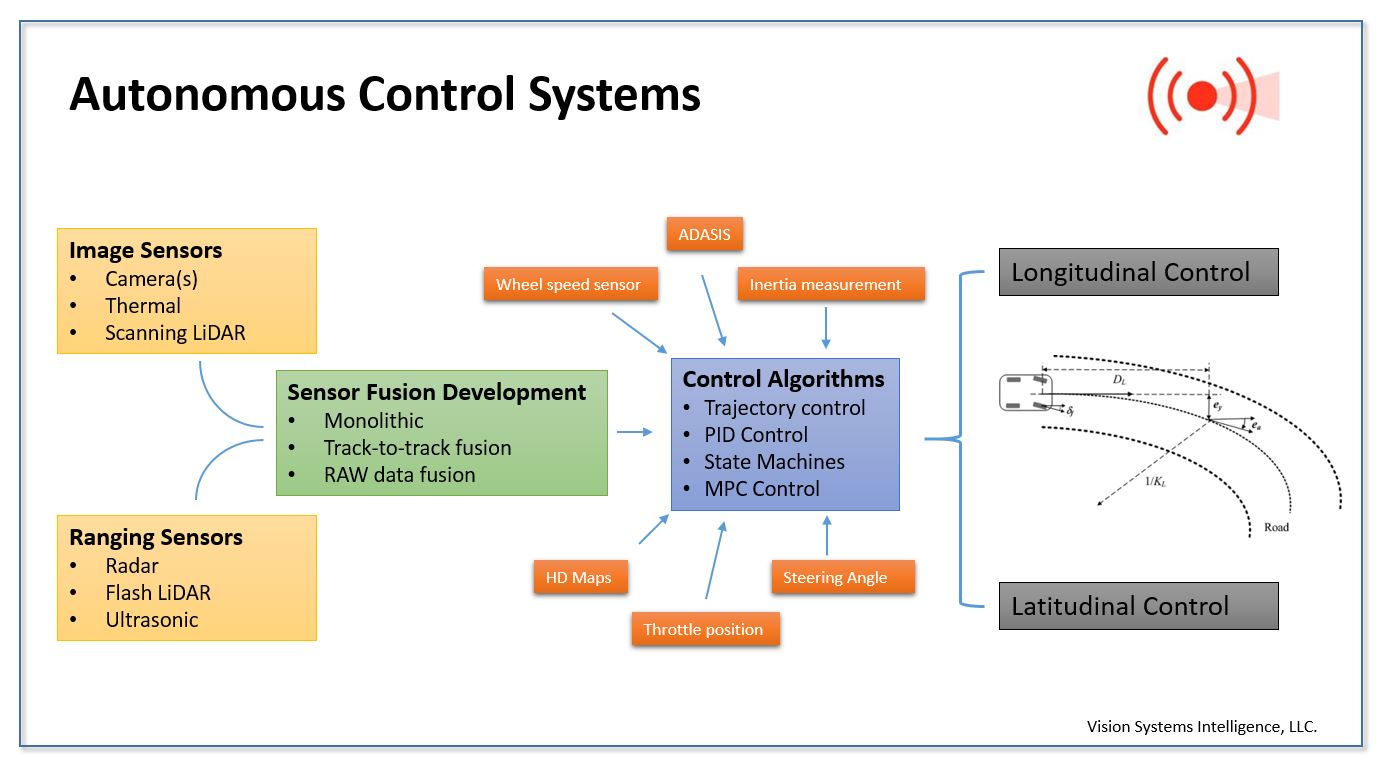
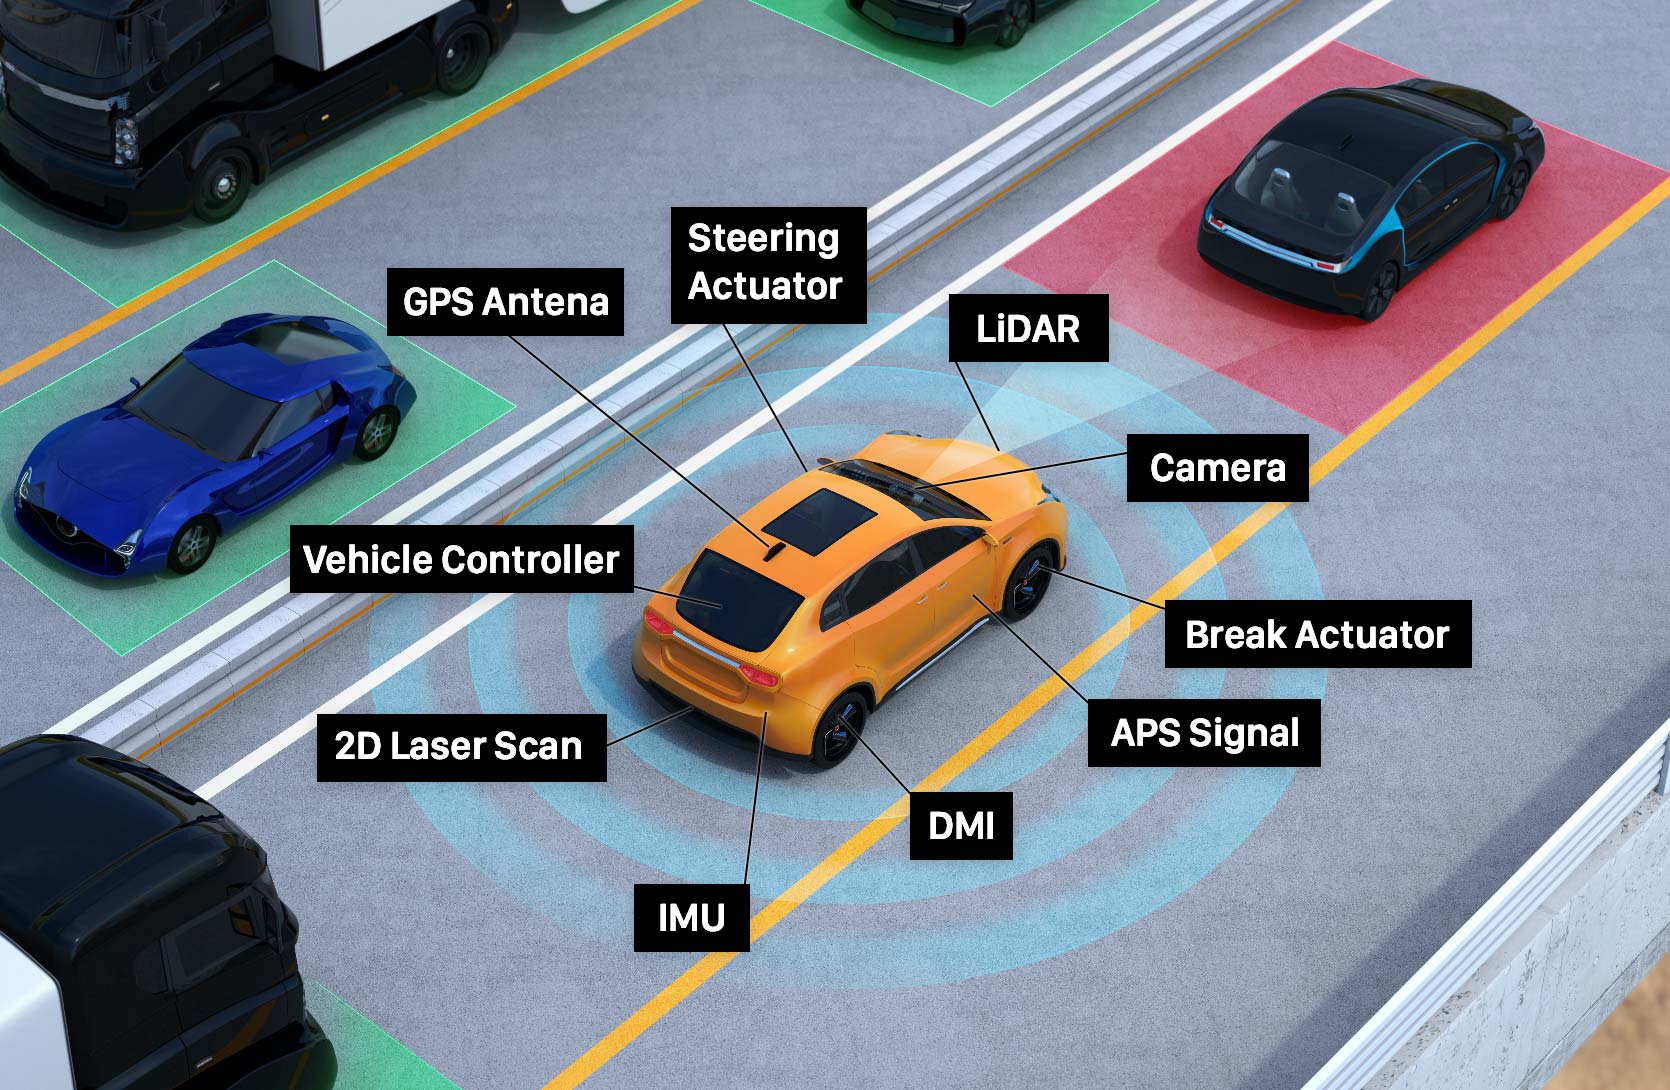
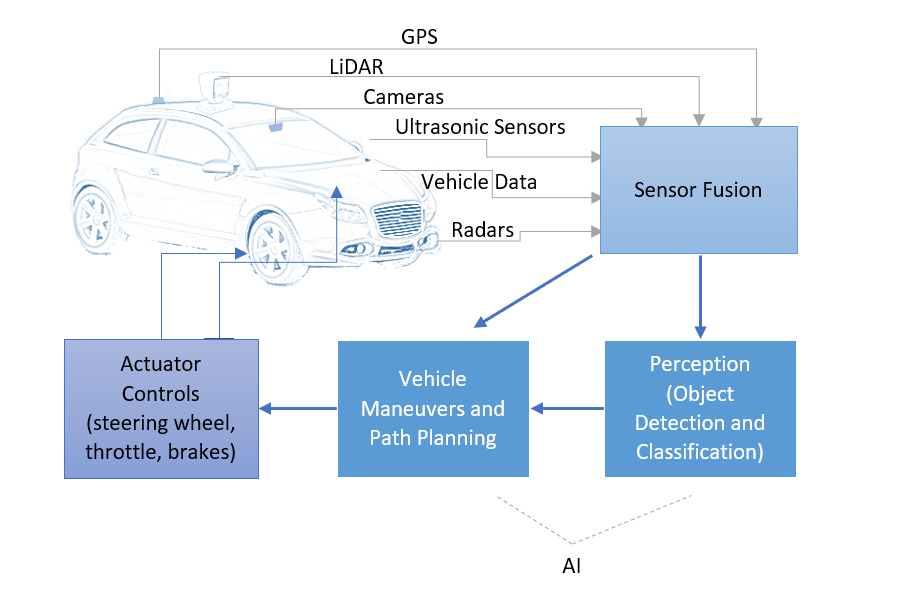
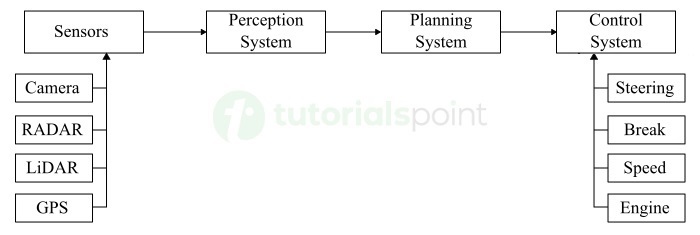
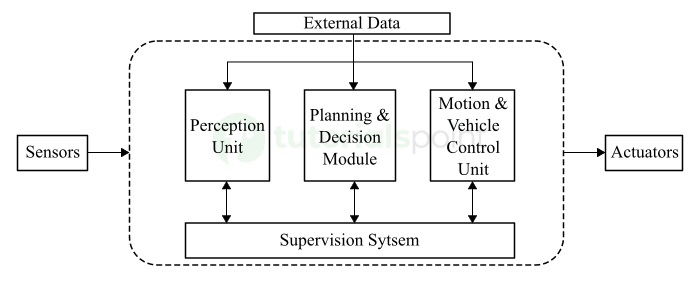
Draw And Explain The Basic Block Diagram Of Autonomous Vehicle


![Autonomous vehicle system block diagram [1] | Download Scientific Diagram](https://www.researchgate.net/publication/344011929/figure/fig1/AS:962179356426254@1606412843772/Autonomous-vehicle-system-block-diagram-1.png)
![Autonomous vehicle system block diagram [1]. | Download Scientific Diagram](https://www.researchgate.net/profile/Seyed-Mahdi-Jameii/publication/339027155/figure/fig3/AS:854849516216324@1580823415823/The-autonomous-driving-system-in-this-research_Q640.jpg)
![Autonomous vehicle system block diagram [1]. | Download Scientific Diagram](https://www.researchgate.net/publication/347626109/figure/fig1/AS:973759859138567@1609173850656/Autonomous-vehicle-system-block-diagram-1.png)
![Autonomous vehicle system block diagram [1]. | Download Scientific Diagram](https://mavink.com/images/loadingwhitetransparent.gif)


![Autonomous vehicle system block diagram [1] | Download Scientific Diagram](https://www.researchgate.net/publication/344011929/figure/fig1/AS:962179356426254@1606412843772/Autonomous-vehicle-system-block-diagram-1_Q640.jpg)


![Autonomous vehicle system block diagram [1]. | Download Scientific Diagram](https://www.researchgate.net/profile/Seyed-Mahdi-Jameii/publication/339027155/figure/fig1/AS:854849516208131@1580823415672/Autonomous-vehicle-system-block-diagram-1_Q640.jpg)

![Basic structure of autonomous car [5] | Download Scientific Diagram](https://www.researchgate.net/publication/360504310/figure/fig2/AS:11431281100885988@1669412478099/Basic-structure-of-autonomous-car-5_Q320.jpg)


![[DIAGRAM] Google Driverless Car Block Diagram - WIRINGSCHEMA.COM](https://image.slidesharecdn.com/automation4-150301002455-conversion-gate01/95/unmanned-groud-vehicle-6-638.jpg?cb=1425169977)


:max_bytes(150000):strip_icc()/GettyImages-959189898-5c82c56e4cedfd000190b16d.jpg)

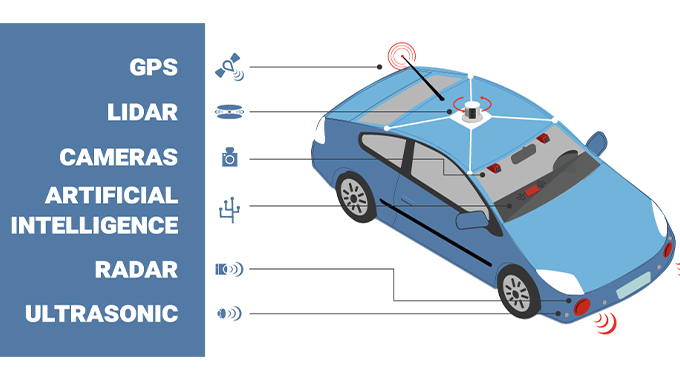
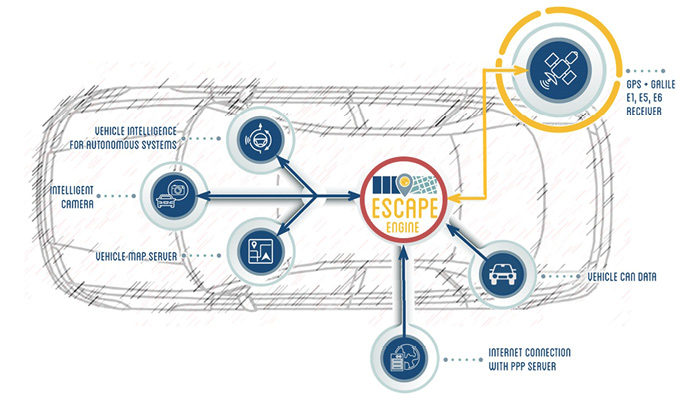
Learn about Draw And Explain The Basic Block Diagram Of Autonomous Vehicle through our educational collection of extensive collections of instructional images. facilitating comprehension through clear visual examples and detailed documentation. supporting curriculum development and lesson planning initiatives. The Draw And Explain The Basic Block Diagram Of Autonomous Vehicle collection maintains consistent quality standards across all images. Excellent for educational materials, academic research, teaching resources, and learning activities All Draw And Explain The Basic Block Diagram Of Autonomous Vehicle images are available in high resolution with professional-grade quality, optimized for both digital and print applications, and include comprehensive metadata for easy organization and usage. Our Draw And Explain The Basic Block Diagram Of Autonomous Vehicle images support learning objectives across diverse educational environments. Reliable customer support ensures smooth experience throughout the Draw And Explain The Basic Block Diagram Of Autonomous Vehicle selection process. Professional licensing options accommodate both commercial and educational usage requirements. Each image in our Draw And Explain The Basic Block Diagram Of Autonomous Vehicle gallery undergoes rigorous quality assessment before inclusion. Cost-effective licensing makes professional Draw And Explain The Basic Block Diagram Of Autonomous Vehicle photography accessible to all budgets. Whether for commercial projects or personal use, our Draw And Explain The Basic Block Diagram Of Autonomous Vehicle collection delivers consistent excellence.