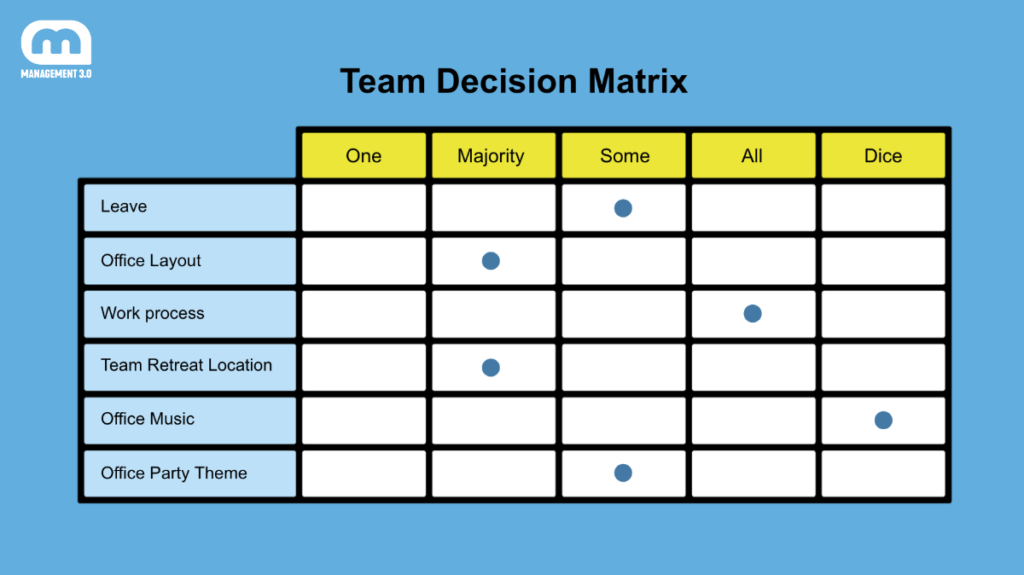
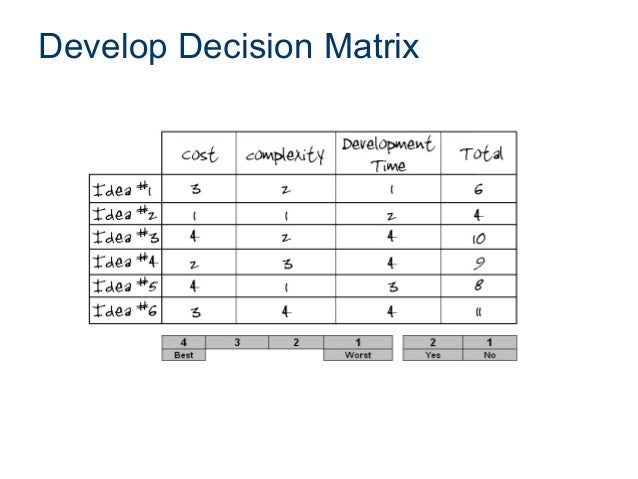
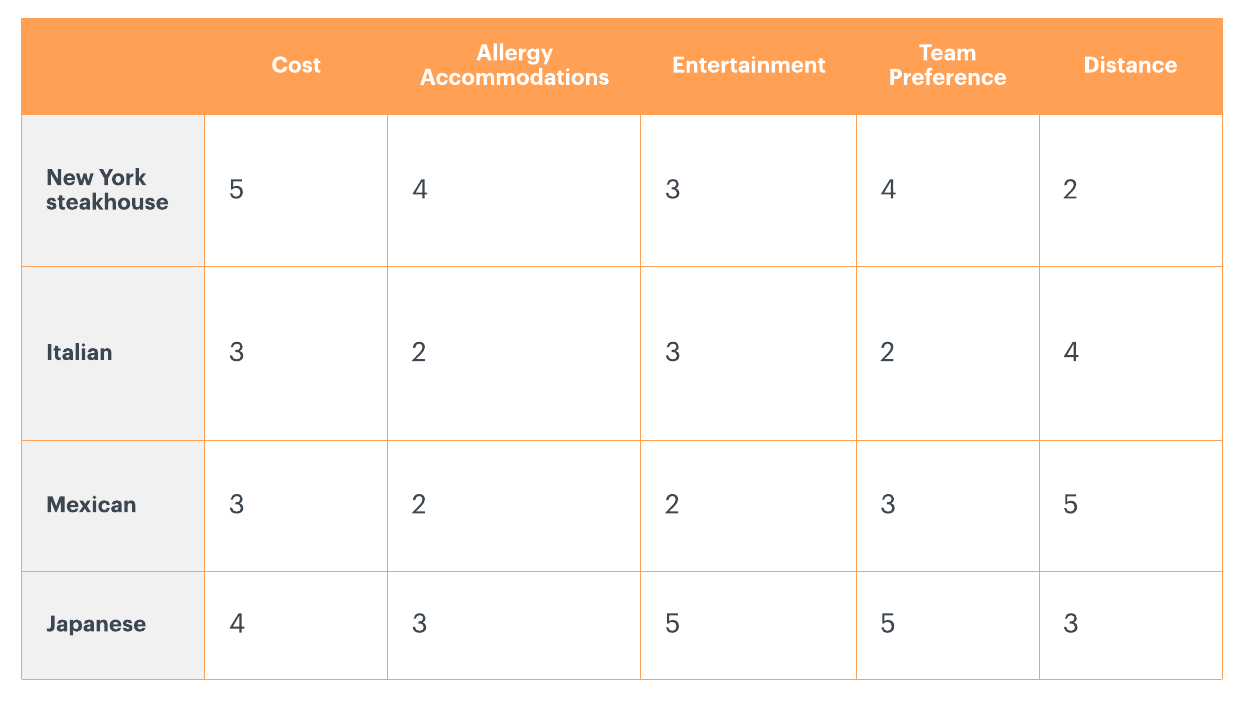
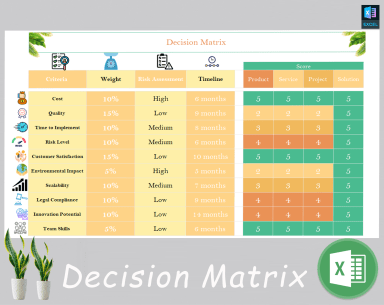
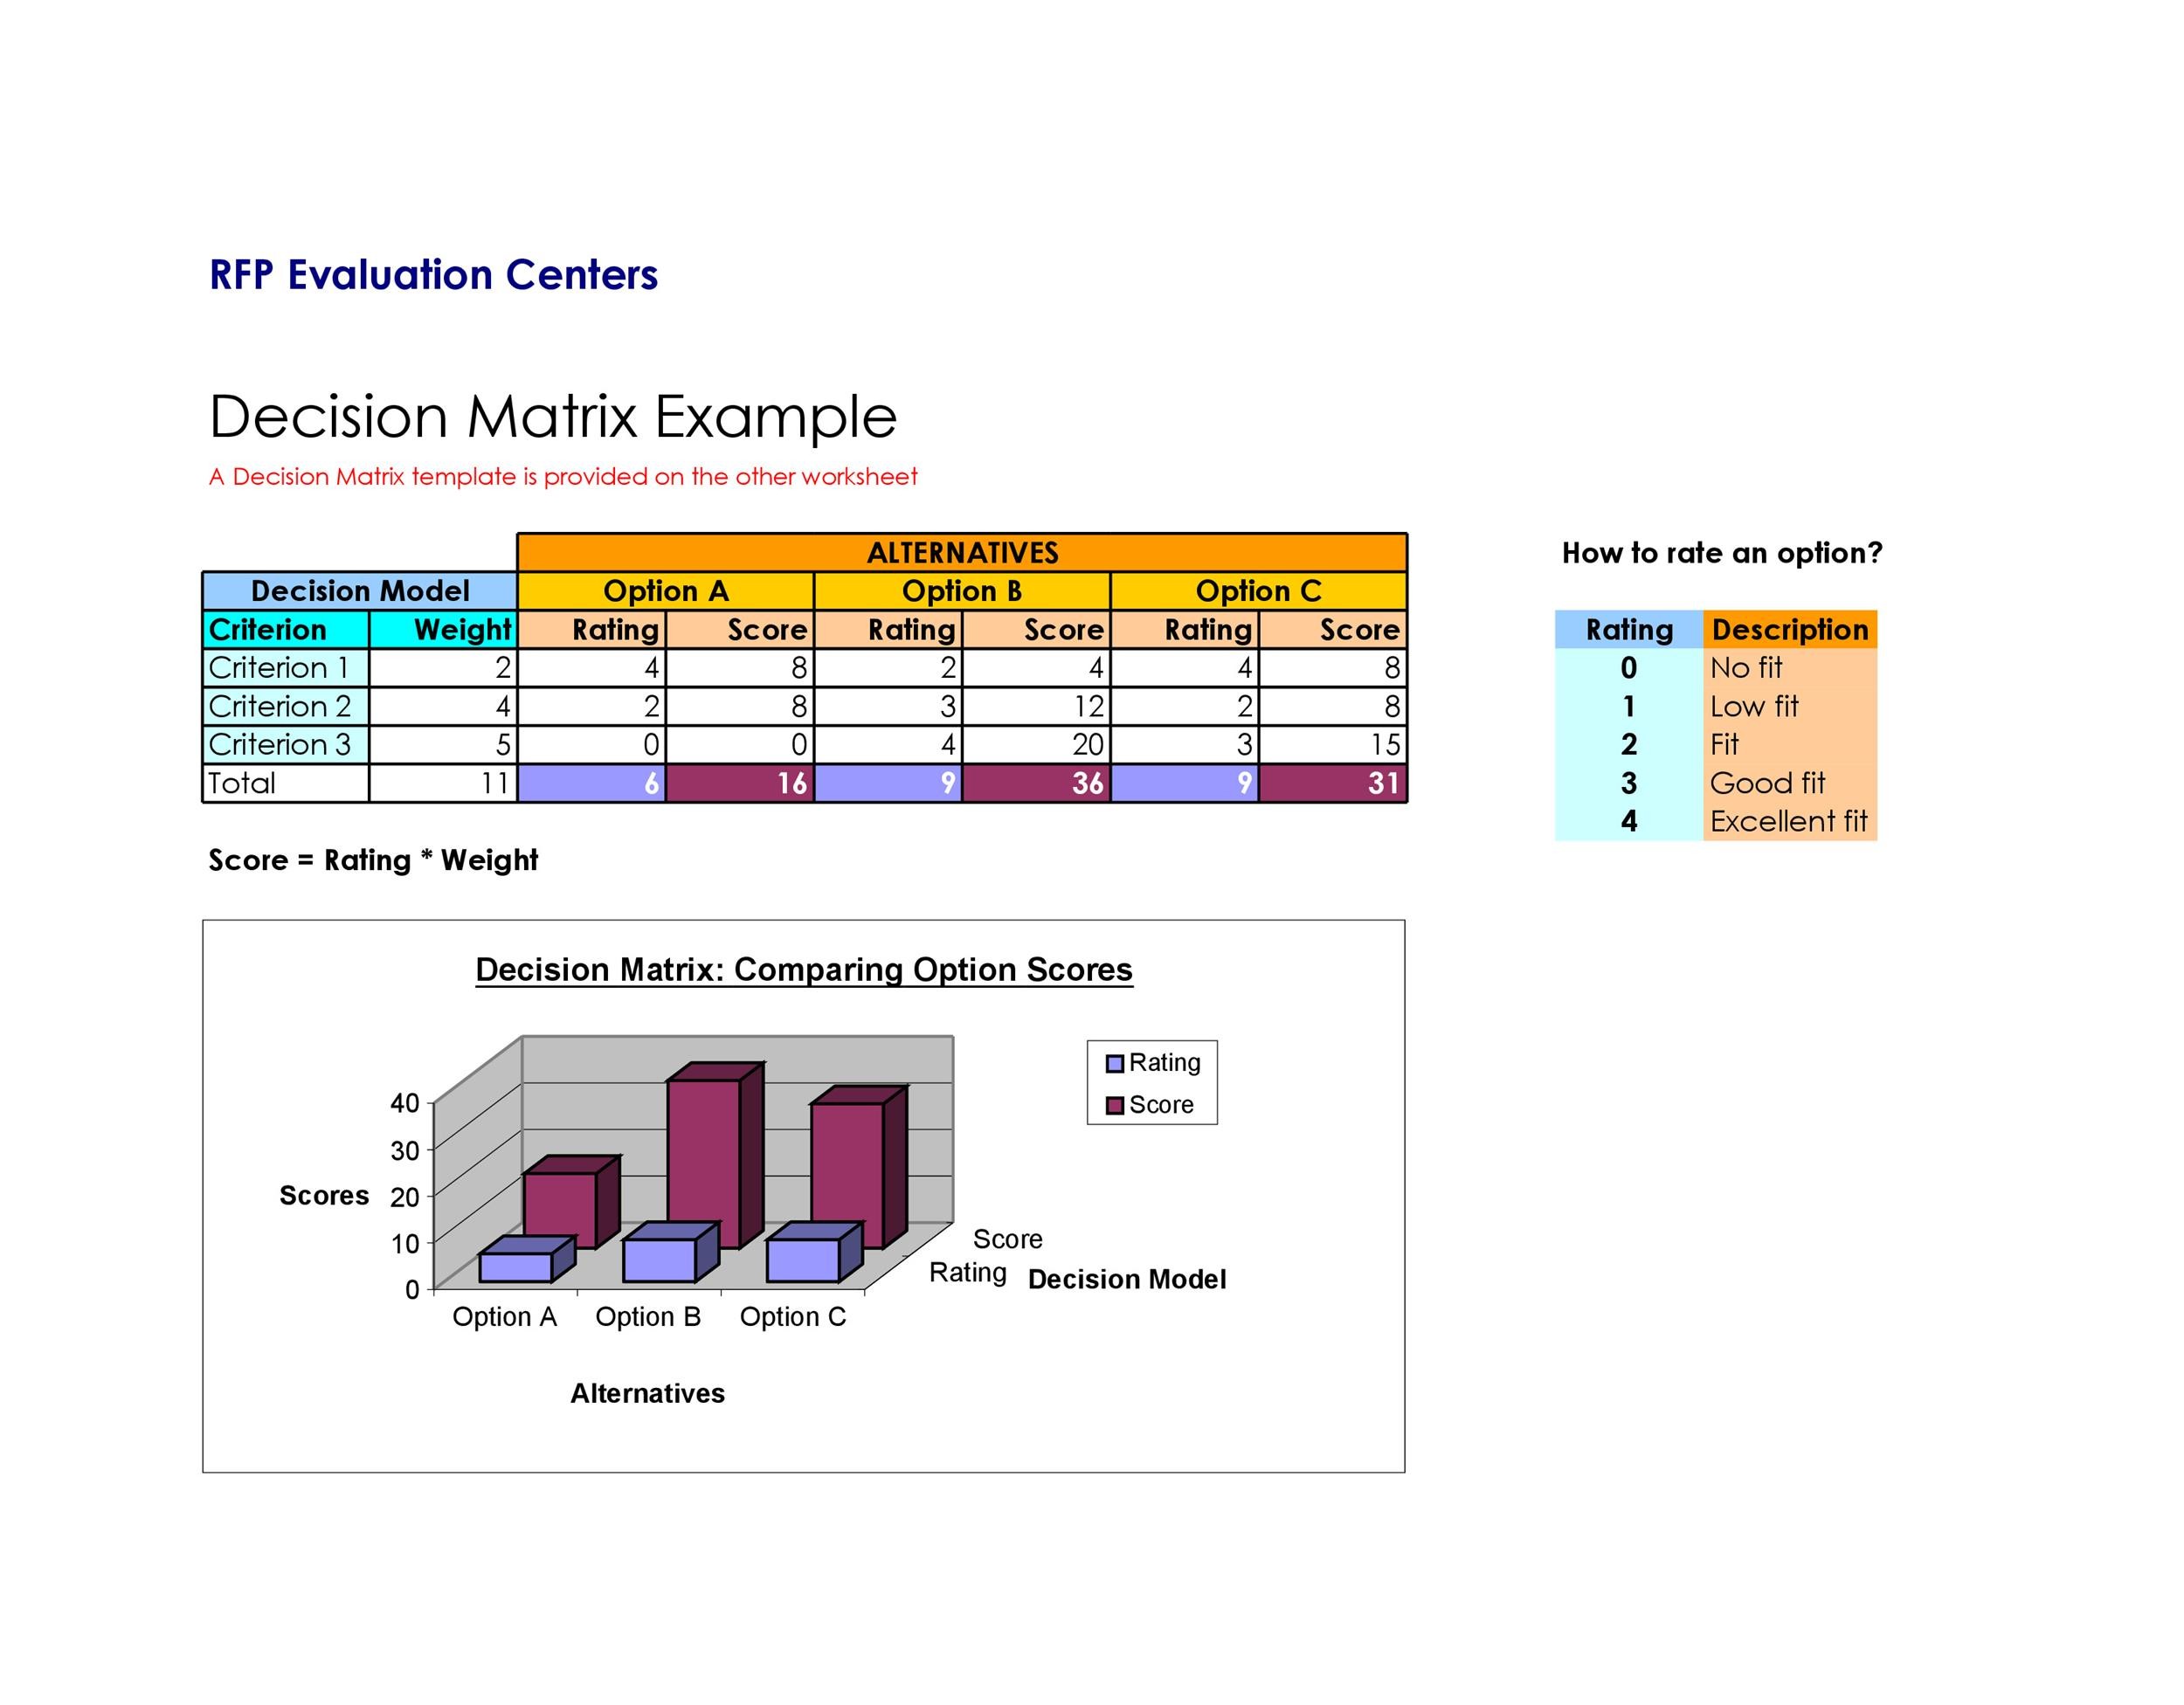
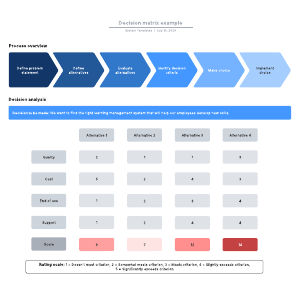
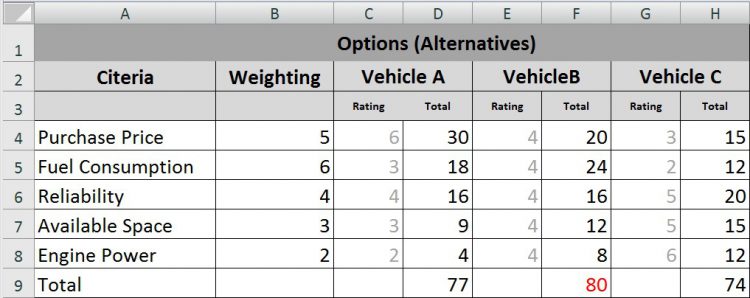
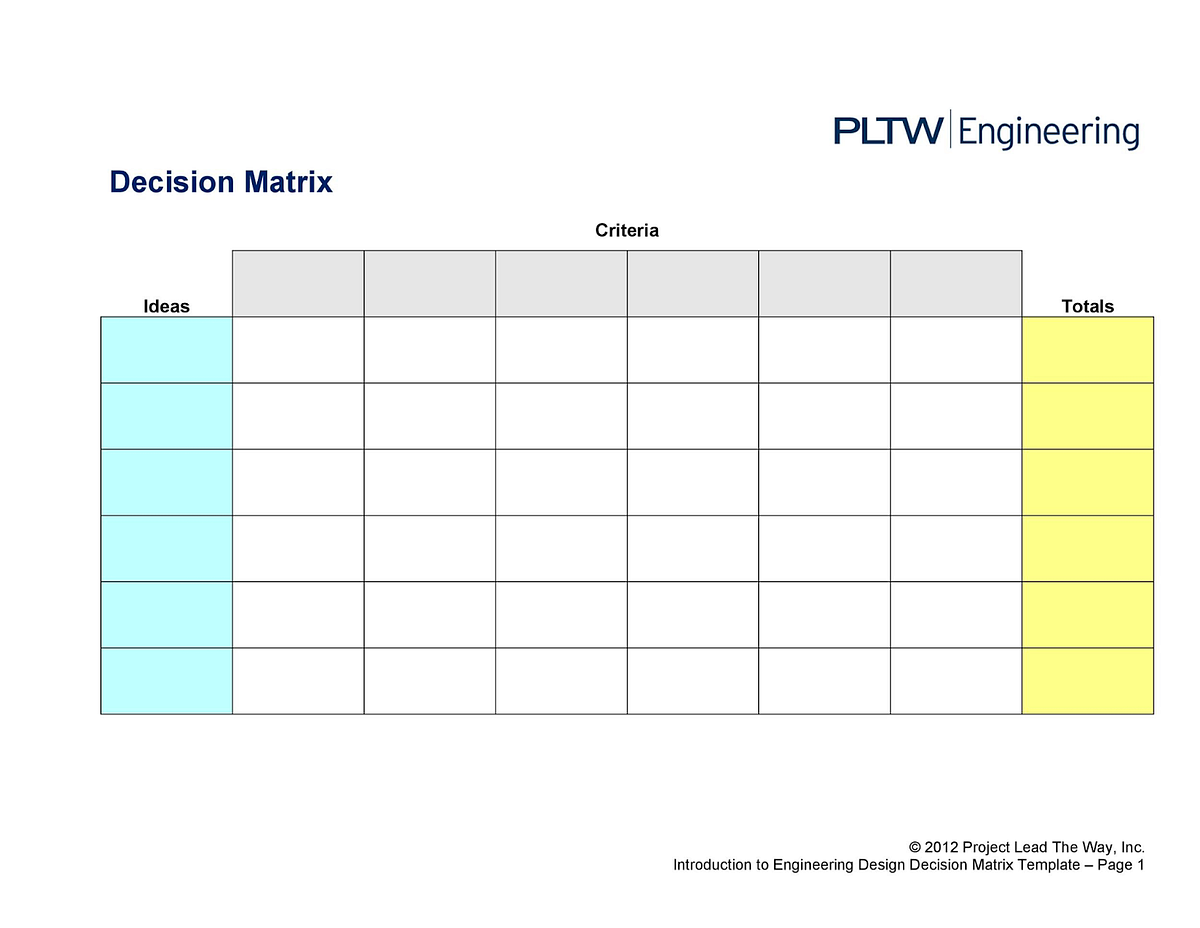
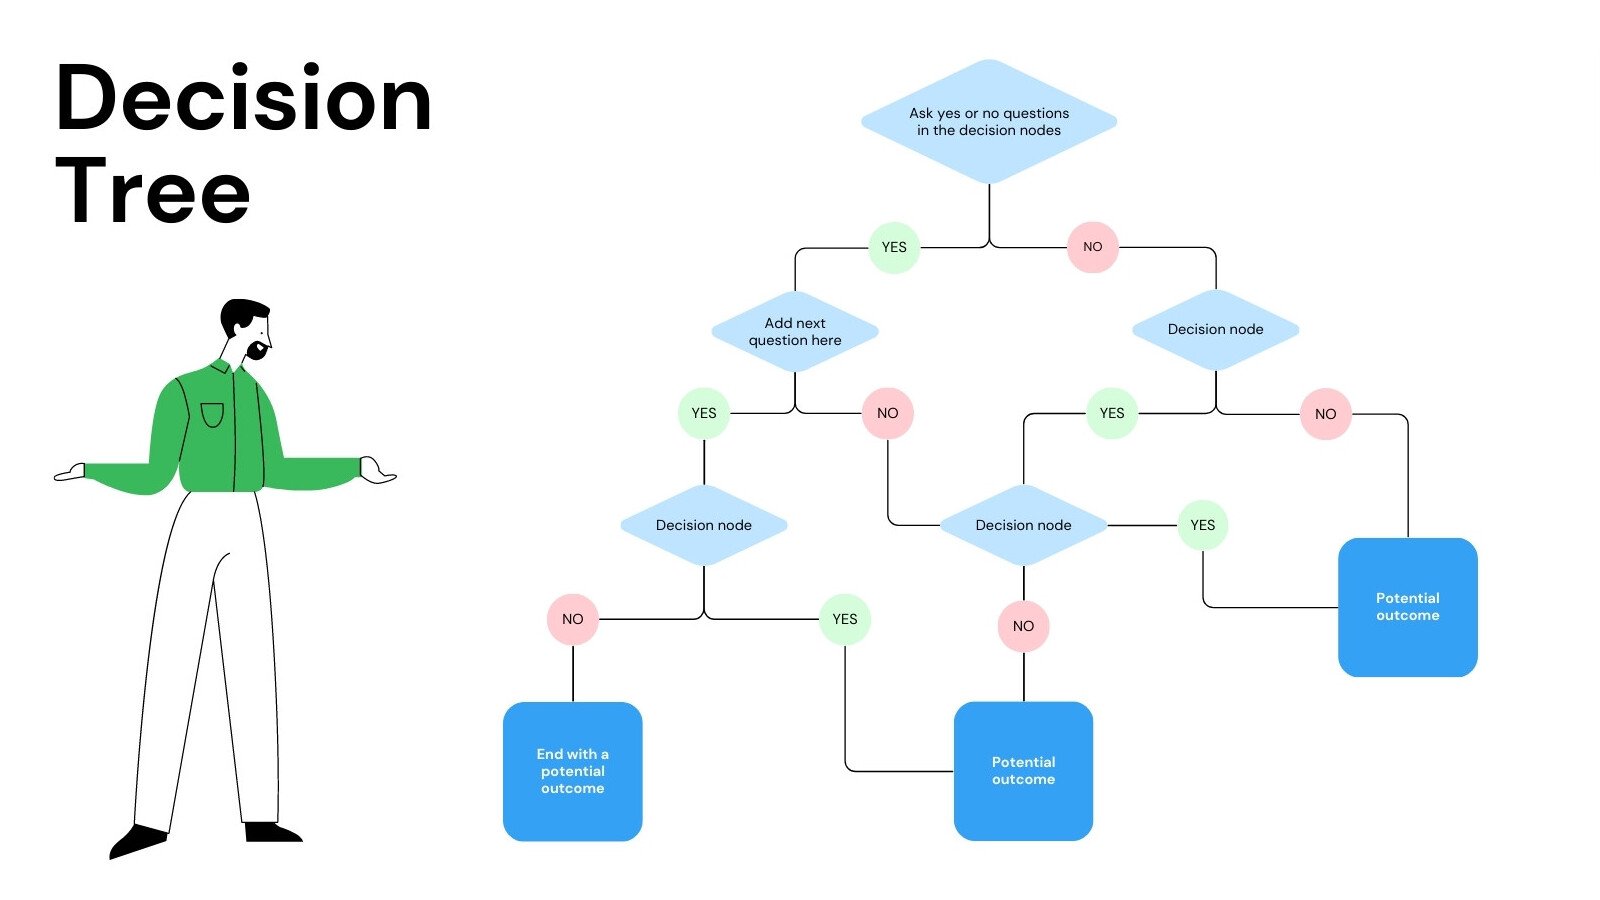
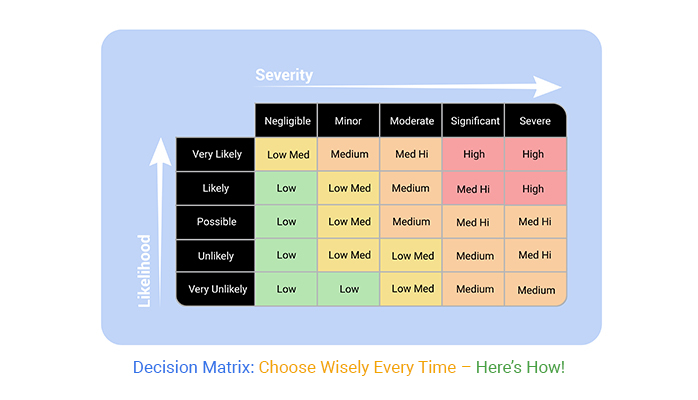
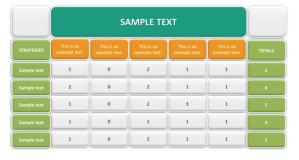
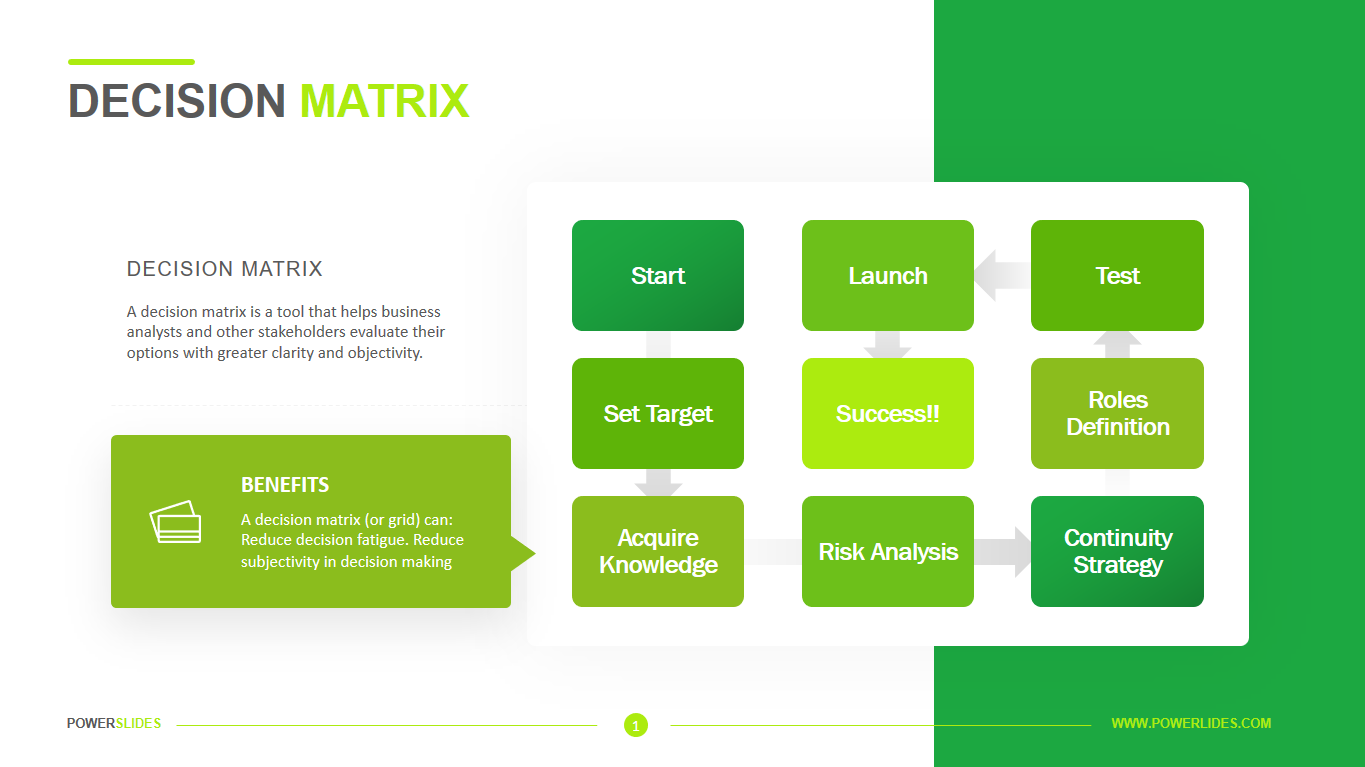
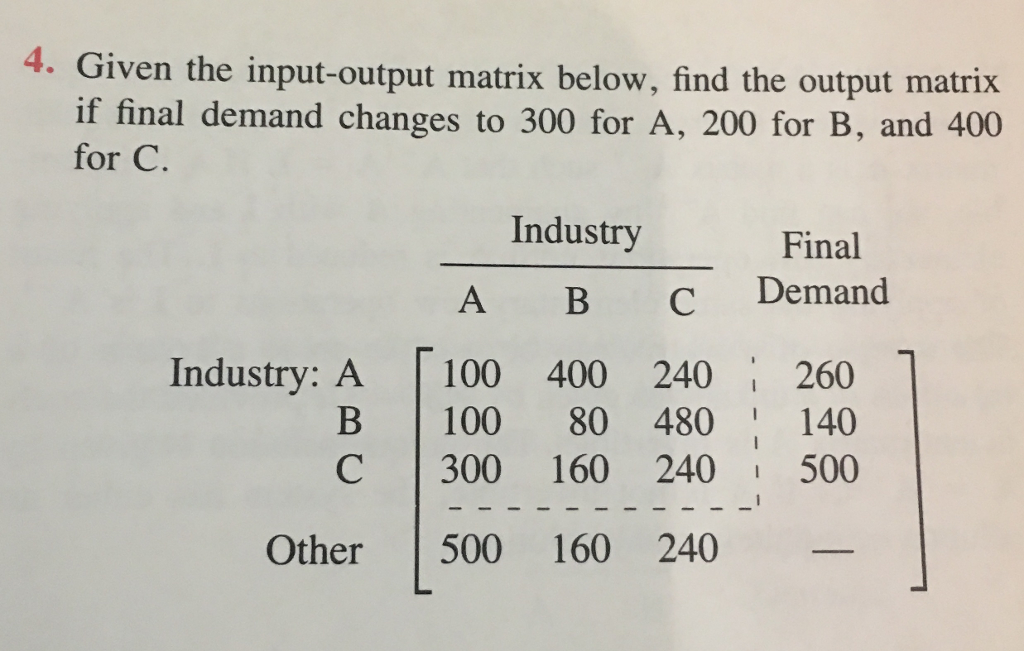
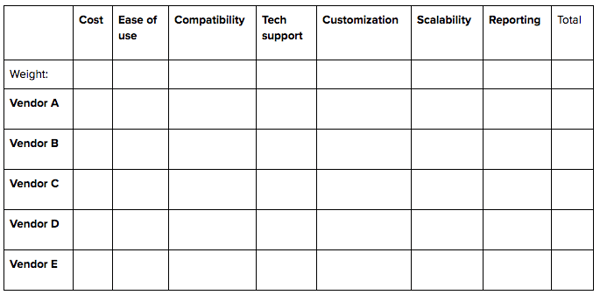
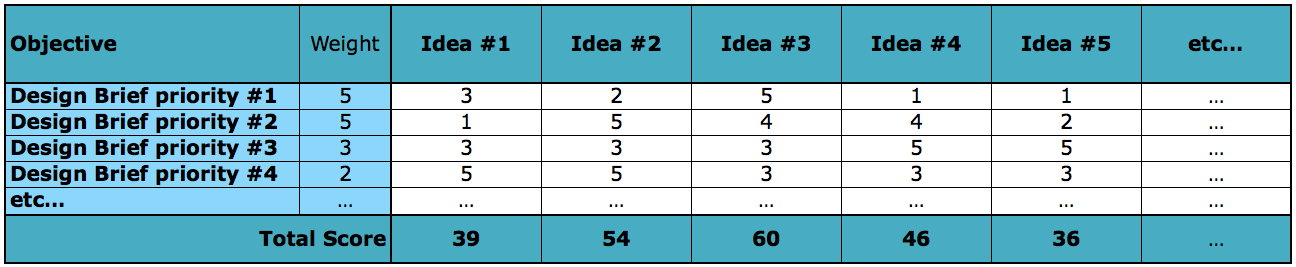
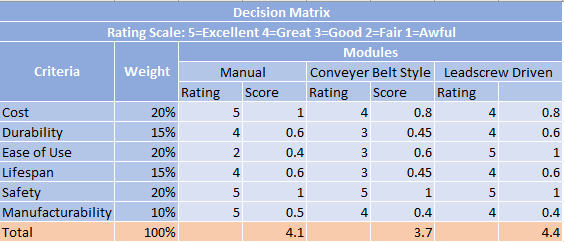
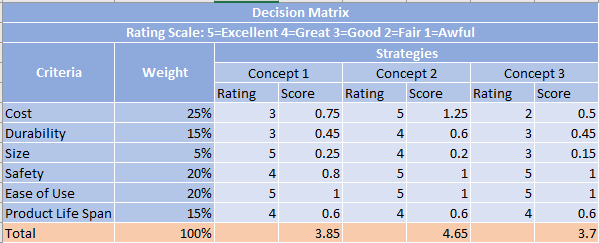
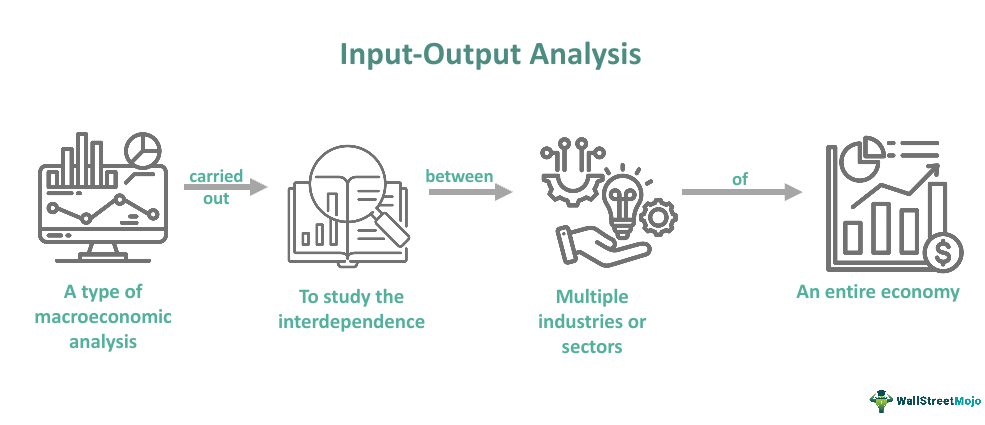
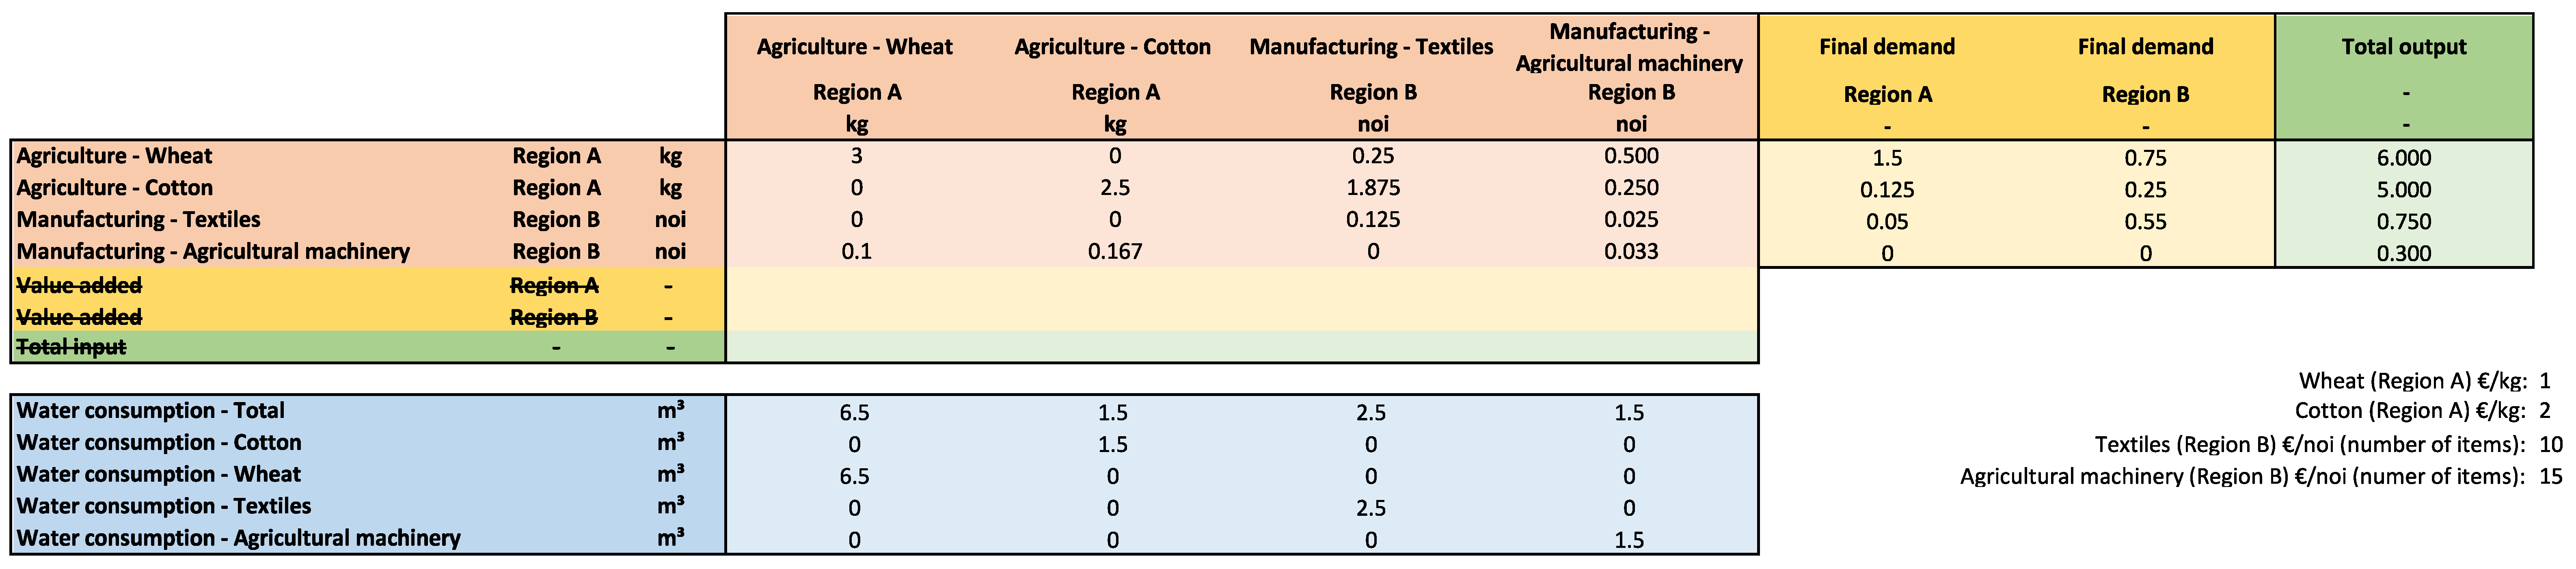
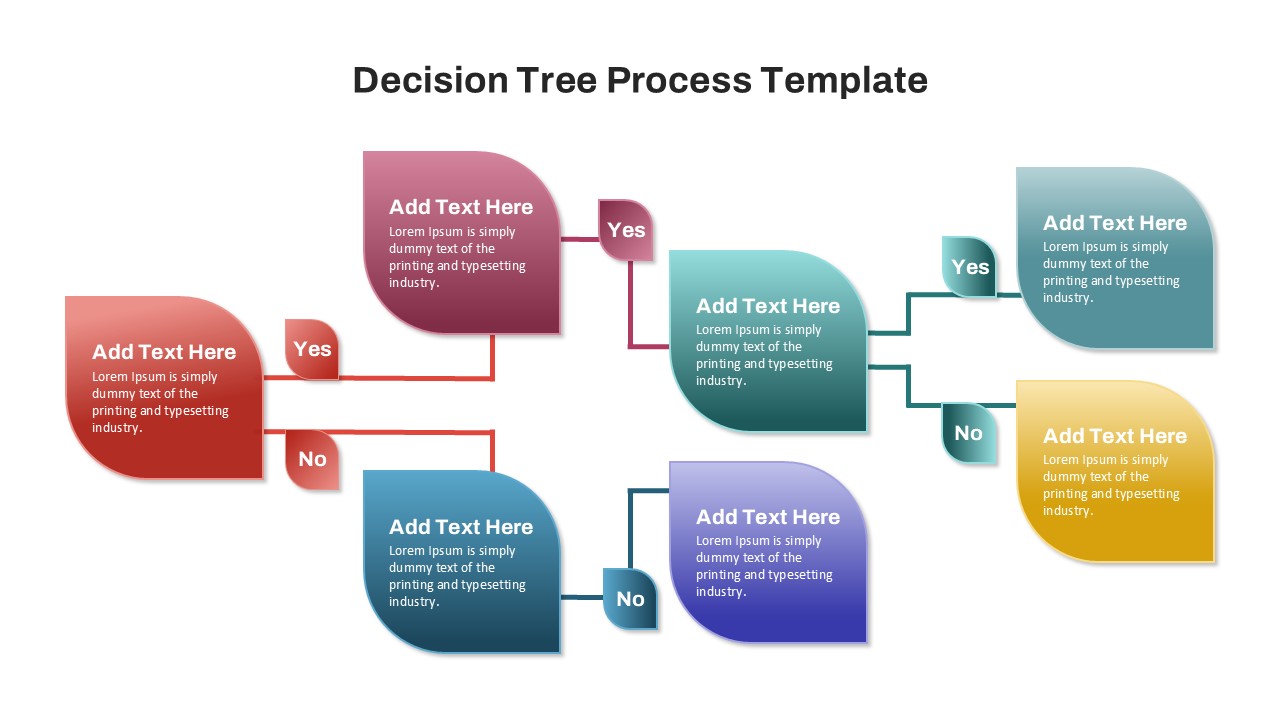
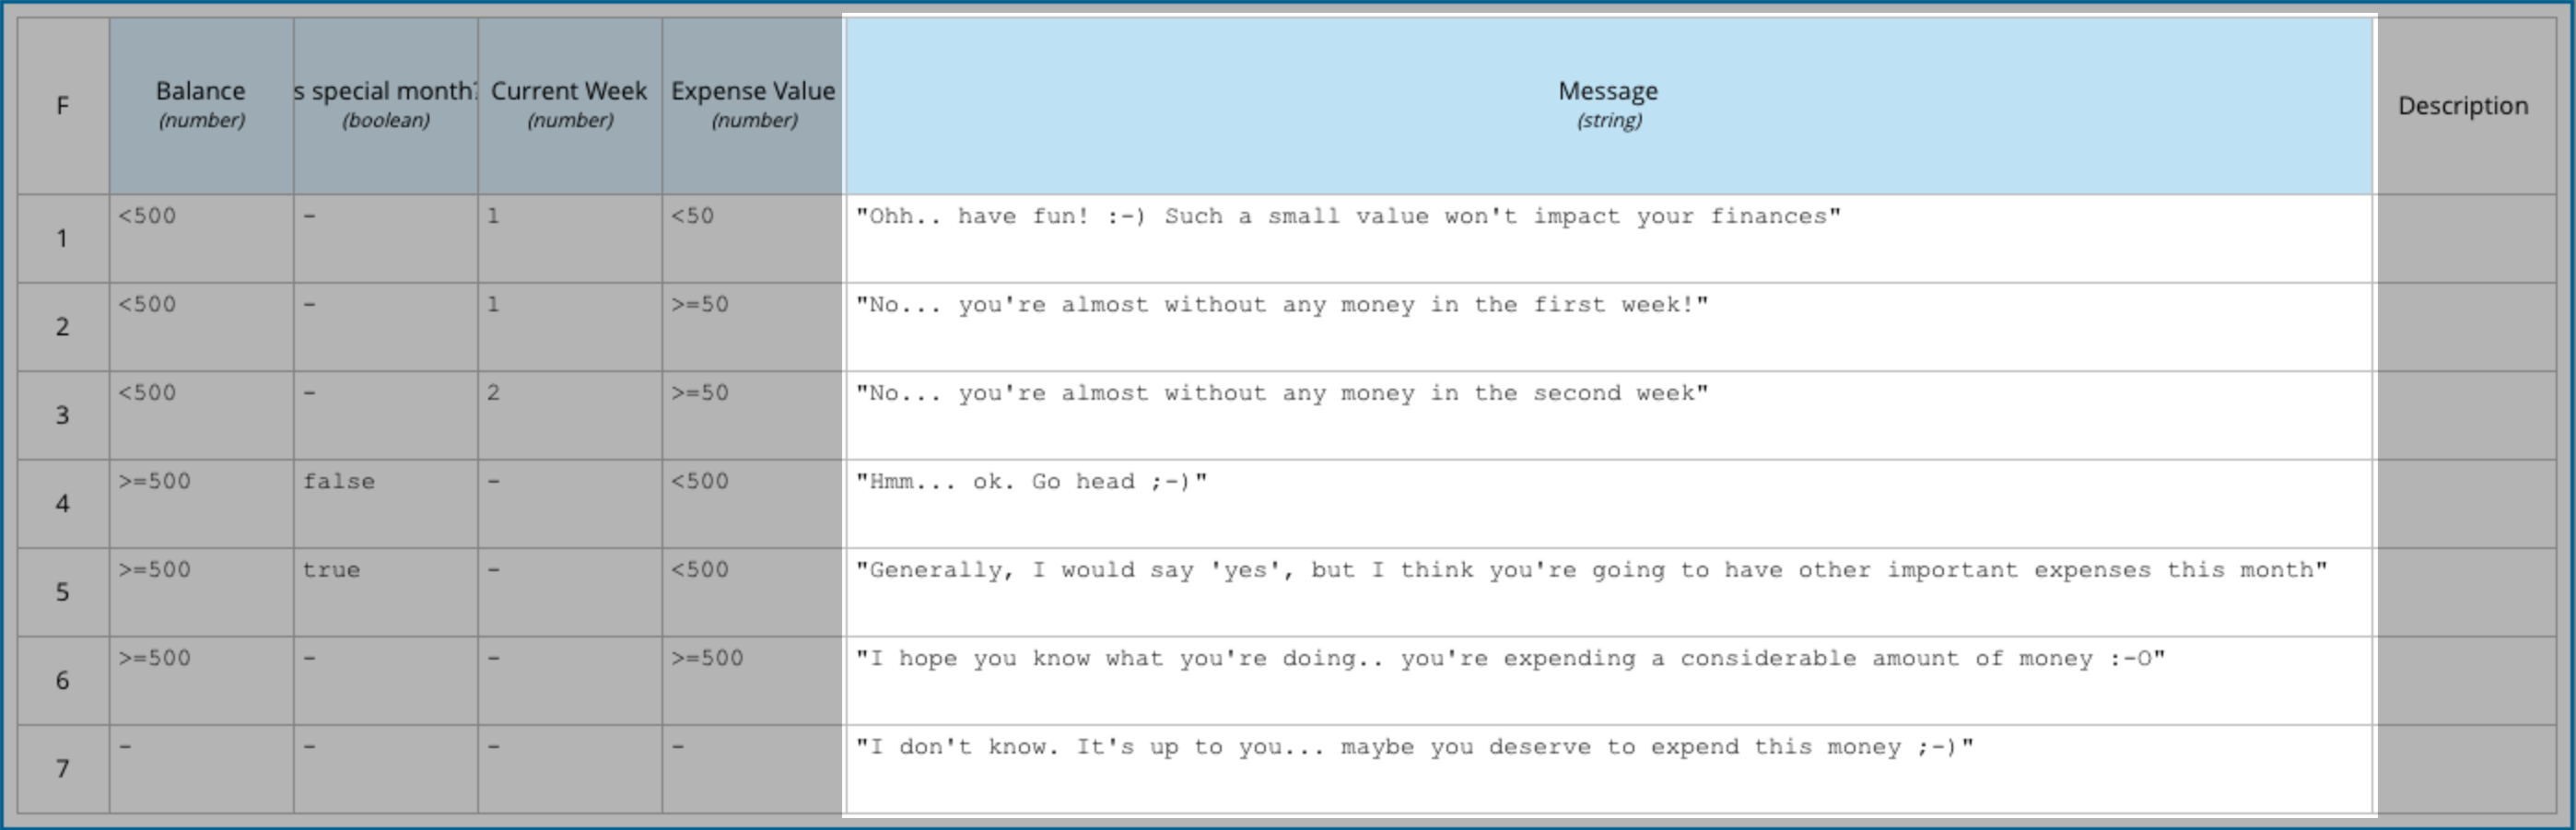
Decision Matrix Input/output Chart


![Decision matrix input data (borrowed from [10]) | Download Scientific ...](https://www.researchgate.net/publication/352844529/figure/tbl2/AS:1042565109383168@1625578300438/Decision-matrix-input-data-borrowed-from-10.png)


.png)


![Flow Chart & Input Output Statement [3] M](https://image.slidesharecdn.com/flow-chart-inputoutput-statement-3-m-1233232763031429-3/95/flow-chart-input-output-statement-3-m-2-728.jpg?cb=1233211298)


Plan adventures with our travel Decision Matrix Input/output Chart gallery of extensive collections of inspiring images. adventurously capturing artistic, creative, and design. ideal for destination guides and planning. The Decision Matrix Input/output Chart collection maintains consistent quality standards across all images. Suitable for various applications including web design, social media, personal projects, and digital content creation All Decision Matrix Input/output Chart images are available in high resolution with professional-grade quality, optimized for both digital and print applications, and include comprehensive metadata for easy organization and usage. Explore the versatility of our Decision Matrix Input/output Chart collection for various creative and professional projects. Multiple resolution options ensure optimal performance across different platforms and applications. Cost-effective licensing makes professional Decision Matrix Input/output Chart photography accessible to all budgets. Comprehensive tagging systems facilitate quick discovery of relevant Decision Matrix Input/output Chart content. Time-saving browsing features help users locate ideal Decision Matrix Input/output Chart images quickly. Our Decision Matrix Input/output Chart database continuously expands with fresh, relevant content from skilled photographers. Advanced search capabilities make finding the perfect Decision Matrix Input/output Chart image effortless and efficient. The Decision Matrix Input/output Chart archive serves professionals, educators, and creatives across diverse industries.