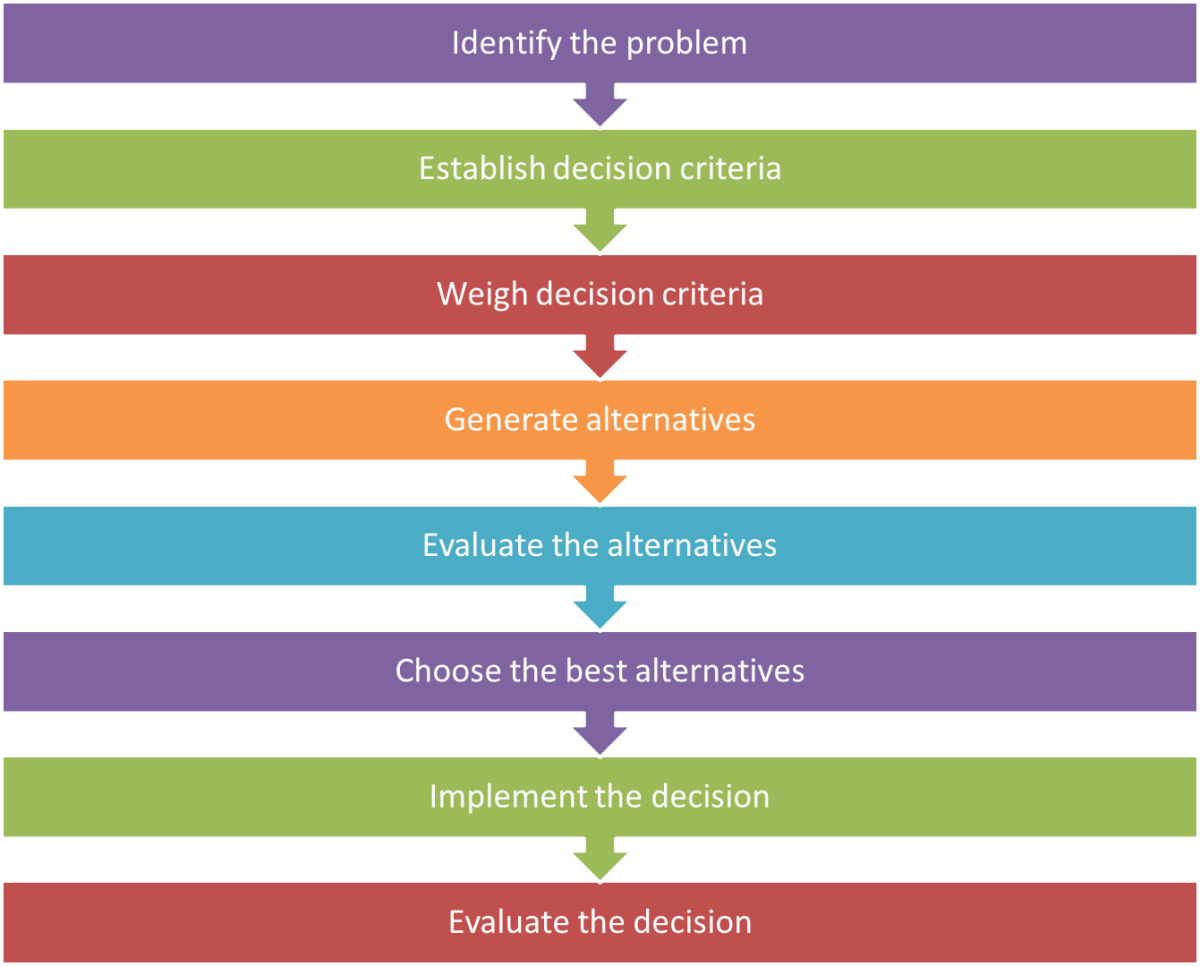
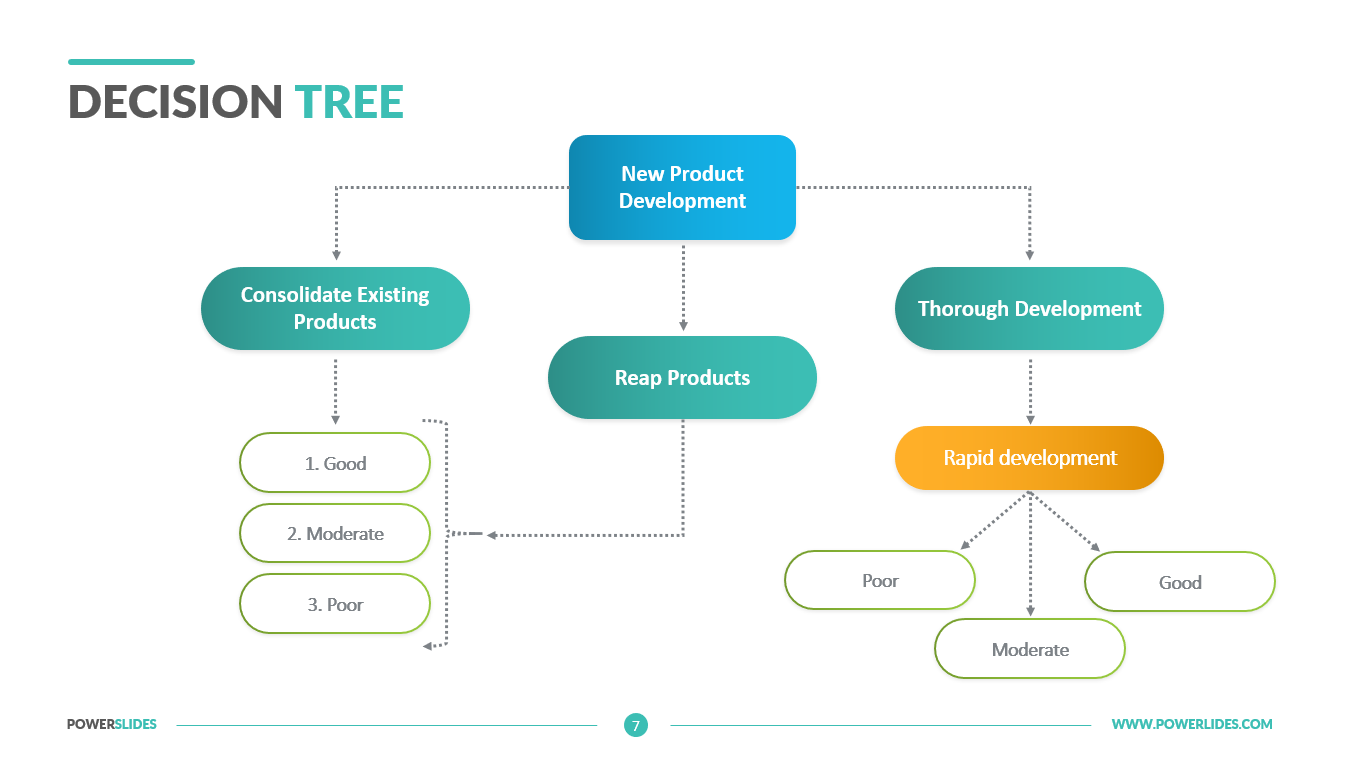
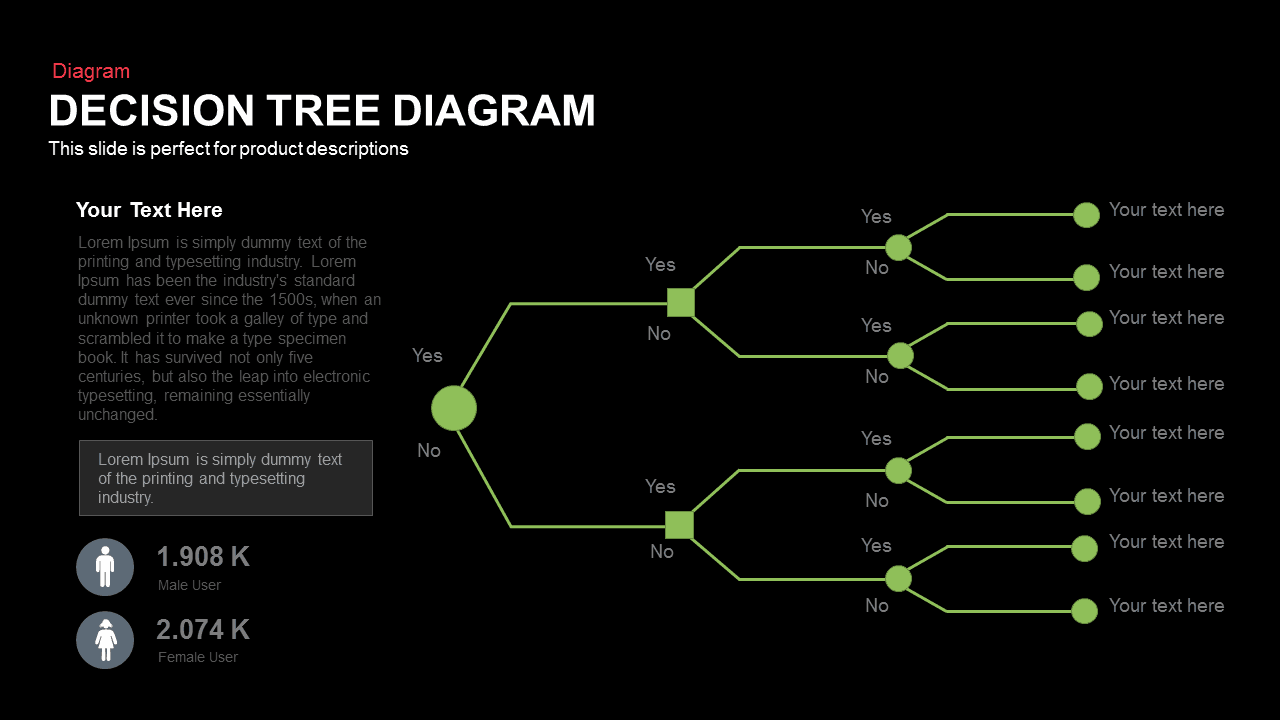
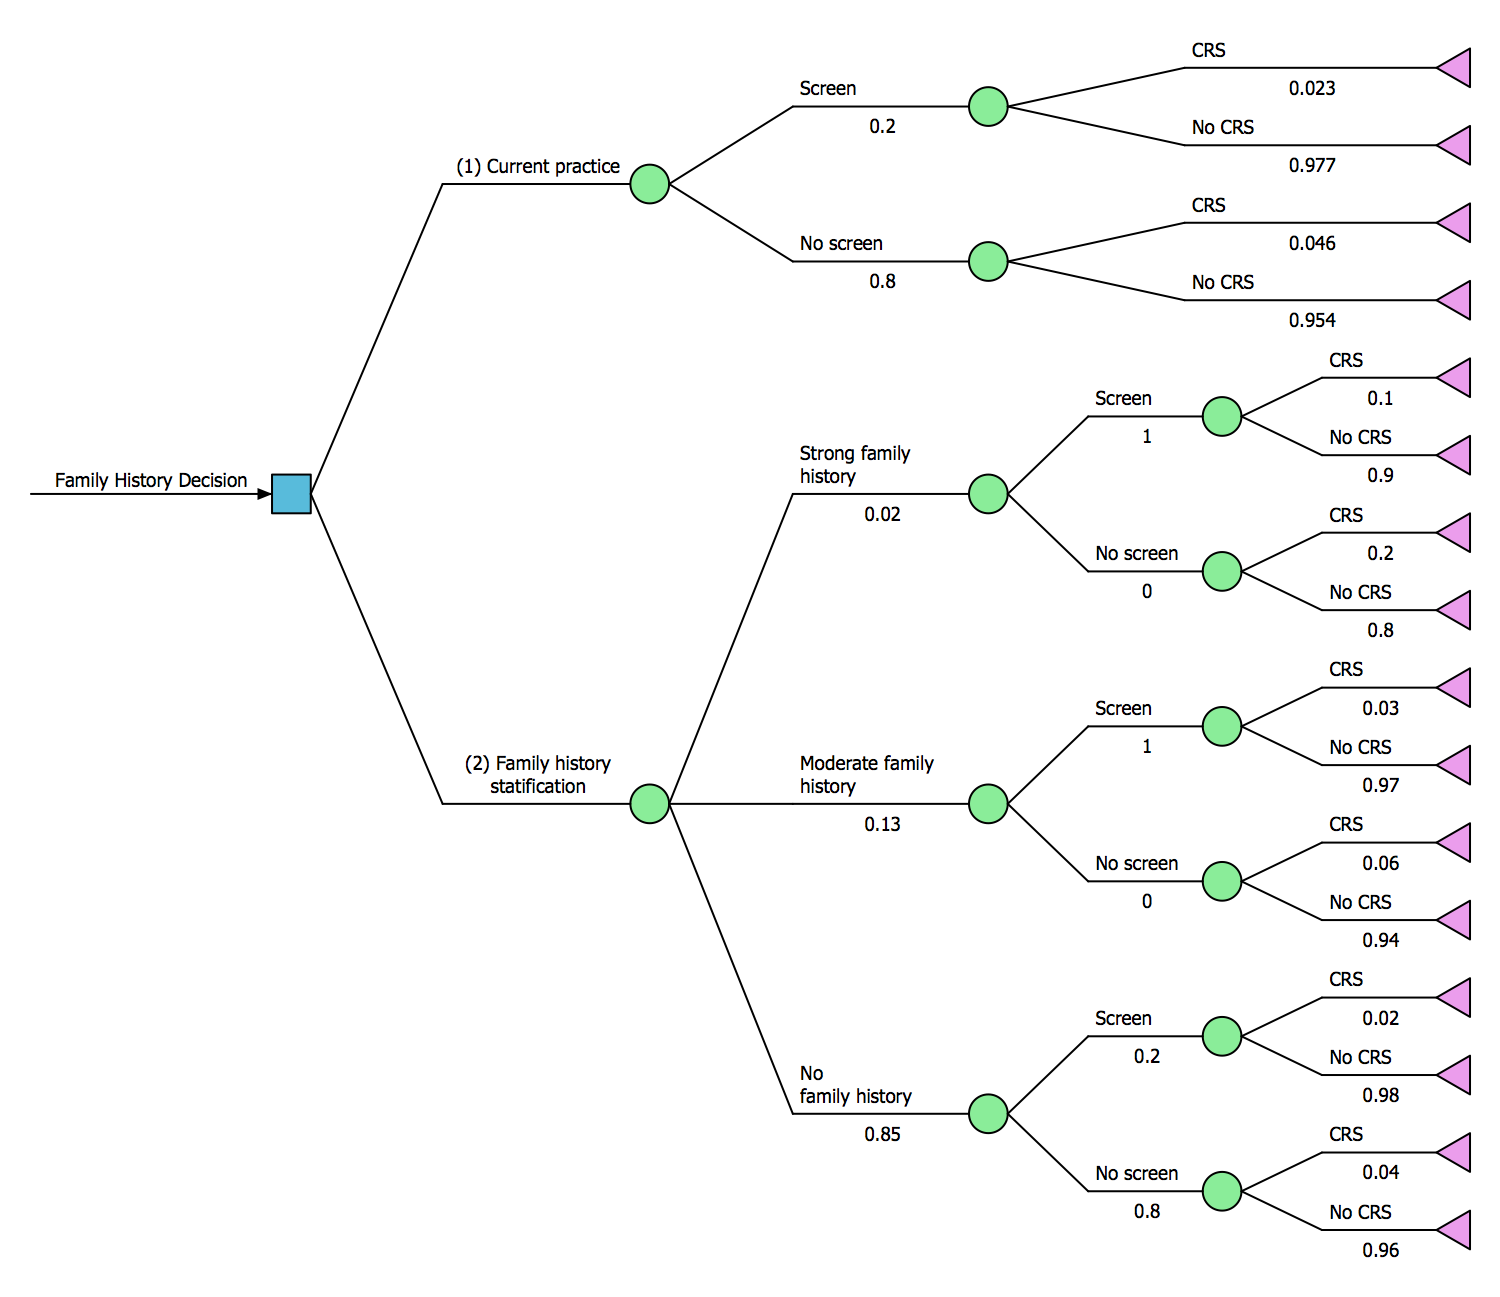
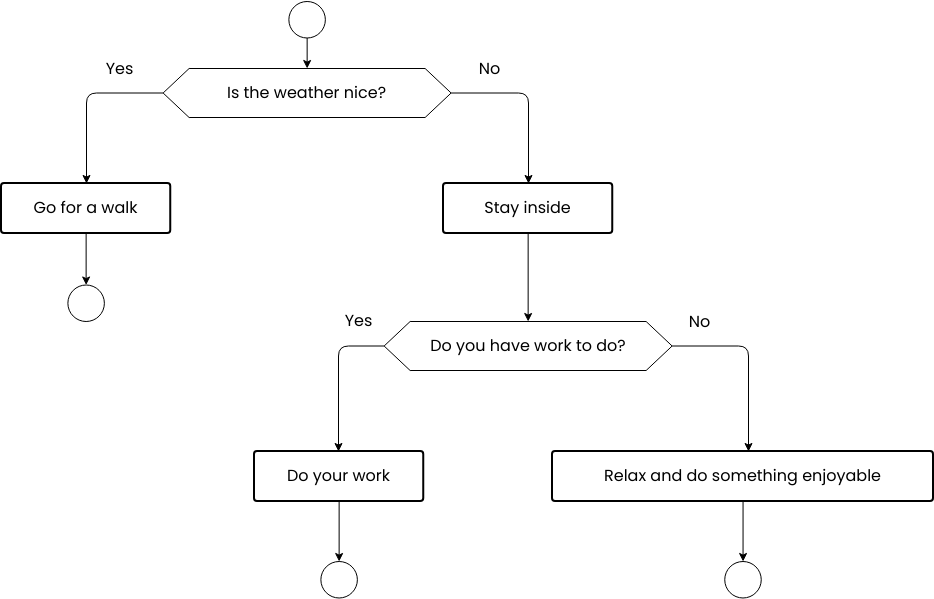
Decision Making Diagram Example


![[DIAGRAM] Wiki Decision Diagram - MYDIAGRAM.ONLINE](https://i.ytimg.com/vi/dcwdU_Fq7Lg/maxresdefault.jpg)


![[DIAGRAM] Process Flow Diagram Decision - MYDIAGRAM.ONLINE](https://www.researchgate.net/profile/Adam_Schembri/publication/282640459/figure/download/fig2/AS:281799881183249@1444197735450/Flowchart-showing-decision-making-process-for-annotating-eyegaze-and-constructed-action.png)
![Decision Making Flowchart Template [Free Download]](https://www.someka.net/wp-content/uploads/2023/06/Decision-Making-Flowchart-Template-Someka-Example-SS1.png)


![[DIAGRAM] Process Flow Diagram Decision - MYDIAGRAM.ONLINE](https://wholesteading.com/wp-content/uploads/2009/10/DecisionDiagram.jpg)
![[DIAGRAM] Process Flow Diagram Decision - MYDIAGRAM.ONLINE](https://www.researchgate.net/profile/Tasos_Dagiuklas2/publication/320628403/figure/download/fig3/AS:556203685814274@1509620700749/The-flow-diagram-of-the-decision-process.png)


![What is a Decision Tree & How to Make One [+ Templates]](https://venngage-wordpress.s3.amazonaws.com/uploads/2021/08/a86e6bdc-e041-4537-b351-77b4cbc1d616-1.png)


![What is a Decision Tree & How to Make One [+ Templates]](https://venngage-wordpress.s3.amazonaws.com/uploads/2019/08/what-is-a-decision-tree-8.png)


![[DIAGRAM] Schematic Making Diagrams - WIRINGSCHEMA.COM](https://sparxsystems.com/resources/gallery/diagrams/images/decision-tree.png)


Explore the wilderness of Decision Making Diagram Example with extensive collections of breathtaking nature photographs. capturing the essence of photography, images, and pictures in their natural habitat. perfect for environmental and conservation projects. Discover high-resolution Decision Making Diagram Example images optimized for various applications. Suitable for various applications including web design, social media, personal projects, and digital content creation All Decision Making Diagram Example images are available in high resolution with professional-grade quality, optimized for both digital and print applications, and include comprehensive metadata for easy organization and usage. Discover the perfect Decision Making Diagram Example images to enhance your visual communication needs. Our Decision Making Diagram Example database continuously expands with fresh, relevant content from skilled photographers. Each image in our Decision Making Diagram Example gallery undergoes rigorous quality assessment before inclusion. Multiple resolution options ensure optimal performance across different platforms and applications. Professional licensing options accommodate both commercial and educational usage requirements. Comprehensive tagging systems facilitate quick discovery of relevant Decision Making Diagram Example content. Cost-effective licensing makes professional Decision Making Diagram Example photography accessible to all budgets. Time-saving browsing features help users locate ideal Decision Making Diagram Example images quickly. The Decision Making Diagram Example collection represents years of careful curation and professional standards.