Data Flow Diagram For Aes Algorithm Using Secret Key And Iv

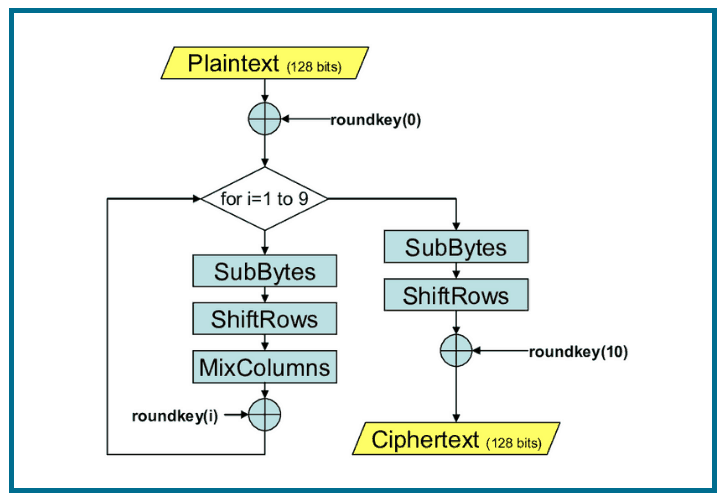


![Flowchart of AES Algorithm [5]. | Download Scientific Diagram](https://www.researchgate.net/publication/372055821/figure/fig2/AS:11431281172003834@1688421244036/Flowchart-of-AES-Algorithm-5.png)


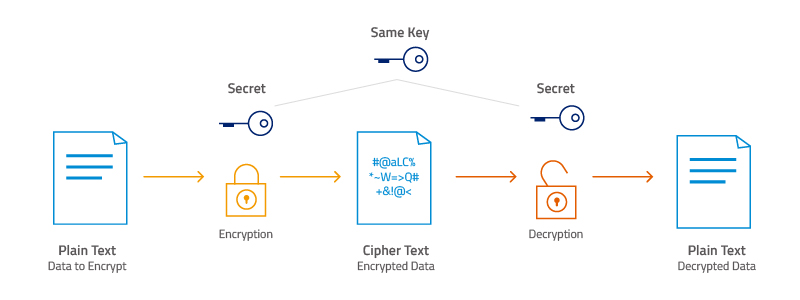


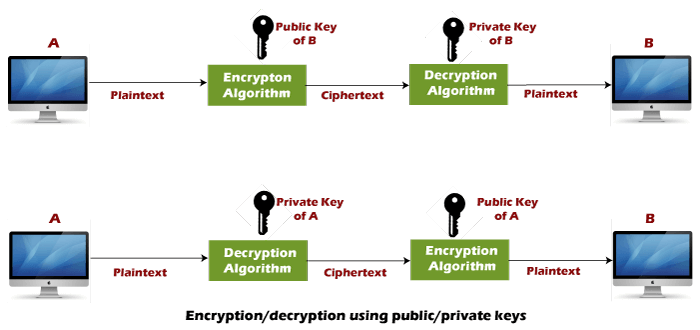
![Encryption Decryption Nedir?[Anlatım] | TurkHackTeam](https://www.researchgate.net/profile/Hueseyin-Bodur/publication/298298027/figure/fig2/AS:339820552441867@1458030941634/RSA-algorithm-structure.png)
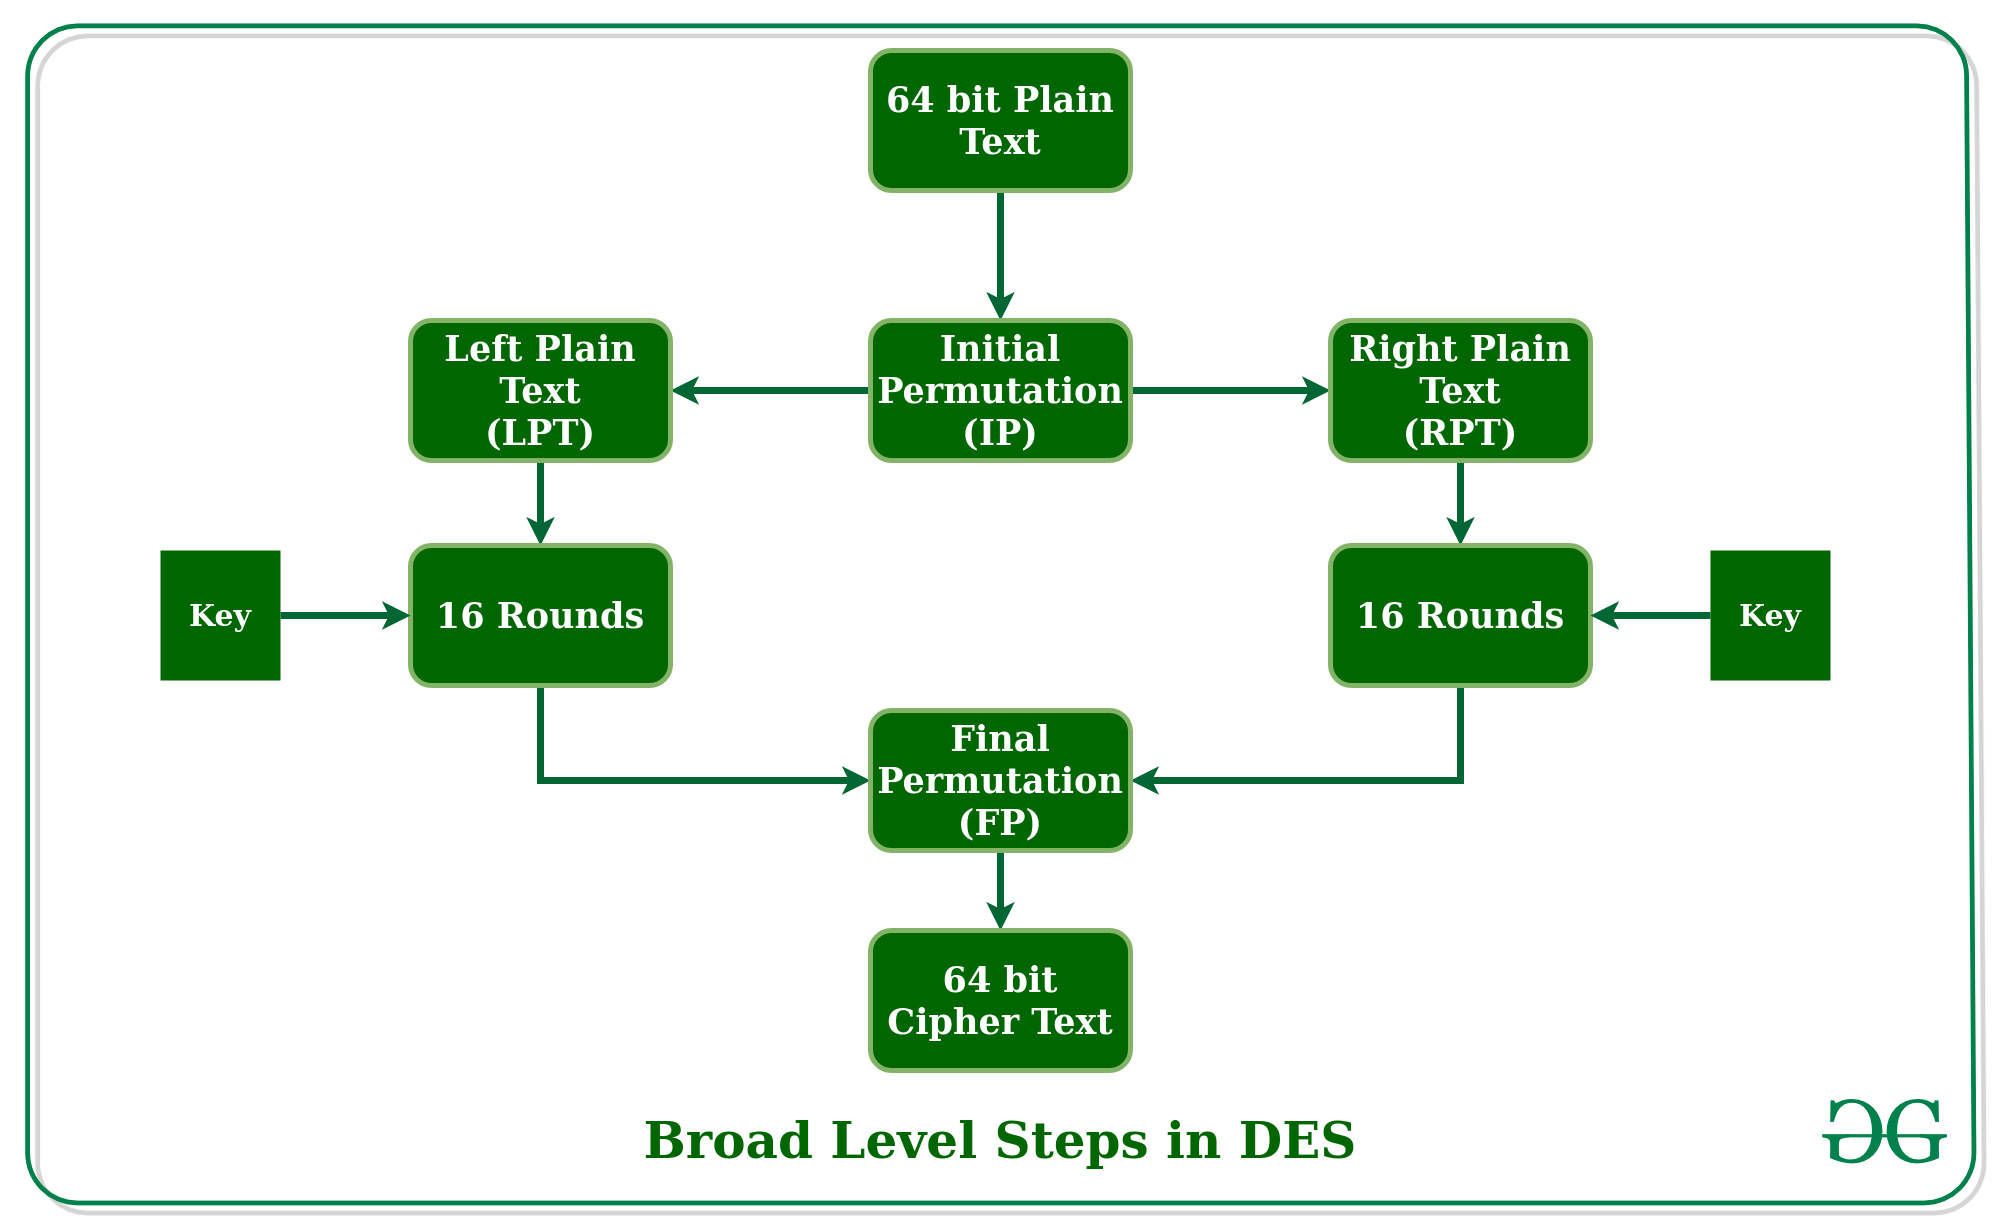
![[DIAGRAM] Firefly Algorithm Diagram - MYDIAGRAM.ONLINE](https://contribute.geeksforgeeks.org/wp-content/uploads/flowchart-3.jpg)


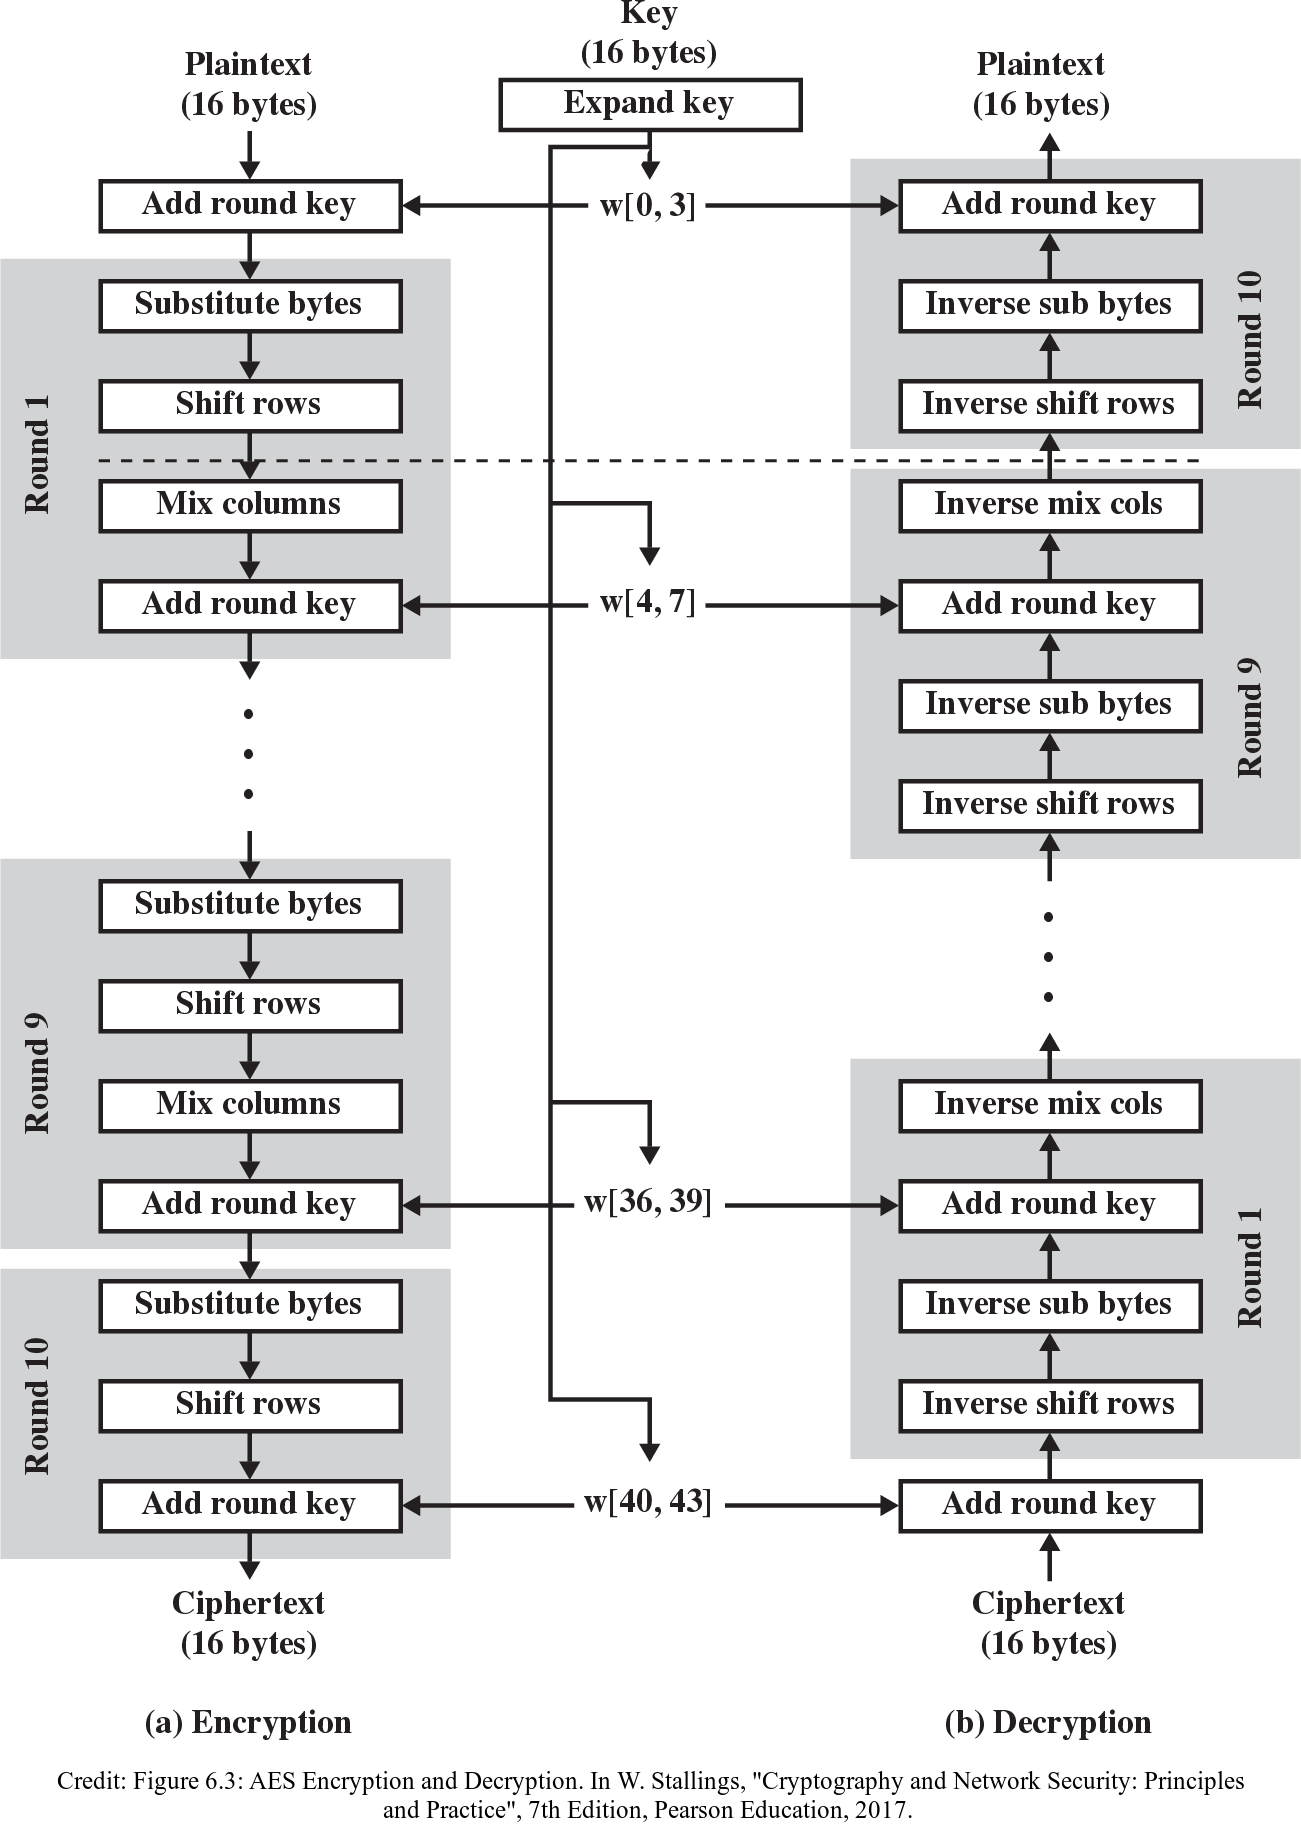
![[DIAGRAM] Firefly Algorithm Diagram - MYDIAGRAM.ONLINE](https://www.edrawsoft.com/flowchart/images/algorithm-flowchart-example3.png)


Advance knowledge with our stunning scientific Data Flow Diagram For Aes Algorithm Using Secret Key And Iv collection of substantial collections of research images. accurately representing photography, images, and pictures. ideal for scientific education and training. Our Data Flow Diagram For Aes Algorithm Using Secret Key And Iv collection features high-quality images with excellent detail and clarity. Suitable for various applications including web design, social media, personal projects, and digital content creation All Data Flow Diagram For Aes Algorithm Using Secret Key And Iv images are available in high resolution with professional-grade quality, optimized for both digital and print applications, and include comprehensive metadata for easy organization and usage. Explore the versatility of our Data Flow Diagram For Aes Algorithm Using Secret Key And Iv collection for various creative and professional projects. Regular updates keep the Data Flow Diagram For Aes Algorithm Using Secret Key And Iv collection current with contemporary trends and styles. Diverse style options within the Data Flow Diagram For Aes Algorithm Using Secret Key And Iv collection suit various aesthetic preferences. Comprehensive tagging systems facilitate quick discovery of relevant Data Flow Diagram For Aes Algorithm Using Secret Key And Iv content. Instant download capabilities enable immediate access to chosen Data Flow Diagram For Aes Algorithm Using Secret Key And Iv images.