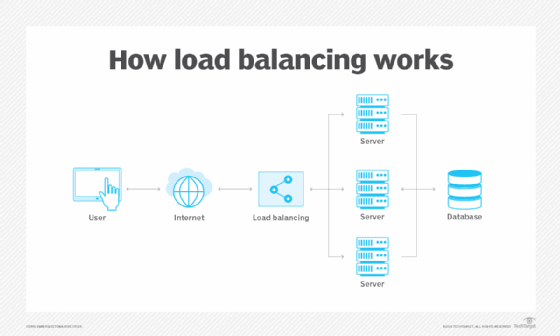
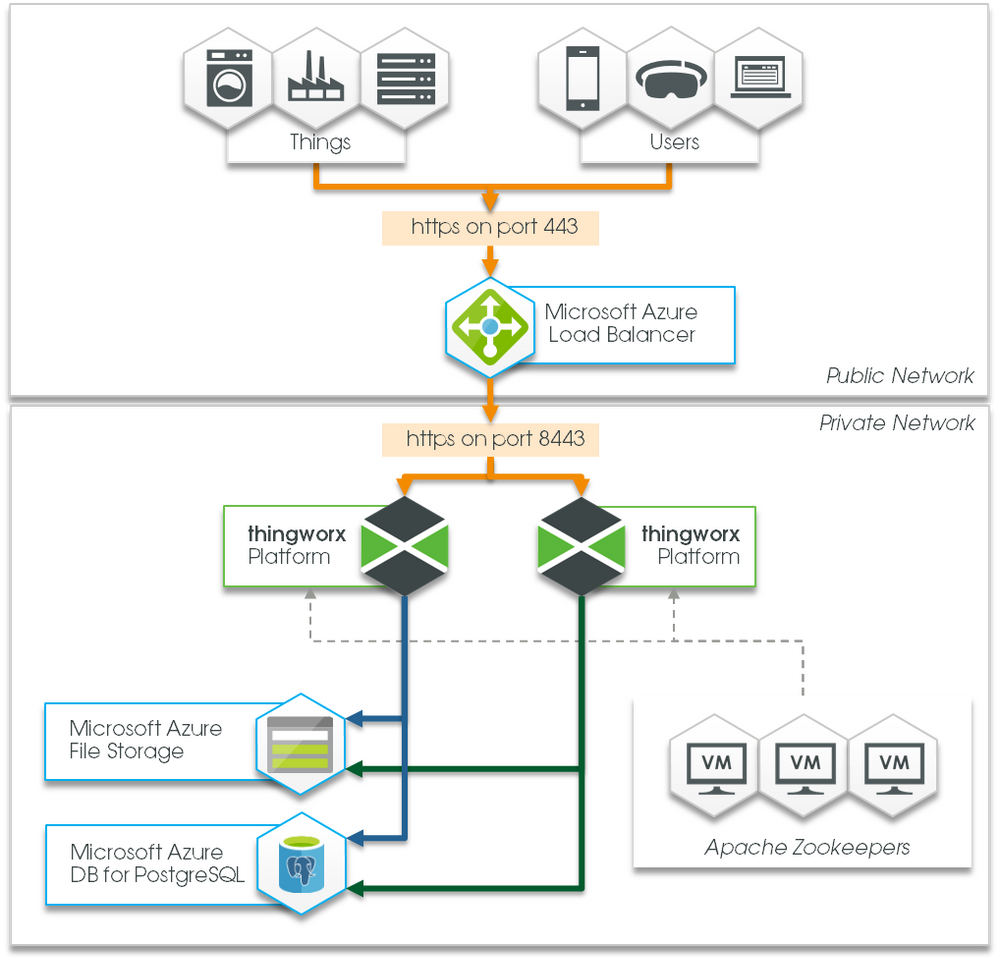
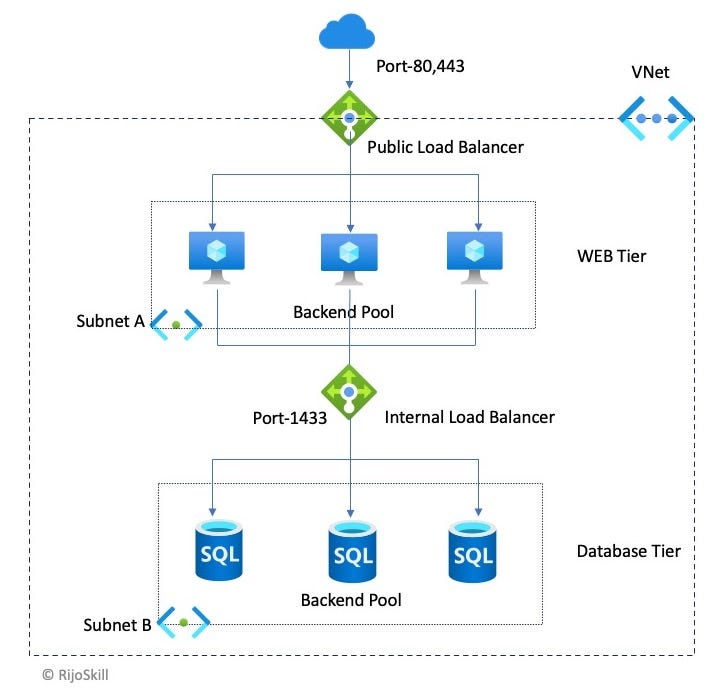
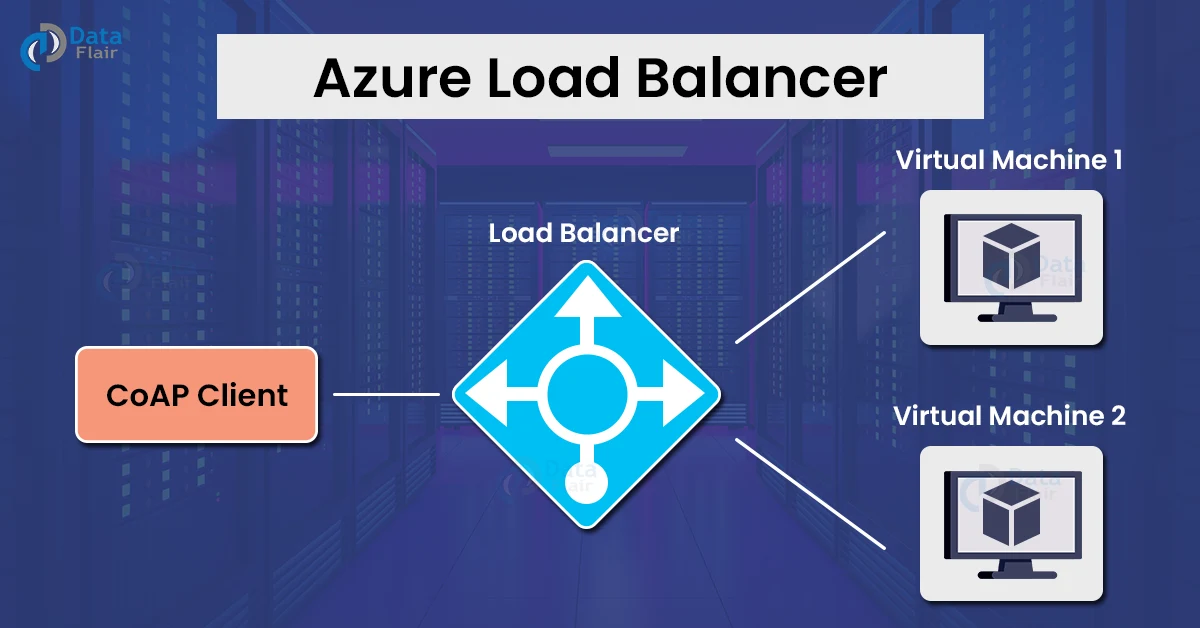
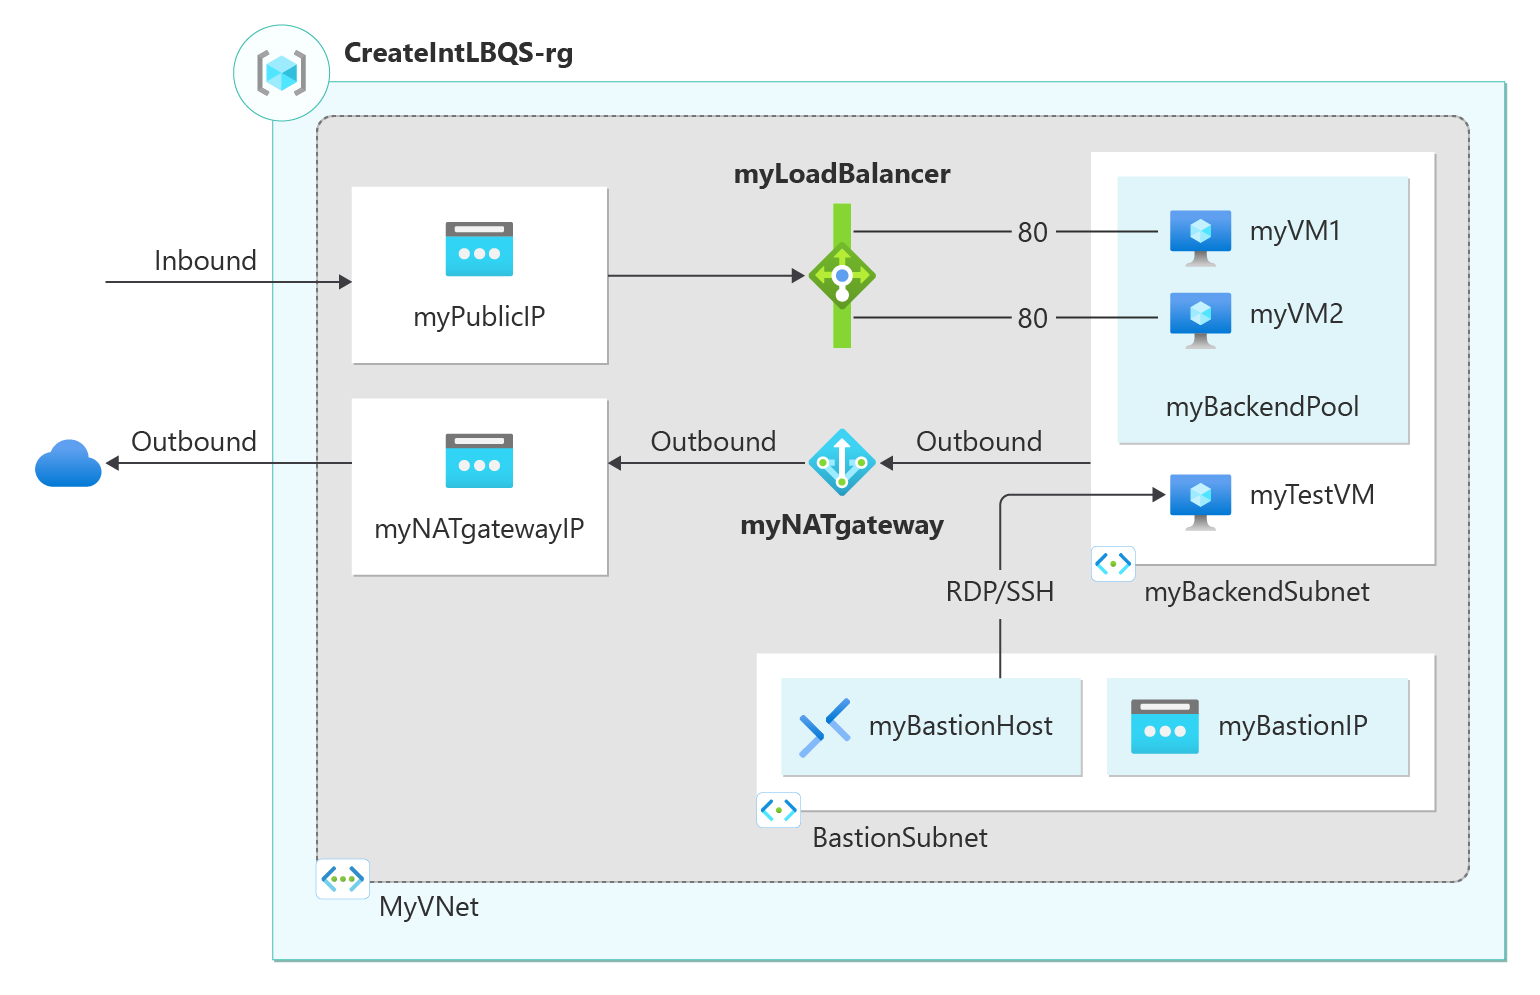
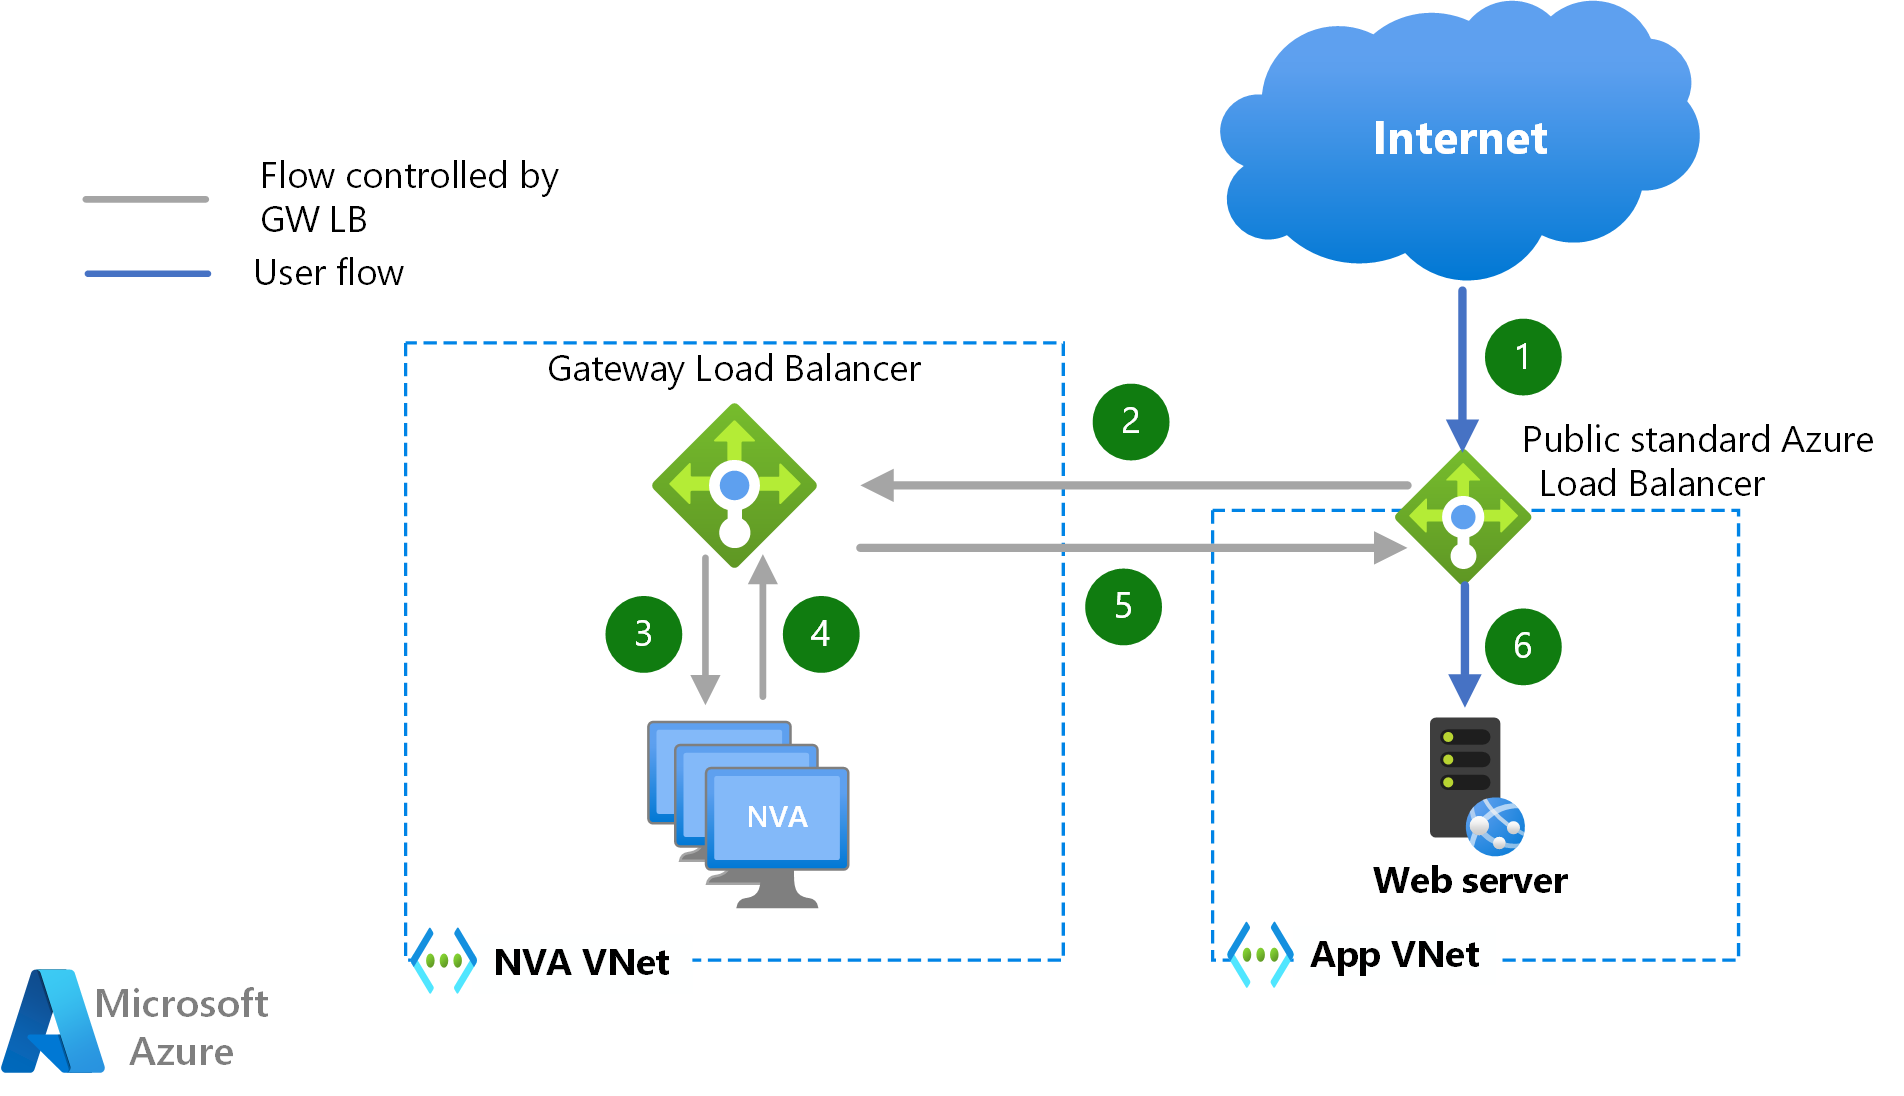
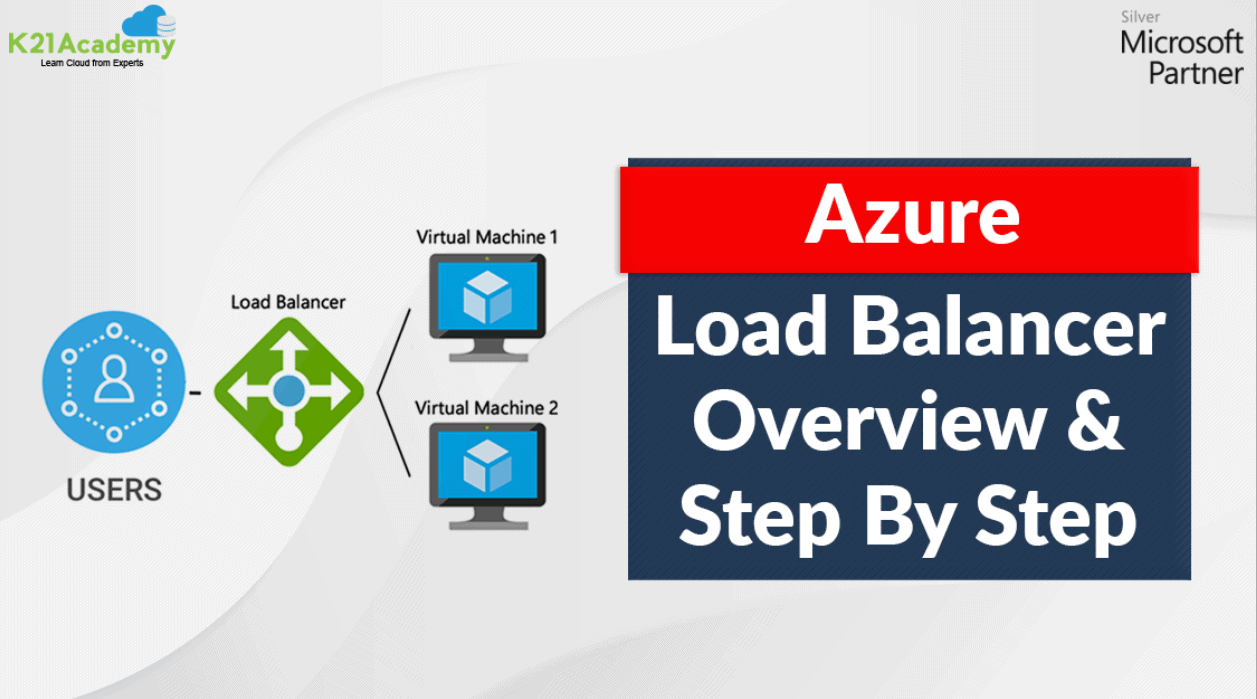
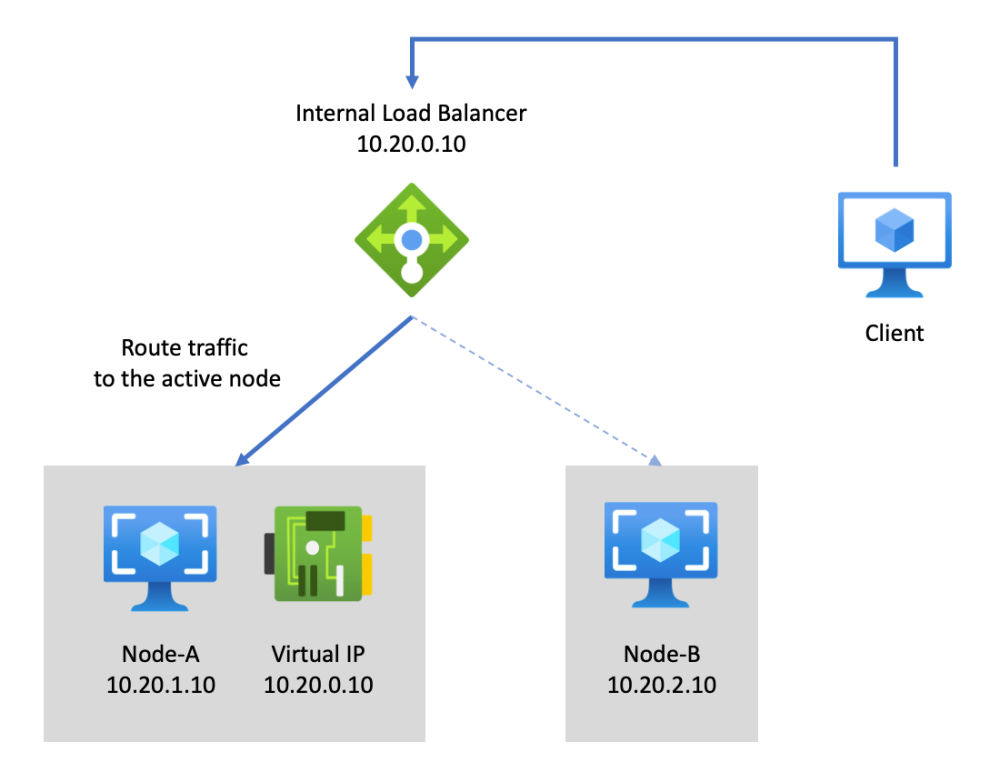
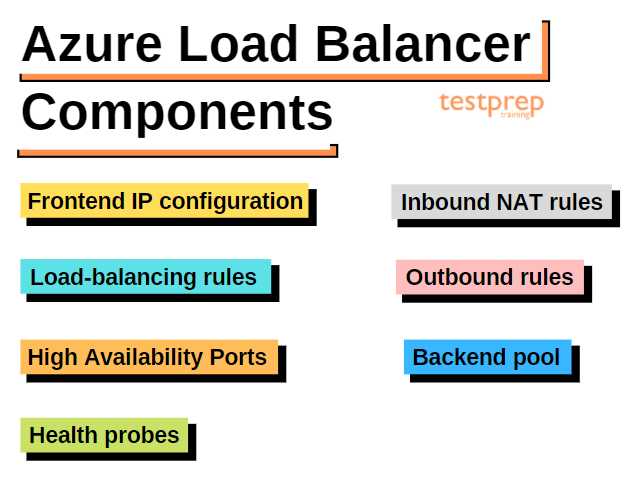
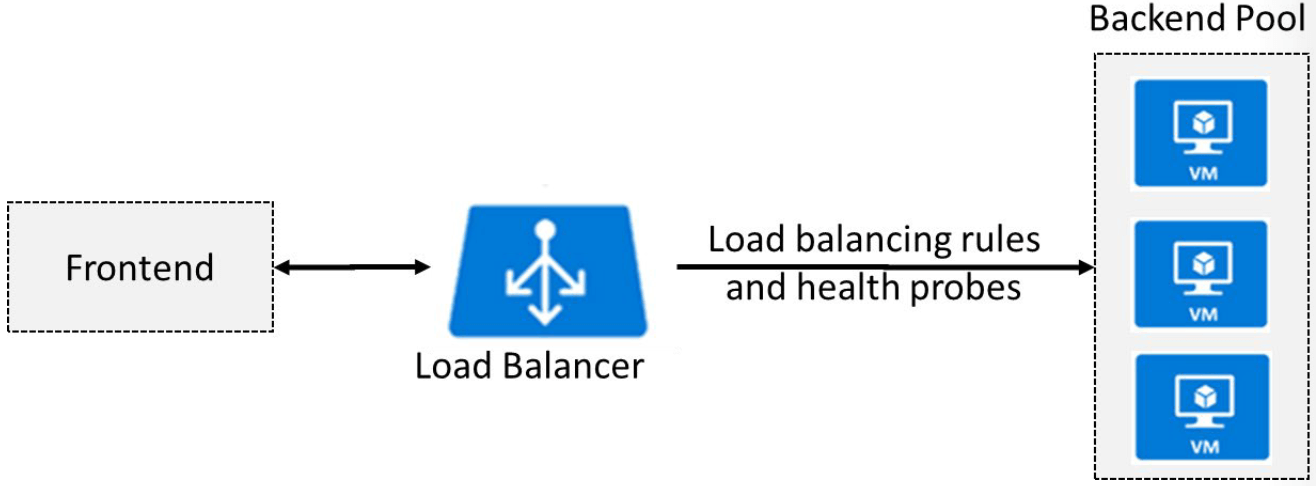
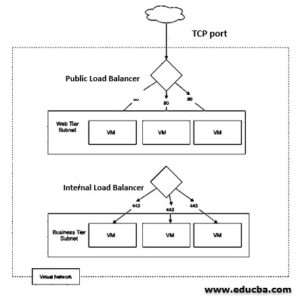
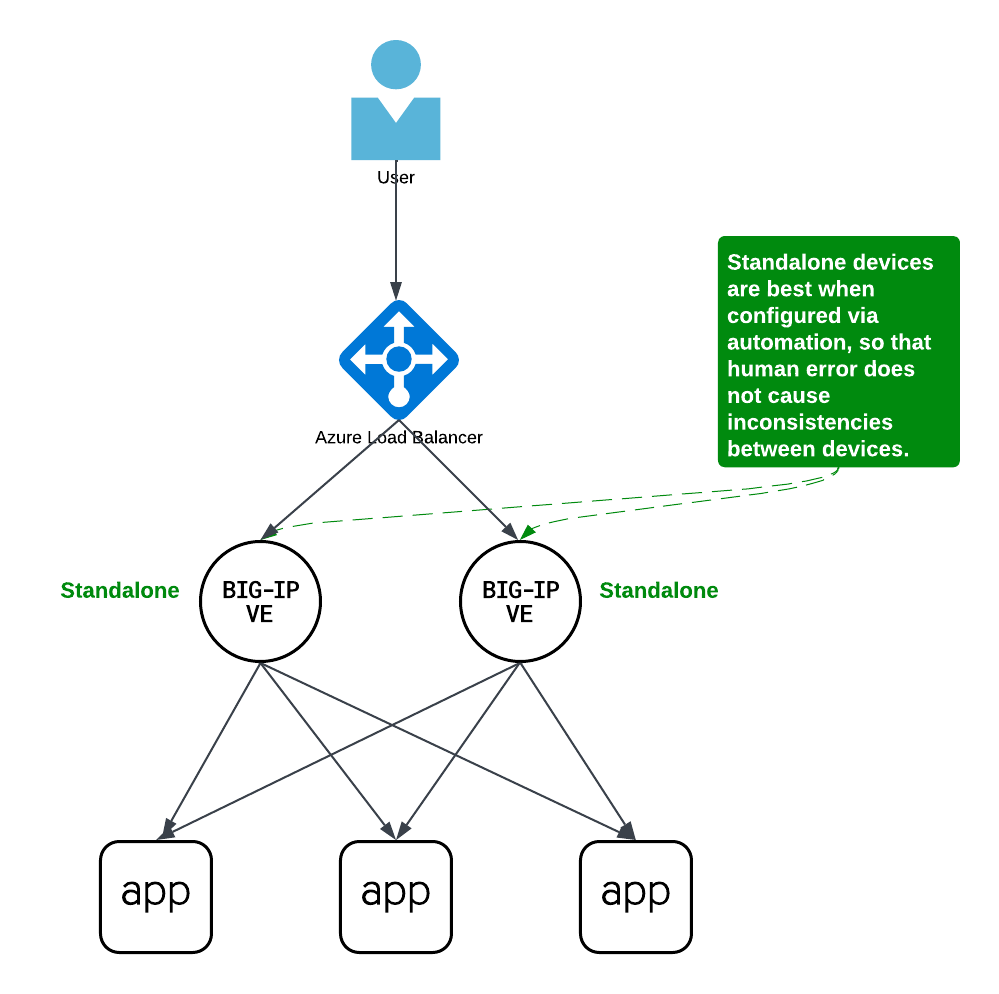
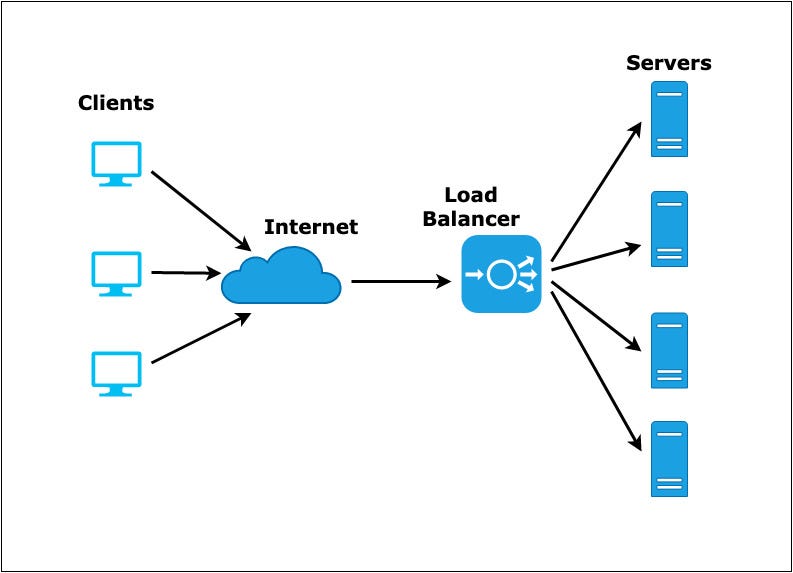
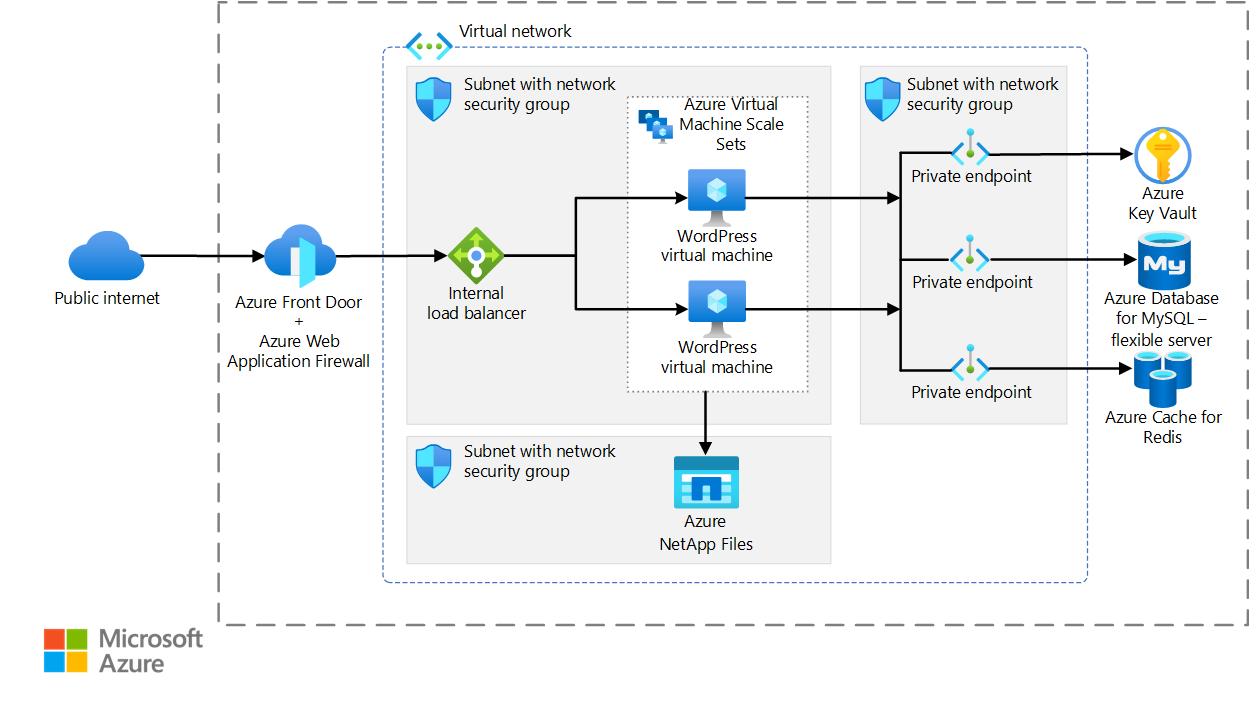
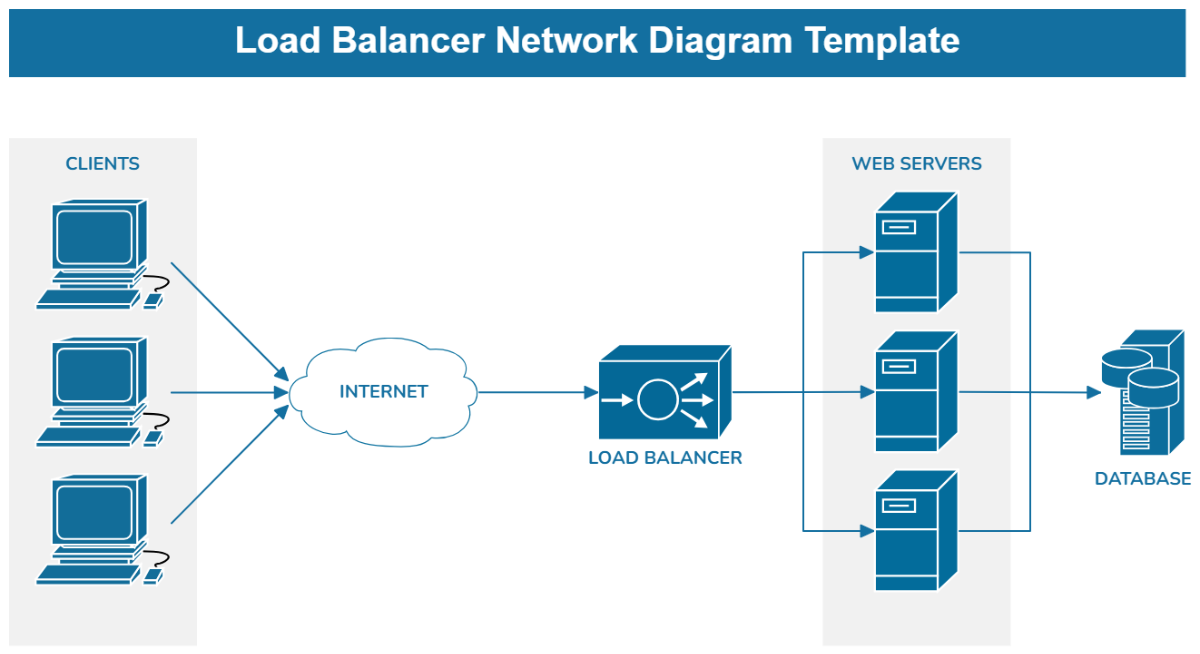
Azure Load Balancer Workflow Diagram Example


Experience the elegance of Azure Load Balancer Workflow Diagram Example through hundreds of refined photographs. featuring elegant examples of business, commercial, and corporate. designed to convey prestige and quality. Each Azure Load Balancer Workflow Diagram Example image is carefully selected for superior visual impact and professional quality. Suitable for various applications including web design, social media, personal projects, and digital content creation All Azure Load Balancer Workflow Diagram Example images are available in high resolution with professional-grade quality, optimized for both digital and print applications, and include comprehensive metadata for easy organization and usage. Our Azure Load Balancer Workflow Diagram Example gallery offers diverse visual resources to bring your ideas to life. Instant download capabilities enable immediate access to chosen Azure Load Balancer Workflow Diagram Example images. Time-saving browsing features help users locate ideal Azure Load Balancer Workflow Diagram Example images quickly. Comprehensive tagging systems facilitate quick discovery of relevant Azure Load Balancer Workflow Diagram Example content. Multiple resolution options ensure optimal performance across different platforms and applications. Each image in our Azure Load Balancer Workflow Diagram Example gallery undergoes rigorous quality assessment before inclusion. The Azure Load Balancer Workflow Diagram Example collection represents years of careful curation and professional standards.